Category: Helpful Kitchen Tips
Seasoning a carbon steel pan means bonding a very thin layer of polymerized oil to the metal. You strip off the factory coating, wipe on a whisper of high-smoke-point oil, and heat the pan until the oil hardens into a dark, slick film. According to Mauviel’s care guide, the stove-top version takes about fifteen minutes. I have not used any of these pans myself. What follows is built from maker instructions, cited third-party guides and the way owners describe their results, and I name the source each time.
TL;DR
- Wash off the factory wax or oil with hot water and dish soap first. Makers say it is not a cooking surface and blocks the seasoning from bonding.
- Use a thin coat of neutral, high-smoke-point oil. Thin matters more than which oil you pick.
- Stove-top seasoning takes about 15 minutes of active heating. The oven takes about an hour plus cooling, according to the maker guidance I reviewed.
- Ventilate the kitchen. The smoke is part of the process, not a sign you did it wrong.
- Seasoning builds with cooking. The first round is a foundation, not a finish line.
What seasoning actually is
Carbon steel is iron with a small amount of carbon. Bare, it rusts quickly and food grabs it. Seasoning fixes both problems. Oil heated past its smoke point changes chemically and bonds to the metal as a hard, thin layer. That layer shields the iron from moisture and gives the surface its nonstick behavior.
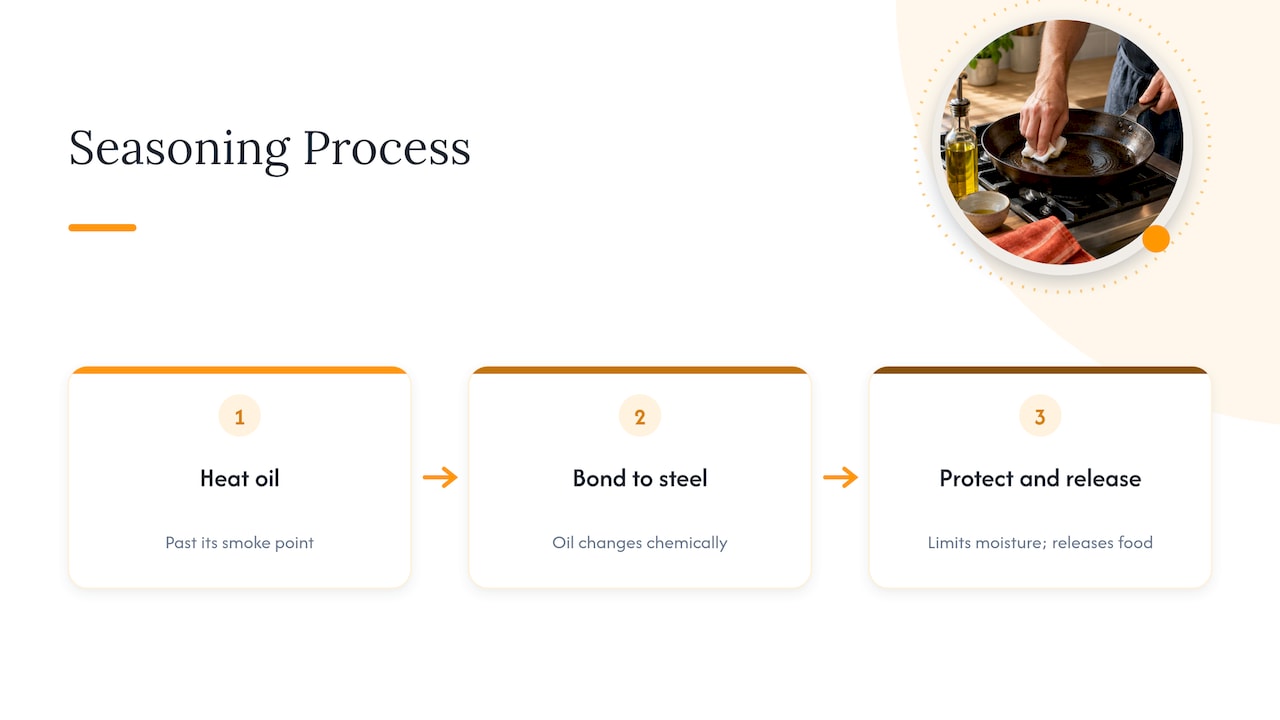
A common misconception is that seasoning is only for cast iron. According to a Southern Kitchen guide that quotes Chef Jeffrey Gardner and America’s Test Kitchen, carbon steel is not porous like cast iron, but it still needs a bonded layer of polymerized oil to resist oxidation and release food. The same guide describes seasoning as maintenance that improves with use, not a one-time setup.
If you are still deciding between the two metals, my carbon steel vs cast iron comparison covers weight, heat response and upkeep side by side.
Before you start
Remove the factory coating
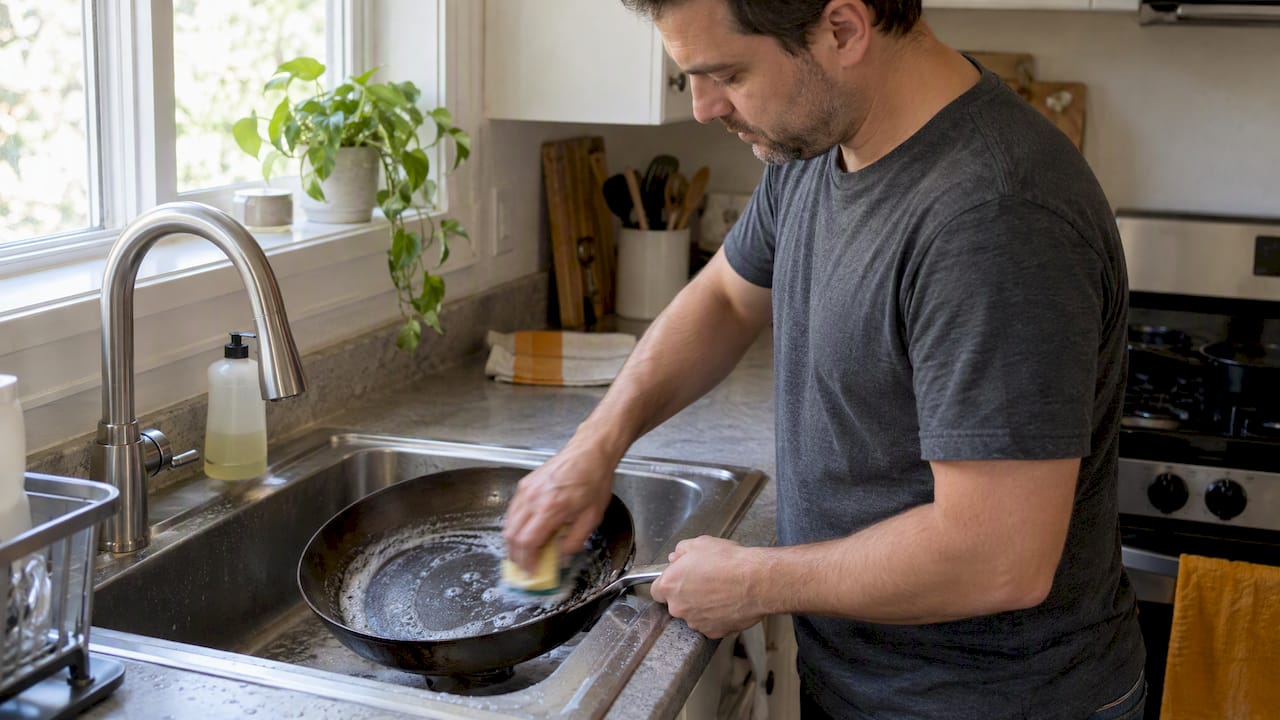
New pans often ship with a protective layer such as food-safe beeswax or oil to prevent rust in transit. De Buyer’s instructions say this layer must be thoroughly removed with hot water and dish soap before the first seasoning, and that leaving it on can interfere with the oil bonding. This is the one time soap is expected. Scrub, rinse, then dry the pan completely.
Dry it on the burner
Water is the enemy of bare steel. After towel-drying, set the pan over low heat for a minute or two until no moisture remains. A pan that looks dry but is damp in the seams can flash-rust before you ever reach the oil.
Open windows and run the fan
Seasoning requires heating oil past its smoke point, so it produces real smoke. The Webstaurant guide to pan seasoning advises opening windows and running kitchen fans first, and treats ventilation as a functional requirement. If you have a smoke detector close to the stove, plan for it. Anyone with asthma or other breathing problems should be especially careful about fumes and should ask a doctor about cooking near heavy smoke.
Match the pan to the burner
De Buyer’s guidance notes that on glass or electric cooktops the pan size should match the burner. Heating too fast, or on a burner much smaller than the pan’s base, creates uneven heat and can permanently warp the metal. Bring the heat up gradually.
If you cook on induction, check your pan’s base and the guidance in my guide to cookware types for induction cooktops first.
Choosing an oil
Makers generally point to flavorless oils. Mauviel’s guide specifies a flavorless oil, and de Buyer’s and Webstaurant’s guides likewise steer toward high-smoke-point options. Here is how I would sort what is commonly named by owners and makers:
| Oil type | Why owners reach for it | Watch out for |
|---|---|---|
| Grapeseed or canola | Neutral, cheap, easy to find | Needs a truly thin coat or it turns tacky |
| Avocado | Very high smoke point | Costs more per ounce |
| Flaxseed | Often described as producing a hard finish | Owners commonly report flaking when applied thickly |
| Shortening or lard | Already in most kitchens | Lower smoke point, so smoke arrives sooner |
The table reflects general owner reports rather than a measured comparison. Each maker I reviewed describes its own preferred method, so if your pan came with instructions, follow those first, especially while the warranty is live.
The quantity matters more than the label. A thick coat does not make a thicker seasoning. It makes a sticky, uneven one. My piece on cast iron that feels sticky after seasoning explains why too much oil is the usual cause, and the same physics apply to carbon steel.
Method one: the stove-top seasoning
This is the quick route. Mauviel’s guide summarizes it as: remove the protective beeswax with hot water, dry the pan, coat it with a thin layer of flavorless oil, heat it for five minutes, let it cool, wipe it out, and repeat once more. Here is how I would lay that out:
- Wash and dry. Hot water, dish soap, then a minute on low heat to drive off moisture.
- Add oil. Pour in a small amount, roughly a teaspoon for a 10 to 12 inch pan. That quantity is my estimate, not a maker figure.
- Spread and wipe. Rub the oil across the whole interior with a paper towel, then wipe again as if you were trying to remove it all. What remains should look barely damp.
- Heat. Set the burner to medium or medium-high and bring the pan up gradually. Hold it there for about five minutes while it smokes and the color shifts.
- Cool and wipe. Let the pan cool until you can handle it, and wipe out any residue.
- Repeat. Do a second round. Mauviel specifies two.
Some makers also suggest tilting the pan to season the walls, so that the whole interior is protected. Check your pan’s own instructions.
Method two: the oven
The oven route gives more even coverage, which is why owners with electric or glass-top ranges often prefer it. The research I reviewed puts oven seasoning at up to an hour, plus cooling time, against roughly 15 minutes of active heating on the stove.
The steps are close to the stove-top method. Wash, dry, and wipe on an extremely thin coat of oil over the entire pan, handle included if it is metal. Then bake it upside down so excess oil cannot pool. Let it cool in the oven before removing it. Follow your maker’s recommended temperature, since figures vary between brands and I have not seen a single agreed number.
The oven is a sensible choice when:
- your burner is smaller than the pan base,
- you want the sides and underside seasoned too,
- you are seasoning several pans at once.
If your pan has a plastic, wood or riveted handle with non-metal parts, confirm it is oven safe before you start.
What a good seasoning looks like
Expect the pan to change from silver-gray to a golden, brown or blotchy dark color. That is normal. De Buyer notes that pans become naturally nonstick after proper seasoning and keep improving with use. The first round will not look like the glossy black pans in photos. Those come from months of cooking.
A healthy surface looks thin, slightly satiny and a little uneven. Danger signs are:
- Sticky or tacky patches: too much oil. Heat the pan again to finish polymerizing, or scrub back and redo with less.
- Flaking: layers built too thick. My article on cast iron seasoning flaking off explains why too many layers cause it.
- Orange spots: surface rust. It is usually reversible. How to fix rusty cast iron covers what makers advise, and the approach carries over.
Building the seasoning through cooking
The first seasoning is a base. The Southern Kitchen guide frames it as ongoing maintenance, and I agree with that framing. A few habits help owners:
- Start with fatty foods, such as bacon, sausage or shallow-fried potatoes, which add oil to the surface.
- Hold off on long-simmered acidic sauces such as tomato until the finish has darkened. Owners often report the pan taking on a metallic taste or losing patina when acid sits in a young pan.
- Rinse while warm, scrub with a brush or a little salt if needed, dry on the burner and wipe with a whisper of oil.
- Skip long soaks and the dishwasher. Standing water is how rust starts.
I would not trust a pan that is wet on a rack overnight. Dry it every time.
Common mistakes and how to fix them
Too much oil. The most reported problem. Wipe until you think there is nothing left, then wipe again.
Skipping the wash. The factory wax is not a cooking surface, per de Buyer. Wax left behind turns patchy.
Heating too hard, too fast. Beyond uneven seasoning, the maker warning is warping.
Stopping at one round. Mauviel’s own routine calls for two passes. Many owners do more.
Expecting an instant egg-slide. Eggs are the hardest test. Early on, use enough fat and let the pan preheat.
Perspective: what I think matters most
I review kitchenware from specifications, maker instructions and owner feedback, not from my own cooking, and seasoning is a good example of why that approach has limits. Every maker I read gives a slightly different recipe: different oils, different times, different numbers of rounds. The common thread is not a magic oil. It is thin coats, adequate heat, and repetition.
My honest read is that the worry around seasoning is bigger than the task. A pan that is cleaned, dried and lightly oiled after cooking will tend to improve, and a pan left wet will not. Owner complaints I see most often are sticky film, flaking and rust, and nearly all trace back to too much oil or too much moisture. If I were buying a first carbon steel pan, I would put the money into a pan that suits my stove, and then follow that pan’s own instructions.
— Glenn
Where to go from here
If you are still comparing pans, my cookware reviews and buying guides set out specifications, pricing and owner-reported strengths and complaints side by side, without marketing spin. If you are outfitting a new kitchen, the kitchen essentials list shows where a carbon steel pan fits among the basics. For gas ranges specifically, see the best cookware material for a gas stove. Some links on this site are affiliate links, explained on the affiliate disclosure page.
FAQ
Can I use vegetable oil to season a carbon steel pan?
Yes, in most cases. Makers recommend neutral, high-smoke-point, flavorless oils, and many vegetable oil blends fit that description. Check the label’s smoke point and keep the layer extremely thin. Follow your pan maker’s own advice if it names a specific oil.
How long does it take to season carbon steel?
The research I reviewed puts it at about 15 minutes of active heating on the stove, or up to an hour in the oven plus cooling. Mauviel’s stove-top routine uses two rounds. Real nonstick performance builds over weeks of cooking.
Do I need to season a carbon steel pan at all?
Makers say yes. Seasoning protects the bare iron from rust and gives the pan its nonstick behavior. Skipping it leaves you with a sticky, rust-prone pan.
How do I get seasoning off carbon steel?
I have not seen one maker method that covers every case. A common owner approach is scrubbing with fine salt and steel wool, then re-seasoning. Check your maker’s instructions before using abrasives, especially on coated or blued finishes.
Sources
- Mauviel 1830: How to Season a Carbon Steel Pan
- de Buyer: Carbon Steel Seasoning Instructions
- Webstaurant: How to Season Pans
- The Southern Kitchen guide to cleaning and seasoning your carbon steel skillet
Recommended
- Cast Iron Sticky After Seasoning? It’s Too Much Oil
- How to Season a Blackstone Griddle (Step by Step)
- Cast Iron Seasoning Flaking Off? It Is Too Many Layers
- Carbon Steel vs Cast Iron: Which Should You Choose?

I'm Glenn, and I started Kitchenware Compare to cut through conflicting product reviews and help readers pick kitchen gear with confidence. I don't own or test the products I write about — these guides are built from verified-purchase reviews, manufacturer specifications, and independent testing where it exists, with the reasoning shown, not just a rating.
Leave a Reply