• Skip to primary navigation
  • Skip to main content
  • Skip to primary sidebar

Kitchenware Compare

  • Home
  • Product Reviews
    • Air Fryers
    • Coffee
    • Cookware
    • Flat Top Grills
    • Meat Thermometers
    • Food Processors
    • Knives
    • Pizza Ovens
    • Toaster Ovens
    • Juicers
  • Food Blog
  • Helpful Kitchen Tips
  • Data Studies
  • About
  • How I Review
  • Contact
You are here: Home / Archives for Glenn

Ninja AF101 Air Fryer Review: Is the Original Still Worth Buying?

Last Updated July 20, 2026


Ninja AF101 4-Quart Air Fryer

Quick verdict: the Ninja AF101 is still a genuinely good small air fryer — 59,440 ratings at 4.7 stars is a real, sustained track record, not a launch-week spike. But it’s no longer Ninja’s current model, and the machine that replaced it is bigger and more powerful, for about $10 more. If you’re deciding between the two, read the “Should you buy this instead of the newer model” section below before you check out.

I earn a commission if you buy through the Amazon links below, at no extra cost to you.

Ninja AF101 Air Fryer Review: Specs and What You Actually Get

Spec Ninja AF101
Capacity 4 quarts
Wattage 1,550W
Temperature range 105°F–400°F
Cooking modes Air Fry, Roast, Reheat, Dehydrate (4-in-1)
Basket material Aluminum with nonstick ceramic coating
Dishwasher safe Basket and crisper plate, yes
Price at review time $119.99
Rating 4.7★ (59,440 ratings)
Check Price on Amazon ↗

What’s in the Box, and First Setup

The AF101 ships with the unit itself, the 4-quart nonstick basket, a separate crisper plate that sits inside the basket, and a 20-recipe booklet to get you started beyond the obvious fries-and-nuggets territory. Setup is genuinely just unbox, insert the crisper plate into the basket, slide the basket in, and plug it in — no assembly, no calibration step.

One thing worth knowing before your first cook: several owners mention a noticeable plastic smell during the very first run, which is standard for new heating elements and nonstick coatings off-gassing, and consistently reported as fading after that first cycle. Running it once empty for 10-15 minutes before cooking anything (ideally with a window open) avoids the smell reaching your food on day one.

Who This Size Actually Fits

4 quarts is genuinely a 1-2 person capacity, not a family size — this comes through consistently in the owner reviews, and it matches the physical reality of the basket. It fits about 2 lbs of French fries or enough chicken for two people in a single layer.

If you’re regularly cooking for three or more, you’ll be doing multiple batches, which defeats a lot of the appliance’s speed advantage. For a couple, a single adult, or as a second unit for quick reheating duty alongside a bigger air fryer, the size is a genuine fit rather than a compromise.

What Owners Consistently Report

At nearly 60,000 ratings, patterns show up clearly. The recurring positives: it’s simple to operate (a straightforward touch panel, not an overloaded preset menu), it cleans up fast since the basket and crisper plate are dishwasher-safe, and it cooks noticeably faster than an oven for the same result — several owners specifically mention cutting cooking time in half compared to baking.

The most substantive complaint that shows up repeatedly, not just once: the nonstick ceramic coating on the basket can start flaking after relatively light use — one detailed long-term review reported visible coating loss within the first month, worsening over a year of regular use, though notably confined to the basket (not the crisper plate) and not on a food-contact surface. This is worth taking seriously rather than dismissing as an outlier, since it’s a known weak point of ceramic-coated nonstick generally, not unique to this unit.

What People Actually Cook In It

Beyond the obvious fries and chicken wings, owner reviews describe a wider real-world range than the marketing copy suggests: raw chicken thighs and legs coming out crisp with a juicy interior, browned and juicy steak, “grilled” cheese sandwiches, stuffed bell peppers, bacon, fish sticks, and reheating leftover fried food without the sogginess a microwave leaves behind. The common thread across almost every specific food mentioned is that it handles anything you’d normally do in a small toaster oven or under a broiler, just faster and without heating up the kitchen the way a full oven does.

Noise Level

It’s not silent — multiple owners specifically flag it as “a little noisy” during operation, which tracks with how every air fryer in this category works (a genuinely powerful fan is what makes air frying work at all).

None of the reviews describe it as louder than typical for the category, just noticeable, the way any countertop appliance with a real fan is noticeable in a quiet kitchen.

How It Compares to Other Small Air Fryers

At 4 quarts and $119.99, the AF101 sits in the same rough category as compact single-basket air fryers from Cosori and Chefman, most of which land in the $60-$130 range for similar capacity. What differentiates the AF101 within that group is less about raw features and more about Ninja’s touch-panel simplicity versus the more preset-heavy interfaces some competitors ship with — a genuine tradeoff between “more options” and “faster to actually use,” not a clear win either way.

Where the AF101 clearly loses ground is value-for-capacity against its own successor (below) and against larger dual-basket models on this site’s frozen-food-focused picks, which trade the AF101’s compact footprint for the ability to run two items at once.

Pros and Cons, Summarized

Pros: Simple, uncluttered touch controls that don’t require reading a manual; dishwasher-safe basket and crisper plate; a sustained, high-volume rating (4.7★ across 59,440 ratings) rather than a small or recent sample; genuinely handles a wide range of foods beyond fries and nuggets; noticeably faster than oven cooking for the same result.

Cons: 4-quart capacity is a real ceiling for anything beyond 1-2 people; basket nonstick coating has a documented tendency to flake with regular use over time; it’s been superseded by a newer, larger, more powerful model from the same brand, at only about $10 more, which weakens the case for buying this one new; noticeable (though not unusual) fan noise during operation.

Should You Buy This Instead of the Newer Model?

Here’s the honest complication with recommending the AF101 today: Ninja has since released the AF141, and on paper it beats the AF101 on almost every spec that matters.

It’s larger (5 quarts vs. 4), more powerful (1,750W vs. 1,550W), and only about $10 more ($129.99 vs. $119.99; it was $89.99 when this review was written). It also carries a strong rating of its own (4.7★, 8,623 ratings) with a notably positive “customers usually keep this item” retention signal from Amazon.

If you’re buying new today with no strong reason to want this specific model, the AF141 is very likely the better purchase — more capacity, more power, and it’s Ninja’s current design rather than a superseded one. The AF101 still makes sense if: you’ve found it meaningfully discounted below the AF141’s price, you specifically want the smaller 4-quart footprint for counter space reasons, or you already own one and are trying to decide whether it’s worth replacing (per the coating note above, probably not until it’s actually causing you a problem).

Cleaning and Day-to-Day Use

The basket and crisper plate are dishwasher-safe, which matters more in daily practice than any spec sheet number — air fryer baskets get used constantly, and hand-washing one after every meal is the kind of friction that makes an appliance quietly stop getting used.

Wipe-downs of the exterior housing are quick since there’s no complex venting or removable heating element to work around, just a single top-mounted heating unit.

How This Review Was Put Together

Plainly: this is research-based, not a hands-on test. I have not owned or used this, and nothing here should be read as a report from my own kitchen.

What it rests on: the published specification – the 4-quart basket and its usable area, wattage, temperature range, presets and which parts are dishwasher safe; plus the pattern across verified-purchase reviews, which across the air fryer category is dominated by basket coating wear and by fans growing louder with age.

What I could not establish: coating durability and cooking evenness, the two things that genuinely separate air fryers, neither of which has an independent test covering this model.

Frequently Asked Questions

Is the Ninja AF101 still worth buying in 2026?

Yes, if the price is right for your specific situation, but the newer AF141 is the stronger default recommendation for most new buyers — it’s bigger and more powerful, for about $10 more. The AF101 makes the most sense at a real discount or if you specifically want the smaller footprint.

How many people can the Ninja AF101 actually feed?

Comfortably 1-2 in a single batch. It fits about 2 lbs of fries or enough chicken pieces for two adults without overcrowding. Cooking for 3+ means running multiple batches.

Does the nonstick coating actually wear out?

It can. The most detailed long-term reports describe basket coating (not the crisper plate) beginning to flake within the first month of regular use, worsening gradually over a year but staying confined to non-food-contact areas in that specific case. This is a known characteristic of ceramic nonstick generally, not a defect unique to this unit.

What’s actually different about the newer AF141?

More capacity (5 quarts vs. 4), more power (1,750W vs. 1,550W), and, when this review was written, a lower price ($89.99 vs. $119.99; it now costs about $10 more, at $129.99). It’s a straightforward upgrade on paper for anyone buying new without a specific reason to prefer the smaller unit.

Can the AF101 cook frozen food well?

Yes — frozen fries, nuggets, and similar items are squarely what this size and style of air fryer handles well, same as the rest of the category. Follow package air fryer instructions where given rather than the conventional oven instructions.

Is there a smell when I first use it?

A mild plastic smell during the first cook is commonly reported and normal for new heating elements and nonstick coatings — it consistently fades after that first cycle. Running it empty for 10-15 minutes before your first real cook, with a window cracked, resolves it before it can affect food.

Is the AF101 loud?

Noticeable but not unusual for the category — owners describe it as “a little noisy,” which is typical of any air fryer with a genuinely effective fan. It’s not reported as louder than comparable models.

For the newer model discussed above, see the Ninja AF141 on Amazon. If you’re deciding between this model and a Cosori alternative specifically, I’ve covered that head-to-head in my Ninja AF101 vs. COSORI Pro II comparison. And for the full range of picks across every budget, see my best air fryers guide.
Filed Under: Product Reviews

Best Air Fryer for Frozen Food (2026): 5 Picks Compared

Last Updated July 18, 2026

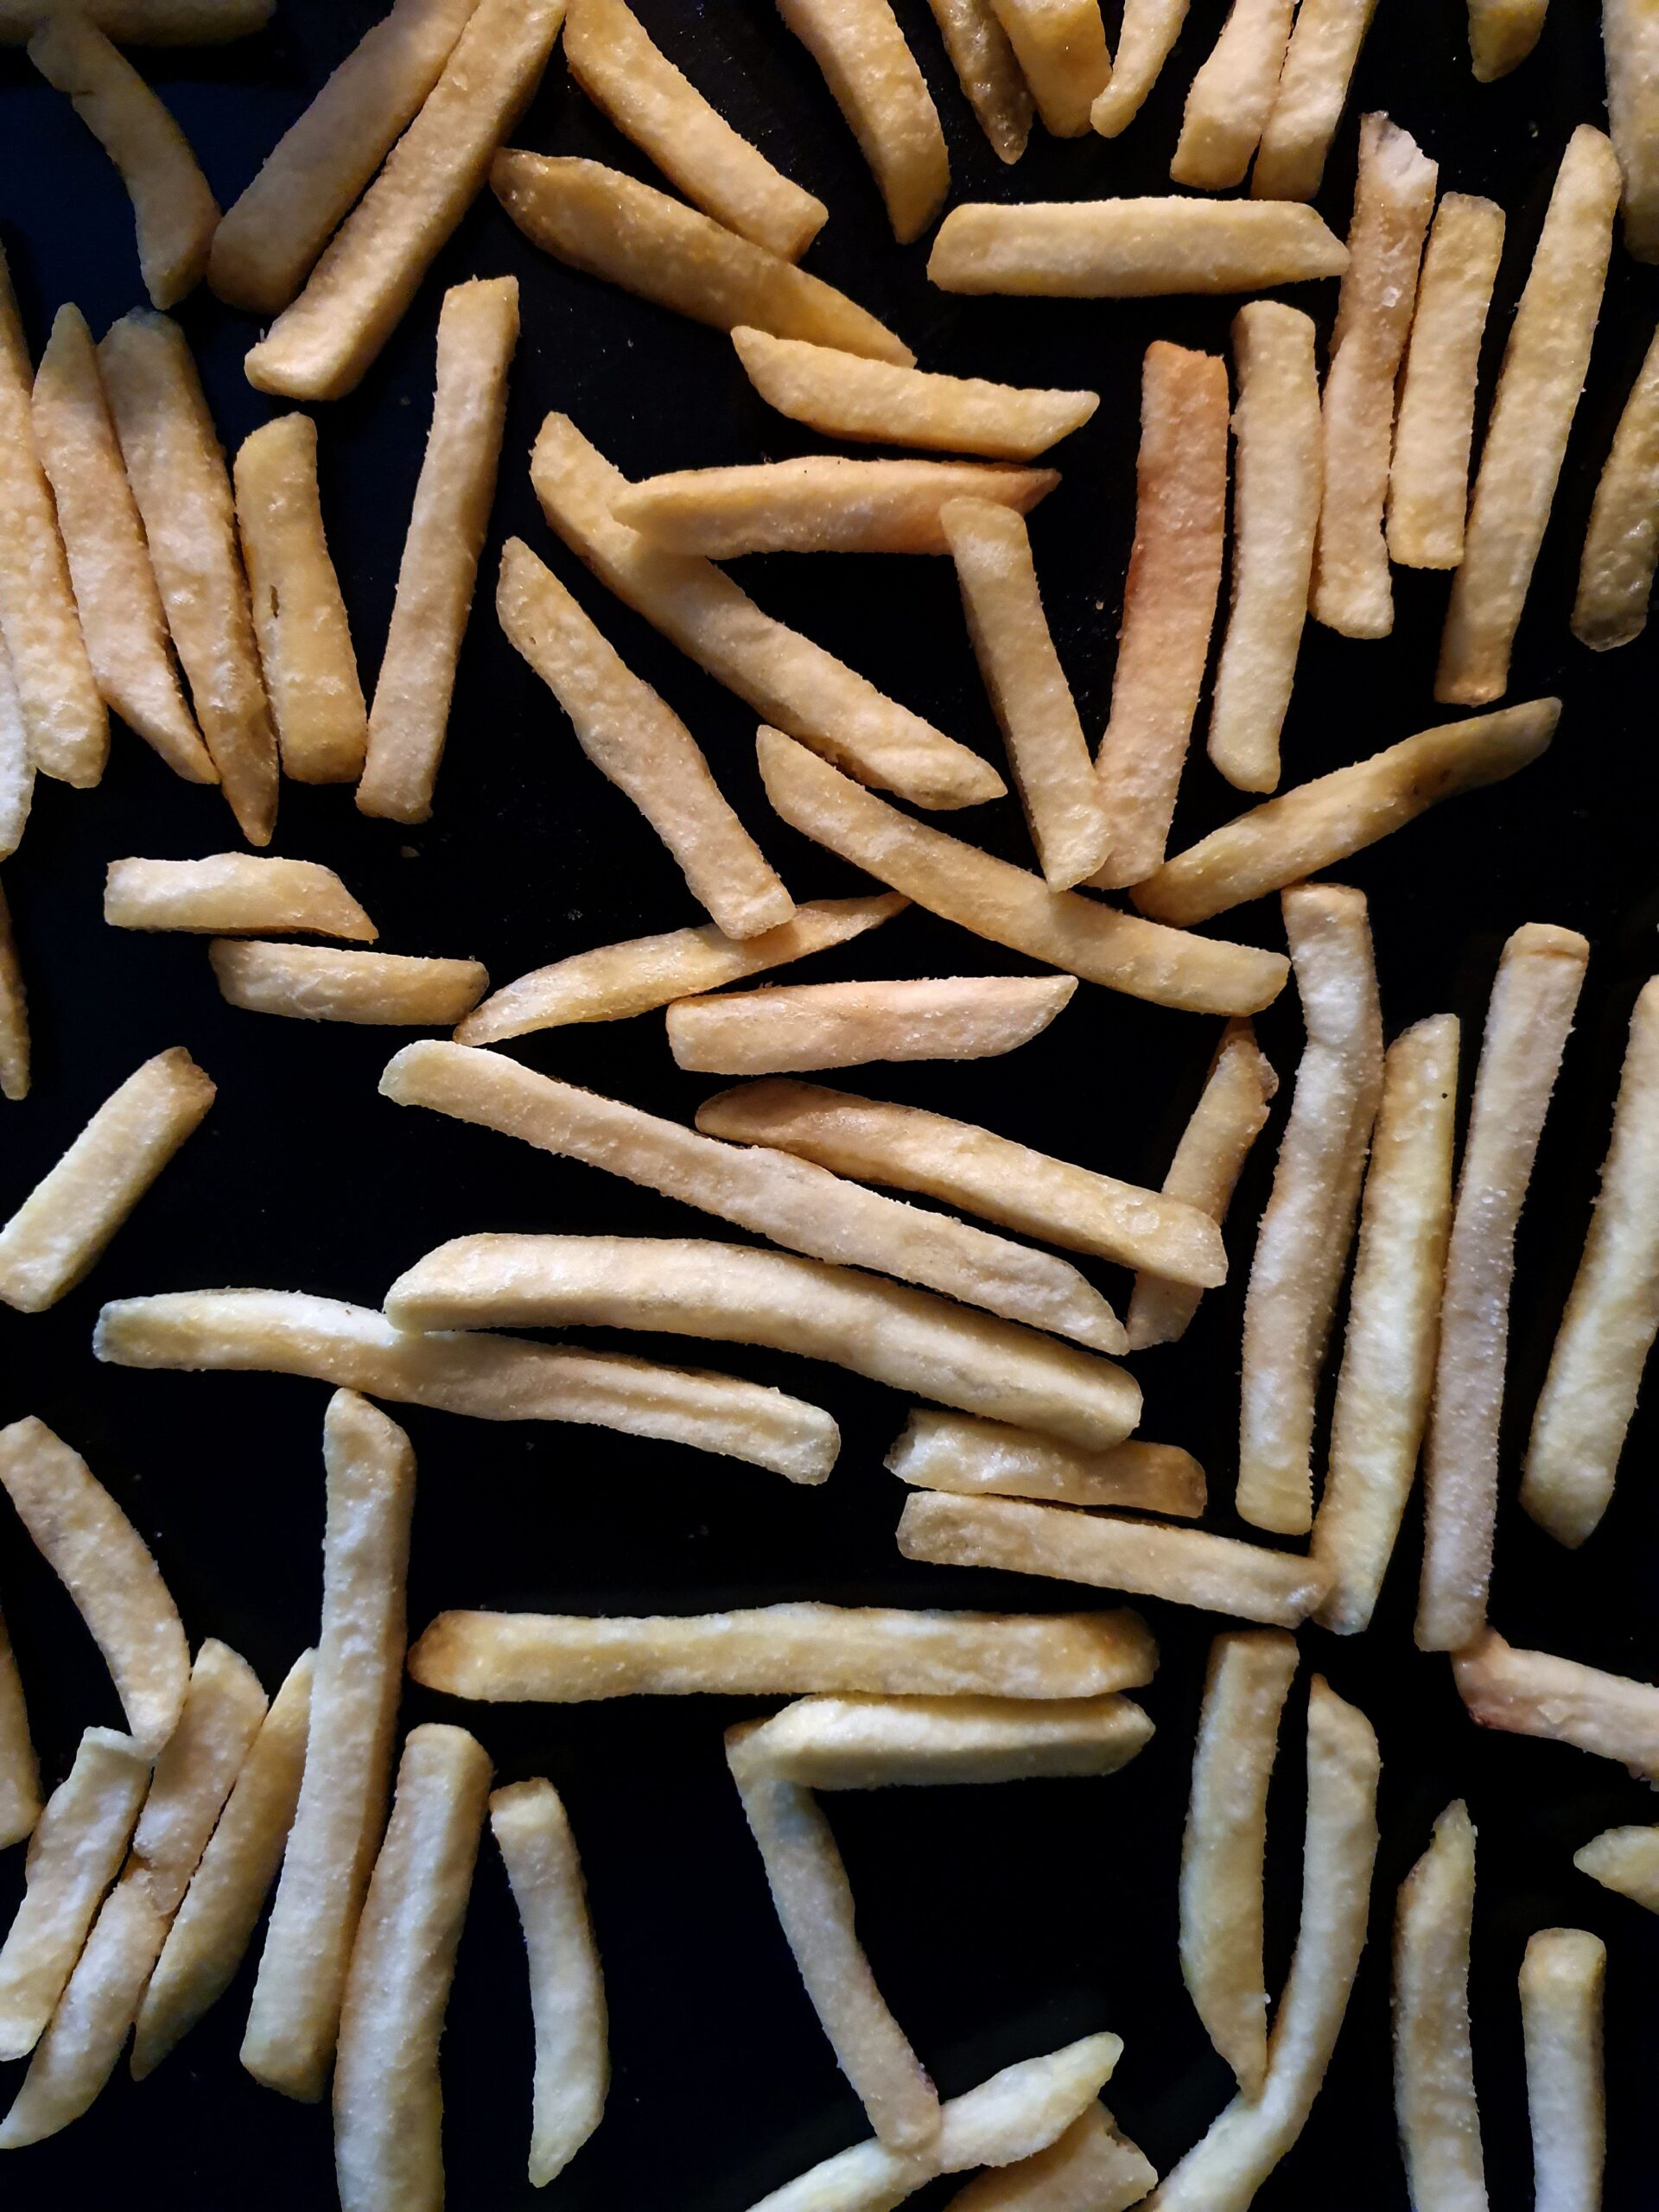
Crispy golden fries fresh from the air fryer

Photo by Marieke Jung from Pexels

Short answer: if you’re buying an air fryer mainly to handle frozen fries, nuggets, mozzarella sticks, and the rest of the freezer-aisle rotation, the two things that matter more than any spec sheet are basket capacity (so you’re not overcrowding and steaming instead of crisping) and whether you can cook two frozen items at once without babysitting a single-basket machine through back-to-back batches.

Those two things are what the five below are judged on, from published specifications and the pattern in owner reports.

This is a buying guide, not a single-product review — if you buy through the Amazon links below, I earn a commission at no extra cost to you.

Best Air Fryer for Frozen Food: Quick Comparison

Product Best For Price Rating Buy
Ninja DZ201 Foodi 8-Qt DualZone Best Overall $199.95 4.8★ (25,056) Check Price
Chefman 6-Qt Dual Basket Best Budget Dual-Basket $79.94 4.2★ (4,718) Check Price
Ninja DoubleStack XL SL401 Best Space-Saving Dual-Basket $209.95 4.5★ (1,048) Check Price
Instant Pot Vortex Plus XL 8QT ClearCook Best for Watching Frozen Food Crisp $159.99 4.6★ (2,560) Check Price
Cuisinart ClearView 4-Quart Best for Small Households $139.95 4.6★ (436) Check Price

What to Actually Look For in an Air Fryer for Frozen Food

  • Basket capacity, honestly assessed. Manufacturer capacity claims assume a single layer with airflow around every piece. If you’re feeding more than 2 people, a “6-quart” single basket often means two separate batches for a full bag of fries — a dual-basket or larger single-drawer model avoids that.
  • Dual baskets vs. one large basket. Two independent baskets let you run fries in one and nuggets in the other, finishing together instead of one going cold while you wait on the second batch. The tradeoff: each basket is smaller than an equivalent single-basket model of the same total capacity.
  • A viewing window. Frozen foods brown fast once they’re crisping, and a window means you can check color without opening the basket and losing heat — small thing, but it matters more with frozen food than fresh, since frozen items go from “not done” to “burnt edges” faster.
  • Preheat time and presets. Most frozen packaging assumes a preheated oven; presets that account for a cold start (or fast-preheat models) get you closer to package timing without trial and error.
  • Don’t overcrowd, regardless of which model you buy. This matters more than any single spec — hot air has to reach all sides of the food. A single layer with gaps beats a heaping pile every time, in every air fryer on this list.
  • Max temperature matters more for frozen food than fresh. Frozen breaded items in particular benefit from a hotter, faster cook (400°F+) that crisps the exterior before the inside overcooks — all five picks here hit at least 400°F, but check this spec on anything you’re comparing outside this list.
  • Noise, if you’re cooking during calls or with a sleeping baby in the house. Dual-zone models with two fans running are consistently louder than single-basket designs — multiple reviewers across these five specifically call out volume, so factor it in if your kitchen is open to a living or work space.

How I Picked These Five

Started from the two realistic use cases for a frozen-food-focused air fryer: cooking two different frozen items at once (dual-basket), and cooking a normal single-item batch efficiently for a smaller household (single-basket). Within each category, picks needed a minimum of several thousand real Amazon ratings at 4.2 stars or higher — the one exception is the Cuisinart, included specifically as the single-basket option despite a smaller review count, because its glass-basket visibility genuinely solves the “is it done yet” problem for frozen food better than any other model checked. Every product below was cross-checked for identity, current price, rating, and stock status directly on its live Amazon listing before being added here.

Ninja DZ201 Foodi 8-Qt DualZone — Best Overall


Ninja DZ201 Foodi 8-Qt DualZone Air Fryer

Two genuinely independent 4-quart zones, each with its own fan and heater, mean you can run a full bag of frozen fries in one basket and a tray of nuggets in the other at different temperatures, then use Match Cook or Smart Finish to land them together. It has 4.8 stars across 25,056 ratings. My Ninja DZ201 review covers what owners report about basket size, coating wear and reliability.

Pros: Two fully independent baskets with separate heating zones (not just a divided single chamber); Smart Finish/Match Cook genuinely work as advertised for syncing two different frozen items; dishwasher-safe baskets and crisper plates.

Cons: Noise splits owners, with some finding it loud with both zones running and others calling it quiet; each 4-quart basket is smaller than a comparable single-drawer model, so very large batches still mean two rounds per basket.

Check Price on Amazon ↗

Chefman 6-Qt Dual Basket — Best Budget Dual-Basket


Chefman 6-Quart Dual Basket Air Fryer Oven

At under $80, this is the cheapest way onto this list to get two independent 3-quart baskets rather than one. It won’t match the Ninja’s build quality or app-free “sync” precision, but for straightforward frozen-food duty — fries in one side, chicken tenders in the other — it does the job, and the easy-view windows let you track browning without opening either drawer.

Pros: Genuinely the lowest price for a true dual-basket design on this list; easy-view windows on both baskets; dishwasher-safe 3-quart nonstick baskets.

Cons: 4.2-star average is the lowest of the five here — some reviewers report the digital controls feeling less responsive than pricier models; 3-quart baskets are the smallest dual-zone capacity on this list, so very large households will hit the “overcrowd” ceiling faster.

Check Price on Amazon ↗

Ninja DoubleStack XL SL401 — Best Space-Saving Dual-Basket


Ninja DoubleStack XL SL401 Air Fryer

Instead of two baskets side by side, Ninja stacks them vertically. The listing claims 10 quarts of capacity in a design 40% slimmer than traditional two-basket air fryers that still fits under standard cabinets, with dimensions of 11.25 inches deep, 19.22 inches wide and 15.14 inches tall. That matters more than it sounds like if counter space, not capacity, is the constraint. Smart Finish and Match Cook work the same way as on the side-by-side models, and the listing adds two removable meal racks so each basket can hold two levels of food.

Pros: 10-quart capacity in a slimmer stacked footprint; two removable meal racks; dishwasher-safe crisper plates; 4.5★ across 1,048 ratings. Cons: Stacked design means you can’t see both baskets’ contents at a glance the way a side-by-side model allows; at 15.14 inches tall it is taller than side-by-side models, so measure the gap under your cabinets; it costs about $10 more than the Ninja DZ201.

Check Price on Amazon ↗

Instant Pot Vortex Plus XL 8QT ClearCook — Best for Watching Frozen Food Crisp


Instant Pot Vortex Plus XL 8QT ClearCook Air Fryer

The clear windows here are genuinely larger and clearer than the “easy-view” cutouts on the Chefman, which matters specifically for frozen food since you’re often checking browning progress rather than following a fixed timer. Two 4-quart baskets, SyncCook/SyncFinish, and a straightforward touchscreen round it out.

Pros: The clearest viewing windows of any model here — genuinely useful for judging frozen-food browning without opening a basket; strong rating at high review volume (4.5★, 6,777 ratings); dishwasher-safe baskets and trays.

Cons: Amazon’s own review-summary flags a real durability pattern worth knowing about upfront — some buyers report units failing within about 11 months of regular use, which is worse than the other four picks here; one long-term reviewer also noted the clear front panel can crack and peel with age.

Check Price on Amazon ↗

Cuisinart ClearView 4-Quart — Best for Small Households


Cuisinart ClearView 4-Quart Air Fryer with Glass Basket

This is the one single-basket pick on this list, and it earns its spot for a specific reason: if you’re cooking for one or two people, a dual-basket machine’s split capacity is often wasted, while a well-designed single 4-quart basket handles a normal frozen-food portion in one pass. The full glass basket (not just a small window) is the standout feature — you can watch the entire cooking process, not just a slice of it.

Pros: Full glass basket, not a small window — see the entire cook, not just what’s near the door; PFAS-free ceramic nonstick crisper plate; 3-year warranty is longer than any other pick here; rated 4.6★, though on a smaller review base (436).

Cons: Single 4-quart basket means no simultaneous two-item cooking — the wrong choice if you regularly cook for a full family; smaller review count than the other four means less long-term reliability data to go on.

Check Price on Amazon ↗

How These Picks Were Chosen

Plainly: this is a research-based guide, not a hands-on test. I have not run these side by side, and nothing here should be read as a report from my own kitchen.

What the picks rest on: basket area rather than nominal quarts, because frozen food cooks in a single layer and volume is irrelevant to that; preheat behaviour, since frozen items go in from cold; wattage against basket area; and whether the basket and crisper plate are dishwasher safe. Plus the complaint patterns across verified-purchase reviews, where the frozen-food theme is uneven browning when a basket is loaded to its stated capacity.

What I could not establish: how evenly each machine browns a full frozen load, which is exactly the job. It needs a tray of identical frozen items cooked and assessed by position, and no independent test covers these models. Basket geometry and watts per square inch are used as proxies here.

Frequently Asked Questions

Do I need a dual-basket air fryer for frozen food specifically?

Not necessarily. A dual-basket model’s real advantage is cooking two different frozen items (say, fries and chicken tenders) at once without one going cold while you wait on the other. If you usually cook one type of frozen food per meal, a well-sized single-basket model like the Cuisinart ClearView handles that fine.

Why did my frozen fries come out soggy instead of crispy?

Almost always overcrowding. Frozen food releases moisture as it cooks, and if the basket is too full, that moisture has nowhere to go and the food steams instead of crisps. Cook in a single layer with visible gaps, even if it means an extra batch.

Should I preheat before adding frozen food?

Check your package instructions first — most frozen-food packaging is timed assuming a preheated appliance. Skipping preheat to save time usually just means undercooked centers or a longer total cook time than the box promises.

Does a bigger capacity always mean better frozen-food results?

No — bigger only helps if you actually fill it in a single layer. A large-capacity basket half-empty performs the same as a smaller one; the benefit only shows up when you’re genuinely cooking for more people or bigger batches.

Is it safe to cook frozen breaded foods (like mozzarella sticks) in any of these?

Yes, all five handle breaded frozen foods without issue — that’s a standard air fryer use case. The main practical note: breading fragments can shed into the basket over repeated uses, so a quick wipe-down between breaded-food batches keeps the next round from picking up burnt crumbs.

Do frozen foods cook faster in an air fryer than a conventional oven?

Usually yes, and that’s most of the appeal — air fryers circulate hot air directly around the food in a much smaller chamber than an oven, so frozen items typically finish in 60–75% of their package’s conventional-oven time. Follow the air fryer instructions on the package if listed separately from the oven instructions; they usually are.

For the full lineup across every use case, not just frozen food, see my best air fryers overall guide. If your air fryer is putting off unexpected smoke rather than the normal cooking haze, here’s how to tell the difference and what to do about it. And for the full range of air fryer content on the site — reviews, comparisons, and troubleshooting — start at the air fryers hub.


Filed Under: Product Reviews

How Often to Replace a Range Hood Charcoal Filter (And How to Tell)

Last Updated July 18, 2026

Steam rising into a range hood above a stovetop

Photo by Created Stories from Pexels

Short answer: every 3 to 6 months for average use, but that range hides a lot. A household that fries and woks four nights a week can burn through a charcoal filter in six weeks. A household that mostly boils pasta and reheats leftovers can stretch one past nine months. Below is the actual breakdown, plus how to tell without guessing.

Charcoal filters get replaced far more often than they need to be, and far less often than they should be, because almost nobody pays attention to the actual signs instead of just marking a date on the calendar. The calendar method works fine as a backstop, but it’s not what tells you when a filter is actually done.

This is an educational guide with no product picks of its own — if you follow a link to one of my buying guides below and buy something on Amazon, I earn a small commission at no extra cost to you. Every range hood page on the site is collected on the range hoods hub.

How Often to Replace a Range Hood Charcoal Filter: The Real Range

Charcoal (sometimes called carbon) filters only exist on ductless range hoods — the ones that recirculate air back into the kitchen instead of venting it outside. If your hood vents through ductwork to the outdoors, you almost certainly have a washable metal grease filter instead, and this article doesn’t apply to you the same way (grease filters get cleaned, not replaced, roughly monthly).

For ductless hoods, here’s the frequency broken down by how hard you actually cook:

Cooking Style Replace Every Why
Heavy — frying, wok cooking, searing, daily meat 6–10 weeks (or ~120 cooking hours) Grease and smoke saturate the carbon fastest at high heat
Average — regular stovetop cooking most nights 3–6 months Manufacturer default for most residential ductless hoods
Light — occasional cooking, mostly boiling/reheating 6–9 months Low grease and odor load extends the carbon’s working life

These ranges come from manufacturer guidance across Broan-NuTone, Proline, and other range hood makers — they broadly agree, which is unusual for appliance maintenance advice.

Why Charcoal Filters Can’t Just Be Cleaned

This trips people up because the metal grease filter right next to it can be washed indefinitely. Charcoal filters can’t.

Once the activated carbon has absorbed enough grease particles and odor compounds, it’s chemically saturated — there’s no washing, soaking, or baking that restores its ability to adsorb anything else. Running water through it or scrubbing it doesn’t “clean” it; it just wets carbon that’s already full. The only fix is a new filter.

If your hood has both a metal mesh/baffle filter and a charcoal filter (a common two-stage setup), you’re doing two different maintenance jobs on two different schedules: wash the metal one every 2–4 weeks, replace the charcoal one every 3–6 months.

Signs Your Filter Is Overdue — Don’t Just Trust the Calendar

Cooking frequency varies enough between similar households that a fixed date is only a backstop.

These signs are more reliable:

  • Cooking odors linger — smells that used to clear in 10–15 minutes now hang around for an hour or more.
  • Reduced airflow or suction — the hood sounds like it’s working just as hard, but you can feel or see less air actually moving (steam sits over the pan longer instead of pulling up and away).
  • Visible grease discoloration on the filter surface, especially a yellow-brown sheen you can see without removing it.
  • New or louder motor noise — a clogged filter makes the fan work harder to pull the same volume of air, which shows up as noise before it shows up as anything else.
  • The indicator light, if your model has one — most mid-range and higher ductless hoods have a filter-change reminder on a timer, though it’s usually set to the manufacturer’s average-use default and won’t account for heavy cooking.

Any one of these on its own isn’t conclusive.

Two or more together, and it’s time.

What Actually Shortens a Filter’s Life

The manufacturer’s “3–6 months” is an average, not a guarantee, because these variables push it in either direction:

  • Cooking method — frying and searing release far more airborne grease than boiling, steaming, or baking.
    A household that fries regularly can cut the filter’s life in half or more compared to one that mostly simmers.
  • Fan speed used — running the hood on its lowest setting because it’s quieter means less air (and less grease) actually passes through the filter, which sounds like it would help, but usually just means smoke and odor escape into the room instead of being captured — false economy.
  • Kitchen size and ventilation — a small, closed kitchen concentrates cooking byproducts onto the filter faster than an open-plan space where some of it disperses before reaching the hood.
  • Whether you use the hood at all — the single biggest factor isn’t the filter, it’s whether the fan gets turned on every time something’s on the stove.
    A filter in a hood that runs consistently lasts longer per month of cooking than one that only gets used for smoky pan-searing nights.

\n\n

How to Check a Filter’s Condition in Under a Minute

  1. Remove the filter per your model’s release mechanism (usually a tab or slide-out tray behind the grease filter).
  2. Hold it up to a light source. A fresh charcoal filter lets some light through the mesh; a saturated one looks noticeably darker and denser.
  3. Smell it.
    This sounds unscientific, but it’s the fastest real test — a saturated filter smells like old cooking grease even when it looks visually okay.
  4. Check the edges and mounting frame for grease buildup, which usually shows up there before the center of the filter looks obviously dirty.

How to Replace It

Charcoal filter replacement is one of the simpler appliance maintenance jobs in the kitchen — most models take under five minutes with no tools:

  1. Turn off the hood and let it cool if it’s been running.
  2. Remove the metal grease filter first (it usually sits in front of or below the charcoal filter).
  3. Release the old charcoal filter — check your model’s manual for the exact latch, but most use spring clips or a simple slide-and-lift mechanism.
  4. Confirm the replacement filter matches your model number exactly; charcoal filters are not universal even across the same brand’s product lines.
  5. Slide the new filter into place until it clicks or seats fully, then reinstall the grease filter on top.
  6. Reset the filter-change indicator light if your model has one (usually a button held for a few seconds, per your manual).

Where to Buy a Replacement — and What to Check First

Charcoal filters are sold both by the original manufacturer and by third-party brands making compatible replacements.

A few things matter more than the price:

  • Match the exact model number, not just the brand. “Fits most Broan hoods” on a listing is a red flag — dimensions and mounting tabs vary across a single manufacturer’s own lineup, sometimes between very similar-looking model years.
  • Check whether your hood uses a standalone charcoal filter or a combination filter (grease and charcoal in one unit).
    Combination filters cost more per unit but mean one part to track instead of two separate replacement schedules.
  • Buy in twos if your model changes on a predictable schedule. If you know you’re a 3-month household, ordering two at once means you’re never caught without one on hand when the old one is visibly done.
  • Third-party filters are usually fine as long as the dimensions and mounting method match exactly — the activated carbon itself isn’t proprietary technology, it’s the physical fit that causes problems.

When It’s Not Just the Filter

Occasionally what looks like an overdue filter is actually a different problem, and a new filter won’t fix it:

  • Motor noise that doesn’t change with a fresh filter — likely a fan motor or bearing issue, not filtration.
  • Persistent smoke haze even on high fan speed with a new filter installed — often means the hood’s CFM (airflow rating) is undersized for your kitchen or stove output, not a filter problem at all.
  • Any burning smell, unusual heat, or visible damage to the housing — stop using the hood and have it inspected.
    This is an electrical or motor issue, not routine maintenance.

If a fresh filter doesn’t resolve the symptom you were chasing, the filter probably wasn’t the actual problem.

If your current hood is on its way out, my Broan-NuTone 413004 review covers a budget-friendly replacement and a genuine installation quirk worth knowing before you buy.

If you could run ducting instead, my 413004 vs BCDF130SS comparison explains why only one of the two can actually vent outside.

Frequently Asked Questions

Can I use my range hood without a charcoal filter?

Not on a ductless hood — the charcoal filter is what removes odor before the air recirculates into your kitchen.

Running it without one means smoke and cooking smells go right back into the room unfiltered. (Ducted hoods don’t need one at all, since they vent outside.)

Do all charcoal filters fit all range hoods?

No. Even within the same brand, filter dimensions and mounting mechanisms vary by model.

Always check your exact model number rather than assuming a filter that “looks about right” will fit.

Is a more expensive charcoal filter worth it?

Mostly no — the core material (activated carbon) does the same job across price points, and saturation depends far more on your cooking habits than on filter grade.

The one exception is filters with a slightly higher carbon density, which can last marginally longer under heavy use, but the difference is incremental, not dramatic.

Why does my kitchen still smell after I replaced the filter?

Check that the new filter is seated correctly first — a gap around the edges lets unfiltered air bypass it entirely. If it’s seated properly and odor is still an issue, the fan speed or the hood’s overall airflow capacity for your kitchen size may be the real problem, not the filter.

Can I wash and reuse a charcoal filter to save money?

No — this is the single most common mistake. Washing doesn’t restore activated carbon’s ability to adsorb odor and grease compounds once it’s saturated; it just wets a filter that’s already done its job. Reusing a washed charcoal filter means running your hood with essentially no odor filtration while assuming it’s still working.

For the fuller comparison of ducted vs. ductless systems — including installation, noise, and which one actually suits your kitchen — see my complete ductless range hood guide. And if you’re shopping for a new unit rather than maintaining an existing one, my picks for best ductless range hoods covers five models I’d actually recommend. Heavy frying and searing is also the exact scenario where cast iron cooking puts the most smoke and grease into the air — worth keeping in mind if you’re deciding how aggressive your ventilation setup needs to be.

Filed Under: Helpful Kitchen Tips

Why Is My Air Fryer Smoking? (And How to Stop It)

Last Updated July 18, 2026

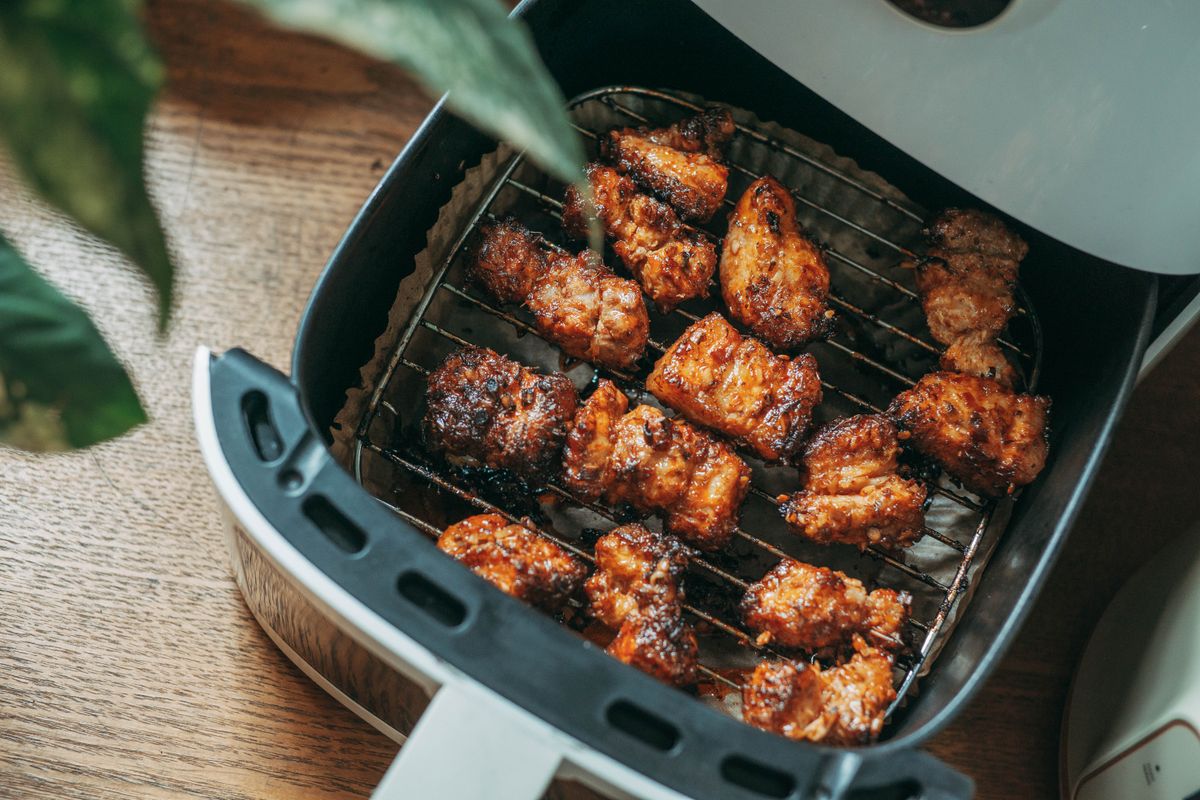
Crispy chicken pieces cooked in an air fryer basket

Air fryer smoke almost always comes from grease, not a fault in the machine. Fatty foods release oil as they cook, that oil drips onto the hot heating element or the bottom of the basket, and it burns off as smoke — the same thing that happens when fat hits a barbecue grill. A dirty machine makes it worse, since built-up grease from past cooks ignites faster than a clean one. Both are fixable in the next few minutes, no repair needed.

Why Is My Air Fryer Smoking? The Two Real Causes

Fatty food at high heat

Bacon, chicken thighs with skin, sausages, and anything marinated in oil all render fat quickly at typical air fryer temperatures (360°F/180°C and above). That fat drips down, contacts the heating element, and smokes. This is normal behavior for the food, not a machine problem — a real grill or oven does the same thing with the same ingredients.

A dirty heating element or basket

Grease residue from previous cooks builds up on the heating coil and basket over time. A heavily coated element also radiates less heat into the food, which is one reason an air fryer can seem not to be heating up. Even a small amount of old, baked-on grease will start smoking well before new food does, since it’s already been through multiple heat cycles. This is the more common cause on a machine that’s been in regular use for a few months without a deep clean.

What the Smoke Color Tells You

Color is the fastest way to tell whether you’re looking at a normal grease event or something to actually worry about.

  • White or light grey smoke: Normal. This is fat and moisture burning off, the same thing you’d see from a grill. Reduce fat and clean the element using the steps below.
  • Black smoke: Usually sugar or heavily marinated/sauced food burning rather than plain fat — barbecue sauce, teriyaki, and other sugary glazes scorch and char faster than oil alone, and char produces darker smoke. Cut sugary sauces earlier in the cook or brush them on for only the last few minutes.
  • Blue or bluish-grey smoke: Stop and unplug the unit. This usually points to an electrical issue, not food or grease, and is the one smoke color that isn’t a normal cooking byproduct.

Two More Real Causes

Sugary sauces and glazes

Sauces with real sugar content — barbecue sauce, honey glazes, teriyaki — caramelize and then burn well before the surrounding food finishes cooking, and that burnt sugar is what produces the darker, sharper-smelling smoke described above. Add sugary sauces for only the final few minutes of cooking instead of the whole time.

Loose breading and batter fragments

Breaded or battered foods shed small fragments during cooking, and those fragments fall through the basket onto the element or drawer bottom, where they burn well before the actual food is done. Shake the basket partway through breaded cooks to redistribute rather than let loose crumbs settle in one spot, and brush off excess loose breading before it goes in.

A design quirk on open-top basket models

Air fryers with an open-top basket design (rather than a fully enclosed drawer) expose the heating element more directly to whatever drips or falls from the food above it, so they tend to smoke somewhat more readily than fully enclosed drawer-style units when cooking the same fatty food. This is a design tradeoff, not a defect — the fix is the same water-and-cleaning routine, just applied a little more proactively.

How to Stop It

  • Add a splash of water to the bottom of the drawer. Two tablespoons of water under the basket (not touching the food) keeps dripping grease from hitting the element directly hot enough to smoke. This works both as a preventive step and mid-cook if smoke starts.
  • Don’t overfill the basket. A packed basket blocks airflow, food cooks unevenly, and the parts that burn instead of crisping are what smoke. The same crowding is the leading reason air fryer food comes out soggy rather than crisp, and note that water under the basket trades crispness for less smoke. Cook in batches instead of forcing everything in at once.
  • Pat fatty foods dry and trim excess fat before they go in. Less rendered fat means less dripping onto the element in the first place.
  • Deep clean the basket, drawer, and heating element after every few uses, not just a rinse of the basket. Remove the basket and grates, wash with soap and water, then flip the unit and wipe the heating coil with a damp cloth once it’s cool.

When Smoke Actually Means Something Is Wrong

Grease smoke smells like burning fat and clears once you address the cause above. A few signs point to an actual problem instead: an electrical or plastic smell rather than a food smell, smoke on an empty preheat with nothing inside, or smoke that doesn’t stop even after cleaning and reducing fat. Any of those means stop using it and check the manufacturer’s warranty support rather than continuing to run it.

Food-Specific Technique

Bacon

The highest-fat food most people cook in an air fryer, and the most common smoke complaint. Cook it on a lower rack position if your model has one, at a slightly lower temperature (325–350°F) for a longer time rather than blasting it at 400°F, and add the water-under-the-basket step every time, not just when it’s already smoking.

Chicken thighs and other skin-on cuts

Skin-on chicken renders a large amount of fat over a longer cook time than most air fryer foods. Pat the skin dry before cooking (wet skin renders faster and messier), and check the drawer for pooled fat halfway through a longer cook rather than waiting until the end.

Mid-cook cleanup, if it starts smoking

Pause the unit, pull the drawer, and pour off any visible pooled grease into a heatproof container before continuing — don’t just add more water and keep going if there’s a visible pool. This takes under a minute and prevents the same grease from continuing to smoke for the rest of the cook.

FAQ

Why is my air fryer smoking with nothing in it?

This points to leftover grease residue on the heating element from previous cooks, not the current food. Clean the basket, drawer, and element thoroughly, including flipping the unit to wipe the coil once it’s cool.

Is it safe to keep using an air fryer that smokes?

Light smoke from fatty food or grease buildup is normal and safe to cook through once you address the cause. An electrical smell, smoke with nothing inside, or smoke that persists after cleaning are signs to stop and investigate further.

Does parchment paper help with air fryer smoke?

Yes — it catches dripping grease before it reaches the element or basket bottom, which is one of the simplest preventive fixes for smoke from fatty foods like bacon or wings.

Which foods cause the most air fryer smoke?

Bacon, chicken thighs with skin, sausages, and anything heavily marinated in oil. These render the most fat during cooking, which is what actually smokes.

Does the color of the smoke matter?

Yes. White or light grey smoke is normal grease burning off. Black smoke usually means sugar in a sauce or glaze is scorching. Blue or bluish-grey smoke is not a normal cooking byproduct and points to an electrical issue — stop using the unit if you see it.

Next Steps

Add water under the basket, don’t overcrowd it, and clean the element regularly — that resolves the vast majority of air fryer smoke without any repair. If you’re shopping for a new machine, my best air fryers guide has current tested picks, and are air fryers healthy covers the fat-rendering question from a nutrition angle instead of a maintenance one. For the full category, start at the air fryers hub.

Based on manufacturer cleaning guidance and the pattern in owner-reported smoking complaints — not laboratory testing.

Filed Under: Helpful Kitchen Tips

Why Is My Blender Leaking From the Bottom?

Last Updated July 18, 2026

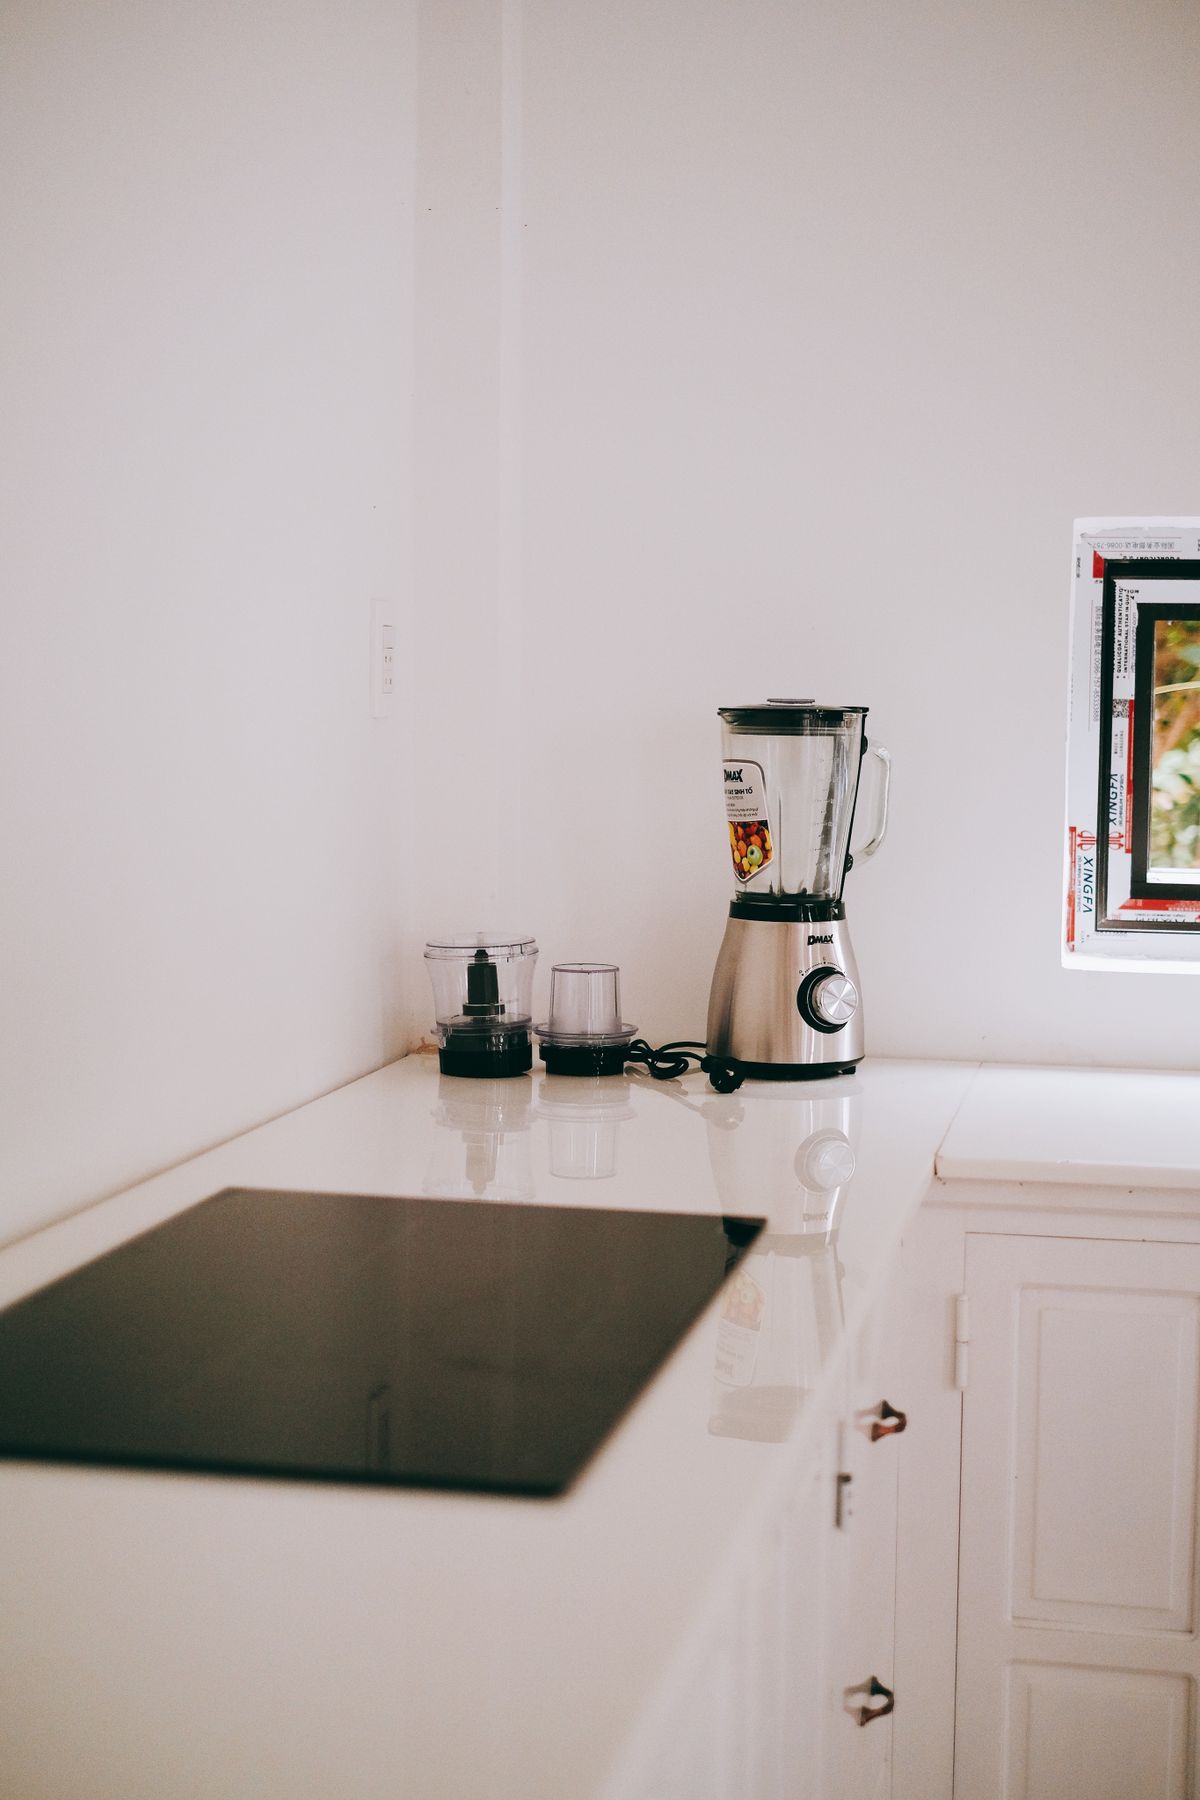
Blender on a modern kitchen countertop

A blender leaking from the bottom is almost always the rubber gasket around the blade assembly, not a sign the appliance is dying. That gasket seals the gap between the spinning blade and the jar, and it stiffens, warps, or loses its seal over time — a $5–15 part, not a reason to replace a $150 machine. Food residue packed under the blade assembly is the second most common cause, and it’s a five-minute fix with no parts required.

Check These Two Things First

  • The gasket. Unscrew the blade assembly from the bottom of the jar (most twist off; some have a removable base) and pull out the rubber gasket ring. Stretched, cracked, or flattened out of its original round shape means it’s done its job and needs replacing.
  • Buildup under the blade. Thick smoothie ingredients, seeds, and fibrous produce pack in around the blade base and stop the gasket from sitting flush. Even a perfectly good gasket leaks if there’s dried residue keeping it from sealing.

Fixing It

1. Disassemble and clean everything

Take the blade assembly all the way apart — jar, blade, gasket, base — and clean each piece individually rather than just rinsing the jar. Dried gunk under the blade is invisible until you separate the parts, and it’s the most common reason a “new gasket” install still leaks.

2. Inspect the gasket under good light

Look for flattening, cracks, or a warped shape that no longer sits round in its groove. A gasket that looks fine at a glance often shows damage once you flex it gently between your fingers.

3. Replace the gasket if it’s worn

Order the exact part number for your model rather than a generic size — blade assemblies vary enough between brands that a close-enough gasket often still leaks. Manufacturer parts pages list the correct part number by model.

4. Reassemble by hand-tight only

Overtightening the blade assembly can warp the gasket’s seal just as easily as under-tightening. Snug it by hand until it stops turning easily — don’t force it further with a tool.

5. Check the jar itself for cracks

If the leak continues after a fresh gasket and thorough cleaning, look at the jar base and threads for hairline cracks, especially on a blender that’s been dropped or run empty at high speed. A cracked jar needs replacing; the rest of the machine is usually fine.

What This Isn’t

A leaking blender is a seal problem, not a motor problem — the base unit and motor are essentially never the cause of a leak, since they don’t touch liquid. Don’t assume the whole appliance is failing because of a $10 gasket. It’s also not usually the bearing: bearing failure shows up as grinding noise or a wobbling blade, not water at the base.

FAQ

Why is my blender leaking from the bottom?

Almost always a worn or dirty gasket around the blade assembly. Disassemble it, clean every part including under the blade, and replace the gasket if it’s stretched, cracked, or flattened.

Can I use a generic replacement gasket?

You can, but a model-specific gasket from the manufacturer fits more reliably. Blade assembly dimensions vary enough between models that a generic size sometimes still leaks even when new.

Is a leaking blender dangerous to keep using?

Not dangerous, but liquid pooling under a blade assembly can eventually reach the base and motor if ignored for a long time. Fix the gasket rather than let it run.

How often does a blender gasket need replacing?

There’s no fixed schedule — it depends on use frequency and how hot or acidic what you blend is. A blender used daily for smoothies might need a new gasket every 1–2 years; occasional use can go much longer.

Next Steps

Clean it apart, check the gasket, replace if needed, and reassemble hand-tight — that resolves the vast majority of blender leaks without a service call. If the leak is coming from the top instead — around the lid or center cap — that’s a different set of parts entirely; see why your blender might be leaking from the top. If you’re shopping for a new machine instead of fixing an old one, the best blender food processor combo guide has current picks, and if a food processor might suit your kitchen better than a blender, best food processor covers that side of things.

Pushing a blender into jobs it wasn’t built for strains the same seals prematurely — see can you grind coffee beans in a Nutribullet for a common example of that.

Based on manufacturer parts and repair documentation, cross-checked against the pattern in owner-reported failures — not laboratory testing.

For the wider picture on choosing and living with a blender, my blenders hub collects the reviews, comparisons and the other fault guides.

Filed Under: Helpful Kitchen Tips

  • « Go to Previous Page
  • Page 1
  • Interim pages omitted …
  • Page 32
  • Page 33
  • Page 34
  • Page 35
  • Page 36
  • Interim pages omitted …
  • Page 53
  • Go to Next Page »

Recent Articles

  • Bosch Universal Plus Stand Mixer Review: Built for Bread Bakers
  • Hamilton Beach 63326 Stand Mixer Review: Real Value, Real Limits
  • Ninja Foodi XL Pro Review (DT201): Biggest Capacity, Lowest Price
  • Cuisinart SM-50 Stand Mixer Review: Solid Value, Real Trade-Offs
  • Breville Smart Oven Pro Review (BOV845BSS): Fast, Even, One Real Flaw

Search


HOME          Contact          Affiliate Disclosure          Terms of Service          Privacy Policy


kitchenwarecompare.com is a participant in the Amazon Services LLC Associates Program, an affiliate advertising program designed to provide a means for sites to earn advertising fees by advertising and linking to Amazon.com, Endless.com, MYHABIT.com, SmallParts.com, or AmazonWireless.com. Amazon, the Amazon logo, AmazonSupply, and the AmazonSupply logo are trademarks of Amazon.com, Inc. or its affiliates. As an Amazon Associate I earn from qualifying purchases.


Copyright © 2026 kitchenwarecompare.com, ALL RIGHTS RESERVED.