• Skip to primary navigation
  • Skip to main content
  • Skip to primary sidebar

Kitchenware Compare

  • Home
  • Product Reviews
    • Air Fryers
    • Coffee
    • Cookware
    • Flat Top Grills
    • Meat Thermometers
    • Food Processors
    • Knives
    • Pizza Ovens
    • Toaster Ovens
    • Juicers
  • Food Blog
  • Helpful Kitchen Tips
  • Data Studies
  • About
  • How I Review
  • Contact
You are here: Home / Archives for Glenn

Best Air Fryers 2026: 5 Picks for Every Budget

Last Updated August 26, 2026

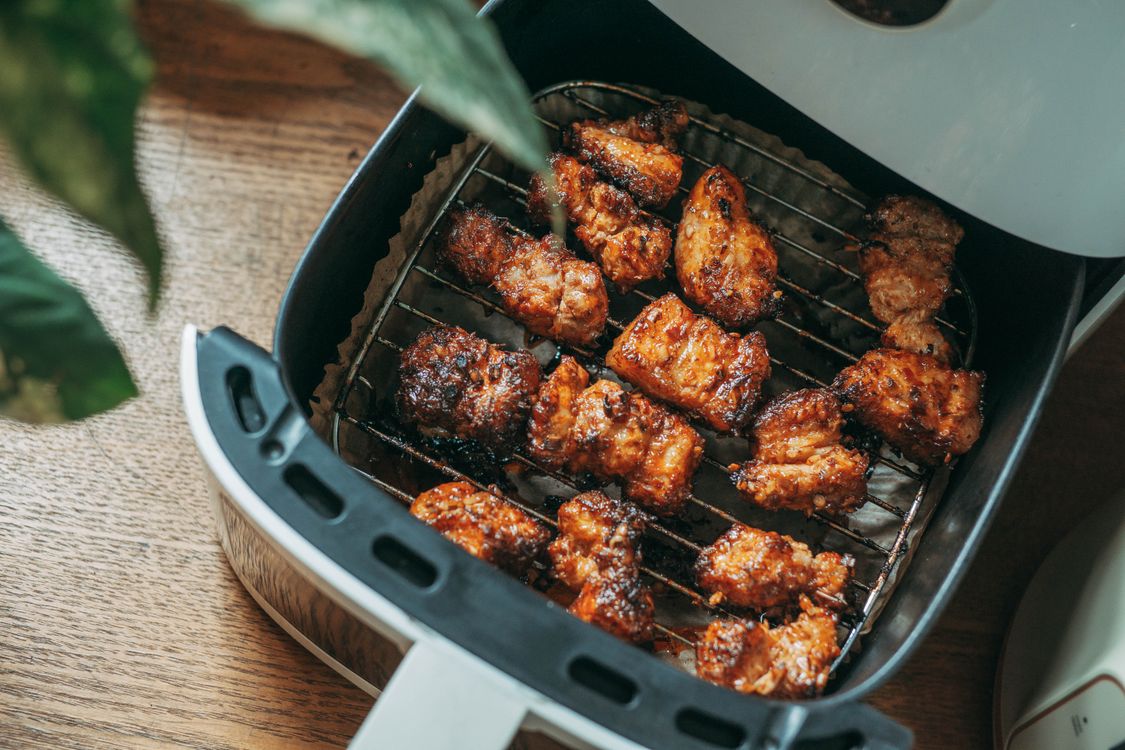
Crispy chicken pieces cooked in a modern air fryer

I earn a commission if you buy through the Amazon links below, at no extra cost to you.

Air fryers have settled into two clear categories: good ones that crisp food reliably with minimal oil, and everything else. If yours is not crisping, it is worth ruling out technique first — soggy and pale results have different causes. The market has matured enough that you don’t need to spend a lot to get a genuinely good appliance — but you do need to choose the right size and basket type for how you actually cook.

For most households, the COSORI TurboBlaze is the straightforward choice: a 6-quart basket, nine functions from 90°F to 450°F, a basket that pauses cooking when you pull it out, and the lowest share of critical written reviews among these picks. If you regularly cook two things at different temperatures simultaneously, the Ninja DualZone‘s two independent baskets solve a problem no single-basket fryer can. Both are covered below alongside three other strong options.

I’ve cross-checked these against the spec sheets and read the written buyer reviews for each one. Where a consistent complaint shows up in the review record, I’ve flagged it below rather than glossing over it.

Best Air Fryers 2026: Quick Comparison

Product Best For Price Rating Buy
COSORI TurboBlaze Best overall ~$120 4.8โ˜… (21,877) Check Price
Ninja DualZone 8Qt Families / dual cooking ~$200 4.8โ˜… (25,056) Check Price
Ninja XL MaxCrisp Biggest single basket ~$180 4.7โ˜… (2,169) Check Price
COSORI Air Fryer Pro Compact / 1โ€“2 people ~$100 4.7โ˜… (35,790) Check Price
Instant Pot Vortex Even browning ~$113 4.6โ˜… (6,682) Check Price

Best Air Fryers 2026: Full Reviews

1. COSORI 9-in-1 TurboBlaze 6Qt — Best Overall

COSORI TurboBlaze 9-in-1 Air Fryer 6 Qt Ceramic Coating

4.8/5  ·  21,877 reviews  ·  ~$120  ·  View on Amazon

The COSORI TurboBlaze is the one to start with for most households. It has the lowest share of critical written reviews on this list, 435 of 7,525 (5.8%), costs $119.99, and has a 6-quart basket that COSORI says serves 3 to 5 people. It runs at 1,725W, and COSORI’s listing describes a PFAS-free ceramic coating on the basket and crisper plate and a fan of up to 3,600 rpm with five speeds.

Nine presets cover everything from air frying to proofing bread dough, which is unusual and genuinely useful if you bake. The temperature range bottoms out at 90°F — low enough for dehydrating and proving — and reaches 450°F at the top.

It has 4.8 stars across 21,877 ratings. COSORI’s manual adds two details that matter day to day: pulling the basket out pauses cooking and pushing it back in resumes it, and there is a built-in Preheat setting. The warranty is two years, and COSORI says to avoid metal utensils and abrasive cleaners on the nonstick basket.

Pros:

  • PFAS-free ceramic coating on the basket and crisper plate, per COSORI’s listing
  • 9 cooking functions, from Proof at 90°F to Broil at 450°F
  • Pauses automatically when the basket is pulled out and resumes when it goes back in
  • Lowest critical share among these picks: 435 of 7,525 written reviews (5.8%)
  • Two-year limited warranty

Cons:

  • COSORI’s manual describes only a nonstick coating, and a few owners dispute the ceramic label
  • No shake reminder, and small food can fall through the crisper plate’s openings
  • COSORI warns that the hot crisper plate can fall out when the basket is tipped over

Verdict: The default recommendation for most households: the strongest owner record on this list, at $119.99. More in my COSORI TurboBlaze review.

Check Price on Amazon ↗

2. Ninja DZ201 Foodi DualZone 8Qt — Best for Families

Ninja DZ201 Foodi 8 Quart DualZone 2-Basket Air Fryer

4.8/5  ·  25,056 ratings  ·  View on Amazon

The DualZone has two independent 4-quart baskets that can run at different temperatures simultaneously. The “Smart Finish” function syncs the two baskets to finish at the same time — so chicken at 400°F in one basket and roasted vegetables at 375°F in the other can be done together. This eliminates the staging problem that single-basket air fryers force on you when cooking a complete meal.

8 quarts total capacity across two baskets makes this the largest-capacity option on this list. It’s also the heaviest and takes the most counter space — this is a full-size kitchen appliance, not something you’ll move around. For a household of 4+ where getting everything on the table at the same temperature matters, the dual-zone format solves a real problem.

My Ninja DZ201 review covers what owners report about basket size and coating wear. See my guide to the best air fryers for families of 4 for a deeper comparison of large-capacity options.

Pros:

  • Two independent baskets at different temperatures simultaneously — a genuine workflow improvement over single-basket fryers
  • Smart Finish syncs both baskets to complete at the same time
  • 8 quarts total capacity handles full family meals in one go
  • 4.8 stars — joint highest rating on this list, with the COSORI TurboBlaze

Cons:

  • Significantly larger footprint than any single-basket air fryer — counter space is a real constraint
  • Premium pricing — costs significantly more than the value picks on this list
  • Two baskets and two crisper plates to wash every time

Verdict: The right pick if you regularly cook complete meals for 4+ people and counter space isn’t a constraint. For 1–3 people, the single-basket Ninja XL is the better call.

Check Price on Amazon ↗

3. Ninja XL Air Fryer with MaxCrisp — Biggest Single Basket

Ninja XL 6.5 Qt Air Fryer with MaxCrisp AF181

4.7/5  ·  2,169 reviews  ·  ~$180  ·  View on Amazon

The Ninja XL MaxCrisp (model AF181) has 4.7 stars across 2,169 ratings. Ninja rates its 6.5-quart basket for up to 5 lb of French fries or 9 lb of chicken wings. It runs at 1750W, and its Max Crisp setting runs at a fixed 450°F for frozen foods. The other five functions (air fry, roast, bake, reheat and dehydrate) top out at 400°F.

The basket and crisper plate are both dishwasher-safe, which matters for everyday use — though hand washing is what keeps a coating intact, and a basket that starts flaking is usually replaceable on its own. Ninja’s owner’s guide describes the basket as ceramic-coated, and the listing says the cooking surface is made 100% PFAS free. Owners praise the simple controls and easy cleaning, but 112 of its 536 written reviews are critical (20.9%, against 5.8% for the COSORI TurboBlaze), mostly about coating wear, noise and units that stopped working. My Ninja AF181 MaxCrisp review covers what owners report.

Pros:

  • Simple controls: temperature and time arrows, Start/Pause and six function buttons
  • 6.5-quart basket, rated by Ninja for up to 5 lb of fries or 9 lb of wings
  • Max Crisp setting at 450°F for frozen foods
  • Dishwasher-safe basket and crisper plate
  • Easy cleaning is a common theme in owner reviews

Cons:

  • Coating peeling or chipping on the basket and crisper plate is the most specific owner complaint
  • At 6.5 quarts, it takes up more counter space than compact models
  • No window to view food without opening the basket
  • Loud, by many owners’ accounts, and it keeps running when the basket is pulled out unless paused

Verdict: The biggest single basket on this list. Choose it if you mostly cook one large batch at a time, and read the coating and noise complaints first.

Check Price on Amazon ↗

4. COSORI Air Fryer Pro 5Qt — Best Compact Option
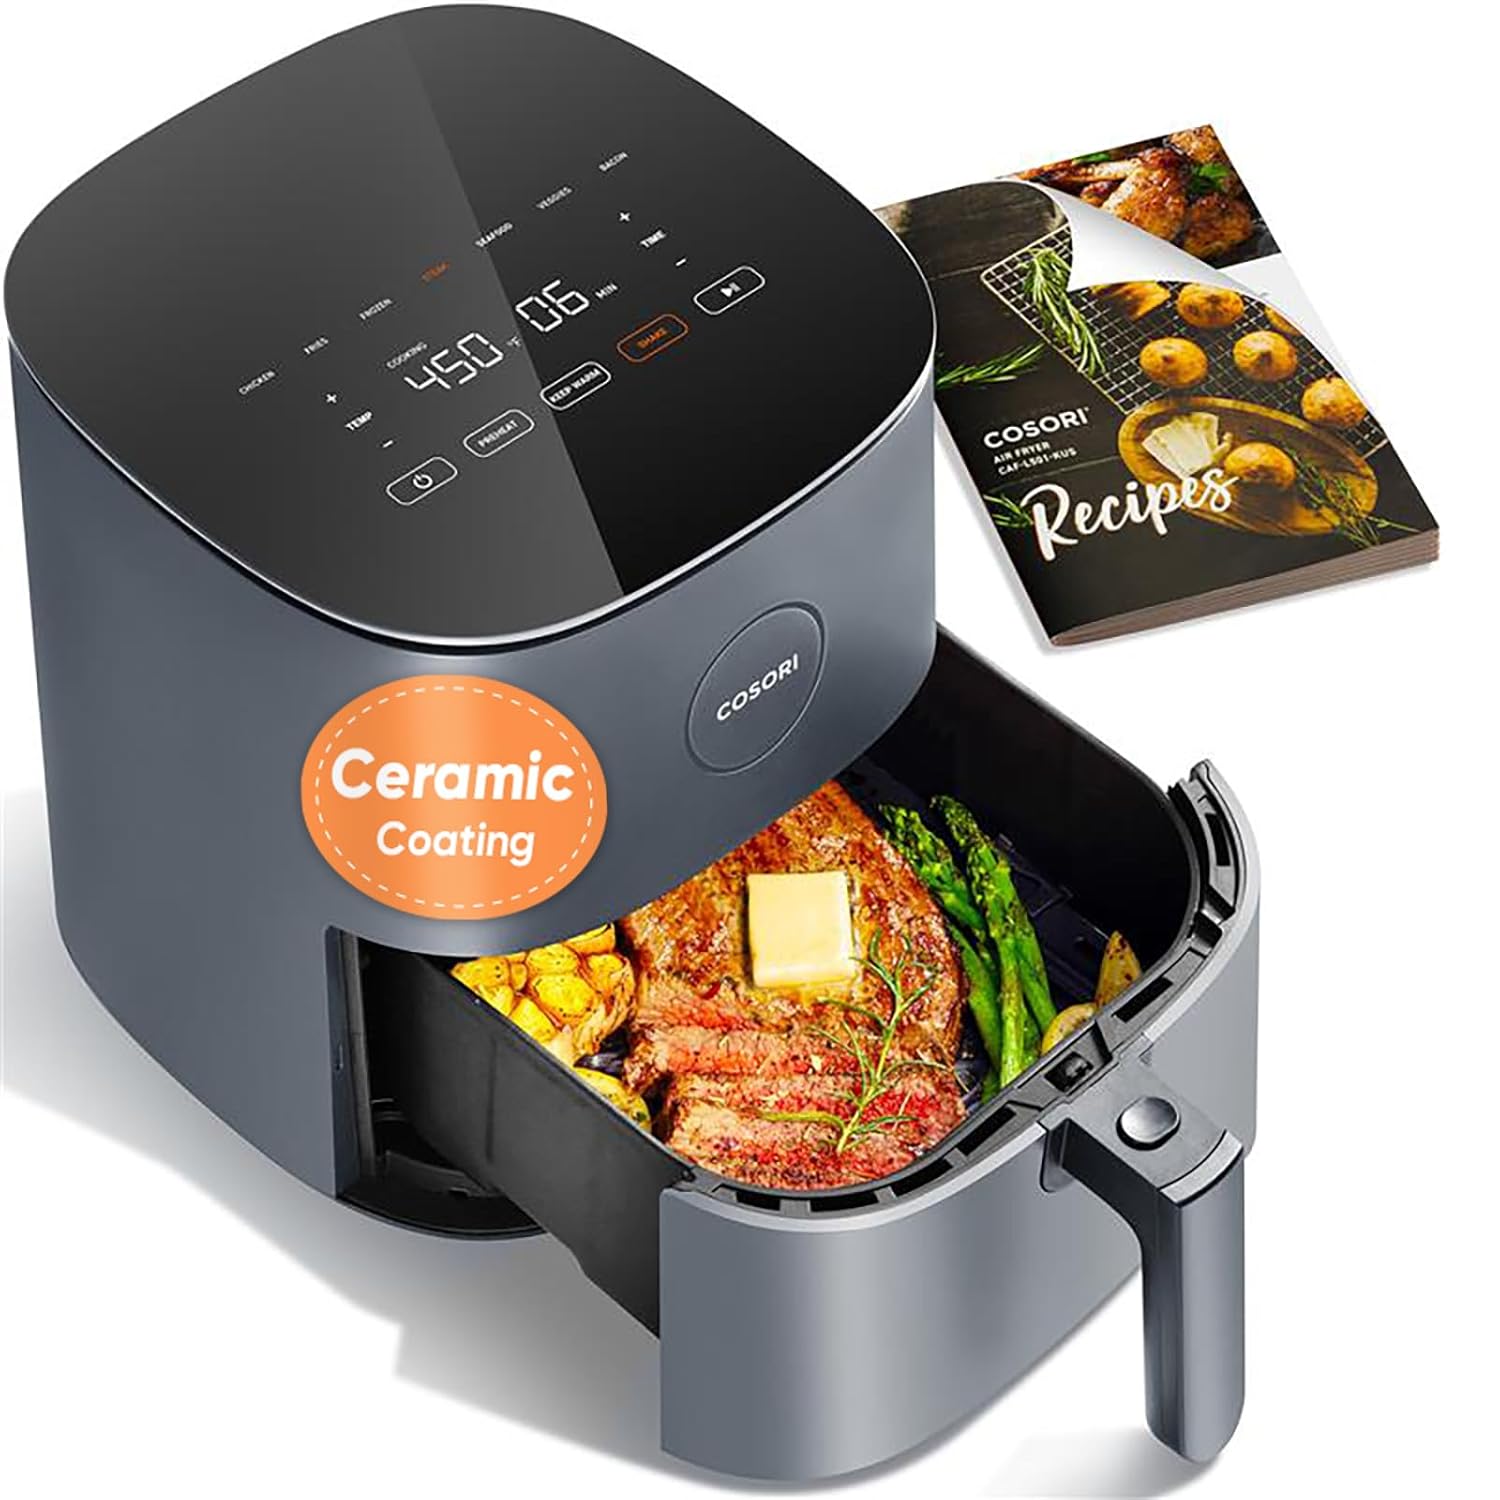
COSORI Air Fryer Pro Compact 5Qt Ceramic Coating

4.7/5  ·  35,790 reviews  ·  View on Amazon

The COSORI Pro is the right choice if counter space is genuinely limited or you’re cooking for one or two people. At 5 quarts, it’s noticeably smaller than the 6–8 quart models on this list — smaller footprint on the counter, less to clean, and proportionate capacity for smaller households. It still has a ceramic coating (PFAS-free), seven presets, and reaches 450°F, which is the only temperature ceiling that matters for crisping.

35,000+ reviews at 4.7 stars makes this one of the best-validated compact air fryers available. The shake reminder function prompts you to turn food halfway through — practical for things like fries or wings where even cooking requires it. The basket and tray are dishwasher-safe. The main limitation is volume: a 5-quart basket fits about 3 pounds of food maximum, which means batching for larger meals.

Pros:

  • Compact footprint — meaningfully smaller than 6+ quart models on counter space
  • 35,000+ reviews at 4.7 stars — the most-reviewed compact air fryer on this list
  • PFAS-free ceramic coating
  • Shake reminder included — practical for fries and wings
  • Dishwasher-safe basket and tray

Cons:

  • 5-quart capacity limits batch size — not suitable for cooking for 4+ people without multiple rounds
  • Ceramic coating trade-offs — scratches more easily than PTFE, shorter lifespan under heavy use
  • A smaller basket than the 6-quart TurboBlaze, though it costs about $20 less

Verdict: The pick for 1–2 person households or anyone with limited counter space. If you’re cooking for 3+, size up to the Ninja XL or COSORI TurboBlaze.

Check Price on Amazon ↗

5. Instant Pot Vortex 5.7Qt — Best for Even Browning

Instant Pot Vortex 5.7QT Air Fryer 4-in-1 EvenCrisp

4.6/5  ·  6,682 reviews  ·  ~$113  ·  View on Amazon

The Instant Pot Vortex is no longer the budget pick it once was — at around $113 on sale (it lists at $139.99) it costs more than the COSORI Pro but less than the COSORI TurboBlaze and the Ninja XL — but it delivers reliable air frying results. EvenCrisp technology refers to Instant Pot’s airflow design, which circulates hot air from the top rather than the sides — the practical result is even browning without the hot-spot problems that cheaper air fryers tend to have. Four functions (air fry, roast, bake, reheat) cover the realistic use cases for most people; dehydrate and specialty modes aren’t here, but they’re not missed by most buyers.

At 5.7 quarts, it sits between the compact COSORI Pro and the larger 6.5-quart Ninja XL. Honest trade-off: 6,682 reviews is less validation than the COSORI models carry, though more than the Ninja XL, and the Instant Pot brand reputation in kitchen appliances adds some confidence. If even browning matters to you more than price or feature count, this is the straightforward choice.

Pros:

  • Four well-chosen functions — no menu clutter, and everything on it gets used
  • EvenCrisp airflow produces consistently even browning
  • 5.7-quart capacity — adequate for 2–3 people without batching
  • Instant Pot brand reliability — well-established in kitchen appliances

Cons:

  • Only 4 functions — no dehydrate, no specialty modes
  • 6,682 reviews — less social proof than the COSORI models (21K–36K), though more than the Ninja XL
  • Nonstick coating; Instant does not name the material

Verdict: The best option if budget is the primary constraint. Reliable results, good airflow, and adequate capacity for most households — without paying for functions most people don’t use.

Check Price on Amazon ↗

How to Choose the Right Air Fryer

Get the Capacity Right First

The most common mistake is buying too small. For 1–2 people, 4–5 quarts is enough. For 3–4 people, 6 quarts is the minimum if you want to cook a full meal without batching. For 4+ people, 6.5 quarts or above — or a dual-basket model.

The actual usable volume is typically 70–75% of the stated capacity after you account for airflow clearance, so a “6 quart” basket realistically holds about 4–4.5 quarts of food.

Single Basket vs Dual Basket

A dual-basket air fryer like the Ninja DualZone lets you cook two different foods at different temperatures simultaneously. For a single-basket fryer, you’re either cooking one thing at a time or accepting that everything gets the same temperature.

If you regularly cook a protein and a vegetable together, a dual-basket model saves 20–30 minutes per meal. If you mostly air-fry single foods — fries, wings, frozen snacks — a single basket is simpler and cheaper. See my full air fryer guide for a deeper breakdown of basket types.

Ceramic vs PTFE Nonstick Coating

PTFE-based nonstick (Teflon) is more durable and longer-lasting under heavy daily use. Ceramic coatings are PFAS-free but scratch more easily and tend to degrade faster. If you’re avoiding PTFE specifically, check the label rather than the name: the COSORI TurboBlaze and COSORI Air Fryer Pro are both sold as ceramic-coated, and Ninja’s owner’s guide describes the Ninja XL MaxCrisp’s basket as ceramic-coated too.

For more on what to use inside an air fryer, see my guide on whether aluminium foil is safe in an air fryer.

If frozen fries, nuggets, and mozzarella sticks are most of what you cook, see my dedicated guide to the best air fryer for frozen food for picks optimized specifically for that.

Considering the Ninja AF101 specifically? See my full Ninja AF101 review for what almost 60,000 owners report and whether the newer AF141 is the better buy today.

Prefer the COSORI side of that same comparison? See my full Cosori Pro II review for the smart-features breakdown and a genuine durability issue worth knowing about first.

Frequently Asked Questions

What size air fryer do I need?

For 1–2 people: 4–5 quarts. For 3–4 people: 6 quarts minimum. For 4+: 6.5 quarts or a dual-basket model. Remember that usable capacity is roughly 70% of stated capacity — you need air circulation space above the food for it to crisp properly.

Are air fryers actually healthier than deep frying?

Yes, in the sense that they use significantly less oil — most air-fried food requires 1 tablespoon vs a quart or more for deep frying. The calorie reduction for equivalent portions is substantial. The texture difference is real too: air-fried food is crisp but not the same as deep-fried. Whether that matters depends on what you’re cooking.

Can you cook frozen food directly in an air fryer?

Yes — and this is one of the strongest use cases for air fryers. Frozen fries, chicken nuggets, fish sticks, and spring rolls all cook well from frozen. Most models have a dedicated frozen foods preset. Cooking times are typically 30–40% faster than a conventional oven from frozen, and the results are noticeably crisper.

How do you clean an air fryer?

Most baskets and crisper plates are dishwasher-safe — check the specific model. For hand washing, hot soapy water and a non-abrasive sponge.

Never use steel wool or metal scourers on nonstick or ceramic coatings. The interior of the unit can be wiped with a damp cloth — don’t submerge it. Let it cool completely before cleaning.

Can you put aluminium foil in an air fryer?

Yes, but with caveats. Foil can be used in the basket but must not block the airflow underneath the basket — that venting is how air fryers work. Never put foil in the bottom of the unit itself.

Avoid foil when cooking acidic foods (tomatoes, citrus) as the acid can react with aluminium. For the full guidance, see my article on using foil in an air fryer.

Do air fryers use a lot of electricity?

Less than a conventional oven — typically 1500–1800W vs 2000–5000W for an oven, and they preheat in 3–5 minutes vs 15–20 for an oven. For shorter cooking tasks (under 30 minutes), an air fryer uses noticeably less energy. For longer cooking at higher temperatures, the difference narrows. For most households using an air fryer for everyday meals, the energy cost is lower than the equivalent oven use.

How These Picks Were Chosen

Plainly: this is a research-based guide, not a hands-on test. I have not run these side by side, and nothing here should be read as a report from my own kitchen.

What the picks rest on: usable basket area rather than nominal quarts, since air fryers cook in a single layer and volume is close to irrelevant; wattage against that area; whether the basket and crisper plate are dishwasher safe; preheat behaviour; and how loud the fan is according to owners. Plus the complaint patterns across verified-purchase reviews, which across the whole category are dominated by basket coating flaking and fans getting louder with age.

What I could not establish: coating durability and cooking evenness, the two things that actually separate air fryers. Neither has an independent test covering these models. Basket geometry and watts per square inch are the proxies used throughout, and they are proxies.

The Bottom Line

For most households, the COSORI TurboBlaze is the straightforward choice: a 6-quart basket, nine functions and the lowest share of critical written reviews among these picks, at 5.8%. If you want the biggest single basket here, the Ninja XL MaxCrisp has 6.5 quarts.

Cooking for 4+ people? The Ninja DualZone‘s dual-basket format solves the staging problem. Budget tight? The Instant Pot Vortex at ~$113 delivers reliable results at a real price advantage.

For a deeper look at all things air fryer — cooking tips, accessory guides, and specific-use recommendations — see my full air fryer hub.

Still weighing an air fryer against old-school oil? My air fryer vs deep fryer comparison settles the texture, health, and cleanup math honestly.

Prefer an oven-style format over a basket? My best convection toaster ovens guide covers the air-fry-capable countertop ovens that replace two appliances.

If you want an appliance that handles both pressure cooking and air frying, see the best air fryer pressure cooker combos โ€” a separate guide covering the small but strong range of genuine combo units available in 2026.

If you cook from frozen regularly, having the right storage makes a real difference. See my guide to the best small chest freezers โ€” I cover five options from 2.0 to 5.0 cubic feet so you can match the size to your cooking habits.

If you’re deciding between two specific 6-quart models, my Instant Vortex Plus vs COSORI Pro comparison breaks down the differences.

Considering the Instant Pot Vortex Plus specifically? Read my full Instant Pot Vortex Plus review.

Already own one and dealing with smoke instead? See why air fryers smoke and how to stop it before assuming it needs replacing.

If it is tripping the breaker rather than smoking, that is an electrical question rather than a faulty-appliance one — see why an air fryer keeps tripping the breaker.
Filed Under: Product Reviews

Best Espresso Machine Under $200: 2026 Reviews + Buying Guide

Last Updated August 26, 2026

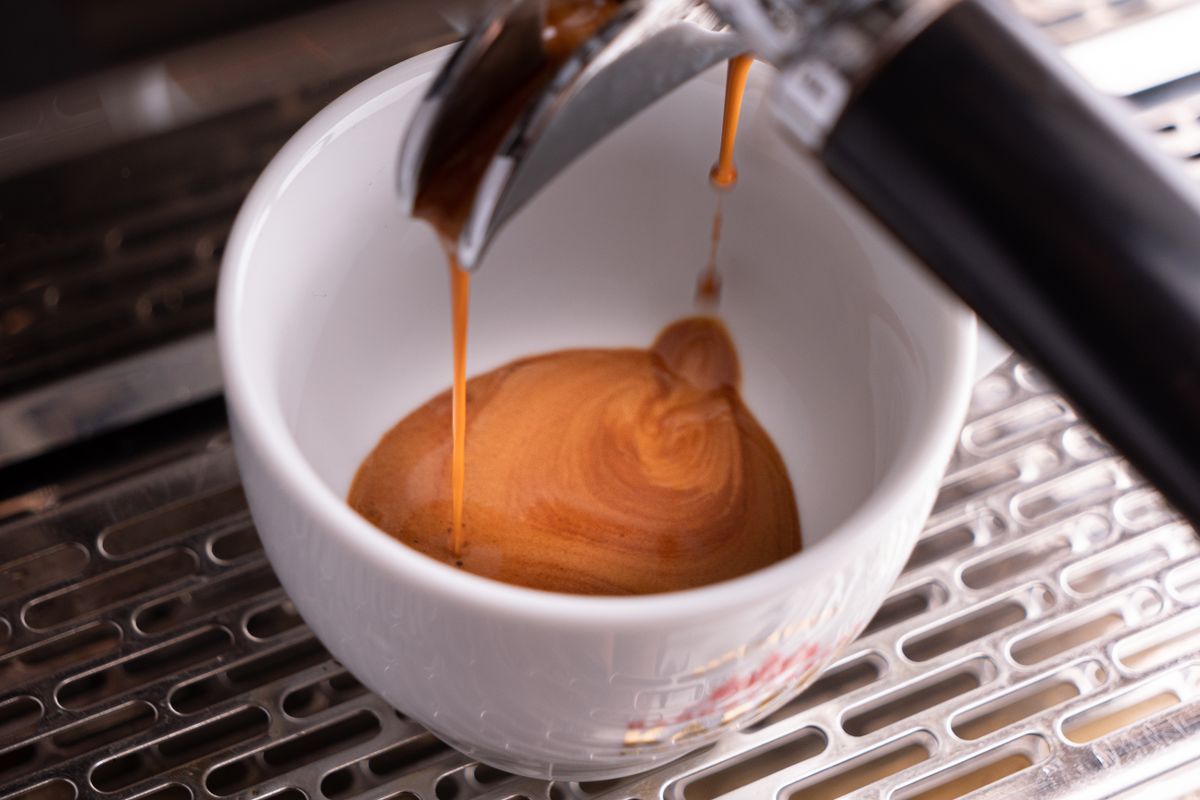
Espresso pouring from a portafilter into a white cup, showing a thick layer of crema

I earn a commission if you buy through the Amazon links below, at no extra cost to you.

Good espresso at home no longer requires a $500 investment. A new wave of well-engineered machines has pushed quality espresso into the sub-$200 bracket โ€” machines that can pull a proper shot with real crema, steam milk for lattes, and hold up to daily use. The question worth asking in this bracket is which machines deliver real crema rather than marketing claims, so the picks below are sorted on pump pressure, basket type and what owners consistently report about shot quality. This guide covers the four best espresso machines under $200 in 2026, from beginner-friendly pod machines to semi-automatic pump espresso makers.

Part of my complete coffee guide โ€” all reviews, comparisons, and buying advice in one place.

Best Espresso Machines Under $200 โ€” Quick Comparison

ProductBest ForPriceRatingBuy
De’Longhi Dedica EC680MBest Overall Under $200$149.954.0★ (4,862)Check Price
Nespresso Essenza MiniBest for Convenience$178.084.6โ˜… (6,074)Check Price
Gevi 20-BarPick With a Pressure Gauge$139.994.3โ˜… (3,767)Check Price
Casabrews 3700Best Budget Semi-Auto$99.994.2★ (3,680)Check Price

Reviews

1. Deโ€™Longhi Dedica EC680M โ€” Best Overall Under $200

Deโ€™Longhi Dedica EC680M espresso machine

The Dedica is a compact pump espresso machine that is only 6 inches wide, the slimmest real espresso machine in this guide. Amazon’s listing describes a 15-bar pump with a thermoblock heating system, adjustable controls, a manual frother with powerful steam, and a removable water tank and drip tray, and it draws 1,450 watts. It is not automatic: you tamp the coffee, control the shot and steam the milk yourself. It replaces the Deโ€™Longhi Stilosa, which this guide used to recommend and which Amazon no longer sells new; my Deโ€™Longhi Stilosa review stays up for owners of that machine.

Pros: Real 15-bar pump espresso, 6-inch width for tight counters, 4,862 ratings, $149.95
Cons: At 4.0 stars it has the lowest average rating in this guide; manual operation has a learning curve; the frother takes practice
Best for: Anyone who wants real espresso from a compact machine and does not mind learning to control the shot.

Check Price on Amazon โ†’

2. Nespresso Essenza Mini โ€” Best for Convenience

Nespresso Essenza Mini espresso machine

The Nespresso Essenza Mini is the smallest and most convenient option in this list. Insert a capsule, press a button, get espresso. There is no grinding, no tamping, no learning curve.

The trade-off is flavour control โ€” you are limited to Nespressoโ€™s capsule range โ€” but the convenience is unmatched for busy mornings. Pair it with a Nespresso Aeroccino milk frother for lattes.

Pros: Tiny footprint, one-touch operation, very fast, consistent results
Cons: Proprietary capsules (ongoing cost); less flavour control than ground coffee
Best for: Convenience-focused users, small kitchens, office environments

Check Price on Amazon โ†’

3. Gevi 20-Bar โ€” Pick With a Pressure Gauge

Gevi 20-Bar espresso machine

The Gevi 20-Bar offers a 20-bar pump (higher pressure than many competitors), a stainless steel body, and a steam wand for $139.99. Owners who get a good unit praise the espresso for the price, but 30% of the written reviews for this listing are critical, mostly about early failures, and the Casabrews below costs $40 less with a lower critical share. What the Gevi adds is a pressure gauge, which the Casabrews 3700 does not have. My Gevi 20-Bar review covers the owner reports.

Pros: Built-in pressure gauge, pre-infusion, stainless steel housing
Cons: Reports of units failing within the first year; plastic tamper
Best for: Buyers who want a pressure gauge to read their shots

Check Price on Amazon โ†’

4. Casabrews 3700 โ€” Best Budget Semi-Auto

Casabrews 3700 espresso machine

At $99.99 the Casabrews 3700 is the cheapest machine in this guide and $40 less than the Gevi. It has a 20-bar pump, a 51mm portafilter with one-cup and two-cup filters, a 43.9 oz removable water tank and a steam wand, and the listing describes low-pressure pre-infusion. There is no milk pitcher in the box: Amazon lists the machine, the tank, the two filters, the portafilter and a tamper with spoon.

Its owner record is better than the Gevi’s but not clean. 417 of the 1,607 written reviews for this exact model are critical (26%, against the Gevi’s 30%). The complaints that recur are machines that stop heating or steaming after a few months, a plastic or chemical smell that some owners could not flush out, and a portafilter that is stiff to lock in. The positive reviews mostly praise how easy it is as a first espresso machine and the value at this price.

Pros: Lowest price in this guide, 43.9 oz water tank, pre-infusion
Cons: Failures after a few months recur in owner reviews; some owners report a plastic smell; no pressure gauge
Best for: A first espresso machine on the tightest budget

Check Price on Amazon โ†’

Espresso Machine Buying Guide

Do I need a pump espresso machine or will a stovetop Moka pot do?

A pump machine produces true espresso โ€” pressurised extraction at 9โ€“15 bar that creates the characteristic crema on top. A Moka pot brews strong, concentrated coffee but at lower pressure, so there is no crema and the flavour profile is different. If espresso taste and crema matter to you, get a pump machine. If you want strong coffee on a very tight budget, a Moka pot is fine.

Do I need a built-in grinder?

A built-in grinder (called a โ€œbean-to-cupโ€ machine) is convenient but pushes most machines well above $200. For the best espresso quality on a budget, buy a separate burr grinder โ€” even a manual hand grinder around $30โ€“$50 will outperform the built-in grinders on budget machines.

What is the difference between 15-bar and 20-bar?

Both are more than sufficient for espresso extraction. The ideal extraction pressure is 9 bar โ€” both 15-bar and 20-bar pumps deliver this via a pressure regulator. The higher bar rating is largely a marketing figure. Focus on build quality and user experience rather than pump bar ratings.

Bottom line: For most people wanting real espresso on a budget, the Deโ€™Longhi Dedica is the best value. If convenience is the priority, go Nespresso.

The Stilosa this guide used to recommend is compared against the more expensive Breville Bambino Plus in my Bambino Plus vs De’Longhi Stilosa head-to-head. Worth reading if you want to understand what an extra $340 actually buys you. And if you’re already leaning toward spending more, my Breville Bambino Plus review covers whether the ~$500 price is justified.

If your budget stretches further, my best espresso machine under $500 guide covers the next tier up โ€” the Breville Bambino Plus and Gaggia Classic Pro are both significant upgrades worth considering if the price difference is workable.

How These Picks Were Chosen

Plainly: this is a research-based guide, not a hands-on test. I have not run these side by side, and nothing here should be read as a report from my own kitchen.

What the picks rest on: whether the portafilter basket is pressurised or not, which at this price is the single most consequential specification and the one least often stated plainly; boiler or thermoblock type and warm-up time; steam wand design and whether it is a panarello; and portafilter diameter, since a 58mm machine can take standard accessories and a proprietary size cannot. Plus the complaint patterns across verified-purchase reviews, which under $200 concentrate on pumps failing inside two years and plastic portafilters flexing.

What I could not establish: how the espresso tastes. Under $200 the cup is decided by the grinder and the technique far more than by the machine, and separating the three would need controlled testing this guide has not done. What can honestly be said is what the hardware does and does not let you control.

Frequently Asked Questions

Can you make good espresso for under $200?

Yes, but with trade-offs. Machines like the De’Longhi Dedica and Gevi 20-Bar pull a respectable shot โ€” better than pod coffee, not as consistent as a $400+ machine. Expect good espresso most of the time with occasional channelling. Dialling in your grind matters more than the machine at this price.

Do you need a separate grinder for a budget espresso machine?

If you want the best results, yes. Pre-ground coffee loses freshness quickly. A decent burr grinder ($50โ€“80) paired with any of the pump machines here will outperform a $300 all-in-one machine using stale pre-ground. It is the single biggest upgrade you can make at any budget.

Is 15-bar or 20-bar better for espresso?

Neither is inherently better โ€” this is mostly marketing. Real espresso extracts at 9 bar. Both 15-bar and 20-bar machines regulate pressure down to a working level.

What matters is how consistently they hold that pressure through extraction. The Gevi and Casabrews both rate at 20 bar.

How long do budget espresso machines last?

Owner reports for $100โ€“200 machines vary widely, and the Gevi’s include many failures within the first year. The Dedica has the longest owner record among the pump machines here: 4,862 ratings, against 3,767 for the Gevi and 3,680 for the Casabrews. Descale every 2โ€“3 months with hard water, every 4โ€“6 months with soft water. Skipping descaling is the number one cause of early failure.

Which machine is easiest for a complete beginner?

The Nespresso Essenza Mini, if you do not mind pods: there is no grinding, tamping or milk technique to learn. Among the pump machines, start with the Dedica, the overall pick here. The Casabrews takes more practice to dial in and is better suited to someone who enjoys tinkering.

Can these machines steam milk for lattes and cappuccinos?

The three pump machines include a steam wand; the Essenza Mini does not, and needs a separate frother such as the Aeroccino. The Dedica has a manual frother, which takes practice to get smooth texture. At this price point, expect flat-white quality rather than latte art competition foam.

If the sub-$200 bracket feels like a compromise, it isn’t: my price-vs-satisfaction study of 158 espresso machines found the priciest machines actually rate lower than the cheapest ones.

A follow-up study on owner dissatisfaction rates backs this up from a different angle: espresso machines had the highest 1-2 star review rate of any category checked (11.75% average) โ€” and it stayed high across every price point, including a $549.95 model at 10%. There’s no price tier that reliably avoids the frustration.

Filed Under: Product Reviews

How to Cook Eggs Without Butter (and Why the Pan Matters More)

Last Updated August 26, 2026

Two eggs frying in a dark non-stick frying pan on a gas hob, cooked with barely any visible fat

You can cook eggs without butter, and in most cases you do not need to replace it with anything. Butter is not doing anything chemically special — it is a layer of fat keeping egg protein off bare metal.

Once that is clear, the question stops being “what do I substitute” and becomes “what is keeping the egg off the pan”. Sometimes that is oil. Sometimes it is the pan itself. Sometimes it is water.

The short answer, by method

  • Scrambled: a teaspoon of any neutral oil, or nothing at all in a good non-stick pan. Low heat, keep them moving.
  • Fried: a thin film of oil, or a well-seasoned cast iron pan with none.
  • Omelette: oil, and a pan the omelette can slide in.
  • Poached, boiled, steamed: no fat of any kind, ever. The water does the whole job.

The rest of this explains why, because knowing the mechanism is what stops eggs sticking — not the particular fat you reach for.

Why eggs stick at all

Egg white is mostly water and protein. Heat unfolds those proteins, and the unfolded chains are chemically reactive — they will bond to whatever they are touching. If that is bare metal, they bond to the metal.

The Royal Society of Chemistry puts the mechanism plainly in its Kitchen Chemistry material on why pans stick: sticking is caused by chemical bonds forming between the food and the material of the pan, and protein-rich foods are especially prone to it “because the proteins can form complexes with metal atoms, such as iron, in the pan.”

That single sentence reframes the whole problem. As the same resource puts it, every method of reducing sticking works by reducing or preventing contact between the food and the metal. Butter is one way of doing that. It is not the only one, and it is not the best one.

What butter is actually contributing

Three things, and only one of them is about sticking.

  • A barrier. Fat sits between protein and metal. Any fat does this.
  • Flavour. This is the real reason to use butter, and no substitute reproduces it. Butter is about 15–18 percent water and contains milk solids that brown, which is where the nutty flavour of a butter-fried egg comes from.
  • A temperature signal. Butter foams, then quietens, then browns. Cooks use it as a thermometer without thinking about it. Lose the butter and you lose that cue, which is a genuine reason eggs go wrong on the first attempt without it.

If the reason for dropping butter is dairy, calories or simply running out, the barrier job transfers to something else without difficulty. The flavour does not transfer, and it is more honest to say so than to pretend olive oil tastes the same.

Route one: another fat

The simplest swap. A teaspoon of neutral oil — sunflower, rapeseed, grapeseed, light olive — does the barrier job as well as butter does, and has a higher smoke point than butter into the bargain, since butter’s milk solids start to burn around 150 °C.

Two practical notes. Use less than you think: a thin film that just wets the surface is enough, and excess oil makes fried eggs greasy rather than less sticky. And get the oil hot before the egg goes in, which matters for the reason in the next section.

One thing to avoid: aerosol cooking spray

Spray seems like the obvious low-fat answer and it is the one genuine trap here. Aerosol sprays contain lecithin as an emulsifier, and lecithin polymerises into a hard, brown varnish that builds up in a thin layer heat cannot easily remove. On a non-stick pan it bonds over the coating and creates a sticky surface that is far worse than the one it replaced — a common cause of a non-stick pan that has started sticking. If the goal is using less fat, a measured half-teaspoon of oil spread with a brush or paper towel achieves it without the side effect.

Route two: no added fat, but the right surface

This is the route most articles skip, and it is the one that actually removes the need for a substitute.

Non-stick

A PTFE coating does not prevent sticking by being slippery so much as by being chemically unavailable. The RSC resource explains that PTFE contains only strong carbon–carbon and carbon–fluorine single bonds, and those bonds would have to break before any new bond could form with the food. There is nothing for the egg protein to grab.

In a genuinely good non-stick pan, eggs need no fat at all. A small amount still improves texture and browning, but it is optional rather than structural. The catch is that PTFE degrades with heat and age, so a pan that used to do this and no longer does is worn rather than dirty. An omelette pan kept for eggs alone, never used for searing and never scoured, will hold that property for years longer than a general-purpose frying pan will.

Seasoned cast iron

Seasoning is the same principle arrived at chemically. The RSC explains what happens when oil is heated in a pan: the oil fills the microscopic valleys in the metal surface, reacts with the metal atoms, and forms a coating — a patina — which “leaves few free metal atoms to react with the food.”

The mechanism it describes is cracking followed by polymerisation: at frying temperatures the long fatty-acid chains break into shorter fragments containing carbon–carbon double bonds, and those polymerise into a molecule large enough to stay solid at cooking heat. That polymer layer is what a seasoned pan is. It is not oil sitting on the surface; it is a plastic-like film bonded to it.

Which means a properly seasoned cast iron pan is doing exactly what butter does, permanently, and eggs can be cooked in one with nothing added. Getting there is the work — see the cast iron skillet guide for how, and note that a tacky pan after seasoning means too much oil was left on, which is the most common way this goes wrong.

The same resource notes why seasoning needs maintaining: detergents strip the patina, so it has to be reapplied.

Route three: methods that never needed fat

Worth stating because the question often assumes frying is the only option.

  • Poaching. The egg never touches metal. Simmering rather than boiling water, and the freshest eggs available, since the white of an older egg spreads.
  • Boiling. Same reasoning, shell included. If the goal is eggs that peel cleanly, the method matters more than the pan, and egg cooker vs boiling, Instant Pot and air fryer compares the options.
  • Steaming. Underrated for both soft-boiled and scrambled. Steam-scrambled eggs in a bowl over water are slow, but they are almost impossible to overcook and use no fat.
  • Oven-baked. Eggs cracked into a dish and baked need only a wiped dish, and the gentle even heat suits them.

Heat is the variable people miss

Most eggs that stick without butter stick because of temperature, not because the butter was missing.

Too cold and the protein has time to spread across the surface and bond thoroughly to the metal before it sets. Too hot and the bottom seizes and toughens while the top is still liquid. Medium-low is right for scrambled eggs, and a pan hot enough that a drop of water sizzles but does not skitter is right for frying.

The RSC resource also gives the trick every cook already uses without knowing the reason: keeping the food moving means it is never in contact with the pan long enough for those bonds to form. That is why stirred scrambled eggs stick far less than an egg left to sit — and it is why the low-and-slow, constantly-moving method works with no fat at all.

What changes in the result

Honestly, some things do.

  • Flavour is the real loss. Browned milk solids are specific and nothing replicates them. Neutral oil is neutral by design.
  • Texture is largely unchanged. Softness in scrambled eggs comes from low heat and stirring, not from butter.
  • Browning reduces. The browning on a butter-fried egg is largely the milk solids, not the egg.
  • Calories fall a little. A teaspoon of butter is around 34 kcal, a teaspoon of oil around 40 — so swapping butter for the same volume of oil saves nothing. The saving comes from using less, or none.

That last point is worth sitting with, because it is the opposite of what the swap implies. Oil is not lower in calories than butter; it is slightly higher by volume. If the aim is fewer calories, the pan is what makes the difference, not the fat.

How this guide was put together

This is a research-based guide rather than an account of firsthand cooking. The chemistry of sticking — protein complexes forming with metal atoms, the way PTFE resists that, and the cracking-and-polymerisation route by which heated oil forms a patina — is taken from the Royal Society of Chemistry’s Kitchen Chemistry resource, linked above and quoted where the exact wording matters. Composition figures for butter and the calorie comparison are standard published values. The method advice reflects what is consistently reported by cooks and by cookware manufacturers, and is presented as that rather than as a personal verdict.

What this cannot tell you is which route suits your kitchen, because that depends on what you already own. The advice is framed around the pan you have rather than one you would need to buy.

Frequently asked questions

Do you need butter to cook eggs?

No. Butter is a barrier between egg protein and metal, and any fat does that job. In a good non-stick or a well-seasoned cast iron pan, no fat is needed at all. Poaching, boiling and steaming never needed any.

What is the best butter substitute for eggs?

A neutral oil such as sunflower, rapeseed or grapeseed. It matches butter’s non-stick performance and has a higher smoke point. It will not reproduce butter’s flavour, which comes from browning milk solids rather than from the fat.

Can you cook eggs with water instead of butter?

Yes, though not in a frying pan in the usual sense. Poaching and steaming cook eggs in water or steam with no fat. A splash of water in a covered pan will also steam-baste a frying egg, setting the top without turning it.

Why do my eggs stick without butter?

Usually heat rather than the missing butter. A pan that is too cool lets the protein spread and bond to the metal before it sets. A worn non-stick coating or an unseasoned cast iron pan will also stick regardless of what fat is used.

Is cooking eggs without butter healthier?

Only if it means using less fat overall. Swapping a teaspoon of butter for a teaspoon of oil saves nothing — oil is slightly higher in calories by volume. The saving comes from cooking with little or none, which a good pan makes possible.

Can I use cooking spray instead of butter?

It is the one option worth avoiding. Aerosol sprays contain lecithin, which polymerises into a hard varnish that builds up on the pan and is difficult to remove. On non-stick pans it is a common cause of a surface that has started sticking.

How do you scramble eggs without butter or oil?

Low heat, a non-stick pan, and constant movement. Keeping the eggs moving prevents them being in contact with the pan long enough to bond to it. Adding a splash of milk or water helps with texture but is not what stops sticking.

Can you fry an egg in a stainless steel pan without butter?

It is the hardest combination. Bare stainless offers plenty of free metal atoms for the protein to bond with, so some fat is genuinely needed. Heating the pan first, then the oil, then adding the egg gives the best result.

Filed Under: Helpful Kitchen Tips

What Does Wild Boar Taste Like? Nuttier and Leaner Than Pork

Last Updated August 25, 2026

Two wild boar standing in a grassy forest clearing, showing the dark coarse coat and lean build typical of the species

Wild boar tastes like pork with the volume turned up: darker, denser, and distinctly nuttier, with a sweetness that farmed pork mostly lost decades ago. How strong that flavour gets depends almost entirely on which animal you have. A ranch-raised boar from a butcher and a hunted feral hog are different eating experiences, and they need different handling once they reach the kitchen. One of those differences is a genuine food-safety issue that most flavour guides skip entirely.

The short answer

Wild boar reads as pork to most people on the first bite, then diverges. The meat is darker — closer to beef than to a supermarket pork chop — and the texture is firmer and more close-grained. The flavour that people reach for words to describe is usually called nutty, sometimes sweet, occasionally described as having a faint hazelnut or chestnut quality through the fat.

It is not, in the usual case, strongly gamey. That surprises people who expect something closer to venison. Wild boar sits much nearer to pork on the spectrum than to deer, and noticeably nearer than lamb does to beef, and a well-handled young animal can be milder than a lot of people anticipate. When wild boar does taste strong, there are specific reasons for it, covered further down.

The other consistent difference is fat. A farmed pig is bred for it; a wild animal that spends its life moving is not. Wild boar is markedly leaner, and the fat it does carry is distributed differently — less of an even marbling, more of a distinct cap. That single fact drives most of the cooking advice that follows, because lean meat with little intramuscular fat punishes overcooking far more harshly than a fatty pork shoulder does.

Which animal do you actually have?

This is the question that determines everything else, and it is the one most articles on the subject skip. “Wild boar” covers two quite different things.

Ranch-raised or farm-raised wild boar

Most wild boar sold in the United States through butchers, online meat purveyors and restaurants is ranch-raised or ranch-harvested, and passes through USDA inspection. These animals are genuine Sus scrofa rather than domestic pigs, so the flavour difference from supermarket pork is real, but they are harvested at a controlled age and handled under commercial conditions.

The practical result is consistency. The meat is milder, the age is known, and the cuts arrive trimmed and portioned the way pork does. If someone tries wild boar for the first time at a restaurant and finds it pleasant but not dramatic, this is almost always what they ate.

Hunted feral hog

The other kind arrives from a hunter, and it is far more variable. Age, sex, season and diet all swing the result, and none of them are controlled. A young feral hog taken in autumn after weeks of feeding on acorns can be excellent. A mature male taken in a lean season can be strong-flavoured and tough enough to need long, slow cooking to be worth eating at all.

This is also the category where the food-safety guidance genuinely differs, and where the assumption that wild boar is “just pork” causes problems.

How it differs from supermarket pork

Placed side by side, the differences are visible before anything is cooked.

  • Colour. Wild boar is a deeper red. Modern commercial pork has been bred pale over several decades; wild boar retains the darker myoglobin-rich colour that comes with an active life.
  • Fat. Substantially less of it, and less evenly distributed. Where a pork chop carries fine marbling through the muscle, wild boar tends toward a firmer external fat cap with leaner meat beneath.
  • Texture. Denser and more close-grained. The muscle has done more work.
  • Flavour. More pronounced, with the nutty and faintly sweet quality that gives the meat its reputation.
  • Shrinkage. Less fat and less water means noticeably less shrinkage in the pan, but also far less margin before the meat dries out.

The comparison people find most useful is that wild boar sits roughly where pork sat before intensive breeding pushed it toward leanness and mildness at the same time. It is closer to what a pig used to taste like.

Why some wild boar tastes strong

The complaint that wild boar can taste unpleasantly strong is real, and it is usually traceable to one of three things.

Age and sexual maturity. This is the big one. Two compounds are responsible for what the pork industry calls boar taint. Androstenone is produced in the testes of sexually mature males and, being fat-soluble, accumulates in fatty tissue; its concentration climbs sharply as a male animal approaches sexual maturity.

Skatole is a byproduct of gut bacteria and is present in both sexes, but testicular steroids slow the liver’s ability to break it down, so it builds up in the fat of intact males as they mature. Research on domestic pigs commonly cites thresholds in the region of 1,000 ng/g of androstenone and 200 ng/g of skatole in back fat as the point where a carcass reads as tainted.

The practical takeaway for anyone eating rather than studying it: a young animal is a much safer bet than a mature male, and because both compounds concentrate in fat, trimming the fat hard reduces the problem considerably.

Handling in the field. A hunted animal that was not cooled quickly, or was poorly dressed, will taste worse regardless of its age. This has nothing to do with the species and everything to do with what happened in the first few hours.

Diet. Genuine, but usually in a good direction rather than a bad one — see below.

Does the acorn diet really change the flavour?

Yes, and this is not marketing. Animals that have fed heavily on mast — acorns, beech nuts, pecans — take on a more pronounced nutty character, and the fat in particular carries it. The same principle is well established at the premium end of European pork production, where pigs finished on acorns are prized precisely for what the diet does to the fat.

The catch is that a wild animal’s diet is not under anyone’s control. A feral hog that has been raiding a maize field, or working through refuse, will not taste like one that spent autumn under oak trees. This is a substantial part of why hunted wild boar varies so much more than the ranch-raised version, and why anyone selling wild boar as consistently nutty is selling a controlled diet, not a wild one.

Is wild boar safe to eat?

It is, cooked properly. But wild boar carries a risk that commercial pork has largely designed out, and the difference matters.

The CDC names wild boar explicitly in its list of meats at risk of carrying Trichinella, alongside bear, wildcat, fox, wolf, seal and walrus. Trichinellosis in the United States is now seen mainly in people who have eaten raw or undercooked wild game, or pork from non-commercial or feral sources — not in people eating supermarket pork, where controlled feeding has made the parasite rare.

That is the whole reason the “wild boar is just pork” assumption is worth resisting. The safety advice that applies to a pork chop was written for an animal raised under conditions a feral hog has never encountered.

What temperature to cook wild boar to

Here is where honesty is more useful than a confident number. The USDA’s safe minimum internal temperature chart does not list wild boar. It lists pork steaks, roasts and chops at 145°F (63°C) with a three-minute rest, ground meat and sausage at 160°F (71°C), and — the relevant entry — “rabbit and venison, wild or farm-raised” at 160°F (71°C).

So the chart covers game generally at 160°F, and covers pork at 145°F, and leaves the animal that is both to inference. Given that the CDC specifically names wild boar as a Trichinella risk, the cautious reading is to treat it as game rather than as pork:

  • 160°F (71°C) for hunted feral hog, of any cut, and for anything ground.
  • 160°F (71°C) remains the safe choice for ranch-raised wild boar too, though the risk profile of a USDA-inspected animal is lower.
  • The 145°F pork figure is predicated on commercial pork production and should not be assumed to transfer.

None of this is possible to judge by eye, and wild boar’s darker colour makes visual doneness cues even less reliable than they are with pork. A probe thermometer is the only way to know, and it doubles as the single most effective defence against the other risk with this meat, which is drying it out. Any of the leave-in probes covered in the BBQ thermometer guide will do the job.

Why freezing does not make wild boar safe

This is the point that most flavour-focused articles get wrong, and it is worth stating plainly because the advice that circulates is actively misleading.

Freezing works for pork. The CDC’s guidance is specific: freezing pork less than six inches thick for 20 days at 5°F (-15°C) will kill any worms. Many people know this and generalise it.

It does not generalise. In the CDC’s own words: “Freezing wild game meats may not effectively kill all worms because some worms that infect wild game are freeze-resistant.” The species that infect wildlife are not the same as the species controlled for in pork production, and some of them survive freezing that would deal with the pork parasite.

The same guidance rules out the other methods people assume are protective: “Curing (salting), drying, smoking, or microwaving meat alone does not consistently kill the worms.” A home-cured wild boar salami made from an untested animal is not made safe by the curing process.

Cooking to temperature is the reliable control. Everything else is a preference.

How to cook it so it is not dry

The tension in cooking wild boar is obvious once both facts are on the table: the meat is very lean, and it needs to reach 160°F. That combination will ruin a lean cut treated like a pork chop.

The way around it is to choose methods that suit the cut rather than fighting the temperature requirement.

  • Shoulder, leg and shank reward long, slow, moist cooking — braises, stews, ragù, the kind of thing a cast iron Dutch oven is built for. Connective tissue breaks down into gelatin, which compensates for the missing fat. These cuts are the reason wild boar ragù is a fixture on Italian menus, and they are the most forgiving place to start.
  • Loin and tenderloin are the risky cuts, being both the leanest and the ones people are tempted to cook quickly. Brining helps meaningfully here. So does barding or wrapping in fat, and so does pulling the meat at temperature rather than by time.
  • Ground wild boar benefits from added fat. Many butchers blend it with pork fat for exactly this reason, and a burger made from unblended wild boar will be noticeably dry at a safe internal temperature.
  • Trim the fat hard if the animal is a mature male or of unknown age, since that is where the strong-flavour compounds concentrate.

Marinades containing acid — wine, vinegar, buttermilk — are traditional with this meat and do help with both tenderness and any lingering strength of flavour, though they will not rescue a badly handled animal.

Where to buy wild boar

Specialist online meat purveyors are the most common route, and several ship ranch-raised wild boar nationally. Some butchers stock it seasonally, and it appears more reliably in areas with established hunting traditions.

What to expect: it costs more than pork, it is usually sold frozen, and the cuts on offer are narrower than the pork counter — shoulder, leg, loin, ribs and ground being typical. For a first attempt, shoulder is both the cheapest and the least likely to disappoint, because the cooking method that suits it is the one with the most margin for error.

How this guide was put together

This is a research-based guide rather than an account of firsthand cooking. The food-safety guidance is taken directly from the CDC’s trichinellosis prevention material and the USDA’s safe minimum internal temperature chart, both linked above and quoted rather than paraphrased where the exact wording matters. The description of boar taint compounds reflects the established meat-science literature on androstenone and skatole.

The flavour and texture descriptions summarise what butchers, purveyors and cooks consistently report, and are presented as that rather than as a personal verdict. The same approach is used across the other flavour guides on this site, including the one on what jackfruit tastes like.

Where the sources genuinely do not settle a question — as with the absence of wild boar from the USDA temperature chart — that gap is stated rather than papered over with a number that sounds official.

Frequently asked questions

Does wild boar taste gamey?

Less than most people expect. It is richer and nuttier than pork, but it is much closer to pork than to venison. Strong or unpleasant flavour is usually down to a mature male animal, poor field handling, or both, rather than the species itself.

Is wild boar just pork?

Biologically they are the same species, but the eating experience is not the same. Wild boar is leaner, darker, firmer and more strongly flavoured, and — importantly — the food-safety guidance that applies to commercial pork does not transfer to a hunted animal.

Can wild boar be cooked medium rare?

No. The CDC identifies wild boar as a meat that can carry Trichinella, and the USDA’s game guidance is 160°F (71°C). Pork’s 145°F figure relies on commercial production conditions that a feral animal has not been through.

Does freezing wild boar kill parasites?

Not reliably. Freezing works for pork, but the CDC states that freezing wild game may not kill all worms because some species that infect wild game are freeze-resistant. Cooking to temperature is the dependable control.

Why does some wild boar smell strong when cooking?

Androstenone and skatole, the two compounds behind what the pork industry calls boar taint, concentrate in the fat of sexually mature males. Both become more noticeable when heated. Trimming fat aggressively reduces it, and a younger animal avoids most of it.

What does wild boar bacon taste like?

Nuttier and considerably leaner than pork bacon, and it crisps faster with less rendered fat in the pan. Note that curing and smoking are not, on their own, reliable ways to make an untested wild animal safe.

Is farm-raised wild boar different from hunted wild boar?

Yes, and it is the most useful distinction to draw. Ranch-raised animals are harvested at a known age under inspected conditions, so they are milder and far more consistent. Hunted feral hog varies enormously with age, sex, season and diet.

What is the best cut of wild boar for a first attempt?

Shoulder, cooked slowly in liquid. It is inexpensive, it suits the braising methods that offset the meat’s leanness, and it is much harder to ruin than a loin.

Filed Under: Food Blog

Food Processor Not Turning On? It Is the Interlock

Last Updated August 25, 2026

Top-down view into a food processor bowl showing the central drive spindle and the locking lugs on the rim

A food processor that does nothing at all is usually not broken. It is a machine that refuses to run unless several parts are locked in exactly the right position, and it gives you no clue which one is wrong — it just sits there.

Before anything else: unplug it before touching the blade. Everything below is either an external check or one made with the machine unplugged.

Three different failures, and they need different things

Put the bowl and lid on, plug it in, and press on.

Nothing at all — no sound, no light. The motor gets no power. This is nearly always the safety interlock, not a fault, and it is the most common of the three by a wide margin.

It hums or buzzes but the blade does not turn. The motor has power and is trying. Something mechanical is stopping it, or the drive is no longer connected to the blade.

It ran, then stopped, and now will not restart. The motor cut out on its own. That is thermal protection, and it usually resets itself.

Nothing happens at all

Food processors have more interlocks than almost any other kitchen appliance, because the blade is exposed the moment the lid comes off. Most machines will not start unless all of the following are true at once.

The bowl is not locked to the base

The bowl drops onto the motor housing and twists to lock. Sitting it on and not turning it is the single most common mistake, and on many designs the bowl will feel stable while still being a few degrees short of locked.

Look for the alignment marks — an arrow, a dot or a padlock symbol moulded into both the bowl and the base. They must line up. Twist until it stops, not until it feels seated.

The lid is not fully rotated

Same idea, one level up. The lid locks to the bowl and usually drives a tab down into a slot in the base, which is what actually closes the switch.

The tell is whether the lid rotates smoothly to its stop. If it fouls or feels springy before it gets there, something below it is misaligned — usually the bowl, occasionally a blade sitting proud.

The pusher or feed tube is not in place

This one catches people constantly, because it looks optional. On a great many models the small pusher must be inserted into the feed tube for the machine to run at all. Some designs use the large pusher as part of the interlock and will not start with it removed, which is deliberate — it stops anyone reaching into a running blade.

The blade or disc is not seated on the shaft

A blade that has not dropped fully onto the drive shaft sits a few millimetres high, which stops the lid closing properly, which leaves the interlock open. Push it down and rotate gently until it drops.

The interlock tab is broken

If everything above looks right and the machine still does nothing, inspect the plastic tab on the lid or bowl that engages the switch. These snap, and a snapped one is invisible unless you look for it — the parts still fit together and still feel locked.

A cracked bowl in that area does the same thing, which is covered in the guide to a food processor bowl that has cracked. Replacement bowls and lids are sold as spare parts for most mid-range and better machines.

Never bypass an interlock. There are videos showing how to defeat them with tape or a screwdriver. The interlock is the only thing standing between your hand and a blade that spins at speed, and it exists because people have been injured. If the tab is broken, replace the part.

And the boring possibilities

Test the socket with something small. Food processors draw a lot of current on start-up, so a marginal extension lead can also stop one starting — plug it directly into the wall.

It hums but the blade does not turn

The motor has power, so the interlocks are satisfied. Stop straight away: leaving a stalled motor powered is how a working machine becomes a dead one.

Something is jamming the blade

Unplug, take the bowl off and turn the blade by hand. If it will not move freely, food has wedged between the blade and the bowl wall, or a piece of something hard has got in. Frozen or very hard items are the usual cause.

The drive coupling has stripped

This is the failure that separates food processors from most other appliances, and it is worth knowing about because it is commonly mistaken for a dead motor.

Between the motor and the blade there is a plastic coupling — sometimes on the motor shaft, sometimes moulded into the bottom of the bowl or the blade itself. It is deliberately the weakest part of the drive, so that it fails before the motor does when the machine is overloaded. When its splines round off, the motor spins freely and the blade does not move at all.

How to tell: with the machine unplugged, look at the drive shaft on the base and the matching socket on the blade or bowl. Rounded, shiny or visibly worn splines mean the coupling has gone. It is a cheap part on machines that sell spares, and replacing it is far more sensible than replacing the machine.

What causes it: processing frozen food, dough that is too stiff, or overfilling. That is also the failure mode behind a food processor that smells like burning, which is worth reading if you have noticed a smell as well.

It ran, then stopped, and will not restart

Thermal cut-out. Food processor motors are protected against overheating, and the protection trips after sustained heavy work — stiff dough, a large batch of nut butter, or a long run without a break.

Unplug the machine and leave it for thirty minutes to an hour. Most cut-outs reset once cool, and the machine behaves normally afterwards. A few models have a reset button on the base, which the manual will identify.

If it trips repeatedly on ordinary work, the machine is undersized for what you are asking of it rather than faulty. Dough is the usual culprit — many processors are simply not built for it, and the guide to choosing a food processor covers which models have the motor for heavy jobs.

If it will not come apart, or the lid will not lock

Two related complaints worth covering, because they are what stop people getting to the checks above.

The lid will not rotate to its locked position. Something underneath is proud. Take everything out and rebuild in order — bowl onto base and twist to the marks, blade down onto the shaft until it drops, then the lid. Do not force the lid; the tabs it turns against are the interlock, and forcing them is how they break.

The bowl will not release. Usually suction or wedged food rather than a broken catch. Run a thin spatula around the inside edge to break the seal, and twist the bowl evenly rather than levering on the handle.

Repair or replace?

  • Warranty first. Motor and switch failures inside the warranty period are normally covered, and it costs an email to ask.
  • Couplings, bowls and lids are cheap on machines that sell spares. A coupling in particular is a genuinely economical repair.
  • Switch and motor faults usually are not. Once the interlock switch itself or the motor has failed on an out-of-warranty machine, the repair cost approaches the price of a replacement.
  • Parts availability is the real dividing line between price tiers. Cheaper machines often have no spares at all, which makes a broken tab terminal.

The order worth working through

  1. Nothing at all? Twist the bowl to its marks, rotate the lid to its stop, and put the pusher in.
  2. Still nothing? Strip it and rebuild in order, checking the blade drops fully onto the shaft.
  3. Still nothing? Inspect the interlock tab for a crack, and test the socket.
  4. Humming? Unplug immediately. Turn the blade by hand, then check the drive coupling splines for wear.
  5. Stopped mid-job? Unplug and leave it half an hour for the thermal cut-out to reset.
  6. Never defeat an interlock to get it running.

How This Guide Was Put Together

Plainly: this is a research-based guide, not a hands-on test. I have not dismantled food processors to compare failure modes, and nothing here is a report from my own kitchen.

What it rests on: manufacturer support documentation, which is consistent across brands that improper assembly is the leading cause and that the interlock will not close unless bowl, lid and pusher are all correctly positioned; the mechanical design of the drive coupling as a deliberate sacrificial part, which is why it strips before the motor burns out; and the pattern of what owners report, in which an unlocked bowl and an unseated blade account for most machines that appear dead.

What I could not establish: how commonly the drive coupling fails relative to the interlock. Manufacturers do not publish failure data, and owner reports do not reliably distinguish a stripped coupling from a dead motor.

Frequently Asked Questions

Why is my food processor not turning on?

Almost always the safety interlock rather than a fault. The bowl must be twisted to lock on the base, the lid rotated fully to its stop, and on many models the pusher must be in the feed tube. All three have to be right at once, and the machine gives no indication which one is wrong. Check the alignment marks moulded into the bowl and base.

What to do if your food processor will not turn on?

Strip it completely and rebuild in order: bowl onto the base and twist to the marks, blade pressed down until it drops onto the drive shaft, lid rotated to its stop, then the pusher. If it still does nothing, inspect the plastic interlock tab on the lid or bowl for a crack, then test the wall socket.

My food processor hums but the blade does not spin. What is wrong?

Unplug it immediately, because running a stalled motor damages it. Either something is jamming the blade, or the plastic drive coupling between the motor and the blade has stripped. The coupling is designed to fail before the motor does, so this is a cheap repair on machines that sell spare parts.

How do I reset a food processor?

Most have no reset button. If the machine stopped mid-job and will not restart, the thermal cut-out has tripped after heavy work such as stiff dough. Unplug it and leave it thirty minutes to an hour to cool, and it will usually run again. A few models do have a reset button on the base.

Can I bypass the safety interlock on a food processor?

No, and it is worth being blunt about it. The interlock is the only thing preventing the blade from spinning with the lid off, and it exists because people have been injured. If a tab is broken, replace the lid or bowl — both are sold as spare parts for most machines.

Why does my food processor stop working with dough?

Stiff dough is the heaviest load most home processors ever see. It trips the thermal cut-out, and repeatedly it is what strips drive couplings. If it happens on ordinary batches, the machine is undersized for the job rather than faulty.

Is it worth repairing a food processor that will not turn on?

If the fault is a broken tab, a cracked bowl or a stripped coupling, yes — those parts are inexpensive where spares are sold. If the interlock switch or the motor has failed out of warranty, the repair usually costs close to a replacement. Parts availability is the practical dividing line between cheap machines and better ones.

More food processor guides

If the machine runs but smells wrong, see a food processor that smells like burning. For a cracked bowl there is a guide to why food processor bowls crack, and for blades that have gone dull, sharpening food processor blades.

Filed Under: Helpful Kitchen Tips

  • « Go to Previous Page
  • Page 1
  • Interim pages omitted …
  • Page 18
  • Page 19
  • Page 20
  • Page 21
  • Page 22
  • Interim pages omitted …
  • Page 53
  • Go to Next Page »

Recent Articles

  • Bosch Universal Plus Stand Mixer Review: Built for Bread Bakers
  • Hamilton Beach 63326 Stand Mixer Review: Real Value, Real Limits
  • Ninja Foodi XL Pro Review (DT201): Biggest Capacity, Lowest Price
  • Cuisinart SM-50 Stand Mixer Review: Solid Value, Real Trade-Offs
  • Breville Smart Oven Pro Review (BOV845BSS): Fast, Even, One Real Flaw

Search


HOME          Contact          Affiliate Disclosure          Terms of Service          Privacy Policy


kitchenwarecompare.com is a participant in the Amazon Services LLC Associates Program, an affiliate advertising program designed to provide a means for sites to earn advertising fees by advertising and linking to Amazon.com, Endless.com, MYHABIT.com, SmallParts.com, or AmazonWireless.com. Amazon, the Amazon logo, AmazonSupply, and the AmazonSupply logo are trademarks of Amazon.com, Inc. or its affiliates. As an Amazon Associate I earn from qualifying purchases.


Copyright © 2026 kitchenwarecompare.com, ALL RIGHTS RESERVED.