• Skip to primary navigation
  • Skip to main content
  • Skip to primary sidebar

Kitchenware Compare

  • Home
  • Product Reviews
    • Air Fryers
    • Coffee
    • Cookware
    • Flat Top Grills
    • Meat Thermometers
    • Food Processors
    • Knives
    • Pizza Ovens
    • Toaster Ovens
    • Juicers
  • Food Blog
  • Helpful Kitchen Tips
  • Data Studies
  • About
  • How I Review
  • Contact
You are here: Home / Archives for Glenn

10 Creative Uses for a Food Processor

Last Updated September 24, 2026

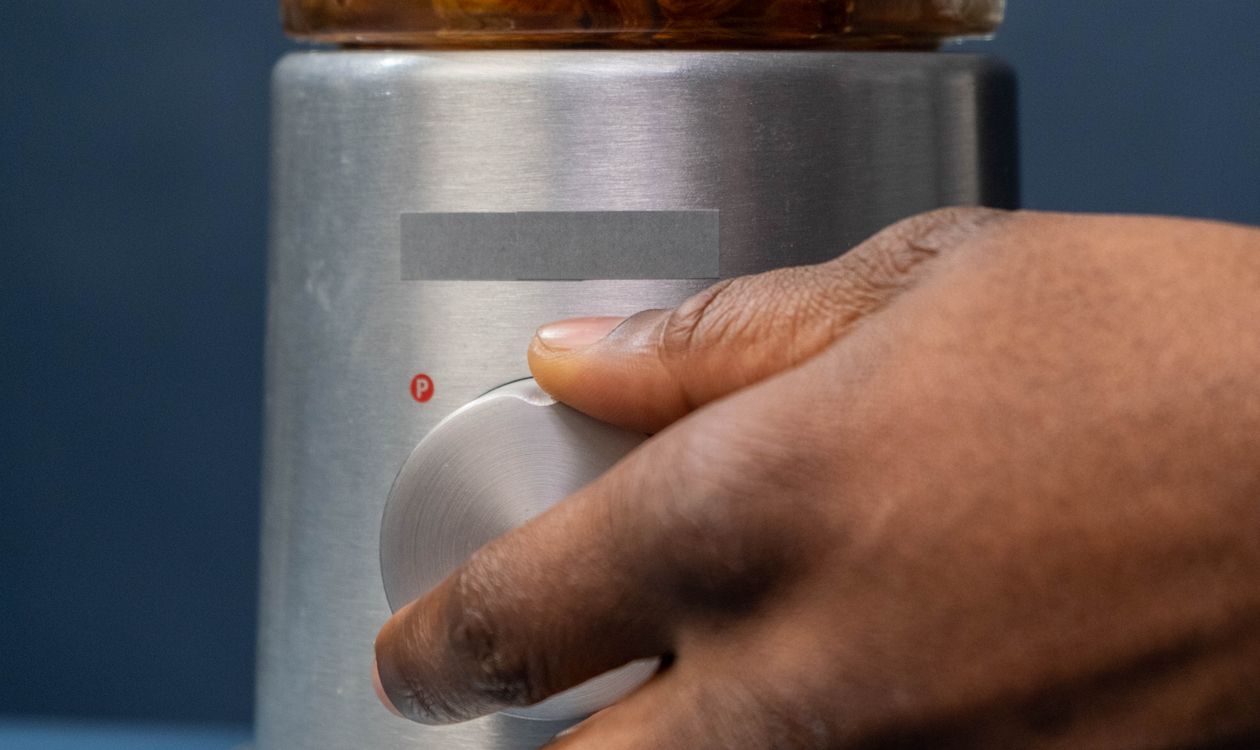
Hand pressing the pulse button on a food processor
Full guide: Best Food Processor 2026
Part of my food processor guide — all reviews, comparisons, and buying advice in one place.

Most people use a food processor for chopping and pureeing and stop there. They will do considerably more than that — here are 10 uses that go past the basics, each one solving a specific prep problem rather than just being a party trick.

I earn a commission if you buy through the Amazon links below, at no extra cost to you.

A food processor handles chopping and slicing faster than almost any other kitchen tool. Say goodbye to endless hours spent with a knife in hand. With just a few pulses, you can have perfectly diced onions, sliced tomatoes, or finely minced herbs. It cuts real prep time, especially for anything that would otherwise mean ten minutes with a knife.

But that’s not all! A food processor can also tackle more complex tasks, like making homemade sauces and dips. Have you ever wanted to whip up your own pesto, hummus, or salsa?

Well, with a food processor, it’s easier than ever. Just toss in the ingredients, give it a whirl, and voila – you’ve got a delicious, homemade dip or sauce to impress your guests.

The possibilities are truly endless with a food processor. From making your own nut butters and grinding spices to creating creamy soups and even kneading dough, this kitchen gadget can do it all. So, if you’re ready to take your culinary skills to new heights and save yourself some precious time and effort in the kitchen, keep reading — this is only scratching the surface of what a food processor can do.

If you need help picking the perfect food processor please check out my in-depth Best Blender Food Processor Combo review.

Most people associate a food processor with chopping and pureeing. It can do a lot more than that, and the ten uses below cover jobs most owners never try with it.

Food processor bowl with fresh ingredients ready for prep

Making Dough

Bread Dough

One of the most popular uses for a food processor is making bread dough. You can easily combine all the ingredients in the processor and let it knead the dough for you. This saves you time and effort, and ensures that your bread comes out perfectly every time. With your food processor, you can make artisanal breads, bagels, and even homemade pizza crust.

Pizza Dough

Speaking of pizza crust, a food processor can also be used to make the perfect pizza dough. Simply mix together flour, yeast, water, salt, and olive oil in the processor, and let it do the work for you. You can customize your pizza dough by adding herbs or spices to give it a unique flavor.

Pie Crust

If you’re someone who loves to bake pies, you’ll be pleased to know that a food processor can help you create the flakiest pie crust. By pulsing together flour, butter, sugar, and salt in the processor, you can achieve the perfect crumbly texture. This saves you from having to manually cut in the butter, making the process much quicker and easier.

Pureeing and Chopping

Chopping Vegetables

Chopping vegetables can be a tedious and time-consuming task, but with a food processor, it becomes a breeze. Simply toss your vegetables into the processor, and within seconds, they will be finely chopped and ready to use in your recipe. This is especially handy when making dishes like salsa or stir fry, where you need evenly chopped vegetables.

Pureeing Soups

If you enjoy making creamy soups, a food processor can be your best friend. After cooking your vegetables, simply transfer them to the processor and blend until smooth. This creates a creamy texture without the need for added cream or butter. It’s a great way to make healthy, homemade soups that are also delicious.

Making Salsa

Salsa is a popular condiment that can be enjoyed with tortilla chips, tacos, or as a topping for various dishes. Making salsa from scratch is simple with a food processor. Just toss in tomatoes, onions, garlic, cilantro, and any other ingredients you desire, and blend until you reach your desired consistency. You can have fresh, homemade salsa in a matter of minutes.

Shredded cheese and vegetables made with a food processor

Grinding

Spices

Grinding your own spices at home allows you to achieve a fresher and more flavorful result. A food processor comes in handy for this task. Whether you’re grinding whole spices like cumin seeds or making a spice blend, the processor can quickly and efficiently grind them to your desired consistency.

Nuts

Using a food processor to grind nuts is a great way to make your own nut butter or add a crunchy texture to baked goods. Whether you want to make almond butter, cashew butter, or simply finely chop nuts for a recipe, the processor can do it all. Just make sure not to over-process, as it may turn the nuts into a paste.

Coffee Beans

If you’re a coffee lover, you’ll be pleased to know that a food processor can be used to grind your own coffee beans. Simply pulse the beans until they reach your desired grind size. This allows you to have freshly ground coffee every morning, ensuring maximum flavor in every cup.

Making Homemade Nut Butter

Peanut Butter

Store-bought peanut butter often contains added sugars and preservatives. By making your own peanut butter in a food processor, you have full control over the ingredients. Just blend roasted peanuts until they reach a smooth and creamy consistency, and you’ll have delicious homemade peanut butter.

Almond Butter

Almond butter is another popular nut butter that can easily be made using a food processor. Just like with peanut butter, blend roasted almonds until smooth and creamy. You can customize your almond butter by adding a pinch of salt or a drizzle of honey for added flavor.

Cashew Butter

Cashew butter has a creamy and rich flavor that can be enjoyed on toast, in smoothies, or as a dip for fruits and vegetables. With your food processor, you can easily make your own cashew butter by blending roasted cashews until smooth. It’s a great alternative for those with peanut allergies.

Homemade nut butter blended in a food processor

Whipping Cream and Eggs

Whipped Cream

Making whipped cream by hand can be tiring and time-consuming. With a food processor, you can whip cream quickly and effortlessly. Simply add chilled cream and a sweetener of your choice to the processor, and blend until soft peaks form. It’s a great way to add a dollop of creamy goodness to your desserts.

Whipped Egg Whites

When making desserts like mousse or soufflés, whipped egg whites are often required for a light and airy texture. Instead of whisking by hand, a food processor can do the job in half the time. Just add the egg whites to the processor, and let it whip until stiff peaks form. It saves the arm work of whipping egg whites by hand.

Shredding and Grating

Cheese

Grating cheese can be a messy and time-consuming task, but with a food processor, it becomes a breeze. Simply cut your cheese into cubes and pulse in the processor until finely grated. You can now easily sprinkle the grated cheese on your favorite dishes or make a delicious cheesy sauce.

Carrots

Whether you’re making carrot cake or adding shredded carrots to a salad, a food processor can come in handy for shredding. Just peel and chop the carrots into pieces, and pulse in the processor until they reach your desired shred size. It’s a great way to save time and effort in the kitchen.

Potatoes

If you love making homemade hash browns or potato pancakes, a food processor can make the process much easier. By using the grating attachment, you can quickly shred potatoes for your recipe. It saves you from the laborious task of grating potatoes by hand, making breakfast preparation a breeze.

Making Nut Flours

Almond Flour

Almond flour is a popular gluten-free alternative to regular flour. You can easily make your own almond flour at home using a food processor. Just blend blanched almonds until they reach a fine, powdery consistency. It’s a great option for those who follow a gluten-free or low-carb diet.

Coconut Flour

Coconut flour is another gluten-free flour that can be made using a food processor. Simply blend shredded coconut until it turns into a fine powder. It’s a great option for adding a coconut flavor to your baked goods or thickening sauces and gravies.

Making Ice Cream

Basic Vanilla Ice Cream

Did you know that you can make your own ice cream using a food processor? By blending together frozen bananas, milk (or a dairy-free substitute), and vanilla extract, you can create a delicious and healthy alternative to traditional ice cream. It’s a great treat for those looking to indulge in something sweet without the guilt.

Chocolate Ice Cream

For all the chocolate lovers out there, a food processor can help you make the most decadent chocolate ice cream. By adding cocoa powder and sweetener to your basic vanilla ice cream mixture, you can create a rich and velvety chocolatey treat. It’s the perfect dessert for any occasion.

Fruit Sorbet

If you prefer a lighter and fruitier dessert, a food processor can help you make refreshing fruit sorbets. Simply blend together frozen fruits of your choice, a sweetener if desired, and a splash of citrus juice. You will have a fresh sorbet in minutes without an ice cream maker.

Making Smoothies and Milkshakes

Fruit Smoothies

Smoothies are a quick and nutritious way to start your day or enjoy as a snack. A food processor can effortlessly blend together your favorite fruits, yogurt, and a liquid of your choice to create a thick and creamy smoothie. It’s a great way to sneak in those extra servings of fruits and vegetables.

Green Smoothies

If you’re looking to boost your intake of leafy greens, a food processor can help you make a delicious green smoothie. By blending together spinach or kale with fruits, yogurt, and a liquid, you can create a nutrient-packed drink without the grainy texture a blender sometimes leaves behind. It’s a great way to incorporate more greens into your diet.

Chocolate Milkshakes

A food processor can also make indulgent chocolate milkshakes. Simply blend together milk, ice cream, cocoa powder, and a sweetener of your choice until smooth and frothy. It’s a great treat for those special occasions or when you’re craving something sweet.

Conclusion

A food processor earns its counter space through range, not any single feature: dough, spice grinding, nut butter, shredding, and ice cream all run through the same base and blade. If yours has been sitting in a cabinet, these ten uses are a reasonable place to start putting it back into regular rotation. For picking a model or upgrading an old one, see my best food processor picks.

Frequently Asked Questions

Can a food processor replace a stand mixer?

Partially. A food processor handles dough, whipped cream, and egg whites well, but it lacks a stand mixer’s paddle and whisk attachments for tasks like creaming butter and sugar for cakes. For occasional baking, a food processor covers most needs; frequent bakers still benefit from a dedicated stand mixer — see my best stand mixer guide.

Is it safe to grind coffee beans in a food processor?

Yes, though the grind will be less consistent than a dedicated coffee grinder, which matters most for espresso. For drip coffee or French press, a food processor’s pulse function gets close enough for most people.

Why is my food processor struggling to make nut butter?

Nut butter takes longer than most people expect — often 5-10 minutes of processing with scrape-downs in between, as the nuts go through a crumbly stage before releasing their oils. A processor under 500 watts may also just be underpowered for the job.

Can I use a food processor to make ice cream without an ice cream maker?

Yes — frozen fruit blended in a food processor produces a soft-serve consistency in a few minutes, which is the basis for most “nice cream” and quick sorbet recipes. It will not have the same texture as a churned custard-based ice cream, but it is a genuine shortcut for fruit-based desserts.

All ten of these uses assume a sharp S-blade — if your results have turned mushy lately, read how to sharpen food processor blades first.

Filed Under: Helpful Kitchen Tips Tagged With: Creative Uses, Food Processor, Kitchen Appliances

The Best Way to Clean A Cast Iron Dutch Oven

Last Updated November 3, 2026

Buying guide: Best Cast Iron Dutch Oven 2026
Part of my cookware reviews hub — all reviews, comparisons, and buying advice in one place.
The best way to clean a cast iron dutch oven

Firstly, What is a Dutch Oven?

A Dutch oven is a type of heavy pot with a tight-fitting lid that is used for slow cooking. It is traditionally made from cast iron and can be used on the stovetop, in the oven, or over an open flame. Dutch ovens suit soups, stews and casseroles. Owning a cast iron Dutch Oven can be challenging to keep clean due to its heat-resistant properties. Cleaning too aggressively, or re-seasoning too often afterwards, is also how seasoning starts flaking off. But with proper care and upkeep, your oven will look just as pristine as when you first bought it. In this article, I will show you the best way to clean a cast iron Dutch Oven. For some more advice and recommendations on Dutch Ovens, please check out my ultimate post on Kitchen Essentials.

How to Clean a Cast Iron Dutch Oven

To clean a cast iron Dutch oven, first, scrape off any food residue with a plastic or wooden scraper. Then rinse the Dutch oven with hot water and use a stiff brush to scrub away any remaining residue. If the pan is still dirty, add a teaspoon of dish soap to the pan and fill it with hot water. Let the pan sit for 10 minutes before scrubbing again. Once the pan is clean, rinse it with hot water and dry it thoroughly. Finally, rub a thin layer of oil over the surface of the pan to prevent rusting. If your cast iron Dutch oven has sticky residue on the inside, bicarbonate of soda is an effective cleaning agent to use. This chemical removes stubborn stains that won’t come off with soap and water alone; plus, you can also use it for burning food residue from inside your Dutch oven.

How to Clean stubborn stains and burnt food

Cleaning a Dutch Oven For burnt or stuck-on food in a bare, seasoned Dutch oven, Lodge’s advice is a nylon scrubbing brush or a pan scraper and warm water, without leaving the pot to soak, because soaking cast iron is a recipe for rust. Do not use Bar Keepers Friend on it: its maker lists cast iron among the surfaces the cleanser should never be used on. If your Dutch oven is enameled, the advice is different, so follow your maker’s care guide for enamel. Once the burnt bits are off, wash the pot in warm, soapy water, dry it completely with a paper towel or lint-free cloth, and wipe a thin layer of oil over the surface, the three steps Lodge gives for everyday cleaning. Leftover moisture, not heat, is what makes cast iron rust. If there is still sticky residue or burned-on food, repeat the process. Lodge does not recommend steel wool or a metal scrubber for daily cleanup, but says either is fine for removing rust; if scouring takes the pot back to bare grey iron, oil it and re-season it before you cook in it again.

Why Do you Need to Season A Dutch Oven?

Seasoning a Dutch oven is important to ensure that the pot is non-stick and to create a protective layer to prevent your food from sticking. This layer also helps to preserve the Dutch oven and prevent it from rusting or corroding. Seasoning a Dutch oven also adds flavor to your food and makes it more enjoyable.

What is the best oil to use to season a Cast Iron Dutch Oven?

The best oil to use to season a Cast Iron Dutch Oven is a food-grade vegetable oil such as canola, grapeseed, flaxseed, or sunflower oil. These oils have a high smoke point and are less likely to turn rancid than other oils. Additionally, they are odorless and tasteless and will create a protective layer on the surface of the Dutch oven that helps to prevent rusting.

How to Season a Cast Iron Dutch Oven

Seasoning a cast iron Dutch oven is essential in keeping it in good condition. The process involves coating the surface of the Dutch oven with a layer of oil and baking it in the oven. This creates a non-stick surface that will last for years. To season a Dutch oven, preheat your oven to 350°F. Rub the entire surface of the Dutch oven with a light coating of vegetable oil or flaxseed oil. Place the Dutch oven in the oven upside down on the middle rack and bake for 1 hour. Allow the Dutch oven to cool completely before using it. This process only needs to be done once. To re-season after use, simply apply a thin layer of oil.

Tips To Prolong The Life Of Your Dutch Oven:

Dutch ovens are a great way to make delicious meals, but they require some special care to keep them in good condition. Here are a few tips to help you prolong the life of your Dutch oven: 1) Make sure to always season your Dutch oven after every use. This will help prevent rust and also enhance the flavor of your food. 2) Don’t leave your Dutch oven in water for too long – it can cause the metal to corrode. 3) Always store your Dutch oven in a dry place. 4) Use a wooden spoon or spatula when stirring food in your Dutch oven to avoid scratching the surface. 5) Use mild soap and warm water to clean your Dutch oven. 6) If you have a cast iron Dutch oven, don’t forget to oil it occasionally to keep it from rusting. Following these tips will help ensure that your Dutch oven lasts for years to come.

Final Thoughts:

Enjoy using your Dutch Oven! With your Dutch oven, you can cook a variety of dishes, from stews and casseroles to roasts and breads. The Dutch oven is also great for slow cooking, as it retains heat well, which suits simmering soups and stews all day. It can also bake, fry, sauté, and roast, not just simmer. When using your Dutch oven, remember to season it regularly before use and clean it after each use. With proper care and maintenance, your Dutch oven will last you for years to come! If you enjoyed this article, be sure to check out some of my other helpful guides like Does a Dishwasher Need Hot Water? and How to Use a Countertop Ice Maker?    

Frequently Asked Questions

Why does a Dutch oven need to be seasoned?

Seasoning gives the pot a non-stick surface and a protective layer that helps stop food sticking and the iron rusting or corroding. It builds a bit of flavor into the pot over time as well.

What oil should I use to season a cast iron Dutch oven?

Vegetable oil or flaxseed oil, rubbed on as a light coating. Preheat the oven to 350 degrees Fahrenheit, place the Dutch oven upside down on the middle rack, bake for an hour, then let it cool completely before using it. That initial seasoning only needs doing once; after that, a thin layer of oil after each use is enough to maintain it.

Can I leave a cast iron Dutch oven soaking in water?

No. Leaving it in water for any length of time is one of the more common ways to cause the metal to corrode. Wash it promptly with mild soap and warm water, dry it thoroughly, and store it somewhere dry.

Filed Under: Helpful Kitchen Tips

Can You Put Dish Soap In A Dish Washer?

Last Updated September 24, 2026

Can You Put Dish Soap in a Dish Washer

Dish soap and dishwasher detergent are both meant to clean dishes, so it looks like an easy substitution when you run out of one. It is also one of the most common ways people accidentally flood their kitchen floor. Dish soap and dishwasher detergent behave completely differently once water and heat are involved, and the difference matters before the cycle starts, not after.

Why It Seems Like It Should Work

The assumption is a reasonable one. Both products are made to clean dirty dishes, so surely the difference is packaging and concentration, and a bit less of the stronger one should do the job. That is exactly why this keeps happening: nothing on the bottle warns you, and the machine will not refuse the load or flash an error. It simply runs the cycle as though everything were normal.

The difference is not concentration. It is foam. Hand dish soap is formulated to produce a thick, stable lather, because that is what people want when washing up in a sink. Dishwasher detergent is formulated to do the opposite — it is deliberately low-foaming, and often contains a defoaming agent specifically to stop suds forming.

What Actually Happens

A dishwasher cleans by firing water at pressure through rotating spray arms. Foam ruins that in two ways at once. It absorbs the force of the jets, so the water stops arriving at the dishes with enough energy to shift anything, and it expands to fill space the machine does not have.

The suds keep building through the cycle until they find the only way out, which is past the door seal. The familiar result is soap foam spreading across the kitchen floor while the machine carries on running, because nothing in the cycle detects the problem. Left long enough, that water reaches the floor and can get into the machine’s electronics or the cabinetry around it, which is where a mess turns into a repair.

This is well established and does not need testing to confirm: the mechanism is in how the two products are formulated, and every manufacturer says the same thing in the manual.

The Gist of Dish Soap

Most would assume that the main difference between dishwashing detergent and dish soap is the soap suds. However, it turns out the difference between dishwashing detergent and dish soap – besides the amount of suds – is the chemicals that make them up.

And while there are many different brands of dish soap, most people have a particular bottle of dish soap that they have relied on for years because they know from their own experience that it works.

To think about it, besides the fact that handwashing the dishes is more economically friendly, most of the time when handwashing dishes, people probably aren’t using the recommended cleaning gloves to cover their hands. This inevitably means you don’t want some highly concentrated dish soap wreaking havoc on your skin. With this in mind, most dish soaps are made with ingredients that are gentle on the skin for this very reason.

Looking back on it now, the differences are like night and day.

Dishwashing Detergent in Comparison

First, any dishwasher will have an appliance guide that recommends using dishwashing detergent. Although, reading that is another matter entirely.

So, to start, the first difference is that dishwashing detergent is made with enzymes and bleach. It’s used by an appliance known for powerful cleaning, so it makes sense that the chemicals will be stronger.

Dishwashing detergent is made without the necessary chemicals that cause soap suds because these will harm the dishwasher. Just imagine soap clogging up your kitchen pipes and soap scum on the edges. It’s not a pretty image, and in the long run, it can be costly to keep fixing.

Some dishwashers require additional salt to be added to aid in the removal of soap scum during normal wash cycles.

Further, dishwashing detergent is created to clean your dishes without being mindful of the user; after all, in this case, the user is an electrically-powered machine with semi-intense sprays of water to wash away all the chemicals right afterward, leaving your dishes properly sanitized and ready to be used again.

Conclusion

No, you shouldn’t ever use dish soap in your dishwasher. Never mind how long the clean-up process is after making this mistake! Yes, there are a ton of sites offering you ways around using dish soap in your dishwasher. Just remember, if something was specifically made to be used for that one reason, then it is more than likely that it has a purpose beyond what you may think, and that might save you the damage to kitchen floors or the appliance.

See Also

  • my dishwasher detergent recommendations

For more on dishwasher care, see does a dishwasher need hot water, and if you’re setting up a kitchen from scratch, my kitchen essentials guide covers the basics.

Frequently Asked Questions

What actually happens if I put dish soap in a dishwasher?

It foams. Hand dish soap is formulated to produce thick suds, and a dishwasher builds pressure during its wash cycle with nowhere for that foam to go except past the door seal. The result is soap foam spreading across the kitchen floor while the machine keeps running, since nothing in the cycle detects the problem.

Why doesn’t the dishwasher just stop or warn me?

Nothing on the bottle or in the cycle is designed to catch it. The machine runs the cycle as though everything were normal, because the fault is a chemistry mismatch, not something the appliance’s sensors are built to detect.

What is the actual difference between dish soap and dishwasher detergent?

Not concentration, foam. Dishwasher detergent is formulated specifically without the sudsing agents hand dish soap relies on, because suds would flood a machine built around water pressure and jets rather than hand scrubbing.

Filed Under: Helpful Kitchen Tips

How to Froth Milk With Espresso Machine?

Last Updated September 24, 2026

Full guide: Best Espresso Machine Under $200
Part of my complete coffee guide — all reviews, comparisons, and buying advice in one place.
close up of woman making coffee by machine at cafe
No matter how you feel about frothed milk, it’s essential to make specialty coffees, such as cappuccinos, lattes, or macchiato. You don’t need to be a professional barista to froth your milk; with a barista steam wand, frothing milk at home is quick and easy. Now you can enjoy your Instagram-worthy beverage while spending less time in the kitchen. I’ll walk you through everything you need to know below, so let’s get to it!
  1. Cold milk should be poured into a small metal pitcher.
  2. The steam wand should be placed under the milk.
  3. Steam the milk by placing the wand directly underneath the surface. A steady stream of steam can be achieved by activating the steam output knob.
  4. The wand’s tip should be kept near the side of the pitcher so that it can create a whirlpool in the milk.
  5. The pitcher must be moved up and down and around the bubble wand to incorporate air and disperse bigger bubbles. There should be a gradual reduction in the size of the bubbles.
  6. A few minutes after the mixture has expanded quite a bit, double the volume for a cappuccino, or multiply the volume by 1.5 for a latte. The wand should be removed from the pitcher after turning off the dial.
  7. A creamy, melted ice cream texture is ideal for hot milk.
  8. The steamed milk foam should be poured immediately into the coffee beverage, with some remaining for latte art if you want.
  9. Immediately after frothing, wipe and purge the wand. Once you’ve finished frothing, wipe your wand with your micro cloth to prevent milk from baking. Do another purge to clean again. It is crucial to perform a final purge. You still have the tip in the milk after you finish steaming. During the rapid cooling of the wand, milk accumulates inside the steam wand until that purge removes it.

Is There a Better Type of Milk to Use for Foaming?

Due to its thicker, creamier foam, whole milk (full-fat milk) gives your coffee drink a creamier texture. Skim and low-fat milk produce more foam containing larger air bubbles, making the latte or cappuccino more delicate. Milk substitutions, such as almond, oat, or soy, can also be used for frothing, but their froth will be lighter. Soy milk can froth but loses its bubbles quickly due to its weak protein structure. Compared to other types of milk, lactose-free and organic milk do not foam well.

Coffee Types That Go Well With Frothed Milk

Latte

Pour one part milk and one part espresso into a steamer. As you are doing this, whip up a thin layer of froth. Espresso should be poured into a heated glass and milk should be poured down the side, not straight down into the glass. The foam should be held with a spoon as the milk is poured down the side. Once the frothed milk has been spooned on top, the process is complete. You can flavor it with syrup if you like. A mug can also be used to serve a latte, which is traditionally served in a tall glass.

Cappuccino

A cappuccino is a simple drink made with one part espresso and one part frothed milk. Let the frothed milk settle untouched in the milk jug for at least half a minute. Rather than pouring frothed milk on top of the espresso, the milk must be spooned over the espresso. The drink could also be made with one part espresso, a little steamed milk, and another part frothed milk. Whichever way is fine; there is no right or wrong.

Mocha

A chocolate lover’s dream. You can make a mocha by adding chocolate milk to your latte. There is no limit to how much chocolate — liquid or powdered — you can add during or after frothing.

Espresso Macchiato

Top an espresso shot with a spoonful or two of frothed milk.

Using a Froth-Assisted Tip to Foam Milk

Identifying a froth-assisted tip is easy. There should be either a device at the wand’s tip or an unusual hole on the side. Air enters through this hole and no steam should come out. This hole injects additional air into it to compensate for the reduced steam in your milk. Not every machine has one of these. There are many trademarked brand names, such as Pannarello and Cappuccinador. The tip should be placed in the milk according to the instructions above. However, different tips require different instructions. For wands with breather holes closer to the end, ensure the hole is just above the surface of the liquid as you froth. The hole cannot breathe if it is submerged. Use a milk frothing thermometer to monitor the milk’s temperature as it froths. When the milk reaches 100° to 115°F, the pitcher still needs to be raised to lower the frothing tip and complete the frothing process. With this device, you will likely be able to make the foam more easily and achieve better results; however, the micro froth will usually be less dense and of lower quality. arista steaming milk

For Frothing Milk, What Is the Correct Temperature to Store It?

Milk should be stored at a temperature of 3-5°C for steaming. The colder the milk, the longer you have for the milk to stretch and texture when it’s in the steamer, which will then make it easier to steam.

How Many Times Can Milk Be Steamed?

When heated, milk’s properties change significantly. The reaction occurs only in one direction and no changes can be reversed. Steaming milk more than once is, therefore, not recommended. By reheating your milk, you will break down its proteins. Your milk’s consistency and sweetness will be affected by this.

Tips for Frothing Milk With an Espresso Machine

To ensure that the milk foam is perfect each time, baristas follow a few simple tricks:
  • Whenever the surface of the milk still contains large bubbles, firmly tap it against a counter and swirl it in the pitcher. Larger bubbles are usually removed this way.
  • Pour frothed milk as soon as possible. If you wait too long, the milk’s texture will deteriorate.
  • The pitcher’s foam serves as a filter, eliminating any untextured milk.
  • Every time you use the steam wand, you should clean it since bacteria can easily grow there. Pour water into the frothing pitcher and run it for a few minutes in the same way as you would froth milk. Repeat the process until the water is clean.

Conclusion

Sweet and creamy foam is like nothing else, especially when sipping a morning latte or savoring the beauty of delicately crafted latte art designs. There are few pleasures more delicious in life than a silky-smooth cappuccino or a latte, and using a milk frother will allow you to make them at home yourself and master the art of barista-making. Even if you prefer non-dairy milk options like almond milk in your espresso drinks, you don’t have to miss out; you can froth all kinds of milk. You can buy a larger milk jug if you are making more than one or you like to use an extra large cup. The frothing process is easy once you get the hang of it.

Dealing with a leak instead of a frothing issue? See why your espresso machine is leaking water for the most common causes and fixes.

Frequently Asked Questions

Is there a better type of milk to use for foaming?

Whole milk gives the thickest, creamiest foam. Skim and low-fat milk produce more foam with larger, more delicate bubbles. Non-dairy substitutes such as almond, oat or soy can be frothed too, but the foam is lighter and less stable — soy in particular loses its bubbles quickly, and lactose-free and organic milk generally foam worse than standard milk.

Why do I need to purge the steam wand after frothing?

Milk gets drawn up inside the wand as it cools after steaming, and left there it bakes onto the inside of the tip. A final purge, running the steam briefly with the wand clear of the pitcher, clears that residue before it can dry on or clog the wand.

What is the actual technique for a good milk whirlpool?

Keep the wand tip near the side of the pitcher rather than centered, so the steam pulls the milk into a whirlpool instead of just bubbling straight up. Moving the pitcher up and down slightly as you go is what breaks the foam down into fine microfoam rather than large bubbles.

Filed Under: Helpful Kitchen Tips

How Often to Descale Espresso Machine?

Last Updated November 5, 2026

Full guide: Best Espresso Machine Under $200
Part of my complete coffee guide — all reviews, comparisons, and buying advice in one place.

Woman making fresh espresso in coffee maker

What is the recommended frequency of descaling of an espresso machine? Here is what I’ve found out about this question. The best results come from descaling on a schedule rather than waiting until the machine tells you something’s wrong.

You should descale your espresso machine every three to six months. If your water is hard, you may need to increase the frequency of descaling. The coffee maker descaling guide covers the steps for drip, espresso and pod machines.

As discussed in this article, a descaler is often needed for espresso machines. In addition, I’ll explain why coffee tastes bad after descaling and what happens if you don’t descale. Read on for more information.

How Often to Descale an Espresso Machine?

Making espresso is performed by a machine where hot water is pumped through and forced into the ground coffee to produce espresso. There are dissolved minerals in almost all water. There is a mineral accumulation on the heating element and in the machine’s tubes, which needs to be cleaned. Descaling involves removing this build-up of minerals.

When determining how often to descale your espresso machine, you must consider two factors. Your usage frequency and water hardness. If you are unsure if your water is hard or soft, you can purchase home kits to test your water.

Usage Frequency

Your espresso machine’s usage pattern will affect how often it needs to be descaled. With only one to three cups of espresso prepared each day, less descaling will be required than if you prepare six cups daily.

To make an espresso, the water must be heated in order to precipitate minerals. Mineral build-up directly correlates with the frequency of use.

The build-up is twice as bad when you drink twice as much espresso. Additionally, there is one other important factor that impacts the frequency of descaling, and that is the hardness of the water.

The Hardness of the Water

Water hardness is determined by the number of minerals dissolved in it. Having hard water refers to water with a high mineral content. Your water is said to be soft if it contains few minerals.

Depending on the hardness of your water, you should descale it at least once a month to avoid build-up.

For those who live in areas with hard water and dislike descaling their espresso machines so often, a water softener might be a good investment. Softening water is achieved by removing minerals from tap water. With one of these, you can reduce the frequency of descaling on your espresso machine.

Best Way to Descale Your Espresso Maker

  • To descale your espresso machine, you need to mix water with a descaler as per instructions on the packet.
  • You can then run the espresso machine with the mixture while the coffee beans are not in it.
  • Clean water should be used to rinse away descaler residue from the espresso machine and water tank.
  • Making a hot, tasty espresso is now easier than ever, thanks to your clean espresso machine.

Makers give their own intervals. Gaggia says to descale every 2 months, and elsewhere in the same manual every 2 to 3 months. Nespresso says every 3 months or 300 capsules, whichever comes first. Breville’s Bambino Plus signals with its lights when it needs descaling.

What Can I Use as a Descaler?

A descaling agent can be either a home solution or a commercial solution. First, let’s look at two of the most popular solutions.

Vinegar

Vinegar is the usual home remedy, but several makers tell you not to use it. Gaggia’s Classic Pro manual says never to use vinegar or other descaling agents, and Nespresso’s descaling guide says vinegar or store-bought descalers may damage the machine. Serious Eats also says no, and My Home Barista allows it only as an emergency descale because it is hard to rinse out and can affect seals.

Breville’s own blog guide gives a one-to-one vinegar mix if you do not have a cleaning agent, but its Bambino Plus manual names a descaling agent and does not mention vinegar. If your machine is under warranty, use the descaler your manual names. The full comparison is in how to clean an espresso machine. Drip coffee makers differ, and several of their makers give vinegar steps, as the maker-by-maker descaling table shows.

Citric Acid

None of the three manuals I read (Breville Bambino Plus, Gaggia Classic Pro and Nespresso Essenza Mini) names citric acid or lemon juice as an approved descaler. Each names its own descaler, so check the manual for your machine before using a home mix.

Commercial Descalers

My next topic will be commercial descalers. Even though there are many descalers available, it’s best to use an organic descaler that is free of any harmful substances.

Black coffee machine and a horn with ground grains on the table.

Why Do I Need to Descale My Coffee Machine?

Water makes up nearly 99% of a cup of coffee, making it an essential part of the process. You may get a lower, inconsistent yield if scale builds up in the boiler or pipes of an espresso machine.

The importance of descaling can be summed up as follows.

Water Won’t Reach the Proper Heating Temperature

Generally, lower brew temperatures result in lower extraction yields, and higher brew temperatures result in higher extraction yields. As the water heats up at the brew point, more ground coffee is released into the cup. A change in brew temperature will have an effect on taste, despite the relatively small difference in extraction yield.

If water is not heated to its ideal brew temperature – or the brew temperature varies – it will be difficult to maintain consistency in cupping profiles. Regarding taste, specialty coffee professionals generally agree that bitterness, sweetness, and body increase as the brew temperature increases, with acidity, slightly decreasing. As brew temperatures are lowered, that taste is lowered.

As a result, the taste becomes more acidic and sweet, bitter, and the body decreases. As your boiler’s temperature falls due to scale build-up, it will likely result in an acidic extraction, leaving your coffee lacking the delicious flavors you love.

There Is a Possibility That Your Machine Will Stop Working

Without proper maintenance, the scale can eventually accumulate in the system’s pipes, obstructing water flow completely or partially. As a result of partially blocked pipes, steam wands and brew heads may experience limited water flow.

This will result in poor extraction and ineffective heating and aeration of milk. Steam and milk cannot be produced when the pipes inside an espresso machine are completely blocked by scale build-up. The level probe inside the boiler can also accumulate scale. Due to this, the machine cannot detect water levels in the boiler, causing the boiler to overfill and overflow.

When Using Filtered Water, Will My Espresso Machine Need to Be Descaled?

You need to descale the espresso machine even with filtered water. You can reduce scale build-up in your espresso machine by filtering your water, although you cannot eliminate it. Filtered water is generally recommended for brewing – both for keeping your machine in good working order and for improving the taste of your coffee.

Several methods exist for filtering, including faucet filters or connecting your espresso machine to the mains via a filter fitting. Floating filters are also available for your machine’s water tank. All do the same thing.

Conclusion

Keeping your espresso machine at its peak performance requires regular descaling. Due to the different construction of each espresso machine, all espresso machines require different descaling instructions. Therefore, it is strongly recommended that you follow the instructions provided by your machine manufacturer to clean and descale your appliance.

I also recommend installing a freshwater filter that removes impurities from the water and taking the necessary steps to reduce scale build-up in areas with hard water. Once your machine needs descaling, and you still have coffee made from it, go ahead and descale it, and you will notice the difference. Such a small step to improve the overall taste of your morning, afternoon, or evening espresso.

See Also

  • best cheap espresso machines

If descaling doesn’t stop it, the leak may be a separate mechanical issue — see why espresso machines leak and how to fix it for the other common causes.

Frequently Asked Questions

How often should I descale my espresso machine?

Every three to six months for most people, more often if the water is hard. Usage matters too: a machine pulling one to three cups a day needs descaling less often than one running all day, and a home water-hardness test kit is the way to know which end of that range applies.

Do I still need to descale if I use filtered water?

Yes. Filtering reduces scale build-up, it does not eliminate it, so a filtered-water machine still needs descaling on a schedule, just possibly a less frequent one than an unfiltered one in the same hard-water area.

What actually happens if I do not descale?

Scale narrows the pipes, steam wand and brew head, which limits water flow and weakens extraction and milk steaming. It also coats the boiler’s level probe, which can stop the machine from correctly detecting the water level and lead to the boiler overfilling.

Filed Under: Helpful Kitchen Tips

  • « Go to Previous Page
  • Page 1
  • Interim pages omitted …
  • Page 66
  • Page 67
  • Page 68
  • Page 69
  • Page 70
  • Go to Next Page »

Recent Articles

  • Burr vs Blade Grinder: Which One Should You Buy?
  • Stainless Steel Pan Sticking? Causes and the Water Test
  • Carbon Steel Pan Rusting: What Makers Say to Do
  • Moka Pot Grind Size: What to Set and How to Dial It In
  • Hard Anodized vs Stainless Steel Cookware: Which to Buy

Search


HOME          Contact          Affiliate Disclosure          Terms of Service          Privacy Policy


kitchenwarecompare.com is a participant in the Amazon Services LLC Associates Program, an affiliate advertising program designed to provide a means for sites to earn advertising fees by advertising and linking to Amazon.com, Endless.com, MYHABIT.com, SmallParts.com, or AmazonWireless.com. Amazon, the Amazon logo, AmazonSupply, and the AmazonSupply logo are trademarks of Amazon.com, Inc. or its affiliates. As an Amazon Associate I earn from qualifying purchases.


Copyright © 2026 kitchenwarecompare.com, ALL RIGHTS RESERVED.