• Skip to primary navigation
  • Skip to main content
  • Skip to primary sidebar

Kitchenware Compare

  • Home
  • Product Reviews
    • Air Fryers
    • Coffee
    • Cookware
    • Flat Top Grills
    • Meat Thermometers
    • Food Processors
    • Knives
    • Pizza Ovens
    • Toaster Ovens
    • Juicers
  • Food Blog
  • Helpful Kitchen Tips
  • Data Studies
  • About
  • How I Review
  • Contact
You are here: Home / Archives for Glenn

How to Clean a Juicer: The 3-Minute Routine That Actually Works

Last Updated September 3, 2026

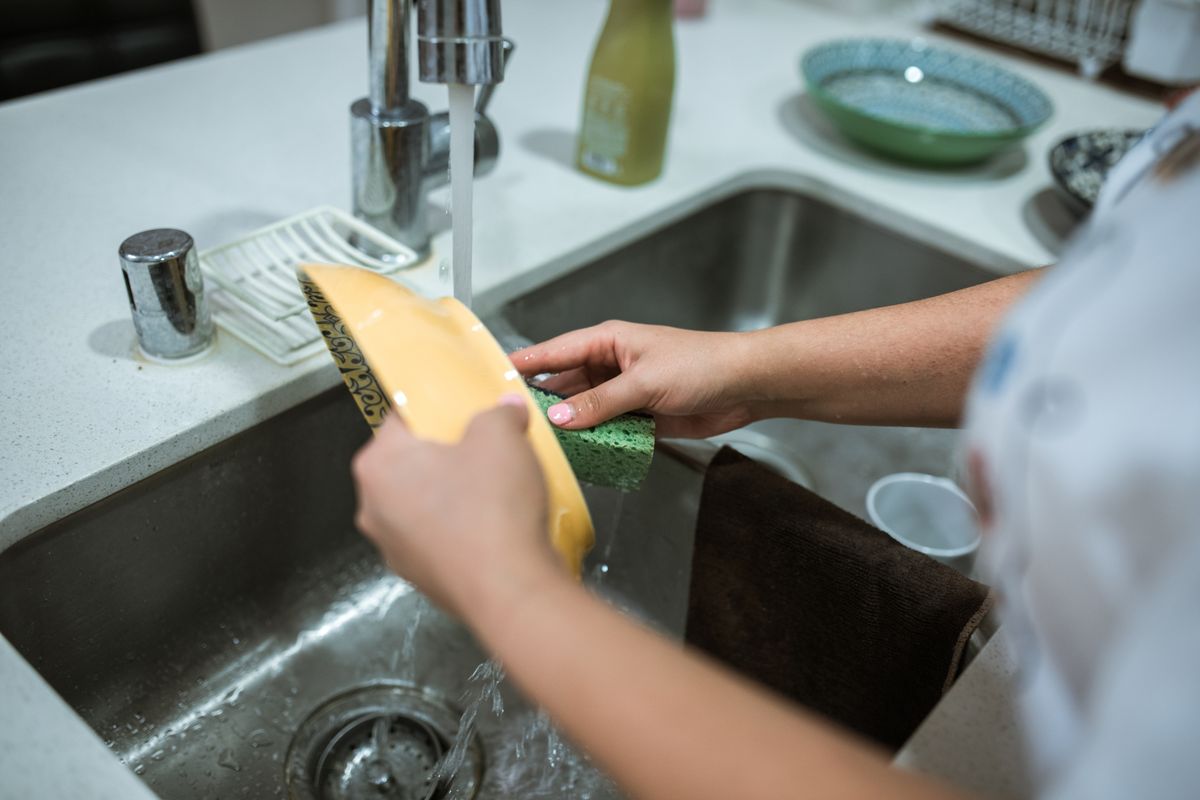
Hands scrubbing kitchen equipment with a brush under running water at a sink

The short version: rinse everything the moment you finish, brush the filter screen while the pulp is still wet, and take the rubber seal off. Done straight away it is three minutes. Left until the pulp dries it is fifteen, and the screen never quite recovers.

Why the timing matters more than the method

Related, and the other half of juicer hygiene: how long fresh juice keeps once it is made.

Juicer pulp is mostly water when it leaves the machine and mostly cement an hour later. The filter screen is a mesh of thousands of fine holes, and pulp forced into them under pressure dries into each one. Wet, it rinses out under a tap in seconds. Dry, you are trying to clear individual holes with a brush, and some of them will not clear at all.

That is the whole reason juicers get abandoned. Not the juice, not the noise — the ten-minute washing-up job that only exists because the machine sat on the counter for an hour first. Everything below is downstream of doing it immediately.

What you need

  • The stiff brush that came with the juicer. It is shaped for the screen and nothing else works as well.
  • Washing-up liquid and warm water.
  • A washing-up bowl or a plugged sink for soaking.
  • White vinegar, for staining and mineral film. Occasional, not routine.
  • A soft toothbrush for the seal groove and threads.

Nothing abrasive, and nothing metal near the mesh. A metal scourer or a knife tip will bend the holes permanently out of shape, and a distorted screen leaks pulp into the juice forever afterwards.

The three-minute routine, step by step

  1. Switch off and unplug. Before any part comes off. Augers and cutting discs both have enough torque to do damage.
  2. Empty the pulp container straight into the bin. Do it first, while it is loose. Pulp left to sit compacts and then has to be scraped.
  3. Disassemble fully. Jug, lid, chute, auger or cutting disc, filter screen, pulp bin, and the seal. Every one of those has to go back in the right position afterwards — if the machine will not start after cleaning, one of them is not seated and the safety lock has stayed open. The seal is the one people skip — see below.
  4. Rinse every part under the tap immediately. No soap yet. Most of the pulp leaves at this stage if it is still wet.
  5. Brush the screen from the outside in. Hold it under running water and work the brush across the mesh from the outer face, so debris is pushed out of the holes rather than further in. This is the single step that decides whether your juicer still performs in a year.
  6. Wash everything in warm soapy water, then rinse.
  7. Dry completely before reassembling. Not optional — see the section on seals.
  8. Wipe the motor base with a damp cloth. Never submerge it, never hold it under a tap.

The part nearly everyone leaves in: the seal

Most juicers have a rubber or silicone ring seating the screen or the juice spout. It lifts out with a fingernail, and most owners never take it out because the machine looks clean without doing so.

It is worth knowing what sits under it. NSF, the public-health certification body, ran a household germ study in which its microbiology team swabbed common kitchen items. The blender gasket came out the third germiest item in the homes tested — and volunteers had not identified blenders as germy at all. NSF’s own instruction is to disassemble the jar completely, remove the blade and gasket, wash them in hot soapy water, and dry before reassembling.

NSF tested blenders rather than juicers, so treat that as an analogy rather than a measurement of your machine. But a juicer seal is the same kind of component in the same kind of environment: a rubber ring in a warm, wet, sugary assembly, hidden in a groove, rarely removed. If the blender gasket is where the problem hides, there is no reason the juicer seal is different.

Take it out every wash. Run a soft toothbrush around the groove it sits in. Both parts go back only when dry.

Why everything must be dry before it goes back together

Reassembling a damp juicer traps moisture against rubber in an enclosed space, which is the specific condition mould needs. NSF makes drying before reassembly an explicit step for the same reason.

There is a mechanical reason too. The Nama J2’s own documentation flags that parts need to be properly dry before they go back together or they do not seat correctly — an independent reviewer testing that machine named it as the single real annoyance in daily use. On any juicer, a seal that goes back damp is a seal that goes back slightly wrong.

Leave the parts on a rack and reassemble later, or dry them with a cloth. Do not stack a wet screen inside a wet jug and put the lid on.

Can you put juicer parts in the dishwasher?

Sometimes, and it depends on the machine rather than on a general rule. The manufacturers are specific, so here is what the four juicers reviewed on this site actually say:

Juicer Manufacturer guidance In practice
Ninja NeverClog JC151 All juice-contact parts dishwasher safe Still brush the screen first — a dishwasher does not clear packed mesh
Omega Cold Press All-in-One Sink rinse or top rack of the dishwasher Top rack only — the bottom rack runs hotter and warps thin plastic
Breville JE98XL Dishwasher-safe parts, cleaning brush supplied The supplied brush is for the filter basket; the dishwasher is for everything else
Nama J2 Quick-release parts, cleaning brush supplied Hand wash is quick by design; drying properly matters more here than on most

Two rules hold across all of them. The motor base never goes near a dishwasher. And the fine filter screen should be brushed by hand even when the manufacturer says the dishwasher is fine, because a spray arm cannot push debris out of holes that fine — it only rinses the surface.

Stains, cloudiness and smells

Orange staining on plastic is carotene from carrots and it is cosmetic. Soak the stained parts in a solution of one part white vinegar to three parts warm water for twenty minutes, then wash normally. Repeated carrot juicing will bring it back; that is not damage.

A white or cloudy film is mineral deposit from hard water rather than food residue. Same vinegar soak clears it.

A sour smell means residue somewhere you have not been washing. Nine times out of ten it is the seal, its groove, or the underside of the pulp chute. Strip the machine fully, soak everything in warm soapy water for fifteen minutes, brush the grooves with a toothbrush, and dry completely.

Bleach is not the answer to any of these, and manufacturers specifically advise against it on juicer plastics.

Deep clean: once a month if you juice often

  1. Strip the machine completely, seal included.
  2. Soak everything except the motor base in warm soapy water for fifteen to twenty minutes.
  3. Brush the screen from the outside face under running water, holding it up to a light afterwards — you should see light through the mesh evenly, not in patches.
  4. Toothbrush every groove, thread and seal seat.
  5. Vinegar soak if there is staining or a mineral film.
  6. Dry every part fully before reassembly.

The light test in step three is the useful one. Patchy light means blocked mesh, and blocked mesh means less juice and wetter pulp long before it means a jam. If it never clears, the screen is a consumable and is worth replacing rather than fighting.

Juicing two recipes back to back

A full teardown between every batch is unnecessary and it is the reason people stop making more than one juice at a time. The working method is a flush rather than a wash.

With the machine assembled and running, pour a glass or two of cold water through the chute and let it run out into the jug. It carries most of the loose pulp off the screen and out of the pulp chute. Discard that water, empty the pulp bin, and start the next recipe.

Two caveats. Flush between recipes, not instead of the real clean at the end — a water flush moves loose pulp but does nothing for what is pressed into the mesh. And do it in the right order: go from mild and pale to strong and dark. Celery and cucumber before carrot and beetroot means the flush has less to shift and the pale juice does not come out pink.

What to do about a screen that is already blocked

Hold it up to a light. Even light through the whole mesh means it is fine. Dark patches mean those holes are packed, and that is where the lost yield is going.

Try this before giving up on it: soak the screen alone in warm water with a little washing-up liquid for twenty minutes, brush it from the outside face under running water, then repeat the light test. A vinegar soak instead of soap will shift mineral film if you are in a hard-water area. Two or three cycles will recover most screens that have been neglected for weeks rather than months.

If patches remain after that, the screen has had it. Filter screens are consumables on every juicer, and manufacturers sell them as replacement parts precisely because they wear out and block up. Replacing one is cheaper than replacing the juicer, and a new screen restores yield immediately. What you cannot recover is a screen someone has been at with a knife or a metal scourer — bent mesh does not go back.

Mistakes that shorten a juicer’s life

  • Leaving it “to soak later.” Later is when the pulp sets. Soaking helps a dry screen but never restores it fully.
  • Metal on the mesh. Knife tips, forks, metal scourers. One slip distorts the holes permanently.
  • Brushing the screen from the inside. That drives debris further into the holes. Always from the outer face inward.
  • Bottom rack of the dishwasher. Hotter, and thin juicer plastics warp. Warped parts stop sealing and start leaking.
  • Reassembling damp. Traps moisture against rubber in a closed space.
  • Bleach or abrasive cream. Damages plastics and is unnecessary for anything a juicer produces.
  • Ignoring the seal. The one part that most rewards attention, and the one almost nobody removes.

How often is enough?

Every single use: full disassembly, rinse, brush the screen, wash, dry. There is no version of juicer ownership where you skip this. Juice residue is sugar and it is wet.

Monthly, if you juice several times a week: the deep clean above, with the light test on the screen.

When performance drops: if yield falls and pulp gets wetter over weeks rather than suddenly, that is a blocked screen and not a fault. A gradual decline is a cleaning problem; a sudden stop is usually something else, which the juicer clog diagnostic covers.

Does the machine you buy change the job?

Yes, though less than people expect. Centrifugal juicers have fewer, larger parts and a bigger filter basket, so they are marginally quicker to wash — the Breville JE98XL scored slightly better than the Ninja on cleaning in independent testing for exactly that reason. Masticating juicers have more components but produce drier pulp, which comes away more cleanly.

The real variable is not the type but the screen. Every juicer at every price has a fine mesh that needs a brush and running water within minutes of finishing. If you are choosing a machine and cleaning is your main worry, the masticating vs centrifugal comparison sets out what else changes between the two designs, and the juicer buying guide covers which specific models come with a usable brush and dishwasher-safe parts.

How this guide was put together

The cleaning guidance for specific machines comes from the manufacturers’ own stated care instructions for the four juicers reviewed on this site, checked against the current Amazon listings for each. The germ findings and the disassemble-and-dry instruction come from NSF’s household germ study, read directly; NSF tested blender gaskets rather than juicer seals, and that limit is stated where the point is made rather than glossed over. I have not run laboratory swabs on juicer components myself and nothing here is presented as though I had.

The one thing worth remembering

Rinse it now, brush the screen while the pulp is wet, and take the seal out. Three minutes at the sink immediately after juicing replaces every other technique on this page, and it is the difference between a juicer you still use next year and one at the back of a cupboard.

Frequently Asked Questions

How do you clean a juicer filter screen properly?

Hold it under running water and brush from the outer face inward with the stiff brush supplied, so debris is pushed out of the mesh rather than deeper into it. Do it while the pulp is still wet. Hold the screen up to a light afterwards — you should see light evenly through the mesh, not in patches.

Can juicer parts go in the dishwasher?

It depends on the machine. Ninja states all juice-contact parts on the JC151 are dishwasher safe; Omega specifies a sink rinse or the top rack only. The motor base never goes in on any juicer, and the fine screen still needs a hand brush first because a spray arm cannot clear mesh that fine.

Why does my juicer smell sour even after washing?

Almost always residue in a part that is not being removed — usually the rubber seal, the groove it sits in, or the underside of the pulp chute. Strip the machine completely, soak everything in warm soapy water for fifteen minutes, brush the grooves with a soft toothbrush, and dry fully before reassembly.

How do I remove orange staining from juicer plastic?

That is carotene from carrots and it is cosmetic rather than damage. Soak the stained parts in one part white vinegar to three parts warm water for about twenty minutes, then wash normally. It will return with more carrot juicing, which is normal.

Do I really need to take the rubber seal out every time?

Yes. In NSF’s household germ study the blender gasket — the same kind of hidden rubber component — was the third germiest item tested, and the volunteers had not thought blenders were germy at all. A juicer seal sits in the same warm, wet, enclosed conditions. It lifts out with a fingernail.

How long should cleaning a juicer take?

About three minutes if you do it straight after juicing, while the pulp is still wet. Left for an hour it becomes a ten to fifteen minute job, and a screen that has dried with pulp in the mesh never fully recovers. The timing matters more than the technique.
Related guides

  • Why Does My Juicer Clog? How to Diagnose It in 30 Seconds
  • Best Juicer 2026: Cold Press and Centrifugal Picks Compared
  • Masticating vs Centrifugal Juicer: Which Should You Buy?
  • Ninja JC151 vs Breville JE98XL

Filed Under: Helpful Kitchen Tips

Why Does My Juicer Clog or Stop Making Much Juice?

Last Updated September 24, 2026

Vertical cold press juicer on a kitchen counter beside jugs of fresh juice

Short answer: almost every juicer clog comes down to one of four things — feeding faster than the auger can swallow, stringy produce going in whole, a pulp outlet that is already blocked, or a screen with dried pulp set in the mesh. The useful trick is that where the machine jams tells you which one you have.

First, work out which clog you have

Every other article on this topic hands you a list of five or six possible causes and leaves you to guess. You do not have to guess. Look at where the machine has actually stopped and match it below.

What you see What it means Fix
Produce sitting in the chute, auger turning slowly or straining Feeding too fast — the auger has more than it can pull down Stop feeding, let it clear, then feed slower
Auger stopped dead, motor humming A fibre bundle has wrapped the auger Reverse, then disassemble if that fails
Juice still coming, but pulp not exiting Pulp outlet blocked — the pulp has nowhere to go Clear the outlet; empty the pulp bin more often
Very little juice, lots of wet pulp Screen blinded by dried pulp in the mesh Soak and brush the screen properly
Greens come out damp and barely juiced, no jam Not a clog at all — wrong machine for the job See the last section

Cause 1: you are feeding it too fast

This is the big one, and it is the least satisfying answer because the fix is patience rather than a part. A masticating juicer turns its auger somewhere between 40 and 80 RPM. That is roughly one revolution per second. Each revolution can only draw down so much material, and if you push a second handful in before the first has been pulled through, the chute packs.

The tell is that the machine does not stop suddenly — it slows, strains, and the produce stops descending. Take your hand off the pusher and give it ten seconds. Most of the time it clears itself.

Cause 2: stringy produce going in whole

Celery, kale stems, chard ribs, ginger, pineapple core, rhubarb. These are the repeat offenders, and they share a property: long fibres that run the length of the piece. A slow auger crushes across those fibres rather than cutting through them, so a full-length celery stalk can wind itself around the auger like thread on a bobbin.

Cut fibrous produce into pieces roughly one to two inches long before it goes in. Short fibres cannot wrap. This single habit prevents more jams than anything else on this page, and it costs about thirty seconds of prep.

Leafy greens are worth rolling into a tight bundle and feeding alongside something firm — a piece of apple or cucumber — so the auger has something solid to bite while it pulls the leaves through.

Cause 3: the pulp outlet, not the chute

This one gets misdiagnosed constantly. If juice is still running but the machine is labouring, look at the pulp side rather than the top. Dry pulp compacts in the outlet and, once it bridges, everything behind it has nowhere to go. Pressure builds back through the machine and the auger stalls.

Two things cause it: letting the pulp container overfill until it backs up into the outlet, and juicing very dry produce (carrot, beetroot, ginger) without anything watery alongside. Alternate hard dry items with something juicy and the pulp stays loose enough to fall out.

Cause 4: a screen that was never properly cleaned

The full routine, including the parts most people never remove, is in how to clean a juicer properly.

The filter screen is a fine mesh, and pulp driven into it under pressure dries hard. Once a meaningful share of those holes is blocked, juice cannot get out, so it stays in the pulp — and the machine works harder against the back-pressure.

The symptom is distinctive: no dramatic jam, just steadily less juice and noticeably wetter pulp over weeks. If your juicer has slowly got worse rather than suddenly stopped, this is almost certainly why.

Rinse the screen the moment you finish, while the pulp is still soft, and use the brush that came with it. If it has already dried in, soak the screen in warm water with a little washing-up liquid for twenty minutes before brushing — do not attack dried mesh with a metal implement, which bends the holes out of shape permanently.

How to clear a jam safely, right now

  1. Stop the machine. Do not keep pressing start hoping it frees itself — that is how motors overheat.
  2. Use Reverse if you have it. Ninja’s manual for the NeverClog is explicit about this: if the feed chute becomes blocked or ingredients are not processing, press and hold the reverse control, then release to stop. Run it for a couple of seconds, then try forward again. Two or three alternations usually free a fibre wrap.
  3. Unplug it before anything goes near the auger. Not a formality — augers have real torque.
  4. Disassemble and clear by hand. Lift out the auger and pull the fibre bundle off it. It usually comes away as one piece.
  5. Rinse everything before reassembling, and make sure parts are dry enough to seat properly.

If Reverse does nothing and the auger will not turn by hand once disassembled, stop and check your model’s support pages rather than forcing it. SharkNinja publishes a model-specific troubleshooting guide for the JC150 series, and most manufacturers have an equivalent.

When it is not a clog

Two situations get mistaken for clogging and are not.

The motor cut out. Most juicers have thermal protection that shuts the motor down when it overheats. The machine goes dead rather than jamming.

Unplug it and leave it forty minutes to cool. If it cuts out repeatedly on normal loads, that is a fault worth a warranty conversation rather than a technique problem.

You are asking a centrifugal juicer to do a masticating job. If greens come out damp and barely juiced but nothing actually jams, the machine is working exactly as designed — it just is not designed for that.

A spinning disc needs structured produce to shred, and kale gives it nothing to grip. No amount of technique fixes this. The masticating vs centrifugal comparison covers why the two mechanisms diverge so sharply on leafy greens.

If it is not clogging, but the yield has dropped

A juicer that runs perfectly well and simply produces less juice than it used to is a different complaint from a clog, and it has its own set of causes. The diagnosis takes about two seconds.

Squeeze the pulp

Take a handful of the pulp coming out of the machine and squeeze it hard over the sink.

Juice runs out of it. The machine is not extracting properly. Everything below applies, and the yield is recoverable.

It stays dry and crumbly. The machine is extracting about as well as it can. The problem is the produce rather than the juicer — see the produce section below.

Wet pulp is the single most reliable indicator that something is wrong, and it is worth checking before you change anything else.

The screen is blinded

This is the most common cause of a gradual decline, and it is easy to miss because the screen can look clean. A sudden total stop is a different matter — if the machine stopped working right after a clean, that is the safety interlock rather than a blockage.

The fine mesh does not block all at once. Pulp dries in the perforations a little at a time, and each dried-in fragment permanently closes one hole until it is scrubbed out. The screen still passes juice, just less of it, and the decline is slow enough that people adapt without noticing. Then one day the pulp is visibly wet.

The fix is a stiff brush — the one supplied with the machine, used against the mesh under running water — and soaking beforehand if the machine has been left standing. Hold the screen up to a light: you should see an even field of pinholes. Dark patches are blocked areas. Anything that has genuinely dried in needs soaking rather than force, because pushing hard enough to clear it can deform the mesh.

The auger or blade has worn

Less common than a dirty screen, but real on an older machine.

On a masticating juicer the auger crushes produce against the screen, and the ridges that do the work round off over years of use. On a centrifugal machine the shredding disc has small teeth that blunt in exactly the way a grater does. Either way the machine still turns and still makes juice — just less of it, from the same input.

The test that separates wear from a dirty screen is whether a genuinely thorough clean restores the yield. If it does not, and the machine has years of regular use behind it, wear is the likely answer. Augers and discs are replaceable parts on most mid-range and better juicers.

You are feeding it too fast

The same cause as the first clog above, showing up differently. Pushing produce through faster than the auger can process it means less time in contact with the screen, and less juice pressed out before the pulp is expelled. If your pulp is wet and you have been using the plunger firmly, try letting the machine pull produce down at its own pace for one batch and compare.

The produce itself

Worth ruling out before blaming the machine, because it accounts for a surprising number of complaints.

  • Older produce holds less juice. Carrots and celery that have been in the fridge for a week have lost moisture, and no juicer recovers what is not there. The full set of juicer guides, including the buying picks, is on the juicers hub.
  • Cold produce yields less than room temperature. Taking things out of the fridge half an hour before juicing makes a measurable difference.
  • Leafy greens are low-yield by nature, and they are also where machine type matters most — the masticating versus centrifugal comparison covers why the gap is so wide on greens specifically.
  • Some things are not really juiceable. Bananas, avocados and mangoes are pulp rather than juice, and a juicer will simply push them through.

If it is a centrifugal machine, expect less

Centrifugal juicers extract less than masticating ones from the same produce, and the difference is widest on leafy greens and herbs. That is the mechanism rather than a fault. If the pulp squeezes dry and the yield still disappoints, the machine is working as designed and the honest answer is that a different type would extract more — which is what the juicer buying guide and the guide to juicers for greens are for.

Preventing it in the first place

  • Cut fibrous produce into 1–2 inch pieces. The single highest-value habit here.
  • Feed slowly and let the auger set the pace.
  • Alternate dry produce with something watery.
  • Empty the pulp container before it is full, not after.
  • Rinse the screen immediately, every time.
  • Peel thick citrus rind and remove large stones — neither belongs in an auger.

If your machine jams several times per session despite all of that, the machine is the problem rather than the technique. A juicer with a reverse function and a high-torque auger handles fibrous produce in a way that cheap models simply do not — the juicer buying guide covers which ones, and the Ninja NeverClog JC151 review goes into how well the anti-clog design actually works in practice.

Frequently Asked Questions

Why is my juicer not making much juice?

Squeeze a handful of the pulp. If juice runs out, the machine is not extracting properly and the usual cause is a blinded screen — dried pulp closing the fine perforations a little at a time. Scrub it under running water with the supplied brush and hold it up to a light to check for dark patches. If the pulp squeezes dry, the machine is extracting as well as it can and the limit is the produce or the machine type.

Why is my pulp coming out wet?

Wet pulp is the clearest sign that juice is being expelled rather than extracted. The most common causes are a partially blocked screen, feeding produce through faster than the auger can process it, and on an older machine a worn auger or shredding disc. Clean the screen thoroughly first, because that alone restores the yield in most cases.

Why does my juicer keep clogging with celery?

Celery has long fibres running the whole length of the stalk, and a slow auger crushes across them rather than cutting through, so a full stalk can wind around the auger. Cut celery into 1-2 inch pieces before juicing and the fibres are too short to wrap.

Does the reverse function actually clear a jam?

Usually, for fibre wraps. Ninja’s manual instructs you to press and hold reverse when the chute is blocked or ingredients stop processing, then release to stop. Alternating reverse and forward two or three times frees most jams without disassembly. It will not help if the screen is blinded with dried pulp.

Why is my juicer producing less juice than it used to?

That is usually a blocked screen rather than a clog. Pulp dries in the fine mesh and progressively closes the holes, so juice stays in the pulp. The giveaway is a gradual decline with wetter pulp, rather than a sudden stop. Soak the screen in warm soapy water for twenty minutes and brush it out.

Can I put a whole apple in my juicer?

In a wide-chute centrifugal juicer with a 3-inch feed, yes. In a masticating juicer, no – the chute is narrower and the auger works slower, so apples need quartering. Remove large stones from stone fruit in either type.

My juicer stopped completely and will not restart. Is it clogged?

Possibly not. Most juicers have thermal cut-out protection that shuts the motor down when it overheats, which reads as a dead machine rather than a jam. Unplug it and leave it around forty minutes to cool. If it cuts out repeatedly under normal loads, treat that as a fault rather than a technique problem.

Do more expensive juicers clog less?

Generally yes, and torque is the reason rather than price itself. A high-torque auger with a reverse function pulls fibrous produce through where a cheap motor stalls. Feeding technique still matters on any machine, but good hardware is far more forgiving of a full chute.

Related guides

  • Best Juicer 2026: Cold Press and Centrifugal Picks Compared
  • Masticating vs Centrifugal Juicer: Which Should You Buy?
  • Best Juicer for Celery in 2026
  • Ninja NeverClog JC151 Review

Filed Under: Helpful Kitchen Tips

Masticating vs Centrifugal Juicer: Which Should You Buy?

Last Updated October 6, 2026

Freshly extracted green vegetable juice with celery and produce on a counter

The short answer: buy a centrifugal juicer if you mostly juice hard produce — apples, carrots, beets, citrus — and want a glass in under a minute. Buy a masticating (cold press) juicer if celery, kale, spinach or wheatgrass are the reason you’re buying at all. The yield difference on fibrous greens is real and you will see it in the pulp. The nutrient difference is far smaller than the brands selling masticating juicers imply.

This post contains affiliate links. I earn a commission if you buy through the Amazon links below, at no extra cost to you.

Worth knowing before you read anything else on this topic: almost every page ranking for this question is published by a company that sells one type of juicer. Hurom and Goodnature sell cold press machines. Breville built its name on centrifugal. NutriBullet sells its own thing.

Those pages aren’t lying, but they’re all answering a question they have a commercial stake in. This one recommends both, depending on what you actually put through the machine, and it pushes back on the part of the standard sales pitch that doesn’t hold up.

How the two machines actually work

Jamming is the complaint that follows both designs around; why juicers clog and how to diagnose it covers the causes and the fixes.

A centrifugal juicer shreds produce against a flat spinning blade, then flings the pulp outward against a mesh screen at 10,000-plus RPM. Centrifugal force separates juice from fibre. It is fast, it is loud, and the wide feed chutes typical of the design mean you can drop in a whole apple.

A masticating juicer — also sold as cold press or slow juicer — turns a single auger at roughly 43 to 80 RPM, crushing produce against a screen and squeezing the juice out. There is no shredding and no high-speed air whipping. It is slower to feed and the chute is usually narrower, so you pre-cut more.

That mechanical difference explains every practical difference below. Shredding works well on dense, rigid produce that breaks apart cleanly. Crushing works better on long fibrous strands that a shredder tends to wrap rather than break.

Side by side

Factor Centrifugal Masticating (cold press)
Speed10,000+ RPM43-80 RPM
Time per glassUnder a minuteSeveral minutes
Hard fruit and rootsExcellentExcellent
Leafy greens and celeryPoor — wet pulp, low yieldStrong — the main reason to buy one
NoiseLoudNotably quieter
Juice shelf lifeDrink fresh — separates within hours24-72 hours sealed and refrigerated
Pre-cuttingMinimal — wide chutesMore — narrower chutes
Typical entry priceLowerHigher

Yield: where the difference is real

On hard produce the two are closer than the marketing suggests. Run apples or carrots through either and you get a good glass of juice; a centrifugal machine gets there faster and the pulp comes out reasonably dry.

Fibrous greens are where they separate, and it is visible without any measuring equipment. Put celery through a centrifugal juicer and pick up the pulp: it comes out heavy and damp, because the shredding action tears the stalk without ever really squeezing it. The same celery through a masticating auger produces drier, lighter pulp and more liquid in the jug. You do not need a scale to see it.

You will find a specific percentage figure quoted across a lot of juicer pages for how much more a masticating machine yields. I am not going to repeat a number I have not measured myself, and neither have most of the sites quoting it — it circulates because it is repeated, not because it is independently established. Treat the direction as reliable and the precise figure as marketing.

The nutrient claim, honestly

Shelf life is the part of this that is real rather than oversold: how long fresh juice actually lasts, and why the juicer changes it.

This is the part of the pitch that gets oversold, and it is worth being blunt about because it is the argument most often used to justify the price gap.

The mechanism is real in principle. Centrifugal juicers spin fast, which whips air into the juice and generates some friction warmth. Oxygen and heat both degrade certain compounds, notably vitamin C and some enzymes. That much is basic chemistry and not in dispute.

What is oversold is the scale. The “heat” a centrifugal juicer generates is a few degrees, not cooking. The degradation happens over hours, which matters enormously if you are batch-juicing on Sunday for the week, and matters very little if you drink the glass you just made. If you juice and drink immediately, the nutritional difference between the two machines is small enough that it should not drive a $150 buying decision on its own.

Buy a masticating juicer for the yield on greens and the longer fridge life. Those are real, observable, and worth paying for if they apply to you. If someone is selling you one primarily on enzymes, they are reaching.

Which one should you buy?

Buy centrifugal if…

  • Apples, carrots, beets, citrus and other hard produce are most of what you juice
  • You drink the juice straight away rather than batching it
  • Speed is what determines whether you’ll actually use the machine on a weekday
  • You want the lowest entry price from an established brand
  • Noise isn’t a constraint — no early mornings in a shared house

Buy masticating if…

  • Celery, kale, spinach or wheatgrass are a real part of why you’re buying
  • You batch-juice and store it for a day or more
  • You want maximum yield from expensive organic produce
  • Noise matters — early mornings, open-plan kitchen, sleeping household
  • You’ll also use it for nut butters, sorbets or baby food (many masticating models include these)

A representative centrifugal machine: Breville JE98XL

Full review: Breville JE98XL review, including the independent category scores behind the yield difference described above.

Breville JE98XL Juice Fountain Plus centrifugal juicer

The JE98XL is the centrifugal machine with the longest track record on Amazon — 16,756 ratings at 4.5 stars, which is more owner data than any other juicer in this category. An 850W dual-speed motor and a 3-inch feed chute mean whole apples go in without pre-cutting. It does exactly what a centrifugal juicer is supposed to do, and it will disappoint you on celery, which is the honest summary of the entire machine type.

Current price: $149.95

See Today’s Price on Amazon ↗

A representative masticating machine: Omega Cold Press

Full review of this machine: Omega Cold Press juicer review. For the hands-free end of the masticating market, see the Nama J2 review.

A cheaper masticating alternative that outscored both in the same independent test: the Ninja NeverClog JC151 review.

Omega cold press masticating juicer

Omega’s all-in-one runs a triple-stage auger at 80 RPM, and it is the machine to compare against if you’re weighing the upgrade. It also handles nut butter, sorbets, pasta and baby food, which is the kind of feature list that usually signals a machine doing nothing well — here juicing is clearly the primary function. Expect more pre-cutting and more parts to wash than the Breville. At the time of writing this listing showed only 4 units in stock with more on the way, so availability may fluctuate.

Current price: $199.87

See Today’s Price on Amazon ↗

Both machines feature in my main juicer buying guide, alongside two others across a wider price range. If celery specifically is the driver, the best juicer for celery guide goes deeper on that one use case.

What about triple-gear and hydraulic press juicers?

Two other types exist and are worth knowing about so you can rule them out quickly. Twin-gear (triturating) juicers use two interlocking gears and extract slightly more than a single auger, particularly from wheatgrass. They cost considerably more and have more parts to clean. Hydraulic press juicers grind produce and then press the mash under high pressure — this is what commercial cold-press juice bars use, and prices start in the four figures.

For home kitchens both are usually the wrong answer. The gap between a good single-auger masticating juicer and a twin-gear machine is much smaller than the gap between centrifugal and masticating, and you pay a lot for it. Get the centrifugal-versus-masticating decision right first; it’s the one that actually changes your results.

Verdict

Match the machine to the produce and this decision stops being difficult. Hard fruit and roots, drunk fresh: centrifugal, and don’t pay more for capability you won’t use. Leafy greens and celery, or juice you store: masticating, and the extra money buys yield and fridge life you’ll genuinely notice.

The mistake worth avoiding is buying a cheap centrifugal juicer specifically to make green juice, discovering the pulp comes out soaking wet, and concluding that juicing isn’t for you. That’s a tool mismatch, not a verdict on juicing — and it’s the single most common way people end up with an unused appliance in a cupboard.

Frequently Asked Questions

Is a masticating juicer worth the extra money?
If you juice leafy greens or celery, or you store juice for more than a few hours, yes — the yield and shelf-life differences are real and observable. If you juice apples and carrots and drink it immediately, the extra cost mostly buys capability you won’t use.

Do centrifugal juicers really destroy nutrients?
“Destroy” overstates it considerably.

They introduce more air and a few degrees of friction warmth, which degrades some compounds like vitamin C over hours. Drink the juice fresh and the practical difference is small. It matters most if you batch-juice and store.

Which type is quieter?
Masticating, by a wide margin. A centrifugal juicer spinning above 10,000 RPM is genuinely loud — comparable to a blender.

A slow auger turning at 43-80 RPM is closer to a hum. If you juice early in a house with other people asleep, this alone may decide it.

Can a centrifugal juicer handle celery at all?
It will produce juice, but noticeably less of it, and the pulp comes out wet. It also clogs more readily, because long celery strings wrap the shredding disc. Cutting stalks into 1-2 inch lengths helps, but it doesn’t close the gap with a masticating machine.

Which is easier to clean?
Usually centrifugal, because there are fewer parts and the mesh basket rinses quickly with the brush most models include. Masticating juicers have more components, and the screen needs proper attention or it stains and clogs over time.

Is “cold press” the same as masticating?
In consumer marketing, yes — cold press, slow juicer and masticating are used interchangeably for single-auger machines. Strictly, “cold press” originally described hydraulic press juicers, but that distinction has been lost in retail listings and you can treat the terms as the same thing when shopping.

How This Comparison Was Put Together

Plainly: this is a research-based comparison, not a hands-on test. I have not run these side by side.

What it rests on: the mechanical difference – an auger pressing produce against a screen at 40-80 RPM versus a basket shredding it at thousands – and what that means for fibrous produce, foam, heat and noise; plus the pattern across verified-purchase reviews for machines of both types, where the masticating complaint is cleaning time and the centrifugal complaint is yield on greens.

What I could not establish: a yield figure. The 20-30% advantage quoted across this topic has no independent test behind it that I can find, and this page has consistently declined to repeat it as fact. The direction is well established by the mechanism; the number is not.

Related guides

Related: Best Juicer 2026: Cold Press and Centrifugal Picks Tested
Related: Best Juicer for Celery
Related: Best Blender Food Processor Combo
Related: Are Expensive Kitchen Appliances Worth It? I Analyzed 602 Products

Filed Under: Product Reviews

Gozney Roccbox vs Ooni Koda 12: Insulation or Portability?

Last Updated November 3, 2026

Gozney Roccbox and Ooni Koda 12 pizza ovens compared side by side

Quick verdict: Buy the Ooni Koda 12 if you want the lighter, slightly cheaper route into 60-second Neapolitan pizza and you’ll cook on calm evenings more often than windy ones. Buy the Gozney Roccbox if pizza night happens weekly, you cook for a crowd, or you’re often fighting wind and want an oven that doesn’t care. My pick: the Koda 12 if the oven will ever leave your patio, the Roccbox if it will not. With the Koda now sold as a bundle at $379.99 against the Roccbox’s $399, only about $19 separates them, so price no longer decides it.

This post contains affiliate links. I earn a commission if you buy through the Amazon links below, at no extra cost to you.

Availability, 3 November 2026: Amazon.com shows the Koda 12 as currently unavailable, so its price and rating on this page are the last ones read. Ooni’s second-generation Koda 2 takes its place: Ooni lists a 14-inch stone, two side burners in place of the single rear one, a 20-minute heat-up and 35.3 lbs, and Amazon had it at $498.95 with 4.7 stars across 46 ratings. That changes the price comparison below: the Koda 2 costs about $100 more than the Roccbox at $399.00, and at 35 lbs it is closer to the Roccbox’s weight than the Koda 12 was.

Both of these are 12-inch, 950F stone-floor pizza ovens that bake a Neapolitan pie in about 60-90 seconds — the two most-recommended entry points into serious home pizza on this site.

The Gozney Roccbox is my Best Premium Build pick; the Koda 12 is featured alongside its bigger sibling in my Koda 12 vs 16 comparison. On paper they look almost identical. In practice, about $19 now separates them, and the Roccbox’s side of that gap buys something real: insulation. This comparison walks through exactly what that insulation does and doesn’t matter for, so you can tell which oven is actually built for how you cook.

Side-by-Side Specs

Spec Gozney Roccbox Ooni Koda 12
Price $399.00 $379.99
Max temperature 950F stone temp 950F (500C)
Pizza size 12 inches 12 inches (13.2 x 13.2in cooking surface)
Heat-up time 20-25 minutes ~15 minutes
Body construction Insulated, silicone-skinned shell Powder-coated carbon steel shell
Fuel Propane standard; detachable wood burner sold separately Propane only
Weight 44 lbs 20.4 lbs
Built-in thermometer Yes, on the dome No
Rating 4.7★ (1,906) 4.2★ (10)
Buy Check Price Check Price

Heat-Up and Bake Quality

The Koda 12 wins the stopwatch: it’s at cooking temperature in about 15 minutes against the Roccbox’s 20-25. Neither is slow enough to matter in practice — both heat up in roughly the time it takes to stretch and top a pizza — but if you’re impatient on a weeknight, the Koda gets you eating sooner.

Bake quality is where the two are hardest to separate. Both bake a 12-inch Neapolitan in 60-90 seconds with proper leopard-spotted char, and neither will disappoint on a single pizza. The gap widens across a session: because the Roccbox’s body holds heat rather than radiating it away, its stone recovers faster between bakes, which is what owners mean when they say it stays hot through a long session. On the Koda 12, later pizzas in a long session can lag slightly behind the first as the stone loses a touch of recovered heat between launches.

Wind Resistance and Consistency

This is the Roccbox’s clearest advantage and the one most worth paying for if it applies to you. Wind is the quiet killer of outdoor pizza nights — it disrupts the flame and drags heat out of an uninsulated chamber. The Koda 12’s folded-steel shell radiates heat outward, so its rolling flame is more exposed to gusts and the stone temperature can drift on a breezy evening.

The Roccbox’s insulated body should hold heat better in the same conditions, though its owners are not unanimous: one says wind does not affect its cooking temperature, another that wind still costs it heat. If your patio catches wind regularly, this single factor can matter more than every other spec on this page combined.

Design and Usability

At 44 lbs versus 20.4 lbs, the weight difference is the most immediately obvious thing about owning either oven. The Koda 12 is a genuine one-hand carry that fits in most car boots without a second thought. The Roccbox is portable with commitment: retractable legs and a detachable burner make it car-bootable, but at more than double the Koda’s weight, it’s a two-hand, plan-your-route kind of portable, not a spontaneous one.

The Roccbox’s built-in stone thermometer is a genuine usability edge — launching on a 750F stone instead of 900F+ is the difference between a pale bake and a properly charred one, and the dial removes the guesswork the Koda 12 doesn’t offer natively. The Koda 12’s shell also runs hotter to the touch during use, since there’s no insulating skin between the flame and the exterior; the Roccbox’s silicone skin stays comparatively cool, which matters if pets or kids are anywhere near the patio during a cook.

Cleaning and Maintenance

Both ovens are largely self-cleaning at operating temperature — food residue on the stone burns to ash and brushes out once cool, and neither stone should ever be washed with soap or water since both absorb it. Maintenance differs mainly in the shell: the Roccbox’s silicone skin wipes down with a damp cloth and its stainless front tolerates a degreaser, while the Koda 12’s powder-coated steel needs the same light wipe-down but has no silicone layer to protect. Both burners benefit from an annual check for spider webs and debris in the venturi — a common, unglamorous cause of a gas oven suddenly running weak on either model. Store either oven under a cover or indoors; standing winter water is what actually ages an outdoor pizza oven, not the number of bakes.

Value for Money

At about $19 the gap is small, so it’s worth being precise about what the Roccbox’s extra buys: better insulation, a built-in thermometer, a touch-safe exterior, and the option to add a wood burner later. It does not buy a bigger pizza, a hotter oven, or noticeably better flavour on a calm night. The Koda 12’s case is no longer its price: it is less than half the weight, heats faster, and is a complete, uncompromised oven, not a stripped-down version of the Roccbox. For someone who already knows pizza night is a fixture, the Roccbox’s premium is easy to justify against years of consistent use.

Who Should Buy Each

Buy the Ooni Koda 12 if…

  • You’re buying your first pizza oven and want to see how often you’ll actually use it
  • You want the faster heat-up, about 15 minutes against 20-25
  • Portability is a priority — camping trips, festivals, a friend’s garden
  • You mostly cook on calm evenings with a patio that isn’t exposed to wind
  • You cook one or two pizzas per session rather than a long back-to-back run

Buy the Gozney Roccbox if…

  • Pizza night is a weekly fixture, not an experiment
  • You regularly cook for a crowd — six or more pizzas in one session
  • Your patio catches wind and you’re tired of fighting it
  • You want the option to add a wood burner for genuine dual-fuel cooking later
  • You’d rather buy the heavier-built oven once than possibly upgrade later

Long-Term Ownership

Neither oven has electronics to fail — the stone and burner are the wearable parts on both, and both are replaceable. The Roccbox’s insulated body is the heavier-built of the two; its 4.7-star average across 1,906 owners backs that up, out-rating the Koda 12, whose original listing held 4.4 stars across 1,134 ratings. The Koda 12’s lighter steel shell is more exposed to the elements without a protective skin, so a cover matters even more for long-term condition. Both brands sell direct-replacement parts, so neither oven becomes disposable if a single component wears out.

Verdict

For most people considering a first pizza oven, the Ooni Koda 12 is the right buy. It makes genuinely excellent 60-second Neapolitan pizza, it’s portable in a way the Roccbox isn’t, and it cooks almost identically on a calm evening, though only about $19 now separates the two.

The Roccbox earns its premium in three specific scenarios: frequent multi-pizza sessions, windy patios, and buyers who want the built-in thermometer and eventual wood-burning option. If none of those apply to you, don’t pay for them. See the full Gozney Roccbox review and the complete pizza oven buying guide for how both stack up against the rest of the market, including the Ooni Karu 12 if wood-fired cooking is the priority.

Frequently Asked Questions

Is the Gozney Roccbox worth more than the Ooni Koda 12?
For frequent bakers, yes — better insulation means more consistent pizzas back-to-back, real wind resistance, and a touch-safe body. For occasional use, the Koda 12 makes essentially the same 60-second Neapolitan on a calm evening for slightly less money.

Which is more portable, the Roccbox or the Koda 12?
The Koda 12, by a wide margin. At 20.4 lbs it’s a genuine one-hand carry that fits in most car boots without planning. The Roccbox’s retractable legs and detachable burner make it car-bootable too, but at 44 lbs — more than double the Koda’s weight — it’s a two-hand job, not a spontaneous grab.

Does wind actually affect these ovens that much?
Yes, more than most buyers expect. Wind disrupts an exposed flame and pulls heat out of an uninsulated chamber. The Koda 12’s folded-steel shell is more susceptible to this than the Roccbox’s insulated, silicone-skinned body, though Roccbox owners still report wind costing it some heat.

Can either oven burn wood?
The Roccbox can, with Gozney’s detachable wood burner sold separately (around $100). The standard Koda 12 is propane-only; Ooni’s wood-burning options are on other models in the range, not the Koda 12 itself.

Do both ovens make the same size pizza?
Yes, both comfortably fit a 12-inch pizza, making them directly comparable on output even though their bodies differ significantly in size and weight.

Which oven is better for a first-time pizza oven buyer?
The Koda 12. It’s a complete, uncompromised oven at a slightly lower price, which makes it the lower-risk way to find out whether you’ll use a pizza oven often enough to justify the Roccbox’s premium later.

How This Comparison Was Put Together

Plainly: this is a research-based comparison, not a hands-on test. I have not run these side by side.

What it rests on: the published specification for both – stone size and thickness, burner design and fuel options, stated peak temperature, insulation, and weight against how portable each is marketed as being; plus the pattern across verified-purchase reviews for each, where the Roccbox theme is weight and the Koda theme is the fixed gas-only design.

What I could not establish: peak stone temperature for either. Both figures are manufacturer claims and independent measurements of outdoor ovens vary by a hundred degrees with wind and ambient conditions. The build and portability differences here are checkable; the temperature claims are not.

Related Reading

Related: Best Pizza Oven 2026: Reviews + Buying Guide
Related: Gozney Roccbox Review 2026: The Buy-Once Pizza Oven
Related: Ooni Koda 12 vs 16: Which Pizza Oven Size Should You Buy?
Related: Ooni Karu 12 Review: The Budget Wood-Fired Pizza Oven
Related: Why Won’t My Pizza Oven Get Hot Enough? Troubleshooting Guide

Filed Under: Product Reviews

Why Won’t My Pizza Oven Get Hot Enough? Troubleshooting Guide

Last Updated September 5, 2026

Flames and glowing coals inside a wood-fired pizza oven with a pizza cooking on the stone

This article contains affiliate links. If you purchase through them, I may earn a small commission at no extra cost to you. Read the full disclosure.

If a pizza oven won’t get past 500-600°F, something specific is stopping it — it’s essentially never a defective oven. After running the gas, wood, and hybrid ovens in my pizza oven buying guide through more sessions than I can count, the same handful of fixable causes explain nearly every underperforming session: how you’re actually measuring the heat, how long you’re really giving it, the wind, the fuel, and the airflow. Here’s how to work through them in the order that actually finds the problem fastest.

First, Check How You’re Measuring It

Before touching the oven itself, rule out a bad reading. An infrared thermometer is the only reliable way to check stone temperature, but it’s easy to get a misleading number from one: point it at the back of the stone near the flame and you’ll read hotter than the cooking surface actually is; point it too close to the mouth and you’ll read cooler. Aim for the center of the stone, hold it at the distance the thermometer’s manual specifies, and take the reading right before you launch the pizza, not five minutes earlier. If your oven has a built-in dial gauge instead of a laser thermometer, treat it as a rough guide only — these are notoriously optimistic on several popular models.

Give It More Time Than the Box Says

Most ovens quote a 15-20 minute preheat, and that number describes ideal conditions: a warm day, no wind, a bone-dry oven. In practice, especially on a cool day or with an oven that’s been sitting outside, 25-30 minutes is often what it actually takes to get the stone itself fully saturated with heat, not just the air inside the dome. A dome that reads hot fast but has a stone that’s still lagging behind is a common way to get a pizza with a good top and a pale, undercooked bottom. If your first pizza of the session comes out underwhelming, resist the urge to declare the oven broken — give the stone another five to ten minutes and try again.

Block the Wind

Wind is the single most underrated cause of a pizza oven that won’t hold temperature, and it affects every fuel type. A cross-breeze through the mouth of the oven pulls heat out as fast as the burner or fire can replace it, which is especially punishing on ovens without a front door (like the Koda 12 in my buying guide). Even a mild breeze that you wouldn’t notice while standing outside can be enough to stall an oven 100°F or more below its target. Reposition the oven so a wall, fence, or windbreak sits between it and the prevailing wind direction rather than trying to out-fuel the problem.

On Gas Ovens: Check the Supply Before Blaming the Oven

A weak or fluctuating flame on a propane model is almost always upstream of the oven itself. A propane tank below roughly a quarter full can struggle to maintain pressure, especially in cold weather, and will show up as a flame that starts strong and fades. A regulator that’s been sitting disconnected can also stick — disconnect it, wait a few minutes, then reconnect and open the tank valve slowly rather than all at once.

Confirm the hose connection is fully seated and that nothing is kinked, and make sure the burner and its intake vents are free of spider webs or debris, which is a surprisingly common cause of a weak flame on ovens that sat unused over winter. Single-burner ovens like the Koda 12 also run a hotter spot right at the back of the stone, which I cover in more detail in my Koda 12 vs 16 comparison — worth a read if you’re chasing uneven heat rather than an oven that won’t get hot at all.

On Wood or Charcoal Ovens: Manage the Fuel, Not Just the Fire

Wood-fired ovens lose temperature fast at the top end, which is normal physics, not a flaw — but it means fuel management matters more here than on gas. Build a proper base fire before you start cooking rather than a small starter flame, and feed it every 10-15 minutes rather than letting it burn down between additions. Dry, well-seasoned wood burns meaningfully hotter than anything damp, so wood stored outdoors without cover is a common, invisible culprit.

Small splits catch and build heat faster than large logs, and adding one more piece just before your cooking session (rather than mid-session) helps hold temperature through the first few pizzas. This is exactly why a retained-heat design like the Gozney Roccbox holds its temperature more evenly than an open-hearth wood oven — its insulated jacket buys back some of the margin for error that a bare wood fire doesn’t give you.

Keep Doors and Vents in the Right Position

On ovens with a front door and a rear damper or chimney, door and vent position change the draw of air through the fire more than most owners expect. A closed or partially closed front door during preheat concentrates heat and improves airflow past the fire; leaving it open the whole time lets heat escape as fast as it builds. The chimney or rear vent needs to stay open (and its cap removed, if it has a weatherproof cap) so the fire can draw properly — a blocked or capped chimney will visibly choke a wood fire down.

Account for a Cold, Damp, or First-Use Oven

An oven that’s been stored outside through a cold snap, or one that’s simply brand new, has more thermal mass to bring up to temperature than one that was used yesterday and is still slightly warm. Cement and firebrick components in particular hold moisture, and driving that moisture out on a cold oven’s first few sessions takes noticeably longer than a normal preheat. Don’t chase this with more fuel than usual — give it more time instead, and expect the second and third sessions of the day to heat up faster than the first.

When It’s Actually the Oven

If you’ve ruled out measurement, time, wind, fuel, and airflow and a gas oven still won’t produce a strong, consistent flame, or a wood oven won’t hold temperature even with a well-built fire, that’s the point to stop troubleshooting and check the manufacturer’s warranty support — a genuinely faulty regulator, burner, or gasket is uncommon but does happen, and no amount of technique fixes a hardware fault.

Frequently Asked Questions

What temperature should a pizza oven actually reach?
For authentic Neapolitan-style results, 800-950°F at the stone is the target, which cooks a pizza in 60-90 seconds. Ovens that top out at 650-700°F still make good pizza, just with a longer cook time and a different crust character — that’s not necessarily a malfunction, just a lower ceiling for that model.

Why does my oven read hot on the dial but the pizza cooks slowly?
Built-in dial gauges usually measure air temperature inside the dome, not the stone surface the pizza actually sits on. The stone lags behind the air by several minutes, especially early in a preheat cycle. An infrared thermometer aimed at the stone itself is the only way to know the number that actually matters.

Does a full propane tank really make a difference?
Yes. As a propane tank empties, especially below about a quarter full, the liquid propane struggles to vaporize fast enough to maintain pressure, and that effect gets worse in cold weather. A flame that starts strong and gradually weakens over a session is a classic low-tank symptom, not a regulator or burner fault.

How much difference does wind actually make?
More than most owners expect. A breeze light enough to go unnoticed standing next to the oven can pull enough heat out through an open mouth to stall the temperature 100°F or more below target, particularly on ovens without a front door. Repositioning behind a windbreak is usually a bigger fix than adding fuel.

Is it normal for a wood-fired oven to lose heat between pizzas?
Some drop is normal — opening the mouth to launch and check pizzas lets heat escape every time. A well-fed fire recovers within a minute or two between cooks. If temperature keeps dropping and doesn’t recover, that’s a fuel-management issue (add wood sooner and in smaller, more frequent amounts) rather than a sign anything is wrong with the oven.

Should I use more fuel if the oven won’t get hot enough?
Not as a first response. Overloading a cold oven with fuel before it has warmed through often just wastes fuel and creates excess smoke without speeding up the process. Diagnose the actual cause first (measurement, time, wind, airflow) — extra fuel only helps if fuel quantity was genuinely the problem.

Filed Under: Product Reviews

  • « Go to Previous Page
  • Page 1
  • Interim pages omitted …
  • Page 55
  • Page 56
  • Page 57
  • Page 58
  • Page 59
  • Interim pages omitted …
  • Page 70
  • Go to Next Page »

Recent Articles

  • Burr vs Blade Grinder: Which One Should You Buy?
  • Stainless Steel Pan Sticking? Causes and the Water Test
  • Carbon Steel Pan Rusting: What Makers Say to Do
  • Moka Pot Grind Size: What to Set and How to Dial It In
  • Hard Anodized vs Stainless Steel Cookware: Which to Buy

Search


HOME          Contact          Affiliate Disclosure          Terms of Service          Privacy Policy


kitchenwarecompare.com is a participant in the Amazon Services LLC Associates Program, an affiliate advertising program designed to provide a means for sites to earn advertising fees by advertising and linking to Amazon.com, Endless.com, MYHABIT.com, SmallParts.com, or AmazonWireless.com. Amazon, the Amazon logo, AmazonSupply, and the AmazonSupply logo are trademarks of Amazon.com, Inc. or its affiliates. As an Amazon Associate I earn from qualifying purchases.


Copyright © 2026 kitchenwarecompare.com, ALL RIGHTS RESERVED.