• Skip to primary navigation
  • Skip to main content
  • Skip to primary sidebar

Kitchenware Compare

  • Home
  • Product Reviews
    • Air Fryers
    • Coffee
    • Cookware
    • Flat Top Grills
    • Meat Thermometers
    • Food Processors
    • Knives
    • Pizza Ovens
    • Toaster Ovens
    • Juicers
  • Food Blog
  • Helpful Kitchen Tips
  • Data Studies
  • About
  • How I Review
  • Contact
You are here: Home / Archives for Glenn

Air Fryer Basket Coating Flaking Off? What It Means and What to Do

Last Updated November 7, 2026

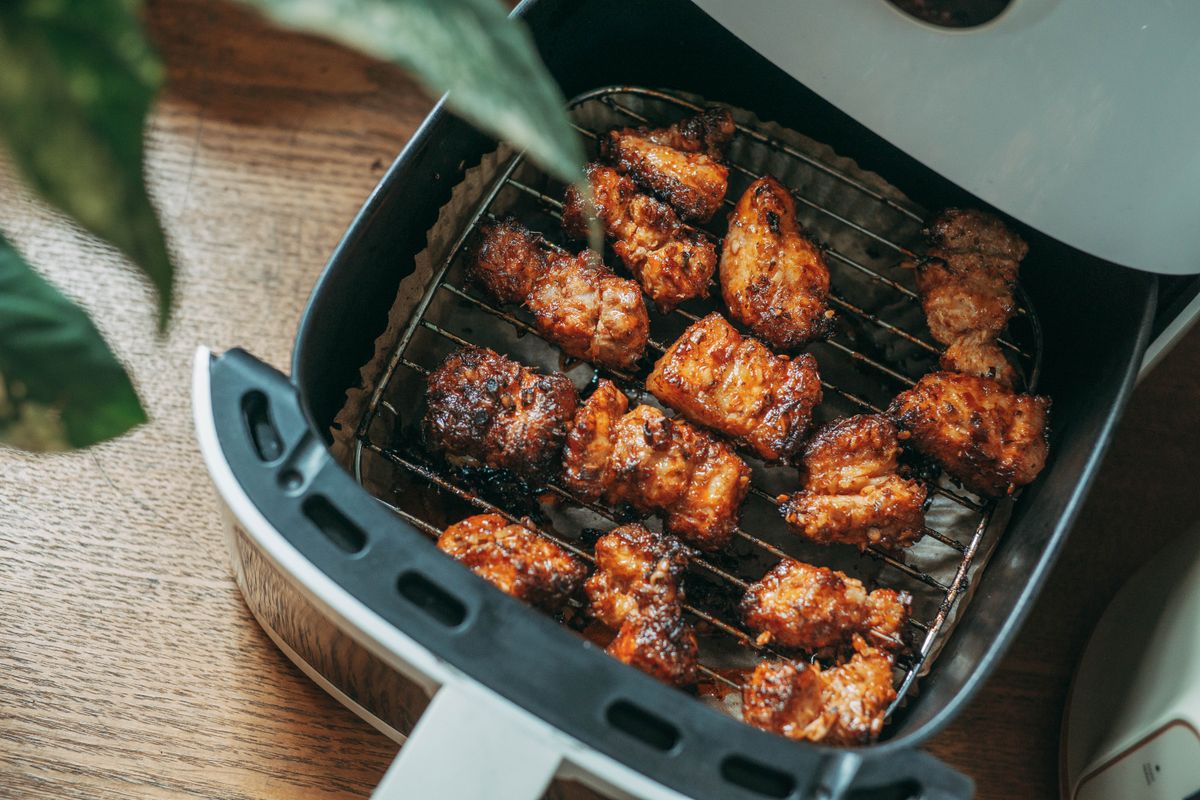
Air fryer drawer pulled out showing the dark non-stick coated basket with food inside

Flakes of black or grey coating coming off an air fryer basket is one of the few kitchen faults where the first question is not “how do I fix it” but “have I been eating this?”. That is the right question to ask first, so this starts there rather than with a list of causes.

First: what the coating actually is

Almost every air fryer basket is aluminium or steel with a non-stick coating, and that coating is usually PTFE — the fluoropolymer sold under brand names such as Teflon. Some newer baskets use a ceramic-based coating instead, which chips rather than peels.

The chemical people are actually worried about is usually not PTFE itself but PFOA, which was historically used as a processing aid in making these coatings. That distinction matters, because the situation has changed:

  • PFOA and PFOS are no longer manufactured in the United States.
  • The International Agency for Research on Cancer classifies PFOA as Group 1, carcinogenic to humans — a serious classification, and one reason the phase-out happened.
  • The American Cancer Society’s summary of PFOA and related PFAS names drinking water and food as the main routes of exposure for most people. Cookware is not what it points to.

So a basket bought in the last decade is very unlikely to contain PFOA at all. That is the part that can be stated with confidence.

Is it safe to keep using a basket that is flaking?

Here is where I have to be straight with you, because most pages on this subject are more confident than the evidence supports.

What regulators say, and what is still open: Germany’s Federal Institute for Risk Assessment (BfR) says tiny particles from a scratched PTFE coating, swallowed while eating, are not expected to harm health, because PTFE is inert and the particles are excreted unchanged; the US FDA says the polymerized PFAS used in nonstick coatings are not absorbed when ingested. Neither statement covers ceramic coatings, and Germany’s consumer advice centre (Verbraucherzentrale) notes that the effect of very small PTFE micro- and nanoparticles in the body has not yet been researched. If you have swallowed some and you are worried, that is a question for a doctor or a poison information line, not for a kitchenware site.

What I can say is that the practical answer does not depend on resolving that question:

Replace the basket. Not because I can quantify a health risk, but because a flaking basket has already failed at its job.

Once the coating breaks, food sticks to the bare patch, that patch gets scrubbed harder, and the peeling accelerates. You are going to replace it soon regardless. The safety question is, in practice, moot.

If you need to use it for another few days before a replacement arrives, line the base with parchment made for air fryers or a perforated silicone liner so food is not sitting on the damaged area. Do not treat that as a permanent fix — a liner that blocks too much airflow causes its own problems.

You cannot re-coat it at home

This deserves stating plainly, because “how to restore your air fryer’s non-stick coating” is a common search result and the framing is misleading.

Factory non-stick is applied as a primer-and-topcoat system and cured in an oven at temperatures a domestic kitchen cannot reach. There is no aerosol, wipe-on product or oil-seasoning routine that re-bonds a fluoropolymer coating to a stripped basket. What you can do is season a basket whose coating is intact but tired — a very thin wipe of high-smoke-point oil, heated briefly — which improves release slightly. That is a different thing from repairing damage, and it will not help once the substrate is exposed.

Treat anything sold as a non-stick repair spray for cookware with scepticism.

Why it happened — in the order that actually matters

1. Aerosol cooking spray

This is the most common preventable cause and the one least likely to be mentioned, so it goes first.

Aerosol cooking sprays are not just oil. They contain emulsifiers, most commonly soy lecithin, plus propellants and anti-foaming agents. Lecithin carbonises at air fryer temperatures and bonds to the coating as a hard, gummy, brownish varnish.

It does not wash off easily, so people scrub it — and the scrubbing is what takes the coating with it. The residue also builds unevenly, so the basket looks blotchy long before it peels.

Use a pump-style oil mister with plain oil, or toss food in oil in a bowl before it goes in. Many manufacturers explicitly tell owners not to use aerosol sprays on coated baskets, and this is why.

2. Metal utensils and stacking

Tongs are the usual culprit — particularly metal tongs used to turn something halfway through, which drag across the base under pressure. Stacking the basket inside other pans in a cupboard scratches it too. Silicone or wooden tools only, and store the basket with nothing resting inside it.

3. The dishwasher

Even where the manual says the basket is dishwasher safe, dishwasher detergents are strongly alkaline and abrasive, and repeated cycles dull and then undermine non-stick. Hand washing in warm soapy water with a soft sponge measurably extends the life of the coating. If food is baked on, soak it rather than attacking it. How to clean an air fryer gives each maker’s cleaning steps.

4. Thermal shock

Running a hot basket under a cold tap makes the metal contract sharply while the coating on it does not, and that stress is what starts edge lifting. Let it cool before it touches water. This is also the mechanism behind coating that peels in sheets rather than flaking in specks.

5. Age and heat cycling

Every heating and cooling cycle works the coating slightly, because coating and substrate expand at different rates. Nothing prevents this — it is why non-stick is a consumable rather than a permanent surface. On a basket used several times a week, a coating lasting a few years is normal rather than a defect.

For reassurance: PTFE coatings are generally rated to around 260 °C (500 °F), and most air fryers top out around 200–230 °C (400–450 °F). Normal air frying does not run hot enough to break the coating down. The damage is nearly always mechanical or chemical, not from the heat of ordinary cooking.

Replace the basket, not the machine

Most people assume a peeling basket means a new air fryer. Usually it does not.

Major manufacturers sell replacement baskets and drawers as spare parts, typically for a fraction of the cost of the appliance. Search the manufacturer’s own parts pages for your exact model number — the number on the rating plate underneath the unit, not the marketing name on the front — because basket dimensions change between revisions of the same model line.

Two things to check before buying:

  • Is the unit still in warranty? Coating failure within the warranty period is often treated as a defect, particularly if it happened early and you have not used aerosol sprays or the dishwasher. It is worth one email before you spend anything.
  • Is a replacement part actually available for your model? This is the genuine weakness of cheaper units — no spares, so a peeling basket does write off the whole machine. If you are replacing the appliance anyway, parts availability is worth weighing.

If you would rather not have a coating at all

Some owners reach this point and decide they are done with non-stick. The options, honestly:

  • Stainless steel baskets and racks exist for many models and never peel. Food sticks more, and they need oil and more cleaning effort. This is a real trade, not a free upgrade.
  • Ceramic-coated baskets are marketed as the healthier option. They contain no PTFE, but the coating is generally less durable, not more — it tends to lose its release properties within a year or two. It chips rather than peels.
  • Air fryers with a removable stainless basket in an oven-style cavity avoid the problem structurally, since the hot surfaces are not coated.

If you are shopping, the air fryer buying guide and the cheaper models worth considering both note basket construction, and the larger family-size units are where replaceable parts matter most, because those machines cost the most to write off. For a wider look at what makes a non toxic air fryer, including glass and stainless models, Barefoot Basil’s guide goes through the options material by material.

Preventing it on the replacement

  1. No aerosol cooking sprays. A pump mister with plain oil, or oil tossed onto the food.
  2. Silicone or wooden tools only, never metal tongs.
  3. Hand wash, soak rather than scrub, soft sponge.
  4. Let it cool before it meets water.
  5. Store it with nothing stacked inside it.
  6. Use liners for genuinely messy items, not as a permanent habit.

Those six between them address every preventable cause above. None of them will make the coating last forever, and it is not supposed to.

How This Guide Was Put Together

Plainly: this is a research-based guide, not a hands-on test. I have not deliberately destroyed a set of air fryer baskets to compare failure modes, and nothing here is a report from my own kitchen.

What it rests on: manufacturer care instructions and spare-part listings, which are where the aerosol-spray and dishwasher warnings come from and where replacement basket availability can be checked; the published position of health authorities on PFOA and related PFAS, specifically the American Cancer Society’s review, which is the source for the IARC Group 1 classification of PFOA and for the point that drinking water and food, rather than cookware, are the main exposure routes; and the well-documented material behaviour of fluoropolymer coatings on metal substrates, which is what the thermal-shock and heat-cycling explanations rest on.

What is still open, and it is the most important gap on this page: whether swallowing very small coating particles over time carries any measurable risk. Regulators do address swallowed particles: the BfR says particles from a scratched PTFE coating are not expected to harm health and are excreted unchanged, and the FDA says the polymerized PFAS in nonstick coatings are not absorbed.

The Verbraucherzentrale adds that the effect of PTFE micro- and nanoparticles in the body has not yet been researched, and neither regulator statement covers ceramic coatings. Pages that answer the whole question with certainty, in either direction, are going beyond their sources. For frying pans, where makers such as Circulon and Made In do say when a damaged coating should be retired, see whether a scratched or peeling nonstick pan is safe to use.

Also not established: how long a coating should be expected to last. There is no published durability standard for air fryer basket coatings, and manufacturers do not quote a figure. The “a few years of regular use” above reflects the pattern in owner reports, not a measured lifespan.

Frequently Asked Questions

Is it safe to use an air fryer with peeling coating?

Regulators say swallowed PTFE particles are not absorbed: Germany’s BfR expects no harm from tiny particles of a scratched coating, and the US FDA says the polymerized PFAS in nonstick coatings are not absorbed. Very small particles are less studied. The practical answer is simpler: replace the basket, because once the coating breaks the basket no longer works as intended, food sticks to the bare patch and the peeling accelerates.

Why is my air fryer basket peeling at the bottom?

The base takes the most abrasion, the most direct heat and the heaviest residue, so it fails first. The most common preventable cause is aerosol cooking spray, whose lecithin carbonises into a hard varnish that people then scrub off along with the coating. Metal tongs turning food halfway through are the second most common.

Can I recoat or repair an air fryer basket?

No. Factory non-stick is a primer-and-topcoat system cured at temperatures a home kitchen cannot reach, and no spray-on or wipe-on product re-bonds it. Seasoning with a thin layer of oil can slightly improve release on a coating that is still intact, but it cannot repair exposed metal.

Do I need a whole new air fryer?

Usually not. Most major manufacturers sell replacement baskets as spare parts for a fraction of the price of the appliance. Look up your exact model number from the rating plate underneath the unit rather than the name on the front. Check the warranty first, since early coating failure is often treated as a defect.

Does the coating contain PFOA?

Almost certainly not, if the appliance is recent. PFOA was a processing aid rather than an ingredient of the finished coating, and it is no longer manufactured in the United States. It is classified by IARC as carcinogenic to humans, which is why it was phased out.

Is a ceramic-coated basket a better option?

It contains no PTFE, which is why it is marketed as the healthier choice, but it is generally less durable rather than more — ceramic coatings tend to lose their release properties within a year or two, and they chip rather than peel. A stainless steel basket is the option that genuinely never peels, at the cost of more sticking and more cleaning.

Will using it at high temperature damage the coating?

Ordinary air frying does not. PTFE coatings are generally rated to around 260 °C (500 °F) and most air fryers top out around 200–230 °C (400–450 °F). Damage is nearly always mechanical (utensils, scrubbing, stacking) or chemical (aerosol sprays, dishwasher detergent) rather than caused by cooking heat.

More air fryer troubleshooting

If the machine is producing smoke as well, see why an air fryer smokes and how to stop it. For what can safely go in the basket, there is a separate guide to using aluminium foil in an air fryer.
Filed Under: Helpful Kitchen Tips

Espresso Steam Wand Not Frothing Milk? Find the Cause First

Last Updated October 12, 2026

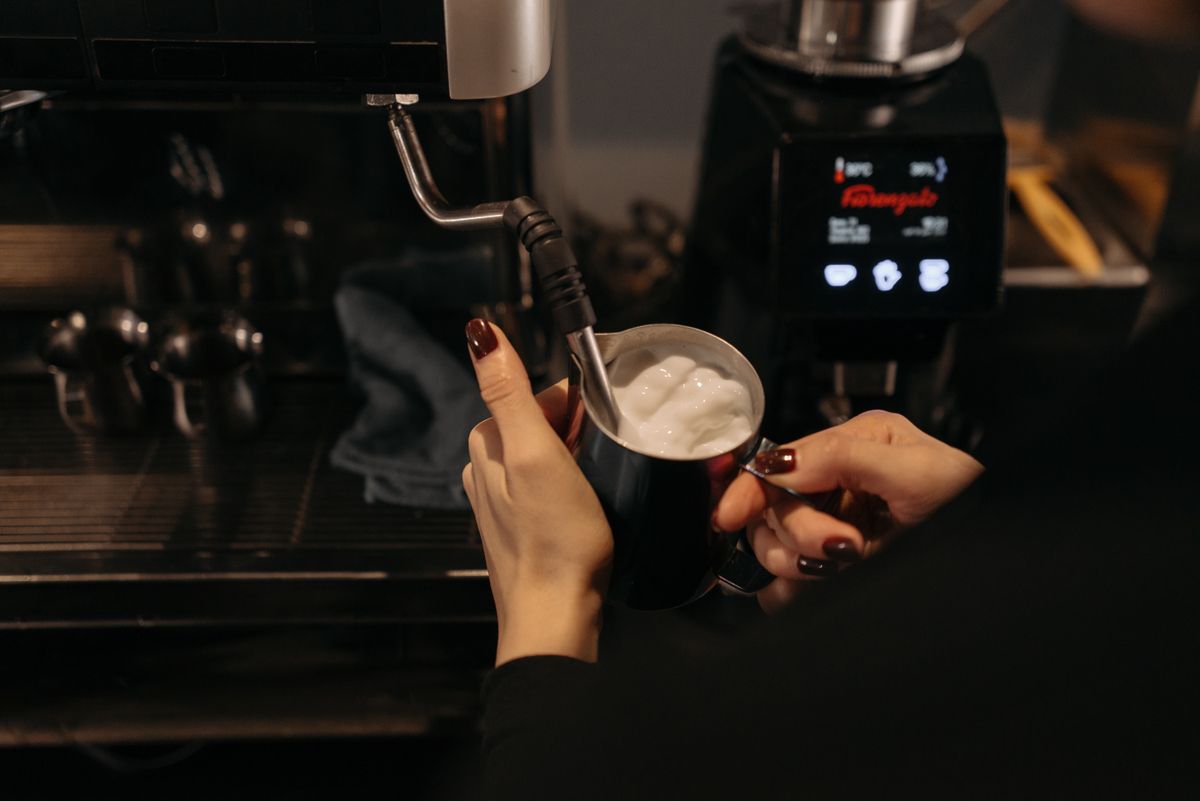
Steam wand producing microfoam in a stainless steel milk jug on an espresso machine

A steam wand that stops frothing is almost always one of two completely different faults, and the fix for one does nothing for the other. Before changing anything, work out which you have — it takes about ten seconds.

Point the wand into an empty jug and open the steam valve. Either dry steam hisses out under pressure, or it does not.

Which problem do you have?

Little or no steam comes out. A weak wisp, a dribble of water, or nothing at all. This is a machine fault — a blocked tip, a machine not up to temperature, or a valve problem. No amount of technique will fix it.

Plenty of steam, but the milk will not foam. The wand hisses properly, the milk gets hot, and you still end up with flat, bubbly or separated milk instead of glossy microfoam. This is technique, milk or equipment shape — and the wand is working fine.

Most guides mix these together and give you a list covering both. Establish which one you have first and you can ignore half of what follows.

If little or no steam comes out

The tip is blocked with dried milk

This is the most common mechanical cause by a distance. Milk that dries inside the tip holes sets hard, and it takes very little of it to choke a 1mm hole. The wand will often still produce a thin, angry hiss rather than nothing at all, which is why people mistake it for a pressure problem.

The fix: soak the tip. Most tips unscrew — take it off and leave it in hot water, or in a dedicated milk-line cleaner, for fifteen minutes or so, then clear each hole with a pin or the wire that came with the machine. If the tip does not unscrew, stand a jug of cleaner under the wand with the tip submerged and leave it.

The habit that prevents it: purge the wand for a second immediately after steaming, before you wipe it. Wiping alone leaves milk inside the holes, which is where the problem starts.

The machine is not at steam temperature

Steam needs a much hotter boiler than brewing does. On a single-boiler machine you have to wait after switching to steam mode — often thirty to sixty seconds after the light changes, because the light frequently indicates the thermostat has switched rather than that the boiler has caught up. Open the wand too early and you get water spitting out rather than steam.

If you get a splutter of water followed by weak steam, this is usually what is happening. Wait longer, and purge the condensed water out of the wand before you put it in the milk.

There is water in the wand and no more

Every wand holds condensed water between uses, which is why purging first is standard. If purging produces water and then nothing, the machine is not making steam at all — check the water tank is seated properly, because a tank that is not fully home will let a machine brew but starve the steam circuit on some designs.

Scale, on an older machine

Scale narrows the steam path over months and shows up as a gradual weakening rather than a sudden stop. If the machine has never been descaled and the decline has been slow, descale before assuming anything has failed.

If there is plenty of steam but no foam

The wand is fine. Something about the milk, the jug or the technique is stopping air being drawn in.

The tip is too deep in the milk

Foam is made in the first few seconds by drawing air in at the surface. If the tip starts submerged, you heat the milk without ever aerating it — hot flat milk, every time.

Start with the tip just under the surface, so it makes a steady tearing or paper-ripping sound. That noise is air being incorporated. Once the jug has grown by roughly a third, sink the tip deeper to stop aerating and just spin the milk to fold the foam in.

There is no whirlpool

Angle the tip off-centre so the milk rotates. The spin is what breaks large bubbles into microfoam. Straight down the middle gives you a jug of stiff, bubbly foam sitting on hot milk — which is what most people mean when they say it is not frothing properly.

The jug is the wrong size or shape

A jug filled much beyond a third has no room to expand, and a jug too large for the volume leaves the tip unable to reach a workable depth. As a rule, fill to just below the base of the spout, and match jug size to the drink rather than using one jug for everything.

What it should sound and look like

Diagnosing bad foam is much easier if you know what correct looks like, because the failure shows up in the first five seconds rather than at the end.

  • Seconds 0–1: a splutter as the last condensed water clears. This is why you purge first.
  • Seconds 1–5: a steady tearing or paper-ripping sound, repeating in short bursts. This is the only part of the process where foam is created. Silence here means the tip is too deep; a violent screeching or bubbling means it is too shallow and you are blowing large bubbles into the milk instead of fine ones.
  • Once the volume has grown by about a third: sink the tip deeper. The tearing should stop and turn into a low rumble as the milk spins.
  • The rest: no new sound, just rotation, until the jug becomes too hot to hold comfortably against your palm — roughly 60 °C. Past that the proteins stop holding air and the foam collapses even if you did everything else right.

Finished milk should look like wet paint and pour as one thing. Visible bubbles, or a layer of foam that separates from the milk beneath while it sits, means aeration happened too late or too aggressively — not that the machine failed.

The milk itself

Start cold, straight from the fridge — cold milk gives you a longer window before it gets too hot to texture. Whole milk foams most easily because fat stabilises the foam; skimmed makes stiffer, drier foam that collapses faster. Milk that has been steamed once and cooled will not foam again properly, so start with fresh milk every time.

Plant milks vary enormously, and the ones that work are usually labelled “barista” for exactly this reason — they contain added stabilisers. A standard oat or almond milk failing to foam is not a machine fault.

If your machine has a panarello, the rules are different

Many entry-level machines do not have a bare steam wand at all. They have a panarello — a plastic or metal sleeve around the wand with an air hole in the side. It works by drawing air in through that hole automatically, and it is designed to make foam without any skill on the user’s part.

Three things follow from that, and they reverse the advice above:

  • The tip needs to be deeper, not shallower. A panarello aerates through its side hole, not at the surface, so keeping it near the top does nothing useful.
  • The air hole blocks. It is small, it sits where milk splashes, and a blocked one is the single most common reason a panarello machine stops foaming. Take the sleeve off and clear the hole.
  • You cannot make proper microfoam with it. A panarello produces stiff, bubbly foam suitable for a cappuccino, not the glossy texture latte art needs. If that is what you are chasing, the limit is the hardware rather than your technique — the semi-automatic guide covers which machines have proper wands.

If you are not sure which you have: a bare wand is a plain metal tube with a screw-on tip; a panarello has a wider sleeve with a visible hole in the side, and often a rubber grip.

The order worth working through

  1. Purge the wand into an empty jug. Steam or no steam? Everything branches here.
  2. No steam: soak and clear the tip, then check you waited long enough for steam temperature.
  3. Still no steam: reseat the water tank, then descale if it has been a while.
  4. Steam but no foam: start with the tip just under the surface until you hear tearing, then submerge and spin.
  5. Still no foam: check jug fill level, then switch to cold whole milk as a control.
  6. Panarello machine: clear the side air hole and go deeper rather than shallower.

When it is the machine rather than you

If the tip is clear, the machine has had time to reach steam temperature, and you still get water or a weak hiss, the fault is internal — a steam valve, a thermoblock, or a thermostat. On a machine with a metal boiler that is worth a repair quote. On an entry-level thermoblock machine the diagnosis often costs more than the machine did.

It is also worth being honest about what a given machine can do. Milk texturing is one of the clearest differences between price tiers: a small thermoblock recovers slowly and runs out of steam part-way through a jug, and no technique fixes that. If you have concluded the hardware is the limit, the machines worth buying under $500 and the options under $200 both note steam performance, and the Breville Bambino Plus review covers automatic milk texturing, which removes the technique question entirely.

How This Guide Was Put Together

Plainly: this is a research-based guide, not a hands-on test. I have not stripped down these machines, and nothing here should be read as a report from my own kitchen.

What it rests on: the physics of milk foam, which is well documented — air is entrained at the surface in the first seconds and fat and protein stabilise the resulting bubbles, which is why fat content and starting temperature matter and why re-steamed milk does not work; manufacturer troubleshooting documentation, including De’Longhi’s own steam wand FAQ; and the pattern of what owners report, where blocked tips and blocked panarello air holes recur far more often than any internal fault.

What I could not establish: how much of the reported failure rate is technique versus hardware. Nobody measures that, and the two are almost impossible to separate from owner reports because a person whose machine cannot hold steam pressure and a person steaming badly describe the same outcome. The ordering above puts the cheap, reversible checks first for that reason rather than because they are statistically more likely.

If the wand clogs repeatedly, the routine that prevents it is in how to clean an espresso machine.

Frequently Asked Questions

Why did my steam wand stop frothing suddenly?

A sudden stop is almost always a blocked tip. Dried milk sets inside the holes and it takes very little to choke them. Unscrew the tip if you can, soak it in hot water or milk-line cleaner for fifteen minutes, and clear each hole with a pin. Purging for a second straight after every use prevents it recurring.

How do I unclog a steam wand?

Soak rather than scrape. Remove the tip if it unscrews and leave it in hot water or a dedicated cleaner, then clear the holes with the pin supplied with the machine. If the tip is fixed, stand a jug of cleaner under the wand with the tip submerged. Do not push anything hard through the holes — enlarging or deforming one changes the steam pattern permanently.

Why is my milk hot but not foamy?

The tip is almost certainly too deep. Foam is created by drawing air in at the surface during the first few seconds. If the tip starts submerged you heat the milk without aerating it. Start just under the surface until you hear a tearing sound, then sink the tip to fold the foam in.

Does the type of milk matter?

Yes. Whole milk foams most readily because fat stabilises the bubbles; skimmed produces stiffer foam that collapses faster. Milk that has already been steamed once will not foam properly again. Most standard plant milks foam poorly unless they are the barista versions, which contain added stabilisers.

Why does my machine make steam for a few seconds and then stop?

Usually the boiler cannot keep up. Small thermoblock machines make steam in short bursts and need time to recover, which is a hardware limit rather than a fault. If it used to manage a full jug and no longer does, descale first.

My machine has a plastic sleeve around the wand and stopped foaming. What is different?

That is a panarello, and it aerates through a small hole in the side of the sleeve rather than at the milk surface. A blocked air hole is the usual cause. Remove the sleeve, clear the hole, and keep the tip deeper in the milk than you would with a bare wand.

More espresso troubleshooting

If the shot itself is the problem rather than the milk, see what to check when an espresso machine is not building pressure, or the guide to an espresso machine leaking water.

Filed Under: Helpful Kitchen Tips

Espresso Machine Not Building Pressure? Check These in Order

Last Updated October 29, 2026

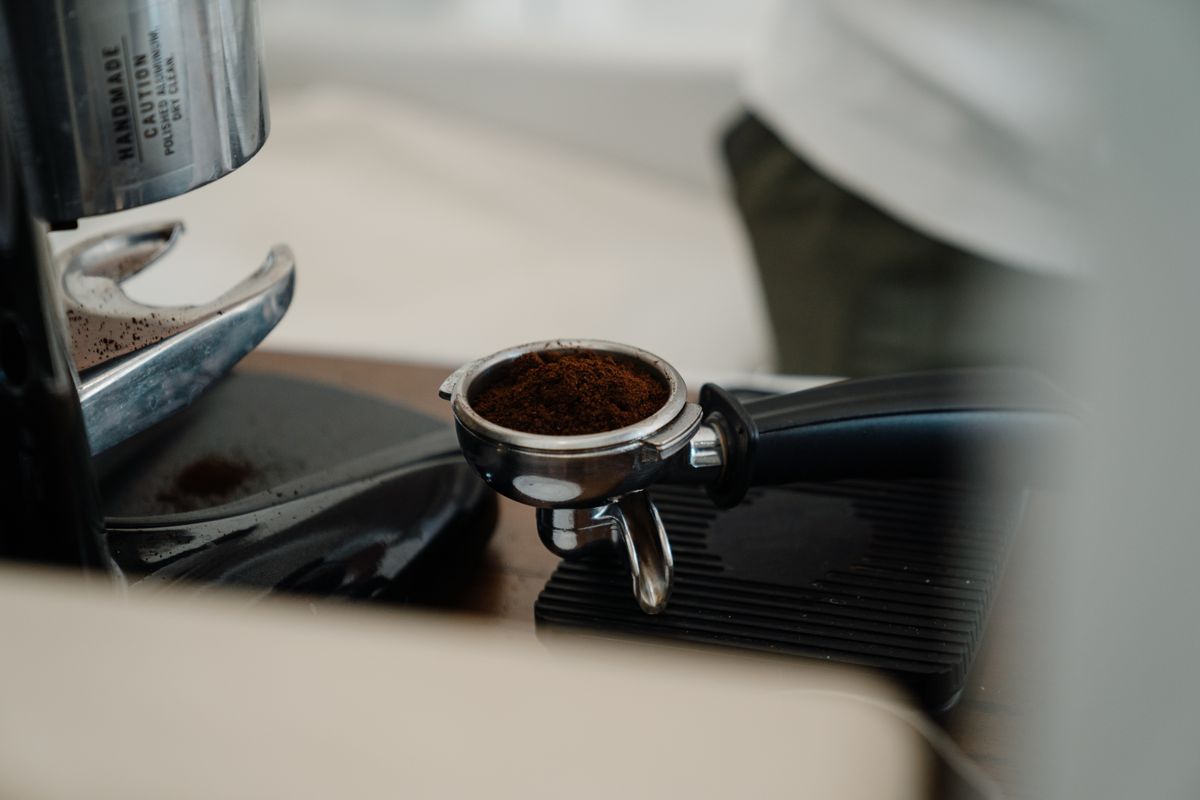
Espresso portafilter holding a basket of evenly ground coffee

An espresso machine that will not build pressure is usually not broken. In most home kitchens the cause is the coffee or the basket rather than the pump, and the two can be told apart in about thirty seconds without opening anything.

This guide works through the causes in the order worth checking them, with a way to tell which one applies to you at each step.

What “not building pressure” actually looks like

Two different faults get described the same way, and separating them saves a great deal of time.

The gauge never reaches the middle band, and the shot gushes out. A double runs in eight or ten seconds and comes out pale and thin. The machine is producing flow but nothing is resisting it. This is the common case and it is almost always the coffee or the basket.

The gauge sits low and almost nothing comes out. The pump is audible but the flow is a dribble or a few drops. That points at a blockage or at the pump itself, and it is much less common.

The first thing to establish is which of those you have, because everything below branches from it.

Start here: is it the coffee or the machine?

Take the portafilter out, empty it, lock it back into the group head with nothing in it, and run the pump for a few seconds.

Water should pour out fast and freely, and the gauge should stay low. That is correct — there is nothing for the pump to push against. If instead you get a weak dribble with an empty basket, the restriction is in the machine, not in your coffee, and you can skip to the machine section below.

If water runs freely on an empty basket but your shots still gush, the machine is fine and the problem is what you are putting in it.

The cause almost nobody mentions: which basket you are using

This is the single most common reason a home machine stops building pressure, and none of the pages currently ranking for this problem mentions it.

Most entry-level machines ship with a pressurised basket — sometimes called a dual-wall or crema-enhancing basket. It has a single tiny hole in a second layer underneath, and that hole creates back-pressure artificially. It will build pressure and produce foam almost regardless of your grind, which is exactly why manufacturers fit them.

A non-pressurised basket, the kind serious users switch to, is a simple mesh of holes. It creates no artificial resistance at all. The pressure has to come entirely from a correctly ground, correctly dosed puck.

If you recently bought a bottomless portafilter or a “proper” basket and your pressure vanished overnight, nothing has failed. You have removed the thing that was doing the work, and your grinder now has to do it instead. If the grinder is not delivering a consistent fine grind, see what to check when a coffee grinder is not grinding properly. That usually means grinding substantially finer than you were before — often several steps.

Two ways to tell what you have: look underneath the basket for a single small hole in a second wall (pressurised) versus a field of holes right through (non-pressurised), or run a shot and watch. A pressurised basket squirts a thin jet from one point; a non-pressurised one wets the whole underside.

If the coffee is the problem

The grind is too coarse

This is the first thing to change and the one most likely to fix it. Espresso needs a grind close to caster sugar or finer — noticeably finer than filter. If your double is running in under twenty seconds, go finer and try again, one or two steps at a time. Change one variable per shot, otherwise you will not know what fixed it.

Pre-ground supermarket espresso is a common dead end here. Much of it is ground for pressurised baskets or for moka pots and simply cannot be made fine enough by any adjustment on the machine. If you are working from pre-ground coffee and cannot get resistance, that is very likely the whole answer, and it is the case for a decent grinder rather than a new machine.

There is not enough coffee in the basket

A double basket generally wants somewhere around 18 grams, and a single around 9. Under-dosing leaves headroom above the puck, water finds the gap, and pressure never develops. If you are dosing by eye, weigh it once to see where you actually are — people are routinely several grams under what they assume.

The puck is not level or not tamped

Tamping is about flatness more than force. A puck tamped at an angle gives water a preferential path down one side, and once water finds that path it takes it. Distribute the grounds evenly before tamping, then press straight down.

The beans are stale

Stale coffee produces less crema and a slightly different flow, but it will not by itself stop a machine building pressure. Treat it as something that makes a shot disappointing rather than as the cause of a pressure fault.

If the machine is the problem

Work through these only if water would not run freely through an empty basket.

A blocked shower screen or basket

The shower screen sits in the group head and spreads water across the puck. Old grounds and coffee oil build up behind it and restrict flow. Most screens unscrew with a single central bolt; the basket holes can block in the same way, particularly if the basket goes through a dishwasher and picks up mineral deposits.

A basket that has genuinely blocked will usually show it — hold it up to a light and the holes should be evenly bright. Soaking in an espresso machine cleaner solution and a soft brush clears most of it.

Scale

In hard-water areas scale narrows the boiler outlet and the internal lines over months. The usual signs are a gradual decline rather than a sudden fault, and often a longer warm-up. Descale to the interval in your machine’s manual, which is the one number genuinely worth taking from the manufacturer here because it is specific to the boiler design.

The over-pressure valve

The OPV bleeds off pressure above a set point, usually around nine bar. If it is set low or has failed open, the machine dumps pressure that should be reaching the puck. This is a real cause but a less likely one, and on most machines adjusting it means opening the case. It is worth suspecting mainly if the machine has always been weak rather than having changed recently.

The pump

Genuine pump failure is the least common cause on this list and the one people reach for first. A failing vibratory pump usually announces itself: a change in the noise it makes, or a machine that works when cold and fades as it runs. If water still flows freely through an empty group head, the pump is moving water and is probably not your problem.

The order worth checking in

Most guides list causes without saying which to try first. This is the sequence that resolves the largest number of cases in the least time:

  1. Establish which symptom you have — gushing shot, or almost no flow at all.
  2. Run water through an empty basket. Free flow means the machine is fine and the coffee is the issue. A dribble means the opposite.
  3. Check which basket you are using. Pressurised or not. If you changed it recently, this is very likely the answer.
  4. Grind finer, one or two steps. Change nothing else and pull another shot.
  5. Weigh your dose. Around 18g in a double.
  6. Check the tamp is level.
  7. Clean the shower screen and basket.
  8. Descale, if it has been a while and your water is hard.
  9. Only then consider the OPV or the pump.

Steps two to five resolve the majority of cases at home and cost nothing.

When to stop and get it serviced

If an empty basket still will not pass water freely after cleaning and descaling, the restriction is internal and further home diagnosis has poor odds. The same applies to a machine that trips a breaker, leaks from the base, or makes a grinding noise from the pump.

The economics matter at the lower end. A service call frequently costs more than an entry-level machine, so on a machine under about $200 a fault that survives cleaning and descaling is often the end of it. On a Gaggia, a Breville or anything with a metal boiler, repair usually makes sense — those are built to be opened, and parts are available. If yours is at the point where replacement is the honest answer, the espresso machines worth buying under $500 and the cheaper options under $200 are both covered separately, and the semi-automatic guide explains what you actually control on each.

How This Guide Was Put Together

Plainly: this is a research-based guide, not a hands-on test. I have not stripped down these machines, and nothing here should be read as a report from my own kitchen.

What it rests on: the mechanics of espresso extraction, which are well documented and not in dispute — resistance comes from the puck, and a pressurised basket manufactures that resistance artificially; manufacturer troubleshooting documentation, including KitchenAid’s own pressure guidance, which is useful on grind and dose and silent on basket type; and the pattern of what owners report across verified-purchase reviews and enthusiast forums, where the basket-swap case recurs constantly and is rarely written up.

What I could not establish: how often each cause actually occurs. Nobody publishes failure statistics for home espresso machines, so the ordering above reflects how cheap and quick each check is and how often it comes up in owner reports — not a measured frequency. If your machine changed behaviour suddenly rather than gradually, weight whatever you changed most recently above everything on this list.

Frequently Asked Questions

Why did my espresso machine stop building pressure after I changed the basket?

Because the old basket was doing the work. A pressurised or dual-wall basket creates back-pressure through a single small hole, largely independent of your grind. A non-pressurised basket has none of that, so the resistance must come from a finer, well-distributed puck. Grind noticeably finer and the pressure returns.

What should the pressure gauge read during a shot?

Most home machines mark a target band, typically around nine bar. Sitting below it with a fast, pale shot points at grind, dose or basket. Sitting below it with almost no flow points at a blockage. The gauge on many machines measures pump pressure rather than pressure at the puck, so treat it as an indicator rather than a measurement.

Can a bad grinder cause low pressure?

Yes, and it is one of the most common causes. A blade grinder, or a burr grinder without fine enough steps at the espresso end, cannot produce a grind fine and even enough to build resistance in a non-pressurised basket. Pre-ground espresso often cannot either.

How do I know whether it is the pump?

Lock in an empty portafilter and run the pump. If water flows out freely, the pump is moving water and is unlikely to be the fault. Pump problems usually come with a change in noise, or a machine that weakens as it heats.

Will descaling fix low pressure?

It can, if scale is restricting flow — but that produces a gradual decline over months rather than a sudden change. If your machine was fine last week, descaling is unlikely to be the answer, though it is worth doing anyway.

Is it worth repairing an espresso machine that will not build pressure?

It depends what you paid. Below roughly $200, a fault that survives cleaning and descaling often costs more to diagnose than the machine is worth. Machines with metal boilers and available parts — Gaggia, Breville and similar — are generally worth repairing.

More espresso reading

If the milk rather than the shot is the problem, see what to check when a steam wand will not froth milk. If the problem is water rather than pressure, there is a separate guide to an espresso machine leaking water. For the grinder side of this problem, see the espresso grinder guide. If the pressure is fine but the shot tastes sour or bitter, see the espresso shot troubleshooting guide.

Filed Under: Helpful Kitchen Tips

Best Juicer for Greens: 4 Cold Press Picks Compared

Last Updated October 25, 2026

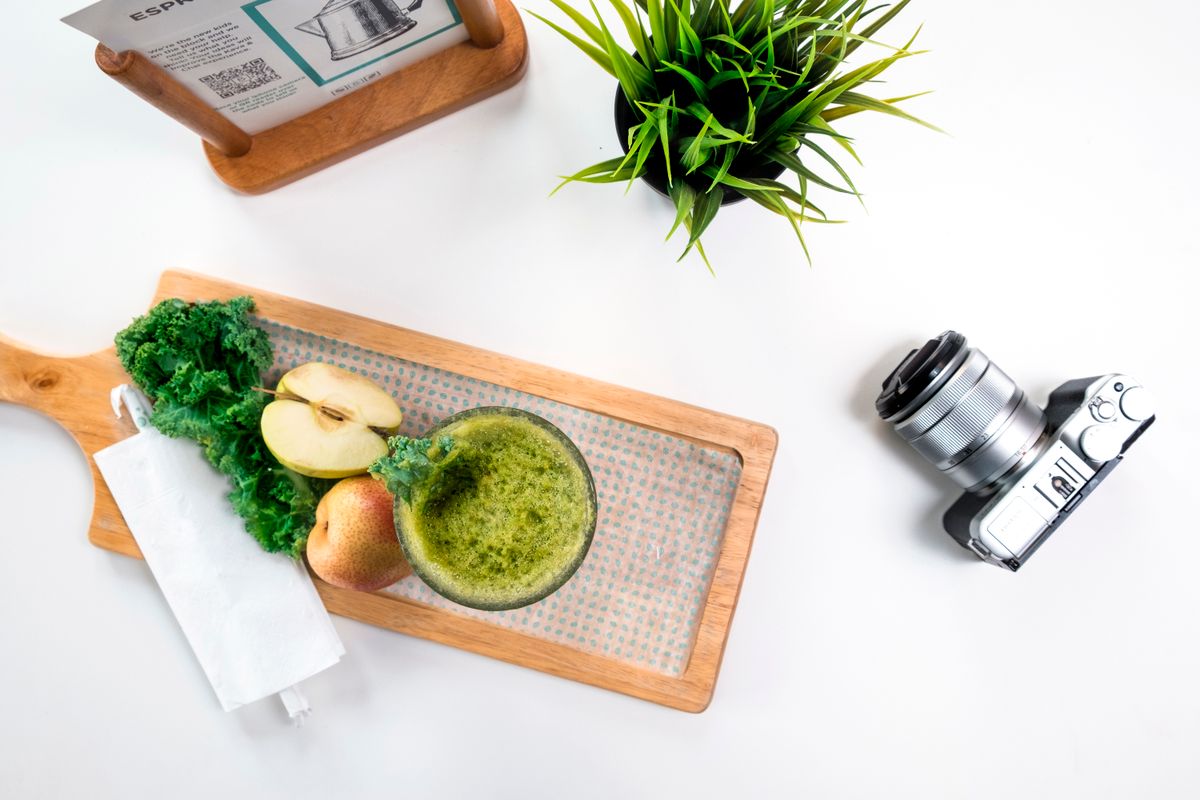
Glass of fresh green juice beside kale leaves and sliced apple on a wooden board

The short answer: for most people the Ninja NeverClog JC151 ($129.99) is the right juicer for greens — it scored 8.7 out of 10 on leafy greens in independent testing, the highest in a 13-machine field, and costs a third of what the premium machines do. If $86 is the budget, the Omega H3000 does the job. What you should not do is buy a centrifugal juicer for this, however good it looks on paper.

This post contains affiliate links. I earn a commission if you buy through the Amazon links below, at no extra cost to you.

Greens are the job that separates juicers. Kale, spinach, chard and wheatgrass have almost no structure, so a machine that shreds produce against a spinning screen has nothing to grip and pushes them out as damp pulp. A slow auger crushes them against the screen instead. That single mechanical fact decides this entire category, and it is why every pick below is a masticating machine.

Best juicers for greens at a glance

Product Best For Price Rating Buy
Ninja NeverClog JC151 Best overall for greens $129.99 4.4★ (3,762) Check Price
Omega H3000 Cold Press 365 Best under $85.87 $85.87 4.2★ (2,514) Check Price
Omega Cold Press All-in-One Best for wheatgrass and volume $199.87 4.4★ (2,836) Check Price
Nama J2 Best premium, hands-free $599.00 4.6★ (1,607) Check Price

Prices and ratings verified on Amazon with a United States delivery address on the date below.

1. Ninja NeverClog JC151 — best overall for greens

Ninja NeverClog JC151 cold press juicer

This is the pick for most people, and it is not a close call. In TechGearLab’s testing of thirteen juicers it scored 8.7 out of 10 on leafy greens — the highest in the field — while taking the top overall position. It costs $129.99.

The 150-watt high-torque auger turns slowly enough to crush kale stems and celery fibre rather than fling them at a screen, and the Reverse program clears the fibre wraps that stringy produce causes. Two pulp filters let you choose how much body stays in the juice.

Cons: it is genuinely poor at hard produce — 5.3 out of 10 on carrots and beets in the same test, the weakest part of its result. The 24 oz jug means stopping to empty if you are juicing for more than one person. And cleaning scored 7.0, slightly behind the centrifugal machines, because the fine screen needs brushing every time.

Full write-up: Ninja NeverClog JC151 review.

Check Price on Amazon

2. Omega H3000 Cold Press 365 — best under $100

Omega H3000 Cold Press 365 slow masticating juicer

At $85.87 this is the cheapest machine here that will genuinely handle greens, and Omega name-checks the job directly: the listing specifies celery, leafy greens and wheatgrass. It runs at 90 to 110 RPM — slower than a centrifugal disc by two orders of magnitude, which is the property that matters.

Omega has been building masticating juicers for decades, and buying their entry model is a more reliable route to a working cheap juicer than buying an unknown brand at the same price.

Cons: 4.2 stars is the lowest rating in this guide, and across 2,514 ratings that is a real signal rather than noise. It runs faster than the 43–80 RPM machines, so it is a compromise rather than a bargain version of them. Stock has been thin — single digits when checked. And at this price the build is plastic throughout.

Check Price on Amazon

3. Omega Cold Press All-in-One — best for wheatgrass and volume

Omega Cold Press All-in-One masticating juicer

The step up at $199.87. The triple-stage auger squeezes pulp three times on the way through rather than twice, and it runs at 80 RPM. If wheatgrass is a regular part of what you juice — the hardest test in this category — this is where the guide starts rather than the $86 machine.

It also handles nut butters, nut milks, baby food and sorbets using the supplied screens, which is genuinely useful if you will use them and irrelevant if you will not.

Cons: 4.4 stars, below the Ninja. Stock is repeatedly single-digit on this listing. And Omega’s model naming is a mess — four similar juicers, three of them at the same price, two sharing the All-in-One name. check the product code, not the name.

Full write-up: Omega Cold Press juicer review.

Check Price on Amazon

4. Nama J2 — best premium, and the only hands-free option

Nama J2 hands-free cold press juicer on a kitchen counter

$599.00, 4.6 stars, and the only machine here you load once and walk away from. The self-feeding hopper takes a whole recipe, which matters more with greens than anything else — feeding a bundle of kale through a narrow chute by hand is the part people give up on.

The 15-year warranty works out around $40 a year, which is a fairer way to look at it than the sticker.

Cons: the yield claim is oversold. An independent hands-on reviewer found the juice-to-pulp ratio comparable to a normal masticating juicer and was specifically unimpressed by the leafy-greens yield — worth knowing before spending $599 on a machine for greens. It is also slow at 50 RPM, and it is a single-purpose appliance.

Full write-up: Nama J2 review.

Check Price on Amazon

The machine to avoid for greens

Worth naming, because it is otherwise an excellent juicer and it costs only $20 more than the winner. The Breville JE98XL is $149.95, holds 4.5 stars from more than 16,700 buyers, and scored 3.7 out of 10 on leafy greens in the same test that gave the Ninja 8.7.

That is not a machine you can coax into this job with better technique. A spinning disc needs structured produce to shred; leaves give it nothing to grip. The same Breville scored 8.3 on hard produce against the Ninja’s 5.3 — it is a very good juicer for apples, carrots and beets, and the wrong tool here. If you juice both, the head-to-head between those two works through the choice.

What actually matters when buying for greens

Feature Why it matters for greens
Masticating, not centrifugal The one non-negotiable. Everything else is refinement.
Low RPM (43–80 is ideal) Slower crushing extracts more from material with no structure.
A reverse function Greens and celery wrap the auger. Reverse clears it without disassembly.
High-torque motor Wattage is misleading; torque at low speed is what pulls fibre through.
Screen that brushes clean Greens pack fine mesh faster than any other produce.
Chute width Matters less than you think — greens get rolled into bundles either way.

How to get more juice out of greens

Technique changes the result more on greens than on any other produce, and none of it costs anything.

  • Roll leaves into a tight bundle before feeding. Loose leaves ride over the auger instead of being drawn in.
  • Alternate greens with something firm. A piece of apple, cucumber or celery gives the auger something solid to bite while it pulls the leaves through.
  • Cut stems to one or two inches. Long fibres wrap the auger; short ones cannot.
  • Run the pulp through twice. Greens pulp often still holds juice on the first pass. This works on masticating machines and is pointless on centrifugal ones.
  • Feed slowly. The auger sets the pace. Pushing harder packs the chute rather than speeding it up.

If it jams anyway, the juicer clog diagnostic maps the symptom to the cause.

How these picks were chosen

Prices, ratings, availability and specifications for all five machines named here were verified directly on their live Amazon listings with a United States delivery address on the date shown below. The leafy-greens and hard-produce scores come from TechGearLab, which buys the units it tests and scored the Ninja and the Breville in the same 13-machine pool on the same rubric; the citation and link appear in full on the Ninja and Breville reviews. The Nama yield finding comes from The Spruce Eats, whose reviewer was sent a sample by the manufacturer — noted because a supplied unit is weaker evidence than a purchased one, and the criticism is more notable for coming from someone holding a free machine.

One candidate was dropped during research: a wide-mouth masticating juicer around $110 whose Amazon listing would not return a reliable price or stock status on repeated checks. Rather than publish a figure that might be wrong, it is not in the guide.

The bottom line

Buy the Ninja NeverClog JC151 unless you have a specific reason not to. It is the best-performing machine on greens in independent testing, it costs $129.99, and it is about a fifth the price of the premium option. Go to the Omega H3000 if the budget is under $100, the Omega All-in-One if wheatgrass is a regular fixture, and the Nama J2 only if you juice often enough that loading it once and walking away is worth $599.

Whatever you buy, do not buy centrifugal for this job. That is the decision that actually matters.

Frequently Asked Questions

What kind of juicer is best for leafy greens?

A masticating (cold press) juicer, without exception. A slow auger crushes leaves against the screen; a centrifugal disc needs structured produce to shred and pushes greens out as damp pulp. In one 13-machine test the best masticating machine scored 8.7 out of 10 on leafy greens while a well-regarded centrifugal juicer at a similar price scored 3.7.

Can a centrifugal juicer handle kale and spinach at all?

Poorly, and no technique fixes it. You will get some juice and a lot of wet pulp. If greens are more than an occasional part of what you juice, a centrifugal machine is the wrong purchase regardless of how good it is at apples and carrots.

What is the cheapest juicer that actually works for greens?

The Omega H3000 Cold Press 365 at around $85.87 is the cheapest machine here that genuinely does the job, and Omega specifies celery, leafy greens and wheatgrass for it. It rates 4.2 stars, the lowest in this guide, so it is a compromise rather than a bargain version of the better machines.

Do I need a special juicer for wheatgrass?

Wheatgrass is the hardest test in this category and rewards a triple-stage auger at low RPM — the Omega Cold Press All-in-One at $199.87 is where to start if it is a regular fixture. Entry-level masticating machines will manage it occasionally but with lower yield.

How do I get more juice out of kale and spinach?

Roll the leaves into a tight bundle, alternate them with something firm like apple or cucumber so the auger has something solid to bite, cut stems to one or two inches so fibres cannot wrap, and feed slowly. Running the greens pulp through a second time recovers a useful amount on a masticating machine.

Is the Nama J2 worth $599 for green juice?

Only if you juice often and the feeding is what you resent — the hands-free hopper genuinely works. An independent hands-on reviewer was specifically unimpressed by its leafy-greens yield, so do not buy it expecting more juice from the same kale than a $200 machine gives you. You are buying back time, not juice.

Related guides

  • Best Juicer 2026: Cold Press and Centrifugal Picks Tested
  • Best Juicer for Celery in 2026
  • Masticating vs Centrifugal Juicer: Which Should You Buy?
  • How Long Does Fresh Juice Last?

Filed Under: Product Reviews

How Long Does Fresh Juice Last? Two Answers, Not One

Last Updated September 1, 2026

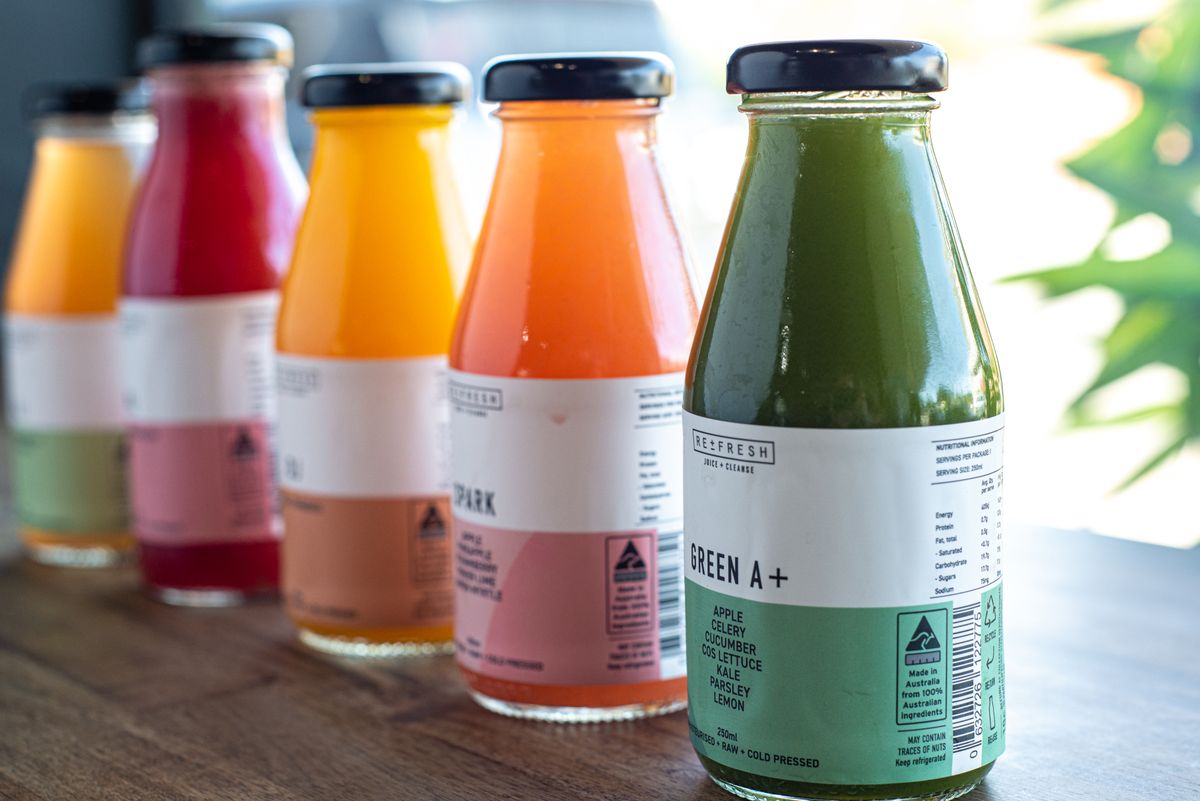
Row of capped glass bottles filled with different coloured fresh juices

The short answer: for quality, drink it the same day — a day or two at a push if it came off a slow juicer into a full, sealed glass bottle in a cold fridge. For safety, home-made juice is unpasteurised, and that is a separate question with a different answer. Most guides only answer the first one.

You are actually asking two different questions

“How long does fresh juice last” collapses two things that behave differently:

  1. How long does it stay good? Colour, flavour, aroma, separation. This degrades gradually and predictably, and you can see and taste it happening. For the buying guides and the maintenance walkthroughs, see the juicers hub.
  2. How long is it safe? Governed by bacteria, not by taste. It does not announce itself, and juice that tastes fine can still be a problem.

Nearly every page answering this question answers only the first and presents the result as though it settled the second. They are not the same, and the gap between them is where people get caught out.

Question one: how long it stays good

Fresh juice starts degrading the moment it leaves the machine. Oxygen is the main culprit — it drives the browning, the flattening of flavour, and the loss of the bright aroma that made you want fresh juice in the first place. Heat and light accelerate it, agitation folds more air in, and the pulp still suspended in the juice gives the whole process more surface area to work on.

You will see confident figures quoted everywhere: 24 hours for centrifugal juice, 48 or 72 for cold press. Treat those as rules of thumb rather than measurements. They circulate widely, they are directionally right, and I have not found an independent test behind the specific numbers — so this page will not present them as fact. What is worth understanding is what actually moves the figure.

Factor Why it matters
Juicer type A fast centrifugal disc whips air through the juice; a slow auger folds in far less. This is the single biggest variable.
Headspace in the container Air trapped above the juice keeps oxidising it. A part-full bottle ages faster than a full one.
Container material Glass is inert and seals well. Plastic holds odours and is usually less airtight.
Fridge temperature The door is the warmest part of a fridge. The back of a shelf is the coldest.
What you juiced Acidic citrus holds up notably better than apple, pear or leafy greens.
Time before chilling Juice left on the counter for an hour has already spent its best window.

Question two: the safety side, which is not about taste

Juice you make at home is unpasteurised. That is the whole point of it, and it is also the thing that changes the storage question.

The FDA is direct about the mechanism: when fruits and vegetables are fresh-squeezed or used raw, bacteria from the produce can end up in the juice, and unless the produce or the juice has been pasteurised or otherwise treated, the juice could be contaminated. The agency says it has received reports of foodborne illness outbreaks traced to drinking juice and cider that was not treated.

It is worth noticing how seriously that is taken commercially. Untreated juice sold in the United States has to be kept refrigerated and has to carry a warning label saying it has not been pasteurised and may contain harmful bacteria. Your kitchen juicer produces the same category of product with none of the labelling.

This is not an argument against juicing at home. It is an argument for treating storage time as a safety decision rather than a flavour one.

Who should not be storing fresh juice at all

The FDA names the groups at greater risk from foodborne illness: children, older adults, pregnant women, and people with weakened immune systems, including transplant patients. For those groups, unpasteurised juice carries a risk that most healthy adults can shrug off.

If you are juicing for someone in one of those categories, the sensible approach is to make it and drink it straight away rather than store it, or to use pasteurised juice. That is the FDA’s framing rather than mine, and it is worth following.

Why the sniff test does not do what you think

Smelling and tasting juice tells you whether it has spoiled. It does not tell you whether it is contaminated. Those are different processes caused by different organisms, and the second one does not necessarily produce any smell, taste or appearance change at all.

So use your senses to catch juice that has obviously turned, but do not treat “it smells fine” as clearance for juice that has been sitting for three days. There is no home test for the thing that actually matters, which is precisely why the honest answer to the headline question is shorter than most pages make it.

Signs it has definitely gone

  • Fizzing, bubbles, or pressure when you open the bottle. That is fermentation. Pour it away.
  • A sour, yeasty or alcoholic smell where there was not one before.
  • Sliminess, or any visible film or fuzz.
  • A flavour that has gone sharp or bitter beyond what the produce would explain.

Separation is not spoilage. Fresh juice settling into layers in the fridge is normal and expected — it is suspended pulp sinking, not a sign of anything wrong. Shake it and look at the other signals instead. Cold press juice separates less, which is one of the genuine reasons people pay more for it.

Getting the most out of the window you have

  1. Chill it immediately. The clock that matters starts when the juice leaves the machine, not when you remember to put it away.
  2. Fill the container to the brim. This is the highest-value habit on the list. Less headspace means less trapped air. A bottle filled to the neck keeps visibly better than the same juice half-filling a jug.
  3. Use glass with a proper seal. Swing-top or screw-cap bottles. Glass is inert, seals tightly and does not carry over yesterday’s smell.
  4. Put it at the back of a shelf, not in the door. The door swings into room temperature every time someone opens the fridge.
  5. Add something acidic. A squeeze of lemon or lime slows browning in apple, pear and green juices. It changes the flavour slightly; that is the trade.
  6. Wash the produce first. The FDA makes this point specifically: wash it even if you plan to peel it, so dirt and bacteria are not transferred from the surface when you cut into it.
  7. Start with clean equipment. Juice sitting in a machine that was not properly washed starts its life with a head start it should not have. The routine is in how to clean a juicer.

Can you freeze fresh juice?

Yes, and it is a better answer than pushing fridge storage further than it should go. Freeze it in a container with a little headspace so it can expand, or in ice cube trays if you want small portions.

Expect two changes. Texture separates more on thawing, so shake it. And freezing does not reverse oxidation that has already happened — freeze it fresh, not on day two. Thaw in the fridge rather than on the counter, and treat the thawed juice as you would fresh juice rather than resetting the clock.

Freezing does not sterilise anything either. It pauses the process; it does not undo it.

Does your juicer actually change how long juice keeps?

Yes, and this is the one place where the machine genuinely matters rather than being marketing. A centrifugal juicer shreds produce against a disc spinning at 10,000 RPM or more, which whips air through the juice as it works. A masticating juicer turns an auger at 40 to 80 RPM and folds in far less. More dissolved oxygen means faster browning, faster flavour loss and more separation.

That is the honest case for spending more — not enzymes or nutrients, which is where cold press marketing usually goes, but the practical ability to make juice in the morning and drink it at lunch without it looking tired. The masticating vs centrifugal comparison goes through the rest of that trade-off, and the Ninja JC151 vs Breville JE98XL head-to-head covers two machines at the same price that sit on opposite sides of it.

If you juice once and drink it immediately, none of this is worth paying for. If you batch on Sunday for the week, it is most of the decision — and the juicer buying guide covers which machines actually deliver it.

How this guide was put together

The safety guidance, the risk groups and the wash-before-juicing point come from the FDA’s consumer guidance on juice safety, read directly rather than paraphrased from another article. Note what the FDA does not provide: it gives no storage duration for home-made juice, so no number on this page is attributed to it. The degradation factors are mechanical and follow from how the two juicer designs work. Where a specific figure circulates without a traceable measurement behind it — the familiar 24, 48 and 72 hour numbers — this page says so rather than repeating it as established fact.

Frequently Asked Questions

How long does fresh juice last in the fridge?

For quality, aim to drink it the same day. A full, sealed glass bottle of cold-press juice kept at the back of a cold fridge will still be pleasant the next day. Separately from taste, home juice is unpasteurised, so treat longer storage as a safety decision rather than a flavour one — and drink it sooner if it was made on a centrifugal juicer.

Is it safe to drink fresh juice the next day?

For most healthy adults, refrigerated properly and drunk within a day, it is normal practice. The FDA notes that raw juice can carry bacteria from the produce and that children, older adults, pregnant women and people with weakened immune systems face greater risk from foodborne illness — those groups are better off drinking it immediately or choosing pasteurised juice.

Why does my fresh juice separate in the fridge?

Suspended pulp settling out under gravity. It is normal and is not a sign of spoilage — shake it and judge by smell and taste instead. Centrifugal juice separates more than cold-press juice because the high-speed disc incorporates more air and leaves finer particles in suspension.

How can I tell if fresh juice has gone bad?

Fizzing or pressure on opening means fermentation and it should go. So does a sour, yeasty or alcoholic smell, sliminess, or visible film. Be aware that these signs detect spoilage, not contamination — juice can be unsafe without smelling or tasting any different, which is why storage time matters more than the sniff test.

Does cold-press juice really last longer?

It keeps its colour, flavour and consistency noticeably longer, because a slow auger folds far less air into the juice than a disc spinning at 10,000 RPM. That is a real, observable difference and the most honest argument for paying more. It does not extend safety indefinitely — the juice is still unpasteurised either way.

Can you freeze fresh juice?

Yes. Leave headspace for expansion, or freeze in ice cube trays for portions. Freeze it fresh rather than on day two, since freezing pauses degradation but does not reverse what has already happened. Thaw in the fridge, expect more separation, and treat the thawed juice as fresh juice rather than starting the clock again.

Related guides

  • Best Juicer 2026: Cold Press and Centrifugal Picks Compared
  • Masticating vs Centrifugal Juicer: Which Should You Buy?
  • How to Clean a Juicer: The 3-Minute Routine
  • Why Does My Juicer Clog?

Filed Under: Helpful Kitchen Tips

  • « Go to Previous Page
  • Page 1
  • Interim pages omitted …
  • Page 54
  • Page 55
  • Page 56
  • Page 57
  • Page 58
  • Interim pages omitted …
  • Page 70
  • Go to Next Page »

Recent Articles

  • Burr vs Blade Grinder: Which One Should You Buy?
  • Stainless Steel Pan Sticking? Causes and the Water Test
  • Carbon Steel Pan Rusting: What Makers Say to Do
  • Moka Pot Grind Size: What to Set and How to Dial It In
  • Hard Anodized vs Stainless Steel Cookware: Which to Buy

Search


HOME          Contact          Affiliate Disclosure          Terms of Service          Privacy Policy


kitchenwarecompare.com is a participant in the Amazon Services LLC Associates Program, an affiliate advertising program designed to provide a means for sites to earn advertising fees by advertising and linking to Amazon.com, Endless.com, MYHABIT.com, SmallParts.com, or AmazonWireless.com. Amazon, the Amazon logo, AmazonSupply, and the AmazonSupply logo are trademarks of Amazon.com, Inc. or its affiliates. As an Amazon Associate I earn from qualifying purchases.


Copyright © 2026 kitchenwarecompare.com, ALL RIGHTS RESERVED.