• Skip to primary navigation
  • Skip to main content
  • Skip to primary sidebar

Kitchenware Compare

  • Home
  • Product Reviews
    • Air Fryers
    • Coffee
    • Cookware
    • Flat Top Grills
    • Meat Thermometers
    • Food Processors
    • Knives
    • Pizza Ovens
    • Toaster Ovens
    • Juicers
  • Food Blog
  • Helpful Kitchen Tips
  • Data Studies
  • About
  • How I Review
  • Contact
You are here: Home / Archives for Glenn

How to Sharpen a Chef’s Knife with a Whetstone: Step-by-Step

Last Updated October 19, 2026

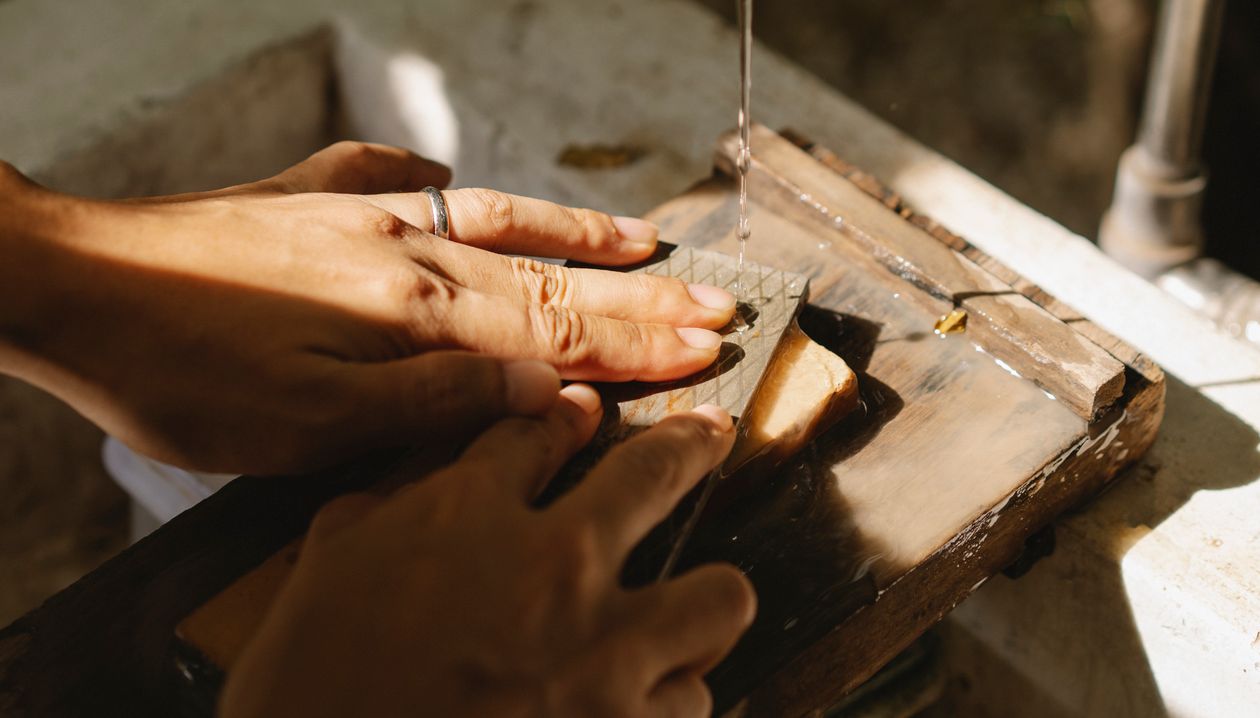
Hands running a knife blade across a wet whetstone

This article contains affiliate links. If you purchase through them, I may earn a small commission at no extra cost to you. Read the full disclosure.

A whetstone gets a knife sharper than almost any other method, and it costs less than most electric sharpeners — but only if you learn the technique properly first. This guide walks through the actual physical process step by step: soaking the stone, holding the angle, working coarse to fine, and knowing when to stop. It’s a genuine skill that takes a few tries to get comfortable with, and I’d rather be upfront about that than pretend it’s effortless.

What You Need

  • A combination whetstone with a coarser side for repair work and a finer side for polishing the edge — one stone with both grits is enough for most home kitchens.
  • A shallow container of water for soaking (skip this step entirely if your stone is a “splash-and-go” type designed to be used dry or lightly misted — check the packaging, since soaking the wrong stone can damage it).
  • A damp towel or a rubber stone holder to stop the stone sliding around on the counter.
  • A knife that’s actually dull enough to need it — if it still slices a tomato skin under its own weight, a honing rod is all you need for now.

Step 1: Soak the Stone

Submerge the stone in water for about 10 to 15 minutes before you start, or until bubbles stop rising from it. This lets the stone’s surface hold enough water to float away the fine metal particles you’ll be grinding off the blade, which is what actually does the polishing work. Skipping this step is one of the most common reasons a whetstone feels like it’s not doing much.

Step 2: Set the Angle

Hold the blade against the stone at roughly 15 degrees for a Japanese-style knife or 20 degrees for a Western-style chef’s knife — the difference comes down to how thin each style grinds its edge. A rough way to find 15 degrees: rest the blade flat on the stone, then lift the spine until there’s about a coin’s width of gap underneath. Keeping that angle consistent matters more than getting the exact number right.

Step 3: Work the Coarse Side First

Starting on the coarser grit, draw the blade across the stone in a sweeping, diagonal motion, moving from the heel of the blade toward the tip as you go, then lift and reset at the starting position for the next pass. Keep the angle steady through the whole stroke rather than letting the blade rock. Do this on one side of the blade until you feel a slight burr — a tiny, rough ridge of displaced metal — running the full length of the edge on the opposite side.

Check for the burr by running a fingertip perpendicular to the edge, never along it, feeling for that rough catch rather than testing sharpness directly. Once the burr runs edge to edge on one side, flip the knife and repeat on the other side until the burr forms there too and the first one mostly disappears. If you finish and the knife is still dull after sharpening, the burr is nearly always the reason — either it never formed, or it never came off.

Step 4: Refine on the Fine Side

Move to the finer grit and repeat the same motion at the same angle, using lighter pressure this time. This step doesn’t remove much metal — it’s polishing the edge the coarse side just created, refining that rough burr into a clean, thin edge. A dozen or so light passes per side is typically enough.

How to Tell When You’re Done

The tomato test is the simplest check: rest the blade’s edge on a tomato’s skin with no downward pressure and let the weight of the knife do the work. A properly sharpened edge slices through the skin cleanly; a dull one dents it first. If you’re still getting dents, go back for a few more light passes on the fine stone rather than pressing harder, since pressure doesn’t fix a poor angle.

Common Mistakes

  • Changing the angle mid-stroke. This is the single biggest reason a whetstone edge comes out uneven — it’s more important to hold one consistent angle than to hit an exact number.
  • Skipping the burr check. Moving to the fine stone before a burr has formed on the coarse side means you’re polishing an edge that was never actually reshaped.
  • Using a bone-dry stone. Water (or oil, for oil stones) carries away metal swarf; working dry just clogs the stone’s surface and slows everything down.
  • Sharpening a knife that only needed honing. A stone removes metal permanently. If a few strokes on a honing rod would have realigned the edge, reach for that first and save the stone for when the knife is genuinely dull.

How Often This Is Actually Needed

For a knife used most days, sharpening with a stone every two to four months is typical, with honing done weekly in between to keep the edge aligned. Honing and sharpening solve different problems — honing straightens an edge that’s bent out of true, while sharpening removes steel to create a new one — so doing one doesn’t replace the other. Cooks who use a knife daily and hone consistently often stretch the gap between stone sharpenings out further than that.

If You’d Rather Not Learn the Technique

A whetstone gives the best edge and the most control, but it’s a genuine skill that takes practice, and not everyone wants to spend a Saturday afternoon learning it. An electric or guided sharpening system removes more metal per use and won’t teach you the underlying skill, but it gets a consistent result with far less practice. My knife sharpener buying guide covers the electric, guided, and pull-through options if that’s the more realistic fit for how you actually cook. For one electric model in detail, see my ChefsChoice 15XV review.

Whichever method you use, the knife itself matters too — a well-made blade holds an edge longer between sharpenings than a cheap one does. My chef’s knife buying guide covers which knives are actually worth sharpening in the first place, and my cutting board guide covers the surfaces that keep an edge sharp longest between sessions — a glass or stone board undoes a good sharpening job faster than almost anything else.

If the Wusthof Classic 8-Inch is the knife you’re maintaining, my full review of the Wusthof Classic 8-Inch covers real edge-retention data on exactly this question.

Frequently Asked Questions

What grit whetstone should I start with?
A combination stone with a coarser side (roughly 1000 grit) and a finer side (roughly 3000-6000 grit) covers most home sharpening needs in a single stone, so there’s no need to buy several separate stones to start.

Do I need to soak every whetstone before use?
Only water stones need soaking. Oil stones use honing oil instead of water, and some modern “splash-and-go” stones only need a light misting. Check what your specific stone is designed for before soaking it, since the wrong prep can damage certain stones.

Why does my knife feel duller right after sharpening?
That’s almost always a leftover burr that hasn’t been fully removed. A few very light finishing passes on the fine stone, or a couple of strokes on a honing rod afterward, usually clears it up.

Can I use the same angle for every knife I own?
Not ideally. Japanese-style knives are typically sharpened closer to 15 degrees per side and Western-style knives closer to 20 degrees, reflecting how thin each style’s edge is ground at the factory. Matching the original angle keeps the edge geometry consistent.

How do I know if my knife needs honing or sharpening?
Try the tomato test first. If the blade dents the skin before cutting through, try a few strokes on a honing rod before reaching for the stone — if honing fixes it, the edge was just bent out of alignment, not actually dull.

Is a whetstone better than an electric sharpener?
A whetstone gives more control over the exact angle and removes less metal per session, which means a knife lasts longer between replacements over its lifetime. An electric sharpener trades some of that precision for consistency and speed, which is a fair trade for a lot of home kitchens.

Filed Under: Product Reviews

Why Is My Blender Leaking From the Top?

Last Updated September 7, 2026

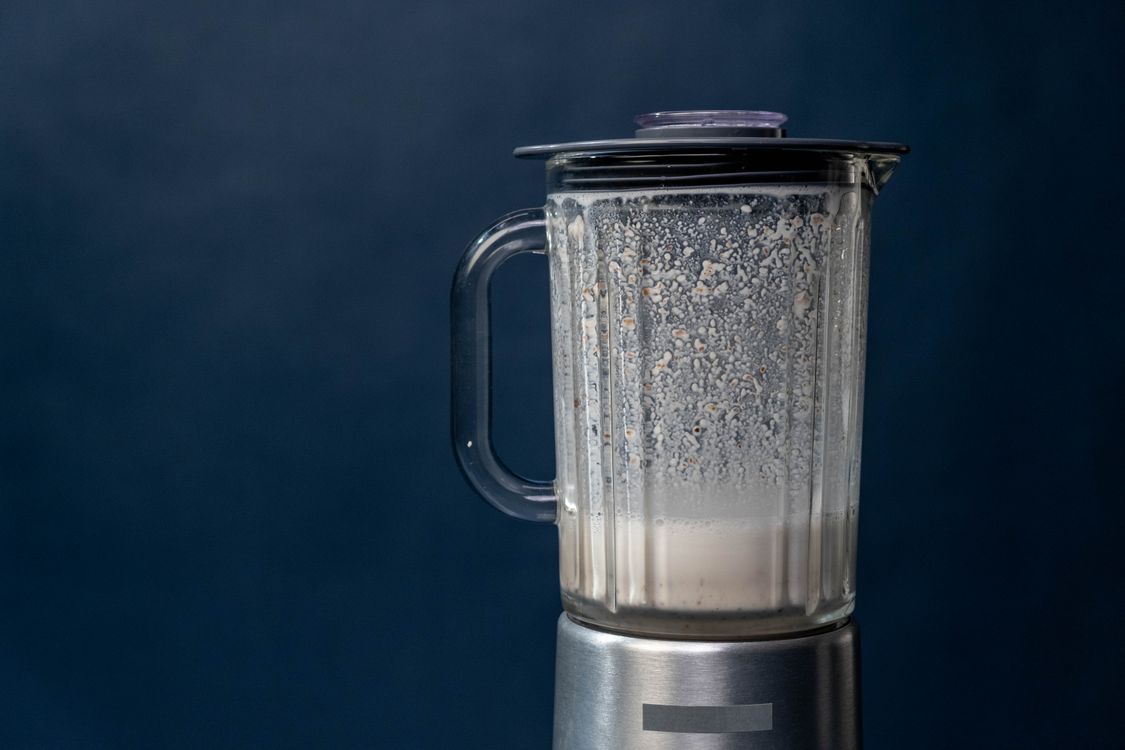
Close-up of a blender jar and lid with a smoothie inside

Photo by cottonbro studio from Pexels

Short answer: leaking from the top is usually one of two separate rubber seals, a fill-level problem, or a lid that isn’t actually locked — not the same gasket that causes leaks from the bottom. My guide to blender leaks from the bottom covers the blade-assembly gasket; this is a different part of the machine entirely, and the fix depends on figuring out which one you’re actually dealing with.

The Two Seals People Confuse

Most blender lids actually have two separate rubber seals, not one, and a leak from either one gets blamed on “the lid” generically. The main lid gasket runs around the full perimeter where the lid meets the jar. The center cap — the small removable piece in the middle of the lid used for adding ingredients while blending — has its own separate seal.

To tell them apart, run a short test blend with the center cap fully seated and locked, using a small amount of water. If it leaks around the outer edge of the lid, it’s the perimeter gasket. If it leaks or sprays specifically from the center, the cap seal is the problem, and replacing the wrong part won’t fix it.

Check the Fill Level and Lid Lock First

Before assuming either seal is worn, rule out the two most common non-seal causes. Overfilling pushes contents up against and past a perfectly good seal, especially with ice, frozen fruit, or anything that expands and foams as it blends — leave more headspace than feels necessary, particularly for smoothies with ice.

A lid that isn’t fully locked will leak even with a brand-new gasket. Most blenders have a distinct click or resistance point when the lid seats correctly; if yours goes on smoothly with no real resistance, it likely isn’t locking. Press down firmly on the lid while blending briefly at low speed to check whether that alone stops the leak.

Is Pressure the Actual Problem?

If the leak only happens with hot liquid, or with contents that foam and expand, the issue may not be the seal at all. Steam and expanding contents build real pressure against a sealed lid, and that pressure finds any weak point — often the center cap, since it’s the smallest and least reinforced seal on the lid. My guide to blending hot liquids safely covers this exact mechanism in more depth, including why most standard blenders aren’t rated for it at all.

Could the Lid Itself Be Warped?

Less common, but worth ruling out if both seals look fine and the lid still leaks: repeated exposure to high heat, particularly a dishwasher’s heated dry cycle, can warp plastic lids just enough that they no longer sit flush, even with good gaskets underneath. This is the same kind of thermal stress covered in my guide to food processor bowl cracking — a slower, structural problem rather than a worn part. If the lid looks slightly domed, uneven, or doesn’t sit level on a flat counter, that’s your answer, and no amount of new gaskets will fix it.

Fixing It

Once you’ve identified which seal is actually leaking, clean it thoroughly first — dried residue under either gasket is a common reason a “new part” install still leaks. If cleaning doesn’t solve it, replace that specific seal with a model-specific part rather than a generic size; lid and cap dimensions vary enough between brands that a close-enough fit often still leaks under pressure. Both seals are inexpensive, usually under $15, and don’t require replacing the whole lid.

Preventing This Going Forward

Hand-wash both seals rather than running them through the dishwasher’s heated dry cycle regularly — the same heat that warps lids over time also degrades rubber seals faster than normal use does. Dry the center cap and lid gasket fully before storing them; trapped moisture breaks down rubber and can encourage mold in the grooves where the seal sits.

Get in the habit of actually checking that the lid clicks into its locked position every time, not just resting it on top, especially if you’re in a hurry. It takes one extra second and prevents the single most common non-seal cause of a top leak.

What this guide is based on

Plainly: this is research-based, not a hands-on test. I have not run blenders to failure to compare seals, and nothing here is a report from my own kitchen.

What it rests on: how these lids are built — a removable centre cap sealing against a smaller gasket than the perimeter seal, handled far more often because it comes out every time something is added mid-blend, and therefore wearing sooner; and the pattern of what owners report, where the centre cap and overfilling account for most top leaks well ahead of a failed main gasket.

What I could not establish: a service life for either seal. Manufacturers do not publish one and it depends heavily on how often the cap is removed.

If you are replacing the machine rather than the seal, the blender food processor combo guide covers units that handle both jobs.

Frequently Asked Questions

Why is my blender leaking from the top but not the bottom?
Top leaks come from the lid’s perimeter gasket or the center cap seal, or from overfilling and pressure — entirely different parts and causes than a bottom leak, which is almost always the blade-assembly gasket.

How do I know if it’s the lid seal or the center cap causing the leak?
Run a short test blend with the center cap fully seated. A leak around the outer edge points to the perimeter gasket; a leak from the middle points to the center cap seal.

Can overfilling cause a blender to leak even with a good seal?
Yes. Contents that expand or foam, especially ice or hot liquid, can push past a perfectly functional seal if there isn’t enough headspace. Leave more room than feels necessary.

Can a warped lid cause leaking even with new gaskets?
Yes, though it’s less common. Heat exposure, particularly a dishwasher’s heated dry cycle, can warp plastic lids enough that they no longer sit flush. Check whether the lid sits level on a flat counter before assuming the seals are the problem.

Filed Under: Helpful Kitchen Tips

Can You Blend Hot Liquids in a Blender? (Is It Safe?)

Last Updated October 26, 2026

Chef using an immersion blender to puree hot soup

Photo by Kampus Production from Pexels

Short answer: it depends entirely on whether your specific blender is rated for hot liquids, and most aren’t. This is the step people skip — they look up “how to blend hot soup safely” and get a list of techniques, without ever checking whether their blender is actually built to handle the pressure hot liquid creates in a sealed jar in the first place. Technique doesn’t fix a blender that isn’t designed for the job.

Check Your Blender First — This Decides Everything

Standard blenders, including popular combo systems like the Ninja BN801, are explicitly not rated for hot liquids. That’s not overcaution on the manufacturer’s part — it’s a real limitation of a sealed pitcher and lid that weren’t engineered to vent pressure.

Blenders that are actually built for this have a specific feature: a small removable center cap in the lid, sometimes paired with a vented lid design, that lets steam escape in a controlled way instead of building up. If your blender’s lid doesn’t have that, or your manual doesn’t specifically say it’s rated for hot ingredients, treat it as a no.

Why This Is a Real Hazard, Not Just a Mess

Hot liquid in a sealed container generates steam, and steam takes up dramatically more space than the liquid it came from. In an open pot that’s harmless — the steam just rises. In a sealed blender jar, it has nowhere to go, and the pressure builds until something gives, usually the lid. Turning the blades on makes this worse, not better: agitation adds heat and speeds up vapor production right as you’re creating the seal-and-shake conditions that build pressure fastest.

This is also why “let it cool for a few minutes” isn’t a complete fix on its own if the lid is still fully sealed. A few minutes takes the edge off the temperature, but it doesn’t eliminate the steam-and-pressure mechanism — it just reduces how much of it you’re dealing with. Cooling helps most when it’s cooling most of the way, not just taking the worst of the heat off.

If Your Blender Isn’t Rated for Hot Liquids

Two honest options, not a workaround. Let the liquid cool until it’s genuinely tepid — not steaming, comfortable to touch through the pitcher — before blending it in a sealed jar. That’s a longer wait than most quick-tip lists suggest, often 15-20 minutes for a full pot of soup, not the 5 minutes commonly cited.

Or skip the transfer entirely and use an immersion blender directly in the pot. This is genuinely the better tool for hot soups regardless of what your countertop blender can handle — no transferring hot liquid, no sealed container, no pressure question at all. If you’re deciding what to buy for this specific job, my blender food processor combo guide covers which current picks handle both blending and food processing, though none of the models in that comparison are rated for hot liquids either.

If Your Blender Does Have a Vented Lid

Remove the center cap and cover the opening loosely with a folded kitchen towel instead of sealing it — the towel catches splatter while still letting steam escape. Fill the pitcher less than half full; hot liquid needs far more headspace than cold. Start on the lowest speed and use short pulses rather than running continuously, and work in smaller batches if you’re processing a full pot. None of this is optional if you want the vented design to actually do its job.

Skip the Gloves and Eyewear Advice

Some guides recommend wearing protective gloves and eyewear to blend hot liquid safely. If you’re at the point where you feel like you need safety gear to use your blender, that’s a sign you shouldn’t be blending it that way at all — not a sign to gear up and proceed. The actual fix is checking whether your blender is rated for the job and using an immersion blender or proper cooling time if it isn’t, not treating a kitchen appliance like a hazmat situation. Genuinely rated hot-liquid blenders don’t require protective equipment to use as intended.

The same goes for precise temperature cutoffs like “never exceed 180°F” that show up in some advice online. That number isn’t wrong exactly, but it implies a precision the situation doesn’t really have — the real variable is how sealed the container is and how much headspace is left, not a single temperature line. A vented lid used correctly handles hotter liquid safely than a fully sealed lid handles lukewarm liquid with no headspace.

Is This Related to Bowl or Pitcher Cracking?

Related, but not the same failure. Sudden temperature swings — hot liquid into a cold pitcher, or a hot pitcher rinsed under cold water — create the kind of thermal stress covered in my guide to food processor bowl cracking. That’s a slower, structural problem with the plastic itself. The pressure issue here is different and immediate: even a pitcher that handles the temperature swing fine can still blow its lid if steam has nowhere to vent.

The Safer Default

The safest default is not to blend hot soup in a sealed pitcher at all, on any blender, rated or not. An immersion blender directly in the pot is faster, has one less thing to clean, and removes the decision entirely. If you are choosing between a stick blender and a hand mixer, my immersion blender vs hand mixer comparison sets out what each one does. A countertop blender earns its place once the soup has cooled enough to store: reprocessing a cold or reheated portion for a smoother texture is no different from blending anything else.

My food processor vs. blender guide covers which of these two tools actually fits which job if you’re deciding what to buy.

Frequently Asked Questions

Can I blend hot soup in a regular blender?
Only if your specific blender is rated for hot liquids, which most standard blenders and combo systems aren’t. Check your manual or look for a vented center cap in the lid. If neither confirms it, don’t.

How long should I let hot liquid cool before blending?
Longer than most quick-tip advice suggests — aim for genuinely tepid, not just “not steaming,” which is often 15-20 minutes for a full pot. A few minutes reduces the risk but doesn’t eliminate the pressure mechanism in a sealed jar.

Is an immersion blender safer than a countertop blender for hot soup?
Yes. It blends directly in the pot, so there’s no sealed container, no transfer of hot liquid, and no pressure buildup to manage at all.

What happens if I blend hot liquid in a blender that isn’t rated for it?
Steam pressure can build up faster than a standard lid can handle, and the lid can pop off or leak hot liquid forcefully. It’s a genuine burn risk, not just a cleanup problem.

The blenders hub covers what to look for when buying, including which machines are actually rated for hot ingredients.

Filed Under: Helpful Kitchen Tips

Why Is My Food Processor Bowl Cracking?

Last Updated September 7, 2026

Dough being mixed in a clear food processor bowl

Photo by Julio Mantilla from Pexels

Short answer: most food processor bowls crack from thermal stress or impact, not just age or bad luck, and it’s usually preventable once you know which one caused yours. What it isn’t is a reason to glue the bowl back together and keep using it — a cracked food-contact vessel is a genuine problem, not a five-minute epoxy fix, and most systems sell a replacement bowl separately for exactly this reason.

The Real Causes, Ranked by How Often They’re Actually It

Thermal Shock

Clear polycarbonate and Tritan bowls handle heat fine gradually, but a sudden temperature swing is a different story. Pulling a bowl straight from a hot dishwasher cycle and rinsing it under cold water, or processing something straight out of the freezer in a bowl that was just washed in hot water, creates uneven expansion across the plastic. That stress concentrates at the thinnest points — usually around the base or the center spindle — and shows up as a crack days or weeks later, not necessarily in the moment it happened.

Impact Damage

The obvious one, and still the most common: a drop, a hard knock against a countertop edge while loading it onto the base, or a heavy object landing on it in a cabinet. Impact cracks are usually easy to identify because they radiate out from a single point rather than running in a clean line.

Stress at the Locking Tabs

The tabs that lock the bowl onto the base or secure the lid are almost always the thinnest, most stressed part of the whole assembly. A cracked tab is also the reason a food processor stops turning on entirely, since the interlock can no longer close. Twisting the bowl to lock or unlock it with more force than it needs, or forcing it into position at a slight angle, puts repeated stress on that exact spot. Over months of regular use, that’s a slow fatigue crack rather than a sudden one — it usually starts as a small stress line near a tab before it actually separates.

Overloading and the Wrong Blade

Less common, but real: processing more food than the bowl is rated for, or running a dense load (thick dough, large batches of nuts) with a blade that isn’t meant for that job, puts more torque through the bowl than it’s designed to absorb. This shows up more on smaller or lighter-duty bowls than on genuinely heavy-duty models.

Is It a Design Flaw, or Just Bad Luck?

It depends on the specific unit, and it’s worth being honest about that rather than blaming yourself or the manufacturer by default. Take the Ninja BN801, a popular blender-food-processor combo: Amazon’s own aggregated review data for that unit flags food-processor-bowl durability as a real, recurring theme — not a universal failure, since plenty of owners report years of solid use, but common enough that it shows up specifically in the review summary rather than as scattered one-off complaints. That’s a genuinely different signal than “this never happens” or “this always happens.” If your bowl cracked and you’ve also seen your specific model mentioned for this in owner reviews, it’s more likely a real weak point in that design than something you did wrong.

Should You Try to Fix It, or Replace the Bowl?

Don’t glue it, and be skeptical of anyone telling you to. Food-grade epoxy exists, but a glued seam on a food-contact vessel that flexes under load and gets run through a dishwasher repeatedly is exactly the kind of repair that fails again, often at the worst moment, and can trap food residue in the seam in the meantime. For a hairline crack that isn’t leaking or growing, some people do get away with monitoring it and retiring the bowl at the first sign of spreading. For anything that leaks, flexes, or has actually separated, replace it.

Most established brands sell the bowl as a standalone replacement part rather than requiring a whole new unit — check the manufacturer’s parts page or Amazon before assuming you need to buy a new machine. It’s usually a fraction of the cost of the full system.

Is This Covered Under Warranty?

Sometimes, but don’t assume it automatically is. A crack that shows up from normal use within the warranty period, with no impact or misuse involved, has a reasonable case for a warranty claim or a documented pattern the manufacturer already acknowledges. A crack from a drop, from running the dishwasher’s heated dry cycle against the manual’s instructions, or from a load the bowl clearly wasn’t rated for, generally won’t be covered — most warranties explicitly exclude accessory damage from misuse. Check your specific model’s warranty terms and keep your receipt; it costs nothing to ask before buying a replacement part outright.

Preventing This Going Forward

Skip the heated dry cycle on the dishwasher for plastic bowls specifically, even if the bowl itself is dishwasher-safe — air-dry it or towel-dry it instead. Let hot ingredients cool before processing, and let a bowl that just came out of a hot wash cool before rinsing it cold. My guide to cleaning a food processor covers the washing routine that avoids the heat-cycle problem specifically.

Turn the bowl into and out of its locked position the way the manual actually shows, without extra twisting force, and don’t force it into position at an angle. Keep loads within the rated capacity, and use the blade that’s actually meant for what you’re processing rather than pushing a lighter-duty blade through a heavy job.

What this guide is based on

Plainly: this is research-based, not a hands-on test. I have not broken food processor bowls to compare failure modes, and nothing here is a report from my own kitchen.

What it rests on: the material behaviour of the polycarbonate and copolyester used for these bowls, which explains why thermal shock and stress concentrations at the locking tabs produce the cracks owners describe; manufacturer care instructions on dishwasher use and hot liquids; and the pattern in owner reports, where hairline cracks near a tab are described far more often than clean impact breaks.

What I could not establish: whether any particular brand cracks more often than another. Complaint volume tracks sales volume, and without normalising for units sold, brand comparisons on this are not meaningful.

If you are reconsidering the format entirely, the food processor vs. blender guide covers which jobs actually need which machine, and the blender food processor combo guide covers the units that do both.

Frequently Asked Questions

Can I glue a cracked food processor bowl back together?
Not recommended. A glued seam on a food-contact vessel that flexes under load and goes through repeated dishwasher cycles is likely to fail again, and can trap food residue in the process. Replace the bowl instead.

What causes a food processor bowl to crack?
Most often thermal shock (sudden hot-to-cold or cold-to-hot temperature changes), impact from a drop, or repeated stress at the locking tabs from twisting the bowl with extra force. Overloading with the wrong blade is a less common but real fourth cause.

Do I need to buy a whole new food processor if the bowl cracks?
Usually not. Most established brands sell the bowl as a standalone replacement part, typically for a fraction of the full unit’s price. Check the manufacturer’s parts page or Amazon before assuming you need a new machine.

Is a cracked food processor bowl covered under warranty?
Sometimes, if it happened from normal use within the warranty period with no impact or misuse involved. Damage from drops, dishwasher heat cycles against manual instructions, or overloading is generally excluded. Check your specific model’s terms.

Filed Under: Helpful Kitchen Tips

Why Is My Blackstone Griddle Sticking?

Last Updated September 7, 2026

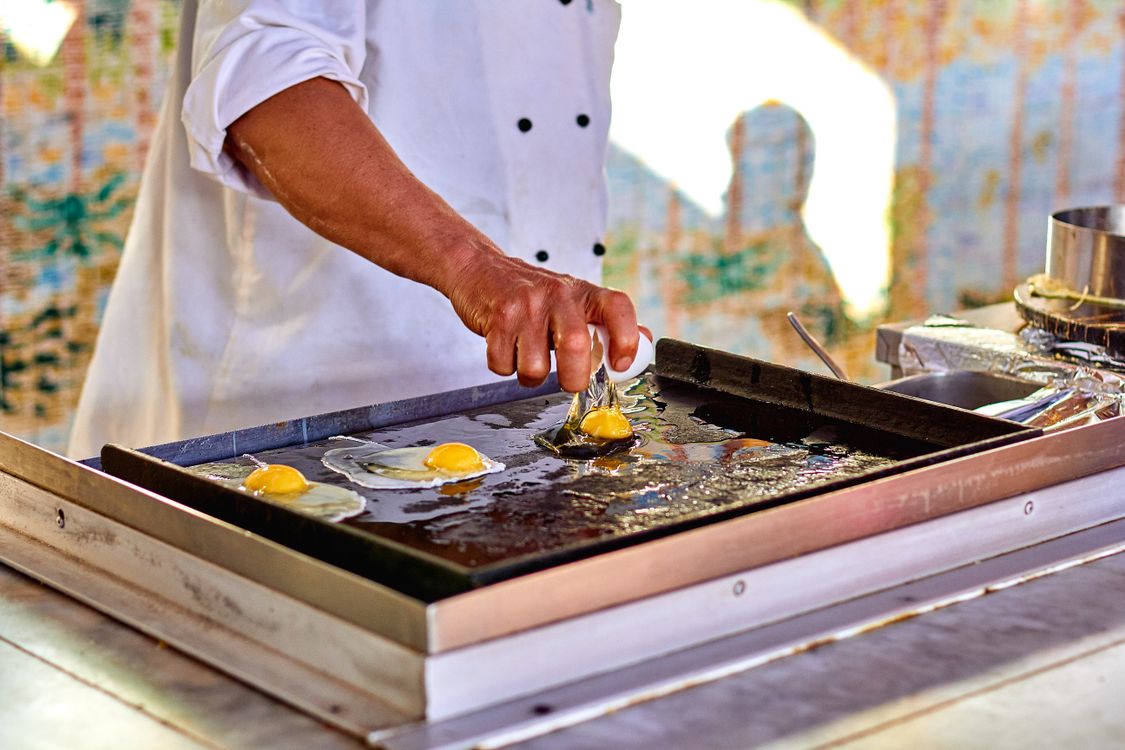
Chef frying eggs on a flat top griddle with a spatula

Photo by Bulat Khamitov from Pexels

Short answer: “sticking” on a flat top grill is actually three different problems that get lumped together, and the fix depends entirely on which one you have. A brand-new griddle that’s sticky before you’ve cooked anything is a factory coating issue. A griddle that’s gummy or tacky after you season it is an oil problem.

Food sticking to a griddle that’s otherwise properly seasoned is almost always a technique problem, not a seasoning problem. Treating all three the same way is why a lot of fixes don’t actually work.

Problem 1: Brand-New Griddle, Sticky Right Out of the Box

This one has nothing to do with seasoning. Most griddles ship with a thin protective coating — sometimes a wax, sometimes a food-safe rust inhibitor — applied at the factory to keep the bare steel from corroding in the warehouse and during transit. It’s meant to come off before you season, not to be cooked on top of.

Scrub it off with hot, soapy water and a nonabrasive pad before you do anything else. This is the one and only time dish soap belongs on your griddle — it’s cutting a factory coating, not stripping seasoning you’ve built up, so the usual no-soap rule doesn’t apply yet. Dry it completely, then season it following my guide to seasoning a Blackstone griddle before the first real cook.

Problem 2: Sticky or Gummy After Seasoning

If the surface feels tacky, gummy, or pulls at a paper towel after you’ve seasoned it, the seasoning itself didn’t cure properly. It’s almost always too much oil applied per coat rather than too little — a thick layer can’t fully polymerize into a hard finish, so part of it stays soft and sticky instead. Using a low-smoke-point oil (olive oil is the most common mistake here) or not getting the surface hot enough for long enough produces the same gummy result.

The fix is more heat, not more oil: run the griddle hot until the sticky layer breaks down and starts to release, scrape it off, then re-season with a genuinely thin coat — wipe oil on, then wipe most of it back off before heating. My seasoning guide covers this exact failure mode and the full correction steps in more detail; the short version is that a proper coat should look matte and feel smooth, never glossy. University of Illinois Extension’s guide to cast iron cookware describes the same underlying principle on a different but chemically similar surface: seasoning exists specifically to keep food from sticking, and once food starts sticking to a surface that used to release cleanly, that’s the signal it needs to be re-seasoned rather than scrubbed harder.

Problem 3: Food Sticks Even Though the Griddle Is Well-Seasoned

This is the one that catches people off guard, because the griddle itself is fine. A properly seasoned griddle can still make food stick if the surface isn’t hot enough, there isn’t enough cooking oil at the time of cooking, or the food is flipped before it’s ready to release. Seasoning creates a non-stick surface for storage and general use; it doesn’t mean every food will glide off with zero added oil at every temperature.

The Preheat Test That Actually Tells You Something

A cold or lukewarm griddle is the single most common cause of food sticking on an otherwise well-seasoned surface. Heat it for a genuine 10-15 minutes before cooking, not just until it feels warm to the hand. The classic test: flick a few drops of water onto the surface. If they sit and slowly evaporate, it’s not ready.

If they bead up and skitter across the surface before disappearing, it’s hot enough to cook on. Cooking too early on a griddle that only feels hot is one of the most common reasons a “properly seasoned” surface still grabs food.

Seasoning Isn’t a Substitute for Cooking Oil

A well-seasoned griddle needs less oil than a bare pan, not none at all. Add a small amount of oil to the specific section you’re cooking on, right before the food goes down, every time — this is separate from the maintenance oil coat applied after cleaning. Skipping this step because “it’s seasoned, it shouldn’t need oil” is a common and avoidable cause of sticking.

Some Foods Are Just Stickier, and Timing Matters More Than Seasoning

Eggs, thin fish, and cheese are the worst offenders, and for the same underlying reason: proteins bond to hot metal as they cook and only release cleanly once a proper crust has formed underneath. Try to flip or move the food before that crust sets and it tears instead of lifting free — which then feels like the griddle is the problem, when it’s actually a timing problem. Give these foods slightly more oil than you’d use for something like a burger, and don’t force a flip; if it’s not releasing on its own with a gentle nudge from the spatula, it isn’t ready yet.

Is This Ever an Actual Griddle Defect?

Rarely, but it happens. A warped surface or a factory hot spot that never seasons evenly can cause persistent sticking in one specific area no matter what you do everywhere else. If food sticks consistently in the exact same spot regardless of oil, preheat time, or food type — while the rest of the surface behaves normally — that’s worth a warranty conversation with the manufacturer rather than more troubleshooting. It’s the exception, not the rule; most sticking complaints trace back to one of the three causes above, not the griddle itself.

What this guide is based on

Plainly: this is research-based, not a hands-on test. I do not own this griddle and nothing here is a report from my own cooking.

What it rests on: the mechanics of seasoning, where polymerised oil forms the release layer and an under-heated or under-seasoned surface grips food; manufacturer guidance on preheating times and seasoning routine; and the pattern of what owners report, in which insufficient preheating and moving food too early account for most sticking complaints, well ahead of any genuine surface defect.

What I could not establish: a preheat time that holds for every griddle. Burner output, plate thickness and ambient temperature all move it, so the guidance above is directional rather than a specification.

For the cleaning routine that keeps a surface working, see the guide to cleaning a flat top grill. If the surface is corroding rather than sticking, there is a separate guide to griddle rust, and the flat top grill buying guide covers replacements.

Frequently Asked Questions

Why is my brand-new Blackstone griddle sticky before I’ve even cooked on it?
That’s the factory protective coating, not seasoning. Scrub it off with hot soapy water and a nonabrasive pad, dry completely, then season it before your first cook.

Why is my griddle sticky after I seasoned it?
Almost always too much oil applied per coat, which prevents it from fully polymerizing. Re-season with a much thinner coat, wiping most of the oil back off before heating.

Why do eggs stick to my griddle even though it’s seasoned?
Usually the griddle wasn’t hot enough, there wasn’t enough oil added at cooking time, or the eggs were moved before a crust formed enough to release on their own. Give it more preheat time and a gentle nudge test before flipping.

Does food sticking mean I need to re-season the whole griddle?
Not necessarily. If it’s isolated to specific foods or moments when you flip too early, it’s a technique issue. If the whole surface feels gummy or dull everywhere, that’s a sign the seasoning itself needs to be redone.

Filed Under: Helpful Kitchen Tips

  • « Go to Previous Page
  • Page 1
  • Interim pages omitted …
  • Page 56
  • Page 57
  • Page 58
  • Page 59
  • Page 60
  • Interim pages omitted …
  • Page 70
  • Go to Next Page »

Recent Articles

  • Burr vs Blade Grinder: Which One Should You Buy?
  • Stainless Steel Pan Sticking? Causes and the Water Test
  • Carbon Steel Pan Rusting: What Makers Say to Do
  • Moka Pot Grind Size: What to Set and How to Dial It In
  • Hard Anodized vs Stainless Steel Cookware: Which to Buy

Search


HOME          Contact          Affiliate Disclosure          Terms of Service          Privacy Policy


kitchenwarecompare.com is a participant in the Amazon Services LLC Associates Program, an affiliate advertising program designed to provide a means for sites to earn advertising fees by advertising and linking to Amazon.com, Endless.com, MYHABIT.com, SmallParts.com, or AmazonWireless.com. Amazon, the Amazon logo, AmazonSupply, and the AmazonSupply logo are trademarks of Amazon.com, Inc. or its affiliates. As an Amazon Associate I earn from qualifying purchases.


Copyright © 2026 kitchenwarecompare.com, ALL RIGHTS RESERVED.