• Skip to primary navigation
  • Skip to main content
  • Skip to primary sidebar

Kitchenware Compare

  • Home
  • Product Reviews
    • Air Fryers
    • Coffee
    • Cookware
    • Flat Top Grills
    • Meat Thermometers
    • Food Processors
    • Knives
    • Pizza Ovens
    • Toaster Ovens
    • Juicers
  • Food Blog
  • Helpful Kitchen Tips
  • Data Studies
  • About
  • How I Review
  • Contact
You are here: Home / Archives for Glenn

Which Kitchen Appliances Have the Most Unhappy Owners? The 1-Star Rate, By Category

Last Updated October 4, 2026

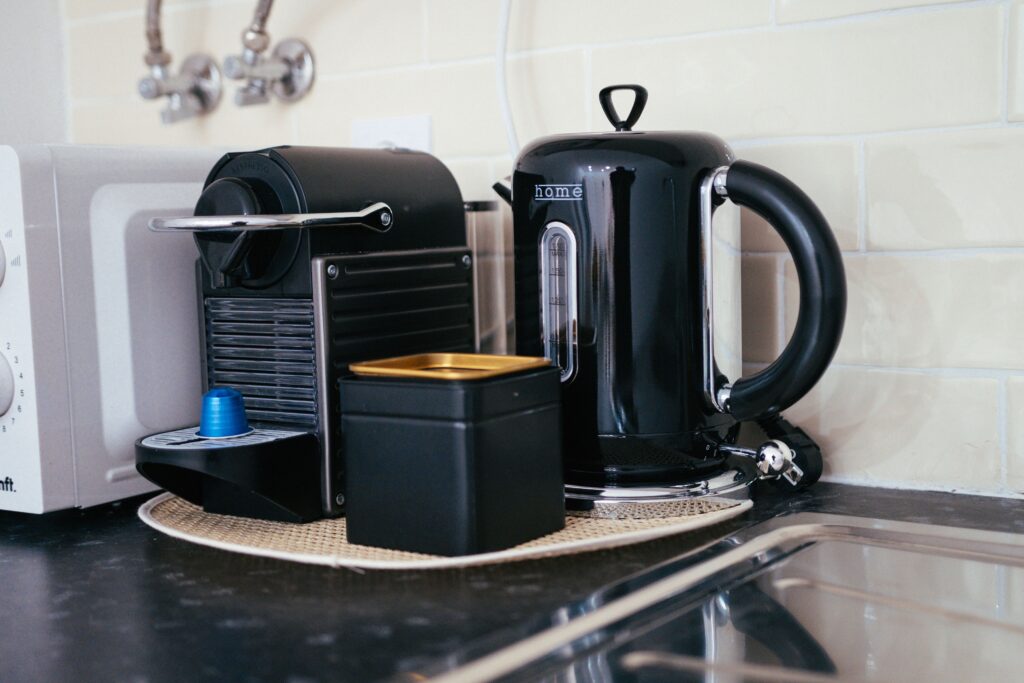
Electric kettle and espresso machine on a kitchen countertop, representing the appliance categories analyzed in this dissatisfaction-rate study

This study checked 40 kitchen products across 5 categories and 924,531 owner ratings to answer a question the average-star-rating number doesn’t: not how good a product is on average, but how often it actually makes someone angry enough to leave a 1 or 2-star review. Pooled across every product in this study, price and that “dissatisfaction rate” have a weak positive correlation (r = 0.144) — meaning the pricier items here had marginally more unhappy owners, not fewer. Espresso machines were the worst offenders by far: an 11.75% average dissatisfaction rate, more than double every other category, with one $149.95 model at 20%.

How this was calculated: for 5 kitchen categories, I identified the top 8 organically-ranked (non-sponsored) products by review count, then read the publicly-displayed star-rating breakdown on each product’s own Amazon page — the percentage of reviews at each star level that Amazon shows every visitor, logged out, no account needed. Dissatisfaction rate is simply 1-star% + 2-star%. This reflects a mix of real defects, shipping damage, and unmet expectations — not a verified failure rate. Full methodology and data →

Quick Stats

Stat Value
Products analyzed 40 (8 per category)
Total owner ratings behind those products 924,531
Pooled price-vs-dissatisfaction correlation r = 0.144 (weak positive)
Highest-dissatisfaction category Espresso machines (11.75% avg)
Lowest-dissatisfaction category Air fryers (3.88% avg)

That pooled correlation running slightly the wrong direction is the most counterintuitive number in this whole study — across all 40 products, paying more bought no protection against ending up with an unhappy purchase, and if anything the relationship leans the other way.

Dissatisfaction Rate by Category

Category Avg. Dissatisfaction Rate Price Correlation (r) Cheapest 2 Avg. Priciest 2 Avg.
Espresso Machines 11.75% -0.211 11.5% 8.0%
Non-Stick Pans 7.38% -0.548 9.0% 5.5%
Electric Kettles 6.62% +0.244 8.0% 7.0%
Food Processors 4.75% +0.166 4.0% 4.5%
Air Fryers 3.88% -0.363 5.0% 4.0%

Small samples (8 products per category) mean these individual correlations are directional, not statistically bulletproof — but the pattern across categories is consistent with the 602-product price-satisfaction study: espresso machines are the one category where spending more consistently buys real headaches, not just diminishing returns.

What This Means for Your Purchase

If you’re buying a non-stick pan, price is actually doing something useful here — the cheapest pans in this sample averaged nearly double the dissatisfaction rate of the priciest ones (9.0% vs 5.5%). Coating quality genuinely seems to cost money, and a $15 pan is a real gamble in a way a $55-$80 pan isn’t.

Espresso machines are the opposite kind of warning: dissatisfaction stays high (8-20%) across the entire price range checked, including a $549.95 machine at 10%. If you’re shopping this category, budget for the fact that a meaningful share of owners end up frustrated regardless of what you spend — read the specific complaints on any model you’re considering, not just the star average.

For food processors and electric kettles, don’t assume spending more buys you a happier ownership experience — in this sample it didn’t, and in food processors it very slightly bought the opposite. If you’re deciding between a budget and premium food processor, that decision should rest on features and capacity, not on an assumption that the pricier one has fewer unhappy owners.

Air fryers are the safest category in this study by a clear margin — even the worst-performing product checked topped out at 6% dissatisfaction. If you’re choosing among the air fryer picks in this guide, you’re statistically unlikely to end up in the unhappy-owner minority no matter which reasonable option you pick.

Frequently Asked Questions

What counts as a “dissatisfied” owner in this study?
Anyone who left a 1 or 2-star review, per Amazon’s own public rating breakdown. That’s a mix of real defects, shipping damage, and unmet expectations — not a verified failure rate, so treat it as a proxy for owner unhappiness, not a defect count.

Why only 8 products per category instead of the 100+ in your other study?
The rating-distribution breakdown only appears on each product’s individual page, not on search results, so this study needed a page visit per product instead of one search-results page per category. I scoped the sample smaller to keep the method honest rather than pad the count.

Does a high dissatisfaction rate mean I should avoid a whole category?
No — it means read the negative reviews before buying, especially for espresso machines. A high average doesn’t mean every model is bad; it means the category has more room for a bad fit between expectations and reality.

How does this relate to your other price study?
The 602-product study found price doesn’t predict average star rating. This study asks a related but different question — does price predict how often someone ends up unhappy — and finds a similar “not really, and sometimes the opposite” answer, with espresso machines the standout bad case in both studies.

Can I cite this data?
Yes — that’s what this page is for. Link back to this page and the Data Studies hub, or reach out via the contact page if you want the full underlying dataset. No commercial links appear anywhere in this article, by design.

Conclusion

Price doesn’t reliably predict how many owners end up unhappy with a kitchen appliance — it helps meaningfully with non-stick pans, does nothing for food processors and kettles, and doesn’t rescue espresso machines from a persistently high complaint rate at every price point checked. If you’re buying an espresso machine, budget extra time to read real complaints, not just the star average. If you’re buying an air fryer, nearly any reasonable pick will keep you out of the unhappy-owner minority.

Filed Under: Helpful Kitchen Tips

Broan-NuTone 413004 vs. BCDF130SS: Which Range Hood Should You Buy?

Last Updated October 22, 2026

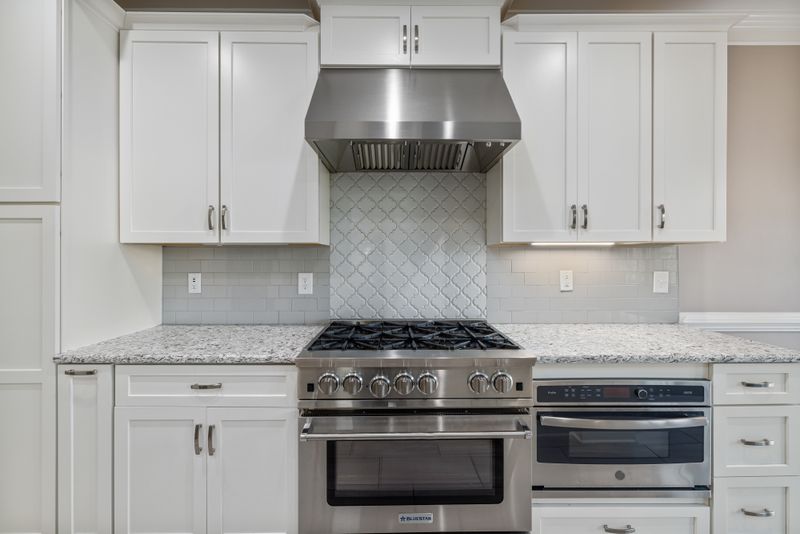
Kitchen with a stainless steel range hood installed above the cooktop

Last Updated July 21, 2026

Quick verdict: these two solve different ventilation problems, not the same one at different prices. The Broan-NuTone 413004 (currently $109) is a ductless-only insert — it recirculates filtered air back into the kitchen and nothing else.

The BCDF130SS ($129) is a 4-way convertible unit that can actually vent outside through three different ducting configurations, or run ductless if you don’t have ducting. If you have or can install ducting, the BCDF130SS is the only one of the two that actually removes heat and humidity rather than just filtering smoke. If ducting isn’t an option, the 413004 does the ductless job for a third of the price.

I earn a commission if you buy through the Amazon links below, at no extra cost to you. Every range hood page on the site is collected on the range hoods hub.

Broan-NuTone 413004 vs. BCDF130SS: Specs Side by Side

Product Best For Price Rating Buy
Broan-NuTone 413004 Ductless-only, budget $109.00 4.6★ (20,490) Check Price
Broan-NuTone BCDF130SS Convertible ducted/ductless $128.98 4.5★ (4,752) Check Price

Availability note: on 22 October 2026 the BCDF130SS had no single Amazon offer, only several third-party sellers at $129.00, so Check Price opens a listing with See All Buying Options and no Add to Cart button. The price and rating in the table were read earlier and may have moved.

Full spec comparison:

Spec Broan-NuTone 413004 Broan-NuTone BCDF130SS
Venting options Non-ducted (recirculating) only 4-way convertible: 2 ducted configurations, 7″ round ducted, or non-ducted
Blower performance 2 speeds, CFM not published 375 max CFM, 5.5 Sones
Lighting Up to 75W bulb (not included) Integrated 2-level LED modules (included)
Filter Charcoal (replaceable) Dual dishwasher-safe micro-mesh filters, plus charcoal for ductless mode
Controls 2 rocker switches (fan, light) Tap-touch capacitive controls
Price at review time $109.00 $128.98
Rating 4.6★ (20,490 ratings) 4.5★ (4,752 ratings)

The Core Difference: Ducted Capability vs. Ductless Only

This comparison isn’t really about which one is “better” — it’s about which ventilation setup you actually have. The 413004 is a non-ducted insert, full stop: it filters smoke and grease through a charcoal filter and blows the same air back into the kitchen.

The BCDF130SS is a genuinely different category of product — it installs in one of three ducted configurations (rear or top 3.25″x10″ rectangular duct, or a 7″ round top vent) that actually vents smoke, heat, and humidity outside, and only falls back to non-ducted recirculation if you choose that installation instead. If your kitchen has existing ductwork, the BCDF130SS is the only one of these two that uses it. If it doesn’t, both machines end up doing the same basic job, just at very different price points.

Power and Airflow

The BCDF130SS publishes real performance numbers — 375 max CFM and 5.5 Sones — while Broan doesn’t publish a CFM rating for the 413004 at all, consistent with it being positioned as a basic economy insert rather than a performance-rated one. Owner reviews for both describe adequate airflow for normal cooking; nobody describes either as struggling with everyday smoke and steam. The real airflow advantage of the BCDF130SS only shows up if you install it ducted, since venting outside moves heat and humidity in a way no recirculating hood can match, regardless of CFM rating.

Lighting

This is a genuine, concrete difference: the BCDF130SS ships with integrated 2-level LED lighting built in and ready to use. The 413004 accepts up to a 75W bulb, but doesn’t include one — you’re buying a bulb separately before it’s usable out of the box. If out-of-box readiness matters to you, that’s a real point in the BCDF130SS’s favor.

Noise Level

Owner reports on both are similar in shape: quiet at low and medium fan speeds, noticeably louder at the highest setting. BCDF130SS owners specifically flag high-speed noise as the one place the “quiet” marketing claim doesn’t fully hold up, though several also note it’s still quieter than the units they replaced. Neither product’s owners describe it as a dealbreaker at any speed below maximum.

What Owners Report

The 413004’s aggregated review themes center on installation, appearance, and value for money, with a specific, recurring installation quirk: the stock mounting screws assume a flush cabinet bottom, which most real cabinets don’t have. The BCDF130SS’s aggregated themes cover installation, brightness, appearance, and noise level, with detailed owner reports describing the ducted installation as more involved than a simple swap — getting the rear duct opening to align within a quarter inch of the existing wall duct, sealing joints with foil tape, and sourcing a wire bushing not included in the box. Both are real, specific complaints rather than vague dissatisfaction, and both are solvable with a bit of extra effort during install.

Value for Money

At $109, the 413004 is the clear value pick if ductless recirculation is all you need — you’re not paying for ducted capability you won’t use. The BCDF130SS’s value case depends entirely on whether you’ll actually duct it: done that way, it’s the only one of the two that meaningfully improves kitchen air quality by venting outside, which can be worth the premium. At $129 it is also no longer the expensive option it briefly appeared to be: an earlier low-stock third-party offer had pushed the listing to $349.99, and that has since resolved.

Buy the 413004 If…

You don’t have kitchen ductwork and aren’t planning to add it, you want the cheapest way to cut down smoke and odor, and you’re comfortable buying a light bulb separately.

Buy the BCDF130SS If…

You have or can install ducting and want a hood that actually vents outside, you want integrated lighting with nothing extra to buy, and you’re willing to take on a somewhat more involved installation for real ventilation performance.

The Verdict

These two aren’t competing for the same buyer. The 413004 is the pick for a straightforward, cheap ductless replacement. The BCDF130SS is the pick if you have ducting and want a hood that uses it — its integrated lighting and published CFM rating reflect a more complete product, and that’s what the higher price is paying for, not just a nicer badge on the same basic insert.

How This Comparison Was Put Together

Plainly: this is a research-based comparison, not a hands-on test. I have not run these side by side.

What it rests on: the published specification for both – airflow in CFM, whether each is ducted or ductless in the configuration compared, filter type and replacement cost, noise in sones where published, and physical dimensions against a standard cabinet opening; plus the pattern across verified-purchase reviews for each.

What I could not establish: real odour and grease removal, which no manufacturer measures publicly and which CFM alone does not describe – particularly for a recirculating configuration, where air passes a filter rather than leaving the room.

Frequently Asked Questions

Can the 413004 be ducted to the outside?

No. It’s a non-ducted (ductless) unit only. If you want ducted capability, the BCDF130SS is the one of these two that provides it.

Does the BCDF130SS include a light bulb?

Yes — it has integrated 2-level LED lighting built in. The 413004 requires you to buy your own bulb separately.

Which is quieter?

Both are quiet at low and medium fan speeds; both get noticeably louder on their highest setting, per each product’s own owner reviews. Neither pattern is unique to one product.

Is the BCDF130SS installation harder than the 413004’s?

Generally yes, if installed ducted — owners describe needing to align duct openings precisely and seal joints with foil tape. The 413004’s install challenge is different: its stock mounting screws don’t reach solid wood on cabinets with a recessed lip.

How much does the BCDF130SS cost?

It currently sells for $129. An earlier low-stock third-party offer had it listed at $349.99, well above its normal price, but that has resolved — the hood is back on a standard listing at a price close to the 413004.

Which one actually improves air quality more?

The BCDF130SS, but only if installed in a ducted configuration — venting outside removes heat and humidity that a recirculating hood can’t touch. Installed ductless, the two perform a similar basic job.

Which is the better budget pick?

The 413004, for anyone without ducting. See my full 413004 review for the complete breakdown of what owners report.

For the full lineup of ductless range hoods across every budget, see my best ductless range hood buying guide. If you’re still deciding whether a ducted or ductless setup makes more sense for your kitchen, my ductless range hood guide covers that decision in more depth, and my charcoal filter replacement guide is worth bookmarking once either hood’s filter starts to wear.

Filed Under: Product Reviews

How Often to Replace a Range Hood Charcoal Filter (And How to Tell)

Last Updated October 8, 2026

Stainless steel range hood above a gas range in a white kitchen

Photo by Created Stories from Pexels

Short answer: every 3 to 6 months for average use, but that range hides a lot. A household that fries and woks four nights a week can burn through a charcoal filter in six weeks. A household that mostly boils pasta and reheats leftovers can stretch one past nine months. Below is the actual breakdown, plus how to tell without guessing.

Charcoal filters get replaced far more often than they need to be, and far less often than they should be, because almost nobody pays attention to the actual signs instead of just marking a date on the calendar. The calendar method works fine as a backstop, but it’s not what tells you when a filter is actually done.

This is an educational guide with no product picks of its own — if you follow a link to one of my buying guides below and buy something on Amazon, I earn a small commission at no extra cost to you. Every range hood page on the site is collected on the range hoods hub.

How Often to Replace a Range Hood Charcoal Filter: The Real Range

Charcoal (sometimes called carbon) filters only exist on ductless range hoods — the ones that recirculate air back into the kitchen instead of venting it outside. If your hood vents through ductwork to the outdoors, you almost certainly have a washable metal grease filter instead, and this article doesn’t apply to you the same way (grease filters get cleaned, not replaced, roughly monthly).

For ductless hoods, here’s the frequency broken down by how hard you actually cook:

Cooking Style Replace Every Why
Heavy — frying, wok cooking, searing, daily meat 6–10 weeks (or ~120 cooking hours) Grease and smoke saturate the carbon fastest at high heat
Average — regular stovetop cooking most nights 3–6 months Manufacturer default for most residential ductless hoods
Light — occasional cooking, mostly boiling/reheating 6–9 months Low grease and odor load extends the carbon’s working life

These ranges come from manufacturer guidance across Broan-NuTone, Proline, and other range hood makers — they broadly agree, which is unusual for appliance maintenance advice.

Why Charcoal Filters Can’t Just Be Cleaned

This trips people up because the metal grease filter right next to it can be washed indefinitely. Charcoal filters can’t.

Once the activated carbon has absorbed enough grease particles and odor compounds, it’s chemically saturated — there’s no washing, soaking, or baking that restores its ability to adsorb anything else. Running water through it or scrubbing it doesn’t “clean” it; it just wets carbon that’s already full. The only fix is a new filter.

If your hood has both a metal mesh/baffle filter and a charcoal filter (a common two-stage setup), you’re doing two different maintenance jobs on two different schedules: wash the metal one every 2–4 weeks, replace the charcoal one every 3–6 months.

Signs Your Filter Is Overdue — Don’t Just Trust the Calendar

Cooking frequency varies enough between similar households that a fixed date is only a backstop.

These signs are more reliable:

  • Cooking odors linger — smells that used to clear in 10–15 minutes now hang around for an hour or more.
  • Reduced airflow or suction — the hood sounds like it’s working just as hard, but you can feel or see less air actually moving (steam sits over the pan longer instead of pulling up and away).
  • Visible grease discoloration on the filter surface, especially a yellow-brown sheen you can see without removing it.
  • New or louder motor noise — a clogged filter makes the fan work harder to pull the same volume of air, which shows up as noise before it shows up as anything else.
  • The indicator light, if your model has one — most mid-range and higher ductless hoods have a filter-change reminder on a timer, though it’s usually set to the manufacturer’s average-use default and won’t account for heavy cooking.

Any one of these on its own isn’t conclusive.

Two or more together, and it’s time.

What Actually Shortens a Filter’s Life

The manufacturer’s “3–6 months” is an average, not a guarantee, because these variables push it in either direction:

  • Cooking method — frying and searing release far more airborne grease than boiling, steaming, or baking.
    A household that fries regularly can cut the filter’s life in half or more compared to one that mostly simmers.
  • Fan speed used — running the hood on its lowest setting because it’s quieter means less air (and less grease) actually passes through the filter, which sounds like it would help, but usually just means smoke and odor escape into the room instead of being captured — false economy.
  • Kitchen size and ventilation — a small, closed kitchen concentrates cooking byproducts onto the filter faster than an open-plan space where some of it disperses before reaching the hood.
  • Whether you use the hood at all — the single biggest factor isn’t the filter, it’s whether the fan gets turned on every time something’s on the stove.
    A filter in a hood that runs consistently lasts longer per month of cooking than one that only gets used for smoky pan-searing nights.

\n\n

How to Check a Filter’s Condition in Under a Minute

  1. Remove the filter per your model’s release mechanism (usually a tab or slide-out tray behind the grease filter).
  2. Hold it up to a light source. A fresh charcoal filter lets some light through the mesh; a saturated one looks noticeably darker and denser.
  3. Smell it.
    This sounds unscientific, but it’s the fastest real test — a saturated filter smells like old cooking grease even when it looks visually okay.
  4. Check the edges and mounting frame for grease buildup, which usually shows up there before the center of the filter looks obviously dirty.

How to Replace It

Charcoal filter replacement is one of the simpler appliance maintenance jobs in the kitchen — most models take under five minutes with no tools:

  1. Turn off the hood and let it cool if it’s been running.
  2. Remove the metal grease filter first (it usually sits in front of or below the charcoal filter).
  3. Release the old charcoal filter — check your model’s manual for the exact latch, but most use spring clips or a simple slide-and-lift mechanism.
  4. Confirm the replacement filter matches your model number exactly; charcoal filters are not universal even across the same brand’s product lines.
  5. Slide the new filter into place until it clicks or seats fully, then reinstall the grease filter on top.
  6. Reset the filter-change indicator light if your model has one (usually a button held for a few seconds, per your manual).

Where to Buy a Replacement — and What to Check First

Charcoal filters are sold both by the original manufacturer and by third-party brands making compatible replacements.

A few things matter more than the price:

  • Match the exact model number, not just the brand. “Fits most Broan hoods” on a listing is a red flag — dimensions and mounting tabs vary across a single manufacturer’s own lineup, sometimes between very similar-looking model years.
  • Check whether your hood uses a standalone charcoal filter or a combination filter (grease and charcoal in one unit).
    Combination filters cost more per unit but mean one part to track instead of two separate replacement schedules.
  • Buy in twos if your model changes on a predictable schedule. If you know you’re a 3-month household, ordering two at once means you’re never caught without one on hand when the old one is visibly done.
  • Third-party filters are usually fine as long as the dimensions and mounting method match exactly — the activated carbon itself isn’t proprietary technology, it’s the physical fit that causes problems.

When It’s Not Just the Filter

Occasionally what looks like an overdue filter is actually a different problem, and a new filter won’t fix it:

  • Motor noise that doesn’t change with a fresh filter — likely a fan motor or bearing issue, not filtration.
  • Persistent smoke haze even on high fan speed with a new filter installed — often means the hood’s CFM (airflow rating) is undersized for your kitchen or stove output, not a filter problem at all.
  • Any burning smell, unusual heat, or visible damage to the housing — stop using the hood and have it inspected.
    This is an electrical or motor issue, not routine maintenance.

If a fresh filter doesn’t resolve the symptom you were chasing, the filter probably wasn’t the actual problem.

If your current hood is on its way out, my Broan-NuTone 413004 review covers a budget-friendly replacement and a genuine installation quirk worth knowing before you buy.

If you could run ducting instead, my 413004 vs BCDF130SS comparison explains why only one of the two can actually vent outside.

Frequently Asked Questions

Can I use my range hood without a charcoal filter?

Not on a ductless hood — the charcoal filter is what removes odor before the air recirculates into your kitchen.

Running it without one means smoke and cooking smells go right back into the room unfiltered. (Ducted hoods don’t need one at all, since they vent outside.)

Do all charcoal filters fit all range hoods?

No. Even within the same brand, filter dimensions and mounting mechanisms vary by model.

Always check your exact model number rather than assuming a filter that “looks about right” will fit.

Is a more expensive charcoal filter worth it?

Mostly no — the core material (activated carbon) does the same job across price points, and saturation depends far more on your cooking habits than on filter grade.

The one exception is filters with a slightly higher carbon density, which can last marginally longer under heavy use, but the difference is incremental, not dramatic.

Why does my kitchen still smell after I replaced the filter?

Check that the new filter is seated correctly first — a gap around the edges lets unfiltered air bypass it entirely. If it’s seated properly and odor is still an issue, the fan speed or the hood’s overall airflow capacity for your kitchen size may be the real problem, not the filter.

Can I wash and reuse a charcoal filter to save money?

No — this is the single most common mistake. Washing doesn’t restore activated carbon’s ability to adsorb odor and grease compounds once it’s saturated; it just wets a filter that’s already done its job. Reusing a washed charcoal filter means running your hood with essentially no odor filtration while assuming it’s still working.

For the fuller comparison of ducted vs. ductless systems — including installation, noise, and which one actually suits your kitchen — see my complete ductless range hood guide. And if you’re shopping for a new unit rather than maintaining an existing one, my picks for best ductless range hoods covers five models I’d actually recommend. Heavy frying and searing is also the exact scenario where cast iron cooking puts the most smoke and grease into the air — worth keeping in mind if you’re deciding how aggressive your ventilation setup needs to be.

Filed Under: Helpful Kitchen Tips

Why Is My Blender Leaking From the Bottom?

Last Updated October 5, 2026

A person pressing the controls on a blender jar of pink smoothie on a kitchen counter

A blender leaking from the bottom is almost always the rubber gasket around the blade assembly, not a sign the appliance is dying. That gasket seals the gap between the spinning blade and the jar, and it stiffens, warps, or loses its seal over time — a $5–15 part, not a reason to replace a $150 machine. Food residue packed under the blade assembly is the second most common cause, and it’s a five-minute fix with no parts required.

Check These Two Things First

  • The gasket. Unscrew the blade assembly from the bottom of the jar (most twist off; some have a removable base) and pull out the rubber gasket ring. Stretched, cracked, or flattened out of its original round shape means it’s done its job and needs replacing.
  • Buildup under the blade. Thick smoothie ingredients, seeds, and fibrous produce pack in around the blade base and stop the gasket from sitting flush. Even a perfectly good gasket leaks if there’s dried residue keeping it from sealing.

Fixing It

1. Disassemble and clean everything

Take the blade assembly all the way apart — jar, blade, gasket, base — and clean each piece individually rather than just rinsing the jar. Dried gunk under the blade is invisible until you separate the parts, and it’s the most common reason a “new gasket” install still leaks.

2. Inspect the gasket under good light

Look for flattening, cracks, or a warped shape that no longer sits round in its groove. A gasket that looks fine at a glance often shows damage once you flex it gently between your fingers.

3. Replace the gasket if it’s worn

Order the exact part number for your model rather than a generic size — blade assemblies vary enough between brands that a close-enough gasket often still leaks. Manufacturer parts pages list the correct part number by model.

4. Reassemble by hand-tight only

Overtightening the blade assembly can warp the gasket’s seal just as easily as under-tightening. Snug it by hand until it stops turning easily — don’t force it further with a tool.

5. Check the jar itself for cracks

If the leak continues after a fresh gasket and thorough cleaning, look at the jar base and threads for hairline cracks, especially on a blender that’s been dropped or run empty at high speed. A cracked jar needs replacing; the rest of the machine is usually fine.

What This Isn’t

A leaking blender is a seal problem, not a motor problem — the base unit and motor are essentially never the cause of a leak, since they don’t touch liquid. Don’t assume the whole appliance is failing because of a $10 gasket. It’s also not usually the bearing: bearing failure shows up as grinding noise or a wobbling blade, not water at the base.

FAQ

Why is my blender leaking from the bottom?

Almost always a worn or dirty gasket around the blade assembly. Disassemble it, clean every part including under the blade, and replace the gasket if it’s stretched, cracked, or flattened.

Can I use a generic replacement gasket?

You can, but a model-specific gasket from the manufacturer fits more reliably. Blade assembly dimensions vary enough between models that a generic size sometimes still leaks even when new.

Is a leaking blender dangerous to keep using?

Not dangerous, but liquid pooling under a blade assembly can eventually reach the base and motor if ignored for a long time. Fix the gasket rather than let it run.

How often does a blender gasket need replacing?

There’s no fixed schedule — it depends on use frequency and how hot or acidic what you blend is. A blender used daily for smoothies might need a new gasket every 1–2 years; occasional use can go much longer.

Next Steps

Clean it apart, check the gasket, replace if needed, and reassemble hand-tight — that resolves the vast majority of blender leaks without a service call. If the leak is coming from the top instead — around the lid or center cap — that’s a different set of parts entirely; see why your blender might be leaking from the top. If you’re shopping for a new machine instead of fixing an old one, the best blender food processor combo guide has current picks, and if a food processor might suit your kitchen better than a blender, best food processor covers that side of things.

Pushing a blender into jobs it wasn’t built for strains the same seals prematurely — see can you grind coffee beans in a Nutribullet for a common example of that.

Based on manufacturer parts and repair documentation, cross-checked against the pattern in owner-reported failures — not laboratory testing.

For the wider picture on choosing and living with a blender, my blenders hub collects the reviews, comparisons and the other fault guides.

Filed Under: Helpful Kitchen Tips

Espresso Machine Leaking Water? Here’s Why (and the Fix)

Last Updated October 12, 2026

A stainless steel espresso machine with white cups on a wooden kitchen counter

Before you assume the machine is dying, check the water tank first — it’s not fully seated more often than people expect, and that alone causes water to leak out the side or back instead of feeding into the machine. If the tank is seated correctly and it’s still leaking, the cause is almost always one of four things: a worn group head gasket, a blocked or damaged hose, mineral buildup from skipped descaling, or a cracked tank. All four are fixable without replacing the machine.

Start Here: Where Is It Actually Leaking From?

The location tells you most of what you need to know before you open anything up.

  • Under the water tank or at the back: Almost always the tank isn’t pushed all the way in, or the tank itself has a hairline crack. Reseat it first — this fixes the majority of “leaking” reports with no repair needed.
  • From the group head during brewing: A worn or misaligned group head gasket. This is a rubber seal that degrades with use and heat cycling over time, and it’s a normal wear part, not a defect.
  • From underneath, with murky or discolored water: A blocked or leaking drain hose, usually from coffee grounds or scale buildup inside it.
  • A slow drip that shows up gradually, clear water: Often a hairline crack in an internal hose or fitting, especially on machines more than a couple of years old — the constant pressure cycling eventually works a joint loose.

The Fixes, in Order of How Often They’re the Actual Problem

1. Reseat the water tank

Remove it completely and push it back in until it clicks or sits flush. This sounds too simple to be the answer, but it’s the single most common cause of a “leak” that isn’t actually a mechanical failure.

2. Descale the machine

Mineral buildup narrows internal passages and forces water to find another way out, which shows up as a leak even though the root cause is scale, not a broken part. If you can’t remember the last time you descaled, that’s very likely it — see how often to descale an espresso machine for a real schedule based on your water hardness and use.

3. Replace the group head gasket

This is a cheap, commonly-stocked part (usually under $15) available from the machine’s manufacturer or a compatible third-party seller. Most machines only need a screwdriver and the gasket to swap; manufacturer support pages typically have a model-specific walkthrough.

Replacing the group head gasket, step by step

  1. Unplug the machine and let it cool completely.
  2. Remove the portafilter, then locate the metal retaining ring inside the group head that holds the gasket in place.
  3. Use a group-head wrench or a flat screwdriver to release the retaining ring (some machines: turn counter-clockwise; check your model’s manual for the direction).
  4. Pull out the old gasket and the diffuser/shower screen behind it — clean both, since coffee oil buildup on the screen is a separate common cause of poor extraction.
  5. Fit the new gasket (model-specific part, not universal) into the retaining ring, then reinstall the ring and diffuser in reverse order.
  6. Reinsert the portafilter without coffee, lock it, and run a blank shot to check the seal holds before making a real espresso.

3.5 Check for signs the gasket is actually worn (before you buy one)

Confirm it’s the gasket before ordering a part: unlock the portafilter and check how far it rotates to lock in place. A healthy gasket stops the handle at roughly the 5 o’clock position; if it rotates noticeably further than that before it locks, or feels loose rather than snug, the gasket has compressed and needs replacing. Visible cracking or a flattened, brittle texture when you press it is the other clear sign.

3.6 Loose internal hose or valve connections

A cause separate from a blocked or split hose: the connection fittings themselves can work loose from repeated heat cycling and vibration, even when the hose material is fine. This shows as an intermittent leak that seems to come and go rather than a steady drip. If you’re comfortable opening the housing, check that hose clamps and push-fit connections are still seated fully; if you’re not comfortable opening the housing, this is one of the better reasons to hand it to a repair tech rather than keep guessing.

4. Check and clear the drain hose

Disconnect it, run water through it to check for blockages, and inspect the full length for cracks or splits. Coffee grounds and scale both accumulate here over time, particularly on machines that get descaled infrequently.

5. Inspect for a cracked tank or hose

If none of the above fixes it, remove the tank and check it under good light for hairline cracks, and look at where internal hoses connect to fittings for wear. Both are replaceable parts, but at this point it’s worth weighing the repair cost against the machine’s age.

When to Stop Troubleshooting and Call It

If the leak is from a hairline tank crack or a worn gasket, fix it — those are inexpensive, normal wear items. If you’re chasing an internal hose leak on a machine that’s several years old and the replacement parts cost approaches what a new budget machine costs, it’s worth comparing against current options rather than sinking more time into an aging unit. My best espresso machine under $200 guide covers what’s actually worth buying right now.

Cleaning routines can matter here too: how to clean an espresso machine covers the daily steps and what the makers say.

FAQ

Why is my espresso machine leaking from the bottom?

Most often a blocked or damaged drain hose, or a cracked water tank. Murky water pooling underneath points to the drain hose; clear water suggests the tank.

Can descaling fix a leaking espresso machine?

Yes, in many cases. Mineral scale narrows internal passages and forces water out through weak points, and this shows up as a leak with no actual part failure. Regular descaling prevents this from building up in the first place.

Is it normal for a little water to leak during brewing?

A few drops around the portafilter during extraction can be normal on some machines. A steady drip or a growing puddle is not — that’s a gasket, hose, or tank issue that needs attention.

How much does it cost to fix a leaking espresso machine?

A group head gasket typically runs $10–20. A replacement hose or tank is usually $15–40 depending on the model. Both are well worth it compared to replacing the machine, unless the unit is already old and failing in multiple ways.

If the symptom is a weak or gushing shot rather than a leak, the causes are entirely different — see what to check when an espresso machine will not build pressure.

Next Steps

Reseat the tank, then descale, then check the gasket — in that order, most leaks resolve without buying a single part. If yours turns out to be a genuine mechanical failure and it’s time to consider a replacement, the coffee equipment hub has the full range of current picks, and how to froth milk with an espresso machine is worth a read once you’re back up and running. If the leaking appliance is a drip coffee maker rather than an espresso machine, the guide to a coffee maker leaking covers the likely causes.

Based on manufacturer support documentation for the most common failures, cross-checked against the pattern in owner reports for the most common failure points — not laboratory testing.

Filed Under: Helpful Kitchen Tips

  • « Go to Previous Page
  • Page 1
  • Interim pages omitted …
  • Page 58
  • Page 59
  • Page 60
  • Page 61
  • Page 62
  • Interim pages omitted …
  • Page 70
  • Go to Next Page »

Recent Articles

  • Burr vs Blade Grinder: Which One Should You Buy?
  • Stainless Steel Pan Sticking? Causes and the Water Test
  • Carbon Steel Pan Rusting: What Makers Say to Do
  • Moka Pot Grind Size: What to Set and How to Dial It In
  • Hard Anodized vs Stainless Steel Cookware: Which to Buy

Search


HOME          Contact          Affiliate Disclosure          Terms of Service          Privacy Policy


kitchenwarecompare.com is a participant in the Amazon Services LLC Associates Program, an affiliate advertising program designed to provide a means for sites to earn advertising fees by advertising and linking to Amazon.com, Endless.com, MYHABIT.com, SmallParts.com, or AmazonWireless.com. Amazon, the Amazon logo, AmazonSupply, and the AmazonSupply logo are trademarks of Amazon.com, Inc. or its affiliates. As an Amazon Associate I earn from qualifying purchases.


Copyright © 2026 kitchenwarecompare.com, ALL RIGHTS RESERVED.