• Skip to primary navigation
  • Skip to main content
  • Skip to primary sidebar

Kitchenware Compare

  • Home
  • Product Reviews
    • Air Fryers
    • Coffee
    • Cookware
    • Flat Top Grills
    • Meat Thermometers
    • Food Processors
    • Knives
    • Pizza Ovens
    • Toaster Ovens
    • Juicers
  • Food Blog
  • Helpful Kitchen Tips
  • Data Studies
  • About
  • How I Review
  • Contact
You are here: Home / Archives for Glenn

Ceramic vs Nonstick Cookware: Which Should You Buy?

Last Updated October 18, 2026

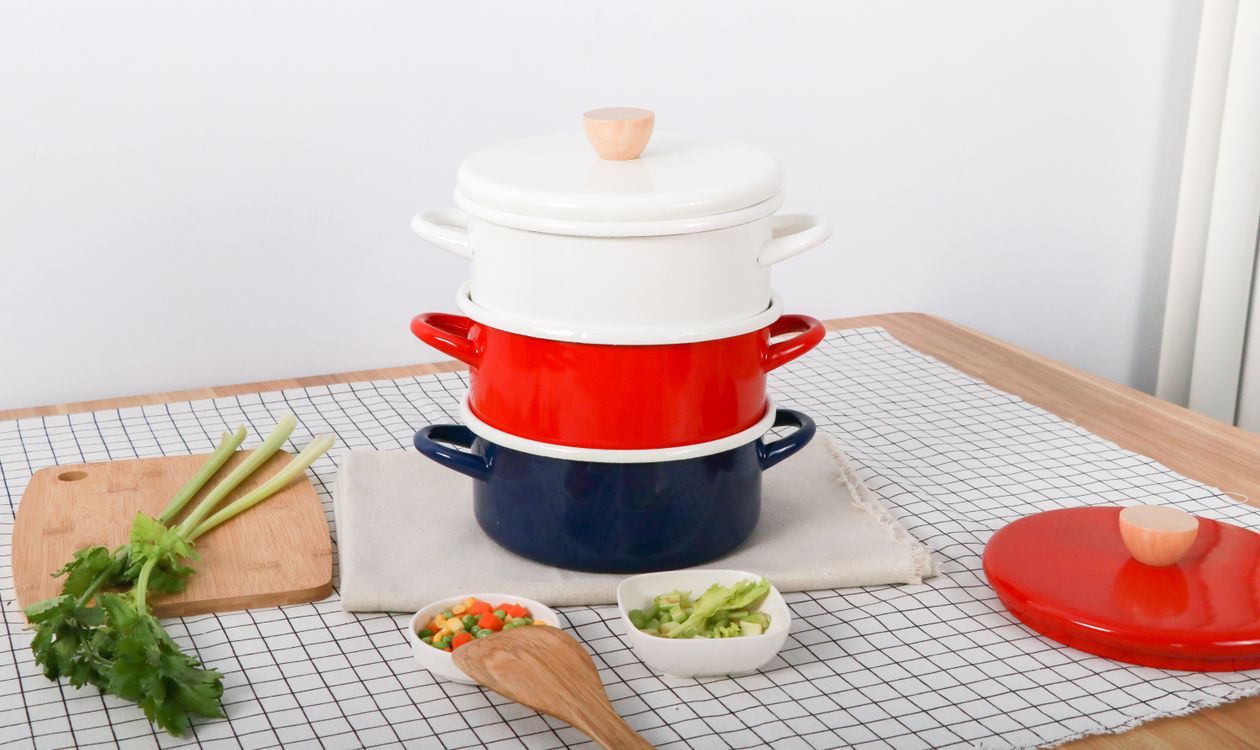
Stacked ceramic and enamel cookware on a kitchen table

Part of my cookware reviews hub — all reviews, comparisons, and buying advice in one place.

Ceramic coatings win if you want zero PTFE or PFAS in your cookware, even knowing you’ll likely replace the pans sooner. Traditional nonstick (PTFE) coatings win if you want the surface to still work well after three or four years of regular cooking.This post contains affiliate links.

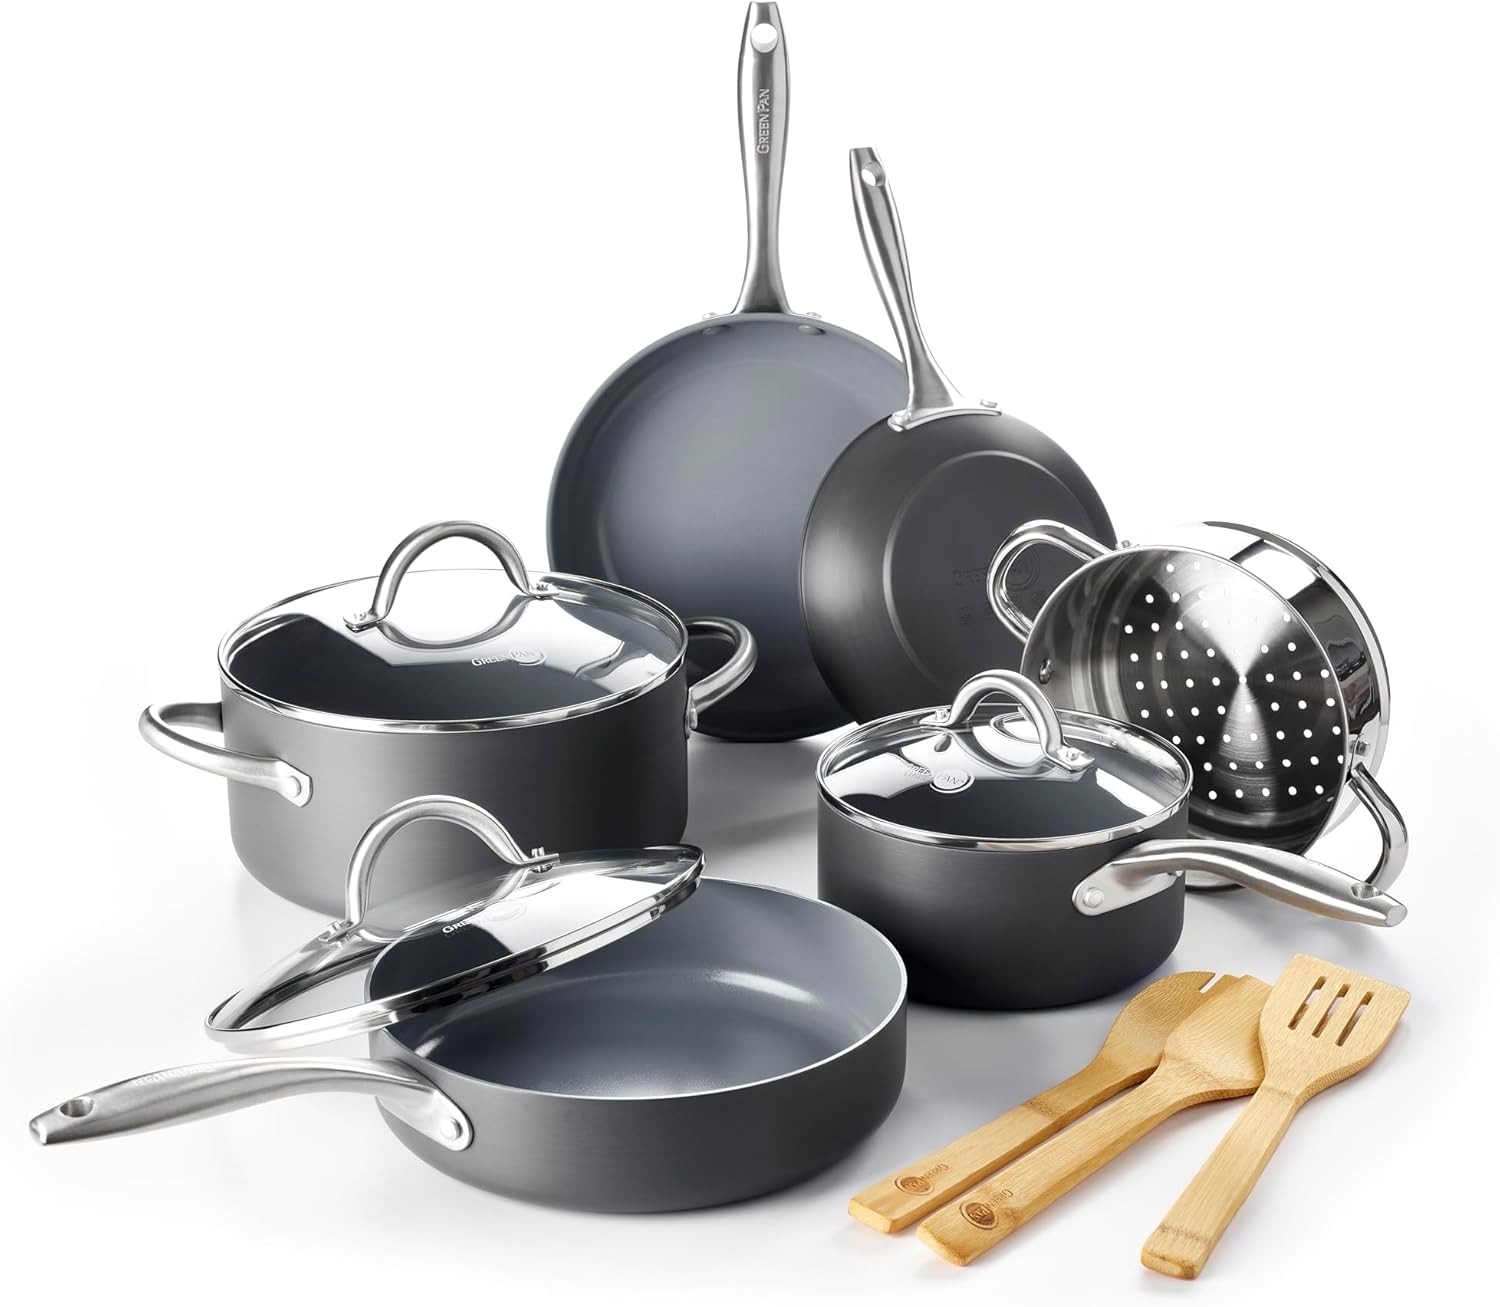
If you buy through my links, I may earn a commission at no extra cost to you. My pick for most people is traditional nonstick — it holds up more consistently over years of normal home use than ceramic does. Throughout this comparison I’m using the GreenPan Lima and T-fal Ultimate Hard Anodized as real, currently-available examples of each coating type, not as the only two sets worth considering.

Both are 12-piece hard-anodized aluminum sets in a similar price range ($150–$160), which makes this a genuinely useful comparison — the difference that matters here is the coating, not the price tier. The trade-off between the two coatings is simple: ceramic starts out with a slicker, “cleaner” feel and no chemical-coating concerns, but it degrades faster with everyday use. Traditional nonstick lasts longer if you treat it right, but it’s still PTFE.

Product Best For Price Rating Buy
GreenPan Lima 12-Piece Ceramic PTFE/PFAS-free cooking $149.99 4.4★ (1,614) Check Price
T-fal Ultimate Hard Anodized 12-Piece Long-term nonstick performance $159.99 4.7★ (8,678) Check Price

Spec Comparison

Spec GreenPan Lima (Ceramic) T-fal Ultimate (Traditional Nonstick)
Coating Ceramic (PTFE/PFAS-free) Traditional PTFE nonstick
Body material Hard-anodized aluminum Hard-anodized aluminum
Pieces 12 12
Oven safe Yes (check listing for max temp) 400°F (lids to 350°F)
Dishwasher safe Hand wash recommended Yes
Rating 4.4★ (1,609 reviews) 4.7★ (8,678 reviews)
Price $149.99 $159.99
GreenPan Lima 12-Piece Ceramic Nonstick Cookware Set

Nonstick Performance

Ceramic coatings, like the one on the GreenPan Lima, are excellent for the first several months — eggs and fish slide off with barely any oil, and there’s no PTFE smell if you accidentally overheat an empty pan. The problem is longevity. Ceramic coatings lose their slick surface faster than PTFE does, especially if you cook with any regularity at medium-high heat. Owners of ceramic pans commonly report needing extra oil for eggs within a year of near-daily use.

Traditional PTFE coatings, illustrated here by the T-fal Ultimate, start almost as slick and stays that way much longer. Two to three years of regular use is a realistic expectation before you notice real degradation, provided you’re not scraping it with metal utensils. For anyone who cooks eggs, fish, or pancakes several times a week, this is the practical difference that matters most.

Heat Distribution and Searing

Both sets use hard-anodized aluminum bodies, so heat distribution is essentially identical — no noticeable hot spots in either, and both preheat at the same rate on a gas or induction burner. Neither set is designed for aggressive searing; the nonstick coating on both limits how much of a crust you’ll get on a steak compared to stainless steel or cast iron. If searing is a priority, neither of these sets is the right tool regardless of coating type.

Response Time and Everyday Handling

Handle comfort and weight are nearly the same across both sets — both use stay-cool stainless handles and comparable pan weights for their sizes. The GreenPan lids run slightly lighter, which some people prefer when lifting a pot one-handed to check on food.

Design and Usability

Both sets come as full 12-piece kits with lids, so the count and coverage are identical — you’re choosing between coatings on otherwise comparable cookware. The GreenPan’s lighter overall build makes it marginally easier to handle for anyone with wrist or grip issues; the T-fal feels slightly more substantial but not in a way that changes daily use.
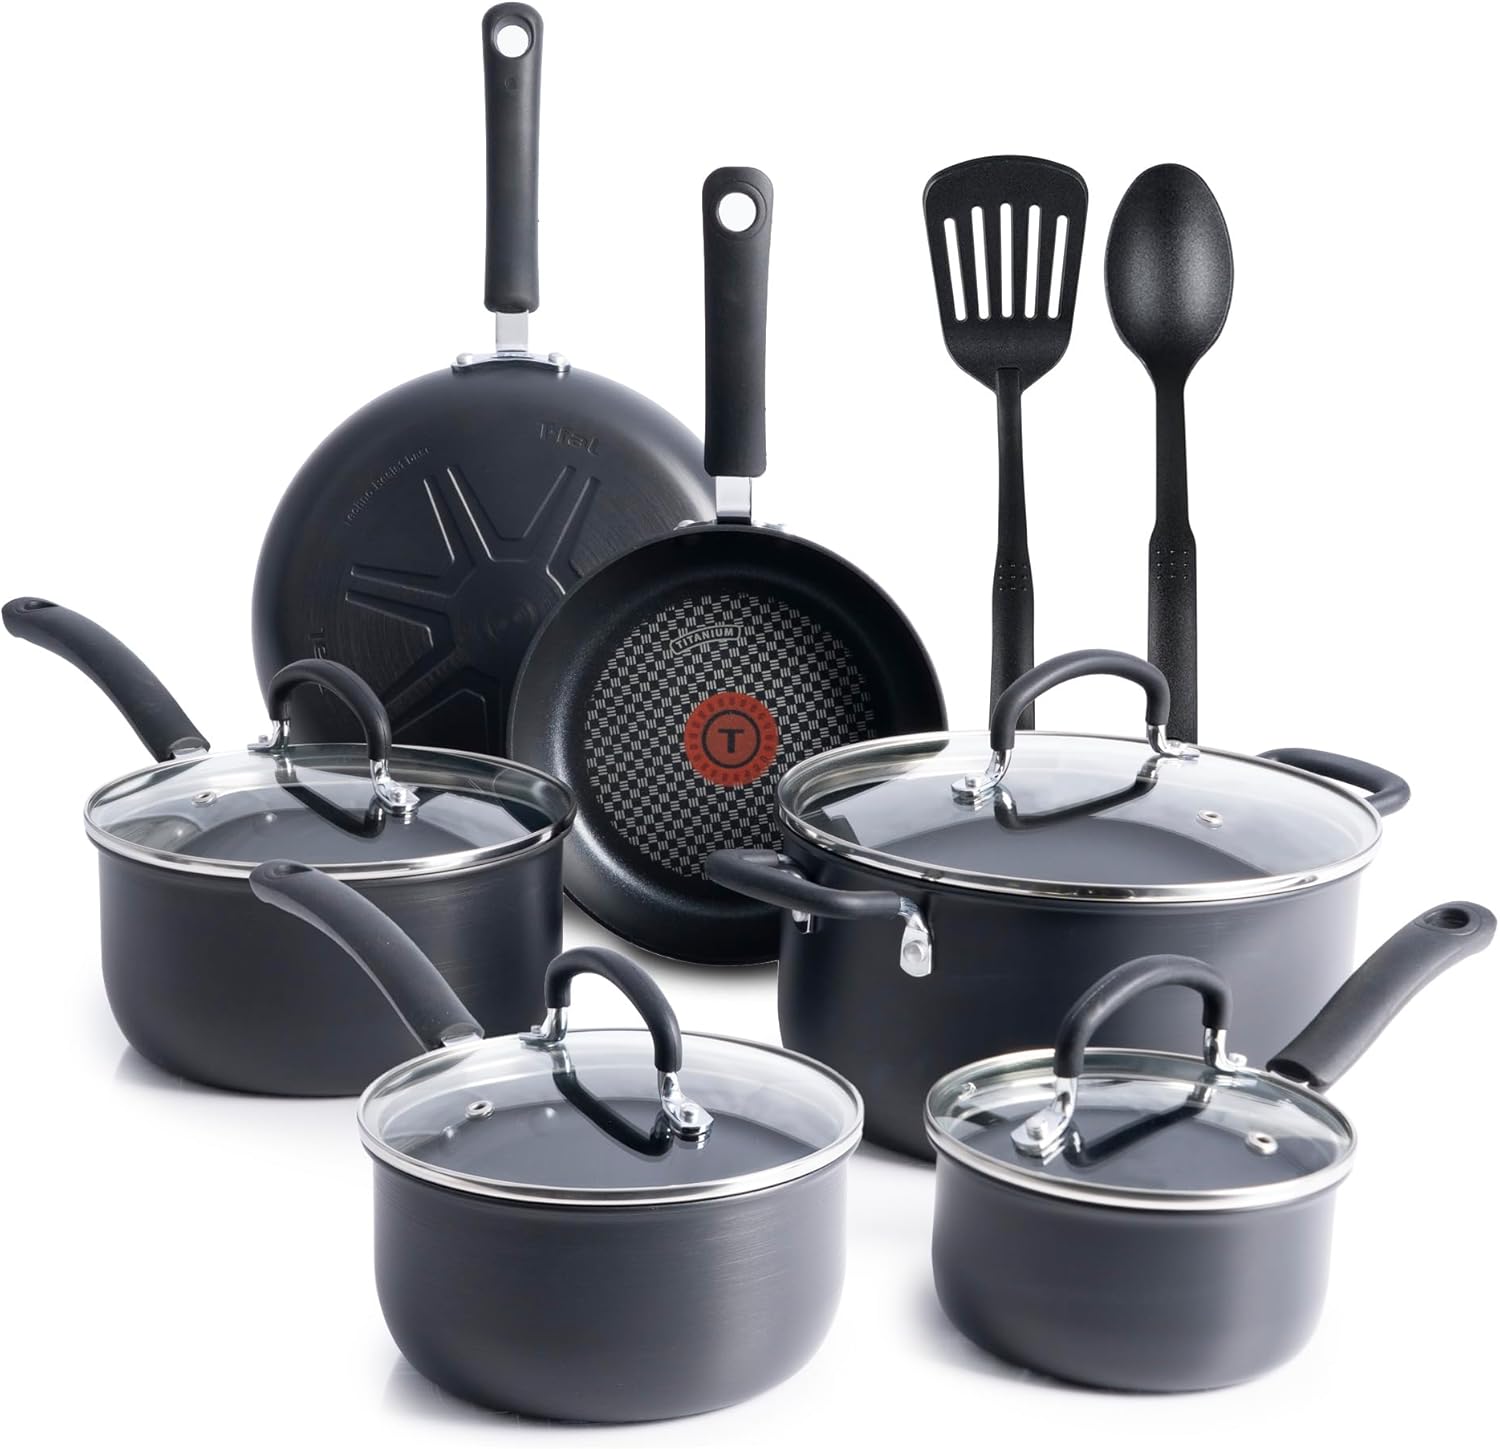
T-fal Ultimate Hard Anodized 12-Piece Nonstick Cookware Set
Check Price on Amazon ↗

Cleaning and Maintenance

T-fal’s set is dishwasher-safe according to the listing, though hand-washing extends nonstick life on any coating. GreenPan recommends hand washing — ceramic coatings are more sensitive to the heat and detergent cycles of a dishwasher, and skipping the dishwasher is one of the few things that meaningfully slows ceramic’s faster wear curve. Neither coating tolerates metal utensils or cooking spray with propellants (both build up a sticky residue over time) — use wood, silicone, or nylon tools on either set.

Value for Money

At $149.99 vs $159.99, the price difference is small enough that it shouldn’t be the deciding factor. The real cost question is replacement frequency: if ceramic needs replacing in 12–18 months of regular use and PTFE lasts 2–3 years, traditional nonstick works out cheaper over time despite the higher upfront price — the T-fal Ultimate is a good example of that — assuming you’re replacing the whole set rather than a single worn pan.

Who Should Buy Each

Buy ceramic (like the GreenPan Lima) if:

  • You specifically want to avoid PTFE and PFAS in cookware, even knowing the coating won’t last as long
  • You cook lighter-duty meals (a few times a week, not daily high-heat searing)
  • You’re comfortable hand-washing your cookware rather than using a dishwasher

Buy traditional nonstick (like the T-fal Ultimate Hard Anodized) if:

  • You cook daily or near-daily and want the nonstick surface to still work in three years
  • You want to use the dishwasher without worrying about coating wear
  • PTFE itself isn’t a concern for you (it’s not linked to health issues in cookware use — that concern is mainly about PFOA, which was phased out of nonstick manufacturing in the US years ago)

Long-Term Ownership

Neither set includes a meaningful long-term warranty against nonstick wear — that’s normal for cookware in this price range, and it’s true of nearly every set on the market. Realistically, plan to replace the frying pans in either set (not necessarily the pots) every 1–3 years depending on use, and expect ceramic to be on the shorter end of that range.

Verdict

For most people, traditional PTFE nonstick is the better choice of coating. It holds up longer under normal home cooking and tends to be dishwasher-safe. The T-fal Ultimate Hard Anodized used in this comparison is a good example of that category done well — its 4.7 rating across 8,678 reviews, well ahead of the GreenPan’s 4.4 across 1,609, is consistent with what you’d expect from the coating difference, though individual products vary within each category. For the safety evidence and a lab study on how long each coating lasts, see ceramic vs Teflon pans.

That said, if avoiding PTFE entirely is a genuine priority for you — not just a vague preference — go with ceramic. The GreenPan Lima is a legitimately good example, not a compromise pick. Just go in knowing you’ll likely be replacing the frying pans sooner regardless of which ceramic set you choose. For the full lineup of sets, see my Best Nonstick Cookware Sets guide, and if the health angle is what’s driving your decision, my piece on cast iron vs ceramic cookware covers that in more depth.

If you specifically want to avoid PTFE and PFAS entirely rather than choosing between coating types, see my guide to the best non-stick pans without Teflon.

Rice cookers pose the same coating choice for their inner pots. My best rice cooker for brown rice guide lists which pots are ceramic-coated or stainless steel, using the listings and four independent tests.

How This Comparison Was Put Together

Plainly: this is a research-based comparison, not a hands-on test. I have not run these two side by side.

What it rests on: what the two coatings actually are – a sol-gel silica layer versus PTFE – and how that difference shows up in maximum safe temperature, behaviour with metal utensils, and the mechanism by which each eventually stops releasing food; plus the pattern across verified-purchase reviews for pans of both types, where the ceramic complaint is a fast, early decline and the PTFE complaint is scratching.

What I could not establish: how long either lasts in a specific kitchen. There is no standardised abrasion test published across both coating types for consumer pans, and owner reports conflate careless heat and metal utensils with genuine coating failure. The direction of the difference is well documented; the timeline is not.

FAQs

Is ceramic cookware actually PFAS-free?

Reputable ceramic-coated cookware, including the GreenPan Lima, is genuinely PTFE- and PFAS-free — the coating is a mineral-based sol-gel finish, not a fluoropolymer. That’s different from “ceramic-look” coatings some budget brands use, which can still contain PTFE underneath a ceramic-style top layer.

Which lasts longer, ceramic or traditional nonstick?

Traditional PTFE nonstick, in almost every real-world case. Ceramic coatings typically show reduced slickness within 12–18 months of regular cooking; PTFE coatings commonly last 2–3 years or more with reasonable care.

Can I use metal utensils on either of these sets?

No. Metal utensils will scratch both coatings and accelerate wear. Use wood, silicone, or nylon utensils on either set.

Is ceramic cookware oven safe?

Yes, most ceramic cookware including the GreenPan Lima is oven safe, though always check the specific temperature limit on the listing — it’s usually lower than hard-anodized PTFE sets rated to 400°F+.

Which is easier to clean day to day?

They’re similar when the coating is new. T-fal’s set is dishwasher-safe, which makes it more convenient for daily cleanup; GreenPan recommends hand washing, which is one more step but extends the ceramic coating’s usable life.

Do either of these need to be seasoned like cast iron?

No. Both ceramic and PTFE nonstick coatings work straight out of the box — seasoning is a cast iron and carbon steel concept, not something either of these coatings needs or benefits from.

Looking for other options? My Best Non-Stick Copper Cookware guide covers copper-core sets, a third coating/construction approach not covered here.

Filed Under: Product Reviews

How to Calibrate a Meat Thermometer (Ice Water Method + More)

Last Updated October 20, 2026

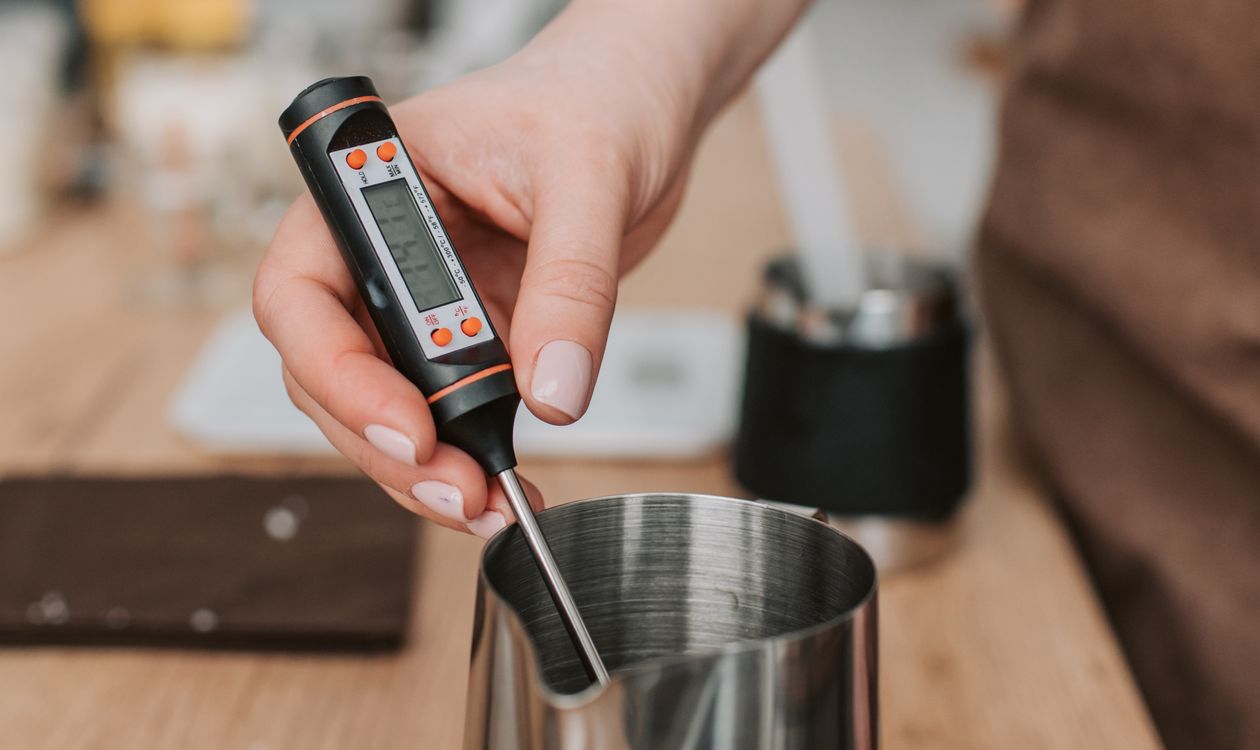
Using a digital probe thermometer while cooking

The quick answer

The ice water method is the standard way to calibrate any meat thermometer: fill a glass with ice, add cold water, stir, and insert the probe. After 30 seconds it should read 32°F (0°C). If it doesn’t, adjust your thermometer’s calibration dial or note the offset. Most quality digital thermometers don’t need manual calibration — they hold accuracy well unless dropped or exposed to extreme heat.

An inaccurate thermometer is worse than no thermometer at all — it gives you false confidence. If your probe says 165°F and your chicken is actually at 155°F, you have a food safety problem. If it says 135°F when the actual temperature is 145°F, you’ll overcook your steak chasing a doneness you’ve already passed.

Here’s how to check your thermometer’s accuracy, how to adjust it if it’s off, and when to replace it entirely.


The ice water method

This is the most reliable calibration check for home use. Ice water holds a stable temperature of exactly 32°F (0°C) at sea level regardless of how much ice or water you add, provided ice is still present. This makes it a perfect reference point.

How to do it:

  1. Fill a tall glass or container completely with ice cubes. Don’t use ice chips — the cubes hold their shape longer.
  2. Add cold tap water until the glass is almost full. The water should reach the top of the ice without overflowing.
  3. Stir the mixture for 15 seconds to equilibrate the temperature.
  4. Insert the probe into the centre of the ice water mixture, making sure the tip is not touching the bottom or sides of the glass. The sensing area must be submerged.
  5. Wait 30 seconds without stirring, then read the temperature.
  6. A correctly calibrated thermometer reads 32°F (0°C). An accuracy of ±1–2°F is acceptable for most thermometers.
At high altitude (above 1,500 feet), the boiling point of water is lower than 212°F, but the freezing point of water does not change with altitude. The ice water method works accurately at any elevation.

The boiling water method

Boiling water provides a second reference point, but altitude affects its usefulness. At sea level, water boils at exactly 212°F (100°C). At 5,000 feet (Denver, Colorado), water boils at approximately 202°F. At 7,000 feet (Santa Fe), it’s around 199°F.

If you live at or near sea level, this method is reliable. If you live at high altitude, look up your local boiling point before using this method, or stick to the ice water test.

How to do it:

  1. Bring a pot of water to a full, rolling boil.
  2. Insert the probe into the boiling water, making sure the tip is submerged but not touching the pot.
  3. Wait 30 seconds and read the temperature.
  4. At sea level, it should read 212°F (100°C). At your local altitude, adjust the expected reading accordingly.

How to adjust a thermometer that’s off

Dial (bimetallic) thermometers

Traditional dial thermometers have a calibration nut under the dial face. When the probe is submerged in ice water and reading an incorrect temperature, use pliers or the calibration wrench that came with the thermometer to rotate the dial until it reads 32°F. This type of thermometer can drift and should be checked regularly.

Digital instant-read thermometers

Most modern digital thermometers either have a calibration button (which resets the reading to 32°F when pressed while in ice water) or they don’t offer field calibration at all. Check your thermometer’s manual. If there is no calibration function and the thermometer is consistently off by more than 2°F, note the offset and adjust mentally — or replace the thermometer.

Wireless/Bluetooth thermometers (MEATER, ThermoPro, etc.)

Wireless probe thermometers like MEATER are factory-calibrated and generally do not offer user calibration. If your MEATER probe is reading noticeably off (more than 2°F in ice water), contact the manufacturer. These probes use silicon nitride ceramic tips and precision sensors; if the calibration has drifted significantly, the probe may need replacement.

MEATER’s app does include a probe check feature that can flag sensors that have drifted out of spec. For my picks across the MEATER range and competitors, see my best Bluetooth meat thermometer guide.


One class of dial cannot be calibrated at all: the gauge built into the door of a smoker or the lid of a grill. It is not adjustable, it sits in the hottest air rather than at the grate, and manufacturers accept it can read a long way out — which is why a smoker that looks like it will not heat is so often a smoker whose gauge is lying. That case is worked through in an electric smoker that is not getting hot enough.

When to replace instead of calibrate

Some signs indicate a thermometer has failed and should be replaced rather than calibrated:

  • Inconsistent readings: If you get a different number each time you test in the same ice water without moving the probe, the sensor has failed.
  • Off by more than 5°F consistently: A thermometer that far out of spec may have a damaged sensor.
  • Physical damage: A bent probe, cracked housing, or water inside the display indicates the unit is compromised.
  • After a drop: Dropping a thermometer — especially onto a hard surface — can damage the sensor or displace the bimetallic spring in dial thermometers.
  • After extremely high heat exposure: Probe tips damaged by flame or excessive ambient heat (such as placement too close to a grill burner) can produce permanently inaccurate readings.

A good meat thermometer costs between $15 and $100. The cost of a foodborne illness — or a ruined $80 brisket — is significantly higher. Replace a suspect thermometer.


How often should you calibrate?

For instant-read digital thermometers: check calibration every few months, or whenever you suspect an inaccurate reading. These hold calibration well unless dropped or subjected to extreme conditions. For the differences between thermometer types, see my guide to choosing kitchen scales and thermometers.

For dial thermometers: check before any important cook. Dial thermometers drift more easily and the calibration nut can shift during transport or handling.

For wireless probe thermometers: check once a season, or if your cooked food consistently seems over- or under-done relative to the probe readings. Test with ice water exactly as described above. See my full meat thermometer buying guide for how this compares across the whole category.

Quick routine: keep a glass, some ice, and water near your prep area. Thirty seconds before you start cooking, dip your probe. If it reads 32°F, cook with confidence.

Related guides

Related: Best Bluetooth Meat Thermometer 2026
Related: Meat Temperature Guide: Safe Temps for Every Protein
Related: Are Wireless Meat Thermometers Accurate?

Frequently Asked Questions

How do I know if my meat thermometer is accurate?
The ice water test is the standard check: fill a glass with ice, add cold water, stir, and insert the probe.

After 30 seconds, a correctly calibrated thermometer reads 32F (0C). If it reads within 1-2F of this, the thermometer is accurate enough for cooking. If it’s off by more than 2-3F consistently, it needs calibration or replacement.

Can I calibrate a digital meat thermometer?
It depends on the model. Some digital thermometers have a dedicated calibration button or setting — check your manual.

Others, including most wireless Bluetooth thermometers like MEATER, are factory-calibrated and don’t offer field adjustment. If a non-adjustable digital thermometer is consistently off by more than 2F, note the offset and adjust mentally, or replace the unit.

How do I calibrate a dial meat thermometer?
Submerge the dial thermometer probe in ice water for 30 seconds.

While still submerged, use pliers or the calibration wrench (usually included) to grip the hex nut beneath the dial face and rotate it until the dial reads 32F. This resets the bimetallic spring to the correct reference point. Verify by removing and reinserting the probe.

Does dropping a thermometer affect its accuracy?
Yes, significantly. Dropping a dial thermometer can displace the bimetallic spring and cause it to read incorrectly.

Dropping a digital thermometer can damage the temperature sensor or loosen internal connections. Always check calibration after dropping a thermometer before trusting its readings for cooking.


Filed Under: Helpful Kitchen Tips

Are Wireless Meat Thermometers Accurate? (Honest Answer)

Last Updated October 20, 2026

Grilling sausages on an outdoor barbecue

The quick answer

Yes — quality wireless meat thermometers are genuinely accurate, typically within ±1°F (±1°C) under normal conditions. MEATER, ThermoPro, and Inkbird all publish and deliver this level of accuracy. The main variables that affect readings are probe placement, oven calibration (not the thermometer’s fault), and how far the probe tip is from bone or fat. The thermometer itself is rarely the problem.

This is one of the most searched questions about wireless thermometers, and it’s a fair one. You’re trusting a wireless device to tell you whether a piece of meat is safe to eat and cooked to the texture you want. The question of whether to trust it matters.

The short answer is: modern wireless meat thermometers are accurate. The longer answer explains why, what affects that accuracy, and how to get the best readings from any probe thermometer. Every model I reference in this article is covered in depth in my best Bluetooth meat thermometer roundup.


Published accuracy specs from major brands

Brand / Model Published Accuracy Sensor Type Probe Material
MEATER Plus ±1°C (±1.8°F) Dual-sensor ceramic Silicon nitride
MEATER Pro Duo ±1°C (±1.8°F) Dual-sensor ceramic Silicon nitride
TempPro TempSync ±1°C (±1.8°F) NTC thermistor Stainless steel
ThermoPro TP20 ±1°C (±1.8°F) NTC thermistor Stainless steel
Inkbird IBT-4XS ±1°C (±1.8°F) NTC thermistor Stainless steel
Weber iGrill 3 ±1.5°C (±2.7°F) NTC thermistor Stainless steel

All of these are well within the margin needed for practical cooking accuracy. Chicken at 165°F is not meaningfully different from chicken at 163°F or 167°F for either safety or eating quality. The ±1°F specification is more than precise enough.

For comparison: the USDA’s recommended safe temperature guidelines assume a thermometer accuracy of ±2°F. Modern wireless thermometers from reputable brands beat this specification.

What actually affects accuracy in practice

Probe placement

This is the biggest variable — not the thermometer itself. The internal temperature of a thick piece of meat varies by as much as 20–30°F between the centre and the edge. Insert the probe into the thickest part, avoiding bone, fat pockets, and the cooking surface. A correctly placed probe from a mediocre thermometer will give a better reading than a poorly placed probe from a premium one.

Bone proximity

Bone conducts heat at a different rate than muscle. A probe tip resting against or near bone will read higher than the surrounding muscle temperature. Always keep the probe tip at least half an inch from any bone.

Fat pockets

Intramuscular fat melts at lower temperatures than muscle proteins cook. A probe in a fat pocket reads the fat temperature, not the muscle. In marbled cuts (brisket, ribeye), take multiple readings at different insertion points.

Ambient temperature measurement (for wireless probes with dual sensors)

Probes like MEATER measure both internal meat temperature and ambient oven/grill temperature simultaneously. The ambient sensor is exposed to direct flame and radiant heat, which can affect its accuracy if the probe is placed too close to a burner or hot spot. The internal sensor (at the probe tip, inside the meat) is insulated from this and remains accurate throughout.

Probe condition

A damaged probe tip — bent, corroded, or exposed to extreme direct flame — can read inaccurately. Check your probe before each use. Stainless steel probes (ThermoPro, Inkbird, Weber) are highly durable. Ceramic-tipped probes (MEATER) are hard and heat-resistant but can crack if dropped on a hard surface.


The comparison people make most often is against the cooker’s own built-in gauge, and that is not a fair test of the probe. A dial in a smoker door or a grill lid measures different air, in the hottest part of the chamber, and is rarely adjustable — a discrepancy there usually means the appliance is wrong rather than the probe. The full version of that argument is in the guide to an electric smoker not getting hot enough.

Independent test results

Third-party testing of major wireless thermometers consistently confirms manufacturer accuracy specs. MEATER probes tested in controlled ice water and boiling water conditions have performed within ±1°C. ThermoPro and Inkbird units tested the same way have also come within their published specs in the majority of units reviewed.

Where wireless thermometers do occasionally fall short is in Bluetooth range rather than temperature accuracy. If the probe will not pair at all, or keeps dropping out mid-cook, there is a separate guide to a wireless meat thermometer that will not connect. A probe that’s dropped its connection and is showing a cached (stale) temperature reading isn’t inaccurate — it’s not reading. This is a connectivity issue, not a sensor issue, and modern thermometers have significantly improved in this area.

The practical conclusion: if your wireless thermometer tells you your chicken is at 165°F, it is very likely at 165°F ±2°F. That is accurate enough for safe, consistent cooking.


When a wireless thermometer might give a misleading reading

Carry-over cooking during rest: The probe reading continues to rise after the meat comes off the heat. This is real physics, not inaccuracy — the meat is genuinely getting hotter. Pull your meat before your target temperature.

Stall (in smoking): During the barbecue stall, the internal temperature can plateau for hours and even temporarily drop slightly as evaporative cooling counters heat gain. The thermometer is accurately measuring what’s happening.

Reading before equilibration: Insert the probe and wait 5–10 seconds before reading. Instant-read thermometers reach their displayed temperature quickly, but probe thermometers that have been cold can take a few seconds to equilibrate to the surrounding meat temperature.

Cheap or damaged units: Budget thermometers with no published accuracy spec and no brand reputation behind them are where inconsistency is genuinely found. Buying from a reputable brand with a stated accuracy specification is the most reliable way to ensure accuracy. See my full meat thermometer buying guide for how this compares across the whole category.


Related guides

Related: Best Bluetooth Meat Thermometer 2026
Related: Meat Temperature Guide: Safe Temps for Every Protein
Related: How to Calibrate a Meat Thermometer
Related: Bluetooth vs Wi-Fi Meat Thermometers

Frequently Asked Questions

Are wireless meat thermometers as accurate as wired ones?
Yes. The accuracy of a meat thermometer depends on its sensor quality and calibration, not whether it transmits wirelessly.

Premium wireless thermometers (MEATER, ThermoPro) achieve +/-1C accuracy — the same specification as the best wired probes. The wireless transmission carries the temperature data; it does not affect how the temperature is measured.

How accurate is the MEATER thermometer?
MEATER publishes a +/-1C (+/-1.8F) accuracy spec for all its probes. Independent tests confirm this. The dual-sensor design measures both internal meat temperature and ambient cooking temperature simultaneously, and both sensors perform within this specification under normal cooking conditions.

Can I trust a meat thermometer for food safety decisions?
Yes, if it’s from a reputable brand with a published accuracy spec. USDA temperature guidelines assume a thermometer accuracy of +/-2F. Quality wireless thermometers from brands like MEATER, ThermoPro, and Inkbird all achieve +/-1F or better, making them reliable tools for food safety decisions.

Why is my wireless thermometer giving different readings than I expect?
The most common causes are probe placement (measuring too close to bone or fat), reading before the probe has equilibrated (wait 5-10 seconds after insertion), or carry-over cooking (temperature continues rising after leaving the heat). The thermometer itself is rarely the cause of unexpected readings in quality units.


Filed Under: Helpful Kitchen Tips

Best Stand Mixer: Reviews + Buying Guide

Last Updated November 4, 2026

Best stand mixer 2026

The right stand mixer depends entirely on how and how often you bake. A weekend cookie baker has completely different needs from someone turning out six loaves of sourdough a week, and the machine that suits one is an expensive irrelevance to the other. This guide is built on specifications, warranty terms and the pattern of what long-term owners report — not on spec-sheet comparison alone, and not on testing I have not done.

If you take one thing from this guide: don’t overthink the choice. The difference between a good stand mixer and a great one matters far less than you think. What matters most is getting one that matches your actual baking volume, fits on your counter, and feels comfortable to use. Read on and I’ll help you figure out exactly which one that is.

This post contains affiliate links. If you buy through my links, I may earn a commission at no extra cost to you. Both stand mixer pages on the site are collected on the stand mixers hub.

Best For My Pick Price Range
Best Overall KitchenAid Artisan 5-Qt From $379.99
Best Simple Option KitchenAid Classic 4.5-Qt $399
Best Budget Pick Cuisinart SM-50 5.5-Qt $275.37
Best for Small Kitchens Hamilton Beach 4-Qt 7-Speed $151.95
Best for Bread Bakers Bosch Universal Plus See listing

My Top Stand Mixer Picks for 2026

Each machine below is assessed against the same set of demands — stiff cookie dough, delicate chiffon batter, and bread dough heavy enough to strain any motor. Here’s where they differ.

Best Overall

KitchenAid Artisan 5-Quart Stand Mixer

From $379.99 on Amazon, depending on colour (pistachio, read 12 October 2026)

KitchenAid Artisan 5-Quart Stand Mixer
See Today’s Price on Amazon →

The KitchenAid Artisan is the stand mixer most people picture when they think of a stand mixer, and it’s earned that place through decades of consistent, reliable performance. The 325-watt motor is more than capable for anything a home baker throws at it — thick peanut butter cookie dough, royal icing that needs to be beaten stiff, whipped cream from scratch, egg whites for macarons. It handles all of it without complaint.

What sets the Artisan apart from cheaper alternatives isn’t just the motor — it’s the planetary mixing action. The beater orbits 67 points around the bowl, making contact with virtually every part of it. You don’t get pockets of unmixed flour hiding at the edges, which is a real problem with cheaper machines that simply spin in place.

The 5-quart bowl is the sweet spot for most home baking. It’s large enough for a double batch of cookies or a full loaf of bread dough, but not so enormous that half-batch recipes get lost. The tilt-head design makes swapping attachments and scraping the bowl quick and easy.

And then there’s the attachment hub — compatible with over 15 optional attachments, from pasta rollers to meat grinders. Once you own an Artisan, you can turn it into almost any kitchen tool you need.

The one consistent complaint: at 26 lbs, it doesn’t move easily. Once it’s on your counter, it tends to stay there. Make sure you have a dedicated spot for it before you buy.

Pros
  • Planetary mixing reaches every part of the bowl
  • 5-qt bowl handles most home baking tasks
  • Compatible with 15+ attachments (pasta, grinder, etc.)
  • Built to last 10–20+ years
  • 10 speeds with smooth transitions
  • Available in dozens of colors
Cons
  • Heavy at 26 lbs — not easy to move
  • More expensive than budget alternatives
  • No built-in timer or digital display

Verdict: The Artisan is the right choice for anyone who bakes regularly and wants one machine to do everything. It’s not cheap, but it’s a machine you’ll still be using in 15 years. If you prefer a simpler build, the Classic below gives you most of the same capability, though at the prices I read it was not cheaper.

Best Simple Option

KitchenAid Classic 4.5-Quart Stand Mixer

$399.00 on Amazon (white, read 12 October 2026)

KitchenAid Classic 4.5-Quart Stand Mixer
See Today’s Price on Amazon →

The KitchenAid Classic is essentially the Artisan with a slightly smaller bowl and a slightly less powerful motor. For casual to moderate bakers, that tradeoff is rarely a problem. You get the same planetary mixing action, the same attachment compatibility, the same iconic build. When I read the listings on 12 October 2026 the Classic in white was $399.00 and the Artisan in pistachio was $379.99, so the Classic was not the cheaper of the two.

The 4.5-quart bowl is the main practical difference. For a single batch of most recipes, it’s plenty. Where you start to feel the constraint is when you double a recipe or work with bulky doughs.

If you regularly bake in large quantities, choose the Artisan’s 5-quart. If you bake a batch of cookies on Sunday mornings, the Classic will never feel limiting.

The 275-watt motor (vs the Artisan’s 325W) is worth mentioning only for very stiff doughs — think bagel dough or dense whole-wheat bread. For cakes, cookies, muffins, meringues, and pasta dough, you’ll never know the difference. The motor runs just as smoothly through most everyday tasks.

The Classic also comes in fewer color options than the Artisan — if you’re particular about matching your kitchen aesthetic, that might matter. But if you just want a great mixer that works beautifully, the Classic is a sound choice, and its 4.8 stars across 12,266 ratings are the highest of the KitchenAid pair.

Pros
  • Same KitchenAid quality and attachment system
  • Rated 4.8 stars across 12,266 ratings
  • Lighter at 22 lbs
  • 10 speeds with planetary mixing
  • Well suited to everyday baking volumes
Cons
  • 4.5-qt bowl limits large batches
  • Fewer color options
  • 275W motor vs Artisan’s 325W
  • Slightly less bowl clearance

Verdict: For most home bakers, the Classic delivers everything that matters, though at the prices I read on 12 October 2026 it was $19 above the Artisan in pistachio. Unless you regularly bake double batches or very stiff bread doughs, you won’t miss the Artisan’s extra capacity or power. An exceptional choice for anyone entering the KitchenAid ecosystem.

Best Budget Pick

Cuisinart SM-50 5.5-Quart Stand Mixer

$275.37 on Amazon (read 12 October 2026)

Cuisinart SM-50 5.5-Quart Stand Mixer
See Today’s Price on Amazon →

Here’s the honest truth about the Cuisinart SM-50: it’s a genuinely capable machine that undercuts the KitchenAid Artisan. At about $275, you’re getting a 5.5-quart bowl (larger than the Artisan’s 5-quart), 12 speeds, a built-in splash guard, and performance that handles 90% of what most home bakers do every week.

The SM-50 mixes cakes, cookie doughs, whipped cream, and frosting without any issues. It’s smooth at low speeds for gentle folding and has plenty of power at higher speeds for beating egg whites stiff. Where it starts to show its limits is with very stiff doughs — dense bread dough or bagel dough will cause the motor to strain noticeably. It can get through it, but not gracefully.

The attachment ecosystem is the other area where you feel the price difference. Cuisinart attachments exist, but the selection is far more limited than KitchenAid’s, and aftermarket options are fewer. If you’re primarily interested in baking (as opposed to, say, grinding meat or making pasta), that’s less of a concern.

For a first stand mixer, for someone who bakes regularly but not obsessively, or for someone who wants to try stand mixing before committing to a KitchenAid price point — the SM-50 is a smart, practical choice.

Pros
  • 5.5-qt bowl — larger than the Artisan
  • 12 speeds for fine control
  • Splash guard included standard
  • Excellent value for the price
  • Handles everyday baking confidently
Cons
  • Strains with very stiff bread doughs
  • Limited attachment ecosystem
  • Motor quality not on par with KitchenAid longevity
  • Less refined low-speed performance

Verdict: The SM-50 is the best non-KitchenAid stand mixer for most home bakers. Don’t let the price tag fool you — it bakes cookies, cakes, and whipped cream beautifully. Just know its limits with heavy doughs, and you’ll get years of solid performance.

Best for Small Kitchens

Hamilton Beach 4-Quart 7-Speed Stand Mixer

$151.95 on Amazon.com, 4 November 2026

Hamilton Beach 4-quart 7-speed stand mixer in black with stainless steel bowl
See Today’s Price on Amazon →

This slot used to go to the Hamilton Beach 63326, a 3.5-quart model. From 28 October to 4 November 2026 Amazon showed that listing with no new-item buy box, only used and third-party offers, so the small-kitchen pick moved to Hamilton Beach’s 4-quart, 7-speed mixer, which Amazon.com had in stock and sold itself on 4 November at $151.95. It holds 4.5 stars across 10,837 ratings, with 7 percent of them one or two stars. The Hamilton Beach 63326 review still covers the older model.

Amazon’s listing gives it a 300-watt motor, planetary mixing in a 4-quart stainless steel bowl, seven speeds with a slow first speed for kneading and for adding dry ingredients, and a speed guide printed on top. A splash guard, dough hook, whisk and flat beater come in the box, and Hamilton Beach says the bowl and attachments are dishwasher safe. A handle on top of the head is there for lifting the head and for carrying the mixer to a cupboard.

That last point is the case for it in a small kitchen. The listing puts it at about 17 inches deep, 11 inches wide and 15 inches tall, so it can live in a cupboard and come out on baking days. Four quarts is still small next to the 5- and 5.5-quart bowls above: a single batch of cookie dough or a cake fits, a double batch or heavy bread dough is better left to a bigger machine.

Pros
  • Planetary mixing at well under KitchenAid prices
  • Carry handle and compact footprint for cupboard storage
  • Splash guard, dough hook, whisk and beater included
  • Dishwasher-safe bowl and attachments, per the maker
  • Large rating base with a low one- and two-star share
Cons
  • 4-qt bowl, the smallest on this list
  • Costs more than the 63326 it replaces
  • Its ratings are pooled across several colour versions

Verdict: For occasional baking, small batches and kitchens where the mixer has to go back in a cupboard. If you bake bread weekly, the Bosch or a KitchenAid is the better buy.

Best for Bread Bakers

Bosch Universal Plus 6.5-Quart Stand Mixer

No price shown on this listing on 12 October 2026; the stainless-bowl version was $599.00

Bosch Universal Plus 6.5-Quart Stand Mixer
See Today’s Price on Amazon →

I want to be upfront about the Bosch Universal Plus: it’s a polarizing machine. People who make bread love it passionately. People who primarily bake cakes and cookies sometimes find it awkward. That’s because Bosch designed it specifically around high-volume, high-resistance tasks — bread dough being the primary one.

Read the full Bosch Universal Plus review for the complete spec breakdown and what the review data says about its power, durability, and mixing performance.

The 500-watt motor is the headline. That’s roughly 1.5x the Artisan’s 325W, and it shows. Stiff whole-wheat dough, dense rye, enriched brioche — none of it causes the Bosch to break a sweat.

Owners who bake heavy doughs regularly report it working through batches that leave the KitchenAid’s motor guard light blinking in alarm. If you bake bread three or more times a week, that power difference matters enormously.

The bottom-drive design (the motor sits beside the bowl and drives the beaters from below, rather than a tilting or lifting head) is extremely stable with heavy loads — there’s no wobble or walking across the counter that you sometimes see with tilt-heads under strain. The 6.5-quart bowl also handles very large batches, making it popular with families who bake in bulk.

The tradeoff: the Bosch’s dough hook and mixing geometry is optimized for dense doughs. For whipping cream or beating egg whites, it performs fine but doesn’t have the same touch as the KitchenAid. The attachment ecosystem, while it exists, isn’t as extensive or widely available. And the design takes some getting used to — it’s more utilitarian than iconic.

Pros
  • 500W motor handles any dough without strain
  • 6.5-qt bowl for large batches
  • Bottom-drive design is exceptionally stable
  • Built for heavy, frequent use
  • Excellent for bread baking specifically
Cons
  • Design takes getting used to
  • Smaller attachment ecosystem
  • Bulkier footprint
  • Overkill (and more expensive) if you don’t bake bread regularly

Verdict: If bread baking is your primary purpose, the Bosch is the better machine — full stop. The motor capacity and stability under load are genuinely superior. For a general baking machine, the KitchenAid Artisan handles a wider range of attachments and larger batches, which is what most people actually need.

Stand Mixer Buying Guide: What Actually Matters

Across the machines on this list, here’s what separates a good stand mixer from a frustrating one.

Bowl Size

The most practical spec to get right. A 4.5-quart bowl handles a standard batch of most recipes. A 5-quart gives you comfortable headroom for slight overfilling.

A 6+ quart is for people who regularly double or triple recipes, or who bake bread in large quantities. Don’t buy more capacity than you actually use — larger bowls don’t mix small batches as effectively because the beater can’t reach the contents properly.

Motor Wattage

For cakes, cookies, whipped cream, and frosting, 250–325W is plenty. For bread dough — especially stiff whole-wheat or dense enriched doughs — you want 500W or more. The Artisan at 325W handles most bread doughs at low speed and with restraint, but the Bosch Universal Plus, which Bosch and NutriMill rate for up to 15 lbs of dough on a 500 W motor, is built for it. Know what you’ll be mixing before deciding how much motor you need.

Planetary vs Standard Mixing

Planetary mixing means the attachment orbits the bowl while rotating on its own axis simultaneously — like a planet moving around the sun. This reaches virtually every part of the bowl’s interior. Standard mixing (the attachment just spins in the center) leaves unmixed pockets at the sides and bottom.

All the machines on this list use planetary mixing. Any mixer that doesn’t is not worth your time.

The Attachment Ecosystem

One of the most underrated reasons to buy a KitchenAid is the attachment hub. The same power outlet that drives the mixer can run a pasta roller, meat grinder, spiralizer, food grinder, ice cream maker, and more. If you cook broadly and want a single machine that does many things, KitchenAid’s ecosystem is unmatched. If you just want to bake, this matters less.

Model Bowl Size Motor Speeds Best For Price
KitchenAid Artisan 5 qt 325W 10 Most home bakers From $379.99
KitchenAid Classic 4.5 qt 275W 10 Simpler build $399
Cuisinart SM-50 5.5 qt 500W 12 Budget-conscious bakers $275.37
Hamilton Beach 4-Qt 7-Speed 4 qt 300W 7 Occasional/light baking $151.95
Bosch Universal Plus 6.5 qt 500W 4 Bread bakers See listing

Frequently Asked Questions

Is a stand mixer worth it if I only bake occasionally?

For true occasional bakers — a few times a year — a hand mixer is probably sufficient and more practical to store. The stand mixer investment makes sense when you bake at least once a week. At that frequency, the hands-free operation and superior power start saving you significant time and effort, and the machine pays for itself in convenience. The tipping point for most people is bread dough — once you try kneading bread in a stand mixer, going back to hand-kneading becomes genuinely painful.

How long does a KitchenAid stand mixer last?

A properly maintained KitchenAid should last 10–20 years without major issues. Many people inherit their parents’ machines and they still run perfectly. The keys to longevity: never overload the motor on speed 10 with stiff dough (keep it at speed 2 for bread), clean the attachment hub regularly, and if you hear a grinding noise, stop immediately and investigate. KitchenAid’s customer service and replacement parts availability are excellent, which extends the practical lifespan even further.

Can a KitchenAid Artisan handle bread dough?

Yes, with some discipline. Use speed 2 only for bread dough — never higher. Mix in 2-minute intervals and let the motor rest for a minute in between. This prevents motor overheating.

For light bread doughs (enriched doughs like brioche, standard white sandwich bread), the Artisan handles it comfortably. For very stiff whole-wheat or high-hydration sourdough in large quantities, you’ll get better results with the Bosch or a dedicated bread machine.

What is the difference between a tilt-head and bowl-lift stand mixer?

Tilt-head mixers (KitchenAid Artisan, Classic) hinge the head back to give you access to the bowl and attachment. Bowl-lift mixers (KitchenAid Pro 600, Bosch) use a lever to raise the bowl to the attachment. Bowl-lift designs are more stable under heavy loads because the head is locked in place — you’ll see less wobble and walking with stiff doughs.

Tilt-heads are slightly more convenient for adding ingredients mid-mix. For most home bakers, tilt-head is perfectly adequate.

Do I need to buy the KitchenAid brand attachments, or do third-party ones work?

Third-party attachments generally work on KitchenAid machines because the power hub dimensions are standardized. Quality varies significantly — some aftermarket attachments are excellent, some are poor. For the pasta roller and other precision attachments, I’d recommend spending the extra money on genuine KitchenAid versions.

For simpler attachments like extra bowls or flex-edge beaters, third-party options are usually fine. Always check compatibility with your specific model.


How much should I spend on a stand mixer?

For occasional home baking, a budget model in the $150-250 range is enough. If you bake weekly or make bread dough regularly, the added torque and bowl capacity on a $350-450 machine like the KitchenAid Artisan pays off within a couple of years of use.

How These Picks Were Chosen

Plainly: this is a research-based guide, not a hands-on test. I have not run these through a cook, and nothing here should be read as a report from my own kitchen.

What the picks rest on: motor wattage set against gearing and whether the gears are metal or nylon, bowl capacity in real dough terms rather than nominal quarts, tilt-head versus bowl-lift geometry, and the breadth and cost of the attachment ecosystem; plus the complaint patterns across verified-purchase reviews, which for stand mixers are unusually clear — stripped gears under stiff dough, bowl-lift wobble, and heat build-up on long runs.

What I could not establish: how long each motor lasts, which is the single thing most buyers actually want to know and the hardest thing to find out. There is no independent longevity test across these machines. What this guide uses instead is warranty length and the frequency of failure reports among long-term owners — weaker evidence than a test, and it should be weighted as such. Anyone telling you confidently which of these will last twenty years is guessing.

Related Reading

Deciding between the KitchenAid models?

  • KitchenAid Classic vs Artisan – detailed comparison of specs, price difference, and which to buy
  • Best Stand Mixer for Bread Dough – maker flour limits and two dough tests, for bread-first bakers
  • KitchenAid Stand Mixer Problems – what KitchenAid’s own help pages say about oil leaks, wobble and shut-offs
  • Best Chef’s Knife 2026 – the natural companion to a stand mixer for a fully equipped kitchen
  • Basic Cooking Tools Every Chef Should Own – where a stand mixer fits in the bigger picture

The Bottom Line

For the vast majority of home bakers, the KitchenAid Artisan is the right choice. It is the model that has been in production longest, and the one owner reports most consistently describe still working after a decade or more. If you don’t need the extra capacity, the KitchenAid Classic gives you the same design, and the Cuisinart SM-50 is the cheaper route.

If you’re budget-constrained and want a capable machine right now, the Cuisinart SM-50 is an honest performer that won’t embarrass you. And if bread is your primary focus, do yourself a favour and look at the Bosch Universal Plus — nothing else handles heavy dough as effortlessly. Whichever you choose, a quality stand mixer is one of those kitchen investments that genuinely improves the experience of cooking, every single time you use it.


Filed Under: Product Reviews

KitchenAid Classic vs Artisan Stand Mixer: Is the Upgrade Worth It?

Last Updated October 20, 2026

Woman using a KitchenAid stand mixer to bake

This post contains affiliate links. If you buy through my links, I may earn a commission at no extra cost to you. Read the full disclosure. Both stand mixer pages on the site are collected on the stand mixers hub.

The quick answer

For most home bakers, the KitchenAid Artisan is the one to buy. The extra half-quart of bowl capacity and the slightly stronger motor make a real difference for bread doughs and large batches. The Classic is the right choice if budget is the deciding factor or if you bake in smaller quantities and want a smaller, simpler way into the KitchenAid ecosystem.

KitchenAid Classic K45SS Stand Mixer
KitchenAid Artisan KSM150 Stand Mixer

The KitchenAid Classic and the KitchenAid Artisan are, from the outside, almost identical. Same silhouette. Same tilt-head design.

Same attachment hub. Same satisfying thunk when you lock the head down. If you put them side by side without the labels, most people couldn’t tell them apart.

But the differences matter. Comparing the two on specification and owner feedback shows exactly what you give up by buying the Classic, and whether that trade-off makes sense for how you bake.

Feature KitchenAid Classic KitchenAid Artisan
Bowl capacity 4.5 quarts 5 quarts
Motor 275 watts 325 watts
Speeds 10 10
Attachments hub Yes (same hub) Yes (same hub)
Bowl type Flat-bottomed Flat-bottomed
Colour options Limited Over 20 colours
Head design Tilt-head Tilt-head
Typical price $399.00 (white) From $379.99, depending on colour

The bowl capacity difference: half a quart matters more than you think

Four and a half quarts vs five quarts. In absolute terms, it’s not much. In practice, it’s the difference between a comfortable double batch of cookie dough and a double batch that’s pushing the bowl’s limits. It’s the difference between kneading a standard 500g bread dough with room to spare, and a 700g dough that has the hook working hard.

If you bake in small quantities — a single loaf, a dozen cookies, one cake at a time — the Classic’s bowl is perfectly adequate. If you bake double batches, or if you ever want to make a large quantity of bread dough at once, the Artisan’s extra half-quart will be something you notice and appreciate regularly.

The motor: 275W vs 325W

The Classic’s 275-watt motor handles most tasks comfortably. Cakes, cookies, whipped cream, pasta dough — all fine. Where it starts to work harder is in stiff enriched doughs: brioche, bagels, anything with a high proportion of butter or a lot of gluten development required. You’ll notice the motor slow down under load in these situations.

The Artisan’s 325-watt motor handles these tasks with noticeably less effort. It doesn’t strain under a stiff brioche dough. This matters for the long-term health of the machine as much as the immediate cooking experience — a motor that’s regularly pushed to its limits wears faster than one operating comfortably within its range.

Attachments: the same, and that’s the point

Both the Classic and the Artisan use the same attachment hub. Every KitchenAid attachment — pasta roller, meat grinder, food processor, ice cream maker, grain mill — fits both machines identically. This is one of KitchenAid’s great strengths as a brand: the attachment ecosystem is enormous, and it doesn’t discriminate by model.

If you plan to build a collection of KitchenAid attachments over time, you don’t need to stretch to the Artisan for attachment compatibility. The Classic will accept them all.

Colour and aesthetics

The Artisan comes in over 20 colours. The Classic comes in a smaller selection. This sounds trivial, and for most people it is — but the KitchenAid is often a countertop centrepiece, and if you want it to match your kitchen exactly, the Artisan gives you that option.

The honest long-term view

Both machines are built to last decades. The die-cast metal construction is overbuilt in the best possible way. Whichever one you buy, you are very likely buying the last stand mixer you will ever need to buy. If one does develop a leak or a wobble, KitchenAid stand mixer problems sets out what KitchenAid’s own help pages say to check.

That durability changes the value calculation. Any extra cost for the Artisan, spread over 20 years of daily baking, is negligible, and on 12 October 2026 the gap ran from $19 in the Artisan’s favour (pistachio) to about $90 against it, depending on colour. The question is whether you’ll notice the differences in the first place.

Buy the KitchenAid Classic if…

  • You bake in smaller quantities and rarely push bowl capacity
  • Budget is a genuine constraint
  • You want a smaller, simpler entry into the KitchenAid attachment ecosystem
  • You mostly make cakes, cookies, and light doughs

Buy the KitchenAid Artisan if…

  • You bake double batches or large quantities regularly
  • You make enriched or stiff bread doughs (brioche, bagels, pizza)
  • You want the full colour range for your kitchen aesthetic
  • You want more motor headroom for long-term reliability

The verdict

If you bake regularly and seriously, buy the Artisan. The extra capacity and motor power are real advantages that you’ll feel every time you use it. If you’re an occasional baker or you’re buying it primarily for lighter tasks, the Classic is an excellent machine, and often the cheaper of the two. Either way, you’re buying one of the best stand mixers ever made.

Want a metal-bodied alternative at a lower price than either KitchenAid model? See my Cuisinart SM-50 review for a genuine mid-tier option with its own optional attachment line.

Want the Cuisinart and the Artisan compared head-to-head instead of each against the Classic? See my Cuisinart SM-50 vs KitchenAid Artisan comparison.

Weighing the Artisan against the true budget option instead? See my Hamilton Beach 63326 vs KitchenAid Artisan comparison.

Considering a mixer built for heavy bread dough instead? See Bosch Universal Plus vs KitchenAid Artisan: which wins.

See KitchenAid Classic Price →
See KitchenAid Artisan Price →
Related: Best Stand Mixer 2026: Full Buying Guide
Related: Basic Cooking Tools Every Chef Should Own

How This Comparison Was Put Together

Plainly: this is a research-based comparison, not a hands-on test. I have not run these side by side.

What it rests on: the published specification for both – bowl capacity, motor wattage, tilt-head geometry which the two share, bowl attachment style, and the colour and accessory range that accounts for much of the price difference; plus the pattern across verified-purchase reviews for each, where the recurring question is whether the Artisan premium buys anything mechanical.

What I could not establish: whether either motor lasts longer than the other. No independent longevity test compares them, and since the two share a great deal of their mechanism the honest answer is that the difference is mostly capacity and finish rather than durability.

Frequently Asked Questions

Is the KitchenAid Classic still worth buying in 2026?

Yes, for the right buyer. The Classic is an excellent entry point into the KitchenAid ecosystem at a lower price. If you bake smaller quantities and don’t need the extra bowl capacity or motor power of the Artisan, the Classic is a sound investment that will last decades. If your baking is growing in ambition or volume, the Artisan is the better long-term choice.

Do both the Classic and Artisan use the same attachments?

Yes. Both models share the same KitchenAid power hub, meaning every official KitchenAid attachment (pasta roller, meat grinder, food processor, ice cream maker, grain mill) fits both machines. Attachment compatibility is not a reason to choose one model over the other.

What is the warranty on KitchenAid stand mixers?

KitchenAid offers a 1-year full warranty on all stand mixers, covering parts and labor. Extended warranties are available through KitchenAid directly or via retailers. Given that these machines routinely last 20-30 years with normal use, the standard warranty period is rarely a concern.

Is a half-quart difference in bowl capacity really noticeable?

More than you’d expect. The difference becomes apparent when you’re making a double batch of cookies, a large bread dough, or any recipe that fills the bowl. A 4.5-quart bowl fills to capacity faster, which can cause ingredients to spill over the edge if you overfill. The 5-quart Artisan bowl gives you meaningful headroom for larger batches.


Filed Under: Product Reviews

  • « Go to Previous Page
  • Page 1
  • Interim pages omitted …
  • Page 60
  • Page 61
  • Page 62
  • Page 63
  • Page 64
  • Interim pages omitted …
  • Page 70
  • Go to Next Page »

Recent Articles

  • Burr vs Blade Grinder: Which One Should You Buy?
  • Stainless Steel Pan Sticking? Causes and the Water Test
  • Carbon Steel Pan Rusting: What Makers Say to Do
  • Moka Pot Grind Size: What to Set and How to Dial It In
  • Hard Anodized vs Stainless Steel Cookware: Which to Buy

Search


HOME          Contact          Affiliate Disclosure          Terms of Service          Privacy Policy


kitchenwarecompare.com is a participant in the Amazon Services LLC Associates Program, an affiliate advertising program designed to provide a means for sites to earn advertising fees by advertising and linking to Amazon.com, Endless.com, MYHABIT.com, SmallParts.com, or AmazonWireless.com. Amazon, the Amazon logo, AmazonSupply, and the AmazonSupply logo are trademarks of Amazon.com, Inc. or its affiliates. As an Amazon Associate I earn from qualifying purchases.


Copyright © 2026 kitchenwarecompare.com, ALL RIGHTS RESERVED.