• Skip to primary navigation
  • Skip to main content
  • Skip to primary sidebar

Kitchenware Compare

  • Home
  • Product Reviews
    • Air Fryers
    • Coffee
    • Cookware
    • Flat Top Grills
    • Meat Thermometers
    • Food Processors
    • Knives
    • Pizza Ovens
    • Toaster Ovens
    • Juicers
  • Food Blog
  • Helpful Kitchen Tips
  • Data Studies
  • About
  • How I Review
  • Contact
You are here: Home / Archives for Glenn

What Does Wild Boar Taste Like? Nuttier and Leaner Than Pork

Last Updated October 5, 2026

Two wild boar standing in a grassy forest clearing, showing the dark coarse coat and lean build typical of the species

Wild boar tastes like pork with the volume turned up: darker, denser, and distinctly nuttier, with a sweetness that farmed pork mostly lost decades ago. How strong that flavour gets depends almost entirely on which animal you have. A ranch-raised boar from a butcher and a hunted feral hog are different eating experiences, and they need different handling once they reach the kitchen. One of those differences is a genuine food-safety issue that most flavour guides skip entirely.

The short answer

Wild boar reads as pork to most people on the first bite, then diverges. The meat is darker — closer to beef than to a supermarket pork chop — and the texture is firmer and more close-grained. The flavour that people reach for words to describe is usually called nutty, sometimes sweet, occasionally described as having a faint hazelnut or chestnut quality through the fat.

It is not, in the usual case, strongly gamey. That surprises people who expect something closer to venison. Wild boar sits much nearer to pork on the spectrum than to deer, and noticeably nearer than lamb does to beef, and a well-handled young animal can be milder than a lot of people anticipate. When wild boar does taste strong, there are specific reasons for it, covered further down.

The other consistent difference is fat. A farmed pig is bred for it; a wild animal that spends its life moving is not. Wild boar is markedly leaner, and the fat it does carry is distributed differently — less of an even marbling, more of a distinct cap. That single fact drives most of the cooking advice that follows, because lean meat with little intramuscular fat punishes overcooking far more harshly than a fatty pork shoulder does.

Which animal do you actually have?

This is the question that determines everything else, and it is the one most articles on the subject skip. “Wild boar” covers two quite different things.

Ranch-raised or farm-raised wild boar

Most wild boar sold in the United States through butchers, online meat purveyors and restaurants is ranch-raised or ranch-harvested, and passes through USDA inspection. These animals are genuine Sus scrofa rather than domestic pigs, so the flavour difference from supermarket pork is real, but they are harvested at a controlled age and handled under commercial conditions.

The practical result is consistency. The meat is milder, the age is known, and the cuts arrive trimmed and portioned the way pork does. If someone tries wild boar for the first time at a restaurant and finds it pleasant but not dramatic, this is almost always what they ate.

Hunted feral hog

The other kind arrives from a hunter, and it is far more variable. Age, sex, season and diet all swing the result, and none of them are controlled. A young feral hog taken in autumn after weeks of feeding on acorns can be excellent. A mature male taken in a lean season can be strong-flavoured and tough enough to need long, slow cooking to be worth eating at all.

This is also the category where the food-safety guidance genuinely differs, and where the assumption that wild boar is “just pork” causes problems.

How it differs from supermarket pork

Placed side by side, the differences are visible before anything is cooked.

  • Colour. Wild boar is a deeper red. Modern commercial pork has been bred pale over several decades; wild boar retains the darker myoglobin-rich colour that comes with an active life.
  • Fat. Substantially less of it, and less evenly distributed. Where a pork chop carries fine marbling through the muscle, wild boar tends toward a firmer external fat cap with leaner meat beneath.
  • Texture. Denser and more close-grained. The muscle has done more work.
  • Flavour. More pronounced, with the nutty and faintly sweet quality that gives the meat its reputation.
  • Shrinkage. Less fat and less water means noticeably less shrinkage in the pan, but also far less margin before the meat dries out.

The comparison people find most useful is that wild boar sits roughly where pork sat before intensive breeding pushed it toward leanness and mildness at the same time. It is closer to what a pig used to taste like.

Why some wild boar tastes strong

The complaint that wild boar can taste unpleasantly strong is real, and it is usually traceable to one of three things.

Age and sexual maturity. This is the big one. Two compounds are responsible for what the pork industry calls boar taint. Androstenone is produced in the testes of sexually mature males and, being fat-soluble, accumulates in fatty tissue; its concentration climbs sharply as a male animal approaches sexual maturity.

Skatole is a byproduct of gut bacteria and is present in both sexes, but testicular steroids slow the liver’s ability to break it down, so it builds up in the fat of intact males as they mature. Research on domestic pigs commonly cites thresholds in the region of 1,000 ng/g of androstenone and 200 ng/g of skatole in back fat as the point where a carcass reads as tainted.

The practical takeaway for anyone eating rather than studying it: a young animal is a much safer bet than a mature male, and because both compounds concentrate in fat, trimming the fat hard reduces the problem considerably.

Handling in the field. A hunted animal that was not cooled quickly, or was poorly dressed, will taste worse regardless of its age. This has nothing to do with the species and everything to do with what happened in the first few hours.

Diet. Genuine, but usually in a good direction rather than a bad one — see below.

Does the acorn diet really change the flavour?

Yes, and this is not marketing. Animals that have fed heavily on mast — acorns, beech nuts, pecans — take on a more pronounced nutty character, and the fat in particular carries it. The same principle is well established at the premium end of European pork production, where pigs finished on acorns are prized precisely for what the diet does to the fat.

The catch is that a wild animal’s diet is not under anyone’s control. A feral hog that has been raiding a maize field, or working through refuse, will not taste like one that spent autumn under oak trees. This is a substantial part of why hunted wild boar varies so much more than the ranch-raised version, and why anyone selling wild boar as consistently nutty is selling a controlled diet, not a wild one.

Is wild boar safe to eat?

It is, cooked properly. But wild boar carries a risk that commercial pork has largely designed out, and the difference matters.

The CDC names wild boar explicitly in its list of meats at risk of carrying Trichinella, alongside bear, wildcat, fox, wolf, seal and walrus. Trichinellosis in the United States is now seen mainly in people who have eaten raw or undercooked wild game, or pork from non-commercial or feral sources — not in people eating supermarket pork, where controlled feeding has made the parasite rare.

That is the whole reason the “wild boar is just pork” assumption is worth resisting. The safety advice that applies to a pork chop was written for an animal raised under conditions a feral hog has never encountered.

What temperature to cook wild boar to

Here is where honesty is more useful than a confident number. The USDA’s safe minimum internal temperature chart does not list wild boar. It lists pork steaks, roasts and chops at 145°F (63°C) with a three-minute rest, ground meat and sausage at 160°F (71°C), and — the relevant entry — “rabbit and venison, wild or farm-raised” at 160°F (71°C).

So the chart covers game generally at 160°F, and covers pork at 145°F, and leaves the animal that is both to inference. Given that the CDC specifically names wild boar as a Trichinella risk, the cautious reading is to treat it as game rather than as pork:

  • 160°F (71°C) for hunted feral hog, of any cut, and for anything ground.
  • 160°F (71°C) remains the safe choice for ranch-raised wild boar too, though the risk profile of a USDA-inspected animal is lower.
  • The 145°F pork figure is predicated on commercial pork production and should not be assumed to transfer.

None of this is possible to judge by eye, and wild boar’s darker colour makes visual doneness cues even less reliable than they are with pork. A probe thermometer is the only way to know, and it doubles as the single most effective defence against the other risk with this meat, which is drying it out. Any of the leave-in probes covered in the BBQ thermometer guide will do the job.

Why freezing does not make wild boar safe

This is the point that most flavour-focused articles get wrong, and it is worth stating plainly because the advice that circulates is actively misleading.

Freezing works for pork. The CDC’s guidance is specific: freezing pork less than six inches thick for 20 days at 5°F (-15°C) will kill any worms. Many people know this and generalise it.

It does not generalise. In the CDC’s own words: “Freezing wild game meats may not effectively kill all worms because some worms that infect wild game are freeze-resistant.” The species that infect wildlife are not the same as the species controlled for in pork production, and some of them survive freezing that would deal with the pork parasite.

The same guidance rules out the other methods people assume are protective: “Curing (salting), drying, smoking, or microwaving meat alone does not consistently kill the worms.” A home-cured wild boar salami made from an untested animal is not made safe by the curing process.

Cooking to temperature is the reliable control. Everything else is a preference.

How to cook it so it is not dry

The tension in cooking wild boar is obvious once both facts are on the table: the meat is very lean, and it needs to reach 160°F. That combination will ruin a lean cut treated like a pork chop.

The way around it is to choose methods that suit the cut rather than fighting the temperature requirement.

  • Shoulder, leg and shank reward long, slow, moist cooking — braises, stews, ragù, the kind of thing a cast iron Dutch oven is built for. Connective tissue breaks down into gelatin, which compensates for the missing fat. These cuts are the reason wild boar ragù is a fixture on Italian menus, and they are the most forgiving place to start.
  • Loin and tenderloin are the risky cuts, being both the leanest and the ones people are tempted to cook quickly. Brining helps meaningfully here. So does barding or wrapping in fat, and so does pulling the meat at temperature rather than by time.
  • Ground wild boar benefits from added fat. Many butchers blend it with pork fat for exactly this reason, and a burger made from unblended wild boar will be noticeably dry at a safe internal temperature.
  • Trim the fat hard if the animal is a mature male or of unknown age, since that is where the strong-flavour compounds concentrate.

Marinades containing acid — wine, vinegar, buttermilk — are traditional with this meat and do help with both tenderness and any lingering strength of flavour, though they will not rescue a badly handled animal.

Where to buy wild boar

Specialist online meat purveyors are the most common route, and several ship ranch-raised wild boar nationally. Some butchers stock it seasonally, and it appears more reliably in areas with established hunting traditions.

What to expect: it costs more than pork, it is usually sold frozen, and the cuts on offer are narrower than the pork counter — shoulder, leg, loin, ribs and ground being typical. For a first attempt, shoulder is both the cheapest and the least likely to disappoint, because the cooking method that suits it is the one with the most margin for error.

How this guide was put together

This is a research-based guide rather than an account of firsthand cooking. The food-safety guidance is taken directly from the CDC’s trichinellosis prevention material and the USDA’s safe minimum internal temperature chart, both linked above and quoted rather than paraphrased where the exact wording matters. The description of boar taint compounds reflects the established meat-science literature on androstenone and skatole.

The flavour and texture descriptions summarise what butchers, purveyors and cooks consistently report, and are presented as that rather than as a personal verdict. The same approach is used across the other flavour guides on this site, including the one on what jackfruit tastes like.

Where the sources genuinely do not settle a question — as with the absence of wild boar from the USDA temperature chart — that gap is stated rather than papered over with a number that sounds official.

If you are curious about other foods, see what crawfish and okra taste like.

Frequently asked questions

Does wild boar taste gamey?

Less than most people expect. It is richer and nuttier than pork, but it is much closer to pork than to venison. Strong or unpleasant flavour is usually down to a mature male animal, poor field handling, or both, rather than the species itself.

Is wild boar just pork?

Biologically they are the same species, but the eating experience is not the same. Wild boar is leaner, darker, firmer and more strongly flavoured, and — importantly — the food-safety guidance that applies to commercial pork does not transfer to a hunted animal.

Can wild boar be cooked medium rare?

No. The CDC identifies wild boar as a meat that can carry Trichinella, and the USDA’s game guidance is 160°F (71°C). Pork’s 145°F figure relies on commercial production conditions that a feral animal has not been through.

Does freezing wild boar kill parasites?

Not reliably. Freezing works for pork, but the CDC states that freezing wild game may not kill all worms because some species that infect wild game are freeze-resistant. Cooking to temperature is the dependable control.

Why does some wild boar smell strong when cooking?

Androstenone and skatole, the two compounds behind what the pork industry calls boar taint, concentrate in the fat of sexually mature males. Both become more noticeable when heated. Trimming fat aggressively reduces it, and a younger animal avoids most of it.

What does wild boar bacon taste like?

Nuttier and considerably leaner than pork bacon, and it crisps faster with less rendered fat in the pan. Note that curing and smoking are not, on their own, reliable ways to make an untested wild animal safe.

Is farm-raised wild boar different from hunted wild boar?

Yes, and it is the most useful distinction to draw. Ranch-raised animals are harvested at a known age under inspected conditions, so they are milder and far more consistent. Hunted feral hog varies enormously with age, sex, season and diet.

What is the best cut of wild boar for a first attempt?

Shoulder, cooked slowly in liquid. It is inexpensive, it suits the braising methods that offset the meat’s leanness, and it is much harder to ruin than a loin.


Filed Under: Food Blog

Food Processor Not Turning On? It Is the Interlock

Last Updated September 28, 2026

Top-down view into a food processor bowl showing the central drive spindle and the locking lugs on the rim

A food processor that does nothing at all is usually not broken. It is a machine that refuses to run unless several parts are locked in exactly the right position, and it gives you no clue which one is wrong — it just sits there.

Before anything else: unplug it before touching the blade. Everything below is either an external check or one made with the machine unplugged.

Three different failures, and they need different things

Put the bowl and lid on, plug it in, and press on.

Nothing at all — no sound, no light. The motor gets no power. This is nearly always the safety interlock, not a fault, and it is the most common of the three by a wide margin.

It hums or buzzes but the blade does not turn. The motor has power and is trying. Something mechanical is stopping it, or the drive is no longer connected to the blade.

It ran, then stopped, and now will not restart. The motor cut out on its own. That is thermal protection, and it usually resets itself.

Nothing happens at all

Food processors have more interlocks than almost any other kitchen appliance, because the blade is exposed the moment the lid comes off. Most machines will not start unless all of the following are true at once.

The bowl is not locked to the base

The bowl drops onto the motor housing and twists to lock. Sitting it on and not turning it is the single most common mistake, and on many designs the bowl will feel stable while still being a few degrees short of locked.

Look for the alignment marks — an arrow, a dot or a padlock symbol moulded into both the bowl and the base. They must line up. Twist until it stops, not until it feels seated.

The lid is not fully rotated

Same idea, one level up. The lid locks to the bowl and usually drives a tab down into a slot in the base, which is what actually closes the switch.

The tell is whether the lid rotates smoothly to its stop. If it fouls or feels springy before it gets there, something below it is misaligned — usually the bowl, occasionally a blade sitting proud.

The pusher or feed tube is not in place

This one catches people constantly, because it looks optional. On a great many models the small pusher must be inserted into the feed tube for the machine to run at all. Some designs use the large pusher as part of the interlock and will not start with it removed, which is deliberate — it stops anyone reaching into a running blade.

The blade or disc is not seated on the shaft

A blade that has not dropped fully onto the drive shaft sits a few millimetres high, which stops the lid closing properly, which leaves the interlock open. Push it down and rotate gently until it drops.

The interlock tab is broken

If everything above looks right and the machine still does nothing, inspect the plastic tab on the lid or bowl that engages the switch. These snap, and a snapped one is invisible unless you look for it — the parts still fit together and still feel locked.

A cracked bowl in that area does the same thing, which is covered in the guide to a food processor bowl that has cracked. Replacement bowls and lids are sold as spare parts for most mid-range and better machines.

Never bypass an interlock. There are videos showing how to defeat them with tape or a screwdriver. The interlock is the only thing standing between your hand and a blade that spins at speed, and it exists because people have been injured. If the tab is broken, replace the part.

And the boring possibilities

Test the socket with something small. Food processors draw a lot of current on start-up, so a marginal extension lead can also stop one starting — plug it directly into the wall.

It hums but the blade does not turn

The motor has power, so the interlocks are satisfied. Stop straight away: leaving a stalled motor powered is how a working machine becomes a dead one.

Something is jamming the blade

Unplug, take the bowl off and turn the blade by hand. If it will not move freely, food has wedged between the blade and the bowl wall, or a piece of something hard has got in. Frozen or very hard items are the usual cause.

The drive coupling has stripped

This is the failure that separates food processors from most other appliances, and it is worth knowing about because it is commonly mistaken for a dead motor.

Between the motor and the blade there is a plastic coupling — sometimes on the motor shaft, sometimes moulded into the bottom of the bowl or the blade itself. It is deliberately the weakest part of the drive, so that it fails before the motor does when the machine is overloaded. When its splines round off, the motor spins freely and the blade does not move at all.

How to tell: with the machine unplugged, look at the drive shaft on the base and the matching socket on the blade or bowl. Rounded, shiny or visibly worn splines mean the coupling has gone. It is a cheap part on machines that sell spares, and replacing it is far more sensible than replacing the machine.

What causes it: processing frozen food, dough that is too stiff, or overfilling. That is also the failure mode behind a food processor that smells like burning, which is worth reading if you have noticed a smell as well.

It ran, then stopped, and will not restart

Thermal cut-out. Food processor motors are protected against overheating, and the protection trips after sustained heavy work — stiff dough, a large batch of nut butter, or a long run without a break.

Unplug the machine and leave it for thirty minutes to an hour. Most cut-outs reset once cool, and the machine behaves normally afterwards. A few models have a reset button on the base, which the manual will identify.

If it trips repeatedly on ordinary work, the machine is undersized for what you are asking of it rather than faulty. Dough is the usual culprit — many processors are simply not built for it, and the guide to choosing a food processor covers which models have the motor for heavy jobs.

If it will not come apart, or the lid will not lock

Two related complaints worth covering, because they are what stop people getting to the checks above.

The lid will not rotate to its locked position. Something underneath is proud. Take everything out and rebuild in order — bowl onto base and twist to the marks, blade down onto the shaft until it drops, then the lid. Do not force the lid; the tabs it turns against are the interlock, and forcing them is how they break.

The bowl will not release. Usually suction or wedged food rather than a broken catch. Run a thin spatula around the inside edge to break the seal, and twist the bowl evenly rather than levering on the handle.

Repair or replace?

  • Warranty first. Motor and switch failures inside the warranty period are normally covered, and it costs an email to ask.
  • Couplings, bowls and lids are cheap on machines that sell spares. A coupling in particular is a genuinely economical repair.
  • Switch and motor faults usually are not. Once the interlock switch itself or the motor has failed on an out-of-warranty machine, the repair cost approaches the price of a replacement.
  • Parts availability is the real dividing line between price tiers. Cheaper machines often have no spares at all, which makes a broken tab terminal.

The order worth working through

  1. Nothing at all? Twist the bowl to its marks, rotate the lid to its stop, and put the pusher in.
  2. Still nothing? Strip it and rebuild in order, checking the blade drops fully onto the shaft.
  3. Still nothing? Inspect the interlock tab for a crack, and test the socket.
  4. Humming? Unplug immediately. Turn the blade by hand, then check the drive coupling splines for wear.
  5. Stopped mid-job? Unplug and leave it half an hour for the thermal cut-out to reset.
  6. Never defeat an interlock to get it running.

How This Guide Was Put Together

Plainly: this is a research-based guide, not a hands-on test. I have not dismantled food processors to compare failure modes, and nothing here is a report from my own kitchen.

What it rests on: manufacturer support documentation, which is consistent across brands that improper assembly is the leading cause and that the interlock will not close unless bowl, lid and pusher are all correctly positioned; the mechanical design of the drive coupling as a deliberate sacrificial part, which is why it strips before the motor burns out; and the pattern of what owners report, in which an unlocked bowl and an unseated blade account for most machines that appear dead.

What I could not establish: how commonly the drive coupling fails relative to the interlock. Manufacturers do not publish failure data, and owner reports do not reliably distinguish a stripped coupling from a dead motor.

Frequently Asked Questions

Why is my food processor not turning on?

Almost always the safety interlock rather than a fault. The bowl must be twisted to lock on the base, the lid rotated fully to its stop, and on many models the pusher must be in the feed tube. All three have to be right at once, and the machine gives no indication which one is wrong. Check the alignment marks moulded into the bowl and base.

What to do if your food processor will not turn on?

Strip it completely and rebuild in order: bowl onto the base and twist to the marks, blade pressed down until it drops onto the drive shaft, lid rotated to its stop, then the pusher. If it still does nothing, inspect the plastic interlock tab on the lid or bowl for a crack, then test the wall socket.

My food processor hums but the blade does not spin. What is wrong?

Unplug it immediately, because running a stalled motor damages it. Either something is jamming the blade, or the plastic drive coupling between the motor and the blade has stripped. The coupling is designed to fail before the motor does, so this is a cheap repair on machines that sell spare parts.

How do I reset a food processor?

Most have no reset button. If the machine stopped mid-job and will not restart, the thermal cut-out has tripped after heavy work such as stiff dough. Unplug it and leave it thirty minutes to an hour to cool, and it will usually run again. A few models do have a reset button on the base.

Can I bypass the safety interlock on a food processor?

No, and it is worth being blunt about it. The interlock is the only thing preventing the blade from spinning with the lid off, and it exists because people have been injured. If a tab is broken, replace the lid or bowl — both are sold as spare parts for most machines.

Why does my food processor stop working with dough?

Stiff dough is the heaviest load most home processors ever see. It trips the thermal cut-out, and repeatedly it is what strips drive couplings. If it happens on ordinary batches, the machine is undersized for the job rather than faulty.

Is it worth repairing a food processor that will not turn on?

If the fault is a broken tab, a cracked bowl or a stripped coupling, yes — those parts are inexpensive where spares are sold. If the interlock switch or the motor has failed out of warranty, the repair usually costs close to a replacement. Parts availability is the practical dividing line between cheap machines and better ones.

More food processor guides

If the machine runs but smells wrong, see a food processor that smells like burning. For a cracked bowl there is a guide to why food processor bowls crack, and for blades that have gone dull, sharpening food processor blades.

Filed Under: Helpful Kitchen Tips

Juicer Not Working After Cleaning? It Is the Safety Lock

Last Updated September 28, 2026

Vertical masticating juicer assembled on a counter beside jugs and glasses

A juicer that worked perfectly before you washed it and refuses to start afterwards has almost certainly not broken. The rest of the juicer guides are collected on the juicers hub. Cleaning does not damage juicers. What it does is take them apart, and a juicer that is reassembled a few millimetres out will not run at all — by design.

The safety lock is doing this, not a fault

Every mains juicer has a safety interlock. It exists because the machine contains a fast-spinning cutting disc or a powerful auger, and it must be impossible to run with the lid off. The interlock only closes when the parts are assembled and locked in exactly the intended position.

That is why the failure looks so alarming. There is no partial behaviour, no warning noise, no weak running. The motor simply does nothing, exactly as though it were unplugged — and it does that whether the assembly is wrong by a centimetre or by a millimetre.

The lid is the tell. On almost every design, if the lid or locking arm will not rotate smoothly into its fully locked position, something underneath is not seated. The lid is the last thing to go on, so it is the first thing to reveal a mistake made earlier in the stack.

Do not force it. Forcing a locking arm against a misaligned bowl is how people crack the tabs that the interlock depends on, which turns a two-minute fix into a replacement part.

Work back through the stack

Take it apart completely and rebuild it in order, checking each stage. On most machines the sequence runs bowl, then screen or filter basket, then auger or cutting disc, then lid, then locking arm.

1. The bowl is not seated on the base

The juicing bowl usually drops onto the motor base and twists a few degrees to locate. If it is sitting on the base rather than locked into it, everything above it will be a fraction too high and the lid will never lock. Look for the alignment marks — most machines have a dot, arrow or padlock symbol on the bowl that must line up with one on the base.

2. The screen or filter basket is not fully home

On a masticating juicer the screen sits inside the bowl and often has a notch that must engage a matching lug. On a centrifugal machine the filter basket must click down onto the drive coupling — if it is merely resting in place it will sit proud, and it will also spin freely by hand rather than driving the coupling.

A screen that has been scrubbed and is still slightly damp can also stick part-way down and feel seated when it is not. Push it home firmly and check it does not lift.

3. The auger is not pushed fully down

This is the most common single mistake on masticating machines. The auger has to drop right into the drive shaft and engage the splines at the bottom. It frequently goes down most of the way and stops, held up by the screen or simply not lined up with the shaft.

Press it down and rotate it gently at the same time until you feel it drop the last few millimetres. There is usually an audible or felt seating. If the auger stands proud by even a small amount, the lid cannot close and the interlock stays open.

4. Parts went back in the wrong order, or from the wrong machine

Worth checking if you own more than one appliance, or if parts were washed together. Screens and augers from different models can look nearly identical and will physically sit in the wrong machine without locking. The same applies to a screen fitted upside down — many are asymmetric and only lock one way up.

5. The pulp container or juice jug is part of the interlock

On some models it is. If the machine still will not start with everything else correct, put every removable part back in its running position, including the pulp bin, and try again.

If it starts but something else is wrong

It runs but leaks from underneath

Almost always the rubber seal. Most juicing bowls have a removable silicone seal or bung in the base, and it is the part most often left out after a wash or refitted the wrong way round. A missing seal produces juice running out under the bowl within seconds; an inverted one leaks more slowly.

Take the bowl off, find the seal, and check it is seated in its groove all the way round with the flat face in the direction the manual shows. The juicer cleaning guide covers where the seal lives on the common designs, since it is the part nearly everyone misses.

It starts and immediately stalls or hums

The auger or disc is fouling something it should clear. Usually the screen is very slightly out of position, so the two are touching. Strip it, rebuild it carefully, and try again with nothing in the chute.

If it hums without turning at all, stop. Repeatedly powering a stalled motor is how you burn one out.

It ran, then stopped, and now will not restart

That is the motor’s thermal cut-out rather than the interlock, and it is usually the aftermath of a jam. Unplug the machine and leave it thirty minutes to an hour. Most reset themselves once cool. If it happens repeatedly, the cause is what is jamming it — covered in the guide to a juicer that clogs or stops making much juice.

If the machine will not come apart at all

The opposite problem, and common enough to be worth covering: the juicer has locked and now the lid or bowl will not release.

This is nearly always pressure and dried pulp rather than a broken catch. Pulp compacted between the screen and the bowl dries into a solid ring that grips both parts, and on masticating machines the auger can wind itself tight against the screen.

  • Run the machine in reverse if it has that function, in short bursts. This relieves the pressure that is holding everything together and is what the function is for.
  • Stand the assembly in warm water for fifteen minutes to soften the dried pulp, then try again. Not hot water, which can distort plastic parts.
  • Twist evenly, not sharply. Grip the bowl rather than the lid, so you are not levering on the locking tabs.

Prevention is simply rinsing the parts straight after juicing rather than letting pulp dry in place, which is the same habit that keeps the screen clear.

Some designs are far easier to put back together

If this has happened more than once, it is worth knowing that the difficulty varies enormously between machines — and that reassembly complexity is a genuine buying criterion almost nobody weighs before purchase.

  • Part count is the honest measure. A juicer with five components to wash and stack has five chances to be a millimetre out. Some vertical masticating machines have seven or eight. Count the parts in the manual before buying, not the features on the box.
  • Clear alignment marks make the difference. Better machines mould arrows, dots or padlock symbols into every mating part, so correct assembly is visible rather than something you learn by feel. Cheaper ones often have none, and you are left guessing which way a screen goes in.
  • Horizontal masticating juicers are generally simpler to reassemble than vertical ones, because the parts stack along an axis you can see rather than dropping blind into a bowl.
  • Centrifugal machines have fewer parts but a filter basket that must click positively onto the drive coupling — a single point of failure rather than several, which some people find easier and some find harder to judge.

None of this shows up in a specification list, which is why it is worth reading owner reports for mentions of fiddly assembly before buying. The juicer buying guide and the guide to juicers for greens both note part counts and cleaning effort, and the masticating versus centrifugal comparison covers how the two mechanisms differ in what has to come apart.

The order worth working through

  1. Try to lock the lid. If it will not rotate fully, the problem is below it — do not force it.
  2. Strip it completely and rebuild in order: bowl, screen, auger or disc, lid, locking arm.
  3. Check the bowl is twisted onto the base and the alignment marks line up.
  4. Press the auger down while rotating gently until it drops onto the drive splines.
  5. Refit every removable part, including the pulp container, since some models interlock on it.
  6. Leaking rather than dead? The silicone seal in the base of the bowl is missing or inverted.

How This Guide Was Put Together

Plainly: this is a research-based guide, not a hands-on test. I have not stripped down a range of juicers to compare assemblies, and nothing here is a report from my own kitchen.

What it rests on: the safety interlock design common to mains juicers, which is a legal and practical requirement on an appliance with an exposed cutting element and which explains why the failure is total rather than partial; manufacturer assembly instructions, which are consistent across brands on alignment marks, assembly order and seating the auger onto the drive shaft; and the pattern of what owners report, in which an unseated auger and a bowl not twisted onto the base account for the large majority of machines that stop working immediately after a clean.

Also not established: assembly details that hold for every machine. Designs differ enough between masticating and centrifugal types, and between brands, that the sequence above is the common pattern rather than a universal specification. Your manual is the authority for your model.

Frequently Asked Questions

Why is my juicer not working after cleaning?

A part is not seated, so the safety interlock has not closed and the motor gets no power at all. The usual culprits are an auger that has not dropped fully onto the drive shaft, or a bowl that is resting on the base rather than twisted into it. Strip the machine and rebuild it in order, checking the alignment marks, and never force the locking arm.

Why will my juicer not turn on at all?

On a juicer, no response whatsoever usually means the interlock rather than an electrical fault, because the switch cuts power completely until everything is locked in position. Check that the lid rotates fully to its locked position. If it does not, something below it is out of place. On some models the pulp container also has to be fitted.

How do I know if the auger is seated properly?

Press it down while rotating it gently. It should drop the last few millimetres onto the drive splines, often with a felt or audible seating, and then sit flush rather than standing proud. If the auger is high by even a small amount, the lid will not lock and the machine will not start.

My juicer leaks from the bottom after cleaning. What did I miss?

The silicone seal or bung in the base of the juicing bowl. It is removable for cleaning and it is the part most commonly left out or refitted the wrong way round. A missing seal leaks within seconds of starting; an inverted one leaks more slowly.

My juicer is stuck and will not come apart. What now?

Dried pulp compacted between the screen and bowl is usually holding it. Run the reverse function in short bursts if the machine has one, or stand the assembly in warm water for fifteen minutes to soften the pulp. Twist the bowl evenly rather than levering on the lid, which risks breaking the locking tabs.

My juicer hums but does not turn. Is it broken?

Probably not, but stop immediately. A hum without rotation means the motor is being blocked, usually by a screen sitting slightly out of position and touching the auger. Unplug it, strip it, rebuild it carefully and try again empty. Repeatedly powering a stalled motor is how it gets damaged.

Can washing a juicer damage it?

Washing the removable parts will not. What causes problems is water reaching the motor base, which should only ever be wiped rather than rinsed, and putting parts back while still wet, which makes them stick part-way and feel seated when they are not. Dry everything before reassembly.

More juicer guides

For the routine itself, see the guide to cleaning a juicer. If the machine runs but the yield has dropped, there is a separate guide to a juicer that clogs or stops making much juice, and if you are choosing a machine, the juicer buying guide notes which designs are simplest to reassemble.

Filed Under: Helpful Kitchen Tips

Air Fryer Not Heating Up or Turning Off? Check the Drawer

Last Updated November 9, 2026

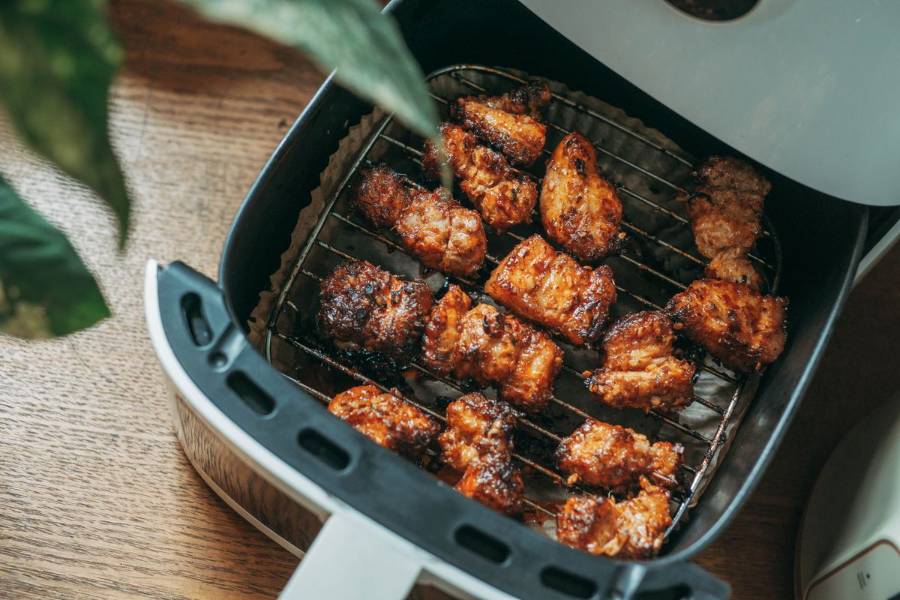
Air fryer with the drawer pulled out, showing the basket and the cavity above it

An air fryer that will not heat, or that switches itself off, may well not be broken. Start with two free checks, a drawer that is not quite closed and a safety cut-out that has done what it was designed to do; both look like a dead machine from the outside.

A safety note first: this is a mains appliance drawing over a kilowatt. Every check below is external, or made with the machine unplugged. Do not open the casing unless you are competent with mains equipment, and never defeat a safety switch.

Air fryer not heating up: which of the three is it?

Put the drawer in, set it going, and watch.

Nothing happens at all. No lights, no fan, no noise. The machine appears dead. The COSORI and Instant troubleshooting tables list two checks for a unit that will not turn on: the plug and socket, and a basket that is not fully in.

The fan runs but the food stays cold. Lights come on, you can hear it working, and after ten minutes nothing has changed. This is the heating circuit — a tripped cut-out, an element, or a control setting that was never made.

It heats, but nowhere near enough. The machine works and the food cooks, just slowly and pale. That is a different problem from this page and is covered in the guide to food that comes out soggy or pale.

Nothing happens at all

The drawer is not fully closed

Start here, because it is free to check and both the COSORI and Instant manuals list it for a machine that will not turn on.

Most basket air fryers covered by the manuals behind this page have a drawer safety switch, and the table further down shows which makers describe the machine pausing or refusing to start with the basket out. On a unit with one, it is what stops the machine running while open. A drawer that is almost closed leaves the switch open, and the machine can behave as though it is unplugged.

What stops a drawer seating properly:

  • Crumbs and hardened grease in the runners. Pull the drawer right out and clean the channel it slides into, not just the basket.
  • The basket is not clicked into the drawer. On two-piece designs the inner basket must latch into the outer drawer before the assembly is the right length to reach the switch.
  • Overfilling. Food standing proud of the basket fouls the top of the cavity and holds the drawer a few millimetres short.
  • A warped or swollen drawer on an older machine.

Push the drawer in firmly and listen. Listen for a click as the switch closes, and watch whether the display wakes. If it wakes when you press harder, that is your answer.

Some displays spell it out. The Instant Vortex Dual 8L manual (UK/EU edition) says the panel shows OPEN when the basket is not fully inserted, and OFF to confirm the basket is locked into place.

It is plugged into an extension lead or a shared socket

Air fryers draw a lot of current — commonly 1,400 to 1,800 watts, comparable to a kettle. That matters more than people expect.

Many extension leads and multi-way adaptors are not rated for a sustained load like that. The result is either a lead that trips or overheats, or enough voltage drop that the appliance behaves erratically. Sharing a socket with a kettle, toaster or microwave can also trip the circuit as soon as both draw at once. If that is the actual symptom, there is a separate guide to an air fryer that keeps tripping the breaker.

Plug the air fryer directly into a wall socket, on its own, and try again. This is a safety point as much as a troubleshooting one: a warm or discoloured extension lead under this kind of load should be taken out of service rather than reused.

The plug fuse or the breaker

If the wall socket is dead, test it with something small like a phone charger. In the UK and other countries using fused plugs, the fuse in the plug itself can fail while everything else looks fine. At the consumer unit, a tripped breaker points at the circuit rather than the appliance — and if it trips again the moment the air fryer is switched on, stop and get it looked at rather than resetting repeatedly.

The fan runs but there is no heat

The temperature was never actually set

Worth ruling out first because it costs nothing. Set both a temperature and a time, press start, and check whether a heating indicator appears.

The thermal cut-out has tripped

This is the machine protecting itself rather than failing.

Air fryers have a thermal cut-out that kills the element if the internal temperature runs away. Swan’s support page names blocked vents, grease build-up and an overloaded basket as causes of overheating, and where the machine is standing is the cheapest of those to check. The manuals ask for clearance but disagree on how much: COSORI says to leave 5 inches behind and above, Chefman at least 6 inches on top and in back, the Ninja DZ401C at least 6 inches above and on all sides, and the Gourmia GAF858 at least 4 inches at the back, sides and above. Pushed against a wall, under a cabinet, or in a corner, the hot exhaust is drawn straight back in and the temperature climbs until the cut-out opens.

Unplug it, move it into open space, and leave it until it is completely cool. The COSORI manuals say to let it cool down completely before using it again, and Chefman’s says that once it has cooled fully it will operate normally; neither puts a time on it. If it heats normally afterwards and you have moved it somewhere with clearance, that was the whole problem. If it trips repeatedly, stop using it.

The heating element has failed

On a basket model you can usually see a failed element without tools.

Unplug the machine, let it cool, remove the drawer and look up into the cavity. The element is the coiled metal loop above the basket. You are looking for an obvious break in the coil, a section that is blistered or discoloured very differently from the rest, or heavy carbonised residue baked onto it. A visibly broken coil is a failed element.

The thermostat or control board

If the drawer switch is fine, the machine has cooled properly, the temperature is set, and the element looks intact, the remaining candidates are the thermostat and the control electronics. Neither is a home repair on a sealed appliance, and this is the point at which the decision becomes repair or replace rather than troubleshoot.

Air fryer turning off by itself part way through

Several shut-offs are designed in and vary by maker and model, so read the display first: End, a dimmed screen, OPEN, dashes or a code each mean something different.

It was idle, or the basket came out

Maker and manual When left idle When the basket is pulled out
COSORI Lite LI211 Turns off after 5 minutes with no active cooking program Pauses and shows dashes; resumes when the basket goes back
COSORI Pro LE L501 Turns off after 3 minutes with no active cooking program Pauses; the display turns off until the basket is replaced
COSORI TurboBlaze Turns off after 30 minutes with no active functions Pauses; the display turns off temporarily
COSORI TwinFry CAF-TF901 Turns off after 9 minutes with no active functions Pauses; resumes when the basket returns
Ninja AF100 and DZ401C Standby after 10 minutes with no interaction; the Power button is dimly lit The AF100 manual says to press START/PAUSE before removing the basket
Philips HD986x and HD925x Switches off if no button is pressed within 30 minutes (HD986x) Pauses when the pan and basket are pulled out (HD925x)
Instant Vortex Dual 8L (UK/EU) Standby after 2 minutes with no activity; the display dims Shows OPEN until the basket is fully inserted

COSORI’s own figures run from 3 to 30 minutes depending on the model, so there is no single idle time for air fryers. Both Ninja manuals say a black screen means the unit is in standby and the power button turns it back on. Chefman’s RJ38-4T manual says cooking resumes where it left off when the basket goes back.

Ninja’s AF100 and DZ401C manuals do not say whether the unit pauses by itself when the basket comes out. The AF100 manual says to press START/PAUSE before taking the basket out to shake it, and the DZ401C’s says pressing the centre of the dial pauses cooking, so pause it first.

The timer finished, or it is keeping food warm

The Philips HD986x manual says the device will shut off automatically when the timer has elapsed, and Chefman’s says the air fryer will beep and cooking will stop. COSORI’s Lite shows End and Ninja’s AF100 shows END. Philips adds that in keep-warm mode the fan and heater turn on from time to time.

The fan keeps running after you switch it off

Instant’s Vortex Slim manual says that after Cancel the internal fan may keep running to cool the unit, depending on its temperature. I found no such statement in the COSORI, Ninja, Philips or Chefman manuals I read.

It overheated, or the power dropped out

COSORI’s manuals say that if the air fryer overheats, it will automatically shut down as a safety feature; the fixes are those in the thermal cut-out section above, plus cleaning grease out of the vents. Swan’s UK support page on an air fryer that keeps losing power also lists the cord, the socket, the fuse in a fused plug and damage to the cord or plug, then says to switch off, unplug and let it cool fully before trying again.

The makers split on extension cords: Ninja and Instant say not to use one, while Philips, Chefman and COSORI say one may be used if care is exercised. If the house power went off too, see an air fryer tripping the breaker; the air fryer wattage guide covers the load on a shared socket.

What an error code on the display means

A code on the display is the machine telling you which fault it has detected, but not every brand uses the same set of codes. E3 is overheat protection in the COSORI and Chefman manuals below, E4 (wrong voltage) appears only in the COSORI manuals, and the Instant manual lists just E1 and E2. The same code does not always mean the same thing either: E2 is a short circuit for COSORI and Instant, but the Gourmia GAF858 manual prints E02 with the same wording as E01, open circuit. Check the manual for your own model before acting on a code.

Maker and manual Code What the manual says it means What the manual says to do
COSORI Lite LI211 and Pro LE L501 (US manuals) E1 Open circuit in the temperature monitor Contact Customer Support
COSORI Lite LI211 and Pro LE L501 (US manuals) E2 Short circuit in the temperature monitor Contact Customer Support
COSORI Lite LI211 and Pro LE L501 (US manuals) E3 Overheat protection has activated Turn off, unplug and let it cool completely; contact Customer Support if E3 is still showing
COSORI Lite LI211 and Pro LE L501 (US manuals) E4 Plugged into a 220–240V outlet Unplug; use only a 120V, 60Hz outlet
Chefman TurboFry Touch RJ38-4T E3 Shut off by overheat protection Let it cool fully and it will operate normally
Chefman TurboFry Touch RJ38-4T E1 or E2 A malfunction that can’t be fixed Contact Chefman Customer Support
Instant Vortex Dual 8L (UK/EU manual) E1 Open circuit Contact Customer Care
Instant Vortex Dual 8L (UK/EU manual) E2 Temperature sensor short circuit Contact Customer Care
COSORI SE601S (US manual) E12 The DC motor has failed Contact Customer Support
COSORI TwinFry CAF-TF901 (US manual) E3 and E28 Zone 1 and Zone 2 overheat protection has activated Turn off, unplug and let it cool completely; contact Customer Support if the code is still showing
COSORI TwinFry CAF-TF901 (US manual) E1, E2, E21, E22, E24 to E27 Open or short circuit in a Zone 1 or Zone 2 temperature monitor Contact Customer Support
Gourmia GAF858 E01 and E02 NTC open circuit (both, as printed) Contact customer service
Gourmia GAF858 E03 NTC temperature over 500°F Contact customer service
Ninja AF100 and DZ401C An “E” message The unit is not functioning properly Contact Customer Service
Swan (UK support page) SHUT or ADD POT The drawer or basket is not fully in, so the safety switch is not activated Reseat it, clear debris, check for warping; unplug for a few minutes

An E3 is the thermal cut-out described above, reported on the display, so the same fix applies: unplug it, give it clearance and let it cool. For E1, E2 and the other circuit and sensor codes, every manual in the table sends you to customer support rather than offering a home fix. The makers part company on overheating, though: COSORI and Chefman say to cool it and try again, while Gourmia’s table sends E03 straight to customer service.

If it heats, but not enough

Worth separating, because it is a genuinely different fault and the fixes do not overlap.

A machine that reaches temperature slowly, or never seems to get properly hot, may be suffering from restricted airflow or a dirty element rather than an electrical fault. Carbonised grease baked onto the element insulates it and cuts the heat reaching the food, which is also the mechanism behind an air fryer that smokes. Clean the element with the machine unplugged and cold, and clear the vents front and back.

If the machine genuinely is hot and the food still is not right, the problem is the food rather than the appliance — that is covered separately in why air fryer food comes out soggy or pale.

Repair or replace?

Be realistic about the arithmetic before ordering parts.

  • Check the warranty first. Heating element and thermostat failures inside the warranty period are normally covered, and it costs one email to ask.
  • Out of warranty, the economics are usually bad. An element or thermostat plus a repair callout frequently approaches or exceeds the price of a new mid-range air fryer, and sealed budget units are often not designed to be opened at all.
  • Do not attempt an element replacement on a mains appliance unless you are competent to work on one. The saving does not justify the risk.

If you are replacing it, the practical lesson from this fault is to buy something with clearance in mind and enough capacity that you are not overfilling the drawer — overfilling is what jams drawers and restricts airflow in the first place. The air fryer guide covers sizes and build, the family-size models matter if overfilling is a habit, and the budget picks are worth reading with the repairability point above in mind.

The order worth working through

  1. It ran, then went off? Read the display first: End, a dark or dimmed standby screen, OPEN, dashes or a code.
  2. Nothing at all? Push the drawer firmly home and listen for the click.
  3. Still nothing? Clean the drawer runners, then plug directly into a wall socket rather than an extension lead.
  4. Fan runs, no heat? Confirm a temperature is actually set and start has been pressed.
  5. Still no heat? Unplug, move it away from the wall, and leave it until completely cool for the thermal cut-out to reset.
  6. Still no heat? Unplugged and cold, look at the element for a break or blistering.
  7. Element intact? Thermostat or control board — check the warranty before spending anything.

How This Guide Was Put Together

Plainly: this is a research-based guide, not a hands-on test. I have not dismantled air fryers to compare failure modes, and nothing here is a report from my own kitchen.

What it rests on: manufacturer manuals and support documentation, which mostly agree on the drawer safety switch and on letting the machine cool after an overheat (Gourmia’s table sends E03 to customer service instead), but not on how much clearance to leave; the electrical characteristics of the appliance class, where a 1,400 to 1,800 watt sustained load explains the extension lead and shared circuit problems.

The error codes and the OPEN/OFF basket messages come from the COSORI Lite LI211 and Pro LE L501 manuals, the Chefman TurboFry Touch RJ38-4T manual and the Instant Vortex Dual 8L UK/EU manual, each for those models only. The shut-off section adds further COSORI, Ninja, Philips, Instant and Gourmia manuals, each named where it is used, and two Swan UK support pages.

Also not established: a clearance figure that applies to every machine, since the manuals give 4, 5 or 6 inches and the Ninja AF100 manual asks only for adequate space; how long a thermal cut-out takes to reset, since no manual I read gives a time; idle shut-off times for models not listed above; and which cause is most common, since no source ranks them. Check the manual for your model.

Frequently Asked Questions

Why is my air fryer not heating up?

If nothing happens, check the drawer is fully closed: a safety switch cuts the power until it is pushed home, and crumbs in the runners can stop it. If the fan runs but there is no heat, either no temperature was set or the thermal cut-out has tripped.

My air fryer turns on but does not get hot. What does that mean?

The fan can run while the heating circuit is dead. Check that a temperature is selected and confirmed, then unplug it, move it into open space and let it cool completely in case the thermal cut-out has tripped. If it still will not heat, inspect the element for a break.

How do I reset an air fryer?

There is rarely a reset button. Unplug it, move it away from the wall and leave it until completely cool so the thermal cut-out can reset. The COSORI and Chefman manuals ask for a full cool-down but give no time for it, and blocked vents can trip it.

Can I use an air fryer with an extension lead?

Best avoided. Air fryers commonly draw 1,400 to 1,800 watts, and many extension leads and multi-way adaptors are not rated for that sustained load, which can mean tripping, voltage drop or an overheating lead. Plug it into a wall socket, and retire any lead that has become warm or discoloured.

How do I know if the heating element has failed?

With the machine unplugged and cold, take the drawer out and look up at the coiled element above the basket. A clear break in the coil or a blistered, discoloured section means a failed element. Clean off heavy baked-on residue first, since that alone cuts the heat reaching the food.

Is it worth repairing an air fryer that will not heat?

Inside the warranty period, yes: element and thermostat failures are normally covered. Outside it, parts plus labour often approach the price of a new mid-range machine, and budget units are often sealed. Do not attempt an element replacement on a mains appliance unless you are competent to do so.

Why does my air fryer keep turning off mid-cook?

A dark or dimmed screen can be standby, End means the timer finished, and OPEN or a blank COSORI display means the basket is out. A cut-out is overheat protection: COSORI and Chefman show E3 and say to let it cool completely. Swan also lists the cord, socket and fuse.

What does E1 or E2 mean on an air fryer?

The COSORI LI211 and L501 manuals give E1 as an open circuit and E2 as a short circuit in the temperature monitor. Instant’s Vortex Dual 8L manual gives the same two faults. Chefman’s TurboFry Touch manual calls either one a malfunction that can’t be fixed. Each says contact support.

More air fryer troubleshooting

If it heats but the food is disappointing, see why air fryer food comes out soggy or pale. If it smokes, there is a guide to why an air fryer smokes, and if the basket surface is deteriorating, one on a basket coating that flakes.

Filed Under: Helpful Kitchen Tips

Coffee Grinder Not Grinding Properly? Three Different Faults

Last Updated November 7, 2026

Burr coffee grinder with roasted beans sitting in the conical hopper above the throat

“Not grinding properly” covers three unrelated faults, and they have almost nothing in common. Before changing settings or ordering parts, work out which one you are looking at — it takes one grind to find out.

Which of the three is it?

Run the grinder with beans in it and watch what happens.

The motor runs but little or nothing comes out. You can hear it working, and the output is a dribble of grounds or none at all. This is a feeding or blockage problem. It is the most common of the three and usually the easiest to fix.

Grounds come out, but they are wrong. Uneven, too coarse however you set it, full of dust and boulders together, or simply not what the same setting used to give you. This is about the burrs, the adjustment, or the type of grinder you own.

The motor does not run at all. Nothing happens, or it hums without turning. This is usually a safety interlock rather than a dead machine, and it is worth checking before assuming the worst.

Motor runs, nothing comes out

The beans are bridging in the hopper

This is the single most common cause, and from the outside it looks exactly like a broken grinder: full hopper, running motor, no coffee.

Beans form an arch over the throat of the hopper and hold each other up, so nothing drops into the burrs. Oily dark roasts do it far more than lighter ones, because the surface oil makes the beans stick to one another and to the hopper walls. A nearly empty hopper does it too, since there is less weight pressing down.

To confirm it: stop the grinder and give the hopper a firm tap on the side, or stir the beans with a wooden spoon handle. If coffee immediately starts coming through, that was your fault — there is nothing else wrong with the machine.

Longer term: keep the hopper reasonably full, avoid very oily beans if your grinder is prone to it, and wipe the inside of the hopper occasionally with a dry cloth, because oil residue on the walls makes bridging worse over time.

The chute is packed with old grounds

Every grinder retains some ground coffee inside the exit chute. Over weeks that retained coffee absorbs moisture from the air, and the oil in it goes tacky. Eventually it packs into a plug that new grounds cannot push past. You get a trickle rather than a dose, and often a burst of stale grounds when it finally clears.

Unplug the machine, take off the hopper, and work through the chute with a stiff brush — a dedicated grinder brush, a clean paintbrush, or a toothbrush. A chopstick or the handle of a wooden spoon shifts a solid plug. Do not use anything metal that could reach the burrs.

Something is jammed in the burrs

Coffee occasionally arrives with a small stone or a piece of packaging in it, and it will stop a grinder dead or make it grind unevenly with a horrible noise. If the machine sounds different — grating, rattling, straining — unplug it, remove the hopper and the upper burr, and look.

This is also the moment to stop using the grinder rather than persist. Running a motor against a jam is how a working grinder becomes a broken one.

It grinds, but the grounds are wrong

First: is it actually a blade grinder?

Worth ruling out before anything else, because it is not a fault at all.

A blade grinder has a spinning blade like a small propeller and chops beans by hitting them. It does not have an adjustable grind size — you control it only by how long you run it. It cannot produce a consistent, uniform grind, and it can never produce a proper espresso grind. Some particles are dust and some are still chunks, no matter how long you run it.

If your grinder chops rather than mills, and you are trying to get an even grind for espresso or pour over, the machine is doing everything it is capable of. That is a hardware limit, and the espresso grinder guide covers what a burr grinder actually changes and at what price. For how blade, burr, manual and electric grinders differ in the first place, see coffee grinder types.

The burrs were not reseated properly after cleaning

If the problem appeared right after you cleaned the grinder, this is almost certainly it, and it catches a lot of people.

Upper burrs on most home grinders locate on tabs or lugs and then twist to lock. It is entirely possible to seat one almost correctly — it sits down, the hopper goes back on, and everything looks fine, but the burr gap is now wrong or uneven. The result is a grind that is far too coarse, or wildly inconsistent, at a setting that used to be right.

Take the burr back out and reseat it deliberately, checking it sits flat and turns to its stop. On many grinders you also need the hopper fitted and locked before the adjustment collar engages at all.

The grind adjustment is not doing what you think

Stepped grinders only change setting while the burrs are turning on some models — adjusting a stationary grinder does nothing, or forces the mechanism. Stepless collars can drift as the machine vibrates. And if the grinder has been apart, the numbers on the dial no longer correspond to what they did before, because the reference point moved.

Rather than chasing the numbers, reset from scratch: with no beans in the burrs, close the adjustment until the burrs just touch and the machine chirps, then back off gradually and re-dial from there.

The burrs are coated in stale oil

Coffee oil builds up on the burr faces and in the grooves between the teeth. A coated burr cuts less cleanly, producing more fines and a duller, muddier grind. It is gradual, so people adapt to it without noticing and then conclude the grinder is worn out.

Use grinder cleaning tablets and follow with a run of the beans you actually use, to clear the tablet residue. Do not use rice. It is widely recommended and several manufacturers explicitly warn against it — rice is much harder than coffee and can damage burrs or strain the motor. And never wash burrs in water: steel burrs rust, and a rusted burr is finished.

The full cleaning routine, with what each maker says, is in how to clean a coffee grinder.

Are the burrs actually worn out?

This is the question people jump to first and it is usually the wrong one, so it is deliberately last.

Burrs are consumables and they do wear. But a home grinder making a few coffees a day passes very little coffee through in a year compared with a cafe machine running kilos a day, and most domestic grinders are cleaned out and sold on long before their burrs are genuinely finished. When someone says their grinder “stopped grinding properly”, stale oil, a bad reseat or bridging beans are far more likely explanations.

The signs that point to real wear, rather than one of the above:

  • You have had to move steadily finer over months to get the same result — the gap needed to produce a given particle size grows as the cutting edges round off.
  • More dust and more boulders at the same time. Worn burrs stop cutting cleanly and start crushing, which widens the spread of particle sizes at every setting.
  • It takes noticeably longer to grind the same dose than it used to.
  • The problem survives a proper clean and a careful reseat. That is the test that separates wear from the far more common causes.

You can also look: remove the upper burr and inspect the cutting edges against a bright light. Sharp burrs have crisp edges and defined corners on the teeth. Worn ones look rounded and polished, and may be visibly shiny where they should be matt.

If the burrs are genuinely worn, replacement burrs are available for most mid-range and better grinders and are usually far cheaper than a new machine. On inexpensive grinders the parts either do not exist or cost more than the grinder did, which is one of the practical differences between price tiers — the espresso grinder guide notes which machines are built to be maintained.

The motor does not run at all

Check these in order before concluding anything is broken.

  1. The hopper is not locked into position. Most grinders have a safety interlock that will not let the motor start unless the hopper is fitted and twisted fully to its stop. A hopper that is on but not locked is the most common cause of a completely dead grinder.
  2. The lid or grounds bin is not seated. Some models interlock on those too.
  3. It has overheated and cut out. Grinders have thermal protection that stops the motor after prolonged use or a jam, and it resets only once the motor has cooled. Give it thirty minutes and try again before doing anything else.
  4. It is jammed. A motor that hums but does not turn is being physically blocked. Unplug it and clear the burrs.
  5. Then the boring possibilities: the socket, the plug fuse, and the cable.

The order worth working through

  1. Motor runs, nothing out? Tap the hopper. If coffee flows, it was bridging.
  2. Still nothing? Unplug and brush out the chute.
  3. Grounds wrong? Did it start right after cleaning? Reseat the burrs properly.
  4. Still wrong? Run cleaning tablets, then re-dial the grind from the point where the burrs just touch.
  5. Still wrong after a clean and a careful reseat? Now consider worn burrs, and inspect the edges.
  6. Motor dead? Lock the hopper down, then let it cool for half an hour.

How This Guide Was Put Together

Plainly: this is a research-based guide, not a hands-on test. I have not stripped down a set of grinders to compare burr wear, and nothing here is a report from my own kitchen.

What it rests on: the mechanics of burr grinding, which explain why a coated or rounded burr widens particle distribution rather than simply grinding coarser, and why a blade grinder cannot produce a uniform grind at all; manufacturer instructions for hopper interlocks, thermal cutouts, burr removal and cleaning, including the warnings against rice as a cleaning medium; and the pattern of what owners report, where bridging, retained grounds and a mis-seated burr after cleaning dominate the reported causes by a wide margin.

Also not established: a figure in kilograms for how long burrs last. Published numbers vary enormously between sources and burr materials, they are drawn largely from commercial use, and applying a cafe figure to a domestic grinder would be misleading. The wear signs above are described qualitatively for that reason.

Frequently Asked Questions

Why is my coffee grinder not grinding?

If the motor runs but nothing comes out, the beans are almost certainly bridging over the hopper throat, or the exit chute is packed with old grounds. Tap the side of the hopper: if coffee starts flowing immediately, that was the whole problem. If the motor does not run at all, check the hopper is twisted fully into its locked position, because most grinders will not start otherwise.

How do I know if my coffee grinder burrs are worn out?

The reliable test is whether the problem survives a proper clean and a careful reseat of the burrs. Genuine wear shows as needing a steadily finer setting over months for the same result, more dust and more large pieces at the same time, and longer grinding for the same dose. Removing the upper burr and looking at the teeth under bright light also helps: sharp burrs have crisp edges, worn ones look rounded and polished.

Why is my grinder producing an uneven grind?

If it started right after cleaning, the upper burr is probably not seated correctly, which changes the burr gap without looking wrong. Otherwise it is usually oil build-up on the burr faces, which stops them cutting cleanly. If you have a blade grinder rather than a burr grinder, an uneven grind is not a fault at all — chopping cannot produce uniform particles.

Can I use rice to clean a coffee grinder?

Better not to. It is a widely repeated tip and several manufacturers specifically warn against it, because rice is considerably harder than coffee and can damage burrs or overload the motor. Use purpose-made grinder cleaning tablets instead, and never wash burrs in water, since steel burrs rust. The full cleaning routine, with what each maker says, is in how to clean a coffee grinder.

Why did my grinder stop working after I cleaned it?

Two likely reasons. Either the upper burr has not gone back on correctly, which gives a very coarse or inconsistent grind, or the hopper is not locked fully into place, which leaves the safety interlock open so the motor will not start. Both are quick to correct.

My grinder hums but does not turn. What is wrong?

Something is physically blocking the burrs, or the motor has thermally cut out. Unplug it, remove the hopper and upper burr, and check for a stone or a jammed bean fragment. If it is clear, let the machine cool for half an hour before trying again. Do not keep running it against a jam.

Is it worth replacing the burrs or should I buy a new grinder?

Replacement burrs are available for most mid-range and better grinders and usually cost far less than a new machine, so they are worth fitting. On cheap grinders the parts often do not exist, or cost more than the grinder is worth, which effectively makes those machines disposable.

More espresso troubleshooting

If the shot is the problem rather than the grind, see what to check when an espresso machine is not building pressure, or the guide to a steam wand that will not froth milk.

Filed Under: Helpful Kitchen Tips

  • « Go to Previous Page
  • Page 1
  • Interim pages omitted …
  • Page 52
  • Page 53
  • Page 54
  • Page 55
  • Page 56
  • Interim pages omitted …
  • Page 70
  • Go to Next Page »

Recent Articles

  • Espresso Grind Size: How Fine to Grind and How to Adjust
  • Burr vs Blade Grinder: Which One Should You Buy?
  • Stainless Steel Pan Sticking? Causes and the Water Test
  • Carbon Steel Pan Rusting: What Makers Say to Do
  • Moka Pot Grind Size: What to Set and How to Dial It In

Search


HOME          Contact          Affiliate Disclosure          Terms of Service          Privacy Policy


kitchenwarecompare.com is a participant in the Amazon Services LLC Associates Program, an affiliate advertising program designed to provide a means for sites to earn advertising fees by advertising and linking to Amazon.com, Endless.com, MYHABIT.com, SmallParts.com, or AmazonWireless.com. Amazon, the Amazon logo, AmazonSupply, and the AmazonSupply logo are trademarks of Amazon.com, Inc. or its affiliates. As an Amazon Associate I earn from qualifying purchases.


Copyright © 2026 kitchenwarecompare.com, ALL RIGHTS RESERVED.