• Skip to primary navigation
  • Skip to main content
  • Skip to primary sidebar

Kitchenware Compare

  • Home
  • Product Reviews
    • Air Fryers
    • Coffee
    • Cookware
    • Flat Top Grills
    • Meat Thermometers
    • Food Processors
    • Knives
    • Pizza Ovens
    • Toaster Ovens
    • Juicers
  • Food Blog
  • Helpful Kitchen Tips
  • Data Studies
  • About
  • How I Review
  • Contact
You are here: Home / Archives for Glenn

Can You Grind Coffee Beans In A Nutribullet? A Step By Step Guide

Last Updated October 19, 2021

Can You Grind Coffee Beans in a Nutribullet

The short answer is yes; you can grind coffee beans in a nutribullet. The long answer is that it’s not as easy as using your typical grinder, and there are some things you need to know if you want to give it a try.

The notes below are drawn from the manufacturer’s own guidance and the pattern in owner reports, rather than from the marketing copy, not just what the box says it can do.

I earn a commission if you buy through the Amazon links below, at no extra cost to you.

Part of my complete coffee guide — all reviews, comparisons, and buying advice in one place.

First of all, the blade on a nutribullet isn’t going to be nearly as sharp or strong as the blades on a traditional coffee bean grinder – so this means that grinding will take longer and won’t turn out quite as finely ground. You also need to know that the nutribullet won’t be able to handle as much weight as a traditional grinder, so there’s a chance you’ll end up with clogged blades if you try it.

Full guide: Best French Press Coffee Maker 2026
Full guide: Best Espresso Machine Under $200

It also doesn’t grind relatively as evenly or consistently, which can make for some inconsistently brewed coffee, depending on what kind of machine you have. However, you can use the Nutribullet as an alternative to a regular coffee grinder. If you follow my guide below, you should get good results with a bit of trial and error.

Nutribullet: The Smart Kitchen Gadget

A Nutribullet is not your regular blender that chops your fruits into tiny watery bits. It breaks them down, releasing all nutrients embedded in your fruits for optimum nutrition. It’s a great kitchen appliance.

It has powerful blades that rotate at 20,000 revolutions per minute, and at this rate, it can liquefy anything that has liquid in it. You have to be careful not to place your finger in it because a machine this powerful grinds your finger into ‘liquid’ too. 

A Nutribullet comes with an extractor blade, but it is not advisable to grind your coffee beans with it. Grinding coffee beans using an extractor blade would wear out the edge faster because it is designed for soft and juicy food items. Your coffee beans can also get stuck between the extractor blades, depriving you of all the coffee powder you can get. 

The correct blade to use is the milling blade. The milling blade, also referred to as a flat blade, would blend your coffee beans perfectly, just like you like it. You would have to purchase a milling blade for this purpose since an ordinary Nutribullet doesn’t come with one. To get your choice of coffee texture, operating the Nutribullet using the appropriate method will make your progress go smoothly.

How To Use A Nutribullet To Grind Your Coffee Beans.

Unlike a regular blender, you do not control a Nutribullet using a knob or a dial. It is managed by pulse control. To use the nutribullet, apply pressure to the cup on the top of the appliance. The blades will rotate for as long as you apply pressure to the cup.

Steps

  • As common with using new appliances, always read through the user’s guide manual for easy assembling. Be sure to avoid connecting the Nutribullet to power while assembling it, so you don’t hurt yourself.
  • Remove the lid of the cup and fill three-quarters of the cup with coffee beans. The extra space in the cup is to give the blades some room to work. 
  • Replace the lid and attach the cup to the base(motor).
  • Pulse your Nutribullet to get it started. 

Grinding your coffee beans using a Nutribullet can be as simple as learning the alphabet if you follow these steps.

For Different Coffee Textures 

  • For Coarse Coffee, you need about 3-5 secs. Put your coffee beans in the cup and pulse just three times. Remember, don’t fill up the cup so that the milling blades can move freely.
  • For Fine Coffee, it takes about 15-20 secs. First, grind it into a coarse texture for about 5 seconds and then grind it into fine particles. To achieve this, you pulse ten times, checking to ensure that the beans get a consistent grind. If this is not the case, hold the cup’s lid and shake to allow the bigger particles to move downward toward the blade. Do this for another 15 seconds or until you’ve achieved your desired texture.

Store your coffee in a suitable container and keep it in a cool and dry place.

Cleaning/ Washing The Nutribullet

Washing your Nutribullet before and after use is as important as washing your hands before and after eating. Regular cleaning helps you maintain your appliance properly. It also ensures that at every point in time, your Nutribullet is free of dirt and germs that can contaminate whatever you put in it later on.

Steps To Follow

  • Detach the cup from the base. You can wash the cup without using a dishwasher.
  • If you come upon tough-to-come-off stains in the cup, fill it with warm, soapy water, and leave for some minutes, then attempt to rewash it.
  • To clean the base, you can only use a damp rag. Make sure you don’t have water dripping from the rag onto the bottom because water and electronics aren’t exactly friendly.
  • Carefully wipe the blades so you don’t get hurt by cutting yourself.

What Kind Of Beans Can The Nutribullet Grind?

The milling blade is specially designed for nuts, grains, and seeds, and your coffee beans fall right into one of the listed categories. You can conveniently grind your coffee beans in a Nutribullet, provided you have the right kind of blade.

You can purchase a milling blade separately, or there is the Nutribullet 600 that comes as an 8-piece set. It also comes with a milling blade and some other added accessories. It is a little bit more expensive than the normal Nutribullet 600 that doesn’t come with accessories. You can check it out below on Amazon.

I hope you found this article helpful. Please let me know in the comments. Also, make sure to look at my other helpful articles like my great tips and tricks for your Air Fryer and the ultimate guide to kitchen essentials. 

Frequently Asked Questions

Can you actually grind coffee beans in a Nutribullet?

Yes — a Nutribullet’s blades are sharp and fast enough to grind coffee beans, though the result is closer to a coarse, uneven grind than what a dedicated burr grinder produces. It works fine for French press or cold brew, where a coarser, less consistent grind is acceptable.

Will grinding coffee ruin my Nutribullet?

Occasional coffee grinding won’t damage a Nutribullet, but the blades and cup can retain coffee oils and odor over time, which may transfer to smoothies later. Many people keep a dedicated cup just for coffee and dry ingredients to avoid cross-contamination of flavors.

How is a Nutribullet grind different from a burr grinder?

A burr grinder crushes beans between two surfaces for a consistent particle size — critical for espresso and pour-over. A Nutribullet (like any blade grinder) chops beans unevenly, producing a mix of fine powder and larger chunks. This inconsistency is fine for French press but will make espresso taste off.

What’s the best way to grind coffee beans in a Nutribullet?

Use short pulses (2-3 seconds) rather than continuous blending, and shake the cup between pulses to redistribute the beans. This helps even out the grind and prevents the blades from over-processing the beans closest to them into powder while larger pieces remain untouched at the top.

If pushing your blender this hard has led to a leak at the base, here’s why that happens and how to fix it.

If your combo blender handles both smoothies and food prep, see my Ninja BN801 review for a full breakdown of how well that dual-purpose approach actually works.
Filed Under: Helpful Kitchen Tips

Best Omelette Pan

Last Updated October 15, 2021

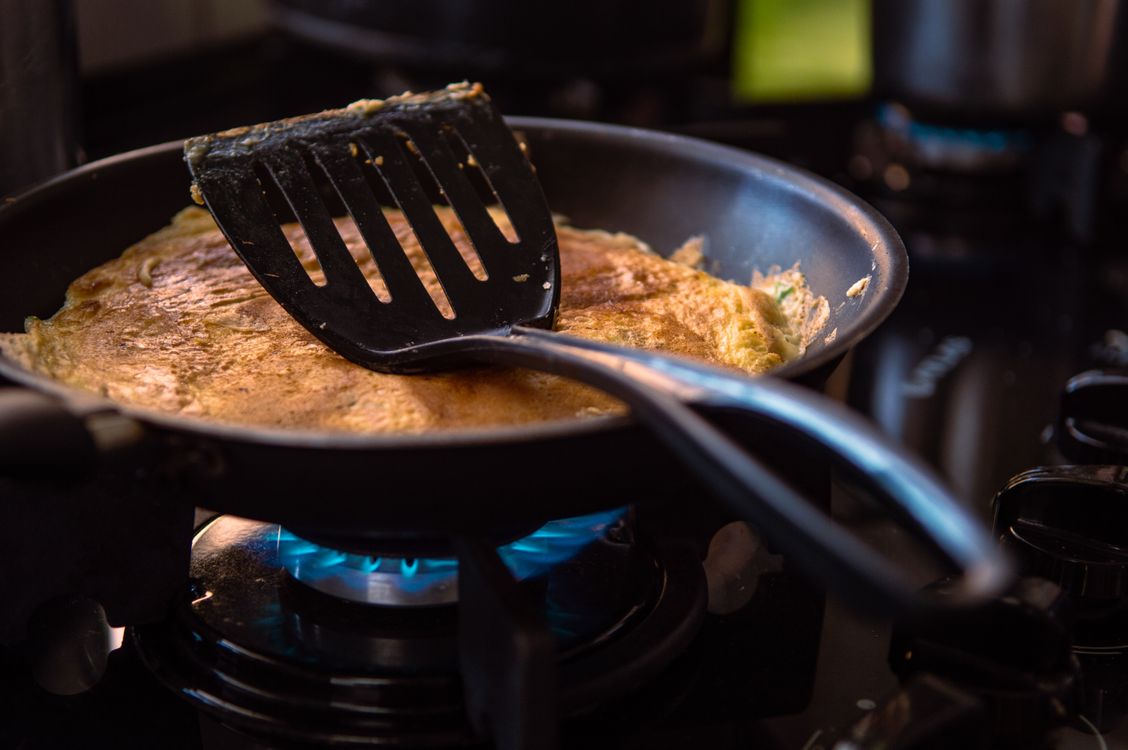
Perfectly cooked omelette in a nonstick frying pan with spatula

This post contains affiliate links. If you buy through my links, I may earn a commission at no extra cost to you.

The right pan matters more for omelettes than almost any other dish. Eggs cook fast, stick easily, and expose every flaw in your cookware. A good nonstick pan removes most of the technical difficulty. It is also why the pan, rather than the fat, is what decides whether eggs cook cleanly without butter.

For most people, the Tramontina Professional 8-Inch is the one to get: an NSF-certified restaurant pan at around $29 whose owners report years of use before the coating wears. If you want a coating whose maker states it is PTFE-free, or you cook on induction, the SENSARTE Ceramic Pan is the alternative — expect to replace it sooner. If you make Japanese-style rolled omelettes specifically, the TECHEF Tamagoyaki is designed for exactly that task.

These picks are based on product specifications, manufacturer data, and aggregated buyer feedback across thousands of reviews. Where consistent complaints appear, I’ve flagged them.

Best Omelette Pans 2026: Quick Comparison

Pan Best For Size Coating Price Buy
Tramontina Professional Best overall 8″ Reinforced nonstick ~$29 Check Price
SENSARTE Ceramic Best PTFE-free 9.5″ Ceramic, PFAS-free ~$24 Check Price
CAROTE Granite Best budget 8″ Granite-effect nonstick ~$16 Check Price
TECHEF Tamagoyaki Japanese omelettes Medium rect. Teflon nonstick, PFOA-free ~$25 Check Price
TECHEF Frittata Frittatas, no-flip 9.5″ round, two halves Teflon nonstick, PFOA-free ~$42 Check Price
All-Clad HA1 Set Best premium 8″ + 10″ Hard-anodized, PTFE nonstick ~$100 Check Price

Best Omelette Pans 2026: Full Reviews

1. Tramontina Professional 8-Inch Nonstick Fry Pan — Best Overall

Tramontina Professional 8-inch nonstick fry pan with a brushed aluminium body and red silicone handle sleeve

4.5/5  ·  5,567 ratings  ·  ~$29  ·  View on Amazon

This pick replaced the SENSARTE ceramic pan as Best Overall in September 2026. The SENSARTE still releases eggs beautifully and stays on this list for anyone who wants a PTFE-free label, but critical owners of that exact pan report its coating failing anywhere from the first week to about a year. For an overall recommendation, how long a pan keeps working matters more.

The Tramontina Professional is a restaurant-style aluminium pan with a reinforced nonstick coating, NSF-certified and made in Brazil, at around $29. It holds 4.5 stars across 5,567 ratings with only a 4% one-star share. What sets it apart is the durability reports: owners describe two, three to four, and five years of regular use before the coating wore out. It is not immune to early failure — a minority of owners report peeling within months, several of them after dishwasher use.

Two things to know before buying. It does not work on induction, and the listing says so plainly. Several owners also report that the 8-inch pan does not sit flat, tipping towards its long handle even with a couple of eggs in it; one owner posted a photo of theirs sitting level, so it may vary by unit, but check it on arrival.

The listing text and specification table give an oven limit of 400°F, although one of the product images says 500°F, so treat 400°F as the limit. It is listed as dishwasher safe, but several owners report the coating or the exterior degrading after dishwasher cycles, so hand wash it. The listing also carries a lifetime warranty.

Pros:

  • Several owners report years of use before the coating wore out
  • NSF-certified restaurant pan with a lifetime warranty, per the listing
  • Only 4% one-star across 5,567 ratings
  • Oven-safe to 400°F, with a removable silicone handle sleeve

Cons:

  • Not induction-compatible
  • Several owners say the 8-inch pan tips towards its handle and does not sit flat
  • Food catches around the rivets, which several owners find hard to clean
  • The listing does not claim the coating is PTFE-free — choose the SENSARTE below if that matters

Verdict: The pan to buy if you want an omelette pan that keeps working. Skip it if you cook on induction or want a PTFE-free label; the SENSARTE ceramic pan below covers both. My full Tramontina Professional 8-inch review sets out the durability reports, the balance complaints and the oven-temperature discrepancy.

Check Price on Amazon ↗

2. SENSARTE Nonstick Ceramic Pan — Best PTFE-Free

SENSARTE Nonstick Ceramic 9.5-inch Omelette Pan

4.4/5  ·  35,186 ratings  ·  ~$24  ·  View on Amazon

The SENSARTE is the pick for anyone who wants a PTFE-free label or cooks on induction. A round 9.5-inch skillet with a ceramic coating free of PFAS, PTFE, and PFOA. Works on all stovetops including induction, and the heat-resistant handle stays cool during normal use.

Its 4.4-star rating is pooled with SENSARTE’s other sizes and its granite pan, but owners of this exact pan consistently report clean egg release from the first use. The ceramic coating heats quickly and responds fast to temperature changes — an advantage for omelettes where you need to pull the heat back before eggs overcook. How long that lasts is the catch: critical owners of this exact pan report food sticking anywhere from the first week to about a year, even with hand washing, so treat the coating as a consumable.

Pros:

  • PFAS-free and PTFE-free — the safest coating on this list
  • Induction-compatible, works on all stovetop types
  • Excellent nonstick release — eggs slide cleanly from day one
  • Lightweight and easy to manoeuvre one-handed

Cons:

  • Ceramic degrades faster than PTFE if overheated or dishwashed — hand-wash only, medium heat or below
  • Thinner construction than hard-anodized alternatives

Verdict: The right starting point if you want an omelette pan whose maker states in writing that it is PTFE-free. Expect to replace it sooner than a PTFE pan; my full SENSARTE ceramic review covers the reported lifespans, the pooled rating, and a listing that calls it both dishwasher safe and hand wash only.

Check Price on Amazon ↗

3. CAROTE Nonstick Granite Frying Pan — Best Budget

CAROTE 8-inch Granite Nonstick Frying Pan

4.6/5  ·  35,984 ratings  ·  ~$16  ·  View on Amazon

The CAROTE costs around $16 and has 35,984 ratings at 4.6 stars — the largest sample on this list, though Amazon pools that count across the 8-, 10-, 12- and 12.5-inch sizes. It is induction-compatible and light enough to flip with one hand. CAROTE labels the coating PFOA-free, but unlike the SENSARTE it does not claim to be PTFE- or PFAS-free.

The granite-effect coating is a speckled stone appearance over aluminium — not actual granite. Egg release is clean when the pan is new. 8 inches handles a two- or three-egg omelette well; buy the 10-inch if you regularly cook for two. Expect 12–18 months of good performance. If you want to cook eggs without butter, a nonstick this slippery makes it easy.

Pros:

  • Best value on this list — strong performance under $16
  • 35,000+ ratings at 4.6 stars
  • Lightweight, easy to manoeuvre when folding
  • PFOA-free, all stovetops including induction

Cons:

  • Coating longevity limited at this price — 12 to 18 months before performance drops
  • 8 inches is small for large or multi-filling omelettes

Verdict: If you want to spend as little as possible on a pan that actually works, start here. My full CAROTE 8-inch review covers how long the coating lasts and what the listing does and does not claim about it.

Check Price on Amazon ↗

4. TECHEF Tamagoyaki Japanese Omelette Pan — Best for Japanese-Style Omelettes

TECHEF Tamagoyaki Japanese Rectangular Omelette Pan

4.7/5  ·  7,548 ratings  ·  ~$25  ·  View on Amazon

A rectangular pan designed specifically for Japanese rolled omelettes. Made in Korea from forged aluminium with a three-layer Teflon nonstick coating (PFOA-free), dishwasher-safe and sold as induction-ready, although several owners report induction hobs that do not detect it. The rectangular shape is the point — straight sides let you roll egg layers cleanly without them slipping off a curved edge.

If you only make Western-style omelettes, a round pan handles the fold better. But if tamagoyaki or Japanese breakfast dishes are part of your regular cooking, this is the right tool. 7,548 ratings at 4.7 stars, pooled across the medium and large sizes — strong for a specialist item.

Pros:

  • Rectangular shape is genuinely better for Japanese rolled omelettes
  • Owners report years of use from the Teflon coating, in two cases close to seven
  • Dishwasher-safe, and works on most induction hobs
  • 4.7 stars across 7,500+ ratings

Cons:

  • Rectangular shape limits it to Japanese egg dishes and a few other tasks
  • Smaller usable surface than a round 9.5-inch pan
  • Induction detection is unreliable on some hobs, and TECHEF lists two oven limits: 350°F in the bullets, 450°F in the specification table

Verdict: Buy this if tamagoyaki is part of your regular cooking. Don’t buy it as a general omelette pan. My full TECHEF tamagoyaki review covers the induction reports, the coating and the oven-limit conflict.

Check Price on Amazon ↗

5. TECHEF Frittata and Omelette Pan — Best for Frittatas and No-Flip Cooking

TECHEF Frittata Double-Sided Folding Omelette Pan

4.5/5  ·  5,135 ratings  ·  ~$42  ·  View on Amazon

A double-sided folding design: two nonstick plates that hinge together, letting you cook on one side then fold the pan over so the food lands cleanly on the other plate. No mid-air flip required — genuinely useful for large omelettes packed with fillings that would fall apart during a toss.

At $42, you’re paying for the folding mechanism as much as the cooking surface. 5,135 ratings at 4.5 stars, pooled across the black and purple versions, back up the concept. The downside is bulk — two plates plus a hinge takes considerably more cabinet space than a single pan. The bigger practical issue is leaking: several owners report liquid egg escaping at the hinge seams when they fold it, and owners who avoid it fold front to back over the handles rather than side to side.

Pros:

  • Folding design eliminates the flip — easier for large or stuffed omelettes and frittatas
  • Works for pancakes and anything else you’d normally flip without tossing
  • Teflon Select nonstick (PFOA-free), made in Korea, oven-safe to 450°F

Cons:

  • Bulky to store — two plates and a hinge takes more cabinet space
  • Expensive if frittatas aren’t a regular part of your cooking
  • Liquid egg can leak from the hinge seams when folding, and it does not work on induction

Verdict: Worth buying if frittatas appear on your weekly menu. For occasional omelettes, the Tramontina Professional 8-inch gives better everyday utility for less money. My full TECHEF frittata pan review covers the leaking problem and how owners avoid it.

Check Price on Amazon ↗

6. All-Clad HA1 Nonstick 8-Inch and 10-Inch Fry Pan Set — Best Premium Option

All-Clad HA1 hard-anodized nonstick 8-inch and 10-inch fry pans

4.6/5  ·  10,814 ratings  ·  ~$100  ·  View on Amazon

This pick replaced the Calphalon Easy System in September 2026. The Calphalon was down to its last units on Amazon, and its owners reported short, hot handles and a small cooking base.

The All-Clad HA1 set pairs an 8-inch pan for omelettes with a 10-inch pan for everything else, at about $100 for both. The bodies are hard-anodized aluminium on a stainless steel base, so they work on induction, and they are oven-safe to 500°F. All-Clad states plainly that the coating is PTFE nonstick. The set holds 4.6 stars across 10,814 ratings, with a 4% one-star share.

The reviews carry real warnings for the price. At least six owners report the pans warping, several of them on induction hobs, where even a slight warp makes the base rock. The handles are the other recurring complaint: many owners find them uncomfortable, some say they get hot, and All-Clad’s own product image suggests wrapping a towel around the handle.

Coating reports vary. Some owners are happy after 18 months, others report sticking or peeling within a year, and at least one says All-Clad would not cover peeling under the warranty. Hand washing is the safer choice, even though the listing says dishwasher safe.

Pros:

  • Two pans, 8-inch and 10-inch, for about $100
  • Works on induction and in the oven to 500°F
  • The largest rating sample of the premium options checked: 10,814 ratings at 4.6 stars
  • Double-riveted stainless steel handles

Cons:

  • At least six owners report warping, several on induction
  • Handles that many owners find uncomfortable, and some say get hot
  • A minority report coating failure within a year, and one says peeling was not covered by the warranty

Verdict: Worth it if you want an induction-ready, oven-safe pair from an established brand and can live with the handles. On gas or electric, the Tramontina Professional 8-inch is a single omelette pan with stronger durability reports for much less. My All-Clad HA1 fry pan set review covers the owner reports in full.

Check Price on Amazon ↗

What to Look for in an Omelette Pan

Round vs. Rectangle: It Depends What You’re Making

Round pans with sloped sides are better for Western omelettes — the slope helps you roll or fold the egg over the filling without tearing it. Rectangular pans like the TECHEF Tamagoyaki are designed for Japanese-style rolled omelettes, where straight sides help you build up thin egg layers in a controlled roll. Don’t buy a rectangular pan unless tamagoyaki is actually something you make.

Ceramic vs. PTFE vs. Hard-Anodized

Ceramic (SENSARTE): PFAS-free and PTFE-free, performs well at medium heat but degrades faster if overheated or dishwashed. Conventional nonstick (Tramontina, TECHEF and CAROTE, none of which is labelled PTFE-free): lasts longer at higher temperatures but releases fumes if left empty on a high flame. Hard-anodized (All-Clad HA1): a tougher pan body and a higher oven limit, though the nonstick coating inside wears like any other. For omelettes, the practical difference is small — good technique uses medium or medium-low heat, where all three perform similarly.

Size: 8-Inch vs. 9.5-Inch

An 8-inch pan suits a two- or three-egg omelette for one person. A 9.5-inch pan gives more room for fillings and is better for cooking for two. See my guide to nonstick pans for gas stoves if you need a larger all-purpose option.

Frequently Asked Questions

What makes a pan specifically good for omelettes?

Three things: sloped sides so you can roll without tearing, a reliable nonstick coating so eggs slide, and even heat distribution with no hot spots. Most dedicated omelette pans have all three. A flat-sided skillet can make omelettes but is less forgiving.

Do I need a separate pan just for omelettes?

Not strictly — but it helps. If you use the same pan for bacon or sausage, residue eventually builds up and affects release. A dedicated 8-inch pan kept just for eggs stays slippery much longer. At $15–25, it’s not a significant investment.

How long does a nonstick coating last?

It varies far more than the labels suggest. Owners of the pans in this guide report ceramic coatings failing anywhere from the first weeks to about a year, and conventional nonstick lasting from about two years to more than five. Hard-anodizing toughens the pan body, not the coating. All degrade faster with metal utensils, dishwasher use, or high heat.

Is ceramic nonstick coating safe?

Yes, for normal cooking temperatures. Ceramic coatings are free of PFAS, PTFE, and PFOA. The main risk is overheating above 450°F — avoid preheating an empty pan on high.

What’s the difference between a French and an American-style omelette?

A French omelette is cooked quickly over medium-high heat, rolled so the outside stays pale with no browning. An American omelette is cooked more slowly, folded in half, often with slight browning. French omelettes require fast heat response and very good nonstick release — the Tramontina and SENSARTE both work well.

Can I use an omelette pan for other things?

Yes — a round nonstick omelette pan is just a small frying pan. Works for sautéed vegetables, pan sauces, fish fillets, or anything that fits in 8–9.5 inches. The TECHEF Tamagoyaki is the exception: the rectangular shape limits it to Japanese egg dishes. The Tramontina, SENSARTE and CAROTE are the most versatile options.

How These Picks Were Chosen

Plainly: this is a research-based guide, not a hands-on test. I have not run these side by side, and nothing here should be read as a report from my own kitchen.

What the picks rest on: coating type and how many layers are claimed, base thickness and induction compatibility, sloped-wall geometry that actually lets an omelette roll, and handle construction and oven-safe temperature; plus the complaint patterns in verified-purchase reviews, which for nonstick pans are strikingly consistent – the coating releases well for months, and then it does not.

What I could not establish: how long each coating lasts, which is the only thing separating a good nonstick pan from a bad one. No standardised abrasion test is published for these pans, and owner reports conflate careless use with genuine coating failure. Where a pan is called durable here, that is owner consensus rather than a measured result.

The Bottom Line

For most people, the Tramontina Professional 8-Inch is the right call: a restaurant-grade pan that owners report lasting for years, at around $29. If you want a PTFE-free label or cook on induction, the SENSARTE Ceramic Pan is the one to buy, on the understanding that its coating may not last as long. The CAROTE is a reasonable alternative if you want to spend less. For five-minute hands-off breakfasts, my Hamilton Beach breakfast sandwich maker review covers the $30 gadget that replaces the drive-through.

If Japanese omelettes are part of your regular cooking, get the TECHEF Tamagoyaki. For frittatas, the TECHEF Frittata Pan earns its cost. The All-Clad HA1 set is the premium choice if you cook on induction and want two pans, provided you can live with the handles.

For more cookware recommendations, see my full cookware guide.


Filed Under: Product Reviews

What Does Jackfruit Taste Like? A Complete Guide to This Super Fruit

Last Updated August 23, 2021

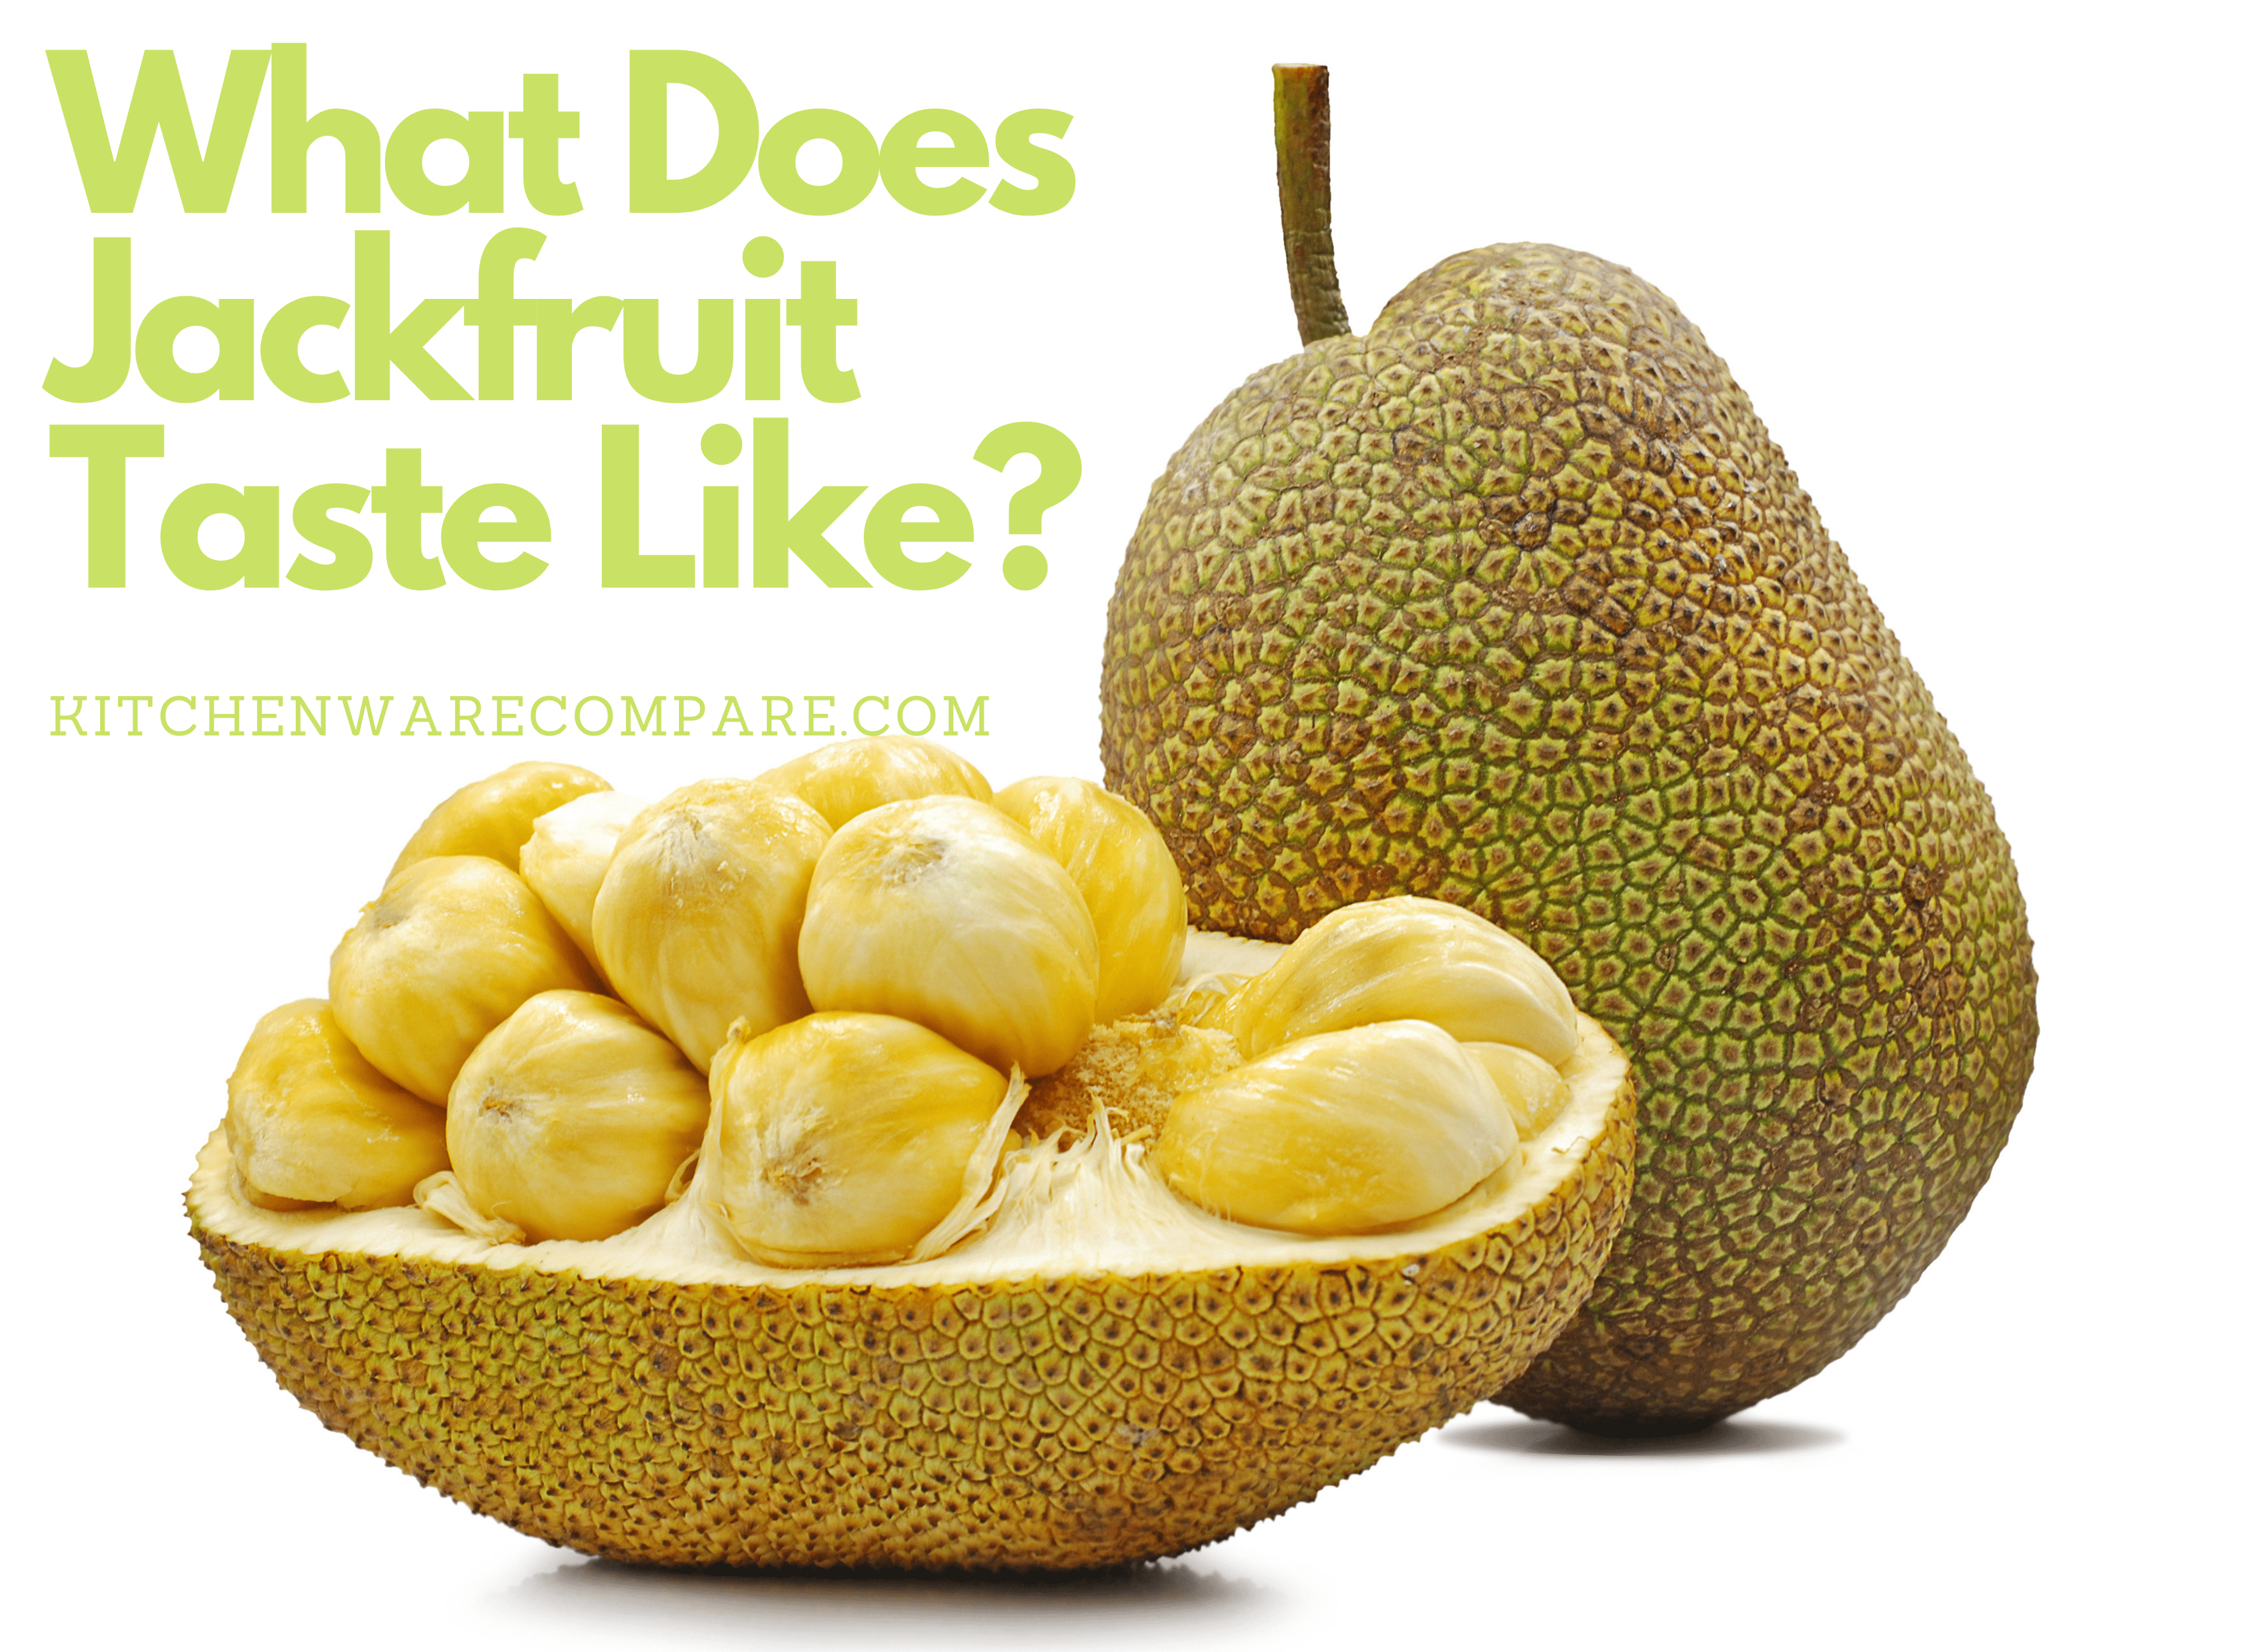
Jackfruit

Ripe jackfruit tastes like a mix of banana and pineapple with hints of apple or mango. Unripe (young green) jackfruit is mild, with a stringy, pulled-pork texture that soaks up whatever you cook it in — which is why it shows up in so many vegan and vegetarian dishes. They can be eaten raw, used as a vegetable in cooking, or ripe as a fruit. I’ve cooked with both ripe and unripe jackfruit — this article covers how to identify a ripe one, what it tastes like, and where to find it, plus a few recipes worth trying: BBQ Jackfruit Bites, Thai Pineapple Curry with Jackfruit, and a Jackfruit Burger.

So, what does jackfruit taste like?

The taste of Jackfruit depends on the ripeness of the fruit when consumed. Its meat-like texture is what makes it work in vegan and vegetarian cooking. Ripe Jackfruit tastes like a combination of banana and pineapple, with hints of apple or mango.

If you are craving meat but don’t want the guilt associated with it, jackfruit is the closest plant-based stand-in. The texture is similar to pulled pork and, when cooked well (like in my BBQ Jackfruit Bites recipe), will have that crispy outside and juicy inside barbecue chicken wings.

Jackfruits come in a number of different varieties, each with its own unique taste. Here are some of the most popular:

Black Gold Jackfruit: This is a green-skinned variety of jackfruit. They are large, dark brown in color with a velvety smooth texture, and have an apple-like taste

Cheena Jackfruit: This is a yellow-fleshed variety of jackfruit. They are smaller in size, pale green to light brown in color, and have an earthy taste, so are usually used in cooking.

Cochin Jackfruit: This is a variety of Jackfruit primarily grown in Australia. They are typically smaller in size, light green to pinkish-brown in color and have an earthy taste with hints of banana.

Dang Rasimi Jackfruit: This is a variety of Jackfruit primarily grown in Thailand. They are typically large, bright green to light brown in color, and have a sweet taste with notes of mango.

Golden Nugget Jackfruit: Averaging between 6-8 pounds, this is well known as being a deliciously sweet variety of Jackfruit with a smooth texture and dark orange flesh.

Green Horned Jackfruit: This is an uncultivated variety that bears similarities to the black gold type of jackfruit. It has been described as having spicy notes with hints of pine.

What is Jackfruit?

Jackfruit is a fruit native to India. They can grow huge, depending on the variety, and are used as a popular substitute for meat. The inside of the fruit is made up of numerous pouches of flesh wrapped in edible skin.

Jackfruit has been cultivated in tropical climates around the world for centuries. There are over 100 varieties, and they come in four different colors: green, yellow, red, or purple. The fruit can be eaten raw or cooked with an edible peel and even edible seeds.

The unripe fruit tastes bitter and is best used for cooking, while ripe ones have this sweet flavor with hints of banana and pineapple; you may also detect other more exotic flavors like mango or apple.

You should note that Jackfruit can be an acquired taste.

Young jackfruits will have spikes on their surface which make them hard to handle, but once they ripen, these disappear, making them easier to prepare

The flesh of this tropical fruit is composed mainly of water (around 92%), which suits dishes where you want a refreshing taste, like my Thai Pineapple Curry recipe.

They also work well when combined with coconut milk, where their texture becomes more like tofu than meat.

But Its taste can also provide an interesting twist in many different dishes!

How can you tell if a Jackfruit is ripe?

You can use three signs to find out. Learn the signs to get the best-tasting Jackfruit.

Firstly, your jackfruit will have a sweet smell, which means it is ripe enough for cooking and eating.

Secondly, the fruit should show some yellow or brown coloring when peeled

Lastly, you need to see if the fruit gives in pressure and creates a “give” sound; this tells you that it’s at its peak ripeness

To tell if jackfruit is ripe enough, the fruit should feel heavy for its size and have an even distribution of colors from white, yellow, or brown on the inside. If the skin has dark spots, then it means they are extra sweet!

The smell of jackfruit depends on the ripeness, as with its flavor. Unripe fruit will have a strong and unpleasant aroma, while ripe ones emit a sweet scent that resembles bananas or pineapple.

Suppose all these three things are true, then congratulations! You’ve found yourself a perfect specimen of jackfruit ripe for picking up and utilizing into one of my recipes, such as BBQ Jackfruit Bites or Vegan Pulled Pork Sandwiches with Slaw Pico de Gallo!

How to prepare Jackfruit

Young Jackfruits are not easy to peel due to their spikes, but these disappear when they mature, making them easier to handle.

When using them for cooking, cut the jackfruit into small cubes and boil until it becomes soft. After this, rinse well in water to remove any dirt.

If you want something that’s refreshing like my Thai Pineapple Curry recipe, mature unpeeled Jackfruit works perfectly because their consistency resembles tofu more than meat when cooked while still maintaining its texture.

But if you’re looking for a meatier texture, I recommend that the jackfruit be cooked with some coconut milk or soy sauce to give it more flavor. You can also add other vegetables like mushrooms, bell peppers, or carrots as your creativity sees fit!

There is an appropriate way of preparing every dish, so read all my recipes carefully and get inspired by new ways of cooking this tropical fruit!

How to cut Jackfruit?

Cutting a Jackfruit can be very challenging due to the size of the fruit. They can be enormous (up to 100lbs). They also contain a sticky resin that can stick to the knife and make it difficult to slice through — a full-size, sharp chef’s knife (oiled lightly to resist the sap) makes this far easier than a small utility blade.

I found this great video on Youtube that walks you through the process step by step.

What are the Nutritional Benefits of Jackfruit?

As mentioned before, jackfruit is mainly composed of water, making it a perfect choice for dishes that require something refreshing, like my Thai Pineapple Curry recipe.

It also has high amounts of micronutrients, including vitamin C, B-complex vitamins (especially folates), potassium, and magnesium.

Additionally, the fruit contains significant amounts of dietary fiber; this can help in weight loss by reducing hunger and controlling blood sugar levels and cholesterol levels. The soluble fibers will keep you satiated longer, while the insoluble ones have been shown to lower LDL or “bad” cholesterol by binding with bile salts found in food particles.

Jackfruit are rich sources of antioxidants such as carotenoids (beta-carotene, alpha-carotene, beta-cryptoxanthin) and polyphenols (flavones like quercetin).

In comparison with other foods, jackfruit is a great source of protein. It contains about six grams per cup.

The fruit also has high amounts of dietary fiber, which makes it easy to digest while being rich in vitamins and minerals, making them an excellent choice for those who need more calcium or potassium in their diet. Jackfruit is also gluten-free!

Is Jackfruit a good meat substitute?

Jackfruit is a great substitute for meat because it usually has a similar texture and consistency to tofu but also retains its own flavor.

It is readily available and far tastier than Tofu. For pulled-pork-style dishes, a few pulses in a food processor shreds young jackfruit in seconds.

Where can you buy Jackfruit?

The best way to purchase Jackfruit is by picking it up at a local fruit market! Make sure that the fruits are ripe and have a sweet scent.

A more convenient option would be buying them frozen. This can be done online or in any store where they sell canned goods.

You can also find fresh jackfruit but make sure you buy them from an ethical source that only sells produce grown without insecticides, fertilizers, or genetic modification.

You can purchase jackfruit on Amazon, and I’ve listed some good options below.

Popular Jackfruit recipes

BBQ Jackfruit Bites:

Prep Time: 30 minutes

Cook Time: 20 minutes

Servings: 12-14 appetizers

Ingredients:

• One 25oz can of jackfruit in water, drained, and chopped into small pieces. • ½ Cup vegan BBQ sauce (I recommend using my Homemade Vegan BBQ Sauce Recipe) • ¼ tsp garlic powder • Pinch sea salt or to taste

Instructions:

Take a large bowl; add the prepared Jackfruit. Put together the BBQ sauce with vinegar, ketchup, garlic, and pepper. In a nonstick pan on medium heat, mix all ingredients until they are well combined. Cook for about 15-20 minutes. Make sure that you stir now and then so that it doesn’t stick to one side. Scoop out onto a paper towel-lined cookie sheet and let cool for about 15 minutes, then serve

Thai Pineapple and Jackfruit Curry:

Prep time: 30 minutes

Cook Time: 20 minutes

Servings: Makes four servings, can be doubled or tripled for more people.

Ingredients:

• One medium onion, diced • Four garlic cloves, peeled and minced • Two tablespoons grated ginger root • Three inches fresh turmeric root, sliced into rounds ¼-inch thick – if you don’t have fresh Turmeric, use ½ tsp ground Turmeric instead. • Five whole cardamom pods (if using preground spices, then increase to two teaspoons) • 1lb of Jackfruit and 1 tin of Pineapple chunks

• One-inch fresh cinnamon stick • Pinch of cayenne pepper • Two teaspoons garam masala • Five dried bay leaves (or one tablespoon dried thyme) • Fresh ginger, peeled and grated to taste – I like using about four tablespoons for two cups of sauce or so; this is completely up to personal preference though! You can also use powdered ginger if you don’t want too much texture, but it doesn’t have as strong an effect as some might prefer.

Instructions:

If using frozen Jackfruit, thaw it by letting it sit in the fridge for a day or two. You can use frozen Jackfruit if you’re making this dish during seasons when jackfruit is not available fresh, but note that thawing will take longer and may not work as well (since freezing tends to break down the cell walls)

Drain jackfruit and pat dry with a paper towel or clean kitchen cloths. Cut into small cubes about ¼-inch thick. Set aside

In a deep saute pan, add three tablespoons of coconut oil – I use organic cold-pressed here. Fry onion until browned, then toss in garlic cloves, grated ginger root, bay leaves, cardamom pods, cinnamon sticks, and salt over medium heat, often stirring, so they don’t burn too quickly). Fry for about five minutes, then add in all the spices and fry until fragrant. Next, toss in your jackfruit cubes and Pineapple chunks, stirring to coat them with the onion mixture.

Add coconut milk or cream (preferred)

If you’re using fresh bay leaves, add four of them now instead of five dried ones. You can also use both if you want an extra hit of flavor!

Bring it to a boil, then simmer on low heat for 20-30 minutes before serving hot over rice or grains like quinoa, barley, etc. Garnish with chopped cilantro and serve as is or over steamed vegetables such as broccoli, cauliflower, carrots, etc.… Enjoy this one-pot meal that’s great for cold days, too, because there are plenty of delicious flavors to keep you warm!

Jackfruit Tacos Recipe:

Prep Time: 30 minutes

Cook Time: 15-20 minutes

Servings: Makes 12 tacos. It can be doubled or tripled for more people.

Ingredients:

• One small onion, diced • Two cloves garlic, peeled and minced

• Three tablespoons tomato paste (preferably roasted) • Four cups shredded cooked jackfruit or one 25oz can in water drained and chopped into small pieces. • ½ Cup vegan BBQ sauce, plus some for topping tacos if desired • ¼ tsp garlic powder

Instructions:

In a deep saute pan, add three tablespoons of coconut oil – I use organic cold-pressed here. Fry onion until browned, then toss in garlic cloves over medium heat, often stirring, so they don’t burn too quickly). Fry for about five minutes, then add the spices and fry until fragrant. Next, toss in your jackfruit cubes and Pineapple chunks, stirring to coat them with the onion mixture.

In a separate bowl, whisk together BBQ sauce and tomato paste. Pour this over your jackfruit mixture and stir until everything is coated (remember to include pineapple as well). Let it simmer on medium-low heat for 15 minutes covered.

Pour into tortillas or taco shells of choice with desired toppings such as lettuce, avocado slices, etc… Enjoy!

Jackfruit Burger Recipe:

Prep Time: 20 minutes

Cook Time: 15-20 minutes

Servings: Makes six burgers.

Jackfruit Burgers are easy to make and taste great!

Ingredients:

• One cup mashed, cooked jackfruit (you can use canned) • ½ Cup chickpeas/garbanzo beans, finely chopped and blended until smooth in a food processor • ¼ tsp onion powder • ¼ tsp garlic powder • A few dashes of chili seasoning mix if desired

Instructions:

In a bowl, mix the jackfruit with chickpeas until it becomes sticky. Add onion powder and garlic to taste, then shape six burgers out of your mixture. Place on an oiled pan or top of foil (sprinkle some salt if desired) and cook for 15-20 minutes over medium-high heat.

Serve as is or place in lettuce leaves, burger buns, etc…with all your favorite toppings!

Jackfruit Nachos Recipe:

Prep Time: 20-30 minutes

Cook Time: None – assemble when ready to serve

Servings: Makes six servings/six to eight appetizer servings. It can be doubled or tripled for more people.

Ingredients:

• One small onion, diced • Two cloves garlic, peeled and minced • Three tablespoons tomato paste (preferably roasted) • Four cups shredded cooked jackfruit or one 25oz can in water drained and chopped into small pieces. • ½ Cup vegan BBQ sauce, plus some for topping if desired

Instructions:

Toss these ingredients together with your hands until they are evenly distributed on the tortilla chips, then top them off with any of your favorite toppings! Be creative…I used guacamole, salsa verde, and black beans here but feel free to get really wild – use what you have on hand to create a custom nacho recipe!

Conclusion

Jackfruit is a fruit that’s been around for quite some time, but it’s still relatively unknown to many people. It originates in India and Southeast Asia and has grown popular due to its ability to replace meat as an ingredient in dishes like tacos or pulled pork sandwiches. This article provides information about the taste of jackfruit, where you can find it, how to cook with it, and more! I hope this post will help introduce you (or your friends) to one more delicious food item out there waiting for you to try! If nothing else, share this blog on social media, so others have access to all these great facts about Jackfruit- I think they’ll appreciate them just as much as I do!”

Curious about other unusual flavors? See my guides to what boba tastes like and what miso tastes like.

Filed Under: Food Blog

Best Air Fryer for Family of 4

Last Updated July 21, 2021

Air fryer and toaster on a modern kitchen counter

This post contains affiliate links. If you buy through one of them, I earn a commission at no extra cost to you.

A family of 4 puts different demands on an air fryer than a couple or a solo cook. You need enough capacity to cook a full batch of chicken thighs, a pile of frozen fries, or a tray of vegetables without splitting everything into three rounds. You also need something that holds up to nightly use.

This guide is research-based rather than hands-on, and the evaluation focuses specifically on how well each model handles the demands of cooking for four people — protein, sides, and batch size — not just performance on a single food item. The five models below are the ones I’d actually recommend.

For a broader look at the category, see my air fryers hub, which covers every style from compact basket models to large-capacity countertop units.

Quick Comparison

Model Pick Capacity Price Rating Buy
Ninja DZ302 Foodi 10 Qt Best Overall 10 Qt ~$230 4.7★ Check Price
Ninja DZ201 Foodi 8 Qt Best 8 Qt Pick 8 Qt ~$200 4.8★ Check Price
Ninja XL MaxCrisp 6.5 Qt Most Popular 6.5 Qt ~$180 4.7★ Check Price
COSORI TurboBlaze 6 Qt Best Value 6 Qt ~$120 4.8★ Check Price
Instant Pot Vortex 5.7 Qt Simplest Controls 5.7 Qt ~$112.99 4.6★ Check Price

The Best Air Fryers for a Family of 4, Reviewed

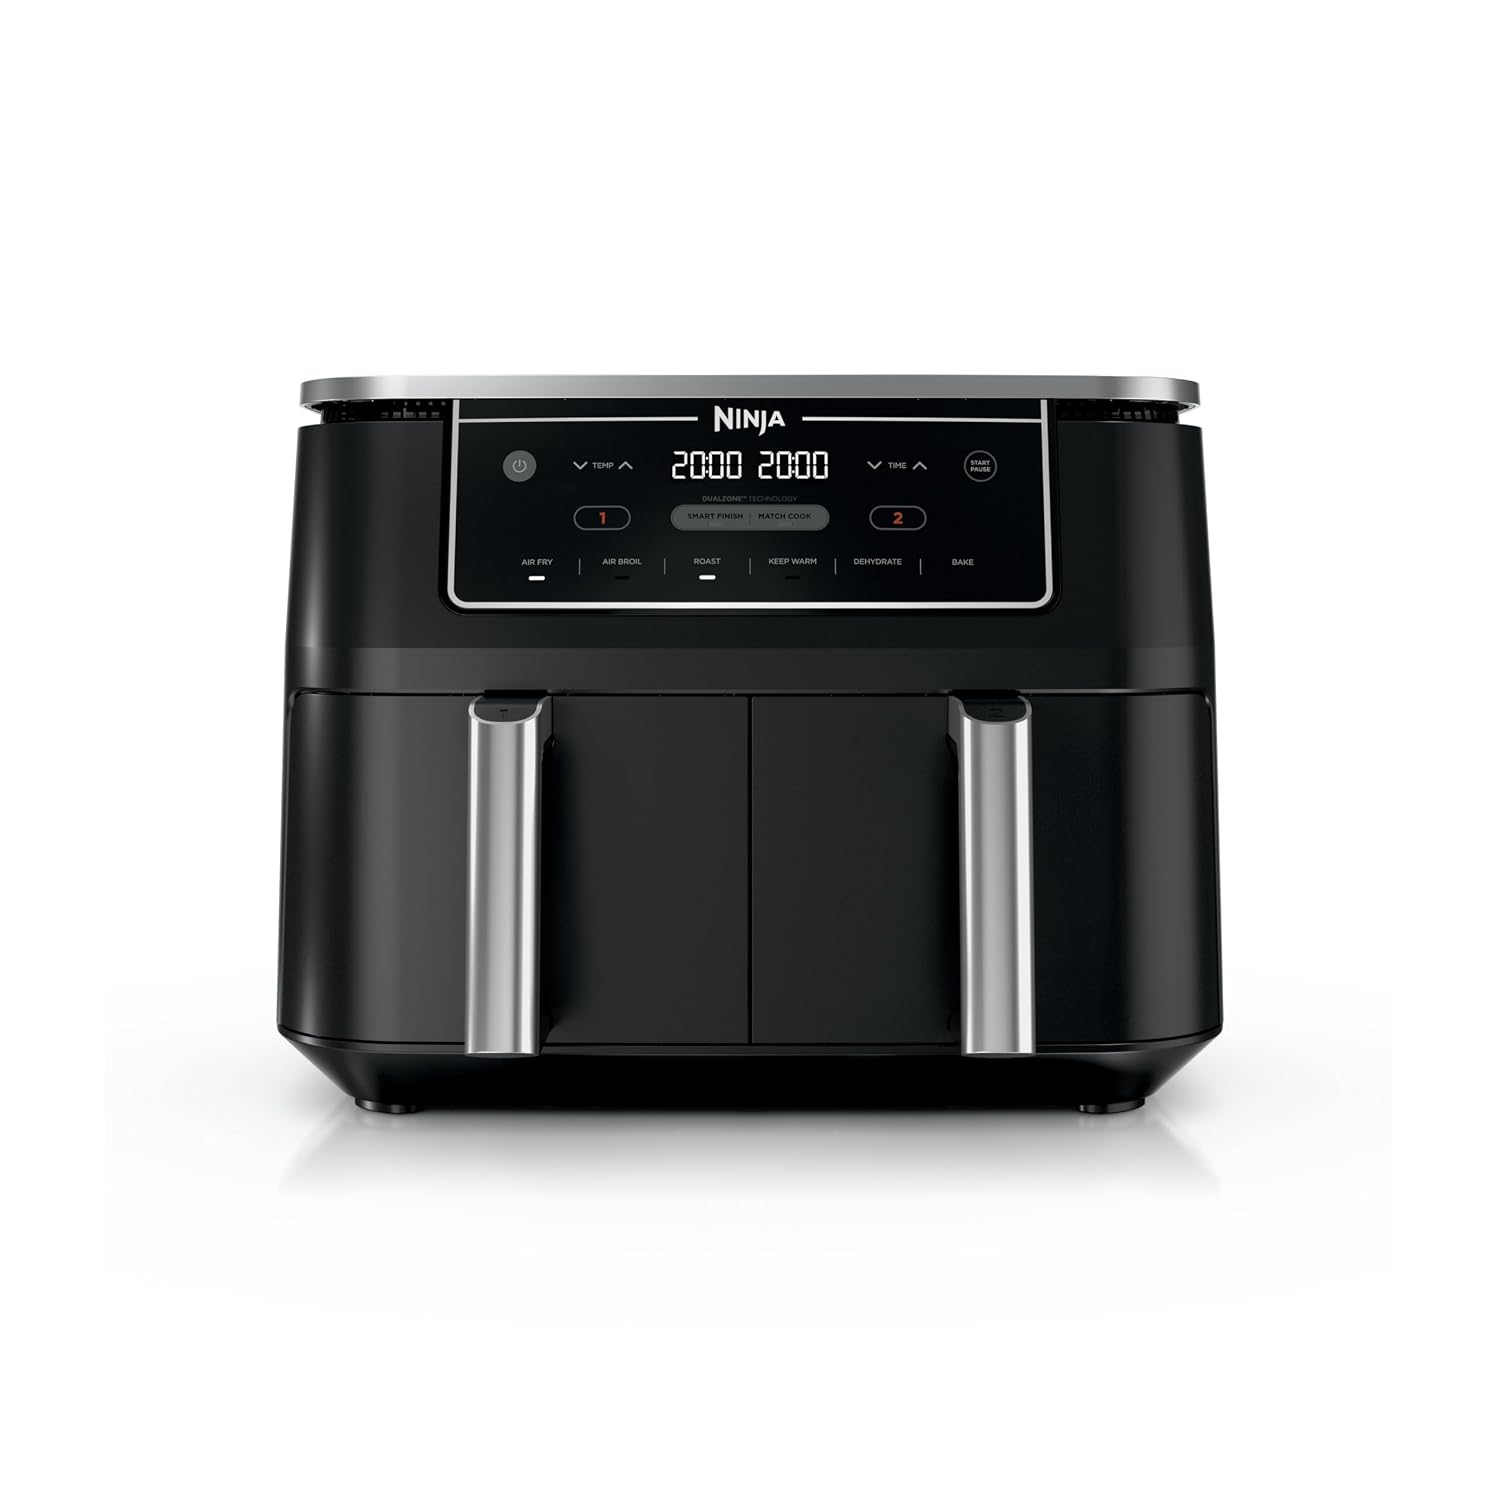
1. Ninja DZ302 Foodi 10 Qt DualZone — Best Overall

Ninja DZ302 Foodi 10 Qt DualZone 2-basket air fryer in black

Rating: 4.7★ (1,045 ratings) | Price: ~$230 | Capacity: 10 Qt (two 5 Qt baskets)

The DZ302 is the air fryer I’d now recommend to most families of 4. It has the same two-basket DualZone design as the DZ201, but each basket is 5 Qt instead of 4, for 10 Qt in total, and at about $230 it costs about $30 more. Ninja says the two baskets take up to 8 lb of wings, and that its IQ Boost setting cooks a 6 lb whole chicken and a side.

It keeps Smart Finish and Match Cook, swaps the DZ201’s Reheat program for Keep Warm, and draws the same 1,690 W. Its owner record is much shorter: 40 of the 244 written reviews for this listing are critical (16%, against 13% for the DZ201), mostly about baskets that feel small for the size of the unit and units that stopped working within about a year.

Pros:

  • Two 5 Qt baskets for 10 Qt total, at the same price as the 8 Qt DZ201
  • A main and a side at the same time, each in its own 5 Qt basket
  • Smart Finish and Match Cook, as on the DZ201
  • Keep Warm program to hold food until everyone sits down

Cons:

  • A much shorter owner record: 1,045 ratings against 25,056 for the DZ201
  • 14.7″ wide x 17.1″ deep, about 3 inches deeper than the DZ201
  • Some owners find the two baskets small for the size of the unit
Check Price on Amazon

2. Ninja DZ201 Foodi 8 Qt DualZone — Best 8 Qt Pick

Ninja DZ201 Foodi 8 Qt DualZone 2-basket air fryer in grey

Rating: 4.8★ (25,056 ratings) | Price: ~$200 | Capacity: 8 Qt (two 4 Qt baskets)

The DZ201 is the smaller DualZone model, and the one with the far longer owner record. Two independent 4 Qt baskets mean you can cook chicken in one side and fries in the other, with the Smart Finish function timing both to finish simultaneously. At about $200 it costs about $30 less than the 10 Qt DZ302, so it makes sense if you would rather save the $30 or its shallower 13.9-inch depth suits your counter. It has 4.8 stars across 25,056 ratings.

The DualZone system solves the single biggest frustration of cooking for a family: protein done before the sides, or sides ready while the chicken needs another 10 minutes. Match Cook lets you run both baskets at the same settings for a double batch of one item. Smart Finish staggers the cooking so both baskets land on the table at the same time. My Ninja DZ201 review covers what owners report about basket size, coating wear and reliability.

The 8 Qt is split across two 4 Qt baskets. Ninja’s cooking chart gives about 2 lb of wings or 1 lb of fries per basket, so a family meal usually means both baskets in use, and anything large has to fit in one of them. Keep food in a single layer, because crowded food steams rather than crisps.

Pros:

  • Dual baskets with Smart Finish — genuinely solves the family timing problem
  • 8 Qt total across two 4 Qt baskets
  • Basket inserts are dishwasher safe
  • Separate heater and fan in each basket
  • Strong review volume and rating give real-world reliability confidence

Cons:

  • Bulky footprint — 15.6″ wide x 13.9″ deep; requires dedicated counter space
  • The plastic control panel feels less premium than the price suggests
  • Each basket is only 4 Qt, too small for a whole chicken or a pizza
Check Price on Amazon

3. Ninja XL Air Fryer with MaxCrisp 6.5 Qt — Most Popular Choice

Ninja XL MaxCrisp air fryer 6.5 quart black model

Rating: 4.7★ (2,169 ratings) | Price: ~$180 | Capacity: 6.5 Qt

The Ninja XL MaxCrisp holds 4.7★ across 2,169 ratings. It runs at 1,750W, and its Max Crisp setting runs at a fixed 450°F for frozen foods, while its other functions top out at 400°F. 112 of its 536 written reviews are critical (20.9%), most often about coating wear and noise, and my Ninja AF181 MaxCrisp review covers what owners report.

At 6.5 Qt, it’s a single-basket machine — you can’t cook two items at different temperatures simultaneously like the DualZone models. For families who typically air fry one large batch at a time, that’s not a limitation. The single-basket design also means easier cleaning: one piece in the dishwasher rather than two.

Pros:

  • 4.7★ across 2,169 ratings
  • Max Crisp setting at 450°F for frozen foods
  • Simple, low-learning-curve control panel
  • Ninja rates the basket for up to 5 lb of fries or 9 lb of wings

Cons:

  • Single basket — can’t cook two items at different temperatures simultaneously
  • 6.5 Qt may require two rounds for a complete family meal with protein and two sides
  • No preset programs for specific dishes; 6 basic functions only
Check Price on Amazon

4. COSORI TurboBlaze 6 Qt — Best Value

COSORI TurboBlaze 6 Qt PFAS-free ceramic air fryer in black

Rating: 4.8★ (21,877 ratings) | Price: ~$120 | Capacity: 6 Qt

The COSORI TurboBlaze sits at 4.8★ across 21,877 ratings — one of the highest ratings in this list. It is the best value on this list: at $119.99 it costs less than every pick except the Instant Vortex (on sale at $112.99), and it has the lowest share of critical written reviews, 435 of 7,525 (5.8%). COSORI’s listing describes a PFAS-free ceramic coating on the basket and crisper plate, though Ninja also sells the MaxCrisp as PFAS-free, so the coating alone does not set it apart.

It runs at 1,725W with a fan COSORI rates at up to 3,600 rpm across five speeds, and has nine functions from Proof at 90°F to Broil at 450°F. COSORI’s manual says pulling the basket out pauses cooking, and the warranty is two years. More in my COSORI TurboBlaze review.

Pros:

  • PFAS-free ceramic coating, named in the listing title
  • 4.8★ across 21,877 ratings, with 5.8% of written reviews critical
  • Nine cooking functions in one 6 Qt basket
  • Pauses automatically when the basket is pulled out

Cons:

  • At 6 Qt, smaller than the Ninja picks here — tight for a complete family meal in one batch
  • COSORI’s manual describes only a nonstick coating, and a few owners dispute the ceramic label
  • Single basket only — no dual-zone option in this model
Check Price on Amazon

5. Instant Pot Vortex 5.7 Qt — Simplest Controls

Instant Pot Vortex 5.7 Qt air fryer in black

Rating: 4.6★ (6,682 ratings) | Price: ~$113 | Capacity: 5.7 Qt

The Instant Pot Vortex carries the reliability that comes with the Instant Pot brand. At 5.7 Qt it’s the smallest model in this roundup — best suited to families where portions run lighter, or families comfortable cooking in two batches for bigger meals. EvenCrisp technology distributes heat consistently, and the 4-in-1 functions cover the basics without complication.

Pros:

  • ~$113 with Instant Pot brand backing
  • Simple 4-function controls — no learning curve
  • EvenCrisp technology delivers consistent results without hot spots
  • Trusted Instant Pot brand with strong customer support

Cons:

  • 5.7 Qt is the smallest here — expect two rounds for a full family meal
  • Only 4 cooking functions — less versatile than the COSORI or Ninja models
  • Fewer reviews than most competitors at this price point
Check Price on Amazon

What to Look for in a Family Air Fryer

Capacity: Bigger Than You Think

The most common mistake is buying a 4 Qt or 5 Qt air fryer for a family of 4 and wondering why dinner takes forever. Food needs to sit in a single layer to crisp properly — pile it up and you get steamed food, not air-fried. For a family of 4, 6 Qt is the minimum worth considering. Eight to 10 Qt gives genuine flexibility for larger meals and means one cook covers most weeknights.

Single Basket vs. Dual Basket

Dual-basket models solve a real problem: getting protein and sides done at the same time. If you’ve eaten cold fries waiting for chicken to finish, you understand the appeal. Single-basket models are simpler, often easier to clean, and frequently deliver better browning per dollar — the right call if you cook one large batch of a single item at a time. Most families with straightforward weeknight routines do fine with a large single basket.

Wattage and Crispiness

Wattage mostly tells you how much power an air fryer draws, and the three Ninja picks here sit close together: 1,690W for both DualZone models and 1,750W for the MaxCrisp. The MaxCrisp reaches 450°F on its Max Crisp setting, against 400°F on its other functions. Ninja’s DualZone guide asks for a 15-amp circuit with nothing else plugged into the outlet, and the MaxCrisp guide says not to use an extension cord.

Cleaning for Nightly Use

With nightly family use, dishwasher-safe baskets are non-negotiable — though repeated cycles are also the fastest route to a basket coating that flakes, so check whether spare baskets are sold for the model you choose. All five models above meet that standard. Dual-basket models have two parts per session; single-basket models have one.

Price vs. Capacity

The $100–$230 range covers most families well: the Ninja DZ201 sits at about $200 and the DZ302 at about $230. Spending under $70 gets you into underpowered or underbuilt territory — fine for occasional use, not for nightly family cooking.

FAQ

What size air fryer do I need for a family of 4?

For a family of 4, I’d recommend a minimum of 6 Qt. An 8 Qt model handles most family meals without batching. For families of 5–6 or anyone who meal preps, 10 Qt gives more room. For more on sizing across different household types, the air fryer guide has a full breakdown.

Is a dual-basket air fryer worth it for a family?

For most families of 4, yes. The ability to cook protein and sides simultaneously — finishing at the same time — is genuinely useful. The Ninja DualZone models handle this well. If you typically air fry one large batch of a single item at a time, a large single-basket model is simpler and often cheaper.

Are air fryers healthy for family cooking?

Compared to deep frying, yes. Air fryers use significantly less oil and reduce fat content in fried foods. They provide crispy textures without submerging food in oil. For a closer look at the nutritional trade-offs, see the are air fryers healthy guide.

Can I cook a whole chicken in a family-sized air fryer?

Yes. A 3–4 lb chicken fits in the 6.5 Qt Ninja XL or 6 Qt COSORI TurboBlaze. Dual-basket models split their capacity, so a whole chicken has to fit in one basket. If you plan to roast a full bird regularly, size up — a basket that’s too small forces trussing or flattening that affects even cooking.

How long does it take to cook chicken thighs for a family of 4?

Bone-in chicken thighs at 380°F take about 25–30 minutes in most models. How many fit depends on the basket, not the total capacity: Ninja’s chart for the DZ201 lists 2 bone-in thighs per 4 Qt basket, so plan on both baskets or two rounds for a family of four.

How does the Ninja DZ201 compare to the DZ302 for a family of 4?

At current prices the DZ302 costs about $30 more ($229.99 against $199.95), and for that each basket is 5 Qt instead of 4, which is the better fit for most families of 4. The DZ201 makes sense if its shallower footprint suits your counter or you want the longer owner record behind it.

Which air fryer is easiest to clean for a busy family?

All five models here have dishwasher-safe baskets. Single-basket models (Ninja MaxCrisp, COSORI TurboBlaze, Instant Pot Vortex) have one piece per session. Ninja recommends hand-washing the baskets on both DualZone models and on the MaxCrisp to extend their life.

How These Picks Were Chosen

Plainly: this is a research-based guide, not a hands-on test. I have not run these side by side, and nothing here should be read as a report from my own kitchen.

What the picks rest on: usable basket area rather than nominal quarts, because a family batch is limited by the footprint of a single layer rather than by volume; wattage against that area, whether the basket is one large drawer or two smaller ones, dishwasher-safe parts, and preheat time; plus the complaint patterns across verified-purchase reviews, where the family-sized theme is uneven cooking when a basket is filled to its stated capacity.

What I could not establish: how evenly each model cooks a full load, which is the whole question for a family-sized fryer. It needs a tray of identical items cooked and weighed or probed by position, and no independent test does that for these machines. Basket geometry and wattage-per-square-inch are used as proxies here.

My Pick

For most families of 4, the Ninja DZ302 is the clearest choice. The dual-basket design solves a real dinner-time problem, its two 5 Qt baskets cover most family meals in a single cook, and at $229.99 it costs about $30 more than the 8 Qt DZ201, which has the longer owner record. If budget is the main constraint, the COSORI TurboBlaze at $119.99 and Instant Vortex at $112.99 are both solid — just know you’re trading dual-zone capability for savings.

For a full look across every household size and use case, see my best air fryers guide. If you’re choosing between the Instant Vortex Plus and COSORI directly, the Instant Vortex Plus vs COSORI comparison covers those two side by side. And for everything else on the topic, the air fryers hub has it covered.

Feeding four out of one countertop appliance? A big convection toaster oven fits a sheet pan of vegetables and a 5-lb chicken — my guide compares the family-size options. If you want the air fryer function inside a pressure cooker instead, my air fryer pressure cooker guide covers the combo units worth buying.

Filed Under: Product Reviews

Complete Air Fryer Guide: Tips, What to Cook & Beginner Recipes

Last Updated July 20, 2021

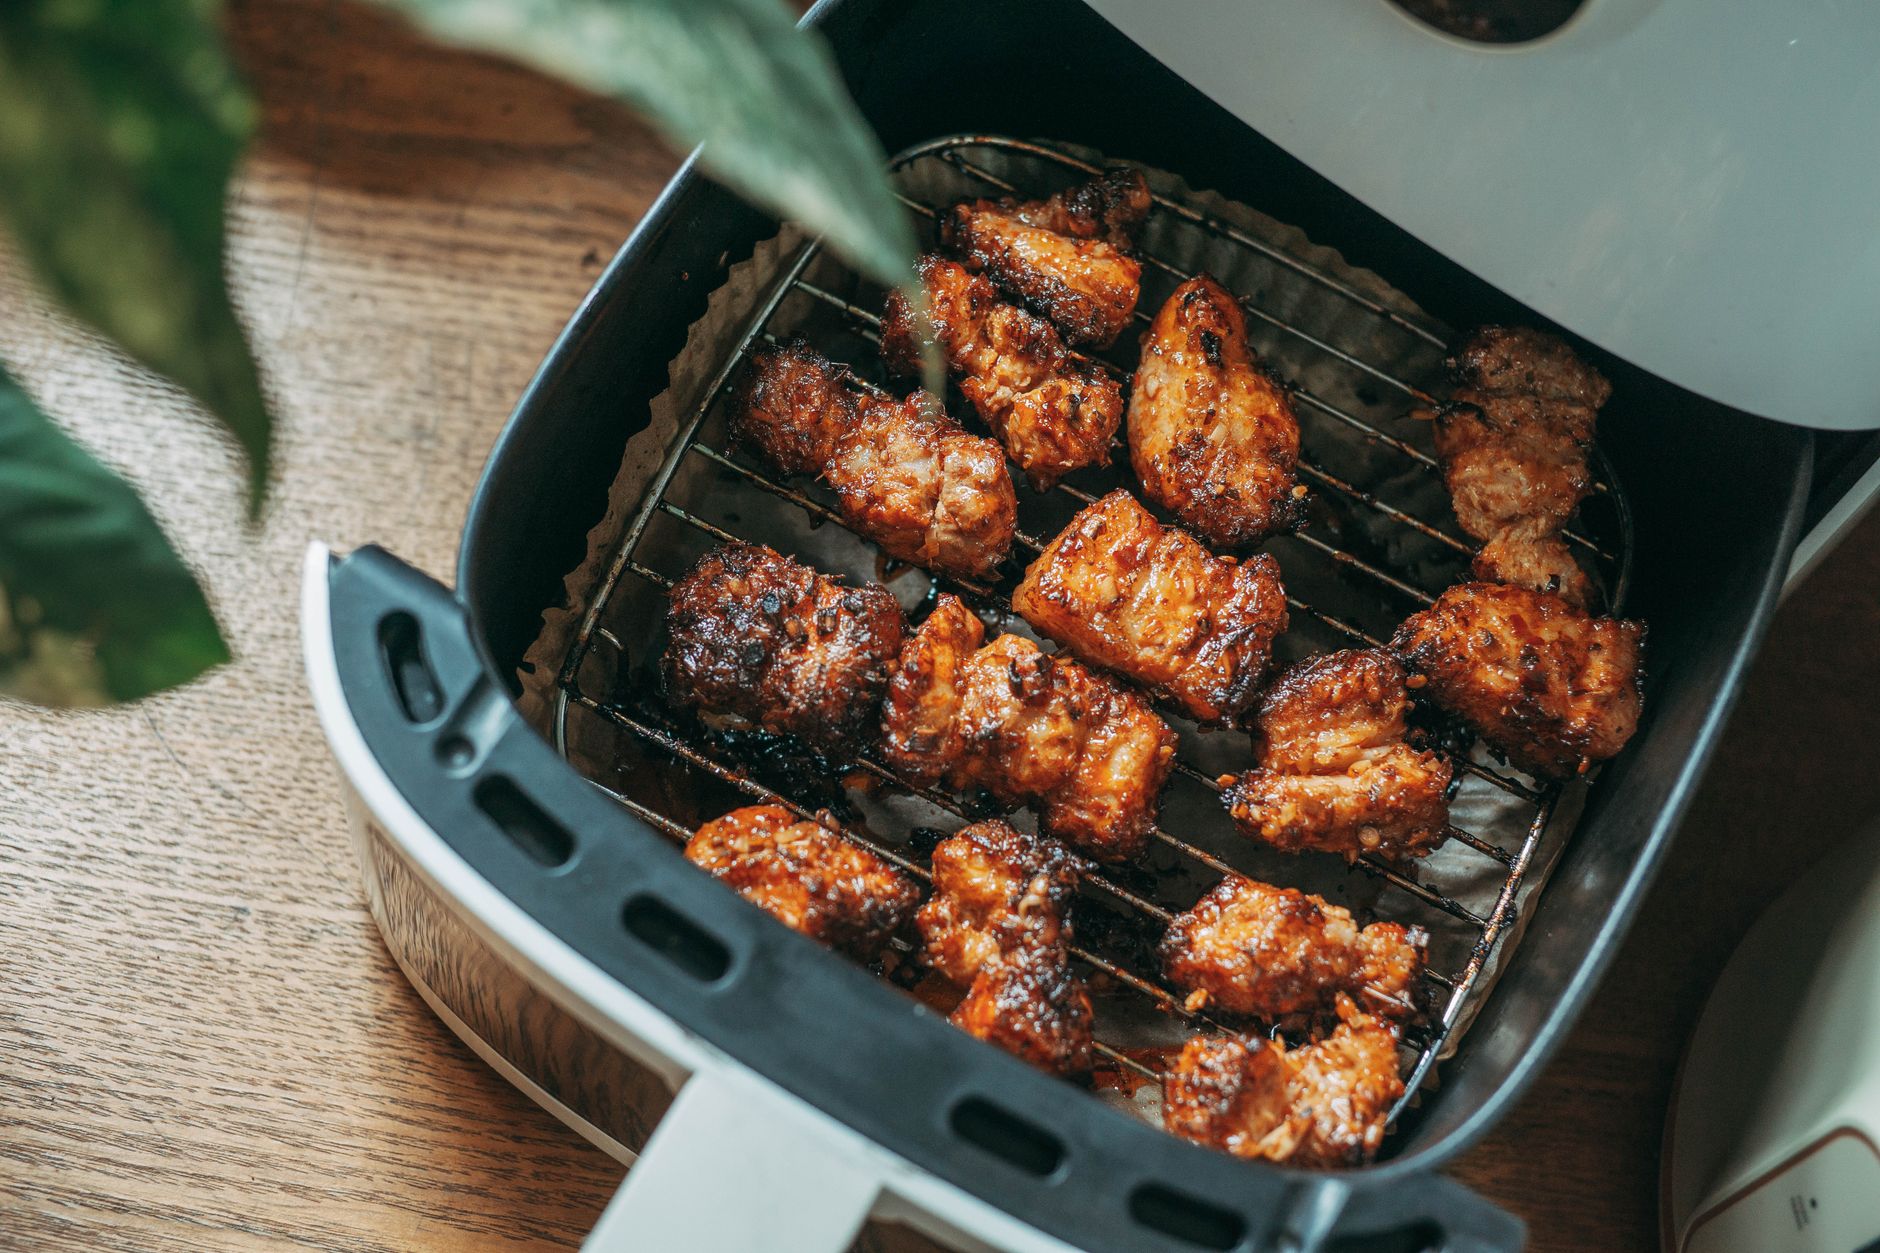
Air fryer basket pulled out with cooked chicken pieces on the rack

Air fryers went from novelty gadget to kitchen staple fast, and owners tend to reach for one several times a week. This guide covers how they actually work, the tips that make a real difference to the results, what you can cook in them, and half a dozen beginner recipes.

If you haven’t bought one yet and you’re still weighing up options, my best cheap air fryer guide covers the top budget picks. For families, the best air fryer for a family of four is worth a look too.

How an Air Fryer Actually Works

An air fryer is a compact convection oven. A heating element sits above the food basket and a powerful fan circulates hot air around the food at high speed. That circulating air is what creates the browning and crispiness people associate with frying — the same Maillard reaction that happens when food is submerged in hot oil, just without the oil.

The fan makes all the difference compared to a regular oven. A conventional oven heats air that largely sits still around the food. An air fryer moves that hot air continuously, which removes surface moisture fast and browns food evenly on all sides at once. That’s why air fryer chips cook in 20 minutes and oven chips take 40.

Most food needs only a light spray of oil — half a teaspoon or less — though fatty foods like sausages or chicken thighs often need none at all.

Tips That Actually Make a Difference

Preheat for 3–5 Minutes

Most manufacturers say you don’t need to preheat. In practice, preheating makes a noticeable difference to crispiness, especially for things like chips, chicken skin, and breaded foods. The food starts cooking on contact with the hot basket rather than slowly coming up to temperature. Three minutes at your target temperature is enough.

Don’t Overcrowd the Basket — This One Matters

Overcrowding is the single most common reason air fryer food comes out soggy rather than crispy. Hot air needs to circulate freely around every piece of food. Pack the basket too tightly and you trap steam, which makes things soft.

A single layer with small gaps between pieces is the rule. If you’re cooking for more than two people, batch-cook and keep the first batch warm in a low oven while you cook the second.

Shake or Flip Halfway Through

Shake smaller foods (chips, vegetables, nuggets) or flip larger pieces (chicken thighs, fish fillets, burgers) at the halfway point. The side sitting against the basket cooks faster than the top because of direct contact heat. Flipping gives you even browning on both sides.

Pat Food Dry Before It Goes In

Wet surfaces steam before they brown. A quick pat with kitchen paper before seasoning food removes surface moisture and helps everything crisp up faster. This matters most with chicken (especially from the fridge), fish, and vegetables with high water content like courgette.

Use Oil Sparingly but Don’t Skip It Entirely

Many recipes say oil is optional. For foods that are naturally fatty, that’s true. For leaner foods — vegetables, chicken breast, fish — a light spray of oil (not a pour, a mist) helps browning and prevents sticking.

Use a refillable oil mister with a neutral oil. Avoid aerosol cooking sprays with propellant gases — over time these can damage the non-stick coating on the basket.

Reduce Temperature When Adapting Oven Recipes

Air fryers run hotter than conventional ovens, and the circulating air speeds up cooking further. When you’re adapting a standard oven recipe, drop the temperature by about 20°C (35°F) and start checking for doneness 5 minutes before the recipe says. It’s easy to overcook things the first time if you follow oven timings exactly.

A Meat Thermometer Is Your Best Friend

Air fryers cook fast, which means the window between perfectly cooked and overdone chicken breast is narrow. A good instant-read or probe thermometer removes the guesswork entirely. My review of the best Bluetooth meat thermometers covers models that work well for quick checks on smaller cuts.

Cook Starchy Foods to Golden, Not Brown

Chips, roast potatoes and anything starchy form acrylamide as they brown, and the darker the colour the more of it there is. The FDA’s guidance on acrylamide is to cook cut potato products to a golden yellow rather than a brown colour, and to soak raw slices in water for 15 to 30 minutes first. It also advises keeping raw potatoes out of the fridge, since refrigeration raises acrylamide when they are cooked later. All of that applies in an air fryer exactly as it does in an oven.

What You Can Cook in an Air Fryer

The short answer is: almost anything you’d cook in an oven or a frying pan, plus things a microwave can’t touch. Here’s a practical breakdown.

Chicken

Chicken is where most air fryers earn their keep. Wings, thighs, drumsticks, and whole spatchcocked chicken all come out with genuinely crispy skin — something a standard oven struggles to achieve without a fan setting. Bone-in, skin-on pieces work best. Chicken breast works well too, though it dries out more quickly than in a pan, so keep an eye on the temperature (74°C / 165°F internal).

Fish and Seafood

Fish cooks in 8–12 minutes for most fillets, and the dry circulating heat crisps breading without the greasiness of deep frying. Salmon, cod, haddock, and prawns all work. One tip: oil the basket or use parchment liners before putting fish in — it prevents sticking and saves the basket from picking up smells.

Chips and Potatoes

Homemade chips may be the air fryer’s greatest achievement. Cut potatoes into even wedges or chips, soak in cold water for 30 minutes (this removes surface starch), pat very dry, toss with a teaspoon of oil and salt, then air fry at 200°C for 20–25 minutes, shaking every 8 minutes. The result: genuinely crispy outside, fluffy inside, with a fraction of the oil of deep-fried chips.

Vegetables

Roasted vegetables come out beautifully in an air fryer — caramelised edges, tender centres — in about half the time of a conventional oven. Broccoli, cauliflower, Brussels sprouts, asparagus, courgette, peppers, and mushrooms all work well. Cut into similar-sized pieces, toss in a small amount of oil and seasoning, and shake the basket halfway through.

Frozen Foods

This is the air fryer’s other killer use case. Frozen chips, nuggets, fish fingers, spring rolls, onion rings — all come out noticeably crispier and faster than in a conventional oven, without the mess or fat of deep frying. There’s no need to defrost first; just add a few minutes to the cook time.

Reheating Leftovers

The air fryer is far better than a microwave for anything you want to stay crispy. Reheated pizza regains its crust. Leftover roast potatoes crisp right up.

Fried chicken comes back to something close to its original texture. Three to five minutes at 180°C is enough for most things.

Baked Goods

Small bakes — muffins, cookies, individual cakes, garlic bread — all work in the air fryer. The convection heat means baking is faster than in a full-size oven, and the compact space means you’re not heating a whole oven for a batch of six muffins. Useful note: cover the tops with foil if they start browning too fast before the centre is set.

Is an Air Fryer Worth It?

I cover the health angle in more depth in my are air fryers healthy? piece, but the short version is: compared to deep frying, air frying significantly reduces fat and calorie content — studies suggest 70–80% less fat. It also reduces the formation of acrylamide, a compound produced when starchy foods are cooked at high temperatures in oil.

If you’re comparing air frying to deep frying and wondering about the difference in actual results, my air fryer vs deep fryer comparison covers both cooking methods in detail.

The practical case for an air fryer is strong regardless of health considerations: it’s faster than an oven, less messy than a frying pan, and easier to clean than either. For anyone who cooks for one or two people regularly, it’s often the most-used appliance in the kitchen.

Air Fryer Recipes for Beginners

These six recipes require no special equipment beyond the air fryer itself and cover the most common things people want to cook.

Crispy Chicken Wings

Temp: 200°C (400°F) | Time: 25–28 minutes

Pat 1 kg of wings completely dry — this is the step most people skip, and it matters. Toss with 1 tsp baking powder, 1 tsp garlic powder, 1 tsp smoked paprika, salt and pepper. No oil needed.

Air fry for 25–28 minutes, flipping at the halfway point. The baking powder is what makes the skin genuinely crackly — it raises the pH of the surface and accelerates browning. Serve immediately.

Air Fryer Chips

Temp: 200°C (400°F) | Time: 22–25 minutes

Cut 2 large potatoes (Maris Piper or King Edward work best) into even 1 cm strips. Soak in cold water for 30 minutes, drain, and pat very dry. Toss with 1 tsp neutral oil, salt, and pepper.

Air fry for 22–25 minutes, shaking every 8 minutes, until deep golden and crispy. If your air fryer has a preheat function, use it here.

Garlic and Herb Salmon

Temp: 200°C (400°F) | Time: 10–12 minutes

Place salmon fillets skin-side down in the basket (no need to oil it — salmon has enough fat). Mix 1 tbsp softened butter with 1 minced garlic clove, a pinch of dried thyme or dill, lemon zest, salt and pepper. Spread over the top of each fillet.

Air fry for 10–12 minutes until the flesh flakes at the thickest point. The butter bastes the fish as it melts and the garlic forms a golden crust on top.

Roasted Broccoli

Temp: 200°C (400°F) | Time: 10–12 minutes

Cut a head of broccoli into similar-sized florets. Toss with 1 tsp olive oil, a pinch of garlic powder, chilli flakes, salt and pepper. Air fry for 10–12 minutes, shaking halfway through, until the florets have slightly charred edges and the stems are tender.

Finish with a squeeze of lemon. This is the recipe that converts people who don’t think they like broccoli.

Breaded Chicken Goujons

Temp: 200°C (400°F) | Time: 12–14 minutes

Slice 2 chicken breasts into finger-width strips. Set up three bowls: seasoned plain flour, beaten egg with a splash of milk, and panko breadcrumbs mixed with a pinch of paprika and garlic powder. Coat each strip in flour (shake off the excess), dip in egg, then press into the panko.

Spray lightly with oil. Air fry for 12–14 minutes, flipping halfway, until golden and cooked through (75°C / 165°F internal). Panko is important — regular breadcrumbs don’t crisp as well.

Sausages

Temp: 180°C (360°F) | Time: 15 minutes

Place sausages in a single layer in the basket — they can touch but shouldn’t be piled up. Air fry for 15 minutes, turning once at the halfway point. No oil needed.

The sausages brown evenly on all sides, something that’s genuinely hard to achieve in a frying pan without constant attention. Works with any type of sausage, including chipolatas (10–12 minutes) and thick bratwurst (18–20 minutes).

Frequently Asked Questions

Can you put foil in an air fryer?

Yes, with conditions. I cover this in detail in my can you put foil in an air fryer? guide, but the short version is: foil is safe as long as it doesn’t cover the basket perforations (which would block airflow), and you shouldn’t use it with acidic foods like tomatoes or citrus, which can react with aluminium.

How does an air fryer compare to a deep fryer?

Air fryers produce food that’s very close to deep-fried but not identical — especially for things like doughnuts or battered fish, where the deep fryer produces a lighter, crispier coating. For most everyday cooking (chips, chicken, vegetables), the air fryer result is excellent and the clean-up is dramatically easier. See my full air fryer vs deep fryer comparison for a side-by-side breakdown.

What size air fryer do I need?

For one or two people, a 2–3 litre basket is enough for most meals. For three to four people, 4–5 litres is the sweet spot — enough to do a main and a side together. For larger families or if you want to cook whole chickens, look at 6-litre models or dual-basket machines. The Ninja AF101 vs COSORI Pro II comparison is a useful starting point for the most popular mid-size models.

Are air fryers actually healthy?

Compared to deep frying, meaningfully so — 70–80% less fat in most foods. Compared to oven roasting, it depends on whether you’re adding oil. Air fryers are not a magic health device, but they make it easier to cook food with minimal added fat, which is genuinely useful. See my full breakdown of the health case for air fryers for a more detailed answer.

What should you not put in an air fryer?

Avoid: very wet batters (they drip through the basket and make a mess), large amounts of cheese on its own (it melts and runs before it browns), leafy greens (they blow around and burn), and anything in a paper bag or light container that can be lifted by the fan. Everything else is fair game with the right technique.

Looking for specific model recommendations? My air fryers page covers every style from compact basket models to full countertop ovens, with reviews and buying guides for every budget.

Filed Under: Helpful Kitchen Tips

  • « Go to Previous Page
  • Page 1
  • Interim pages omitted …
  • Page 50
  • Page 51
  • Page 52
  • Page 53
  • Go to Next Page »

Recent Articles

  • Bosch Universal Plus Stand Mixer Review: Built for Bread Bakers
  • Hamilton Beach 63326 Stand Mixer Review: Real Value, Real Limits
  • Ninja Foodi XL Pro Review (DT201): Biggest Capacity, Lowest Price
  • Cuisinart SM-50 Stand Mixer Review: Solid Value, Real Trade-Offs
  • Breville Smart Oven Pro Review (BOV845BSS): Fast, Even, One Real Flaw

Search


HOME          Contact          Affiliate Disclosure          Terms of Service          Privacy Policy


kitchenwarecompare.com is a participant in the Amazon Services LLC Associates Program, an affiliate advertising program designed to provide a means for sites to earn advertising fees by advertising and linking to Amazon.com, Endless.com, MYHABIT.com, SmallParts.com, or AmazonWireless.com. Amazon, the Amazon logo, AmazonSupply, and the AmazonSupply logo are trademarks of Amazon.com, Inc. or its affiliates. As an Amazon Associate I earn from qualifying purchases.


Copyright © 2026 kitchenwarecompare.com, ALL RIGHTS RESERVED.