• Skip to primary navigation
  • Skip to main content
  • Skip to primary sidebar

Kitchenware Compare

  • Home
  • Product Reviews
    • Air Fryers
    • Coffee
    • Cookware
    • Flat Top Grills
    • Meat Thermometers
    • Food Processors
    • Knives
    • Pizza Ovens
    • Toaster Ovens
    • Juicers
  • Food Blog
  • Helpful Kitchen Tips
  • Data Studies
  • About
  • How I Review
  • Contact
You are here: Home / Archives for Helpful Kitchen Tips

Why Is My Blender Leaking From the Bottom?

Last Updated October 5, 2026

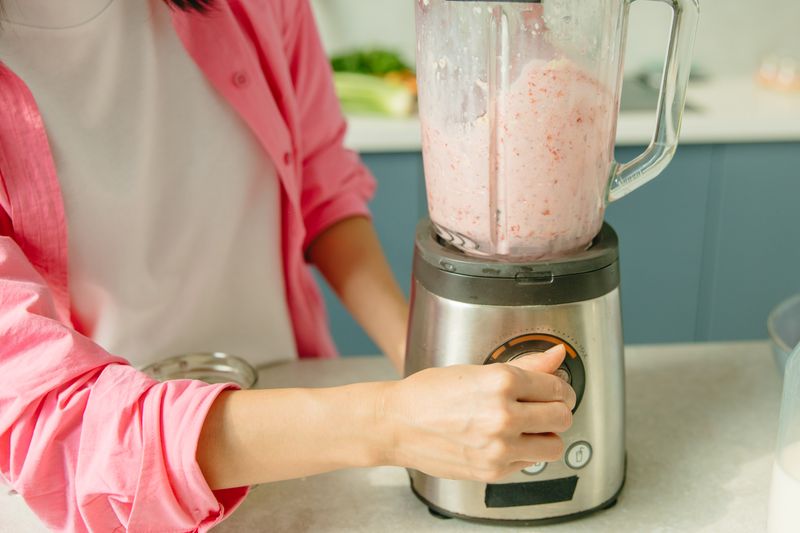
A person pressing the controls on a blender jar of pink smoothie on a kitchen counter

A blender leaking from the bottom is almost always the rubber gasket around the blade assembly, not a sign the appliance is dying. That gasket seals the gap between the spinning blade and the jar, and it stiffens, warps, or loses its seal over time — a $5–15 part, not a reason to replace a $150 machine. Food residue packed under the blade assembly is the second most common cause, and it’s a five-minute fix with no parts required.

Check These Two Things First

  • The gasket. Unscrew the blade assembly from the bottom of the jar (most twist off; some have a removable base) and pull out the rubber gasket ring. Stretched, cracked, or flattened out of its original round shape means it’s done its job and needs replacing.
  • Buildup under the blade. Thick smoothie ingredients, seeds, and fibrous produce pack in around the blade base and stop the gasket from sitting flush. Even a perfectly good gasket leaks if there’s dried residue keeping it from sealing.

Fixing It

1. Disassemble and clean everything

Take the blade assembly all the way apart — jar, blade, gasket, base — and clean each piece individually rather than just rinsing the jar. Dried gunk under the blade is invisible until you separate the parts, and it’s the most common reason a “new gasket” install still leaks.

2. Inspect the gasket under good light

Look for flattening, cracks, or a warped shape that no longer sits round in its groove. A gasket that looks fine at a glance often shows damage once you flex it gently between your fingers.

3. Replace the gasket if it’s worn

Order the exact part number for your model rather than a generic size — blade assemblies vary enough between brands that a close-enough gasket often still leaks. Manufacturer parts pages list the correct part number by model.

4. Reassemble by hand-tight only

Overtightening the blade assembly can warp the gasket’s seal just as easily as under-tightening. Snug it by hand until it stops turning easily — don’t force it further with a tool.

5. Check the jar itself for cracks

If the leak continues after a fresh gasket and thorough cleaning, look at the jar base and threads for hairline cracks, especially on a blender that’s been dropped or run empty at high speed. A cracked jar needs replacing; the rest of the machine is usually fine.

What This Isn’t

A leaking blender is a seal problem, not a motor problem — the base unit and motor are essentially never the cause of a leak, since they don’t touch liquid. Don’t assume the whole appliance is failing because of a $10 gasket. It’s also not usually the bearing: bearing failure shows up as grinding noise or a wobbling blade, not water at the base.

FAQ

Why is my blender leaking from the bottom?

Almost always a worn or dirty gasket around the blade assembly. Disassemble it, clean every part including under the blade, and replace the gasket if it’s stretched, cracked, or flattened.

Can I use a generic replacement gasket?

You can, but a model-specific gasket from the manufacturer fits more reliably. Blade assembly dimensions vary enough between models that a generic size sometimes still leaks even when new.

Is a leaking blender dangerous to keep using?

Not dangerous, but liquid pooling under a blade assembly can eventually reach the base and motor if ignored for a long time. Fix the gasket rather than let it run.

How often does a blender gasket need replacing?

There’s no fixed schedule — it depends on use frequency and how hot or acidic what you blend is. A blender used daily for smoothies might need a new gasket every 1–2 years; occasional use can go much longer.

Next Steps

Clean it apart, check the gasket, replace if needed, and reassemble hand-tight — that resolves the vast majority of blender leaks without a service call. If the leak is coming from the top instead — around the lid or center cap — that’s a different set of parts entirely; see why your blender might be leaking from the top. If you’re shopping for a new machine instead of fixing an old one, the best blender food processor combo guide has current picks, and if a food processor might suit your kitchen better than a blender, best food processor covers that side of things.

Pushing a blender into jobs it wasn’t built for strains the same seals prematurely — see can you grind coffee beans in a Nutribullet for a common example of that.

Based on manufacturer parts and repair documentation, cross-checked against the pattern in owner-reported failures — not laboratory testing.

For the wider picture on choosing and living with a blender, my blenders hub collects the reviews, comparisons and the other fault guides.

Filed Under: Helpful Kitchen Tips

Espresso Machine Leaking Water? Here’s Why (and the Fix)

Last Updated October 12, 2026

A stainless steel espresso machine with white cups on a wooden kitchen counter

Before you assume the machine is dying, check the water tank first — it’s not fully seated more often than people expect, and that alone causes water to leak out the side or back instead of feeding into the machine. If the tank is seated correctly and it’s still leaking, the cause is almost always one of four things: a worn group head gasket, a blocked or damaged hose, mineral buildup from skipped descaling, or a cracked tank. All four are fixable without replacing the machine.

Start Here: Where Is It Actually Leaking From?

The location tells you most of what you need to know before you open anything up.

  • Under the water tank or at the back: Almost always the tank isn’t pushed all the way in, or the tank itself has a hairline crack. Reseat it first — this fixes the majority of “leaking” reports with no repair needed.
  • From the group head during brewing: A worn or misaligned group head gasket. This is a rubber seal that degrades with use and heat cycling over time, and it’s a normal wear part, not a defect.
  • From underneath, with murky or discolored water: A blocked or leaking drain hose, usually from coffee grounds or scale buildup inside it.
  • A slow drip that shows up gradually, clear water: Often a hairline crack in an internal hose or fitting, especially on machines more than a couple of years old — the constant pressure cycling eventually works a joint loose.

The Fixes, in Order of How Often They’re the Actual Problem

1. Reseat the water tank

Remove it completely and push it back in until it clicks or sits flush. This sounds too simple to be the answer, but it’s the single most common cause of a “leak” that isn’t actually a mechanical failure.

2. Descale the machine

Mineral buildup narrows internal passages and forces water to find another way out, which shows up as a leak even though the root cause is scale, not a broken part. If you can’t remember the last time you descaled, that’s very likely it — see how often to descale an espresso machine for a real schedule based on your water hardness and use.

3. Replace the group head gasket

This is a cheap, commonly-stocked part (usually under $15) available from the machine’s manufacturer or a compatible third-party seller. Most machines only need a screwdriver and the gasket to swap; manufacturer support pages typically have a model-specific walkthrough.

Replacing the group head gasket, step by step

  1. Unplug the machine and let it cool completely.
  2. Remove the portafilter, then locate the metal retaining ring inside the group head that holds the gasket in place.
  3. Use a group-head wrench or a flat screwdriver to release the retaining ring (some machines: turn counter-clockwise; check your model’s manual for the direction).
  4. Pull out the old gasket and the diffuser/shower screen behind it — clean both, since coffee oil buildup on the screen is a separate common cause of poor extraction.
  5. Fit the new gasket (model-specific part, not universal) into the retaining ring, then reinstall the ring and diffuser in reverse order.
  6. Reinsert the portafilter without coffee, lock it, and run a blank shot to check the seal holds before making a real espresso.

3.5 Check for signs the gasket is actually worn (before you buy one)

Confirm it’s the gasket before ordering a part: unlock the portafilter and check how far it rotates to lock in place. A healthy gasket stops the handle at roughly the 5 o’clock position; if it rotates noticeably further than that before it locks, or feels loose rather than snug, the gasket has compressed and needs replacing. Visible cracking or a flattened, brittle texture when you press it is the other clear sign.

3.6 Loose internal hose or valve connections

A cause separate from a blocked or split hose: the connection fittings themselves can work loose from repeated heat cycling and vibration, even when the hose material is fine. This shows as an intermittent leak that seems to come and go rather than a steady drip. If you’re comfortable opening the housing, check that hose clamps and push-fit connections are still seated fully; if you’re not comfortable opening the housing, this is one of the better reasons to hand it to a repair tech rather than keep guessing.

4. Check and clear the drain hose

Disconnect it, run water through it to check for blockages, and inspect the full length for cracks or splits. Coffee grounds and scale both accumulate here over time, particularly on machines that get descaled infrequently.

5. Inspect for a cracked tank or hose

If none of the above fixes it, remove the tank and check it under good light for hairline cracks, and look at where internal hoses connect to fittings for wear. Both are replaceable parts, but at this point it’s worth weighing the repair cost against the machine’s age.

When to Stop Troubleshooting and Call It

If the leak is from a hairline tank crack or a worn gasket, fix it — those are inexpensive, normal wear items. If you’re chasing an internal hose leak on a machine that’s several years old and the replacement parts cost approaches what a new budget machine costs, it’s worth comparing against current options rather than sinking more time into an aging unit. My best espresso machine under $200 guide covers what’s actually worth buying right now.

Cleaning routines can matter here too: how to clean an espresso machine covers the daily steps and what the makers say.

FAQ

Why is my espresso machine leaking from the bottom?

Most often a blocked or damaged drain hose, or a cracked water tank. Murky water pooling underneath points to the drain hose; clear water suggests the tank.

Can descaling fix a leaking espresso machine?

Yes, in many cases. Mineral scale narrows internal passages and forces water out through weak points, and this shows up as a leak with no actual part failure. Regular descaling prevents this from building up in the first place.

Is it normal for a little water to leak during brewing?

A few drops around the portafilter during extraction can be normal on some machines. A steady drip or a growing puddle is not — that’s a gasket, hose, or tank issue that needs attention.

How much does it cost to fix a leaking espresso machine?

A group head gasket typically runs $10–20. A replacement hose or tank is usually $15–40 depending on the model. Both are well worth it compared to replacing the machine, unless the unit is already old and failing in multiple ways.

If the symptom is a weak or gushing shot rather than a leak, the causes are entirely different — see what to check when an espresso machine will not build pressure.

Next Steps

Reseat the tank, then descale, then check the gasket — in that order, most leaks resolve without buying a single part. If yours turns out to be a genuine mechanical failure and it’s time to consider a replacement, the coffee equipment hub has the full range of current picks, and how to froth milk with an espresso machine is worth a read once you’re back up and running. If the leaking appliance is a drip coffee maker rather than an espresso machine, the guide to a coffee maker leaking covers the likely causes.

Based on manufacturer support documentation for the most common failures, cross-checked against the pattern in owner reports for the most common failure points — not laboratory testing.

Filed Under: Helpful Kitchen Tips

Can You Use Metal Utensils on Stainless Steel Pans?

Last Updated October 11, 2026

Metal skimmer, ladle, slotted spatula and carving fork hanging against a tan background

Yes — stainless steel is one of the few cooking surfaces built to take metal utensils. The surface is harder than the metal in most spatulas and spoons, so a metal utensil won’t gouge or damage it the way it would ruin a non-stick coating. The worst that happens is light cosmetic scratching, which doesn’t affect how the pan cooks.

Why Stainless Steel Can Take It

Stainless steel cookware sits at roughly 5.5 to 7 on the Mohs hardness scale. Most kitchen utensils — stainless spoons, spatulas, whisks — fall around 4 to 5.5. The pan is simply harder than the tool. On top of that, the chromium in stainless steel forms a thin, self-healing oxide layer on the surface.

That layer is also what chloride attacks, which is why white spots on a stainless steel pan are sometimes permanent pits rather than removable deposits. If a utensil does leave a fine scratch, that layer re-forms over it within hours, which is why old stainless pans that have taken metal for years still cook exactly the same as new ones, even once they look worn.

When It’s Actually a Problem

  • Cosmetic scratching over time. Years of metal-on-metal contact will leave fine scratch marks, especially with rougher tools like whisks or aggressive scraping. It’s a look issue, not a performance one — the pan still heats and cooks the same.
  • Sharp knife edges. Don’t cut food directly in a stainless pan with a knife. That’s a different kind of contact than a spatula pushing food around, and it can leave deeper gouges.
  • Non-stick and hard-anodized cookware. This is where metal utensils genuinely cause damage — those coatings are soft and scratch easily, unlike bare stainless steel. That scratching is one of the two reasons a non-stick pan starts sticking, and it is the reason that cannot be undone. Keep metal tools for stainless and cast iron, and use silicone or wood on anything coated.

Stainless Steel Grades: Does It Matter Which One?

Cookware is almost always 18/10 or 18/8 stainless (18% chromium, 10% or 8% nickel) — the numbers describe corrosion resistance and shine, not hardness against utensils. There’s no “premium grade” that’s more scratch-resistant than a budget one; the metal-utensil safety comes from the base alloy every food-grade cookware maker uses, not a tier you pay extra for. The one grade to actually watch for is 18/0 (no nickel) on very cheap pans, which is more prone to rust spotting — a separate issue from utensil scratching.

Metal Utensils Across Different Cookware Materials

Material Metal Utensils Safe? Why
Stainless steel Yes Harder than most utensils, self-healing oxide layer
Cast iron Yes Extremely hard surface; metal utensils won’t damage seasoning if it’s properly cured
Non-stick (PTFE/ceramic) No Coating is soft and scratches or flakes under metal contact
Hard-anodized aluminum No Anodized layer is a coating, not solid metal — behaves like non-stick for this purpose

Myths Worth Correcting

  • “Scratches ruin the pan.” Cosmetic scratches don’t affect heat conduction, food safety, or cooking performance on stainless steel. They only matter if you care how the pan looks.
  • “Professional kitchens use special utensils on stainless.” The opposite is usually true — commercial kitchens run stainless steel pans hard with metal tongs, spatulas, and whisks daily for years, precisely because it holds up to that treatment better than coated alternatives.
  • “Metal utensils mean the pan needs replacing sooner.” Stainless steel cookware routinely outlasts non-stick pans by a decade or more, and normal utensil use isn’t a factor in that lifespan.

Which Utensils Actually Work Best

Any metal utensil is fine, but some suit stainless steel better for practical reasons unrelated to scratching: metal tongs give better control for searing and flipping, a fish spatula’s thin edge slides cleanly under food on a flat stainless surface, and a metal whisk clears a fond (the browned bits) for sauce-making in a way silicone can’t. Save silicone-tipped tools for delicate tasks like folding eggs, not because stainless requires it.

What Actually Causes Food to Stick (It’s Not the Utensil)

If you’re asking this question because food is sticking and you suspect your metal spatula is the cause, it almost certainly isn’t. Stainless steel sticks when the pan isn’t hot enough before food goes in, or when there isn’t enough oil to form a barrier between the food and the microscopic pores in the surface. Preheat the empty pan for a couple of minutes, add oil once it’s hot, and most sticking problems disappear regardless of what utensil you’re using.

If you are choosing between materials rather than utensils, cast iron vs stainless steel compares heat retention, care and what an Oregon State study found on nickel and chromium leaching.

FAQ

Will metal utensils scratch stainless steel pans?

They can leave fine cosmetic scratches over time, but stainless steel’s hardness and self-healing oxide layer mean this doesn’t affect cooking performance. The pan works the same whether it looks brand new or well-used.

Can you use metal utensils on stainless steel cookware in the dishwasher too?

Yes, that’s unrelated to the utensil question — most stainless steel cookware is dishwasher-safe. Just avoid the dishwasher for pieces with wooden or riveted handles that can loosen over time.

Is it safe to use metal utensils on all stainless steel, or only some grades?

All food-grade stainless steel cookware (typically 18/10 or 18/8) handles metal utensils fine. The hardness that resists scratching comes from the chromium and nickel content standard across cookware-grade stainless, not a premium tier.

Should I still avoid metal utensils on stainless steel?

Only if you care about keeping the surface looking pristine and scratch-free for appearance’s sake. There’s no functional or safety reason to avoid them — unlike non-stick pans, where metal utensils are a genuine mistake.

The Short Answer

Use whatever utensil is convenient. Stainless steel is one of the few surfaces in the kitchen where that’s true without a caveat. Save the wood and silicone for your non-stick and hard-anodized pans, where metal actually does damage. If you’re shopping for a set rather than maintaining one you own, the best cookware sets guide has current picks, and best non-stick pan covers the coated side of the kitchen where utensil choice actually matters.

For material-by-material tradeoffs beyond stainless, see the most durable types of cookware, or browse the full cookware hub for reviews across every material.

Based on cookware-grade stainless steel’s standard hardness properties relative to common utensil metals — not laboratory material testing.

Filed Under: Helpful Kitchen Tips

How to Season a Blackstone Griddle (Step by Step)

Last Updated October 5, 2026

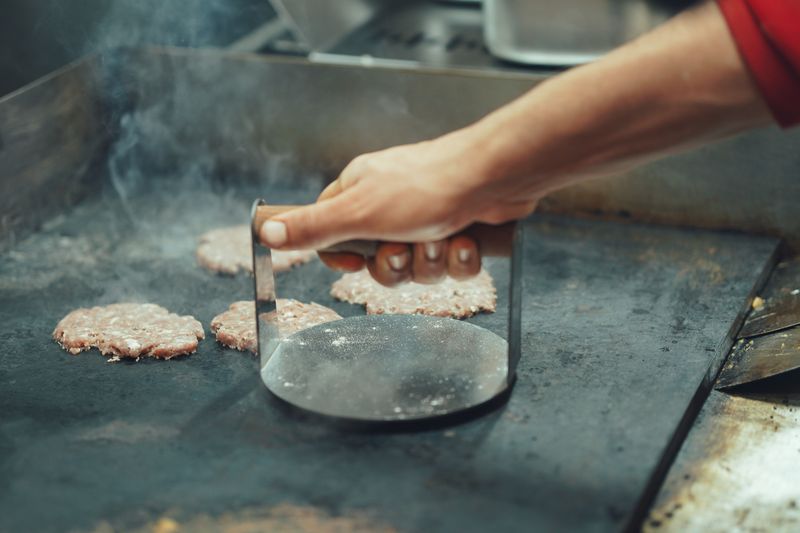
A hand pressing burger patties with a press on a hot flat top griddle

Seasoning a Blackstone comes down to thin oil, real heat, and patience — skip any one of those and you get the sticky, blotchy surface almost every new owner ends up asking about. Wash the griddle, heat it until it discolors, wipe on a thin coat of high-smoke-point oil, and run it hot until the oil stops smoking and turns matte black. Repeat that three or four times before you cook on it for real.

What You Need

  • A high smoke-point oil. Flaxseed, avocado, canola, or Blackstone’s own Cast Iron Conditioner all work. Skip olive oil and butter — both smoke and burn before the surface reaches seasoning temperature.
  • Paper towels or a lint-free cloth for spreading oil and wiping off excess. You’ll go through more than you expect.
  • Dish soap and water for the first-time factory-residue wash only. Never use soap again after this step — it strips seasoning. My guide to cleaning a flat top grill covers what to use instead for routine cleaning.
  • Heat-resistant gloves or tongs for handling a griddle that’s about to be genuinely hot.

How to Season It, Step by Step

  1. Wash the bare griddle with soap and water. New griddles ship with a factory coating that has to come off before oil can bond to the metal. Rinse and dry completely — any leftover water spots into rust fast.
  2. Preheat on high for 10–15 minutes until the surface starts to discolor and change from silver to a duller grey-brown across the whole plate, not just the center.
  3. Turn the heat off (or down low) and add a thin layer of oil. Pour a small amount and spread it with folded paper towels until the surface looks damp, not wet — you should barely see a sheen, not a puddle.
  4. Turn the heat back to high and let the oil smoke. This takes 10–15 minutes per layer. The smoke means the oil is polymerizing — bonding to the metal as a hard, matte black finish, not just sitting on top of it. Don’t rush this step by pulling it off heat early; that’s the single most common reason seasoning turns out sticky instead of smooth.
  5. Let it cool, then repeat. Wipe off any pooled oil, add another thin coat, and run it hot again. Do this three to four more times — a brand-new griddle typically needs four to five total layers before the color is even and dark across the whole surface.

Why Seasoning Goes Wrong (and How to Fix It)

The surface is sticky, not smooth

This is almost always too much oil, not too little. A thick layer can’t fully polymerize — it partially burns and leaves a tacky residue instead of a hard finish. The fix is more heat, not more oil: run the griddle hot for another 10–15 minutes to finish burning off the excess, then start your next layer thinner than you think it needs to be. If food keeps sticking even after the seasoning itself looks fine, my guide to griddle sticking covers the other causes — preheat, cooking oil, and technique — that aren’t a seasoning problem at all.

The finish is blotchy or uneven

Usually uneven oil application, or a cold spot on the griddle that never got hot enough to polymerize. Spread oil corner to corner, including the edges people tend to skip, and confirm the whole surface — not just the middle — reaches a light smoke before you count that layer as done.

Rust spots have appeared

Rust means water got to bare metal, usually from washing with soap after the first seasoning, air-drying instead of towel-drying, or storing it uncovered outdoors. Scrub the rust off with a grill stone or fine steel wool down to clean metal, then re-season from step 2 as if it were new.

How Often to Reseason

Not every use — that’s a myth that leads directly to the over-oiled, sticky surface above. A well-seasoned griddle that’s cleaned properly (hot water and a scraper, no soap) and lightly oiled after each cook holds its seasoning for months. Plan on a full reseasoning pass two to four times a year for a griddle in regular use, or any time you see rust, consistent sticking, or bare metal showing through.

FAQ

What’s the best oil for seasoning a Blackstone griddle?

Any oil with a high smoke point works: flaxseed, avocado, canola, or a dedicated product like Blackstone’s Cast Iron Conditioner. Avoid olive oil and butter, which burn before the surface gets hot enough to polymerize properly.

How many layers of seasoning does a new griddle need?

Four to five thin layers for a brand-new griddle. A griddle that’s already seasoned but needs a touch-up usually only needs two to three passes.

Can you season a Blackstone griddle indoors?

Not safely. The smoke produced during proper seasoning is heavy and this is a propane appliance — it needs to run outdoors with good ventilation, the same as normal cooking use.

Do you have to season a griddle before the first use?

Yes. Cooking directly on unseasoned bare steel causes everything to stick and leaves metallic flavor in the food. Seasoning first is not optional, even if you’re eager to cook.

Next Steps

Once it’s seasoned, day-to-day care is simple: scrape it clean while it’s still warm, wipe with a thin layer of oil, and skip the soap. If you’re still deciding which griddle to buy in the first place, the best flat top grill guide covers current picks, and Blackstone 28-inch vs. 36-inch breaks down which size actually fits your cooking habits. For the full category, start at the flat top grills hub.

Steps based on manufacturer guidance and repeated owner-reported troubleshooting patterns — not laboratory testing.

Filed Under: Helpful Kitchen Tips

How to Sharpen Food Processor Blades (and When to Replace Them)

Last Updated October 19, 2026

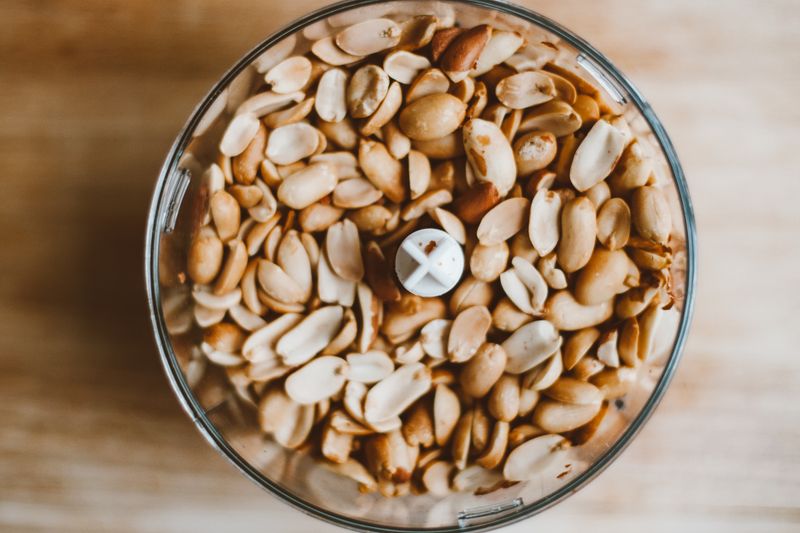
Overhead view of shelled peanuts in a food processor bowl with the S-blade in the center

A blade that used to chop onions in three pulses now turns them to watery mush, and you’re wondering whether it can be sharpened or the whole machine is heading for the bin. The main S-blade can be sharpened with a fine whetstone or a small file, and I’ll walk through exactly how below. But before you start, check whether sharpening is actually the right fix — about half the time, it isn’t.

Sharpen or Replace? The Honest Answer First

Sharpen the S-blade if it’s simply dull from normal use. Replace it if the edge is chipped, the metal is corroded, or the replacement is cheap enough that your time is worth more than the saving. Shredding and slicing discs can’t be meaningfully sharpened at all; those get replaced, not fixed.

That’s the part most sharpening guides skip. A genuine sharpening job on an S-blade takes 20–30 minutes of careful work around an awkward curved edge, and a factory-fresh replacement blade is not free: Cuisinart’s own parts store lists its 7- and 9-cup chopping blade and its 11-cup chopping blade at $41.95 each (checked October 2026), and other brands price by model. If your time is worth anything to you, sharpening only wins when the blade is discontinued, the replacement is overpriced, or you already own the stone and know how to use it.

How to Tell the Blade Is Actually Dull

Don’t sharpen on a hunch — a surprising number of “dull blade” complaints are actually overloaded bowls or worn drive couplings. A genuinely dull blade shows up as:

  • Bruised, not cut, herbs. Basil and parsley come out dark, wet, and mushy at the edges instead of cleanly sliced.
  • Uneven chopping. Half the onion is paste, the other half is in big chunks, no matter how carefully you pulse.
  • Longer run times. Jobs that took five pulses now take fifteen, and the motor sounds like it’s working harder.
  • Tomatoes smear instead of dice. Soft produce is the first thing a dull edge fails on.

Run your test with a single carrot: a healthy blade cuts clean discs of shrapnel-sized pieces in a few pulses. If you get ragged, crushed pieces, the edge is gone.

What You Need

  • A fine sharpening stone (1000-grit or higher) or a small diamond file. Electric knife sharpeners and bench grinders are the wrong tools here — they remove too much metal and can overheat the edge, and the S-blade’s curve doesn’t fit their slots anyway.
  • Cut-resistant glove for the hand holding the blade. Optional but sensible — you’ll be gripping a curved knife by its hub for 20 minutes.
  • Dish soap and a towel for cleanup before and after.

How to Sharpen the S-Blade, Step by Step

  1. Unplug the processor and remove the work bowl. Release the blade — most lift straight off the drive shaft; some twist-lock.
  2. Wash and dry the blade completely. Grip it only by the plastic center hub from here on. The two wings stay sharp enough to cut you even when they’re too dull to chop.
  3. Soak or wet the stone per its instructions, and set it on a damp towel so it can’t slide.
  4. Find the factory bevel. Look at the cutting edge of one wing under good light — you’ll see a narrow angled strip, usually a shallow 15–20 degrees, on the top face only. That’s the angle you’re matching. Food processor blades are single-bevel: sharpened face on top, flat underneath.
  5. Stroke the beveled edge along the stone, following the wing’s curve, pushing away from your body. Keep the bevel flat against the stone. Eight to ten light strokes, maintaining the same angle each pass — consistency matters more than pressure.
  6. Remove the burr. Flip the blade and make two or three nearly-flat passes on the underside to strip off the wire edge the sharpening raised.
  7. Repeat on the second wing, same stroke count so both edges cut evenly.
  8. Wash, dry, reinstall, and test on an onion or carrot. Clean discs and even pieces mean you’re done. Still ragged? The edge is likely chipped or worn past what a stone can recover — replace it.

What About Shredding and Slicing Discs?

Replace them. Disc cutters are stamped and machine-ground with dozens of small raised teeth, and there’s no practical way to re-establish those edges by hand without changing their geometry — at which point the disc cuts worse, not better. The good news for your wallet: discs dull far slower than the S-blade because they slice on a single pass instead of smashing into food thousands of times per minute.

What Dulls the Blade in the First Place

An S-blade stays usable for years mostly by avoiding four things:

  • Ice and frozen food. The single fastest way to chip an edge. Let frozen ingredients soften for ten minutes first — or use a blender, which is built for it. (If you routinely need both jobs done, a blender food processor combo covers ice without sacrificing your processor blade.)
  • Whole spices and coffee beans. Hard, glassy seeds act like an abrasive on the edge.
  • The dishwasher. Hot cycles and harsh detergent corrode the edge microscopically — the blade comes out clean and measurably duller for it. Thirty seconds of hand-washing preserves the edge.
  • Loose drawer storage. A blade rattling against other metal dulls itself between uses. Store it in the bowl or a sleeve.

Finding a Replacement Blade

Search your model number plus “S-blade” — the model number is printed on the base’s underside label. Cuisinart, KitchenAid, and Ninja all sell first-party replacement blades through their parts stores, and a first-party blade is worth the few extra dollars over a generic: third-party blades often sit a millimeter too high or low on the drive shaft, which ruins chopping consistency. If the machine is over a decade old and a blade costs half of what a new processor does, put that money toward a current machine instead — my picks are in the food processor buying guide.

FAQ

Can you sharpen food processor blades?

Yes — the main S-blade can be sharpened with a fine whetstone or diamond file, matching the factory bevel on the top face of each wing. Shredding and slicing discs cannot be sharpened and should be replaced when dull.

How often do food processor blades need sharpening or replacing?

With hand-washing and no ice-crushing, an S-blade typically stays sharp for 3–5 years of regular home use. Heavy use, dishwasher cleaning, or frozen ingredients can halve that.

Are food processor blades dishwasher safe?

Most are technically rated dishwasher-safe, but hot cycles and detergent dull the edge faster than any amount of chopping. Hand-wash the blade if you want it to stay sharp.

Why does my food processor puree everything instead of chopping?

Either the blade is dull (crushing instead of cutting) or the bowl is overloaded. Fill the bowl no more than half full and use short pulses; if evenly-loaded pulses still produce mush, the blade needs attention.

Worth Sharpening? Usually Once

Sharpen a healthy-but-dull S-blade once and you’ll get a real second life out of it. But when the same blade dulls again — or was chipped or corroded to begin with — buy the replacement and spend your half hour cooking instead. If this repair is part of deciding whether to keep the machine at all, start with the food processor guide for what’s actually worth owning, and see what else the machine can do before you write it off.

This guide is based on manufacturer service documentation and the pattern in owner-reported blade wear — not laboratory testing.

If you’re shopping for a new machine rather than fixing this one, see the best food processor for shredding cheese for a disc-by-disc comparison.

If you’re shopping for a full-size processor specifically, see my Cuisinart DFP-14BCNY review for a detailed look at the 14-cup Best Overall pick.

Filed Under: Helpful Kitchen Tips

  • « Go to Previous Page
  • Page 1
  • Interim pages omitted …
  • Page 21
  • Page 22
  • Page 23
  • Page 24
  • Page 25
  • Interim pages omitted …
  • Page 27
  • Go to Next Page »

Recent Articles

  • Coffee Grinder Static: Why It Happens and How to Fix It
  • How to Descale an Electric Kettle
  • Saucepan vs Saucier: Which Pan Do You Need?
  • Espresso Shot Troubleshooting: Fast, Slow, Sour or Bitter
  • How to Clean a Coffee Grinder: What Makers Say

Search


HOME          Contact          Affiliate Disclosure          Terms of Service          Privacy Policy


kitchenwarecompare.com is a participant in the Amazon Services LLC Associates Program, an affiliate advertising program designed to provide a means for sites to earn advertising fees by advertising and linking to Amazon.com, Endless.com, MYHABIT.com, SmallParts.com, or AmazonWireless.com. Amazon, the Amazon logo, AmazonSupply, and the AmazonSupply logo are trademarks of Amazon.com, Inc. or its affiliates. As an Amazon Associate I earn from qualifying purchases.


Copyright © 2026 kitchenwarecompare.com, ALL RIGHTS RESERVED.