• Skip to primary navigation
  • Skip to main content
  • Skip to primary sidebar

Kitchenware Compare

  • Home
  • Product Reviews
    • Air Fryers
    • Coffee
    • Cookware
    • Flat Top Grills
    • Meat Thermometers
    • Food Processors
    • Knives
    • Pizza Ovens
    • Toaster Ovens
    • Juicers
  • Food Blog
  • Helpful Kitchen Tips
  • Data Studies
  • About
  • How I Review
  • Contact
You are here: Home / Archives for Product Reviews

Best BBQ Thermometers 2026: Leave-In Probes and Instant-Reads

Last Updated August 28, 2026

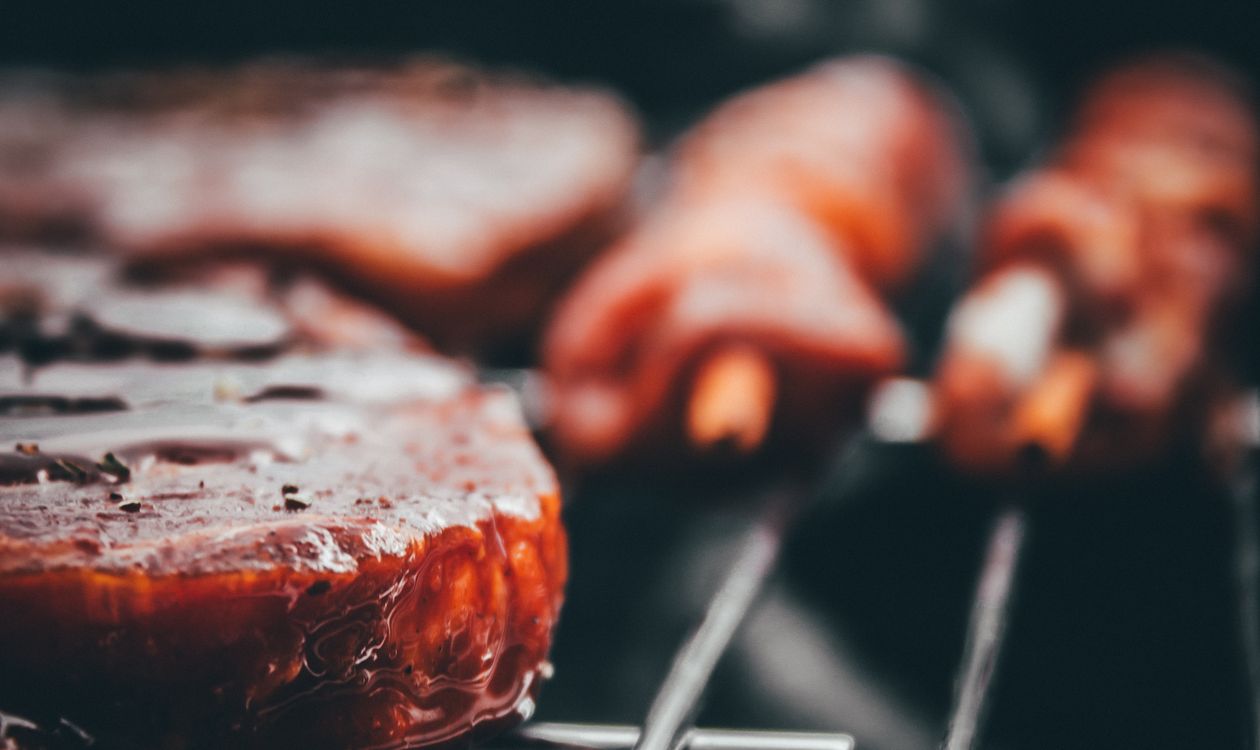
Sizzling meat on a charcoal grill

The quick answer

You need two types of thermometer at the BBQ: a leave-in probe for monitoring internal temperature throughout a cook, and an instant-read for quick checks on steaks, burgers, and chicken pieces. The MEATER Plus ($59.98) is my top leave-in pick; the Lavatools Javelin PRO ($43.99) is the instant-read I’d reach for.

The term ‘BBQ thermometer’ gets applied to everything from a $10 dial probe to a $200 multi-probe Wi-Fi system. This guide splits them into two clear categories — leave-in probes for long cooks, and instant-reads for quick checks — and recommends the best in each. For wireless probe models specifically, my best Bluetooth meat thermometer guide goes deeper on app quality, range, and accuracy.


This post contains affiliate links. If you buy through my links, I may earn a commission at no extra cost to you.

ProductBest ForPriceRatingBuy
MEATER PlusBest Wireless Probe$59.984.3★ (48,491)Check Price
TempPro TempSyncBest Multi-Probe$42.984.5★ (10,332)Check Price
Inkbird IBT-4XSAlternative Pick$49.994.5★ (10,856)Check Price
Lavatools Javelin PROBest Instant-Read$43.994.7★ (18,363)Check Price

Leave-in probe thermometers

Leave-in probes stay in the meat throughout the cook, transmitting live temperature readings so you can monitor without lifting the lid. These are the right tool for roasts, whole birds, brisket, pork shoulder, and any cook that takes more than 20 minutes.


MEATER Plus — best wireless leave-in probe

MEATER Plus Wireless Meat Thermometer for BBQ
BEST WIRELESS PROBE

MEATER Plus

  • Truly wireless — no cable, the probe stays inside the meat
  • Dual sensor: internal meat temp + ambient grill temp
  • 165-foot Bluetooth range
  • Guided cook app with estimated finish time and rest timer
  • IP67 waterproof, dishwasher safe

The MEATER Plus is the cleanest solution for BBQ use. No cable to route through the grill lid, no wire to kink, nothing to manage. The ambient temperature sensor measures your grill temperature alongside the meat temperature — both from a single probe. For charcoal grills and kamado cookers where routing a wire out of the lid is awkward, MEATER is uniquely suited.

Current price: $59.98

See Today’s Price on Amazon →

TempPro TempSync — best multi-probe for BBQ

TempPro TempSync 4-Probe Bluetooth BBQ Thermometer
BEST MULTI-PROBE

TempPro TempSync

  • 4 probes — monitor multiple proteins or grill zones
  • 650-foot Bluetooth range
  • 40-hour battery, USB rechargeable
  • Physical display shows all 4 temps simultaneously
  • TempPro app with high/low temperature alarms

When you’re grilling multiple proteins or running a smoker with distinct zones, the TP25’s four probes give you a complete picture at a glance. The 650-foot range is exceptional — far beyond what most other Bluetooth thermometers achieve at this price. If you regularly cook for large groups or run multi-zone smokes, this is the BBQ thermometer to buy.

Current price: $42.98

See Today’s Price on Amazon →

Inkbird IBT-4XS — alternative leave-in probe

Inkbird IBT-4XS Bluetooth BBQ Thermometer
BEST BUDGET PROBE

Inkbird IBT-4XS

  • 4 probes
  • 150-foot Bluetooth range
  • 150-hour battery life
  • iOS and Android app

The Inkbird is among the most affordable four-probe BBQ thermometers with a genuinely usable app, and it now sits level with the TempPro on price — so the choice between the two comes down to battery life against range. The Bluetooth range tops out at 150 feet — fine for most backyards, a limitation on large properties. Battery life at 150 hours is excellent. A reliable starting point for anyone new to probe thermometers.

Current price: $49.99

See Today’s Price on Amazon →

Instant-read thermometers for BBQ

Instant-read thermometers give you a temperature reading in 2-5 seconds when you insert the probe. They’re the right tool for steaks, burgers, chops, and quick chicken pieces where you want a fast doneness check at the grill — not a continuous monitor. A good instant-read and a good leave-in probe cover every BBQ scenario between them.


Lavatools Javelin PRO — best instant-read for BBQ

Lavatools Javelin PRO Classic Instant Read Meat Thermometer
BEST INSTANT-READ

Lavatools Javelin PRO Classic

  • 2-second response time
  • Auto-rotating backlit display — reads from any angle
  • IP65 water resistant (NSF certified)
  • Folds flat for storage, magnetic back
  • ±0.9°F accuracy

The Javelin PRO is a professional-grade instant-read at a home-cook price. The 2-second response time is fast enough to check a steak without standing at the grill with the lid open, and the auto-rotating display means you can hold it at any angle and the number orients itself correctly. The magnetic back sticks to your grill frame or fridge. It’s the instant-read I’d pick before anything else at this price.

Current price: $43.99

See Today’s Price on Amazon →

Which thermometer for which grill?

The right thermometer isn’t just about price and probe count — different grill types create different constraints for cable routing, Bluetooth range, and probe placement. Here’s what to consider for each setup.

Charcoal kettle grills (Weber Kettle, etc.)

Routing a cable through a kettle lid is possible but disrupts the seal. MEATER Plus is the natural choice here — the wireless probe stays inside the cooking chamber with no cable, the lid seals completely, and you monitor from your phone. The 165-foot Bluetooth range covers any backyard easily. If you want multiple probes on a charcoal grill, the TempPro TempSync works with its cable routed through the top vent — it doesn’t seal perfectly but the thermal impact is minimal for most cooks.

Kamado cookers (Big Green Egg, Kamado Joe)

Kamados seal tightly — that’s the point. Any cable compromises the ceramic seal, affecting both heat retention and draft management. MEATER Plus is almost certainly the right choice for kamado cooking. The probe sits entirely inside the dome with no external cable. If you’re serious about kamado cooking and need two probes, the MEATER Pro Duo is worth the premium; the two wireless probes work identically inside the ceramic chamber without any seal disruption.

Before blaming a thermometer on a gas grill, rule out the regulator. Weber states that a safety device in every propane hose since around 1995 can cut gas flow to roughly ten per cent if the grill is lit in the wrong order, which makes a healthy grill look faulty on any instrument — see a grill igniter clicking but not lighting.

Gas grills

Gas grills typically have gaps around the lid that make cable routing easy — the lid gasket is rarely airtight. TempPro TempSync or Inkbird IBT-4XS both work well here; you route the probe cable through the gap and it sits barely noticeable. MEATER also works on gas grills and is cleaner, but the cable-routing issue is much less significant than on charcoal or kamado setups. If you’re primarily a gas grill cook doing steaks and chicken, an instant-read like the Lavatools Javelin PRO is also worth having alongside a leave-in probe for those quick-check moments.

Pellet grills (Traeger, Pit Boss, Weber SmokeFire)

Many pellet grills have built-in meat probes — Traeger’s WiFIRE models, for example, come with probe ports that connect to the grill’s own controller app. If your pellet grill has this, test the built-in probe before buying a third-party thermometer — it may be sufficient. If the built-in probe is unreliable or you need more probe ports, TempPro TempSync is the best addition: cable routing is straightforward on pellet grills, and four probes cover everything a multi-rack smoke session demands.

One caution specific to pellet grills: the controller and your probe will disagree, and that is by design rather than a fault. Traeger states its grills cook on an average across the whole cooking surface while a probe reads one point, and both Traeger and Pit Boss publish a normal swing of about 25°F. Use the probe for the food, not to audit the controller — the full argument is in pellet grill temperature swings.

Offset smokers

Offset smokers often have large, imprecise lid gaps — cable routing is easy. The priority here is probe count and range. A brisket and pork shoulder running simultaneously for 14 hours on an offset is exactly the scenario for which TempPro TempSync was built. Four probes, 650-foot Bluetooth range, 40-hour battery. If your offset is close to the house, Inkbird IBT-4XS covers the same bases for less.


Electric smokers

Electric cabinets hold a set temperature more steadily than anything else here, so grate-level ambient readings matter less and probe count and range matter more. A cabinet running overnight at the bottom of the garden is the case for TempPro TempSync’s 650-foot range; MEATER Plus is enough if there is only one piece of meat in there. The failure to plan for on an electric smoker is electrical rather than thermal — if it keeps cutting the power mid-cook, see why an electric smoker trips the breaker.

The two-thermometer setup

The most versatile BBQ thermometer setup isn’t one expensive device — it’s two complementary ones: a leave-in probe for monitoring throughout the cook, and an instant-read for quick checks at the end.

The leave-in probe (MEATER Plus, TempPro TempSync, Inkbird IBT-4XS) tells you the internal temperature of the protein throughout the cook without lifting the lid. The instant-read (Lavatools Javelin PRO) gives you a precise reading in two seconds when you want to spot-check multiple points on a steak, check the thigh of a whole chicken, or verify a burger is at the right doneness before serving. That matters most with proteins that have a hard safety floor rather than a preference — wild boar and other wild game need 160°F, well above the 145°F used for pork.

The two tools serve different purposes and neither fully replaces the other. A leave-in probe can give a misleading reading if placed near bone; an instant-read lets you check multiple spots to confirm. An instant-read can’t tell you when your brisket is done from the other side of the yard; a leave-in probe can alert you on your phone. Together they cover every BBQ scenario.

Recommended pairing: MEATER Plus ($59.98) as your leave-in probe + Lavatools Javelin PRO ($43.99) as your instant-read. Total outlay: ~$124. Covers every cooking scenario from a 14-hour brisket to a 6-minute steak.

A pellet tube is the other cheap accessory worth knowing about for a smoker or a gas grill: it smoulders independently of the thermostat, so it keeps making smoke while the cooker cycles. The formats are compared in the best pellet tube smoker.

How These Picks Were Chosen

Plainly: this is a research-based guide, not a hands-on test. I have not run these through a cook, and nothing here should be read as a report from my own kitchen.

What the picks rest on: published accuracy tolerances and maximum probe temperatures from each manufacturer; the pattern of complaints across verified-purchase reviews, where a thermometer’s real failure modes show up clearly — probe cables giving out at the strain point, apps dropping connection part-way through a cook, and units that read accurately at room temperature but drift at smoker heat; and current prices and ratings checked directly on the Amazon listings.

What I could not establish: manufacturers quote Bluetooth range line-of-sight, which is not the condition anyone actually cooks in. I found no independent measurement of real range through house walls for these specific units, so treat every range figure on this page as the manufacturer’s ceiling rather than what you should expect from the kitchen.

Frequently Asked Questions

Do I need a leave-in probe and an instant-read, or just one?
Most serious BBQ cooks eventually own both — a leave-in probe (MEATER Plus, TempPro TempSync, or Inkbird IBT-4XS) for monitoring a long cook without lifting the lid, and an instant-read (Lavatools Javelin PRO) for quick spot-checks on steaks and burgers. If you’re only buying one, start with a leave-in probe — it covers more cooking scenarios.

Will a wireless thermometer work through a metal smoker or kamado grill?
Yes, but range drops. Metal and ceramic both reduce Bluetooth signal compared to open air. The TempPro TempSync’s 650-foot open-air range still leaves plenty of headroom through a smoker body; the MEATER Plus’s 165-foot range is enough for most backyard setups but can struggle at the far end of a large property.

Can I use the same thermometer on a charcoal grill and a gas grill?
Yes — all the thermometers in this guide work on any grill type. The difference is convenience: charcoal kettles and kamados seal tightly, so a fully wireless probe like the MEATER Plus avoids compromising that seal, while gas grills usually have enough of a lid gap that a corded probe routes through easily.

How many probes do I actually need for BBQ?
One probe covers one piece of meat. If you regularly smoke multiple proteins or run a multi-zone offset smoker, a 4-probe thermometer like the TempPro TempSync pays for itself in convenience. Most single-protein cooks do fine with one probe.

What if my pellet grill already has a built-in probe?
Test it first. Many pellet grills (Traeger WiFIRE models and similar) include probe ports tied to the grill’s own app, and it may be sufficient on its own. A third-party thermometer is worth adding only if the built-in probe is unreliable or you need more probe ports than the grill provides.

Is an expensive BBQ thermometer worth it over a basic dial thermometer?
For anything beyond quick steaks, yes. A basic dial thermometer requires opening the lid to check, losing heat each time on a long smoke. A leave-in probe thermometer monitors continuously without opening the lid, which matters most on cooks over an hour.

Related guides
Related: Best Bluetooth Meat Thermometer 2026
Related: Best Meat Thermometer for Smoking
Related: Meat Temperature Guide
Related: Are Wireless Meat Thermometers Accurate?
Related: Best Probe Thermometers 2026


Filed Under: Product Reviews

Best Knife Sharpener 2026: Top Electric, Whetstone Picks

Last Updated August 26, 2026

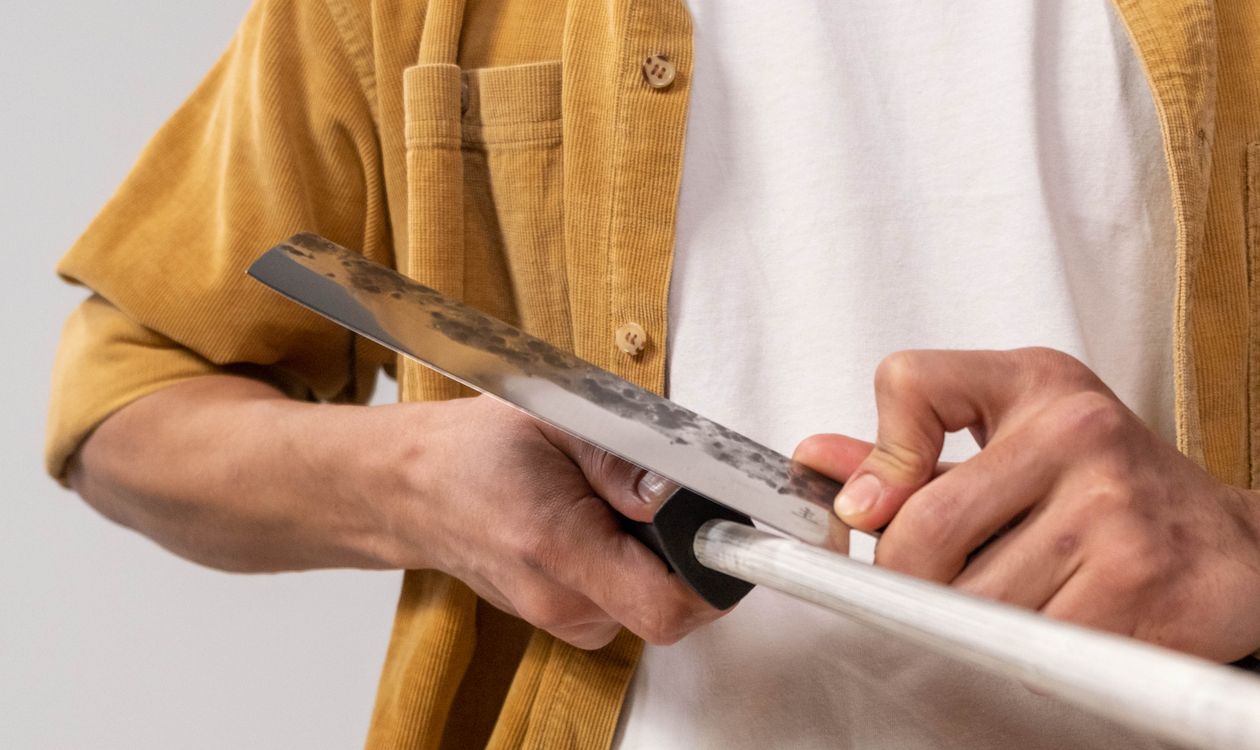
Sharpening a kitchen knife on a honing rod

This post contains affiliate links. If you buy through my links, I may earn a commission at no extra cost to you.

A $200 chef’s knife with a dull edge cuts worse than a $30 knife with a sharp one. That’s the entire economics of knife sharpeners: the cheapest meaningful upgrade to every knife you own is the tool that maintains them. Worth knowing before you buy: if sharpening already leaves your knife sharp for one cut and then dull, the tool may not be the problem. Across the five approaches — an electric sharpener, a guided system, a whetstone, a pull-through and a honing rod — here’s what each actually delivers on German and Japanese edges alike, and which one fits how you cook.

Best Knife Sharpeners — Quick Comparison

Product Best For Price Rating Buy
Chef’sChoice 15XV Trizor Best Overall (Electric) $165.99 4.6★ (14,366) Check Price
Work Sharp Precision Adjust Best Guided System $69.95 4.5★ (11,539) Check Price
Sharp Pebble 1000/6000 Whetstone Best Whetstone $39.99 4.6★ (25,625) Check Price
KitchenIQ 50009 Edge Grip Best Budget $10.07 4.4★ (97,704) Check Price
Utopia 12″ Honing Rod Daily Maintenance $10.90 4.7★ (8,340) Check Price

If you are still choosing the knife itself rather than the sharpener, the knives section collects every guide, review and comparison on the site in one place.

How These Picks Were Chosen

Plainly: this is a research-based guide, not a hands-on test. I have not run these through a cook, and nothing here should be read as a report from my own kitchen.

What the picks rest on: abrasive type and grit progression, whether the angle guide is fixed or adjustable and what angle it holds, whether that angle suits Japanese or German edges, and how much steel each mechanism removes per pass; plus the complaint patterns in verified-purchase reviews, which for sharpeners are unusually informative — the recurring one is a device that sharpens quickly by grinding away far more blade than it needs to.

What I could not establish: the consistency of the edge angle each device actually produces. That is the measurement that would separate these properly, and I found no independent test of it covering these units. The angles quoted here are the manufacturers’ stated guides, not verified output.

The Best Knife Sharpeners of 2026, Reviewed

1. Chef’sChoice 15XV Trizor EdgeSelect — Best Overall

Chef'sChoice 15XV Trizor EdgeSelect electric knife sharpener

The Trizor XV is the pick for anyone who wants sharp knives without learning a technique. Its spring guides hold the angle through two diamond-abrasive stages and a polishing stage, so the technique is a light, steady pull, though owners report scratched blade faces and, on early attempts, duller edges. It converts traditional 20-degree factory edges to Chef’sChoice’s 15-degree Trizor XV edge, which its manual describes as a triple bevel with 14-degree major facets.

Trade-offs: $165.99 is real money, it takes counter space, and the first sharpening removes noticeable metal while it re-bevels. A stone gives more control, for anyone willing to learn it.

Verdict: if you want every knife in the house sharp this afternoon and never want to think about burr angles, this is the simplest answer. 4.6★ across 14,366 owners agrees. More in my Chef’sChoice 15XV review.

Check Price on Amazon ↗

2. Work Sharp Precision Adjust — Best Guided System

Work Sharp Precision Adjust guided knife sharpening system

The Precision Adjust clamps the knife and rides an abrasive on a guided arm at your chosen angle — 15 to 30 degrees, click-adjustable. It’s the middle path: stone-like control and edge quality without stone-like skill demands. Setup per knife takes a couple of minutes, and the results on the Japanese blade in particular beat what the electric produced — you can match the factory angle exactly instead of converting it.

Trade-offs: it’s slower per knife than the Trizor, the clamp fights very tall or very short blades, and it lives in a drawer between sessions, which for some people means it lives there forever.

Verdict: the enthusiast pick. If you own knives with different edge angles and care about keeping each one authentic, this does at $69.95 what systems twice the price do.

Check Price on Amazon ↗

3. Sharp Pebble 1000/6000 Whetstone — Best Whetstone

Sharp Pebble 1000/6000 grit whetstone with bamboo base and angle guide

The traditional answer, and still the best edge available at any price — once you’ve put in the practice. The 1000 grit side rebuilds an edge; the 6000 side polishes it to the kind of sharpness that makes tomatoes surrender. This kit’s angle guide, non-slip bamboo base, and instructions make it a beginner-friendly on-ramp, and 25,625 owners at 4.6★ back that up.

Trade-offs: honesty required — your first five or so sessions will produce edges worse than the KitchenIQ manages in thirty seconds. Budget fifteen minutes per knife and a YouTube evening. Water-soak before use, flatten the stone occasionally.

Verdict: buy it if the skill appeals to you — it’s genuinely satisfying and the ceiling is the highest here. Skip it if you just want sharp knives with zero ceremony.

Check Price on Amazon ↗

4. KitchenIQ 50009 Edge Grip — Best Budget

KitchenIQ 50009 Edge Grip two-stage pull-through knife sharpener

Pull-through sharpeners get sneered at, and the sneering is half-right: carbide pull-throughs are aggressive, remove more steel than necessary, and leave a coarser edge than any other method here. Now the other half: this $10.07 gadget takes a dull knife to genuinely useful sharpness in under a minute with little skill, and its 97,704 ratings — the most of any product in this guide — are overwhelmingly from people it made happy. My 602-product study found this pattern everywhere: cheap workhorses out-satisfy premium gear.

Trade-offs: fixed angle, coarse edge, steel removal. Don’t use it on an expensive Japanese blade — ever. For the $20–$60 knives that do most kitchens’ work, none of that matters.

Verdict: the right answer for beater knives, rentals, and anyone who was never, ever going to use a whetstone.

Check Price on Amazon ↗

5. Utopia Kitchen 12″ Honing Rod — Daily Maintenance

Utopia Kitchen 12 inch honing steel rod

Not a sharpener — and that’s the point. A honing rod realigns the microscopic rolled edge that daily cutting produces, which is why a knife that “went dull” often springs back after eight strokes on steel. Hone weekly and you’ll sharpen a quarter as often, which means every other tool in this guide lasts longer and your knives keep more of their steel. Twelve inches handles any kitchen blade; the hanging hook means it actually stays near the cutting board.

Verdict: the $10.90 accessory every kitchen should own regardless of which sharpener you pick. Highest rating in this guide (4.7★) for the simplest tool in it.

Check Price on Amazon ↗

How to Choose: Electric vs Guided vs Stone vs Pull-Through

Electric (Trizor XV): fastest route to consistently sharp knives, little skill, highest price. Right for most busy kitchens.
Guided system (Work Sharp): stone-quality edges with training wheels; per-knife angle control.

Right for mixed German/Japanese collections.
Whetstone (Sharp Pebble): best possible edge, cheapest per use, real learning curve.

Right if the craft appeals.
Pull-through (KitchenIQ): adequate edges instantly, hardest on blades. Right for inexpensive knives only.
Honing rod (Utopia): not a sharpener — buy one alongside whichever you choose and use it weekly.

Honing vs Sharpening: The 30-Second Version

Sharpening removes steel to create a new edge. Honing bends the existing edge back into line without removing anything. A knife needs honing weekly and sharpening only a few times a year — if you’re sharpening monthly, you’re either skipping the honing rod or slicing on glass boards (please stop — see my cutting board guide for what your edge wants to land on). If you want the full step-by-step whetstone technique rather than just the summary, see my guide to sharpening a knife with a whetstone.

Frequently Asked Questions

How often should I sharpen my kitchen knives?

For a knife used daily: hone weekly, sharpen every 2–4 months. The tomato test tells you when — if the skin dents before it slices with no pressure, it’s time.

Do electric sharpeners ruin knives?

They can mark them. Owners of the Trizor XV report scratched blade faces and, on early attempts, duller edges, though most describe very sharp results once they follow the manual. Any electric removes more steel than a stone, so a knife sharpened electrically for twenty years wears visibly narrower.

Can I sharpen Japanese knives with these?

The Work Sharp (set to 15°) and the whetstone are the right tools. The Trizor XV works — its manual covers 15-degree Asian knives and has a separate method for single-bevel ones — but skip the KitchenIQ entirely: harder Japanese steel chips rather than folds, and carbide pull-throughs cause exactly that.

Are whetstones worth the learning curve?

If you enjoy the process, unambiguously yes — best edges, lowest lifetime cost, works on every blade shape. If you know you won’t practice, buy the electric and never look back. Be honest with yourself; the drawer full of abandoned whetstones is a cliché for a reason.

What angle should I sharpen my knives at?

German/Western knives: 20° per side traditionally, though 15–17° holds fine on modern steel. Japanese knives: 12–15°. When in doubt, match the factory edge — the guided Work Sharp makes that trivial.

Related Reading

  • Best Chef’s Knife 2026: Reviews + Buying Guide
  • Best Cutting Board for Japanese Knives
  • Are Expensive Kitchen Appliances Worth It? I Analyzed 602 Products

Filed Under: Product Reviews

Best Pullman Loaf Pan 2026: 4 Picks Compared

Last Updated August 26, 2026

Flat-topped white sandwich bread sliced on a wooden cutting board

This post contains affiliate links. If you buy through my links, I may earn a commission at no extra cost to you.

A Pullman pan does one thing a regular loaf pan can’t: the sliding lid forces bread into a perfect square with a tight, even crumb — the flat-topped sandwich slices you get from a bakery, or the shokupan you’ve seen all over milk bread recipes. The USA Pan 9×4 Pullman is the one to buy for most bakers: commercial aluminized steel, a corrugated quick-release surface, made in the USA, and $30.56. Below it: a $13 budget option that overperforms, a corrugated CHEFMADE for the most even browning, and the 13-inch USA Pan for full-size sandwich loaves.

Working with enriched or high-hydration doughs by hand gets old quickly — if you are baking often enough to care about pan shape, a stand mixer is the next thing worth owning.

Best Pullman Loaf Pans — Quick Comparison

Product Best For Price Rating Buy
USA Pan Pullman 9×4 with Cover Best Overall $30.56 4.7★ (8,232) Check Price
KITESSENSU Pullman 1 lb with Lid Best Budget $12.99 4.5★ (2,613) Check Price
CHEFMADE Pullman 1 lb with Lid Best Even Browning $24.99 4.7★ (1,215) Check Price
USA Pan Pullman 13×4 with Cover Best Large $41.95 4.7★ (8,232) Check Price

How I Picked

Four pans, not five — the Pullman category is small, and padding a list with interchangeable no-name imports helps nobody. Every pick here was verified live on Amazon this week (26 August 2026): current price, rating, and availability. Selection weighed steel gauge and coating quality, lid fit (a sticking lid ruins the whole point), size coverage across 1 lb and 2 lb doughs, and what several thousand owner reviews say happens after a year of regular baking. This is research-based, spec-verified work — the bread science comes from the recipes these pans are built around.

The 4 Best Pullman Loaf Pans in 2026

1. USA Pan Pullman 9×4 with Cover — Best Overall

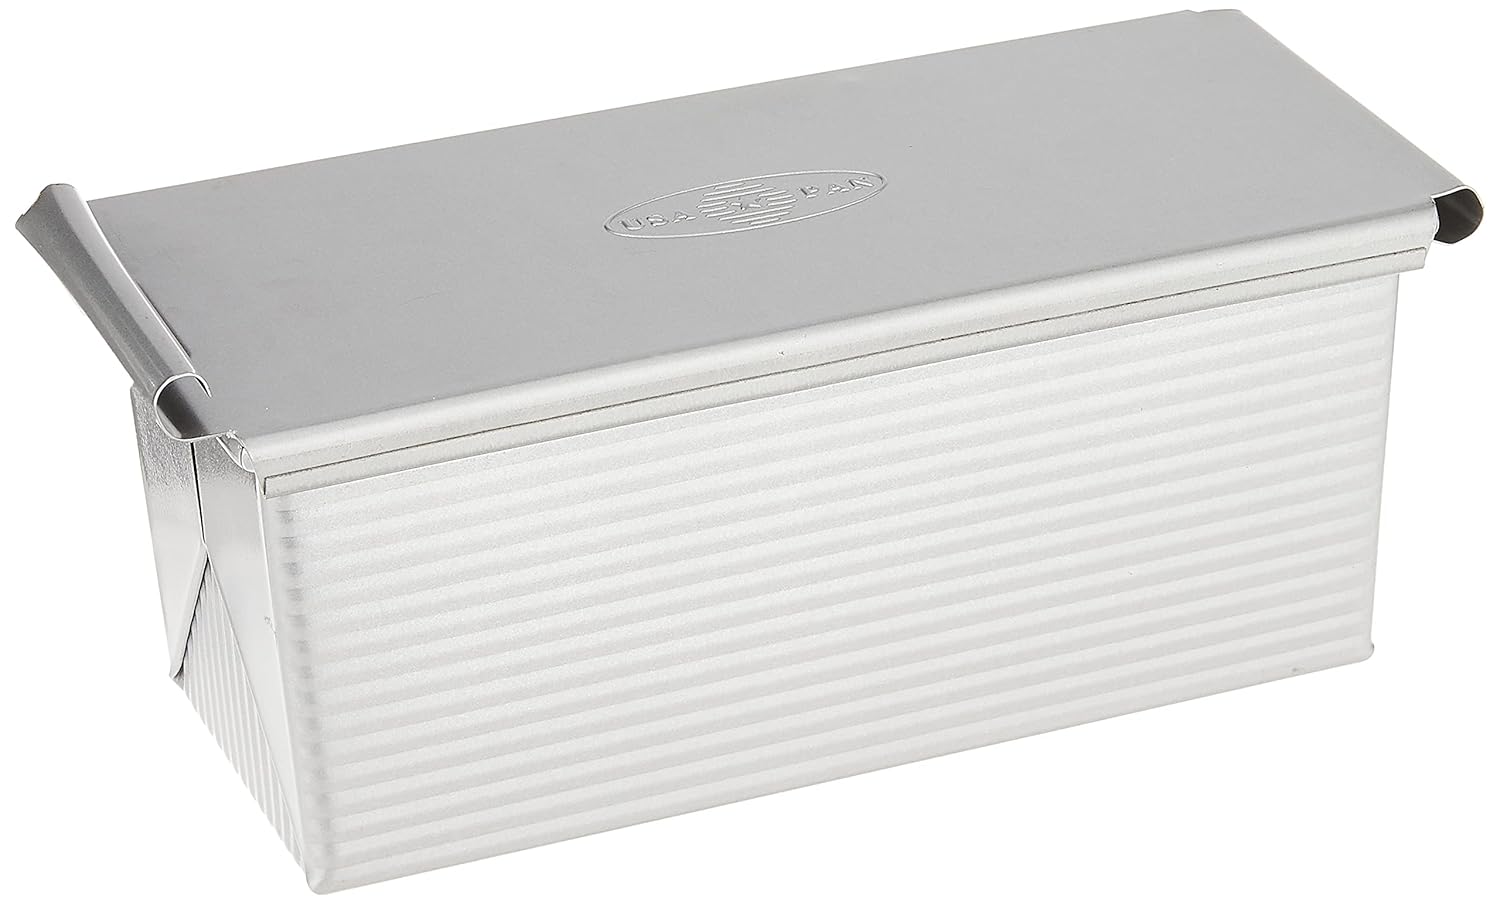
USA Pan 9x4 inch Pullman loaf pan with sliding cover

This is the pan most Pullman recipes are quietly written around. Commercial-gauge aluminized steel heats evenly without hot spots, the corrugated surface releases loaves with a gentle twist, and the lid slides cleanly instead of binding halfway — the small thing that separates a good Pullman pan from a frustrating one. It’s made in the USA by a company that supplies commercial bakeries, and it holds a 4.7-star average across 8,000+ reviews.

The 9x4x4 size takes about 1 lb of dough — the standard for shokupan and pain de mie recipes. Run it lid-off and it works as a deep standard loaf pan, so it earns its shelf space twice.

Downsides: it’s the most expensive small Pullman here, and the nonstick coating means hand-wash only — dishwashers kill it. The corrugation also leaves faint ridges on the loaf sides, which bothers exactly the kind of person who buys a Pullman pan for perfect squares.

Check Price on Amazon

2. KITESSENSU Pullman 1 lb — Best Budget

KITESSENSU gold 1 lb Pullman loaf pan with sliding lid

Thirteen dollars gets you a genuinely usable Pullman pan — carbon steel, corrugated, gold nonstick coating, sliding lid. For anyone unsure whether square sandwich bread will become a habit, this is the low-risk way to find out, and 2,500+ owners at 4.5 stars suggest most people are pleasantly surprised.

Downsides: the steel is a lighter gauge than the USA Pan, so it heats faster and can brown the bottom crust ahead of the crumb — worth checking five minutes early. Coating longevity is the honest question mark at this price; treat it gently and skip metal tools. And the lid tolerances are looser, with occasional sticking reported when dough over-proofs against it.

Check Price on Amazon

3. CHEFMADE Pullman 1 lb — Best Even Browning

CHEFMADE champagne gold corrugated Pullman loaf pan with lid

CHEFMADE’s corrugated champagne-gold pan is the browning specialist: the deep corrugation channels air along every face of the loaf, producing the most even crust color of the group — including the sides and bottom, where cheaper pans go pale or scorch. Build quality punches above the $25 price, with a heavier feel than the KITESSENSU and a lid that slides confidently. It was the one keeper from the previous version of this guide, and its 4.6-star average has held steady as reviews doubled.

Downsides: the interior runs slightly smaller than the USA Pan, so a full 1 lb recipe proofs right to the lid — scale down 5–10% or expect dense corners. Hand-wash only, like every coated pan here. And the pale gold coating shows tea-colored heat staining after a few months, which is cosmetic but visible.

Check Price on Amazon

4. USA Pan Pullman 13×4 with Cover — Best Large

USA Pan 13x4 inch large Pullman loaf pan with sliding cover

Same steel, same coating, same clean-sliding lid as the 9-inch — stretched to 13 inches for households that actually eat sandwich bread all week. This is the size delis use: around 1.5–2 lb of dough, yielding the long, uniform loaf that slices into 20+ even sandwich squares. If your 9×4 loaves vanish in two days, this is the fix.

Downsides: most published Pullman recipes are written for the 9×4, so you’ll be scaling everything up by roughly 1.5x — easy math, but a real friction point for recipe followers. It’s also a long pan that needs a full oven rack and a storage slot to match, and underfilling it produces a squat, sad loaf rather than a smaller version of the right one.

Check Price on Amazon

Pullman Loaf Pan Buying Guide

What the lid actually does

Bread in an open pan rises into a dome; bread against a Pullman lid can’t. The trapped dough compresses into a fine, tight crumb with no large holes — which is why Pullman bread makes the best toast, tea sandwiches, and French toast, and why Japanese shokupan recipes all specify one. Slide the lid off and every pan here bakes a normal domed loaf, so you’re not buying a single-trick tool.

9×4 or 13×4 — match the pan to your recipe

The small 9x4x4 takes about 1 lb of dough and matches nearly every shokupan, pain de mie, and milk bread recipe published. The 13x4x4 takes 1.5–2 lb and suits weekly sandwich-bread bakers. Buy the size your recipes call for, not the bigger one “to be safe” — an underfilled Pullman pan can’t reach the lid, which defeats the whole mechanism. Kneading larger doughs is also where a machine earns its keep; a good food processor handles 1 lb bread doughs in under two minutes.

Aluminized steel vs carbon steel

Aluminized steel (both USA Pans) spreads heat more evenly and resists rust at the cut edges; it’s the commercial-bakery standard. Carbon steel (KITESSENSU, CHEFMADE) heats faster and costs less, at some cost in evenness. Every pan here is nonstick-coated, which means the same care rule across the board: no dishwasher, no metal tools, and they’ll outlast the coating warranty. The same rules cover most bakeware, and looking after bakeware and baking tools goes through the rest. The same logic covers your stovetop pans — my non-stick pan guide explains what actually kills coatings.

Gluten-free and enriched doughs

Pullman pans work well for gluten-free sandwich bread — the lid gives structurally weak GF doughs a shape they can’t hold on their own. If GF baking is the goal, pair the pan with my best gluten-free bread maker guide for the dough side of the equation. Enriched doughs (milk, butter, sugar) brown faster; check ten minutes early the first time.

Frequently Asked Questions

What is a Pullman loaf pan used for?

Square, flat-topped sandwich bread with a tight, even crumb — the style used for tea sandwiches, shokupan, and pain de mie. The sliding lid stops the dough doming as it bakes.

How much dough goes in a Pullman pan?

About 1 lb for a 9x4x4 pan and 1.5–2 lb for a 13x4x4. The dough should fill the pan two-thirds to three-quarters at the end of proofing so it just reaches the lid in the oven.

Do I need to grease a nonstick Pullman pan?

Lightly, yes — including the underside of the lid. The top corners are where loaves stick, and a thin coat of butter or spray on the lid prevents the one failure that ruins a Pullman loaf at the last step.

Can I bake with the lid off?

Yes. Every pan in this guide works as a standard deep loaf pan with the lid removed — you’ll get a normal domed top instead of the flat square.

Why did my Pullman loaf come out dense?

Usually too much dough or an over-proofed rise pressing against the lid too early. Compressed dough has nowhere to go; scale the recipe to the pan and lid it when the dough sits about an inch below the rim.

Are Pullman pans dishwasher safe?

No — all four picks here are nonstick-coated and hand-wash only. Dishwasher detergent degrades the coating within months. A rinse and a soft sponge is a 30-second job.

Bottom Line

Buy the USA Pan 9×4 and it will match every Pullman recipe you’ll find while outlasting the cheaper pans around it. Try the KITESSENSU first if $13 is the right level of commitment, and step up to the 13-inch USA Pan once homemade sandwich bread becomes the household default. For everything else in the kitchen, my cookware guides keep the same no-nonsense format.

How These Picks Were Chosen

Plainly: this is a research-based guide, not a hands-on test. I have not run these side by side, and nothing here should be read as a report from my own kitchen.

What the picks rest on: internal dimensions and the dough weight each pan is actually sized for, which is the specification that decides whether you get a square-sided loaf or an overflow; material and gauge; whether the lid slides freely when the pan is hot; and coating type. Plus the complaint patterns in verified-purchase reviews, which for Pullman pans concentrate on lids sticking and on coatings failing where the lid rubs.

What I could not establish: how long each coating survives the lid sliding across it, which is the wear point unique to this pan shape. No published test covers it. Gauge and coating type are the indicators used here.

You Might Also Like

  • Best gluten-free bread maker
  • Best cookware sets
  • Best small chest freezer — freeze sliced loaves for the week
  • Best omelette pan — the other half of a proper breakfast


Filed Under: Product Reviews

Best Cast Iron Dutch Oven 2026: Reviews + Buying Guide

Last Updated August 26, 2026

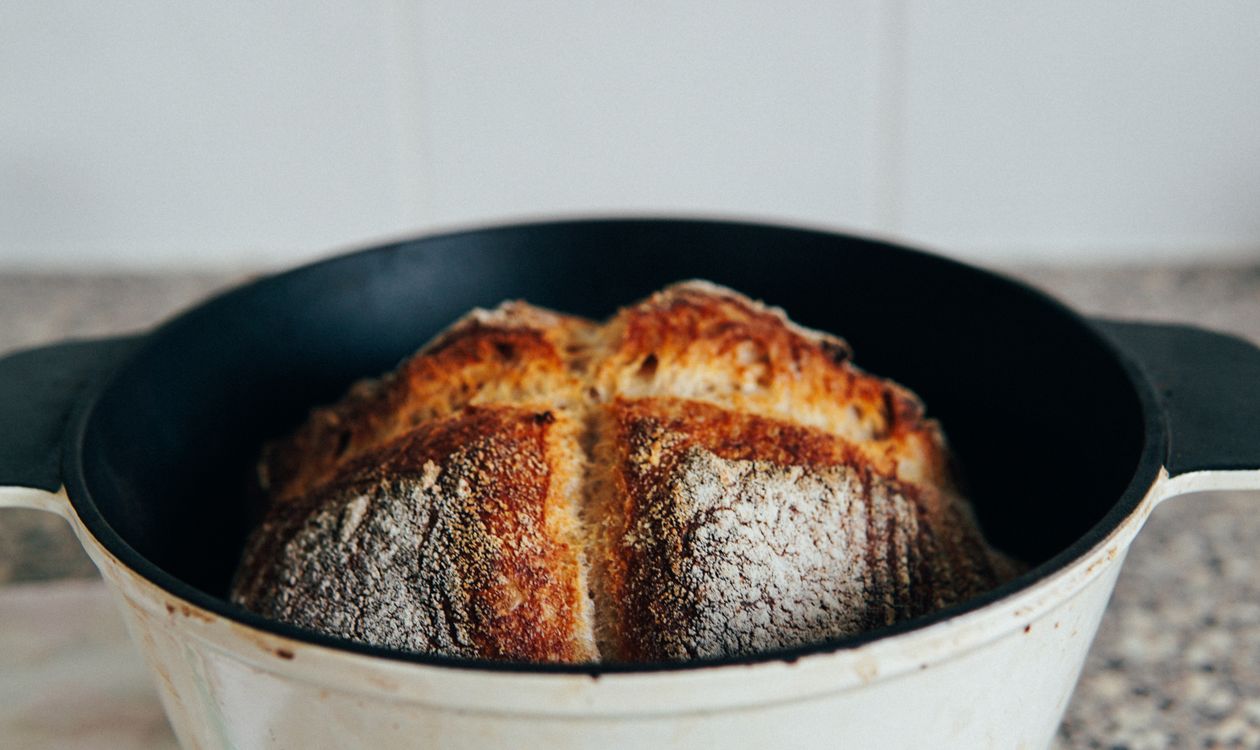
Fresh baked sourdough bread in a cast iron Dutch oven

A cast iron Dutch oven is one of the most versatile pieces of cookware you can own. It braises, braids, bakes bread, makes soups and stews, and can go from stovetop to oven without a second thought. Buy a good one and it will last generations. This guide covers the five best cast iron Dutch ovens in 2026, from the industry benchmark Lodge to enamel-coated options that give Le Creuset results at lower prices.

I earn a commission if you buy through the Amazon links below, at no extra cost to you.

Part of my cookware reviews hub — all reviews, comparisons, and buying advice in one place. If you want a skillet instead of a Dutch oven, see my best cast iron skillet guide.

Best Cast Iron Dutch Ovens — Quick Comparison

Product Best For Price Rating Buy
Lodge 6 Qt Enameled Best Overall Value $89.90 4.7★ (39,154) Check Price
Le Creuset Signature 5.5 Qt Best Premium $299.98 4.7★ (7,859) Check Price
Staub 5.5 Qt Cocotte Best for Braising $367.95 4.6★ (1,539) Check Price
Lodge Bare Cast Iron 5 Qt Most Versatile Budget $59.90 4.7★ (17,335) Check Price
Cuisinart Chef’s Classic 5.5 Qt Oval and Colour Options $110.46 4.5★ (232) Check Price

Related Reading

  • The best way to clean a cast iron Dutch oven
  • Which cookware works on induction cooktops?

Reviews

1. Lodge 6 Qt Enameled — Best Overall Value


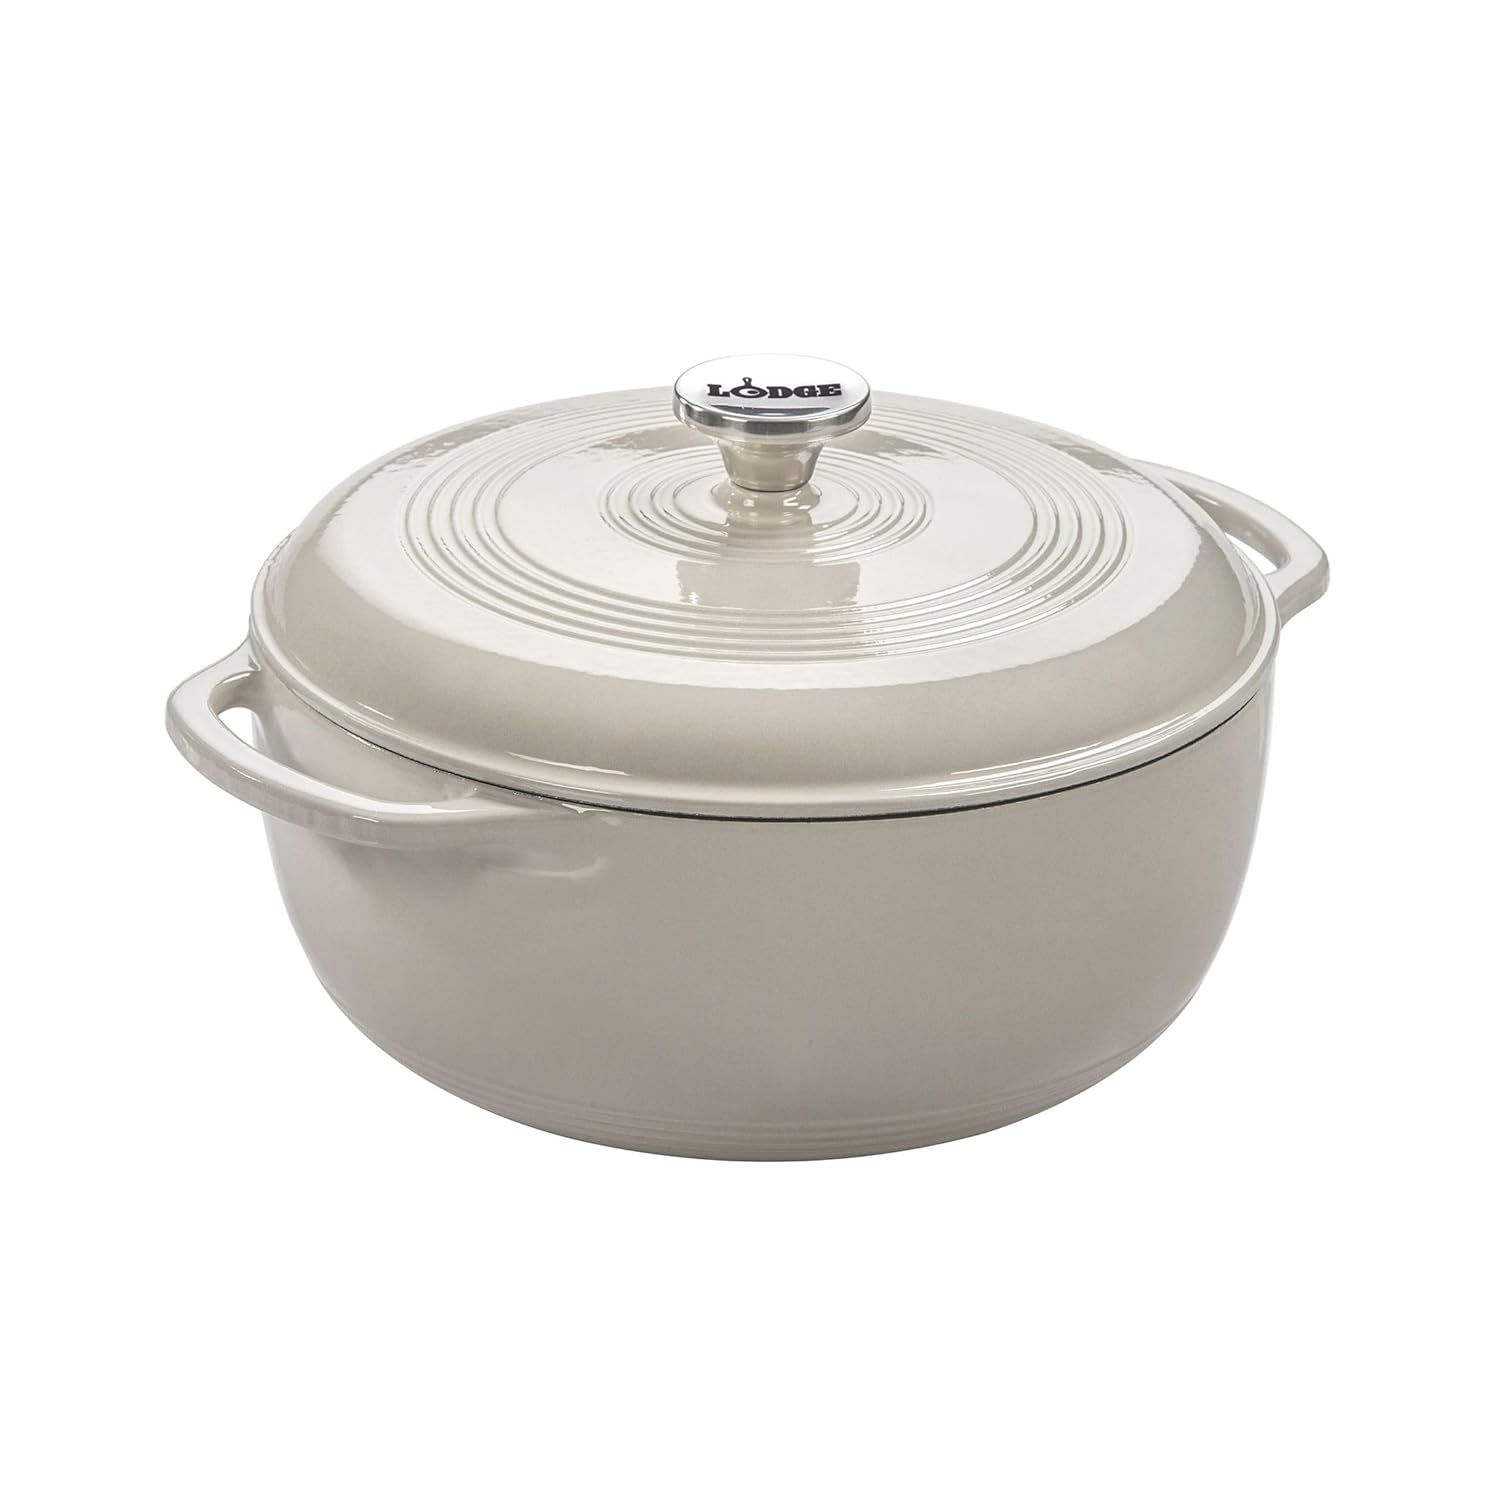
Lodge Essential Enamel Cast Iron Dutch Oven 6 Quarts

Lodge’s enameled Dutch oven delivers Le Creuset-level performance at roughly a third of the price. The porcelain enamel interior is smooth, non-reactive, and doesn’t hold onto stains or odors between uses. At 6 quarts it is large enough for a whole chicken, a large batch of chili, or a 4–5 lb artisan bread loaf. The colour range is limited compared to Le Creuset, but the cooking performance is virtually identical.

  • Pros: Affordable, excellent heat retention and distribution, oven-safe to 500°F, lifetime warranty
  • Cons: Heavier than Le Creuset equivalent; fewer colour options
  • Best for: Home cooks who want Le Creuset performance without the price
Check Price on Amazon →

2. Le Creuset Signature 5.5 Qt — Best Premium Dutch Oven


Le Creuset Signature Round Dutch Oven 5.5 Quart

The Le Creuset Signature is the Dutch oven that all others are compared to. Its sand-coloured enamel interior resists staining better than white alternatives, the tight-fitting lid creates excellent moisture retention, and the ergonomic handles are noticeably more comfortable than budget versions. It is expensive — but it is also the only piece of cookware you are likely to put in your will.

Deciding between these two specifically? See my full Lodge vs Le Creuset head-to-head comparison.

  • Pros: Lifetime warranty, superior lid seal, best-in-class enamel quality, heirloom build quality
  • Cons: Expensive; heavy at 13 lbs
  • Best for: Serious home cooks, wedding gifts, anyone buying for life
Check Price on Amazon →

3. Staub 5.5 Qt Cocotte — Best for Braising


Staub Cast Iron 5.5 Quart Round Cocotte

Staub’s Dutch oven takes a different design approach to Le Creuset: the interior is matte black enamel rather than light-coloured, and the lid has self-basting spikes that continuously return moisture to the food as it cooks. For braises and stews where moisture retention is critical, Staub has a genuine advantage. The tight lid seal is excellent.

  • Pros: Self-basting lid, superb moisture retention, matte interior resists staining, beautiful design
  • Cons: Dark interior makes it harder to monitor browning; expensive
  • Best for: Dedicated braising and slow-cooking; cooks who make stews and braises regularly
Check Price on Amazon →

4. Lodge Bare Cast Iron 5 Qt — Most Versatile Budget Option


Lodge Bare Cast Iron Dutch Oven 5 Quart

The bare (uncoated) Lodge cast iron Dutch oven is the most affordable option and arguably the most versatile. Unlike enameled versions, bare cast iron can be used over a campfire or on very high heat, develops a natural non-stick seasoning over time, and improves with every use. The trade-off: it requires seasoning, cannot be used with acidic ingredients for long periods, and takes more care to maintain.

  • Pros: Very affordable, campfire-safe, improves with use, extremely durable
  • Cons: Requires seasoning and careful drying; reactive with acidic foods
  • Best for: Camp cooking, budget buyers, cast iron enthusiasts
Check Price on Amazon →

5. Cuisinart Chef’s Classic — Oval and Colour Options


Cuisinart Chefs Classic Enameled Cast Iron Oval Casserole 5.5 Quart

Cuisinart’s enameled Dutch oven has risen sharply in price and no longer undercuts Lodge — at around $110 it now costs more than the Lodge enameled above, which is also better reviewed. It still offers solid heat distribution and a porcelain enamel interior. It is not as refined as Lodge or Le Creuset — the lid fit is slightly less precise and the handles are smaller — but for occasional use it performs well.

  • Pros: Oven-safe to 500°F, available in several sizes
  • Cons: Lid fit less precise than Lodge; lighter weight affects heat retention
  • Best for: Occasional use, budget shoppers, a starter Dutch oven
Check Price on Amazon →

Dutch Oven Buying Guide

What size Dutch oven should I buy?

A 5–6 quart Dutch oven is the most versatile size for most households. It handles a whole chicken, a large batch of soup, bread up to a 4–5 lb loaf, and braises for 4–6 people. Go larger (7–8 qt) if you regularly cook for big groups; go smaller (3.5 qt) if you mostly cook for one or two.

Enameled vs. bare cast iron — which is better?

Enameled cast iron requires no seasoning, can be used with acidic ingredients, and is easier to clean. Bare cast iron is more affordable, improves over time, and can withstand higher heat and campfire use. For Dutch oven cooking (soups, stews, braises, bread), enameled cast iron is generally the better choice. For everything else, bare cast iron has more versatility.

Can I use a Dutch oven on an induction cooktop?

Yes — all cast iron Dutch ovens, enameled or bare, work on induction cooktops. Cast iron is magnetic and heats efficiently on induction. The heat distribution is excellent, though cast iron takes slightly longer to heat up than thinner pans.

How These Picks Were Chosen

Plainly: this is a research-based guide, not a hands-on test. I have not run these side by side, and nothing here should be read as a report from my own kitchen.

What the picks rest on: whether the interior is bare cast iron or enamelled, which decides everything about maintenance and what you can cook in it; capacity against the number of people you actually feed; lid weight and how well it seals; handle size with oven gloves on; and oven-safe temperature including the knob. Plus the complaint patterns across verified-purchase reviews, which for enamelled pots concentrate on chipping at the rim and on the interior staining.

What I could not establish: enamel durability, which is the difference between a pot that lasts decades and one that chips in a year. No independent test covers these models, and owner reports of chipping rarely say whether the pot was dropped, thermally shocked, or simply used. The guide reports the pattern without claiming to know the cause.

Frequently Asked Questions

What is the best cast iron Dutch oven overall?

The Lodge Essential Enamel 6 Qt. It delivers cooking performance close to Le Creuset at under a third of the price, and its 39,154 ratings at 4.7 stars is the largest, most stable track record on this list.

Is Le Creuset really worth the price over Lodge?

For most home cooks, no — the cooking results are nearly identical. Le Creuset earns its price through a smoother enamel interior that resists staining longer, more comfortable handles, and a wider color selection. Buy it if you plan to use it daily for decades; buy Lodge if you just want great results.

How do you season or maintain a cast iron Dutch oven?

Enameled Dutch ovens (Lodge Enameled, Le Creuset, Staub, Cuisinart) never need seasoning — just hand wash and dry. Bare cast iron (Lodge Bare) needs a light coat of oil after each wash to prevent rust, the same as a cast iron skillet.

Can you put a cast iron Dutch oven in the dishwasher?

Enameled Dutch ovens are generally dishwasher-safe, though hand-washing preserves the enamel’s shine longer. Bare cast iron should never go in the dishwasher — the detergent and prolonged water exposure will cause rust.

What is the difference between a Dutch oven and a cocotte?

They’re the same type of cookware. “Cocotte” is the French term Staub uses for its round enameled cast iron pot; “Dutch oven” is the more common English term used by Lodge, Le Creuset, and most other brands.

How long does a cast iron Dutch oven last?

Decades with basic care. Bare cast iron can last generations if kept seasoned and dry. Enameled versions typically last 15-25+ years before the enamel shows significant wear, and the cast iron core underneath does not degrade.

Bottom line: The Lodge Enameled 6 Qt is the smart buy for most people — it matches Le Creuset cooking performance at a much more accessible price. If you want to invest in the best, Le Creuset or Staub are the benchmarks and genuinely worth the price for daily cooks.


Filed Under: Product Reviews

Best Stainless Steel Moka Pot 2026: 5 Picks That Actually Hold Up

Last Updated August 26, 2026

Disclosure: I earn a small commission if you buy through links on this page, at no extra cost to you.

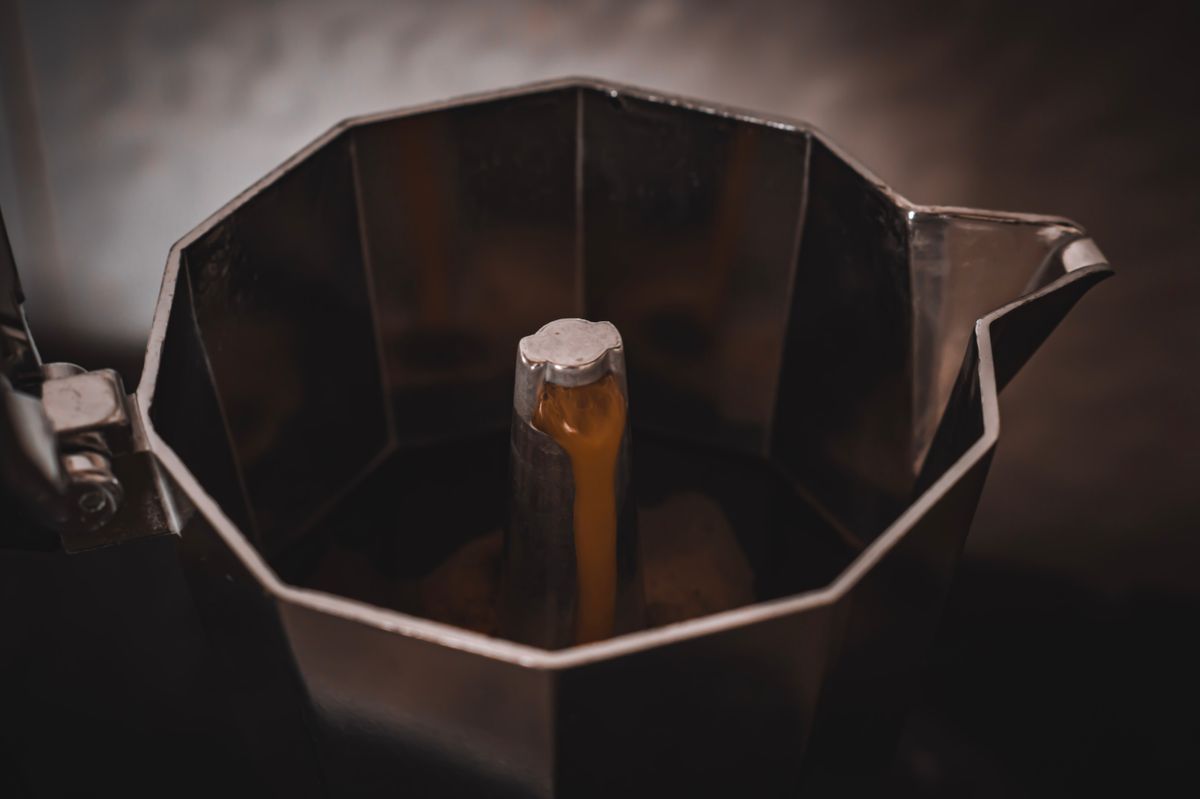
Close-up of a stainless steel moka pot upper chamber with coffee rising from the central column

Moka pots are simple — boiler, filter basket, collector chamber — but most are made from aluminum, which means no induction cooking and ongoing questions about metallic taste. If you want stainless steel specifically, the field narrows fast.

After working through five options across different price points, the Bialetti Venus Induction is the one I’d buy again. It works on every stovetop including induction, uses 18/10 stainless steel throughout, and the brand has been making moka pots since 1933. At around $60 it’s not the cheapest option, but it’s the most reliable.

Below are the five best stainless steel moka pots I’ve found, from a $29 beginner pick to a 12-cup model for larger households. This guide is part of my complete espresso and coffee guide.

Quick Comparison

Product Best For Rating Price Buy
Bialetti Venus Induction 6-Cup Best Overall 4.4★ ~$46 Check Price
Zulay Moka Pot 9-Cup Best Budget 4.4★ ~$29 Check Price
GROSCHE Milano 9-Cup Best Mid-Range 4.4★ ~$55 Check Price
Coffee Gator 4-Cup Best for Solo Drinkers 4.4★ ~$22 Check Price
Easyworkz Diego 12-Cup Best for Large Households 4.3★ ~$65 Check Price

How I Chose These Moka Pots

The first filter: the pot has to actually be stainless steel. Many products in this category use aluminum bodies with stainless-looking exteriors, or stainless chambers sitting on aluminum boilers. I only included models where the main body and boiler chamber are 304 or 18/10 stainless steel.

Beyond material, I looked at four things:

Induction compatibility. Traditional aluminum moka pots won’t work on induction cooktops. Some stainless pots do, some don’t — it depends on whether the base contains iron. I’ve flagged which pots are induction-ready below.

Capacity sizing. A moka “cup” is roughly 1.5–2 oz of concentrated brew — not a 6-oz coffee cup. I’ve translated every size into real-world household guidance throughout this guide.

Seal and pressure valve quality. A worn gasket or missing safety valve is a safety issue, not just a leak risk. Every pot here has a functional pressure release valve.

Review longevity. Products with 1,000+ reviews across several years carry more weight than newer listings with inflated early ratings.

1. Bialetti New Venus Induction — Best Overall

Bialetti New Venus Induction stainless steel moka pot silver 6 cup

Best for: Anyone who needs a moka pot that works on induction, or wants the most trusted stainless brand without second-guessing the specs.

The Venus Induction is Bialetti’s all-stainless answer to their classic aluminum Moka Express. The body is 18/10 stainless steel and the base plate contains iron, so it works properly on induction elements — something the original Express cannot do. The octagonal shape is identical to Bialetti’s classic design, which means the pour is predictable and the pressure valve behavior is well established over millions of units.

At 6 cups (roughly 10 oz), it’s the right size for two people drinking doubles or one person making morning back-to-back rounds. The filter basket removes easily, the pressure valve holds reliably, and the black plastic handle doesn’t transfer heat at the medium-low settings good moka coffee requires. Some reviewers note the handle screw loosens after months of daily use — worth checking quarterly.

It brews slightly hotter and faster than the aluminum Moka Express. Some people prefer this; others find it makes the coffee marginally more bitter if they don’t pull it from heat the moment gurgling starts.

  • Capacity: 6 cups (~10 oz / 300 ml)
  • Material: 18/10 stainless steel body and boiler
  • Induction: Yes
  • Stovetop compatibility: Gas, electric, ceramic, induction
  • Available sizes: 2, 4, 6, 10 cup

Pros:

  • Confirmed induction compatible — uncommon at this price point
  • 18/10 stainless throughout, no aluminum body or boiler
  • Trusted Bialetti manufacturing — 30,953 reviews at 4.4★
  • Consistent pressure across all stovetop types
  • Multiple size options available

Cons:

  • Handle screw loosens over time — requires occasional tightening
  • More expensive than alternatives with comparable specs
  • Lid doesn’t lock; needs care when moving the pot

Verdict: Buy it if you have an induction cooktop or want the most reliable stainless moka pot on the market. Skip it if you’re on a tight budget with gas or electric — the Zulay or GROSCHE will produce comparable coffee for considerably less money.

Check Price on Amazon ↗

2. Zulay Moka Pot — Best Budget

Zulay stainless steel moka pot 9 cup white stovetop espresso maker

Best for: First-time moka pot buyers, or anyone who wants a solid stainless everyday pot without paying the Bialetti premium.

Under $30 with close to 19,000 reviews at 4.4 stars — the Zulay earns its spot on numbers alone. The stainless steel body is solid, the handle stays cool at medium-low heat, and the pressure valve functions properly, which isn’t guaranteed at this price point. The 9-cup size works for households where two or three people drink coffee together; for solo use, Zulay’s 3-cup or 6-cup variants are more practical and waste fewer grounds.

It’s not induction compatible, and the gasket material is adequate but not as durable as Bialetti’s. A small number of buyers report minor leaking in early uses, which typically stops once the gasket fully seats. Instructions are minimal, so complete beginners may want to look up moka pot technique separately before the first brew.

  • Capacity: 9 cups (~14 oz)
  • Material: Stainless steel body
  • Induction: No
  • Stovetop compatibility: Gas, electric, ceramic
  • Colors: White, Black, and others

Pros:

  • Under $30 with over 19,000 reviews at 4.4★ — exceptional for the price
  • Stainless steel body, not aluminum
  • Heat-resistant handle performs well at correct settings
  • Available in multiple colors and sizes
  • Safety valve included and functional

Cons:

  • Not induction compatible
  • Gasket may need replacing sooner than on premium models
  • Minimal instructions — not ideal for moka pot beginners
  • Early-use seal dripping reported on some units

Verdict: The right choice if you want a stainless moka pot under $30 and don’t need induction. Skip it if induction compatibility matters or if you’re usually brewing for one person — sizing down would serve you better.

Check Price on Amazon ↗

3. GROSCHE Milano — Best Mid-Range

GROSCHE Milano stainless steel moka pot 9 cup black stovetop espresso maker

Best for: Households where 2–4 people drink coffee every morning and want a proven pot with a decade of user feedback.

GROSCHE has been manufacturing stovetop coffee makers for years, and the Milano is their most-reviewed model. With over 25,000 reviews at 4.4 stars, it sits alongside Bialetti for overall satisfaction — at a slightly lower price and a larger base capacity.

The 9-cup version is the most popular size, and sensibly so: one brew covers 3–4 people without refilling. The stainless steel body is solid, the handle stays cool, and the filter basket screws on without cross-threading — a common issue with cheaper pots. The black exterior finish does show fingerprints and minor heat discoloration near the base with regular use, and the standard version isn’t induction compatible.

  • Capacity: 9 cups (~15.2 oz)
  • Material: Stainless steel body
  • Induction: No (standard version)
  • Stovetop compatibility: Gas, electric, ceramic
  • Available sizes: Multiple

Pros:

  • 25,000+ reviews at 4.4★ — extensive proven track record
  • 9-cup capacity serves 3–4 people in a single brew
  • Clean basket threading — easy to assemble without cross-threading
  • Competitive pricing against Bialetti at larger capacity
  • Stainless steel build throughout

Cons:

  • Not induction compatible in the standard version
  • Black exterior shows heat marks and fingerprints over time
  • Finish near the base can discolor with high-heat cooking

Verdict: Buy it if you’re serving 2–4 people daily on gas or electric and want a large-capacity pot with a long review track record. Skip it if you need induction or regularly brew just for one or two people — the 9-cup size wastes coffee grounds at low fill levels.

Check Price on Amazon ↗

4. Coffee Gator 4-Cup — Best for Solo Drinkers

Coffee Gator 4 cup stainless steel moka pot with glass top

Best for: One- or two-cup drinkers who want to see exactly when the coffee starts rising — and learn to pull the pot at the right moment.

The Coffee Gator is different from every other pot in this list: the top chamber has a transparent glass lid, so you can watch the coffee rise through the column and into the collector. This is more useful than it sounds. Knowing when to pull the pot from the heat is the single hardest skill in moka pot brewing, and being able to see the flow helps you stop it before the coffee starts burning and going bitter.

The body is stainless steel, the 4-cup size suits one or two people without overbrewing, and the build quality holds up well for $22.10. It comes with two stainless steel espresso cups included. The glass lid requires more careful handling than a standard pot — it won’t survive a drop from counter height — and the pot isn’t induction compatible.

  • Capacity: 4 cups (~6.7 oz / 200 ml)
  • Material: Stainless steel body with glass lid
  • Induction: No
  • Stovetop compatibility: Gas, electric, ceramic
  • Included: 2 stainless steel espresso cups

Pros:

  • Glass top gives real-time visual feedback on the brew — practical for learning timing
  • Compact 4-cup size — right for 1–2 people without wasting grounds
  • Stainless steel body, not aluminum
  • Includes 2 stainless steel espresso cups
  • Good value at $22.10 for the combination of features

Cons:

  • Glass lid cracks if dropped or subjected to sudden temperature changes
  • Not induction compatible
  • Glass chamber requires more careful cleaning than standard all-metal pots
  • Small capacity — needs refilling if more than 2 people are drinking

Verdict: Buy it if you’re new to moka pots and want visual feedback on the brew, or if you drink solo and want a compact format. Skip it if you regularly brew for more than two people or if your stovetop is induction.

Check Price on Amazon ↗

5. Easyworkz Diego 12-Cup — Best for Large Households

Easyworkz Diego 12 cup stainless steel induction moka pot

Best for: Families, shared households, or anyone who regularly makes moka pot coffee for four or more people in one batch.

The Easyworkz Diego handles the capacity need the other four pots don’t: 12 moka cups (roughly 20 oz) in a single brew. It’s also induction compatible, which puts it alongside the Bialetti Venus for cooktop versatility — but at more than twice the volume. Stainless steel throughout, and the safety valve is properly rated for the boiler pressure the larger water volume generates.

At $65, it’s the most expensive pot in this roundup, and the 4.3-star rating is slightly below the 4.4 average of the others — partly reflecting some early reviews before the manufacturer resolved a seal inconsistency. More recent reviews are consistently positive. The size itself is the main consideration: a 12-cup pot takes longer to heat, uses more coffee grounds per brew, and occupies more stove space. If you’re usually making coffee for one or two people, this is the wrong tool for the job.

  • Capacity: 12 cups (~17.5 oz / 520 ml)
  • Material: Stainless steel
  • Induction: Yes
  • Stovetop compatibility: Gas, electric, ceramic, induction
  • Monthly sales velocity: 400+ units/month

Pros:

  • 12-cup capacity — largest in this roundup, serves 4–6 people per brew
  • Induction compatible — one of only two in this list with that capability
  • Stainless steel body throughout
  • Strong current sales velocity (400+ units sold monthly)
  • Good option for entertaining or shared households

Cons:

  • Larger capacity means significantly more coffee grounds used per brew — wasteful for solo or couple use
  • Slightly lower average rating than the other four picks
  • Higher price without a proportionally better build over the Bialetti Venus
  • Larger footprint on the stovetop

Verdict: Buy it if you regularly brew for four or more people and want induction compatibility at high volume. Skip it if you usually brew for one to three people — you’ll overshoot capacity every morning.

Check Price on Amazon ↗

How to Choose the Right Stainless Steel Moka Pot

What “stainless steel” actually means in this category

Traditional moka pots — including the iconic Bialetti Moka Express — are made from aluminum. Stainless steel versions cost more but offer two practical advantages: induction compatibility and the absence of aluminum-reactivity concerns. The taste difference between materials is genuinely debated; most people can’t reliably tell them apart in a blind test. Induction compatibility, however, is a real functional advantage.

Not all pots marketed as “stainless steel” are fully stainless. Some use stainless steel bodies with aluminum filter baskets or boiler chambers. To confirm you’re getting a truly stainless pot, check that both the body and boiler chamber are listed as 304 or 18/10 stainless steel, not just the outer panels.

Induction compatibility

If you have an induction cooktop, you need a moka pot with an iron-containing base plate — not all stainless pots have one. Of the five pots in this guide, only the Bialetti Venus Induction and the Easyworkz Diego are confirmed induction-ready. The Zulay, GROSCHE Milano, and Coffee Gator work on gas, electric, and ceramic only.

On any stovetop, medium-low heat is correct. High heat produces bitter, overextracted moka coffee regardless of pot material or brand.

Sizing guide — moka cups vs real cups

Moka pot sizes are listed in “cups” but these are 1.5–2 oz espresso servings, not standard 6-oz coffee cups. A practical conversion:

  • 4-cup pot → ~6–7 oz total → good for 1–2 people
  • 6-cup pot → ~9–10 oz total → good for 2–3 people
  • 9-cup pot → ~14–15 oz total → good for 3–4 people
  • 12-cup pot → ~18–20 oz total → good for 4–6 people

Don’t buy large hoping to make less coffee — moka pots need a full filter basket to build proper pressure. A half-filled basket produces weak, uneven results.

When to replace the gasket

The rubber gasket inside every moka pot seals the upper and lower chambers. It degrades over time — typically after 2–3 years of daily use — and causes leaking around the seal joint. Replacement gaskets are available on Amazon for under $5 for most major brands. If your pot starts weeping at the joint, replace the gasket before assuming the pot is broken.

Moka pot technique — where most people go wrong

Good moka coffee depends more on technique than on the pot itself. The most common mistakes:

  • Using too high a heat setting (causes burnt, overextracted coffee)
  • Tamping the grounds (creates uneven pressure and channeling — don’t tamp)
  • Letting it brew until the sputtering stops (the coffee has already overextracted by then)
  • Using fine espresso grind (moka pots need a medium-fine grind, not espresso fine)

Pull the pot from the heat as soon as the coffee starts gurgling steadily. For induction cooktops, reduce to the lowest setting once you hear the first gurgle — induction responds faster than gas and can go from slow to rapid extraction in seconds.

For more on espresso brewing, see my stovetop espresso maker guide and my espresso grinder recommendations — the grind quality affects the cup as much as the pot does.

Frequently Asked Questions

What is the best stainless steel moka pot overall?

The Bialetti Venus Induction is the best stainless steel moka pot for most people. It uses 18/10 stainless steel, works on induction cooktops, and comes from a brand that has been making moka pots since 1933. At around $60 for the 6-cup, it’s the most reliable option in the category.

Are stainless steel moka pots better than aluminum?

Stainless steel moka pots offer two practical advantages: induction cooktop compatibility and the absence of aluminum-reactivity concerns. The taste difference between the two materials is genuinely debated — most people can’t tell them apart in a blind comparison. If you have an induction cooktop, stainless is the clear choice. On gas or electric, the difference is largely personal preference.

Can I use a stainless steel moka pot on induction?

Not all stainless steel moka pots work on induction. The base must contain iron to interact with the induction element. Of the five pots in this guide, only the Bialetti Venus Induction and the Easyworkz Diego are confirmed induction compatible. Always check the product listing for “induction compatible” before buying.

What size moka pot should I buy?

Match the size to your household. A 4-cup pot makes roughly 6–7 oz (good for 1–2 people), a 6-cup makes ~10 oz (2–3 people), a 9-cup makes ~15 oz (3–4 people), and a 12-cup makes ~20 oz (4–6 people). Moka pots don’t brew well at partial capacity — the filter basket needs to be full to build correct pressure, so buy the size you’ll actually fill each morning.

How long does a stainless steel moka pot last?

A quality stainless steel moka pot should last 10–15 years with basic care. The body is essentially indestructible; what wears out is the rubber gasket (replace every 2–3 years for around $5) and occasionally the filter basket. Handwashing is strongly recommended regardless of manufacturer claims — dishwashers degrade the gasket material significantly faster.

Is the Bialetti Venus worth paying more than budget alternatives?

Yes, if you have an induction cooktop — the Venus Induction is one of the few stainless moka pots that’s genuinely induction-ready, and the Bialetti engineering is well proven. On gas or electric, the GROSCHE Milano and Zulay produce comparable coffee quality for substantially less. The price difference buys you the Bialetti brand reputation and induction compatibility, not a meaningfully better cup of coffee on non-induction stoves.

No stove where you’re brewing? A portable burner works fine with a moka pot — my best hot plates for boiling water guide covers which types suit small stainless pots (induction models need that magnetic base).

How These Picks Were Chosen

Plainly: this is a research-based guide, not a hands-on test. I have not run these side by side, and nothing here should be read as a report from my own kitchen.

What the picks rest on: whether the body is genuinely stainless rather than aluminium with a steel-look finish, which decides induction compatibility and how the pot handles dishwashing; cup size in the Italian sense – a moka “cup” is about 50ml, not a mug – along with gasket material and how easily gaskets and filter plates can be replaced; plus the complaint patterns in verified-purchase reviews, which cluster on gaskets perishing and handles loosening.

What I could not establish: extraction quality, which in a moka pot depends far more on grind, heat level and how promptly you take it off the hob than on the pot. Comparing brews across these without controlling all three would be measuring the technique. What can be said is which pots are built to last and which have replaceable parts.

The Bottom Line

The Bialetti Venus Induction is the one I’d recommend without qualification — induction compatible, 18/10 stainless throughout, and backed by a manufacturer that has been making this exact type of pot for over 90 years.

If budget is the priority, the Zulay delivers strong everyday performance at $29 with over 19,000 reviews to back it up. For households of four or more, the Easyworkz Diego is the only widely available 12-cup induction-compatible stainless pot in this price range.

If you want to step up from stovetop brewing entirely, my semi-automatic espresso machine guide covers the next tier. And if you’re serious about the grind — which matters as much as the pot — see my espresso grinder recommendations.

Filed Under: Product Reviews

  • « Go to Previous Page
  • Page 1
  • Interim pages omitted …
  • Page 13
  • Page 14
  • Page 15
  • Page 16
  • Page 17
  • Interim pages omitted …
  • Page 35
  • Go to Next Page »

Recent Articles

  • Cuisinart DLC-10SYP1 Review: Durable, But a Newer Bowl
  • COSORI Pro Gen 2 Review: Big Basket, Fragile Handle
  • Dash Tasti-Crisp Review: Cheap, but the Coating Wears Fast
  • Chefman TurboFry Touch Review: Cheap, but the Coating Wears
  • Chef’sChoice 15XV Review: Very Sharp, With Scratch Reports

Search


HOME          Contact          Affiliate Disclosure          Terms of Service          Privacy Policy


kitchenwarecompare.com is a participant in the Amazon Services LLC Associates Program, an affiliate advertising program designed to provide a means for sites to earn advertising fees by advertising and linking to Amazon.com, Endless.com, MYHABIT.com, SmallParts.com, or AmazonWireless.com. Amazon, the Amazon logo, AmazonSupply, and the AmazonSupply logo are trademarks of Amazon.com, Inc. or its affiliates. As an Amazon Associate I earn from qualifying purchases.


Copyright © 2026 kitchenwarecompare.com, ALL RIGHTS RESERVED.