• Skip to primary navigation
  • Skip to main content
  • Skip to primary sidebar

Kitchenware Compare

  • Home
  • Product Reviews
    • Air Fryers
    • Coffee
    • Cookware
    • Flat Top Grills
    • Meat Thermometers
    • Food Processors
    • Knives
    • Pizza Ovens
    • Toaster Ovens
    • Juicers
  • Food Blog
  • Helpful Kitchen Tips
  • Data Studies
  • About
  • How I Review
  • Contact
You are here: Home / Archives for Glenn

Ninja AF101 vs COSORI Pro II: Which Air Fryer Should You Actually Buy?

Last Updated June 25, 2026

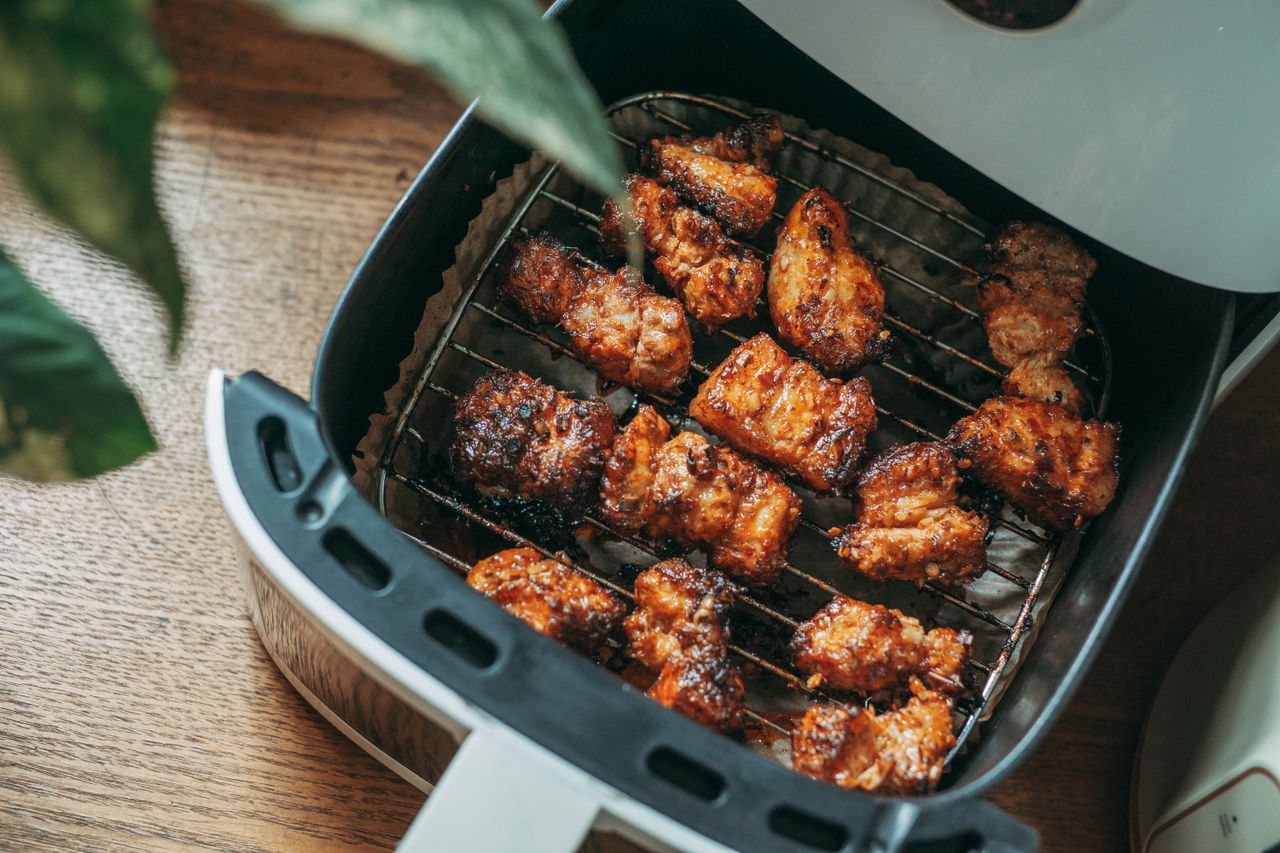
Crispy chicken pieces cooked in an air fryer basket

The quick answer

For most households of one to three people, buy the Ninja AF101. At the same $119.99 price, it takes up less counter space and is easier to clean. If you regularly cook for four or more — or want to fit a whole chicken without engineering a compromise — the COSORI Pro II’s larger basket is the better fit. That’s the whole decision.

I earn a commission if you buy through the Amazon links below, at no extra cost to you.
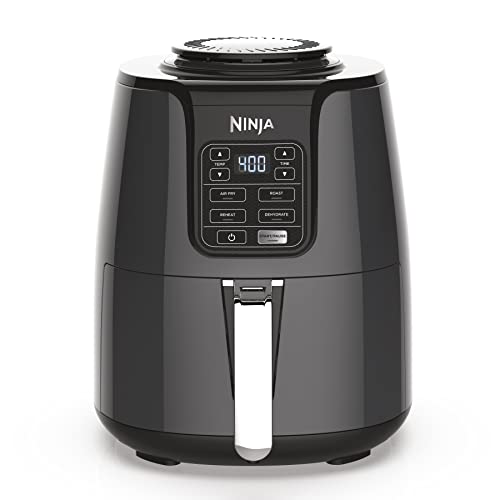
Ninja AF101 4-Quart Air Fryer

Ninja AF101 (4 QT)

Check Price
COSORI 6-Quart Air Fryer

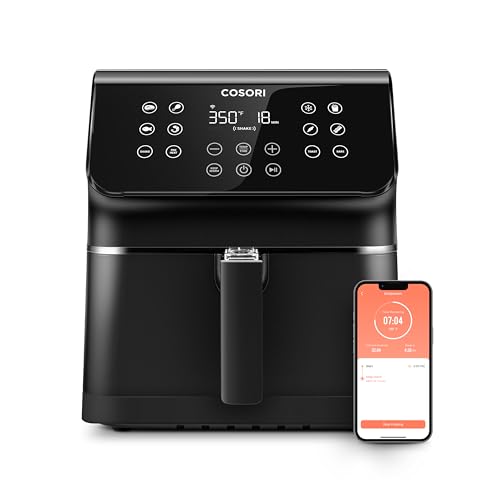
COSORI Pro II (5.8 QT)

Check Price

These two have been the default budget air fryer recommendation for years, and the internet makes the comparison much more complicated than it needs to be. Both of these air fryers cook food well. Both are well-built for the price. The question is never which is better — it’s which one fits how you actually cook.

Before I get into the details: don’t buy an air fryer based on the preset buttons. You’ll use them twice and then ignore them for the life of the machine. The thing that actually matters is basket size, and I’ll explain exactly why.

Product Best For Price Rating Buy
Ninja AF101 (4 QT) 1-3 people, compact kitchens $119.99 4.7★ (59,440) Check Price
COSORI Pro II (5.8 QT) Families, batch cooking $119.99 4.6★ (2,392) Check Price

Prices checked 15 September 2026.

Feature Ninja AF101 COSORI Pro II
Capacity 4 quarts 5.8 quarts
Wattage 1,550W 1,700W
Controls Analog dials Digital touchscreen
Presets None 12
Footprint (approx.) 11 x 13.6″ 11.8 x 12.0″
Weight 7.5 lbs 12.3 lbs
Dishwasher safe basket Yes Yes
Typical price $119.99 $119.99

Capacity: the only spec that actually changes your cooking

A 4-quart basket and a 5.8-quart basket sound close on paper. In practice, the difference is significant. In the Ninja AF101, a standard pack of chicken thighs (about four pieces) fits comfortably in a single layer — and a single layer is how you get properly crispy results. Add a fifth piece and you’re starting to overlap, which means steam instead of crispiness.

In the COSORI Pro II, you can fit six chicken thighs flat, or a whole spatchcocked chicken, or a rack of ribs folded to fit. That extra 1.8 quarts isn’t just a number — it’s the difference between cooking dinner in one batch or two.

For one or two people, the Ninja is perfectly sized and you’ll never hit its limits. For a family of four eating together, the COSORI saves you a meaningful amount of time over weeks and months of cooking.

Controls: dials vs digital

People talk about this more than it deserves. The Ninja’s analog temperature and time dials are genuinely easy to use — set temperature, set time, done. The COSORI’s digital touchscreen is clear and responsive, and the 12 presets cover the things people actually air fry: fries, chicken, fish, vegetables, steak.

Here’s my honest take: if you’re the kind of cook who knows what temperature and time they want, you’ll prefer the Ninja’s tactile dials. If you’re newer to air frying or cooking with others who don’t want to think about settings, the COSORI’s presets are genuinely useful. Neither is a disadvantage.

Cooking performance

Both of these machines circulate hot air around food. That’s how air frying works. The Ninja runs at 1,550W; the COSORI at 1,700W. Owner reports describe both cooking evenly when the basket isn’t overcrowded.

Across frozen fries, chicken wings, salmon, roasted vegetables and reheated pizza, owner reports describe the results as indistinguishable.

If someone tells you one of these air fryers produces noticeably crispier food than the other, they’re either imagining it or they had one basket overcrowded. At proper capacity, they cook identically.

Cleaning

Both have dishwasher-safe baskets and inserts. In practice, the Ninja’s basket is slightly simpler — one main basket piece rather than COSORI’s basket-plus-crisper-plate design. The COSORI’s crisper plate does elevate food for better airflow, but it’s one more piece to wash. Neither is a burden, but if you’re cooking for one and already find cleanup tedious, the Ninja is marginally faster.

Build quality and durability

Both feel solid for the price. The Ninja’s plastic housing is slightly thicker; the COSORI has a cleaner, more polished exterior. The durability complaint that recurs in owner reviews of both is basket coating wear, so don’t use metal utensils, and hand-wash occasionally rather than always running the basket through the dishwasher.

Buy the Ninja AF101 if…

  • You cook for one or two people
  • You want a smaller footprint on the counter
  • You prefer tactile dials over touchscreens
  • You want slightly easier cleanup

Buy the COSORI Pro II if…

  • You cook for three or four people regularly
  • You want to cook a whole chicken or larger portions in one batch
  • You appreciate preset programmes
  • You want a bit more headroom for batch cooking

The verdict

The Ninja AF101 is the better choice for most people — not because it outperforms the COSORI, but because it’s correctly sized for most households and doesn’t make you pay for capacity you won’t use. If you know you need the larger basket, the COSORI Pro II is excellent at the same price. Buy either with confidence.

Check Ninja AF101 Price Check COSORI Pro II Price

Want the deeper dive on the AF101 specifically, including what almost 60,000 owners report and whether the newer AF141 is a better buy? See my full Ninja AF101 review.

Considering the COSORI side instead? See my full Cosori Pro II review for what over 2,300 owners report and whether the smart features are worth paying for.

How This Comparison Was Put Together

Plainly: this is a research-based comparison, not a hands-on test. I have not run these side by side.

What it rests on: the published specification for both – basket capacity and usable area, wattage, temperature range, preset count and which parts are dishwasher safe; plus the pattern across verified-purchase reviews for each, where the recurring themes are basket coating wear on both and app dependence on the COSORI side.

What I could not establish: how evenly either cooks a full basket, which is the comparison that would actually separate them. It needs identical food cooked in both and assessed by position, and no independent test covers this pairing.

Frequently Asked Questions

Is the Ninja AF101 big enough for a family?

It’s tight for more than two or three people. The 4-quart basket fits about 2 pounds of fries or a small chicken. If you regularly cook for four or more, the COSORI’s 5.8-quart basket gives you noticeably more room without a second batch.

What is the main difference between the Ninja AF101 and the COSORI Pro II?

Capacity and controls. The Ninja AF101 has a 4-quart basket with dial controls; the COSORI Pro II has a 5.8-quart basket with a digital touchscreen and a few more preset programs. Cooking performance between the two is close — the deciding factor is almost always how much food you need to cook at once.

Which air fryer is easier to clean?

The Ninja is marginally easier — its basket is a single piece, while the COSORI uses a basket-plus-crisper-plate design that adds one more part to wash. Neither is a real burden; both have dishwasher-safe parts.

Should I buy the smaller or larger air fryer?

Buy based on how many people you cook for, not on wanting extra capacity ‘just in case.’ A too-large air fryer takes longer to heat and wastes counter space; a too-small one means cooking in batches. For one to three people, the 4-quart Ninja is usually enough.

Related: See all my air fryer reviews and guides
Related: Best cheap air fryer 2026: full buying guide


Filed Under: Product Reviews

Best Food Processor 2026: Reviews + Buying Guide

Last Updated June 24, 2026

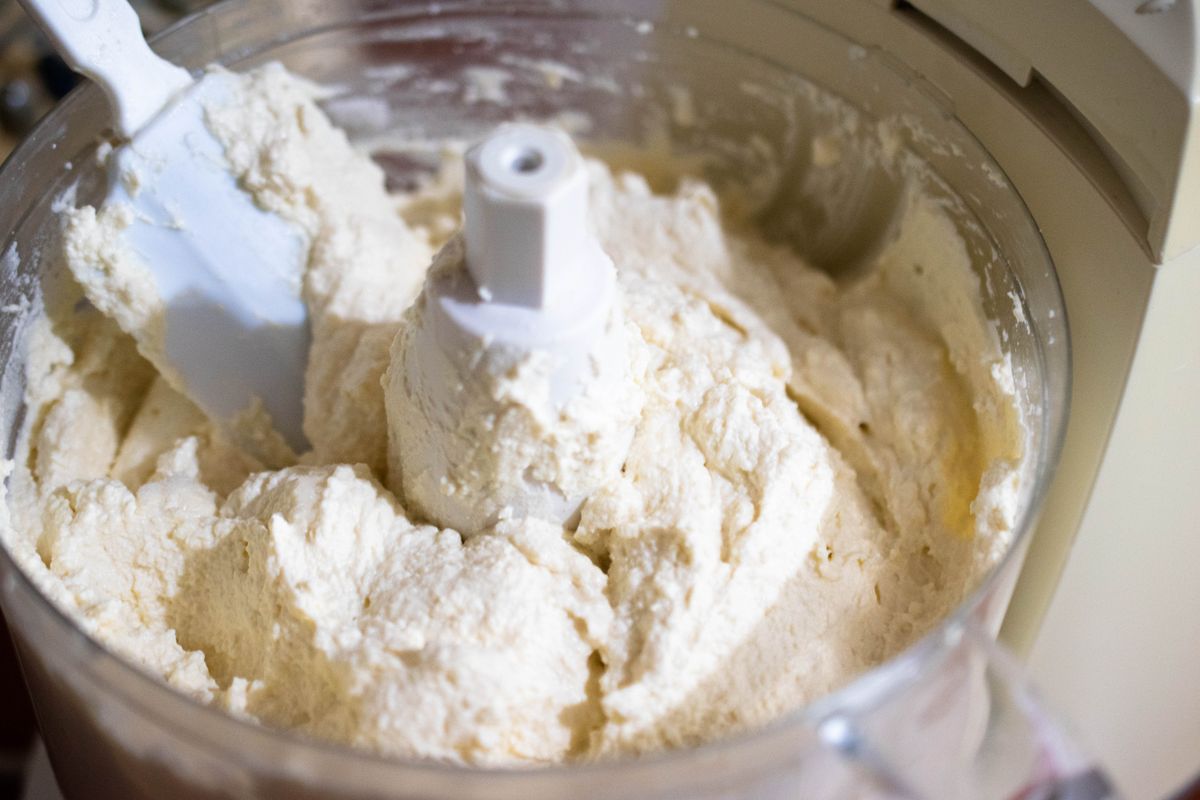
Cheese batter being mixed in a food processor bowl
Photo: Mohammad abasi / Pexels

This article contains affiliate links. If you purchase through them, I may earn a small commission at no extra cost to you. Read the full disclosure.

A good food processor is one of those appliances that makes you wonder how you managed without it. Weekly prep that used to take 40 minutes — chopping, shredding, slicing, blending — drops to 10. (Not sure you even need one over a blender?

My food processor vs. blender guide breaks down which jobs actually need which appliance.) The problem is the market is cluttered with options that look similar on spec sheets but perform very differently in practice.

After working through what’s actually available and worth buying in 2026, here are five picks that cover every budget and use case. The Cuisinart DFP-14BCNY is the clear overall winner — 15,262 reviews at 4.6 stars and a 14-cup capacity that handles serious batch cooking. The Ninja BZ601 ($109.99) is actually the highest-rated option in this guide at 4.7 stars, with a 1000-watt motor that outpunches the more expensive Cuisinart on raw power. And the Hamilton Beach Stack & Snap gives you a 12-cup bowl for $54.95, which is hard to argue with if budget is the priority.

Whichever one you buy, plan on cleaning it properly from day one — my guide to cleaning a food processor covers the two spots (the blade underside and the lid handle) that cause most of the smell and staining complaints in owner reviews.

If yours ever smells like it is burning rather than just needing a clean, my guide to a food processor burning smell covers the common, harmless causes and the rarer ones actually worth worrying about.

Not sure what bowl size you actually need? My food processor sizing guide breaks it down by household size and by what you actually make, since the cup number on the box is not the whole story.

Read the full reviews below, or jump straight to the food processor buying guide if you want to know what to look for first.

Best Food Processors — Quick Comparison

Model Capacity Key Feature Best For Price
Cuisinart DFP-14BCNY 14 cups 720W, 2 discs Best overall Check Price
Ninja BZ601 9 cups 1000W, Auto-IQ Best mid-range Check Price
Hamilton Beach 70725A 12 cups 450W, 2-speed Best budget Check Price
Cuisinart DLC-8SBCYP1 11 cups Dishwasher safe, 3 discs Best for easy cleanup Check Price
BLACK+DECKER 8-Cup 8 cups Easy assembly, compact Best compact Check Price

Reviews

1. Cuisinart DFP-14BCNY 14-Cup Food Processor — Best Overall

Cuisinart DFP-14BCNY 14-cup food processor stainless steel on white background

★ 4.6 | 15,262 reviews | $290.84

The Cuisinart DFP-14BCNY is the benchmark. It’s what professional cooks reach for, what cooking schools stock, and what 15,262 Amazon reviewers have rated at 4.6 stars over many years. That review count is nearly double the Ninja BZ601 — this machine has been tested at scale, and it holds up.

The 14-cup capacity is the main advantage. You can prep a week’s worth of vegetables in one pass, slice enough potatoes for a gratin without refilling, or make a double batch of pastry dough without stopping. The 720-watt motor handles hard root vegetables, frozen fruit, and bread dough without stalling. Included accessories cover the essentials: a stainless steel chopping blade, medium shredding disc, and medium slicing disc handle most tasks without needing add-ons.

The tradeoff is cleanup. The blade is not dishwasher safe and should be hand-washed, and the feed tube assembly has tight corners that trap food. For people who prioritise easy cleanup over maximum capacity, look at the Cuisinart DLC-8SBCYP1 further down — it’s explicitly dishwasher safe and costs nearly the same. For everyone who batch-cooks and doesn’t mind hand-washing a blade, this is the one to get.

Pros
✓ 14-cup capacity for large batches
✓ 720W handles tough ingredients
✓ Slicing and shredding discs included
✓ Extra-large feed tube
✓ 15,262 reviews — proven track record
Cons
✗ Blade not dishwasher safe
✗ Feed tube corners trap food
✗ No mini bowl for small tasks

Check Price on Amazon →

Read my full Cuisinart DFP-14BCNY review for the complete breakdown, including what over 22,000 owners report and a genuine durability issue worth knowing about.

Deciding between these two specifically? See my Cuisinart DFP-14BCNY vs. Ninja BZ601 comparison for a direct breakdown of capacity, price, and reliability.

2. Ninja BZ601 9-Cup Food Processor — Best Mid-Range

Ninja BZ601 9-cup food processor grey with removable bowl and blades

★ 4.7 | 12,555 reviews | $109.99

The Ninja BZ601 is the highest-rated food processor in this guide at 4.7 stars — and $180 cheaper than the Cuisinart. The motor is more powerful (1000 watts vs 720 watts), which means it processes faster and handles tough ingredients with less effort. For the majority of home cooks who don’t regularly fill a 14-cup bowl, this is the smarter buy on performance and price.

The Auto-IQ technology is the standout feature. Four intelligent preset programs — chopping, slicing, shredding, pureeing, and dough — take the guesswork out of timing. You press a button and walk away rather than hovering over the pulse. The stainless steel Ninja blades produce consistent results across fine and coarse textures, and the 9-cup bowl handles most family-sized tasks comfortably.

The limitation is capacity. Nine cups covers most everyday recipes, but if you batch-cook large volumes or regularly double recipes, you’ll hit the limit. The Cuisinart 14-cup makes more sense for high-volume cooking. For everyone else, the BZ601 combination of higher motor power, better rating, and $180 lower price makes it the value pick of this guide.

Pros
✓ Highest-rated pick at 4.7★
✓ 1000W — more powerful than the Cuisinart
✓ Auto-IQ preset programs
✓ $180 cheaper than Best Overall
✓ 12,555 verified reviews
Cons
✗ 9-cup bowl limits batch size
✗ No mini bowl included
✗ Fewer discs than Cuisinart options

Check Price on Amazon →

3. Hamilton Beach Stack & Snap 70725A — Best Budget

Hamilton Beach Stack and Snap 12-cup food processor black stainless steel blades

★ 4.5 | 28,881 reviews | $54.95

The Hamilton Beach Stack & Snap has more reviews than any other food processor in this guide — 28,881 at 4.5 stars. For $54.95, that’s a remarkable track record. The 12-cup bowl is larger than what you get on the Ninja BZ601 at three times the price, and the BPA-free construction with stainless steel blades holds up to daily use.

The name comes from the bowl-lock design: instead of the usual align-and-twist mechanism, the bowl stacks onto the base and the lid locks it in place. It’s simpler to assemble than most food processors — which is why reviewers consistently mention using it regularly rather than leaving it in the cupboard. Two speeds plus pulse handles chopping herbs, pureeing soup, and shredding cheese without complications.

The limits are what you’d expect at this price. The 450-watt motor handles most tasks but can slow down on very hard ingredients like frozen fruit or raw dense vegetables. It does ship with a reversible slicing/shredding disc, though the single-disc design means you can’t have both installed at once.

For mainly chopping, shredding, and pureeing — and for households where budget is the priority — nothing in this guide comes close to this value. Full breakdown in my Hamilton Beach Stack & Snap 70725A review, including independent lab-test results on chopping, slicing, and pureeing.

Pros
✓ $54.95 for a 12-cup bowl
✓ 12-cup bowl (largest in budget tier)
✓ 28,881 reviews at 4.5★
✓ Simple stack-and-snap assembly
✓ BPA-free, stainless steel blades
Cons
✗ 450W can slow on hard ingredients
✗ Lid has no rubber gasket, so it can leak if overfilled
✗ Only 2 speeds — no fine control

Check Price on Amazon →

4. Cuisinart Pro Custom 11 DLC-8SBCYP1 — Best for Easy Cleanup

Cuisinart Pro Custom 11 DLC-8SBCYP1 food processor chrome stainless steel on white background

★ 4.4 | 3,470 reviews | $219.95

At $70 less than the Cuisinart DFP-14BCNY, the DLC-8SBCYP1 makes most sense for one specific type of cook: someone who finds cleanup the biggest friction point in using a food processor. The unit is explicitly marketed as dishwasher safe — bowl, lid, and accessories — which the DFP-14BCNY isn’t (its blades require hand-washing). If that single difference changes whether you actually use the machine, it justifies the trade in capacity.

The Pro Custom 11 includes three slicing and shredding discs, one more than the DFP-14BCNY. That extra disc variety gives more options for cut types without buying add-ons separately. The 11-cup capacity is three cups smaller than the top pick but more than sufficient for most households cooking for four or fewer. Build quality is standard Cuisinart — solid motor, tight lid seal, no wobble during operation.

The honest verdict: if cleanup time matters more than capacity, this is the better choice over the DFP-14BCNY at essentially the same price. If you batch-cook large volumes and don’t mind hand-washing a blade, the 14-cup is still the call. Full breakdown in the Cuisinart DLC-8SBCYP1 review, including specific owner-reported pros and cons.

Pros
✓ Fully dishwasher safe
✓ 3 slicing/shredding discs included
✓ Same Cuisinart reliability as Best Overall
✓ 11-cup capacity fits most households
Cons
✗ Same price as the larger DFP-14BCNY
✗ 3 cups smaller capacity
✗ Fewer total reviews

Check Price on Amazon →

5. BLACK+DECKER 3-in-1 8-Cup Food Processor — Best Compact

BLACK+DECKER 8-cup food processor black with touchpad controls on white background

★ 4.4 | 3,969 reviews | $40.49

The BLACK+DECKER 3-in-1 is built around one idea: make it easier to assemble and use than any other food processor at this price. The bowl stacks straight onto the base and the lid locks it — no align-and-twist, no checking which notch lines up. For people who’ve left food processors in the cupboard because of fiddly setup, that matters.

The 8-cup bowl is smaller than the Hamilton Beach budget pick, but the included reversible slice/shred disc adds functionality that the Hamilton Beach lacks at a similar price. If you want to slice vegetables uniformly or shred cheese as well as chop, the BLACK+DECKER delivers that for under $50. Full breakdown in my BLACK+DECKER 8-Cup review, including independent lab-test scores on shredding, slicing, and pureeing. The stainless steel S-blade and touchpad controls (no mechanical knobs) round out a machine that prioritises ease of use at every step.

The 8-cup limit is the main constraint. For single-person prep or smaller kitchens where counter space matters, it’s fine. For batch cooking or households of four or more, move up to the Hamilton Beach 12-cup or step to the Ninja BZ601 for added motor power.

Pros
✓ Easiest assembly in this guide
✓ Reversible slice/shred disc included
✓ Touchpad controls — no mechanical switches
✓ Compact footprint for smaller kitchens
✓ Under $50
Cons
✗ 8-cup bowl limits batch size
✗ 450W struggles on toughest ingredients
✗ Similar price to larger Hamilton Beach

Check Price on Amazon →

Food Processor Buying Guide

Before settling on a model, here are the five things that make a real difference to daily use.

Bowl Capacity

Bowl capacity dictates how much you can process in one pass. For a single person or couple, 7–9 cups covers most tasks. Families of four or more get more use from 11–14 cups. Undersizing is the most common mistake — if you’re splitting batches because the bowl fills up, you’ll use the machine less over time.

Motor Power

Higher wattage means the motor handles tougher ingredients without stalling. Budget machines at 450W manage herbs, onions, and soft vegetables fine. For hard root vegetables, frozen fruit, or bread dough, 600W or more is worth the upgrade. The Ninja BZ601’s 1000-watt motor is the most powerful in this guide and handles everything without hesitation.

Included Blades and Discs

Most food processors include a chopping blade, a shredding disc, and a slicing disc. What varies is the quality and number of those discs. The Cuisinart DLC-8SBCYP1 includes three discs where most competitors include two. If you slice vegetables regularly and care about cut variety, check what’s in the box before buying.

Ease of Use and Cleanup

The best food processor is the one you actually get out of the cupboard. Easy bowl assembly (BLACK+DECKER’s lock-down lid, Hamilton Beach’s stack-and-snap), simple controls, and dishwasher-safe parts all reduce friction. If cleanup is a priority, the Cuisinart DLC-8SBCYP1 is the clear pick — fully dishwasher safe at the same price as the DFP-14BCNY.

Price and Value

The $40–$55 tier (Hamilton Beach, BLACK+DECKER) handles basic chopping and shredding competently. The $110 tier (Ninja BZ601) adds motor power, preset programs, and consistent results. The $290 tier (Cuisinart) adds maximum capacity and professional build quality. There’s a genuine jump at each step, not just marketing.

If you bake gluten-free, a food processor is one half of the equation — for the other half, see my guide to the best gluten-free bread makers, which covers five machines with dedicated GF cycles from $75 to $455.

Frequently Asked Questions

What size food processor do I need?

For one or two people, 7–9 cups covers most tasks. Families of four or more will get more use from 11–14 cups. If you batch-cook or regularly double recipes, choose the largest capacity that fits your counter — running two passes because the bowl filled up defeats the purpose.

Can a food processor replace a blender?

Not entirely. Food processors are better at chopping, slicing, shredding, and mixing dough — tasks where some texture should remain. Blenders are better at completely smooth liquids: smoothies, soups, and sauces. For one machine that does both, see the best blender food processor combos.

What attachments should I look for?

The essentials are a steel chopping blade, a shredding disc, and a slicing disc. Beyond that, a dough blade is useful if you make bread. An adjustable slicing disc (multiple thickness settings) matters if you slice vegetables regularly. Most mid-range and above machines include everything needed for standard prep.

How do I clean a food processor?

The bowl and lid are usually dishwasher safe on the top rack — check your specific model. The chopping blade should always be hand-washed carefully (it’s sharp enough to cut through a cloth). The motor base should be wiped with a damp cloth rather than submerged. The Cuisinart DLC-8SBCYP1 is the pick if you want the full machine to be dishwasher safe.

What is the difference between a food processor and a vegetable chopper?

A vegetable chopper is a smaller, simpler device for quick jobs — dicing onions, mincing garlic, chopping herbs in seconds. Food processors are larger, more powerful, and handle slicing, shredding, kneading dough, and pureeing as well as chopping. For smaller-scale prep, see the best vegetable chopper guide. For larger volumes and more variety of tasks, a full food processor makes more sense.

Can a food processor knead dough?

Yes — most mid-range and above food processors include a dough blade for this purpose. The Cuisinart DFP-14BCNY and Ninja BZ601 both handle bread and pastry dough well. The key is not overfilling the bowl: fill to no more than two-thirds capacity since dough expands during kneading. Budget machines at 450W manage light doughs but can struggle with heavier bread recipes.

How These Picks Were Chosen

Plainly: this is a research-based guide, not a hands-on test. I have not run these side by side, and nothing here should be read as a report from my own kitchen.

What the picks rest on: bowl capacity against what you actually process, since a 14-cup bowl needs a minimum load to engage the blade at all; motor wattage relative to that bowl; which discs and blades are included rather than available separately; feed-tube width; and how many parts must be washed. Plus the complaint patterns across verified-purchase reviews, where the recurring themes are lid interlocks failing and bowls cracking at the collar.

What I could not establish: motor longevity under dough, which is the load that kills food processors and the reason wattage claims exist. No independent test covers these models. Wattage relative to bowl size and the pattern of failure reports are what this guide reasons from.

The Bottom Line

The Cuisinart DFP-14BCNY is the right pick for most home cooks — reliable, high-capacity, and backed by more reviews than any other option in this guide. If $200 is more than you want to spend, the Ninja BZ601 at $109.99 is the value pick: higher rated, more powerful motor, and suited to anyone who doesn’t need 14-cup capacity. And for budget cooking without sacrificing bowl size, the Hamilton Beach Stack & Snap at $54.95 is hard to beat.

For more food processor reviews, see the food processors category. For smaller prep tools, browse the best vegetable choppers. And if you want one machine to replace both appliances, see the best blender food processor combos.

Using the dough blade for bread? A Pullman loaf pan turns that kneaded dough into flat-topped bakery-style sandwich bread — my guide covers the sizes and which pans hold up.

If you want to extract juice rather than chop, a food processor isn’t the right tool — it won’t separate liquid from fiber. See my guide to the best juicers for celery for machines that handle fibrous vegetables efficiently.

If batch-cooking is part of your routine, you need somewhere to store everything you prep. My guide to the best small chest freezers covers compact options from 2.0 to 5.0 cubic feet, including garage-ready and convertible fridge/freezer models.

Already own one and want to get more out of it? See my 10 creative uses for a food processor.

One more maintenance note: a processor that has started crushing instead of chopping usually just has a dull blade, not a dying motor — see my guide on how to sharpen food processor blades before replacing the machine.

Shredding a lot of cheese specifically? See the dedicated shredding-cheese comparison for which disc setup actually performs best.

Filed Under: Product Reviews

Best Cheap Air Fryer 2026: Reviews + Buying Guide

Last Updated June 24, 2026

Crispy French fries in an air fryer basket

Air fryers have transformed weeknight cooking — faster than a conventional oven, crispier than a microwave, and far less mess than deep frying. The good news: you do not need to spend a lot to get excellent results. The best cheap air fryers deliver the same crisp finish as premium models at a fraction of the price — though if food is coming out limp, the cause is usually batch size rather than the machine, which the guide to air fryer food that will not crisp covers.

This guide covers five verified options from $46 to $120 — the Ninja AF101 is the pick to start with if you just want one reliable air fryer without overthinking it. If you want to see exactly how it stacks up against a larger 6-quart model, read my Ninja AF101 vs COSORI Pro Gen 2 comparison.

I earn a commission if you buy through the Amazon links below, at no extra cost to you.
Part of my complete air fryer guide — all reviews, comparisons, and buying advice in one place.

Best Cheap Air Fryers at a Glance

Product Best For Price Rating Buy
Ninja AF101 Best Overall Value $119.99 4.7★ (59,440) Check Price
COSORI Pro Gen 2 5.8 Qt Best for Families $72.99 4.6★ (964) Check Price
Instant Vortex 4 Qt Mini Best Window View $69.95 4.6★ (14,133) Check Price
Dash Tasti-Crisp 2.6 Qt Best for Small Spaces $45.70 4.5★ (8,028) Check Price
Chefman TurboFry Touch Tightest Budget Pick $57.92 4.6★ (3,797) Check Price

Related Reading

  • Air fryer guide: what to cook and how to use it
  • Are air fryers healthy? What the research says
  • Can you put aluminum foil in an air fryer?

My Top Picks — Reviewed

1. Ninja AF101 — Best Overall Value


Ninja AF101 4 Quart Air Fryer

The Ninja AF101 consistently tops budget air fryer rankings because it simply works. It heats up quickly, produces genuinely crispy results, and the 4-quart basket is right-sized for one to three people. The wide temperature range (105°F to 400°F) gives it genuine dehydrating capability at the low end and serious crunch-producing heat at the top.

  • Pros: Reliable crisping, easy-to-clean ceramic-coated basket, compact footprint
  • Cons: Digital display (not touch) can feel dated; basket not dishwasher-safe on all models
  • Best for: Individuals and couples who cook air fryer staples daily
Check Price on Amazon →

2. COSORI Pro Gen 2 5.8 Qt — Best for Families


COSORI Pro Gen 2 Air Fryer 5.8 Quart

If you regularly cook for three or four people, the COSORI Pro Gen 2 is worth the modest step up in price. The 5.8-quart square basket has significantly more usable space than round baskets of the same stated capacity. The 13 one-touch functions are genuinely useful rather than gimmicky — particularly the preheat and shake reminder functions.

  • Pros: Large square basket, shake reminder, bright LED display, dishwasher-safe basket
  • Cons: Bigger footprint on the counter; slight learning curve with presets
  • Best for: Families of 3–4, meal preppers, people who cook larger batches
  • My full COSORI Pro Gen 2 review has the model-specific review breakdown, including the basket handle complaints and why some reviews mention a recall this model was not part of.

Check Price on Amazon →

3. Instant Vortex 4 Qt — Best Window View


Instant Pot Vortex 4 Quart Mini Air Fryer

The Instant Vortex is the pick if you want a familiar name and a window on your food. Amazon’s listing describes six functions (air fry, bake, roast, broil, dehydrate and reheat), a 4-quart basket that Instant Pot rates for up to four servings, a ClearCook window with an internal light so you can check progress without opening the door, a dishwasher-safe non-stick basket and 1,500 watts. It also has the second-largest review base in this guide, 14,133 ratings at 4.6 stars, behind only the Ninja AF101.

  • Pros: ClearCook window with an internal light, six functions in a 4-quart size, dishwasher-safe basket, 14,133 ratings
  • Cons: A 4-quart basket suits one to four servings, not a family batch
  • Best for: Small households and anyone who wants to watch food crisp through a window
Check Price on Amazon →

4. Dash Tasti-Crisp 2.6 Qt — Best for Small Spaces


Dash Tasti-Crisp 2.6 Quart Compact Air Fryer

The Dash Tasti-Crisp is the smallest and cheapest air fryer worth recommending. At 2.6 quarts it cannot handle a full batch of wings, but it excels at single portions — a handful of fries, one chicken breast, or reheating a slice of pizza. Its digital touch panel has three presets and needs no manual to start, and at under $60 it is a low-risk way to try air frying, though its nonstick coating draws more wear complaints than pricier picks in this guide.

  • Pros: Tiny footprint, very affordable, includes a printed recipe guide
  • Cons: 2.6-quart basket limits batch size; coating wear some owners report within a year
  • Best for: Singles, studio apartments, dorms, office use

My full Dash Tasti-Crisp review has the model-specific review breakdown, including why the coating draws more complaints than its dishwasher-safe label suggests.

Check Price on Amazon →

5. Chefman TurboFry Touch — Tightest Budget Pick


Chefman 4 Quart Compact Air Fryer

The Chefman is usually available around $58 and still delivers respectable air-fry results. It is not as polished as the Ninja or COSORI, but for someone wanting to try air frying before committing to a more expensive model, it is an ideal entry point. The 4-quart capacity handles a decent portion size.

  • Pros: Very cheap, 4-quart basket for the price, dishwasher-safe basket and rack
  • Cons: Plastic-heavy build, less even heat distribution, only a one-year warranty
  • Best for: Budget shoppers, gift buying, casual use

My full Chefman TurboFry Touch review has the model-specific review breakdown and what the coating complaints look like in practice.

Check Price on Amazon →

Air Fryer Buying Guide

What size air fryer do I need?

A 2–3 quart basket suits one person cooking single portions. A 4–5 quart basket is the sweet spot for couples and small families — it handles a full portion of fries, 4–6 chicken wings, or a small whole chicken. For families of four or more, look for 5.8 quarts or above.

Do cheap air fryers work as well as expensive ones?

For everyday tasks — fries, wings, reheating leftovers — budget models perform nearly identically to premium ones. The differences show up in build quality over years of use, the evenness of heat distribution, and extra features like smart connectivity or dehydrating presets. If you cook air fryer food daily, spending slightly more makes sense. If you cook it occasionally, a budget model is perfectly fine.

Are air fryer baskets dishwasher-safe?

Most modern air fryer baskets have a non-stick coating that technically survives dishwasher cycles, but hand-washing extends the lifespan of the coating significantly. If the coating has already started to go, there is a separate guide to an air fryer basket whose coating is flaking off.

How These Picks Were Chosen

Plainly: this is a research-based guide, not a hands-on test. I have not run these side by side, and nothing here should be read as a report from my own kitchen.

What the picks rest on: usable basket capacity rather than the nominal quart figure, wattage against that capacity, whether the basket and crisper plate are dishwasher safe, and how the controls behave in the dark; plus the complaint patterns in verified-purchase reviews, which at this price point are dominated by basket coating flaking and by fans getting noticeably louder after a few months.

What I could not establish: coating durability, which is the defining risk of a budget air fryer. There is no published abrasion or heat-cycling test for these baskets, and the owner reports that mention flaking rarely say how the basket was cleaned. This guide flags the pattern without pretending to know the cause.

Frequently Asked Questions

How long does an air fryer take to cook frozen fries?

At 400°F, most frozen fries take 15–18 minutes with a shake halfway through. Thicker cut fries may need 20 minutes. The exact time varies by air fryer model and your preferred level of crispiness.

Can I cook raw chicken in an air fryer?

Yes — air fryers cook raw chicken safely and efficiently. Chicken breasts at 375°F take approximately 18–22 minutes depending on thickness. Always verify internal temperature reaches 165°F with a meat thermometer.

Do I need to preheat an air fryer?

Most recipes benefit from 3–5 minutes of preheating, particularly for anything you want very crispy. Some budget models without a preheat function can simply run empty for a few minutes before adding food.

What is the best cheap air fryer overall?

The Ninja AF101. It has 4.7 stars across 59,440 ratings and a 4-quart basket that handles most everyday cooking without being too big to store.

Is it worth spending more on a premium air fryer instead of a cheap one?

Not for basic frying, roasting, and reheating — the heating mechanism is the same across price tiers. Premium models add larger capacity, dual baskets, and app connectivity, which matter for specific use cases but do not change how crispy your fries turn out.

How long do cheap air fryers typically last?

Most budget air fryers last 2–4 years with regular use before the heating element or fan motor wears out. Hand-washing the basket instead of using the dishwasher, and avoiding metal utensils that scratch the nonstick coating, extends this meaningfully.

Bottom line: The Ninja AF101 is the best cheap air fryer for most people — it is reliable, right-sized, and the basket and crisper plate are dishwasher-safe. If you cook for a bigger household, the COSORI Pro Gen 2’s larger basket costs less, at $72.99. Either way, you do not need to spend more than $120 to get genuinely great air-fried food.

Filed Under: Product Reviews

Ductless Range Hoods: Complete Guide to Benefits, Installation & Noise Control

Last Updated October 13, 2023

A range hood capturing steam rising from a pot on the stove

If you’re upgrading your kitchen ventilation, you’ve probably come across two options: ducted and ductless range hoods. This guide covers everything you need to know — from choosing between the two to installing your ductless hood, keeping noise levels low, and getting the most from your ventilation system. The duct-versus-ductless decision is the one most people get stuck on, so this covers what actually matters, not just spec sheets.

I earn a commission if you buy through the Amazon links below, at no extra cost to you.

If you already know you want a ductless hood and just need product picks, see my ductless range hood recommendations. Every range hood page on the site is collected on the range hoods hub.

Ducted vs. Ductless Range Hoods: Key Differences

A ducted hood pulls air through a duct and pushes it outside the building. A ductless hood — also called recirculating — pulls air through a grease filter and a charcoal filter, then blows it back into the room. That one difference decides everything else, including something most comparisons skip: what each type physically cannot remove.

What a charcoal filter actually removes

Activated carbon adsorbs grease and many of the organic molecules behind cooking smells. That part genuinely works, and it is why a ductless hood really does cut odour.

What it does not remove is anything that is neither grease nor an odour molecule. Water vapour passes straight through. So do the combustion gases a gas burner produces, carbon monoxide and nitrogen dioxide among them. A recirculating hood hands all of that back to the room, because the air has nowhere else to go.

That is not a technicality. Asked directly whether a recirculating hood could satisfy the kitchen local-exhaust requirement of ASHRAE 62.2, the residential ventilation standard, the committee’s former chair Max Sherman answered in five words: “Recirculation is not exhaust.” Under that standard a ductless hood does not count as kitchen ventilation at all.

The practical comparison

Factor Ducted Ductless
Grease and odour Removed from the building Filtered and reduced
Steam and moisture Removed Stays in the kitchen
Combustion gases from a gas hob Removed Returned to the room
Counts as ventilation under ASHRAE 62.2 Yes No
Installation Ductwork through wall or ceiling Mount and plug in
Running cost Wash the grease filter Charcoal filters every 3–6 months
Where it suits Any kitchen a duct can reach Flats, island hobs, rentals, interior walls

Ducted is not automatically good either

Assuming a ducted hood works well simply because it vents outside is its own mistake. Researchers at Lawrence Berkeley National Laboratory tested seven residential hoods and found capture efficiency ranging from under 15 percent to over 98 percent. The same study found every hood captured more from the back burners than the front ones; among hoods hitting their recommended airflow, capture was around 80 percent or better for back burners but only 50 percent or better for the front.

Two things follow from that, and both are free. Cook on the back burners when the pan can go there, and run the hood on a higher setting than feels necessary. A poorly fitted ducted hood on a low setting, venting from a front burner, can underperform a good ductless one at the job of catching grease.

Which one to choose

The honest version is that this is usually decided for you rather than by you.

  • Gas hob and a duct route available: duct it. The combustion-gas argument is the strongest single reason in this whole comparison, and no filter substitutes for it.
  • Electric or induction hob: the gap narrows considerably. There are no combustion gases to remove, so the remaining differences are moisture and how thoroughly grease leaves the room.
  • Flat, rental, island hob, or an interior wall with no route out: ductless is the realistic option, and it is meaningfully better than no hood at all. Pair it with an open window when cooking anything that produces a lot of steam.
  • Heavy, high-heat cooking — searing, wok work, frequent frying: ducted, if it is at all possible. This is the case ductless handles worst.

One point worth being clear about, because it is often implied and rarely stated: a ductless hood does not become a ducted one by buying a more expensive model. Every recirculating hood, at any price, returns the air to the room. Price buys quieter fans, better grease capture and longer filter life — not a different category of ventilation.

Benefits of Ductless Range Hood Ventilation

Removes Cooking Odours Effectively

Modern activated carbon filters are highly effective at trapping cooking smells. Fish, garlic, spices — the charcoal filter captures them before the air returns to your kitchen. High-heat cooking like searing on cast iron produces the most smoke of any home cooking method, so it’s exactly the scenario where a good hood earns its keep. Many units use multi-layer filters combining a grease mesh and a charcoal filter for maximum odour removal.

Reduces Airborne Grease

The mesh grease filter catches fat particles before they coat your cabinets, walls, and ceiling. This means less cleaning and longer-lasting kitchen surfaces — gas stoves in particular throw off more airborne grease than electric or induction, so ventilation matters more if that’s what you’re cooking on.

Easy Retrofit Installation

Because ductless hoods only need a power outlet — no external duct — they can be added to virtually any kitchen without construction work. Most installations take under two hours.

Multiple Speed Settings

Most ductless range hoods offer 3–4 fan speed settings. Use low speeds for gentle simmering and high speeds when frying or grilling to pull smoke away quickly.

How to Install a Ductless Range Hood

What You’ll Need

  • Electric drill and drill bits
  • Spirit level
  • Screwdrivers (flathead and Phillips)
  • Wall anchors (usually included with the hood)

Step 1: Choose Your Location

Position the hood 65–75 cm (26–30 inches) above an electric hob, or 75–90 cm (30–36 inches) above a gas hob. Centre over your cooking surface and mark the position lightly with a pencil.

Step 2: Find the Studs

Use a stud finder to locate studs or joists behind the wall. Attaching the bracket to a stud provides a much more secure fit than wall anchors alone.

Step 3: Attach the Mounting Bracket

Hold the mounting template against the wall and mark the drill holes. Drill pilot holes, insert wall anchors, and secure the bracket with the provided screws. Use a spirit level to ensure the bracket is perfectly horizontal.

Step 4: Connect the Wiring

Most domestic ductless range hoods plug into a standard 13A socket. If your hood is hardwired, you’ll need a qualified electrician. Switch off the circuit at the consumer unit before any wiring work.

Step 5: Install the Filters

Slide the grease mesh filter(s) into their slots — they usually click into place. Insert the activated charcoal filter behind the mesh filter.

Step 6: Hang, Secure, and Test

Lift the hood onto the mounting bracket and secure with the provided screws. Switch on at the lowest speed and check all controls work. Run through each fan speed to confirm everything functions correctly.

How to Reduce Noise Levels of Your Ductless Range Hood

Use the Lowest Effective Fan Speed

The most effective noise reduction is using the lowest fan speed that does the job. For gentle frying and simmering, speed 1 or 2 is usually sufficient and considerably quieter than maximum speed.

Keep Filters Clean

Clogged grease filters force the fan motor to work harder and run louder. Wash the metal mesh grease filter every 4–6 weeks in hot soapy water or the dishwasher. A clean filter lets air pass through more freely, reducing load on the motor and cutting noise.

Replace Charcoal Filters on Schedule

Saturated charcoal filters also restrict airflow. Replace them every 3–6 months, or sooner if you cook frequently with strong-smelling foods.

Check for Loose Screws and Panels

Vibration from the fan motor can gradually loosen screws in the casing and mounting bracket. Every six months, check all visible screws and tighten any that have worked loose.

Ensure Secure Wall Mounting

A poorly mounted hood will vibrate against the wall. If your hood is mounted on drywall anchors rather than directly into studs, consider adding an anti-vibration rubber pad between the bracket and the wall surface.

Maintenance Schedule

  • Weekly: Wipe the exterior with a damp cloth
  • Monthly: Wash the grease mesh filter in hot soapy water or the dishwasher
  • Every 3–6 months: Replace the activated charcoal filter
  • Every 6 months: Check and tighten all mounting screws

Cooking frequency changes that 3–6 month filter estimate more than people expect — see my full breakdown on how often to replace a charcoal filter for the real range and the signs it’s overdue.

What to Look for When Buying a Ductless Range Hood

CFM Rating: What It Means and What You Actually Need

CFM (cubic feet per minute) measures how much air the fan moves. Most residential hoods range from 200 CFM to 1,200 CFM. For a ductless hood, the figure matters less than for a ducted model — because you’re not actually venting air out of the house, you’re recirculating and filtering it. That said, higher CFM still means faster smoke and steam capture, and better coverage for high-heat cooking.

A general rule for ductless hoods: aim for at least 100 CFM per 10,000 BTU of hob output, or roughly 300–400 CFM for a standard four-burner gas range. For induction or electric hobs, which produce less ambient heat, 200–300 CFM is usually sufficient.

Size: Match the Hood to the Hob

A range hood should be at least as wide as the hob beneath it, ideally 3–6 inches (7–15 cm) wider on each side. A 60 cm (24-inch) hob needs a minimum 60 cm hood; a 90 cm (36-inch) range needs a 90 cm hood. Under-cabinet models often come in standard widths (60, 76, and 90 cm) that correspond to common hob sizes.

Mounting Height

Install the hood between 65–75 cm (26–30 inches) above the hob surface for gas hobs, and 60–70 cm (24–28 inches) for electric or induction. Too high and the hood captures less smoke; too low and it can be a safety hazard for tall pots. Check the manufacturer’s specifications — most give a recommended range.

Filter Type and Replacement Schedule

Ductless hoods use two types of filters:

  • Grease filter (aluminium mesh or baffle): Catches cooking grease before it reaches the charcoal filter. Clean monthly in the dishwasher or with hot soapy water. Most are dishwasher-safe.
  • Charcoal/carbon filter: Removes odours and smoke particles. Not washable — must be replaced every 3–6 months depending on how frequently you cook. Budget for replacement filters when buying the hood; some brands use proprietary sizes that are expensive to replace.

Noise Levels

Ductless hoods are typically louder than equivalent ducted models at the same CFM because the fan must work harder against the filter resistance. Look for noise ratings measured in sones or decibels. Under 4 sones (roughly 56 dB) at mid-speed is a reasonable target for everyday use. Island and wall-mounted models with larger fan housings tend to be quieter than compact under-cabinet units at equivalent airflow.

Frequently Asked Questions

Do ductless range hoods work as well as ducted ones?

For most home cooks, a good ductless hood is more than adequate. Ducted hoods are superior for removing moisture and are better for very high-heat cooking. But for standard gas or electric hobs, a quality ductless hood will keep your kitchen fresh and grease-free.

How often do I need to replace the charcoal filter?

Every 3–6 months for average use. If you cook daily or use a lot of strongly-scented ingredients, replace closer to the 3-month mark. Most hoods have an indicator light to remind you.

Can I install a ductless range hood myself?

Yes — most ductless hoods are designed for DIY installation and come with all necessary fixings. The job typically takes 1–2 hours. If the hood is hardwired rather than plug-in, have a qualified electrician do the electrical connection.

How loud is a ductless range hood?

Typical noise levels range from 45 dB on low speed to 65 dB on high speed. Look for hoods rated under 60 dB at maximum speed if noise is a concern.

Can I convert a ductless hood to ducted?

It depends on the model. Some range hoods are sold as “convertible” — they come configured for ductless use but can be switched to ducted installation by removing the charcoal filters and connecting the exhaust port to a duct. Others are ductless-only. Check the product specifications before buying if you think you might ever want to switch.

What’s the best placement for a ductless range hood in a kitchen without a ceiling exhaust point?

Under-cabinet ductless hoods are the most common choice for kitchens without exhaust points, as they mount directly beneath the wall cabinet above the hob. If there’s no cabinet, a wall-mounted chimney-style hood provides a permanent installation with a clean visual. Island hoods require ceiling mounting and are generally overkill for ductless applications — the longer ductwork run creates more resistance and reduces effectiveness.

Filed Under: Helpful Kitchen Tips Tagged With: ducted, Ductless range hood, pros and cons

What Are The Most Durable Types Of Cookware

Last Updated October 2, 2023

A stack of durable stainless steel cooking pots
Part of my cookware reviews hub — all reviews, comparisons, and buying advice in one place.

Some cookware lasts decades. Some warps or scratches within a year. The difference usually comes down to material and construction, not price. The differences show up clearly once you look at what fails and when, so here’s how cast iron, stainless steel, and the rest compare on durability.

I earn a commission if you buy through the Amazon links below, at no extra cost to you.

Cast Iron Cookware

Advantages of Cast Iron Cookware

Cast iron cookware has been a staple in kitchens for centuries, and for good reason. The advantages of using cast iron cookware are numerous. First and foremost, cast iron is incredibly durable. It can withstand high heat and is resistant to chips and cracks, making it a long-lasting investment for your kitchen.

Cast iron also distributes heat evenly, ensuring that your food is cooked consistently and thoroughly. Additionally, using cast iron cookware can actually increase the iron content in your food, which is beneficial for individuals with iron deficiencies. Cast iron also moves between the stovetop, oven, and even an open fire, making it a solid choice for camping or cooking over an open fire.

Disadvantages of Cast Iron Cookware

While cast iron cookware has many advantages, it also has a few disadvantages to consider. One of the main drawbacks of using cast iron cookware is its weight. Cast iron is much heavier than other types of cookware, which can make it difficult to handle, especially for individuals with limited strength or mobility.

Additionally, cast iron requires special care to maintain its seasoning, which is the layer of oil that prevents food from sticking to the surface. Improper cleaning or exposure to moisture can cause the seasoning to deteriorate, leading to rust and a loss of non-stick properties. Lastly, cast iron cookware takes longer to heat up compared to other materials, so it requires some patience and preheating before cooking.

Tips for Caring for Cast Iron Cookware

To make your cast iron cookware last for generations, give it proper care and maintenance. Here are a few tips for caring for your cast iron cookware:

  1. Season your cast iron cookware: New cast iron cookware should be seasoned before use. This creates a protective layer of oil that prevents rust and provides a natural non-stick surface. To season your cookware, coat the surface with a thin layer of oil, then bake it in the oven at a high temperature for about an hour.
  2. Avoid using harsh cleaning agents: Cast iron should not be cleaned with soap or harsh scrubbing pads, as this can remove the seasoning. Instead, use hot water and a stiff brush or non-abrasive sponge to clean your cookware. If needed, you can use a small amount of salt to help scrub away stubborn residue.
  3. Dry thoroughly: After washing your cast iron cookware, make sure to dry it thoroughly to prevent rust. You can place it on the stove over low heat for a few minutes to evaporate any remaining moisture.
  4. Re-season as needed: Over time, the seasoning on your cast iron cookware may wear off. If you notice food sticking to the surface or rust starting to form, it’s time to re-season. Simply scrub off any rust, apply a thin layer of oil, and bake in the oven to restore the seasoning.

By following these simple care tips, you can ensure that your cast iron cookware remains in excellent condition and continues to provide you with delicious meals for years to come.

Stainless Steel Cookware

Advantages of Stainless Steel Cookware

Stainless steel cookware is a popular choice among both home cooks and professional chefs for its many advantages. First and foremost, stainless steel is extremely durable. It can withstand high temperatures, resist corrosion, and is less likely to chip or dent compared to other materials. This makes stainless steel cookware a long-lasting investment for your kitchen.

Another advantage of stainless steel is its non-reactive nature, meaning it won’t interact with acidic or alkaline foods, preserving the flavor and integrity of your dishes. Stainless steel cookware also heats up quickly and distributes heat evenly, resulting in consistent and efficient cooking. Stainless steel is also simple to maintain — it’s dishwasher-safe and resists stains.

Disadvantages of Stainless Steel Cookware

While stainless steel cookware has many advantages, it is not without its drawbacks. One of the main disadvantages of stainless steel is that it is not a good conductor of heat. This means that it can develop hot spots, which can lead to uneven cooking if not properly managed.

Additionally, stainless steel cookware can be prone to food sticking, especially when cooking delicate items such as eggs or fish. This can be mitigated by using proper cooking techniques and using a sufficient amount of fats or oils. Lastly, stainless steel cookware tends to be more expensive compared to other types of cookware, which may be a consideration for those on a budget.

Tips for Caring for Stainless Steel Cookware

To keep your stainless steel cookware in top condition, here are some tips for caring for it:

  1. Preheat your stainless steel cookware: Before adding food to your stainless steel cookware, preheat it over medium heat for a few minutes. This helps to ensure even heat distribution and prevents food from sticking.
  2. Use proper cooking techniques: When cooking with stainless steel, use enough fat or oil to prevent sticking. Allow the oil to heat up before adding food, and make sure the pan is evenly coated.
  3. Avoid using metal utensils: To prevent scratching the surface of your stainless steel cookware, use non-metal utensils such as silicone or wooden spoons. Metal utensils can create marks or even cause the stainless steel to pit over time.
  4. Clean properly: After cooking, allow your stainless steel cookware to cool slightly before washing. Use a non-abrasive sponge or cloth and a mild dish soap to remove any food residue. Avoid using harsh scrubbers or abrasive cleaners, as they can damage the stainless steel surface.
  5. Remove stains and discoloration: If you notice stains or discoloration on your stainless steel cookware, you can use a mixture of vinegar and water or a specialized stainless steel cleaner to restore its shine. Simply apply the solution, scrub gently, and rinse thoroughly.

By following these care tips, you can maintain the durability and appearance of your stainless steel cookware, ensuring that it remains a valuable asset in your kitchen for years to come.

Carbon Steel Cookware

Advantages of Carbon Steel Cookware

Carbon steel cookware is a favorite among professional chefs due to its many advantages. One of the main advantages of carbon steel is its exceptional heat conductivity. It heats up quickly and distributes heat evenly, allowing for precise control over the cooking process. This makes carbon steel ideal for searing, stir-frying, and achieving a perfect crust on meats and vegetables.

Additionally, carbon steel is lightweight compared to cast iron, making it easier to handle and maneuver in the kitchen. Another advantage of carbon steel is its durability. It can withstand high temperatures, resist warping, and is less prone to scratches and chips compared to other materials. Carbon steel also develops a natural non-stick patina over time, which improves with each use, making it easier to release food without the need for excessive oil or fats.

Disadvantages of Carbon Steel Cookware

While carbon steel cookware has many advantages, it does have a few disadvantages to consider. One of the main drawbacks is that carbon steel requires special care to maintain its seasoning. Unlike cast iron, carbon steel is not pre-seasoned, and the seasoning process can be more involved.

Failure to properly season or maintain the seasoning can lead to rust or food sticking to the surface. Additionally, carbon steel cookware can be prone to developing a patina unevenly, which can lead to areas with reduced non-stick properties. Lastly, carbon steel requires regular maintenance, including drying immediately after washing and applying a thin layer of oil to prevent rust.

Tips for Caring for Carbon Steel Cookware

To ensure your carbon steel cookware remains in top condition, here are some tips for caring for it:

  1. Season your carbon steel cookware: Before using your carbon steel cookware for the first time, season it to create a protective layer. To season, scrub the cookware with hot water and mild dish soap to remove any coatings or residue. Dry thoroughly, then apply a thin layer of oil (such as vegetable or flaxseed oil) all over the surface. Heat the cookware over medium heat until it smokes slightly, then remove from the heat and let it cool completely. Repeat this process a few times to build up a durable seasoning.
  2. Clean with care: After each use, clean your carbon steel cookware with hot water and a brush or non-abrasive sponge. Avoid using soap, as it can strip away the seasoning. You can use a small amount of salt to help remove stubborn food residue. Dry the cookware immediately after cleaning to prevent rust.
  3. Maintain the seasoning: To maintain the seasoning on your carbon steel cookware, apply a thin layer of oil after each use. This helps to prevent rust and enhance the non-stick properties of the cookware. If the seasoning starts to wear off, simply scrub the surface with hot water and re-season as needed.
  4. Store properly: To prevent damage and maintain the seasoning, store your carbon steel cookware in a dry and well-ventilated area. Avoid stacking other heavy cookware on top of it, as this can cause dents or scratches.

By following these care tips, you can enjoy the benefits of carbon steel cookware for many years to come, creating flavorful meals with ease and precision.

Copper Cookware

Advantages of Copper Cookware

Copper cookware has long been revered by professional chefs for its superior heat conductivity and responsiveness. One of the main advantages of copper cookware is its ability to heat up quickly and distribute heat evenly.

This allows for precise control over temperature, making copper cookware a strong choice for delicate tasks such as sautéing or making sauces. Copper also cools down quickly, providing immediate temperature adjustments when needed. Additionally, copper is an excellent conductor of electricity, making it ideal for induction cooking. Furthermore, copper cookware is aesthetically pleasing, adding a touch of elegance to any kitchen.

Disadvantages of Copper Cookware

While copper cookware offers many advantages, it also has a few disadvantages to consider. One of the main drawbacks of copper cookware is its high price. Copper is a costly material, making copper cookware much more expensive compared to other types of cookware. Additionally, copper can react with certain foods, particularly acidic or alkaline ingredients.

This can lead to a metallic taste in the food and potentially cause health concerns. To mitigate this, most copper cookware is lined with a layer of stainless steel or tin to create a non-reactive surface. However, these linings can wear off over time and require maintenance or replacement.

Tips for Caring for Copper Cookware

To keep your copper cookware looking and performing its best, here are some tips for caring for it:

  1. Clean with care: After each use, clean your copper cookware with warm water and mild dish soap. Avoid using abrasive cleaners or scrubbers, as they can damage the copper surface. To remove stubborn stains or tarnish, you can create a paste with equal parts baking soda and lemon juice and gently scrub the affected areas. Rinse thoroughly and dry immediately to prevent water spots or corrosion.
  2. Polish regularly: Copper naturally develops a patina over time, which can add character and enhance its appearance. However, if you prefer the bright shine of newly polished copper, you can use a specialized copper polish to restore its luster. Follow the instructions on the polish and buff the cookware with a soft cloth until the desired shine is achieved.
  3. Retin your copper cookware: If your copper cookware is lined with tin, it may need to be re-tinned periodically. Tin can wear off over time, exposing the copper surface and potentially causing reactivity with certain foods. If you notice any signs of wear or if the lining becomes damaged, it’s best to have it professionally re-tinned to avoid any potential health risks.
  4. Store properly: To prevent scratches or dents, store your copper cookware in a dry and well-ventilated area. If stacking multiple pieces, place a soft cloth or paper towel between them to protect the surfaces.

By following these care tips, you can enjoy the beauty and functionality of your copper cookware for years to come, and its exceptional heat conductivity and responsiveness will keep paying off every time you cook.

Frequently Asked Questions

Which cookware material is the most durable overall?

Cast iron and stainless steel are the two most durable materials for everyday cookware — both can last decades with basic care. Cast iron wins on sheer longevity (a well-seasoned pan can last generations), while stainless steel is more forgiving of neglect and doesn’t need re-seasoning.

Is more expensive cookware always more durable?

Not necessarily. Price often reflects brand, design, and finish more than actual lifespan. A $30 Lodge cast iron skillet will outlast plenty of $150 nonstick pans, because the failure point for nonstick cookware is the coating, not the base metal.

Does copper cookware need special care to last?

Yes — copper needs periodic polishing to keep its shine and, if it’s tin-lined, occasional re-tinning as the lining wears. It rewards that maintenance with excellent heat conductivity and responsiveness, but it’s a higher-maintenance choice than stainless steel or cast iron.

What actually causes cookware to wear out?

For nonstick and coated cookware, it’s almost always coating degradation from metal utensils, high heat, or the dishwasher. For bare metal cookware (cast iron, carbon steel, stainless), failure is rare — these materials mostly wear out from rust (lack of care) rather than the material itself breaking down.

Filed Under: Helpful Kitchen Tips Tagged With: cookware, Durable, Kitchen Appliances

  • « Go to Previous Page
  • Page 1
  • Interim pages omitted …
  • Page 43
  • Page 44
  • Page 45
  • Page 46
  • Page 47
  • Interim pages omitted …
  • Page 53
  • Go to Next Page »

Recent Articles

  • Bosch Universal Plus Stand Mixer Review: Built for Bread Bakers
  • Hamilton Beach 63326 Stand Mixer Review: Real Value, Real Limits
  • Ninja Foodi XL Pro Review (DT201): Biggest Capacity, Lowest Price
  • Cuisinart SM-50 Stand Mixer Review: Solid Value, Real Trade-Offs
  • Breville Smart Oven Pro Review (BOV845BSS): Fast, Even, One Real Flaw

Search


HOME          Contact          Affiliate Disclosure          Terms of Service          Privacy Policy


kitchenwarecompare.com is a participant in the Amazon Services LLC Associates Program, an affiliate advertising program designed to provide a means for sites to earn advertising fees by advertising and linking to Amazon.com, Endless.com, MYHABIT.com, SmallParts.com, or AmazonWireless.com. Amazon, the Amazon logo, AmazonSupply, and the AmazonSupply logo are trademarks of Amazon.com, Inc. or its affiliates. As an Amazon Associate I earn from qualifying purchases.


Copyright © 2026 kitchenwarecompare.com, ALL RIGHTS RESERVED.