• Skip to primary navigation
  • Skip to main content
  • Skip to primary sidebar

Kitchenware Compare

  • Home
  • Product Reviews
    • Air Fryers
    • Coffee
    • Cookware
    • Flat Top Grills
    • Meat Thermometers
    • Food Processors
    • Knives
    • Pizza Ovens
    • Toaster Ovens
    • Juicers
  • Food Blog
  • Helpful Kitchen Tips
  • Data Studies
  • About
  • How I Review
  • Contact
You are here: Home / Archives for Helpful Kitchen Tips

Espresso Machine Not Building Pressure? Check These in Order

Last Updated October 29, 2026

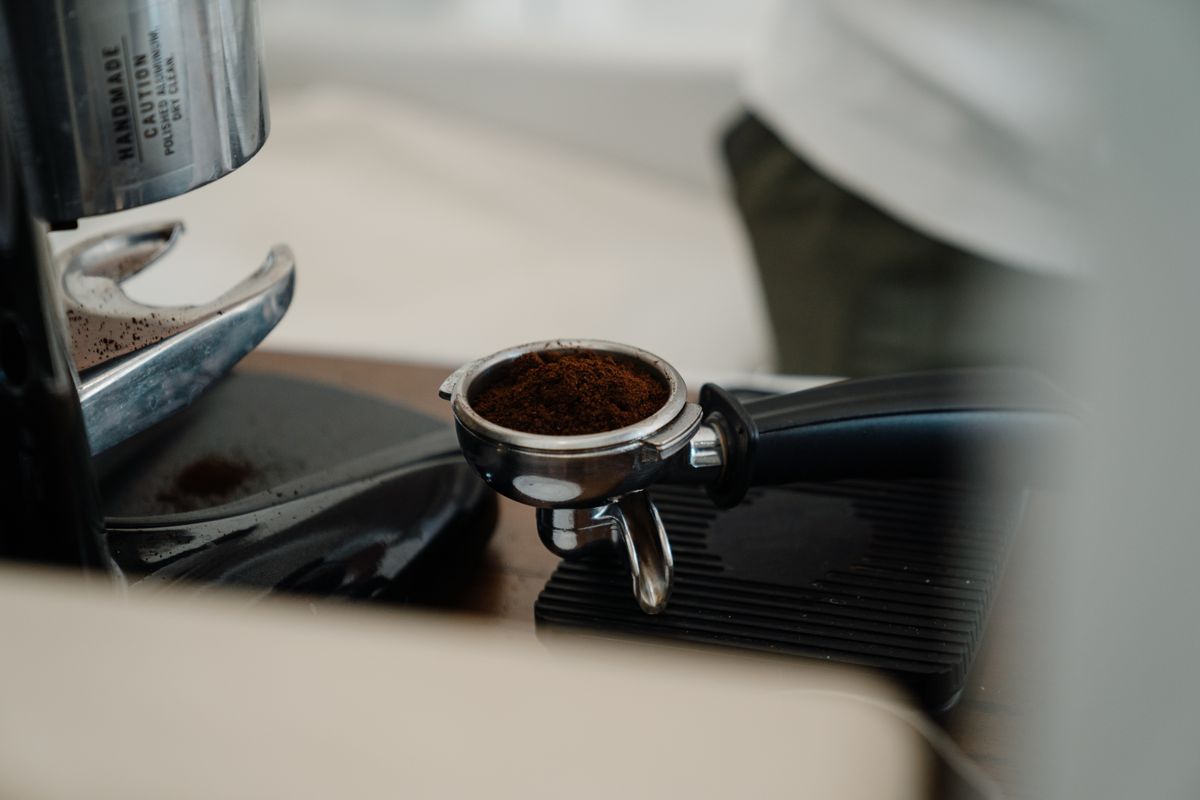
Espresso portafilter holding a basket of evenly ground coffee

An espresso machine that will not build pressure is usually not broken. In most home kitchens the cause is the coffee or the basket rather than the pump, and the two can be told apart in about thirty seconds without opening anything.

This guide works through the causes in the order worth checking them, with a way to tell which one applies to you at each step.

What “not building pressure” actually looks like

Two different faults get described the same way, and separating them saves a great deal of time.

The gauge never reaches the middle band, and the shot gushes out. A double runs in eight or ten seconds and comes out pale and thin. The machine is producing flow but nothing is resisting it. This is the common case and it is almost always the coffee or the basket.

The gauge sits low and almost nothing comes out. The pump is audible but the flow is a dribble or a few drops. That points at a blockage or at the pump itself, and it is much less common.

The first thing to establish is which of those you have, because everything below branches from it.

Start here: is it the coffee or the machine?

Take the portafilter out, empty it, lock it back into the group head with nothing in it, and run the pump for a few seconds.

Water should pour out fast and freely, and the gauge should stay low. That is correct — there is nothing for the pump to push against. If instead you get a weak dribble with an empty basket, the restriction is in the machine, not in your coffee, and you can skip to the machine section below.

If water runs freely on an empty basket but your shots still gush, the machine is fine and the problem is what you are putting in it.

The cause almost nobody mentions: which basket you are using

This is the single most common reason a home machine stops building pressure, and none of the pages currently ranking for this problem mentions it.

Most entry-level machines ship with a pressurised basket — sometimes called a dual-wall or crema-enhancing basket. It has a single tiny hole in a second layer underneath, and that hole creates back-pressure artificially. It will build pressure and produce foam almost regardless of your grind, which is exactly why manufacturers fit them.

A non-pressurised basket, the kind serious users switch to, is a simple mesh of holes. It creates no artificial resistance at all. The pressure has to come entirely from a correctly ground, correctly dosed puck.

If you recently bought a bottomless portafilter or a “proper” basket and your pressure vanished overnight, nothing has failed. You have removed the thing that was doing the work, and your grinder now has to do it instead. If the grinder is not delivering a consistent fine grind, see what to check when a coffee grinder is not grinding properly. That usually means grinding substantially finer than you were before — often several steps.

Two ways to tell what you have: look underneath the basket for a single small hole in a second wall (pressurised) versus a field of holes right through (non-pressurised), or run a shot and watch. A pressurised basket squirts a thin jet from one point; a non-pressurised one wets the whole underside.

If the coffee is the problem

The grind is too coarse

This is the first thing to change and the one most likely to fix it. Espresso needs a grind close to caster sugar or finer — noticeably finer than filter. If your double is running in under twenty seconds, go finer and try again, one or two steps at a time. Change one variable per shot, otherwise you will not know what fixed it.

Pre-ground supermarket espresso is a common dead end here. Much of it is ground for pressurised baskets or for moka pots and simply cannot be made fine enough by any adjustment on the machine. If you are working from pre-ground coffee and cannot get resistance, that is very likely the whole answer, and it is the case for a decent grinder rather than a new machine.

There is not enough coffee in the basket

A double basket generally wants somewhere around 18 grams, and a single around 9. Under-dosing leaves headroom above the puck, water finds the gap, and pressure never develops. If you are dosing by eye, weigh it once to see where you actually are — people are routinely several grams under what they assume.

The puck is not level or not tamped

Tamping is about flatness more than force. A puck tamped at an angle gives water a preferential path down one side, and once water finds that path it takes it. Distribute the grounds evenly before tamping, then press straight down.

The beans are stale

Stale coffee produces less crema and a slightly different flow, but it will not by itself stop a machine building pressure. Treat it as something that makes a shot disappointing rather than as the cause of a pressure fault.

If the machine is the problem

Work through these only if water would not run freely through an empty basket.

A blocked shower screen or basket

The shower screen sits in the group head and spreads water across the puck. Old grounds and coffee oil build up behind it and restrict flow. Most screens unscrew with a single central bolt; the basket holes can block in the same way, particularly if the basket goes through a dishwasher and picks up mineral deposits.

A basket that has genuinely blocked will usually show it — hold it up to a light and the holes should be evenly bright. Soaking in an espresso machine cleaner solution and a soft brush clears most of it.

Scale

In hard-water areas scale narrows the boiler outlet and the internal lines over months. The usual signs are a gradual decline rather than a sudden fault, and often a longer warm-up. Descale to the interval in your machine’s manual, which is the one number genuinely worth taking from the manufacturer here because it is specific to the boiler design.

The over-pressure valve

The OPV bleeds off pressure above a set point, usually around nine bar. If it is set low or has failed open, the machine dumps pressure that should be reaching the puck. This is a real cause but a less likely one, and on most machines adjusting it means opening the case. It is worth suspecting mainly if the machine has always been weak rather than having changed recently.

The pump

Genuine pump failure is the least common cause on this list and the one people reach for first. A failing vibratory pump usually announces itself: a change in the noise it makes, or a machine that works when cold and fades as it runs. If water still flows freely through an empty group head, the pump is moving water and is probably not your problem.

The order worth checking in

Most guides list causes without saying which to try first. This is the sequence that resolves the largest number of cases in the least time:

  1. Establish which symptom you have — gushing shot, or almost no flow at all.
  2. Run water through an empty basket. Free flow means the machine is fine and the coffee is the issue. A dribble means the opposite.
  3. Check which basket you are using. Pressurised or not. If you changed it recently, this is very likely the answer.
  4. Grind finer, one or two steps. Change nothing else and pull another shot.
  5. Weigh your dose. Around 18g in a double.
  6. Check the tamp is level.
  7. Clean the shower screen and basket.
  8. Descale, if it has been a while and your water is hard.
  9. Only then consider the OPV or the pump.

Steps two to five resolve the majority of cases at home and cost nothing.

When to stop and get it serviced

If an empty basket still will not pass water freely after cleaning and descaling, the restriction is internal and further home diagnosis has poor odds. The same applies to a machine that trips a breaker, leaks from the base, or makes a grinding noise from the pump.

The economics matter at the lower end. A service call frequently costs more than an entry-level machine, so on a machine under about $200 a fault that survives cleaning and descaling is often the end of it. On a Gaggia, a Breville or anything with a metal boiler, repair usually makes sense — those are built to be opened, and parts are available. If yours is at the point where replacement is the honest answer, the espresso machines worth buying under $500 and the cheaper options under $200 are both covered separately, and the semi-automatic guide explains what you actually control on each.

How This Guide Was Put Together

Plainly: this is a research-based guide, not a hands-on test. I have not stripped down these machines, and nothing here should be read as a report from my own kitchen.

What it rests on: the mechanics of espresso extraction, which are well documented and not in dispute — resistance comes from the puck, and a pressurised basket manufactures that resistance artificially; manufacturer troubleshooting documentation, including KitchenAid’s own pressure guidance, which is useful on grind and dose and silent on basket type; and the pattern of what owners report across verified-purchase reviews and enthusiast forums, where the basket-swap case recurs constantly and is rarely written up.

What I could not establish: how often each cause actually occurs. Nobody publishes failure statistics for home espresso machines, so the ordering above reflects how cheap and quick each check is and how often it comes up in owner reports — not a measured frequency. If your machine changed behaviour suddenly rather than gradually, weight whatever you changed most recently above everything on this list.

Frequently Asked Questions

Why did my espresso machine stop building pressure after I changed the basket?

Because the old basket was doing the work. A pressurised or dual-wall basket creates back-pressure through a single small hole, largely independent of your grind. A non-pressurised basket has none of that, so the resistance must come from a finer, well-distributed puck. Grind noticeably finer and the pressure returns.

What should the pressure gauge read during a shot?

Most home machines mark a target band, typically around nine bar. Sitting below it with a fast, pale shot points at grind, dose or basket. Sitting below it with almost no flow points at a blockage. The gauge on many machines measures pump pressure rather than pressure at the puck, so treat it as an indicator rather than a measurement.

Can a bad grinder cause low pressure?

Yes, and it is one of the most common causes. A blade grinder, or a burr grinder without fine enough steps at the espresso end, cannot produce a grind fine and even enough to build resistance in a non-pressurised basket. Pre-ground espresso often cannot either.

How do I know whether it is the pump?

Lock in an empty portafilter and run the pump. If water flows out freely, the pump is moving water and is unlikely to be the fault. Pump problems usually come with a change in noise, or a machine that weakens as it heats.

Will descaling fix low pressure?

It can, if scale is restricting flow — but that produces a gradual decline over months rather than a sudden change. If your machine was fine last week, descaling is unlikely to be the answer, though it is worth doing anyway.

Is it worth repairing an espresso machine that will not build pressure?

It depends what you paid. Below roughly $200, a fault that survives cleaning and descaling often costs more to diagnose than the machine is worth. Machines with metal boilers and available parts — Gaggia, Breville and similar — are generally worth repairing.

More espresso reading

If the milk rather than the shot is the problem, see what to check when a steam wand will not froth milk. If the problem is water rather than pressure, there is a separate guide to an espresso machine leaking water. For the grinder side of this problem, see the espresso grinder guide. If the pressure is fine but the shot tastes sour or bitter, see the espresso shot troubleshooting guide.

Filed Under: Helpful Kitchen Tips

How Long Does Fresh Juice Last? Two Answers, Not One

Last Updated September 1, 2026

Row of capped glass bottles filled with different coloured fresh juices

The short answer: for quality, drink it the same day — a day or two at a push if it came off a slow juicer into a full, sealed glass bottle in a cold fridge. For safety, home-made juice is unpasteurised, and that is a separate question with a different answer. Most guides only answer the first one.

You are actually asking two different questions

“How long does fresh juice last” collapses two things that behave differently:

  1. How long does it stay good? Colour, flavour, aroma, separation. This degrades gradually and predictably, and you can see and taste it happening. For the buying guides and the maintenance walkthroughs, see the juicers hub.
  2. How long is it safe? Governed by bacteria, not by taste. It does not announce itself, and juice that tastes fine can still be a problem.

Nearly every page answering this question answers only the first and presents the result as though it settled the second. They are not the same, and the gap between them is where people get caught out.

Question one: how long it stays good

Fresh juice starts degrading the moment it leaves the machine. Oxygen is the main culprit — it drives the browning, the flattening of flavour, and the loss of the bright aroma that made you want fresh juice in the first place. Heat and light accelerate it, agitation folds more air in, and the pulp still suspended in the juice gives the whole process more surface area to work on.

You will see confident figures quoted everywhere: 24 hours for centrifugal juice, 48 or 72 for cold press. Treat those as rules of thumb rather than measurements. They circulate widely, they are directionally right, and I have not found an independent test behind the specific numbers — so this page will not present them as fact. What is worth understanding is what actually moves the figure.

Factor Why it matters
Juicer type A fast centrifugal disc whips air through the juice; a slow auger folds in far less. This is the single biggest variable.
Headspace in the container Air trapped above the juice keeps oxidising it. A part-full bottle ages faster than a full one.
Container material Glass is inert and seals well. Plastic holds odours and is usually less airtight.
Fridge temperature The door is the warmest part of a fridge. The back of a shelf is the coldest.
What you juiced Acidic citrus holds up notably better than apple, pear or leafy greens.
Time before chilling Juice left on the counter for an hour has already spent its best window.

Question two: the safety side, which is not about taste

Juice you make at home is unpasteurised. That is the whole point of it, and it is also the thing that changes the storage question.

The FDA is direct about the mechanism: when fruits and vegetables are fresh-squeezed or used raw, bacteria from the produce can end up in the juice, and unless the produce or the juice has been pasteurised or otherwise treated, the juice could be contaminated. The agency says it has received reports of foodborne illness outbreaks traced to drinking juice and cider that was not treated.

It is worth noticing how seriously that is taken commercially. Untreated juice sold in the United States has to be kept refrigerated and has to carry a warning label saying it has not been pasteurised and may contain harmful bacteria. Your kitchen juicer produces the same category of product with none of the labelling.

This is not an argument against juicing at home. It is an argument for treating storage time as a safety decision rather than a flavour one.

Who should not be storing fresh juice at all

The FDA names the groups at greater risk from foodborne illness: children, older adults, pregnant women, and people with weakened immune systems, including transplant patients. For those groups, unpasteurised juice carries a risk that most healthy adults can shrug off.

If you are juicing for someone in one of those categories, the sensible approach is to make it and drink it straight away rather than store it, or to use pasteurised juice. That is the FDA’s framing rather than mine, and it is worth following.

Why the sniff test does not do what you think

Smelling and tasting juice tells you whether it has spoiled. It does not tell you whether it is contaminated. Those are different processes caused by different organisms, and the second one does not necessarily produce any smell, taste or appearance change at all.

So use your senses to catch juice that has obviously turned, but do not treat “it smells fine” as clearance for juice that has been sitting for three days. There is no home test for the thing that actually matters, which is precisely why the honest answer to the headline question is shorter than most pages make it.

Signs it has definitely gone

  • Fizzing, bubbles, or pressure when you open the bottle. That is fermentation. Pour it away.
  • A sour, yeasty or alcoholic smell where there was not one before.
  • Sliminess, or any visible film or fuzz.
  • A flavour that has gone sharp or bitter beyond what the produce would explain.

Separation is not spoilage. Fresh juice settling into layers in the fridge is normal and expected — it is suspended pulp sinking, not a sign of anything wrong. Shake it and look at the other signals instead. Cold press juice separates less, which is one of the genuine reasons people pay more for it.

Getting the most out of the window you have

  1. Chill it immediately. The clock that matters starts when the juice leaves the machine, not when you remember to put it away.
  2. Fill the container to the brim. This is the highest-value habit on the list. Less headspace means less trapped air. A bottle filled to the neck keeps visibly better than the same juice half-filling a jug.
  3. Use glass with a proper seal. Swing-top or screw-cap bottles. Glass is inert, seals tightly and does not carry over yesterday’s smell.
  4. Put it at the back of a shelf, not in the door. The door swings into room temperature every time someone opens the fridge.
  5. Add something acidic. A squeeze of lemon or lime slows browning in apple, pear and green juices. It changes the flavour slightly; that is the trade.
  6. Wash the produce first. The FDA makes this point specifically: wash it even if you plan to peel it, so dirt and bacteria are not transferred from the surface when you cut into it.
  7. Start with clean equipment. Juice sitting in a machine that was not properly washed starts its life with a head start it should not have. The routine is in how to clean a juicer.

Can you freeze fresh juice?

Yes, and it is a better answer than pushing fridge storage further than it should go. Freeze it in a container with a little headspace so it can expand, or in ice cube trays if you want small portions.

Expect two changes. Texture separates more on thawing, so shake it. And freezing does not reverse oxidation that has already happened — freeze it fresh, not on day two. Thaw in the fridge rather than on the counter, and treat the thawed juice as you would fresh juice rather than resetting the clock.

Freezing does not sterilise anything either. It pauses the process; it does not undo it.

Does your juicer actually change how long juice keeps?

Yes, and this is the one place where the machine genuinely matters rather than being marketing. A centrifugal juicer shreds produce against a disc spinning at 10,000 RPM or more, which whips air through the juice as it works. A masticating juicer turns an auger at 40 to 80 RPM and folds in far less. More dissolved oxygen means faster browning, faster flavour loss and more separation.

That is the honest case for spending more — not enzymes or nutrients, which is where cold press marketing usually goes, but the practical ability to make juice in the morning and drink it at lunch without it looking tired. The masticating vs centrifugal comparison goes through the rest of that trade-off, and the Ninja JC151 vs Breville JE98XL head-to-head covers two machines at the same price that sit on opposite sides of it.

If you juice once and drink it immediately, none of this is worth paying for. If you batch on Sunday for the week, it is most of the decision — and the juicer buying guide covers which machines actually deliver it.

How this guide was put together

The safety guidance, the risk groups and the wash-before-juicing point come from the FDA’s consumer guidance on juice safety, read directly rather than paraphrased from another article. Note what the FDA does not provide: it gives no storage duration for home-made juice, so no number on this page is attributed to it. The degradation factors are mechanical and follow from how the two juicer designs work. Where a specific figure circulates without a traceable measurement behind it — the familiar 24, 48 and 72 hour numbers — this page says so rather than repeating it as established fact.

Frequently Asked Questions

How long does fresh juice last in the fridge?

For quality, aim to drink it the same day. A full, sealed glass bottle of cold-press juice kept at the back of a cold fridge will still be pleasant the next day. Separately from taste, home juice is unpasteurised, so treat longer storage as a safety decision rather than a flavour one — and drink it sooner if it was made on a centrifugal juicer.

Is it safe to drink fresh juice the next day?

For most healthy adults, refrigerated properly and drunk within a day, it is normal practice. The FDA notes that raw juice can carry bacteria from the produce and that children, older adults, pregnant women and people with weakened immune systems face greater risk from foodborne illness — those groups are better off drinking it immediately or choosing pasteurised juice.

Why does my fresh juice separate in the fridge?

Suspended pulp settling out under gravity. It is normal and is not a sign of spoilage — shake it and judge by smell and taste instead. Centrifugal juice separates more than cold-press juice because the high-speed disc incorporates more air and leaves finer particles in suspension.

How can I tell if fresh juice has gone bad?

Fizzing or pressure on opening means fermentation and it should go. So does a sour, yeasty or alcoholic smell, sliminess, or visible film. Be aware that these signs detect spoilage, not contamination — juice can be unsafe without smelling or tasting any different, which is why storage time matters more than the sniff test.

Does cold-press juice really last longer?

It keeps its colour, flavour and consistency noticeably longer, because a slow auger folds far less air into the juice than a disc spinning at 10,000 RPM. That is a real, observable difference and the most honest argument for paying more. It does not extend safety indefinitely — the juice is still unpasteurised either way.

Can you freeze fresh juice?

Yes. Leave headspace for expansion, or freeze in ice cube trays for portions. Freeze it fresh rather than on day two, since freezing pauses degradation but does not reverse what has already happened. Thaw in the fridge, expect more separation, and treat the thawed juice as fresh juice rather than starting the clock again.

Related guides

  • Best Juicer 2026: Cold Press and Centrifugal Picks Compared
  • Masticating vs Centrifugal Juicer: Which Should You Buy?
  • How to Clean a Juicer: The 3-Minute Routine
  • Why Does My Juicer Clog?

Filed Under: Helpful Kitchen Tips

How to Clean a Juicer: The 3-Minute Routine That Actually Works

Last Updated September 3, 2026

Hands scrubbing kitchen equipment with a brush under running water at a sink

The short version: rinse everything the moment you finish, brush the filter screen while the pulp is still wet, and take the rubber seal off. Done straight away it is three minutes. Left until the pulp dries it is fifteen, and the screen never quite recovers.

Why the timing matters more than the method

Related, and the other half of juicer hygiene: how long fresh juice keeps once it is made.

Juicer pulp is mostly water when it leaves the machine and mostly cement an hour later. The filter screen is a mesh of thousands of fine holes, and pulp forced into them under pressure dries into each one. Wet, it rinses out under a tap in seconds. Dry, you are trying to clear individual holes with a brush, and some of them will not clear at all.

That is the whole reason juicers get abandoned. Not the juice, not the noise — the ten-minute washing-up job that only exists because the machine sat on the counter for an hour first. Everything below is downstream of doing it immediately.

What you need

  • The stiff brush that came with the juicer. It is shaped for the screen and nothing else works as well.
  • Washing-up liquid and warm water.
  • A washing-up bowl or a plugged sink for soaking.
  • White vinegar, for staining and mineral film. Occasional, not routine.
  • A soft toothbrush for the seal groove and threads.

Nothing abrasive, and nothing metal near the mesh. A metal scourer or a knife tip will bend the holes permanently out of shape, and a distorted screen leaks pulp into the juice forever afterwards.

The three-minute routine, step by step

  1. Switch off and unplug. Before any part comes off. Augers and cutting discs both have enough torque to do damage.
  2. Empty the pulp container straight into the bin. Do it first, while it is loose. Pulp left to sit compacts and then has to be scraped.
  3. Disassemble fully. Jug, lid, chute, auger or cutting disc, filter screen, pulp bin, and the seal. Every one of those has to go back in the right position afterwards — if the machine will not start after cleaning, one of them is not seated and the safety lock has stayed open. The seal is the one people skip — see below.
  4. Rinse every part under the tap immediately. No soap yet. Most of the pulp leaves at this stage if it is still wet.
  5. Brush the screen from the outside in. Hold it under running water and work the brush across the mesh from the outer face, so debris is pushed out of the holes rather than further in. This is the single step that decides whether your juicer still performs in a year.
  6. Wash everything in warm soapy water, then rinse.
  7. Dry completely before reassembling. Not optional — see the section on seals.
  8. Wipe the motor base with a damp cloth. Never submerge it, never hold it under a tap.

The part nearly everyone leaves in: the seal

Most juicers have a rubber or silicone ring seating the screen or the juice spout. It lifts out with a fingernail, and most owners never take it out because the machine looks clean without doing so.

It is worth knowing what sits under it. NSF, the public-health certification body, ran a household germ study in which its microbiology team swabbed common kitchen items. The blender gasket came out the third germiest item in the homes tested — and volunteers had not identified blenders as germy at all. NSF’s own instruction is to disassemble the jar completely, remove the blade and gasket, wash them in hot soapy water, and dry before reassembling.

NSF tested blenders rather than juicers, so treat that as an analogy rather than a measurement of your machine. But a juicer seal is the same kind of component in the same kind of environment: a rubber ring in a warm, wet, sugary assembly, hidden in a groove, rarely removed. If the blender gasket is where the problem hides, there is no reason the juicer seal is different.

Take it out every wash. Run a soft toothbrush around the groove it sits in. Both parts go back only when dry.

Why everything must be dry before it goes back together

Reassembling a damp juicer traps moisture against rubber in an enclosed space, which is the specific condition mould needs. NSF makes drying before reassembly an explicit step for the same reason.

There is a mechanical reason too. The Nama J2’s own documentation flags that parts need to be properly dry before they go back together or they do not seat correctly — an independent reviewer testing that machine named it as the single real annoyance in daily use. On any juicer, a seal that goes back damp is a seal that goes back slightly wrong.

Leave the parts on a rack and reassemble later, or dry them with a cloth. Do not stack a wet screen inside a wet jug and put the lid on.

Can you put juicer parts in the dishwasher?

Sometimes, and it depends on the machine rather than on a general rule. The manufacturers are specific, so here is what the four juicers reviewed on this site actually say:

Juicer Manufacturer guidance In practice
Ninja NeverClog JC151 All juice-contact parts dishwasher safe Still brush the screen first — a dishwasher does not clear packed mesh
Omega Cold Press All-in-One Sink rinse or top rack of the dishwasher Top rack only — the bottom rack runs hotter and warps thin plastic
Breville JE98XL Dishwasher-safe parts, cleaning brush supplied The supplied brush is for the filter basket; the dishwasher is for everything else
Nama J2 Quick-release parts, cleaning brush supplied Hand wash is quick by design; drying properly matters more here than on most

Two rules hold across all of them. The motor base never goes near a dishwasher. And the fine filter screen should be brushed by hand even when the manufacturer says the dishwasher is fine, because a spray arm cannot push debris out of holes that fine — it only rinses the surface.

Stains, cloudiness and smells

Orange staining on plastic is carotene from carrots and it is cosmetic. Soak the stained parts in a solution of one part white vinegar to three parts warm water for twenty minutes, then wash normally. Repeated carrot juicing will bring it back; that is not damage.

A white or cloudy film is mineral deposit from hard water rather than food residue. Same vinegar soak clears it.

A sour smell means residue somewhere you have not been washing. Nine times out of ten it is the seal, its groove, or the underside of the pulp chute. Strip the machine fully, soak everything in warm soapy water for fifteen minutes, brush the grooves with a toothbrush, and dry completely.

Bleach is not the answer to any of these, and manufacturers specifically advise against it on juicer plastics.

Deep clean: once a month if you juice often

  1. Strip the machine completely, seal included.
  2. Soak everything except the motor base in warm soapy water for fifteen to twenty minutes.
  3. Brush the screen from the outside face under running water, holding it up to a light afterwards — you should see light through the mesh evenly, not in patches.
  4. Toothbrush every groove, thread and seal seat.
  5. Vinegar soak if there is staining or a mineral film.
  6. Dry every part fully before reassembly.

The light test in step three is the useful one. Patchy light means blocked mesh, and blocked mesh means less juice and wetter pulp long before it means a jam. If it never clears, the screen is a consumable and is worth replacing rather than fighting.

Juicing two recipes back to back

A full teardown between every batch is unnecessary and it is the reason people stop making more than one juice at a time. The working method is a flush rather than a wash.

With the machine assembled and running, pour a glass or two of cold water through the chute and let it run out into the jug. It carries most of the loose pulp off the screen and out of the pulp chute. Discard that water, empty the pulp bin, and start the next recipe.

Two caveats. Flush between recipes, not instead of the real clean at the end — a water flush moves loose pulp but does nothing for what is pressed into the mesh. And do it in the right order: go from mild and pale to strong and dark. Celery and cucumber before carrot and beetroot means the flush has less to shift and the pale juice does not come out pink.

What to do about a screen that is already blocked

Hold it up to a light. Even light through the whole mesh means it is fine. Dark patches mean those holes are packed, and that is where the lost yield is going.

Try this before giving up on it: soak the screen alone in warm water with a little washing-up liquid for twenty minutes, brush it from the outside face under running water, then repeat the light test. A vinegar soak instead of soap will shift mineral film if you are in a hard-water area. Two or three cycles will recover most screens that have been neglected for weeks rather than months.

If patches remain after that, the screen has had it. Filter screens are consumables on every juicer, and manufacturers sell them as replacement parts precisely because they wear out and block up. Replacing one is cheaper than replacing the juicer, and a new screen restores yield immediately. What you cannot recover is a screen someone has been at with a knife or a metal scourer — bent mesh does not go back.

Mistakes that shorten a juicer’s life

  • Leaving it “to soak later.” Later is when the pulp sets. Soaking helps a dry screen but never restores it fully.
  • Metal on the mesh. Knife tips, forks, metal scourers. One slip distorts the holes permanently.
  • Brushing the screen from the inside. That drives debris further into the holes. Always from the outer face inward.
  • Bottom rack of the dishwasher. Hotter, and thin juicer plastics warp. Warped parts stop sealing and start leaking.
  • Reassembling damp. Traps moisture against rubber in a closed space.
  • Bleach or abrasive cream. Damages plastics and is unnecessary for anything a juicer produces.
  • Ignoring the seal. The one part that most rewards attention, and the one almost nobody removes.

How often is enough?

Every single use: full disassembly, rinse, brush the screen, wash, dry. There is no version of juicer ownership where you skip this. Juice residue is sugar and it is wet.

Monthly, if you juice several times a week: the deep clean above, with the light test on the screen.

When performance drops: if yield falls and pulp gets wetter over weeks rather than suddenly, that is a blocked screen and not a fault. A gradual decline is a cleaning problem; a sudden stop is usually something else, which the juicer clog diagnostic covers.

Does the machine you buy change the job?

Yes, though less than people expect. Centrifugal juicers have fewer, larger parts and a bigger filter basket, so they are marginally quicker to wash — the Breville JE98XL scored slightly better than the Ninja on cleaning in independent testing for exactly that reason. Masticating juicers have more components but produce drier pulp, which comes away more cleanly.

The real variable is not the type but the screen. Every juicer at every price has a fine mesh that needs a brush and running water within minutes of finishing. If you are choosing a machine and cleaning is your main worry, the masticating vs centrifugal comparison sets out what else changes between the two designs, and the juicer buying guide covers which specific models come with a usable brush and dishwasher-safe parts.

How this guide was put together

The cleaning guidance for specific machines comes from the manufacturers’ own stated care instructions for the four juicers reviewed on this site, checked against the current Amazon listings for each. The germ findings and the disassemble-and-dry instruction come from NSF’s household germ study, read directly; NSF tested blender gaskets rather than juicer seals, and that limit is stated where the point is made rather than glossed over. I have not run laboratory swabs on juicer components myself and nothing here is presented as though I had.

The one thing worth remembering

Rinse it now, brush the screen while the pulp is wet, and take the seal out. Three minutes at the sink immediately after juicing replaces every other technique on this page, and it is the difference between a juicer you still use next year and one at the back of a cupboard.

Frequently Asked Questions

How do you clean a juicer filter screen properly?

Hold it under running water and brush from the outer face inward with the stiff brush supplied, so debris is pushed out of the mesh rather than deeper into it. Do it while the pulp is still wet. Hold the screen up to a light afterwards — you should see light evenly through the mesh, not in patches.

Can juicer parts go in the dishwasher?

It depends on the machine. Ninja states all juice-contact parts on the JC151 are dishwasher safe; Omega specifies a sink rinse or the top rack only. The motor base never goes in on any juicer, and the fine screen still needs a hand brush first because a spray arm cannot clear mesh that fine.

Why does my juicer smell sour even after washing?

Almost always residue in a part that is not being removed — usually the rubber seal, the groove it sits in, or the underside of the pulp chute. Strip the machine completely, soak everything in warm soapy water for fifteen minutes, brush the grooves with a soft toothbrush, and dry fully before reassembly.

How do I remove orange staining from juicer plastic?

That is carotene from carrots and it is cosmetic rather than damage. Soak the stained parts in one part white vinegar to three parts warm water for about twenty minutes, then wash normally. It will return with more carrot juicing, which is normal.

Do I really need to take the rubber seal out every time?

Yes. In NSF’s household germ study the blender gasket — the same kind of hidden rubber component — was the third germiest item tested, and the volunteers had not thought blenders were germy at all. A juicer seal sits in the same warm, wet, enclosed conditions. It lifts out with a fingernail.

How long should cleaning a juicer take?

About three minutes if you do it straight after juicing, while the pulp is still wet. Left for an hour it becomes a ten to fifteen minute job, and a screen that has dried with pulp in the mesh never fully recovers. The timing matters more than the technique.

Related guides

  • Why Does My Juicer Clog? How to Diagnose It in 30 Seconds
  • Best Juicer 2026: Cold Press and Centrifugal Picks Compared
  • Masticating vs Centrifugal Juicer: Which Should You Buy?
  • Ninja JC151 vs Breville JE98XL

Filed Under: Helpful Kitchen Tips

Why Does My Juicer Clog or Stop Making Much Juice?

Last Updated September 24, 2026

Vertical cold press juicer on a kitchen counter beside jugs of fresh juice

Short answer: almost every juicer clog comes down to one of four things — feeding faster than the auger can swallow, stringy produce going in whole, a pulp outlet that is already blocked, or a screen with dried pulp set in the mesh. The useful trick is that where the machine jams tells you which one you have.

First, work out which clog you have

Every other article on this topic hands you a list of five or six possible causes and leaves you to guess. You do not have to guess. Look at where the machine has actually stopped and match it below.

What you see What it means Fix
Produce sitting in the chute, auger turning slowly or straining Feeding too fast — the auger has more than it can pull down Stop feeding, let it clear, then feed slower
Auger stopped dead, motor humming A fibre bundle has wrapped the auger Reverse, then disassemble if that fails
Juice still coming, but pulp not exiting Pulp outlet blocked — the pulp has nowhere to go Clear the outlet; empty the pulp bin more often
Very little juice, lots of wet pulp Screen blinded by dried pulp in the mesh Soak and brush the screen properly
Greens come out damp and barely juiced, no jam Not a clog at all — wrong machine for the job See the last section

Cause 1: you are feeding it too fast

This is the big one, and it is the least satisfying answer because the fix is patience rather than a part. A masticating juicer turns its auger somewhere between 40 and 80 RPM. That is roughly one revolution per second. Each revolution can only draw down so much material, and if you push a second handful in before the first has been pulled through, the chute packs.

The tell is that the machine does not stop suddenly — it slows, strains, and the produce stops descending. Take your hand off the pusher and give it ten seconds. Most of the time it clears itself.

Cause 2: stringy produce going in whole

Celery, kale stems, chard ribs, ginger, pineapple core, rhubarb. These are the repeat offenders, and they share a property: long fibres that run the length of the piece. A slow auger crushes across those fibres rather than cutting through them, so a full-length celery stalk can wind itself around the auger like thread on a bobbin.

Cut fibrous produce into pieces roughly one to two inches long before it goes in. Short fibres cannot wrap. This single habit prevents more jams than anything else on this page, and it costs about thirty seconds of prep.

Leafy greens are worth rolling into a tight bundle and feeding alongside something firm — a piece of apple or cucumber — so the auger has something solid to bite while it pulls the leaves through.

Cause 3: the pulp outlet, not the chute

This one gets misdiagnosed constantly. If juice is still running but the machine is labouring, look at the pulp side rather than the top. Dry pulp compacts in the outlet and, once it bridges, everything behind it has nowhere to go. Pressure builds back through the machine and the auger stalls.

Two things cause it: letting the pulp container overfill until it backs up into the outlet, and juicing very dry produce (carrot, beetroot, ginger) without anything watery alongside. Alternate hard dry items with something juicy and the pulp stays loose enough to fall out.

Cause 4: a screen that was never properly cleaned

The full routine, including the parts most people never remove, is in how to clean a juicer properly.

The filter screen is a fine mesh, and pulp driven into it under pressure dries hard. Once a meaningful share of those holes is blocked, juice cannot get out, so it stays in the pulp — and the machine works harder against the back-pressure.

The symptom is distinctive: no dramatic jam, just steadily less juice and noticeably wetter pulp over weeks. If your juicer has slowly got worse rather than suddenly stopped, this is almost certainly why.

Rinse the screen the moment you finish, while the pulp is still soft, and use the brush that came with it. If it has already dried in, soak the screen in warm water with a little washing-up liquid for twenty minutes before brushing — do not attack dried mesh with a metal implement, which bends the holes out of shape permanently.

How to clear a jam safely, right now

  1. Stop the machine. Do not keep pressing start hoping it frees itself — that is how motors overheat.
  2. Use Reverse if you have it. Ninja’s manual for the NeverClog is explicit about this: if the feed chute becomes blocked or ingredients are not processing, press and hold the reverse control, then release to stop. Run it for a couple of seconds, then try forward again. Two or three alternations usually free a fibre wrap.
  3. Unplug it before anything goes near the auger. Not a formality — augers have real torque.
  4. Disassemble and clear by hand. Lift out the auger and pull the fibre bundle off it. It usually comes away as one piece.
  5. Rinse everything before reassembling, and make sure parts are dry enough to seat properly.

If Reverse does nothing and the auger will not turn by hand once disassembled, stop and check your model’s support pages rather than forcing it. SharkNinja publishes a model-specific troubleshooting guide for the JC150 series, and most manufacturers have an equivalent.

When it is not a clog

Two situations get mistaken for clogging and are not.

The motor cut out. Most juicers have thermal protection that shuts the motor down when it overheats. The machine goes dead rather than jamming.

Unplug it and leave it forty minutes to cool. If it cuts out repeatedly on normal loads, that is a fault worth a warranty conversation rather than a technique problem.

You are asking a centrifugal juicer to do a masticating job. If greens come out damp and barely juiced but nothing actually jams, the machine is working exactly as designed — it just is not designed for that.

A spinning disc needs structured produce to shred, and kale gives it nothing to grip. No amount of technique fixes this. The masticating vs centrifugal comparison covers why the two mechanisms diverge so sharply on leafy greens.

If it is not clogging, but the yield has dropped

A juicer that runs perfectly well and simply produces less juice than it used to is a different complaint from a clog, and it has its own set of causes. The diagnosis takes about two seconds.

Squeeze the pulp

Take a handful of the pulp coming out of the machine and squeeze it hard over the sink.

Juice runs out of it. The machine is not extracting properly. Everything below applies, and the yield is recoverable.

It stays dry and crumbly. The machine is extracting about as well as it can. The problem is the produce rather than the juicer — see the produce section below.

Wet pulp is the single most reliable indicator that something is wrong, and it is worth checking before you change anything else.

The screen is blinded

This is the most common cause of a gradual decline, and it is easy to miss because the screen can look clean. A sudden total stop is a different matter — if the machine stopped working right after a clean, that is the safety interlock rather than a blockage.

The fine mesh does not block all at once. Pulp dries in the perforations a little at a time, and each dried-in fragment permanently closes one hole until it is scrubbed out. The screen still passes juice, just less of it, and the decline is slow enough that people adapt without noticing. Then one day the pulp is visibly wet.

The fix is a stiff brush — the one supplied with the machine, used against the mesh under running water — and soaking beforehand if the machine has been left standing. Hold the screen up to a light: you should see an even field of pinholes. Dark patches are blocked areas. Anything that has genuinely dried in needs soaking rather than force, because pushing hard enough to clear it can deform the mesh.

The auger or blade has worn

Less common than a dirty screen, but real on an older machine.

On a masticating juicer the auger crushes produce against the screen, and the ridges that do the work round off over years of use. On a centrifugal machine the shredding disc has small teeth that blunt in exactly the way a grater does. Either way the machine still turns and still makes juice — just less of it, from the same input.

The test that separates wear from a dirty screen is whether a genuinely thorough clean restores the yield. If it does not, and the machine has years of regular use behind it, wear is the likely answer. Augers and discs are replaceable parts on most mid-range and better juicers.

You are feeding it too fast

The same cause as the first clog above, showing up differently. Pushing produce through faster than the auger can process it means less time in contact with the screen, and less juice pressed out before the pulp is expelled. If your pulp is wet and you have been using the plunger firmly, try letting the machine pull produce down at its own pace for one batch and compare.

The produce itself

Worth ruling out before blaming the machine, because it accounts for a surprising number of complaints.

  • Older produce holds less juice. Carrots and celery that have been in the fridge for a week have lost moisture, and no juicer recovers what is not there. The full set of juicer guides, including the buying picks, is on the juicers hub.
  • Cold produce yields less than room temperature. Taking things out of the fridge half an hour before juicing makes a measurable difference.
  • Leafy greens are low-yield by nature, and they are also where machine type matters most — the masticating versus centrifugal comparison covers why the gap is so wide on greens specifically.
  • Some things are not really juiceable. Bananas, avocados and mangoes are pulp rather than juice, and a juicer will simply push them through.

If it is a centrifugal machine, expect less

Centrifugal juicers extract less than masticating ones from the same produce, and the difference is widest on leafy greens and herbs. That is the mechanism rather than a fault. If the pulp squeezes dry and the yield still disappoints, the machine is working as designed and the honest answer is that a different type would extract more — which is what the juicer buying guide and the guide to juicers for greens are for.

Preventing it in the first place

  • Cut fibrous produce into 1–2 inch pieces. The single highest-value habit here.
  • Feed slowly and let the auger set the pace.
  • Alternate dry produce with something watery.
  • Empty the pulp container before it is full, not after.
  • Rinse the screen immediately, every time.
  • Peel thick citrus rind and remove large stones — neither belongs in an auger.

If your machine jams several times per session despite all of that, the machine is the problem rather than the technique. A juicer with a reverse function and a high-torque auger handles fibrous produce in a way that cheap models simply do not — the juicer buying guide covers which ones, and the Ninja NeverClog JC151 review goes into how well the anti-clog design actually works in practice.

Frequently Asked Questions

Why is my juicer not making much juice?

Squeeze a handful of the pulp. If juice runs out, the machine is not extracting properly and the usual cause is a blinded screen — dried pulp closing the fine perforations a little at a time. Scrub it under running water with the supplied brush and hold it up to a light to check for dark patches. If the pulp squeezes dry, the machine is extracting as well as it can and the limit is the produce or the machine type.

Why is my pulp coming out wet?

Wet pulp is the clearest sign that juice is being expelled rather than extracted. The most common causes are a partially blocked screen, feeding produce through faster than the auger can process it, and on an older machine a worn auger or shredding disc. Clean the screen thoroughly first, because that alone restores the yield in most cases.

Why does my juicer keep clogging with celery?

Celery has long fibres running the whole length of the stalk, and a slow auger crushes across them rather than cutting through, so a full stalk can wind around the auger. Cut celery into 1-2 inch pieces before juicing and the fibres are too short to wrap.

Does the reverse function actually clear a jam?

Usually, for fibre wraps. Ninja’s manual instructs you to press and hold reverse when the chute is blocked or ingredients stop processing, then release to stop. Alternating reverse and forward two or three times frees most jams without disassembly. It will not help if the screen is blinded with dried pulp.

Why is my juicer producing less juice than it used to?

That is usually a blocked screen rather than a clog. Pulp dries in the fine mesh and progressively closes the holes, so juice stays in the pulp. The giveaway is a gradual decline with wetter pulp, rather than a sudden stop. Soak the screen in warm soapy water for twenty minutes and brush it out.

Can I put a whole apple in my juicer?

In a wide-chute centrifugal juicer with a 3-inch feed, yes. In a masticating juicer, no – the chute is narrower and the auger works slower, so apples need quartering. Remove large stones from stone fruit in either type.

My juicer stopped completely and will not restart. Is it clogged?

Possibly not. Most juicers have thermal cut-out protection that shuts the motor down when it overheats, which reads as a dead machine rather than a jam. Unplug it and leave it around forty minutes to cool. If it cuts out repeatedly under normal loads, treat that as a fault rather than a technique problem.

Do more expensive juicers clog less?

Generally yes, and torque is the reason rather than price itself. A high-torque auger with a reverse function pulls fibrous produce through where a cheap motor stalls. Feeding technique still matters on any machine, but good hardware is far more forgiving of a full chute.

Related guides

  • Best Juicer 2026: Cold Press and Centrifugal Picks Compared
  • Masticating vs Centrifugal Juicer: Which Should You Buy?
  • Best Juicer for Celery in 2026
  • Ninja NeverClog JC151 Review

Filed Under: Helpful Kitchen Tips

Why Is My Blender Leaking From the Top?

Last Updated September 7, 2026

Close-up of a blender jar and lid with a smoothie inside

Photo by cottonbro studio from Pexels

Short answer: leaking from the top is usually one of two separate rubber seals, a fill-level problem, or a lid that isn’t actually locked — not the same gasket that causes leaks from the bottom. My guide to blender leaks from the bottom covers the blade-assembly gasket; this is a different part of the machine entirely, and the fix depends on figuring out which one you’re actually dealing with.

The Two Seals People Confuse

Most blender lids actually have two separate rubber seals, not one, and a leak from either one gets blamed on “the lid” generically. The main lid gasket runs around the full perimeter where the lid meets the jar. The center cap — the small removable piece in the middle of the lid used for adding ingredients while blending — has its own separate seal.

To tell them apart, run a short test blend with the center cap fully seated and locked, using a small amount of water. If it leaks around the outer edge of the lid, it’s the perimeter gasket. If it leaks or sprays specifically from the center, the cap seal is the problem, and replacing the wrong part won’t fix it.

Check the Fill Level and Lid Lock First

Before assuming either seal is worn, rule out the two most common non-seal causes. Overfilling pushes contents up against and past a perfectly good seal, especially with ice, frozen fruit, or anything that expands and foams as it blends — leave more headspace than feels necessary, particularly for smoothies with ice.

A lid that isn’t fully locked will leak even with a brand-new gasket. Most blenders have a distinct click or resistance point when the lid seats correctly; if yours goes on smoothly with no real resistance, it likely isn’t locking. Press down firmly on the lid while blending briefly at low speed to check whether that alone stops the leak.

Is Pressure the Actual Problem?

If the leak only happens with hot liquid, or with contents that foam and expand, the issue may not be the seal at all. Steam and expanding contents build real pressure against a sealed lid, and that pressure finds any weak point — often the center cap, since it’s the smallest and least reinforced seal on the lid. My guide to blending hot liquids safely covers this exact mechanism in more depth, including why most standard blenders aren’t rated for it at all.

Could the Lid Itself Be Warped?

Less common, but worth ruling out if both seals look fine and the lid still leaks: repeated exposure to high heat, particularly a dishwasher’s heated dry cycle, can warp plastic lids just enough that they no longer sit flush, even with good gaskets underneath. This is the same kind of thermal stress covered in my guide to food processor bowl cracking — a slower, structural problem rather than a worn part. If the lid looks slightly domed, uneven, or doesn’t sit level on a flat counter, that’s your answer, and no amount of new gaskets will fix it.

Fixing It

Once you’ve identified which seal is actually leaking, clean it thoroughly first — dried residue under either gasket is a common reason a “new part” install still leaks. If cleaning doesn’t solve it, replace that specific seal with a model-specific part rather than a generic size; lid and cap dimensions vary enough between brands that a close-enough fit often still leaks under pressure. Both seals are inexpensive, usually under $15, and don’t require replacing the whole lid.

Preventing This Going Forward

Hand-wash both seals rather than running them through the dishwasher’s heated dry cycle regularly — the same heat that warps lids over time also degrades rubber seals faster than normal use does. Dry the center cap and lid gasket fully before storing them; trapped moisture breaks down rubber and can encourage mold in the grooves where the seal sits.

Get in the habit of actually checking that the lid clicks into its locked position every time, not just resting it on top, especially if you’re in a hurry. It takes one extra second and prevents the single most common non-seal cause of a top leak.

What this guide is based on

Plainly: this is research-based, not a hands-on test. I have not run blenders to failure to compare seals, and nothing here is a report from my own kitchen.

What it rests on: how these lids are built — a removable centre cap sealing against a smaller gasket than the perimeter seal, handled far more often because it comes out every time something is added mid-blend, and therefore wearing sooner; and the pattern of what owners report, where the centre cap and overfilling account for most top leaks well ahead of a failed main gasket.

What I could not establish: a service life for either seal. Manufacturers do not publish one and it depends heavily on how often the cap is removed.

If you are replacing the machine rather than the seal, the blender food processor combo guide covers units that handle both jobs.

Frequently Asked Questions

Why is my blender leaking from the top but not the bottom?
Top leaks come from the lid’s perimeter gasket or the center cap seal, or from overfilling and pressure — entirely different parts and causes than a bottom leak, which is almost always the blade-assembly gasket.

How do I know if it’s the lid seal or the center cap causing the leak?
Run a short test blend with the center cap fully seated. A leak around the outer edge points to the perimeter gasket; a leak from the middle points to the center cap seal.

Can overfilling cause a blender to leak even with a good seal?
Yes. Contents that expand or foam, especially ice or hot liquid, can push past a perfectly functional seal if there isn’t enough headspace. Leave more room than feels necessary.

Can a warped lid cause leaking even with new gaskets?
Yes, though it’s less common. Heat exposure, particularly a dishwasher’s heated dry cycle, can warp plastic lids enough that they no longer sit flush. Check whether the lid sits level on a flat counter before assuming the seals are the problem.

Filed Under: Helpful Kitchen Tips

  • « Go to Previous Page
  • Page 1
  • Interim pages omitted …
  • Page 18
  • Page 19
  • Page 20
  • Page 21
  • Page 22
  • Interim pages omitted …
  • Page 27
  • Go to Next Page »

Recent Articles

  • Coffee Grinder Static: Why It Happens and How to Fix It
  • How to Descale an Electric Kettle
  • Saucepan vs Saucier: Which Pan Do You Need?
  • Espresso Shot Troubleshooting: Fast, Slow, Sour or Bitter
  • How to Clean a Coffee Grinder: What Makers Say

Search


HOME          Contact          Affiliate Disclosure          Terms of Service          Privacy Policy


kitchenwarecompare.com is a participant in the Amazon Services LLC Associates Program, an affiliate advertising program designed to provide a means for sites to earn advertising fees by advertising and linking to Amazon.com, Endless.com, MYHABIT.com, SmallParts.com, or AmazonWireless.com. Amazon, the Amazon logo, AmazonSupply, and the AmazonSupply logo are trademarks of Amazon.com, Inc. or its affiliates. As an Amazon Associate I earn from qualifying purchases.


Copyright © 2026 kitchenwarecompare.com, ALL RIGHTS RESERVED.