• Skip to primary navigation
  • Skip to main content
  • Skip to primary sidebar

Kitchenware Compare

  • Home
  • Product Reviews
    • Air Fryers
    • Coffee
    • Cookware
    • Flat Top Grills
    • Meat Thermometers
    • Food Processors
    • Knives
    • Pizza Ovens
    • Toaster Ovens
    • Juicers
  • Food Blog
  • Helpful Kitchen Tips
  • Data Studies
  • About
  • How I Review
  • Contact
You are here: Home / Archives for Helpful Kitchen Tips

Cast Iron Sticky After Seasoning? Too Much Oil, Usually

Last Updated September 5, 2026

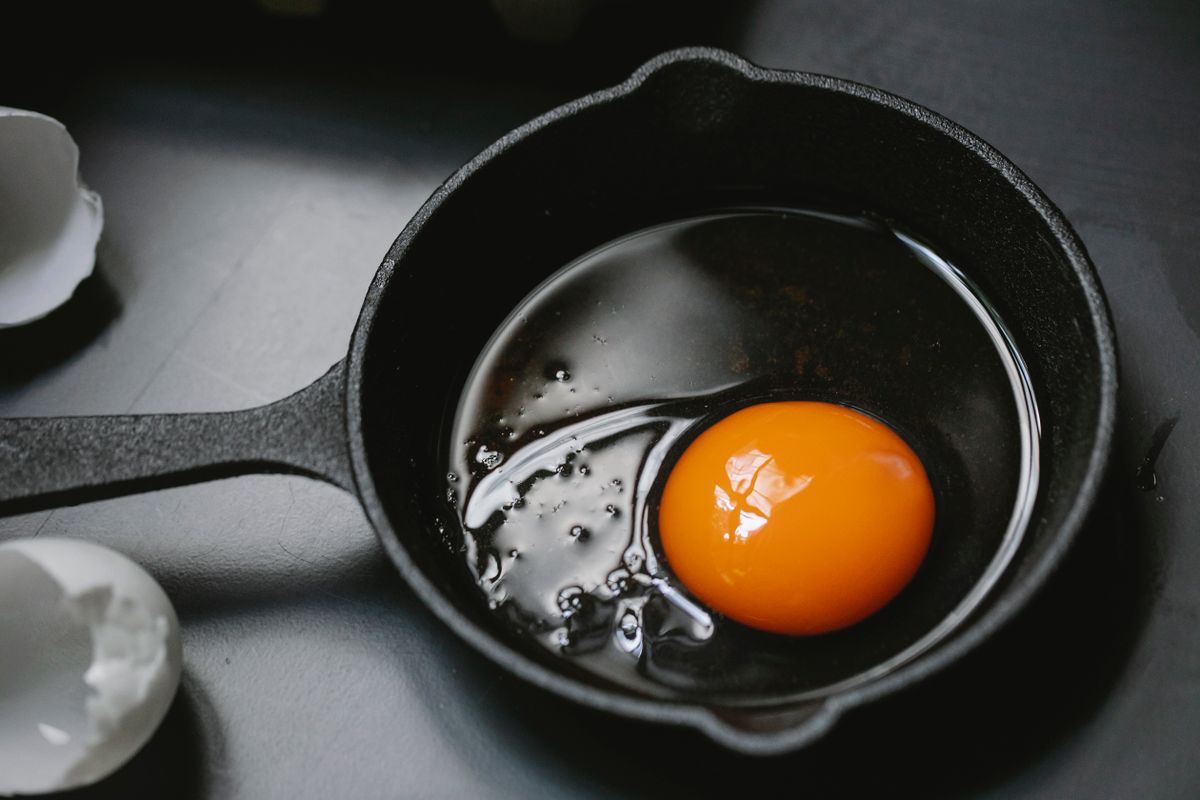
Overhead view of a cast iron skillet with a dark seasoned cooking surface and an egg in it

A cast iron pan that comes out of the oven tacky has not been ruined, and it does not need stripping back to bare metal in most cases. It usually means one specific thing went wrong, and it is the easiest seasoning mistake to make. If the seasoning is coming away in black flecks rather than staying tacky, that is a different failure with a different fix — see cast iron seasoning that is flaking off.

First: which kind of sticky?

Two very different complaints get filed under the same word, and only one of them is a seasoning failure.

Tacky or gummy to the touch, before you have cooked anything. You run a finger over the pan and it drags.

It may feel slightly greasy, or leave a faint residue. This is a curing failure — the oil did not fully convert. It is fixable, and the rest of this section is about it.

The surface is dry and hard, but food sticks to it while cooking. The pan feels fine cold. This is not a seasoning failure at all, and re-seasoning will not help much. It is nearly always heat or technique, covered further down.

So: is the problem how the pan feels, or how it cooks? Answer that first.

If it is tacky to the touch

Almost always: too much oil

This is the cause in the large majority of cases, and it is counterintuitive, because more oil sounds like more seasoning.

Seasoning is not a coat of oil. It is a chemical change — oil heated past its smoke point oxidises and cross-links into a hard, plastic-like polymer bonded to the iron. That reaction needs a film thin enough to be measured in molecules.

Leave a visible layer of oil and the part touching the iron may polymerise while the surface above it never fully cross-links. What you are left with is a half-converted layer: soft, tacky, and slightly sticky to the touch.

The rule that prevents it sounds wrong the first time you hear it: rub the oil in, then wipe it all off again. Wipe as though you have changed your mind and want the oil gone. The pan should look dry, not glossy. What remains in the surface texture is more than enough — that residue is the seasoning layer.

Or it did not get hot enough, or was not held there long enough

Polymerisation only happens above the oil’s smoke point. Below that temperature the oil simply sits there and bakes gently, which produces exactly the sticky varnish described above.

The usual approach is an hour at around 230 °C (450 °F), which is above the smoke point of the common seasoning oils, then leaving the pan to cool in the oven as it turns off. Pulling it out early, or running the oven at a moderate baking temperature, gives you a tacky pan.

Or the oil is not suited to it

A high smoke point matters, because the oven temperature has to exceed it. Neutral oils such as grapeseed, sunflower, canola and refined vegetable oil all work, as do purpose-sold seasoning oils. Olive oil and butter have smoke points too low to be reliable.

Flaxseed oil is widely recommended and is genuinely contested. It polymerises hard and fast, which is why it became popular, but a great many owners report the resulting layer flaking off in sheets after some months. I could not find a controlled comparison that settles it, so I am not going to tell you it is either the best choice or a mistake — but if you want the low-risk option, a neutral high-smoke-point oil is it.

What a correctly seasoned pan should look like

Useful as a reference point, because “seasoned” is often described without being described.

  • Colour: even dark brown to black. New pans start mid-brown and darken across the first several months on the stove. Patchiness is normal early on and evens out.
  • Finish: a low satin sheen, not a wet-looking gloss. A pan that looks freshly oiled after it has cooled has too much oil on it.
  • Feel: dry and hard. A dry fingertip should slide, not drag or tack.
  • Smell: nothing much. A rancid smell means oil that never polymerised and has since gone off — the same excess-oil problem, further along.

A note if the pan was sold pre-seasoned

Most cast iron now arrives pre-seasoned from the factory, and a lot of tacky-pan problems start with someone seasoning a new pan that did not need it.

Factory seasoning is applied and cured industrially, and it is ready to cook on. You do not need to season it before first use — and if you do, applying a normal home-sized amount of oil on top of it is a very easy way to produce exactly the sticky layer described above. Cook on it first. Add a maintenance coat later, when the surface tells you it wants one.

How to fix a pan that is already tacky

Pick based on how bad it is.

Lightly tacky: bake it again

  1. Wipe the pan hard with a dry cloth or paper towel to take off anything loose.
  2. Put it in the oven upside down at around 230 °C (450 °F) for an hour, with something underneath to catch drips.
  3. Turn the oven off and let the pan cool inside it.

You are simply finishing the reaction that did not complete. Often that is all it takes, and the surface comes out hard and dry.

Heavily gummy or uneven: take it back and redo it

  1. Scrub the tacky layer off with coarse salt and a little oil, or a stiff brush, or fine steel wool. Cast iron is not delicate — unlike a coated pan, you cannot ruin it this way.
  2. Wash with hot water and dish soap. Modern washing-up liquid is fine on cast iron; the old warning refers to the harsh lye soaps of a century ago, and polymerised seasoning is not dissolved by detergent.
  3. Dry it immediately and completely, on a low hob burner for a minute or two if in doubt.
  4. Apply a very small amount of oil, rub it over every surface, then wipe it all off again.
  5. Bake upside down at 230 °C (450 °F) for an hour and cool in the oven.

Repeat the oil-and-bake cycle two or three times if you want a solid base. Thin layers built up repeatedly are what produces a durable surface — one thick layer never does.

If the pan is dry but food still sticks

Re-seasoning is the wrong tool here. Work through these instead.

It was not preheated properly

Cast iron heats slowly and unevenly, and this is the single most common cause of sticking in use. Dropping food into a pan that has been on the heat for ninety seconds means putting it onto cold patches. Give it several minutes on a medium burner, and let the heat spread rather than blasting it.

There is not enough fat in the pan

Seasoned cast iron is not a non-stick coating and was never going to behave like one. It needs a working layer of fat to release food. A well-seasoned pan needs less fat than a bare one, not none.

You are cooking the hardest foods too early

Eggs and delicate fish are the most demanding things you can ask of a new pan. A young seasoning is thin and patchy. Cook bacon, sausages, roast vegetables and steak on it for a few weeks first — those add to the seasoning while being forgiving about it — and come back to eggs later.

The seasoning has been thinned

Long simmering of tomatoes, wine or vinegar strips seasoning, as does prolonged soaking. If the pan used to release well and now does not, and the surface looks patchy or grey in places, it needs a maintenance coat rather than a diagnosis.

The same chemistry as a non-stick pan, with the opposite goal

Worth noticing, because it explains both problems at once.

Polymerised oil is exactly what a sticky non-stick pan is suffering from. On a coated pan, oil that has cross-linked into a hard film is contamination sitting on top of the working surface, and the fix is to remove it — which is what the guide to a non-stick pan that has started sticking is about.

On cast iron, that same polymerised layer is the working surface. You are deliberately creating what you would strip off a coated pan.

Which is why the two need opposite treatment. Cast iron wants heat above the smoke point, repeated oiling and no fear of an abrasive scrub. A coated pan wants none of those things, and doing any of them to it causes the damage described in the guide to coatings that flake. Advice that works brilliantly on one will wreck the other, which is worth remembering when you read general cookware tips.

The order worth working through

  1. Touch the cold pan. Tacky, or dry and hard? That decides which half of this applies.
  2. Tacky: re-bake at 230 °C (450 °F) for an hour, cooling in the oven.
  3. Still tacky: scrub it back, wash, dry thoroughly, then oil and wipe it all off before baking again.
  4. Dry but food sticks: preheat for longer on a medium burner, and use more fat.
  5. Still sticking: stop cooking eggs and fish on it for a few weeks and build the seasoning with forgiving foods.

How This Guide Was Put Together

Plainly: this is a research-based guide, not a hands-on test. I have not seasoned a row of pans with different oils to compare the results, and nothing here is a report from my own kitchen.

What it rests on: the chemistry of oil polymerisation, which is well documented and explains why film thickness and temperature relative to the oil’s smoke point determine whether you get a hard layer or a tacky one; the seasoning instructions published by cast iron manufacturers, which agree closely on the wipe-it-all-off principle and on oven temperatures around 230 °C; and the pattern of what owners report, where excess oil dominates the reported causes by a wide margin.

What I could not establish: whether flaxseed oil is genuinely worse than neutral oils for long-term durability. The reports of it flaking are numerous and consistent enough to be worth mentioning, but I found no controlled comparison, so the guide declines to rule on it and points to the lower-risk option instead.

Frequently Asked Questions

Is cast iron supposed to be sticky after seasoning?

No. A correctly seasoned pan comes out dry, hard and slightly glossy, and feels smooth rather than draggy. Tackiness means the oil did not fully polymerise, nearly always because too much of it was left on the surface before baking.

How do you fix sticky cast iron seasoning?

If it is lightly tacky, wipe it hard with a dry cloth and bake it upside down at around 230 °C (450 °F) for an hour, then let it cool in the oven — you are finishing a reaction that did not complete. If it is heavily gummy, scrub the layer off with coarse salt or steel wool, wash, dry completely, then re-oil and wipe it all off before baking.

What happens if you use too much oil when seasoning cast iron?

You get exactly this problem. Polymerisation needs an extremely thin film. A visible layer of oil cannot fully cross-link, so the surface stays soft and tacky instead of hardening. Apply the oil, then wipe it all off before the pan goes in the oven.

Why does my cast iron stick even after seasoning?

If the pan is dry and hard rather than tacky, this is not a seasoning fault. The usual causes are not preheating long enough — cast iron heats slowly and unevenly — not using enough fat, or asking a young seasoning to handle eggs and delicate fish before it has built up.

What oil should I use to season cast iron?

A neutral oil with a high smoke point: grapeseed, sunflower, canola or refined vegetable oil, or a purpose-sold seasoning oil. The oven temperature has to exceed the oil’s smoke point for polymerisation to happen, which rules out olive oil and butter.

Can I use soap on cast iron?

Yes. Modern washing-up liquid does not dissolve polymerised seasoning. The warning against soap dates from when soap meant harsh lye-based products. What genuinely damages seasoning is prolonged soaking, long simmering of acidic foods, and putting the pan away wet.

How many layers of seasoning does a pan need?

Several thin ones beat any attempt at a thick one. Two or three oil-and-bake cycles give a workable base, and normal cooking with fat adds to it from there. A single heavy application does not produce a thicker seasoning — it produces the sticky pan this guide is about.

More cast iron reading

For choosing a pan in the first place, there is a cast iron skillet buying guide covering sizes and surface finish, and the best cast iron skillet picks compare specific models. For Dutch ovens, see the cast iron Dutch oven guide.
Filed Under: Helpful Kitchen Tips

Why Is My Non-Stick Pan Sticking? Residue or Wear

Last Updated September 5, 2026

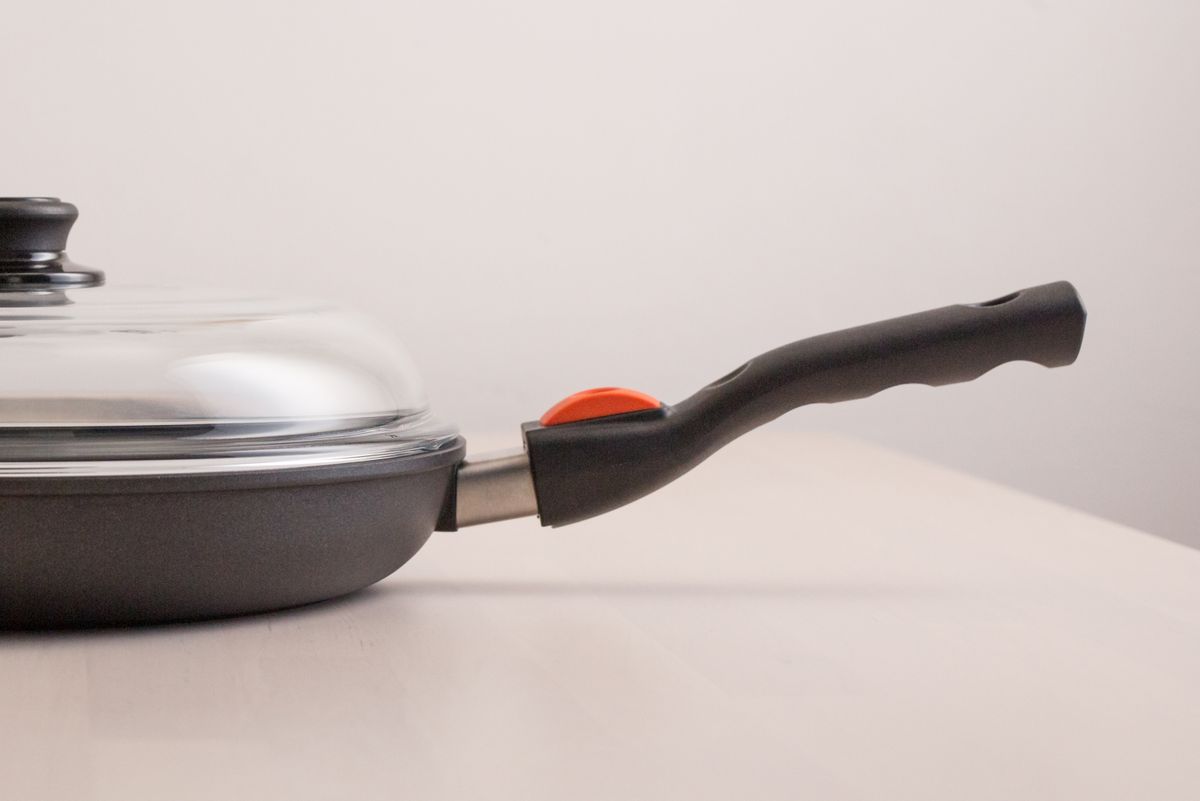
Dark non-stick frying pan with a glass lid resting on a kitchen worktop

A non-stick pan that has started sticking is one of two things, and they are not variations of the same problem. One is completely reversible in about twenty minutes. The other cannot be fixed by anyone, at any price, and most of the advice you will find is written as though only the first exists.

Residue on top, or coating worn through?

The distinction is everything, so establish it before you try anything.

Residue. A layer of polymerised oil has built up on top of a coating that is still perfectly good. Food sticks to the residue, not to the pan. Remove it and the pan works again.

Wear. The coating itself has been abraded, scratched or heat-damaged. There is nothing on top of it — there is less of it than there used to be. No cleaning method and no product restores it.

How to tell which one you have

Clean and dry the pan, then look at it in good light, tilting it so the light rakes across the surface.

  • Residue looks like a film. Faint brown, amber or bronze staining, often patchy, often heaviest in a ring where the oil pools. The surface may feel very slightly tacky or gummy rather than slick. It usually sits within the cooking area rather than at the edges.
  • Wear looks like a change in the surface itself. Dull grey or metallic patches where the sheen has gone, visible scratches, or the base colour showing through. Run a fingertip over it — worn areas feel different in texture, not just slightly sticky.
  • The water test. Put a few drops of water on the cold, clean, dry pan and tilt it. On an intact coating the drops stay beaded and slide freely. Where the coating has gone, they spread and cling.

The timing is a strong clue too. Coating wear is gradual — it gets slightly worse over months. If the pan was fine a fortnight ago and is suddenly sticking, that is almost always residue.

On bare stainless the equivalent question is whether white spots are deposits or pitting, which a little vinegar settles. “Suddenly” and “worn out” rarely go together.

If it is residue: how to remove it

Polymerised oil is not grease and does not come off with ordinary washing up — that is exactly why it accumulated. It needs to be softened rather than scrubbed, because scrubbing hard enough to shift it is also hard enough to damage the coating underneath and turn a fixable pan into an unfixable one.

  1. Half fill the pan with water and add a couple of tablespoons of bicarbonate of soda.
  2. Bring it to a gentle simmer for ten to fifteen minutes. Do not let it boil dry.
  3. Let it cool until it is safe to handle, tip it out, and wipe with a soft sponge or cloth. The residue should lift as a film.
  4. Wash normally, dry, and repeat once if a stubborn ring remains.

What not to use: steel wool, scouring pads, abrasive powders and oven cleaner. Abrasive cleansers are frequently recommended for this and they do work — on stainless steel. On non-stick they take the coating with the residue. If a method requires real scrubbing pressure, it is the wrong method for this pan.

A pan cleaned this way genuinely does behave like new, which is where the “restore your non-stick pan” advice comes from. It is true, but only for this case.

If the coating is worn: it cannot be restored

This is worth saying plainly, because a large share of what ranks for this question is published by companies that sell pans, and the framing is consistently optimistic.

Factory non-stick is a primer-and-topcoat system bonded to the metal and cured in an industrial oven at temperatures no domestic kitchen reaches. Nothing you apply at home re-bonds it. There is no spray, wipe-on product, oil treatment or seasoning routine that puts fluoropolymer back onto a stripped pan.

What about “seasoning” a non-stick pan? A thin wipe of oil heated briefly can very slightly improve release on a coating that is still intact but tired. It fills minor surface irregularities. It does not repair anything, the effect does not last, and on a genuinely worn pan it does nothing at all — worse, repeated oil applications at heat are how you create the residue problem above.

When the coating is worn through, the honest options are to accept that it is now a pan that needs oil and behaves like a cheap uncoated one, or to replace it. The same logic applies as with an air fryer basket whose coating is flaking: once the surface has failed, it has failed.

Is it safe to keep using a worn pan?

Being straight about this, as on the air fryer page: I could not find a health authority that has published a specific risk assessment for swallowing flakes of non-stick coating from cookware. Plenty of pages state confidently that the material is inert and passes through, and that may be right, but I found no regulator saying it, so it is not asserted here as established fact. If you are genuinely worried about something you have swallowed, that is a question for a doctor rather than a kitchenware site.

What can be said: the coating on a modern pan is very unlikely to contain PFOA, which was a processing aid rather than an ingredient and is no longer manufactured in the United States. And the practical decision does not depend on the health question at all — a pan whose coating has gone is no longer doing the job you bought it for.

Why it happened, so the next one lasts

Cooking spray

This is the most common cause of the residue problem and almost nobody connects the two. Aerosol cooking sprays are not simply oil — they contain emulsifiers, usually soy lecithin, plus propellants. Lecithin polymerises at cooking temperatures into exactly the hard, gummy, brownish film described above, and it builds a little more with every use.

The irony is that people reach for the spray because the pan has started sticking, which accelerates the problem that is causing the sticking. Use a pump mister with plain oil, or a small amount of oil wiped in with kitchen paper. Spray is reached for most often with eggs, where it is treated as the low-fat option — but cooking eggs without butter is better solved by the pan than by any substitute.

Heat that is too high

Non-stick coatings are generally rated to around 260 °C (500 °F). An empty pan on a high burner passes that in a couple of minutes, and cooking oils begin smoking and polymerising well before it. High heat therefore damages the coating and creates residue at the same time.

Non-stick is a low-and-medium-heat tool. Searing steak is a job for stainless or cast iron. Never preheat a non-stick pan empty on a high setting.

The dishwasher

Dishwasher detergents are strongly alkaline and abrasive. Even where a pan is labelled dishwasher safe, repeated cycles dull the coating and shorten its life measurably. Hand washing is the single easiest thing that extends it.

Metal utensils and stacking

Silicone, wood or nylon only. Stacking pans inside one another grinds the base of one against the coating of the next — put a cloth or pan protector between them.

Thermal shock

Running a hot pan under a cold tap makes the metal contract sharply while the coating does not, which stresses the bond between them. Let it cool first.

How long should a non-stick pan actually last?

Non-stick is a consumable, not a permanent surface, and treating it as a lifetime purchase is the root of most disappointment. With everyday use, a coating lasting a few years is normal rather than a failure. A pan used daily on high heat and put through the dishwasher may be finished within a year; one used gently at medium heat and hand washed can go considerably longer.

That is worth factoring into what you buy. Spending heavily on a single non-stick pan is usually worse value than buying a reasonable one and accepting it is replaceable — which is the logic behind the picks in the non-stick pan guide. If you would rather step off the replacement cycle altogether, the PTFE-free options and the ceramic versus non-stick comparison cover the trade honestly: ceramic contains no PTFE but generally loses its release properties sooner, not later.

And for the jobs that destroy non-stick fastest — searing, high-heat work, anything that wants a fond — the answer is a different pan rather than a better coating. Stainless takes metal utensils and high heat without complaint, which is covered separately.

The order worth working through

  1. Clean and dry the pan, then look at it in raking light. Film and staining, or dull metallic patches?
  2. Do the water test. Beads that slide mean the coating is intact and the problem is residue.
  3. Ask when it started. Sudden means residue. Gradual over months means wear.
  4. Residue: simmer with bicarbonate of soda, wipe gently, repeat once if needed.
  5. Wear: stop looking for a fix. Decide whether to keep it as an oiled pan or replace it.
  6. Either way: stop the cooking spray, drop the heat, and take it out of the dishwasher.

How This Guide Was Put Together

Plainly: this is a research-based guide, not a hands-on test. I have not run pans to destruction to compare coatings, and nothing here is a report from my own kitchen.

What it rests on: the chemistry of oil polymerisation, which is well established and is the mechanism behind both the residue problem and the reason cooking sprays cause it — oils and the lecithin in aerosol sprays cross-link into a hard varnish when heated repeatedly; manufacturer care instructions and stated temperature limits for fluoropolymer coatings; and the pattern of what owners report, where sudden onset and gradual decline separate the two failure modes with reasonable consistency.

Worth knowing about the advice available elsewhere: much of it is published by companies that sell non-stick cookware, and much of it is framed as restoring a pan — a promise that is true for residue and false for genuine wear, usually without the distinction being drawn.

Also not established: whether swallowing a flake of coating carries measurable risk. No health authority appears to have published a risk assessment on that specific question, so this guide declines to answer it either way, exactly as the air fryer basket guide does.

Frequently Asked Questions

Why is my non-stick pan suddenly sticking?

Sudden onset almost always means residue rather than wear, because coating wear is gradual. A film of polymerised oil has built up on top of a coating that is still good, and food is sticking to that film. Simmer water with a couple of tablespoons of bicarbonate of soda in the pan for ten to fifteen minutes, then wipe gently with a soft sponge.

How do I make my non-stick pan non-stick again?

Only if the coating is intact. Clean off polymerised residue with a bicarbonate of soda simmer and the pan will behave like new. If the coating itself is worn, scratched or heat-damaged, nothing restores it — no spray, product or seasoning routine re-bonds a fluoropolymer coating outside a factory.

How can I tell if the coating is worn out or just dirty?

Put a few drops of water on the cold, clean, dry pan. If they bead and slide, the coating is intact and your problem is residue. If they spread and cling, the coating has gone in that area. Visually, residue looks like a brown or amber film; wear looks like dull grey patches where the sheen has gone.

Should I season a non-stick pan?

It has a marginal effect at best. A thin wipe of oil can slightly improve release on a coating that is still intact but tired. It repairs nothing, the effect is short-lived, and repeated oiling at heat is how the residue problem starts in the first place.

Does cooking spray damage non-stick pans?

It is the most common cause of the sticky residue. Aerosol sprays contain lecithin and other emulsifiers that polymerise into a hard film at cooking temperatures, building up with every use. Use a pump mister with plain oil, or wipe a little oil in with kitchen paper.

Can I use a scouring pad or abrasive cleaner on it?

No. Abrasive cleansers do shift polymerised residue, but on non-stick they remove the coating along with it and turn a fixable pan into an unfixable one. Soften the residue with a bicarbonate of soda simmer instead. If a method needs real scrubbing pressure, it is the wrong method for this pan.

How long should a non-stick pan last?

A few years with everyday use is normal. Daily high heat and dishwasher cycles can finish one inside a year; gentle medium-heat use and hand washing extends it considerably. Non-stick is a consumable rather than a permanent surface.

More cookware guides

For which pans handle metal utensils and high heat, see using metal utensils on stainless steel. For the coated-surface question on a different appliance, there is a guide to an air fryer basket coating that flakes off.

Filed Under: Helpful Kitchen Tips

Air Fryer Food Not Crispy? Soggy and Pale Are Different Faults

Last Updated October 26, 2026

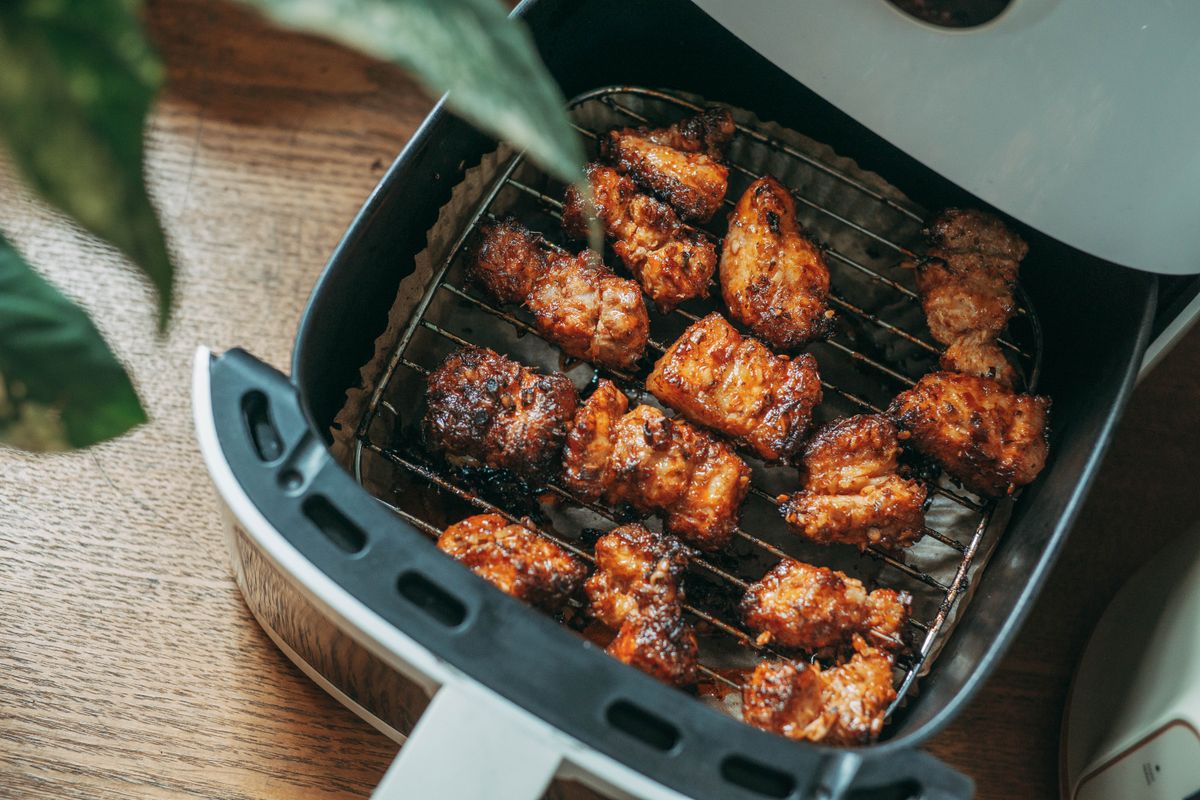
Crispy food in an air fryer basket in a single layer with gaps between the pieces

Almost everything written about this is a list of seven or eight mistakes, which leaves you guessing which one is yours. There is a faster way in, and it starts with looking at what came out of the basket.

Soggy, or just pale?

These are two different faults with two different fixes, and treating them as one problem is why generic advice so often fails.

Soggy, limp or visibly wet. The food is damp, the coating has gone soft, chips bend instead of snapping. This is a moisture problem — water is coming off the food faster than the machine can carry it away, so the food is effectively being steamed.

Dry, but pale and unbrowned. The food is not wet. It is cooked through, the texture is fine, but it has no colour and no crunch. This is a heat and surface problem — the outside never got hot enough or dry enough for browning to happen.

Some food manages both, but one usually dominates. Work out which and the relevant half of what follows applies.

If it comes out soggy or wet

The basket is overcrowded — and the reason matters

This is the single most common cause, and the usual explanation for it is vague. “Air needs to circulate” is true but not the mechanism.

The real problem is moisture load. Every piece of food releases steam as it heats. The air fryer removes that steam by moving hot, relatively dry air past the food and venting it. There is a fixed amount of airflow.

Double the food and you double the steam without changing the extraction, so humidity inside the drawer climbs until the food is sitting in its own vapour. At that point you are steaming, not air frying, and no amount of extra time fixes it — more time just means more steam.

A single layer with visible gaps between pieces is the standard, and for wet foods it needs to be a generous single layer. Two smaller batches genuinely finish faster than one crowded batch, because the crowded one never gets there at all.

The surface of the food is wet

Every drop of surface water has to be boiled off before the surface can rise above 100 °C and start browning. Wet food spends the first several minutes drying rather than cooking, and if it is crowded as well, it never finishes.

Pat food dry with paper towel before it goes anywhere near oil. This matters most for marinated meat, anything rinsed, and vegetables like courgette or mushrooms that hold a lot of water.

There is water in the drawer

This one catches people out because it comes from good advice applied in the wrong place.

Adding a little water to the bottom of the drawer is a real technique for stopping fatty food from smoking — it stops rendered fat hitting the hot base and burning. But water in the drawer is also a steam source sitting directly under your food, and it will keep the coating soft.

If you have been doing this, it is a trade rather than a mistake, and you cannot have both at once. For fatty food that smokes, better options are to raise the food onto a rack and clean the basket between batches — the separate guide to why an air fryer smokes covers those in detail.

Frozen food that was iced up

Frozen chips and nuggets are designed for this appliance and generally work well, because they are par-fried before freezing and arrive with a coating already set. What does not work is frozen food carrying a layer of frost or ice crystals, which is a direct water load. Knock the ice off before cooking, and do not thaw them first — thawed par-fried chips go limp and never recover.

The wrong food, honestly

Some things will not crisp in an air fryer regardless of technique. Wet batters slide off before they set, because there is no hot oil to seize them instantly.

Very watery vegetables release more moisture than a small drawer can clear. Cheese-heavy items melt before they dry. These are limits of the method, not faults to troubleshoot.

If it comes out dry but pale

There is not enough oil

Oil in an air fryer is not there for flavour or for frying. It works as a thermal bridge: it fills the microscopic irregularities on the food’s surface and conducts heat into it far better than air alone. Without it, the surface heats unevenly and browning reactions are slow and patchy.

A light, even coat is enough — toss the food in a bowl with a small amount of oil rather than spraying it in the basket. Too much oil causes the opposite failure: it pools in the base, the food sits in it, and the bottom goes greasy and soft.

Use a pump mister with plain oil rather than an aerosol spray. Aerosol sprays contain lecithin that carbonises onto the coating, which is a leading cause of a basket coating that flakes off.

It was not preheated

Putting food into a cold air fryer means the first few minutes are spent bringing the machine up to temperature with the food already inside, releasing moisture into an environment not yet hot enough to drive it off. That is the exact condition that produces pale, slightly damp results.

Three to five minutes of preheating is enough on most models, and it matters most for thin, quick-cooking items where the total cook time is short. Makers disagree on whether it is required, which do you need to preheat an air fryer sets out.

The temperature is too low

Browning needs surface temperatures that low settings never reach. Recipes written for ovens frequently need adjusting, and the common advice to drop oven temperature by around 20 °C for an air fryer is aimed at preventing the outside burning before the inside cooks — useful for a thick chicken breast, actively counterproductive for chips, where you want the surface hot.

If the food is cooked through but pale, the answer is usually a higher temperature for a shorter time, not longer at the same setting.

Airflow is restricted by something you added

Parchment and foil are useful, but both fail the same way: they block the perforations in the basket base that the airflow depends on. Perforated parchment made for air fryers is the safer option, and nothing should go in during preheating, when it can lift into the element. Makers differ on paper, so what each one says about parchment is worth reading first. There is a separate guide to using foil in an air fryer covering when it works and when it does not.

The basket or element is dirty

Baked-on residue on the basket and crisper plate blocks perforations, and a greasy heating element radiates less effectively. If the machine produces no heat at all rather than too little, that is a separate fault — see why an air fryer will not heat up. A machine that used to crisp and no longer does, with no change in technique, is usually just dirty. This is the one cause where the fault genuinely is the appliance rather than the method.

The machine may be too small for what you are asking

Capacity claims are measured by volume, not by usable single-layer area, and those are very different things. A 4-quart basket holds four quarts of space but might only have room for two portions of chips in a proper single layer.

If you are consistently forced to choose between crowding the basket and cooking three batches, the machine is undersized for the household rather than faulty. That is worth knowing before you spend another hour troubleshooting technique. The larger family-size models are sized around exactly this problem, and the main air fryer guide notes usable basket area rather than just quoted capacity. Two-drawer models are the other answer, since two separate airflows beat one large shared one for this specific failure.

Food-specific notes

Home-made chips from fresh potatoes

These are the hardest case and the most common disappointment, because frozen chips are par-fried at the factory and fresh ones are not. Soak the cut potatoes in cold water to draw out surface starch, then dry them thoroughly — genuinely dry, not damp — before oiling. Skipping the drying step after soaking guarantees the soggy result you were trying to avoid.

Breaded and crumbed food

Dry breadcrumb coatings crisp well; wet batters do not. Spray or brush the coating lightly with oil, because dry crumb left unoiled stays pale and powdery rather than golden.

Vegetables

High-water vegetables need space above all else. Cut them larger than feels right, so there is less surface area releasing water at once, and accept smaller batches.

Reheating

Air fryers are extremely good at reviving leftovers that have gone soft — pizza, chips, fried chicken — because the problem there is purely surface moisture. Short, hot and uncrowded is the rule.

The order worth working through

  1. Look at the food. Wet and limp, or dry and pale? That decides everything else.
  2. Wet: halve the batch size, then pat the food dry before oiling.
  3. Still wet: check for water in the drawer and for ice on frozen food.
  4. Pale: add a light even coat of oil, preheat, and raise the temperature rather than extending the time.
  5. Still pale: remove liner or foil covering the perforations, and clean the basket and crisper plate properly.
  6. Neither works: the machine is probably too small for the batch you are cooking.

How This Guide Was Put Together

Plainly: this is a research-based guide, not a hands-on test. I have not run batches of chips through a row of machines to compare results, and nothing here is a report from my own kitchen.

What it rests on: the physics of the process, which is what most of the advice on this subject omits — air frying is convection drying plus surface browning, and browning cannot begin until surface water has boiled off, which is why moisture load and airflow explain the majority of failures; manufacturer guidance on preheating, batch sizes and liner use; and the pattern of what owners report, where crowding is by a wide margin the most common cause.

Also not established: exact temperature and time conversions from oven recipes. These vary enough between models — basket geometry, fan speed and wattage all differ — that any single number would be misleading. The guidance above is directional for that reason.

Frequently Asked Questions

Why is my food soggy in my air fryer?

Almost always too much food in the basket. Each piece releases steam, the airflow that removes it is fixed, so a crowded basket becomes humid and the food steams instead of crisping. Adding time makes it worse rather than better. Cook in a single layer with gaps, in two batches if necessary.

Why is my food not crisping even though it is cooked?

If it is dry but pale, that is a browning problem rather than a moisture one. The usual causes are too little oil, no preheat, or a temperature too low for the surface to brown. Raise the temperature and shorten the time rather than cooking for longer at the same setting.

Does an air fryer need to be preheated?

For short cooks and anything you want crisp, yes. Food placed in a cold machine releases moisture before the environment is hot enough to drive it off, which produces pale and slightly damp results. Three to five minutes is enough on most models.

How much oil should I use?

A light, even coat, applied by tossing the food in a bowl rather than spraying into the basket. Oil works as a thermal bridge that conducts heat into the food surface, so too little leaves it pale. Too much pools in the base and makes the underside greasy and soft.

Should I put water in the air fryer drawer?

Only to stop fatty food smoking, and it will cost you crispness. Water in the drawer is a steam source directly beneath the food. If smoking is the problem, raising the food on a rack and cleaning the basket between batches solves it without the sogginess.

Why are my home-made chips soggy when frozen ones are fine?

Frozen chips are par-fried before freezing, so they arrive with a set coating. Fresh potatoes are raw and starchy. Soak the cut pieces in cold water to remove surface starch, then dry them thoroughly before oiling. The drying step is the one people skip, and it is the one that decides the outcome.

Can parchment or foil make food soggy?

Yes, if it covers the perforations in the basket base, because that is the path the airflow takes. Use perforated parchment made for air fryers, keep it clear of the edges, and never put it in during preheating when it can lift into the element.

More air fryer troubleshooting

If the machine is smoking, see why an air fryer smokes and how to stop it. If the basket surface is deteriorating, there is a guide to a basket coating that is flaking off.

Filed Under: Helpful Kitchen Tips

Air Fryer Basket Coating Flaking Off? What It Means and What to Do

Last Updated October 28, 2026

Air fryer drawer pulled out showing the dark non-stick coated basket with food inside

Flakes of black or grey coating coming off an air fryer basket is one of the few kitchen faults where the first question is not “how do I fix it” but “have I been eating this?”. That is the right question to ask first, so this starts there rather than with a list of causes.

First: what the coating actually is

Almost every air fryer basket is aluminium or steel with a non-stick coating, and that coating is usually PTFE — the fluoropolymer sold under brand names such as Teflon. Some newer baskets use a ceramic-based coating instead, which chips rather than peels.

The chemical people are actually worried about is usually not PTFE itself but PFOA, which was historically used as a processing aid in making these coatings. That distinction matters, because the situation has changed:

  • PFOA and PFOS are no longer manufactured in the United States.
  • The International Agency for Research on Cancer classifies PFOA as Group 1, carcinogenic to humans — a serious classification, and one reason the phase-out happened.
  • The American Cancer Society’s summary of PFOA and related PFAS names drinking water and food as the main routes of exposure for most people. Cookware is not what it points to.

So a basket bought in the last decade is very unlikely to contain PFOA at all. That is the part that can be stated with confidence.

Is it safe to keep using a basket that is flaking?

Here is where I have to be straight with you, because most pages on this subject are more confident than the evidence supports.

What I could not establish: I could not find a health authority that has published a specific risk assessment for swallowing flakes of non-stick coating from cookware. Plenty of articles assert that the coating is inert and passes straight through, and that may well be right — PTFE is a notably unreactive material — but I am not going to present that as a settled finding backed by a regulator when I could not find the regulator saying it. If you have swallowed some and you are worried, that is a question for a doctor or a poison information line, not for a kitchenware site.

What I can say is that the practical answer does not depend on resolving that question:

Replace the basket. Not because I can quantify a health risk, but because a flaking basket has already failed at its job.

Once the coating breaks, food sticks to the bare patch, that patch gets scrubbed harder, and the peeling accelerates. You are going to replace it soon regardless. The safety question is, in practice, moot.

If you need to use it for another few days before a replacement arrives, line the base with parchment made for air fryers or a perforated silicone liner so food is not sitting on the damaged area. Do not treat that as a permanent fix — a liner that blocks too much airflow causes its own problems.

You cannot re-coat it at home

This deserves stating plainly, because “how to restore your air fryer’s non-stick coating” is a common search result and the framing is misleading.

Factory non-stick is applied as a primer-and-topcoat system and cured in an oven at temperatures a domestic kitchen cannot reach. There is no aerosol, wipe-on product or oil-seasoning routine that re-bonds a fluoropolymer coating to a stripped basket. What you can do is season a basket whose coating is intact but tired — a very thin wipe of high-smoke-point oil, heated briefly — which improves release slightly. That is a different thing from repairing damage, and it will not help once the substrate is exposed.

Treat anything sold as a non-stick repair spray for cookware with scepticism.

Why it happened — in the order that actually matters

1. Aerosol cooking spray

This is the most common preventable cause and the one least likely to be mentioned, so it goes first.

Aerosol cooking sprays are not just oil. They contain emulsifiers, most commonly soy lecithin, plus propellants and anti-foaming agents. Lecithin carbonises at air fryer temperatures and bonds to the coating as a hard, gummy, brownish varnish.

It does not wash off easily, so people scrub it — and the scrubbing is what takes the coating with it. The residue also builds unevenly, so the basket looks blotchy long before it peels.

Use a pump-style oil mister with plain oil, or toss food in oil in a bowl before it goes in. Many manufacturers explicitly tell owners not to use aerosol sprays on coated baskets, and this is why.

2. Metal utensils and stacking

Tongs are the usual culprit — particularly metal tongs used to turn something halfway through, which drag across the base under pressure. Stacking the basket inside other pans in a cupboard scratches it too. Silicone or wooden tools only, and store the basket with nothing resting inside it.

3. The dishwasher

Even where the manual says the basket is dishwasher safe, dishwasher detergents are strongly alkaline and abrasive, and repeated cycles dull and then undermine non-stick. Hand washing in warm soapy water with a soft sponge measurably extends the life of the coating. If food is baked on, soak it rather than attacking it. How to clean an air fryer gives each maker’s cleaning steps.

4. Thermal shock

Running a hot basket under a cold tap makes the metal contract sharply while the coating on it does not, and that stress is what starts edge lifting. Let it cool before it touches water. This is also the mechanism behind coating that peels in sheets rather than flaking in specks.

5. Age and heat cycling

Every heating and cooling cycle works the coating slightly, because coating and substrate expand at different rates. Nothing prevents this — it is why non-stick is a consumable rather than a permanent surface. On a basket used several times a week, a coating lasting a few years is normal rather than a defect.

For reassurance: PTFE coatings are generally rated to around 260 °C (500 °F), and most air fryers top out around 200–230 °C (400–450 °F). Normal air frying does not run hot enough to break the coating down. The damage is nearly always mechanical or chemical, not from the heat of ordinary cooking.

Replace the basket, not the machine

Most people assume a peeling basket means a new air fryer. Usually it does not.

Major manufacturers sell replacement baskets and drawers as spare parts, typically for a fraction of the cost of the appliance. Search the manufacturer’s own parts pages for your exact model number — the number on the rating plate underneath the unit, not the marketing name on the front — because basket dimensions change between revisions of the same model line.

Two things to check before buying:

  • Is the unit still in warranty? Coating failure within the warranty period is often treated as a defect, particularly if it happened early and you have not used aerosol sprays or the dishwasher. It is worth one email before you spend anything.
  • Is a replacement part actually available for your model? This is the genuine weakness of cheaper units — no spares, so a peeling basket does write off the whole machine. If you are replacing the appliance anyway, parts availability is worth weighing.

If you would rather not have a coating at all

Some owners reach this point and decide they are done with non-stick. The options, honestly:

  • Stainless steel baskets and racks exist for many models and never peel. Food sticks more, and they need oil and more cleaning effort. This is a real trade, not a free upgrade.
  • Ceramic-coated baskets are marketed as the healthier option. They contain no PTFE, but the coating is generally less durable, not more — it tends to lose its release properties within a year or two. It chips rather than peels.
  • Air fryers with a removable stainless basket in an oven-style cavity avoid the problem structurally, since the hot surfaces are not coated.

If you are shopping, the air fryer buying guide and the cheaper models worth considering both note basket construction, and the larger family-size units are where replaceable parts matter most, because those machines cost the most to write off. For a wider look at what makes a non toxic air fryer, including glass and stainless models, Barefoot Basil’s guide goes through the options material by material.

Preventing it on the replacement

  1. No aerosol cooking sprays. A pump mister with plain oil, or oil tossed onto the food.
  2. Silicone or wooden tools only, never metal tongs.
  3. Hand wash, soak rather than scrub, soft sponge.
  4. Let it cool before it meets water.
  5. Store it with nothing stacked inside it.
  6. Use liners for genuinely messy items, not as a permanent habit.

Those six between them address every preventable cause above. None of them will make the coating last forever, and it is not supposed to.

How This Guide Was Put Together

Plainly: this is a research-based guide, not a hands-on test. I have not deliberately destroyed a set of air fryer baskets to compare failure modes, and nothing here is a report from my own kitchen.

What it rests on: manufacturer care instructions and spare-part listings, which are where the aerosol-spray and dishwasher warnings come from and where replacement basket availability can be checked; the published position of health authorities on PFOA and related PFAS, specifically the American Cancer Society’s review, which is the source for the IARC Group 1 classification of PFOA and for the point that drinking water and food, rather than cookware, are the main exposure routes; and the well-documented material behaviour of fluoropolymer coatings on metal substrates, which is what the thermal-shock and heat-cycling explanations rest on.

What I could not establish, and it is the most important gap on this page: whether swallowing a flake of non-stick coating carries any measurable risk. I could not find a health authority that has published a risk assessment on that specific question. The common claim that the material is inert and passes through the body is plausible and may be correct, but I found no regulator or cancer research body stating it, so it is not asserted here as fact. Pages that answer this question confidently are, as far as I can tell, going beyond their sources.

Also not established: how long a coating should be expected to last. There is no published durability standard for air fryer basket coatings, and manufacturers do not quote a figure. The “a few years of regular use” above reflects the pattern in owner reports, not a measured lifespan.

Frequently Asked Questions

Is it safe to use an air fryer with peeling coating?

The honest answer is that no health authority has published a specific risk assessment on ingesting flakes of cookware coating, so anyone answering with certainty is going beyond the evidence. The practical answer is simpler: replace the basket, because once the coating breaks the basket no longer works as intended, food sticks to the bare patch and the peeling accelerates.

Why is my air fryer basket peeling at the bottom?

The base takes the most abrasion, the most direct heat and the heaviest residue, so it fails first. The most common preventable cause is aerosol cooking spray, whose lecithin carbonises into a hard varnish that people then scrub off along with the coating. Metal tongs turning food halfway through are the second most common.

Can I recoat or repair an air fryer basket?

No. Factory non-stick is a primer-and-topcoat system cured at temperatures a home kitchen cannot reach, and no spray-on or wipe-on product re-bonds it. Seasoning with a thin layer of oil can slightly improve release on a coating that is still intact, but it cannot repair exposed metal.

Do I need a whole new air fryer?

Usually not. Most major manufacturers sell replacement baskets as spare parts for a fraction of the price of the appliance. Look up your exact model number from the rating plate underneath the unit rather than the name on the front. Check the warranty first, since early coating failure is often treated as a defect.

Does the coating contain PFOA?

Almost certainly not, if the appliance is recent. PFOA was a processing aid rather than an ingredient of the finished coating, and it is no longer manufactured in the United States. It is classified by IARC as carcinogenic to humans, which is why it was phased out.

Is a ceramic-coated basket a better option?

It contains no PTFE, which is why it is marketed as the healthier choice, but it is generally less durable rather than more — ceramic coatings tend to lose their release properties within a year or two, and they chip rather than peel. A stainless steel basket is the option that genuinely never peels, at the cost of more sticking and more cleaning.

Will using it at high temperature damage the coating?

Ordinary air frying does not. PTFE coatings are generally rated to around 260 °C (500 °F) and most air fryers top out around 200–230 °C (400–450 °F). Damage is nearly always mechanical (utensils, scrubbing, stacking) or chemical (aerosol sprays, dishwasher detergent) rather than caused by cooking heat.

More air fryer troubleshooting

If the machine is producing smoke as well, see why an air fryer smokes and how to stop it. For what can safely go in the basket, there is a separate guide to using aluminium foil in an air fryer.

Filed Under: Helpful Kitchen Tips

Espresso Steam Wand Not Frothing Milk? Find the Cause First

Last Updated October 12, 2026

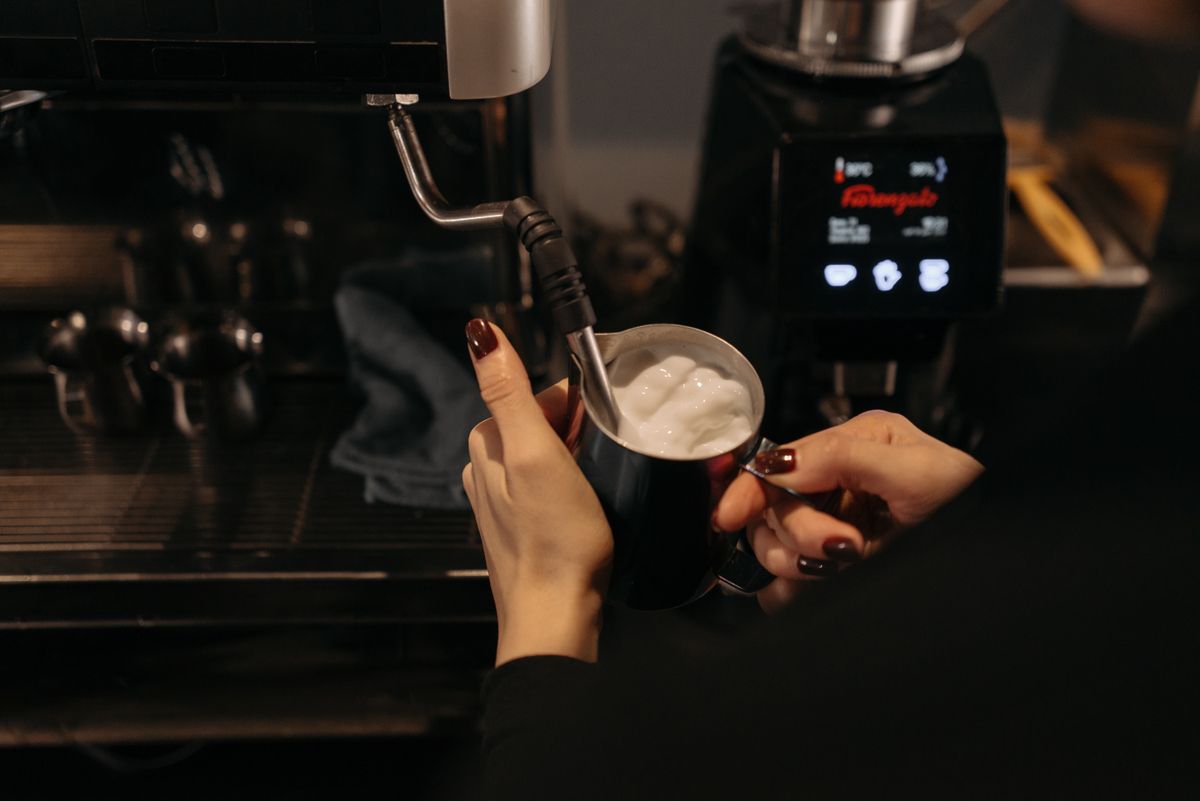
Steam wand producing microfoam in a stainless steel milk jug on an espresso machine

A steam wand that stops frothing is almost always one of two completely different faults, and the fix for one does nothing for the other. Before changing anything, work out which you have — it takes about ten seconds.

Point the wand into an empty jug and open the steam valve. Either dry steam hisses out under pressure, or it does not.

Which problem do you have?

Little or no steam comes out. A weak wisp, a dribble of water, or nothing at all. This is a machine fault — a blocked tip, a machine not up to temperature, or a valve problem. No amount of technique will fix it.

Plenty of steam, but the milk will not foam. The wand hisses properly, the milk gets hot, and you still end up with flat, bubbly or separated milk instead of glossy microfoam. This is technique, milk or equipment shape — and the wand is working fine.

Most guides mix these together and give you a list covering both. Establish which one you have first and you can ignore half of what follows.

If little or no steam comes out

The tip is blocked with dried milk

This is the most common mechanical cause by a distance. Milk that dries inside the tip holes sets hard, and it takes very little of it to choke a 1mm hole. The wand will often still produce a thin, angry hiss rather than nothing at all, which is why people mistake it for a pressure problem.

The fix: soak the tip. Most tips unscrew — take it off and leave it in hot water, or in a dedicated milk-line cleaner, for fifteen minutes or so, then clear each hole with a pin or the wire that came with the machine. If the tip does not unscrew, stand a jug of cleaner under the wand with the tip submerged and leave it.

The habit that prevents it: purge the wand for a second immediately after steaming, before you wipe it. Wiping alone leaves milk inside the holes, which is where the problem starts.

The machine is not at steam temperature

Steam needs a much hotter boiler than brewing does. On a single-boiler machine you have to wait after switching to steam mode — often thirty to sixty seconds after the light changes, because the light frequently indicates the thermostat has switched rather than that the boiler has caught up. Open the wand too early and you get water spitting out rather than steam.

If you get a splutter of water followed by weak steam, this is usually what is happening. Wait longer, and purge the condensed water out of the wand before you put it in the milk.

There is water in the wand and no more

Every wand holds condensed water between uses, which is why purging first is standard. If purging produces water and then nothing, the machine is not making steam at all — check the water tank is seated properly, because a tank that is not fully home will let a machine brew but starve the steam circuit on some designs.

Scale, on an older machine

Scale narrows the steam path over months and shows up as a gradual weakening rather than a sudden stop. If the machine has never been descaled and the decline has been slow, descale before assuming anything has failed.

If there is plenty of steam but no foam

The wand is fine. Something about the milk, the jug or the technique is stopping air being drawn in.

The tip is too deep in the milk

Foam is made in the first few seconds by drawing air in at the surface. If the tip starts submerged, you heat the milk without ever aerating it — hot flat milk, every time.

Start with the tip just under the surface, so it makes a steady tearing or paper-ripping sound. That noise is air being incorporated. Once the jug has grown by roughly a third, sink the tip deeper to stop aerating and just spin the milk to fold the foam in.

There is no whirlpool

Angle the tip off-centre so the milk rotates. The spin is what breaks large bubbles into microfoam. Straight down the middle gives you a jug of stiff, bubbly foam sitting on hot milk — which is what most people mean when they say it is not frothing properly.

The jug is the wrong size or shape

A jug filled much beyond a third has no room to expand, and a jug too large for the volume leaves the tip unable to reach a workable depth. As a rule, fill to just below the base of the spout, and match jug size to the drink rather than using one jug for everything.

What it should sound and look like

Diagnosing bad foam is much easier if you know what correct looks like, because the failure shows up in the first five seconds rather than at the end.

  • Seconds 0–1: a splutter as the last condensed water clears. This is why you purge first.
  • Seconds 1–5: a steady tearing or paper-ripping sound, repeating in short bursts. This is the only part of the process where foam is created. Silence here means the tip is too deep; a violent screeching or bubbling means it is too shallow and you are blowing large bubbles into the milk instead of fine ones.
  • Once the volume has grown by about a third: sink the tip deeper. The tearing should stop and turn into a low rumble as the milk spins.
  • The rest: no new sound, just rotation, until the jug becomes too hot to hold comfortably against your palm — roughly 60 °C. Past that the proteins stop holding air and the foam collapses even if you did everything else right.

Finished milk should look like wet paint and pour as one thing. Visible bubbles, or a layer of foam that separates from the milk beneath while it sits, means aeration happened too late or too aggressively — not that the machine failed.

The milk itself

Start cold, straight from the fridge — cold milk gives you a longer window before it gets too hot to texture. Whole milk foams most easily because fat stabilises the foam; skimmed makes stiffer, drier foam that collapses faster. Milk that has been steamed once and cooled will not foam again properly, so start with fresh milk every time.

Plant milks vary enormously, and the ones that work are usually labelled “barista” for exactly this reason — they contain added stabilisers. A standard oat or almond milk failing to foam is not a machine fault.

If your machine has a panarello, the rules are different

Many entry-level machines do not have a bare steam wand at all. They have a panarello — a plastic or metal sleeve around the wand with an air hole in the side. It works by drawing air in through that hole automatically, and it is designed to make foam without any skill on the user’s part.

Three things follow from that, and they reverse the advice above:

  • The tip needs to be deeper, not shallower. A panarello aerates through its side hole, not at the surface, so keeping it near the top does nothing useful.
  • The air hole blocks. It is small, it sits where milk splashes, and a blocked one is the single most common reason a panarello machine stops foaming. Take the sleeve off and clear the hole.
  • You cannot make proper microfoam with it. A panarello produces stiff, bubbly foam suitable for a cappuccino, not the glossy texture latte art needs. If that is what you are chasing, the limit is the hardware rather than your technique — the semi-automatic guide covers which machines have proper wands.

If you are not sure which you have: a bare wand is a plain metal tube with a screw-on tip; a panarello has a wider sleeve with a visible hole in the side, and often a rubber grip.

The order worth working through

  1. Purge the wand into an empty jug. Steam or no steam? Everything branches here.
  2. No steam: soak and clear the tip, then check you waited long enough for steam temperature.
  3. Still no steam: reseat the water tank, then descale if it has been a while.
  4. Steam but no foam: start with the tip just under the surface until you hear tearing, then submerge and spin.
  5. Still no foam: check jug fill level, then switch to cold whole milk as a control.
  6. Panarello machine: clear the side air hole and go deeper rather than shallower.

When it is the machine rather than you

If the tip is clear, the machine has had time to reach steam temperature, and you still get water or a weak hiss, the fault is internal — a steam valve, a thermoblock, or a thermostat. On a machine with a metal boiler that is worth a repair quote. On an entry-level thermoblock machine the diagnosis often costs more than the machine did.

It is also worth being honest about what a given machine can do. Milk texturing is one of the clearest differences between price tiers: a small thermoblock recovers slowly and runs out of steam part-way through a jug, and no technique fixes that. If you have concluded the hardware is the limit, the machines worth buying under $500 and the options under $200 both note steam performance, and the Breville Bambino Plus review covers automatic milk texturing, which removes the technique question entirely.

How This Guide Was Put Together

Plainly: this is a research-based guide, not a hands-on test. I have not stripped down these machines, and nothing here should be read as a report from my own kitchen.

What it rests on: the physics of milk foam, which is well documented — air is entrained at the surface in the first seconds and fat and protein stabilise the resulting bubbles, which is why fat content and starting temperature matter and why re-steamed milk does not work; manufacturer troubleshooting documentation, including De’Longhi’s own steam wand FAQ; and the pattern of what owners report, where blocked tips and blocked panarello air holes recur far more often than any internal fault.

What I could not establish: how much of the reported failure rate is technique versus hardware. Nobody measures that, and the two are almost impossible to separate from owner reports because a person whose machine cannot hold steam pressure and a person steaming badly describe the same outcome. The ordering above puts the cheap, reversible checks first for that reason rather than because they are statistically more likely.

If the wand clogs repeatedly, the routine that prevents it is in how to clean an espresso machine.

Frequently Asked Questions

Why did my steam wand stop frothing suddenly?

A sudden stop is almost always a blocked tip. Dried milk sets inside the holes and it takes very little to choke them. Unscrew the tip if you can, soak it in hot water or milk-line cleaner for fifteen minutes, and clear each hole with a pin. Purging for a second straight after every use prevents it recurring.

How do I unclog a steam wand?

Soak rather than scrape. Remove the tip if it unscrews and leave it in hot water or a dedicated cleaner, then clear the holes with the pin supplied with the machine. If the tip is fixed, stand a jug of cleaner under the wand with the tip submerged. Do not push anything hard through the holes — enlarging or deforming one changes the steam pattern permanently.

Why is my milk hot but not foamy?

The tip is almost certainly too deep. Foam is created by drawing air in at the surface during the first few seconds. If the tip starts submerged you heat the milk without aerating it. Start just under the surface until you hear a tearing sound, then sink the tip to fold the foam in.

Does the type of milk matter?

Yes. Whole milk foams most readily because fat stabilises the bubbles; skimmed produces stiffer foam that collapses faster. Milk that has already been steamed once will not foam properly again. Most standard plant milks foam poorly unless they are the barista versions, which contain added stabilisers.

Why does my machine make steam for a few seconds and then stop?

Usually the boiler cannot keep up. Small thermoblock machines make steam in short bursts and need time to recover, which is a hardware limit rather than a fault. If it used to manage a full jug and no longer does, descale first.

My machine has a plastic sleeve around the wand and stopped foaming. What is different?

That is a panarello, and it aerates through a small hole in the side of the sleeve rather than at the milk surface. A blocked air hole is the usual cause. Remove the sleeve, clear the hole, and keep the tip deeper in the milk than you would with a bare wand.

More espresso troubleshooting

If the shot itself is the problem rather than the milk, see what to check when an espresso machine is not building pressure, or the guide to an espresso machine leaking water.

Filed Under: Helpful Kitchen Tips

  • « Go to Previous Page
  • Page 1
  • Interim pages omitted …
  • Page 17
  • Page 18
  • Page 19
  • Page 20
  • Page 21
  • Interim pages omitted …
  • Page 27
  • Go to Next Page »

Recent Articles

  • Coffee Grinder Static: Why It Happens and How to Fix It
  • How to Descale an Electric Kettle
  • Saucepan vs Saucier: Which Pan Do You Need?
  • Espresso Shot Troubleshooting: Fast, Slow, Sour or Bitter
  • How to Clean a Coffee Grinder: What Makers Say

Search


HOME          Contact          Affiliate Disclosure          Terms of Service          Privacy Policy


kitchenwarecompare.com is a participant in the Amazon Services LLC Associates Program, an affiliate advertising program designed to provide a means for sites to earn advertising fees by advertising and linking to Amazon.com, Endless.com, MYHABIT.com, SmallParts.com, or AmazonWireless.com. Amazon, the Amazon logo, AmazonSupply, and the AmazonSupply logo are trademarks of Amazon.com, Inc. or its affiliates. As an Amazon Associate I earn from qualifying purchases.


Copyright © 2026 kitchenwarecompare.com, ALL RIGHTS RESERVED.