• Skip to primary navigation
  • Skip to main content
  • Skip to primary sidebar

Kitchenware Compare

  • Home
  • Product Reviews
    • Air Fryers
    • Coffee
    • Cookware
    • Flat Top Grills
    • Meat Thermometers
    • Food Processors
    • Knives
    • Pizza Ovens
    • Toaster Ovens
    • Juicers
  • Food Blog
  • Helpful Kitchen Tips
  • Data Studies
  • About
  • How I Review
  • Contact
You are here: Home / Archives for Helpful Kitchen Tips

Air Fryer Not Heating Up? Start With the Drawer

Last Updated October 29, 2026

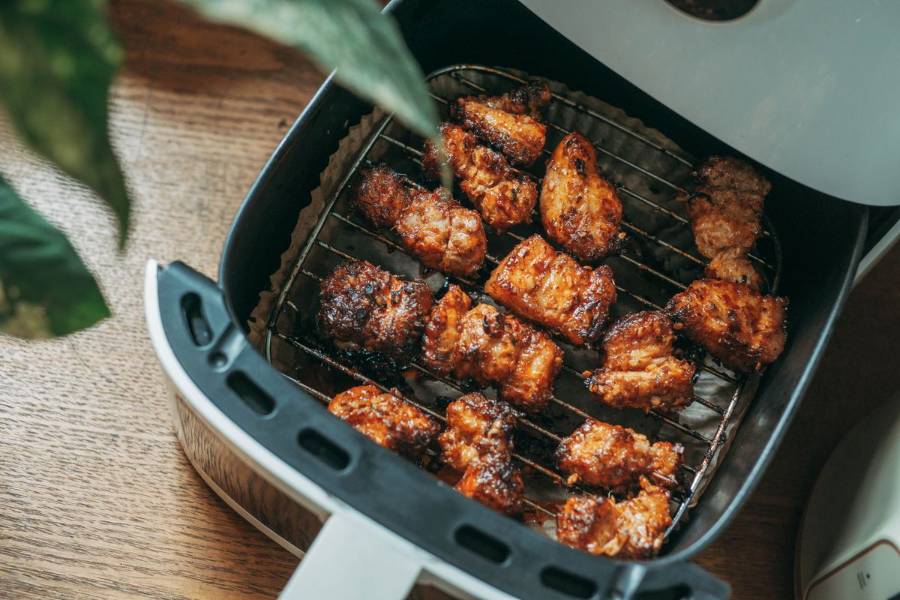
Air fryer with the drawer pulled out, showing the basket and the cavity above it

An air fryer that will not heat is usually not broken. The two most common causes are a drawer that is not quite closed and a safety cut-out that has done exactly what it was designed to do — and both look identical to a dead machine from the outside.

A safety note first: this is a mains appliance drawing over a kilowatt. Every check below is external, or made with the machine unplugged. Do not open the casing unless you are competent with mains equipment, and never defeat a safety switch.

Air fryer not heating up: which of the three is it?

Put the drawer in, set it going, and watch.

Nothing happens at all. No lights, no fan, no noise. The machine appears dead. This is almost always power or the drawer safety switch rather than a fault.

The fan runs but the food stays cold. Lights come on, you can hear it working, and after ten minutes nothing has changed. This is the heating circuit — a tripped cut-out, an element, or a control setting that was never made.

It heats, but nowhere near enough. The machine works and the food cooks, just slowly and pale. That is a different problem from this page and is covered in the guide to food that comes out soggy or pale.

Nothing happens at all

The drawer is not fully closed

Start here, because it is the most common cause by a wide margin and it is free to check.

Essentially every basket-style air fryer has a safety switch that cuts all power to the element and fan unless the drawer is pushed fully home. It is what stops the machine running while open. A drawer that is almost closed leaves the switch open, and the machine behaves exactly as though it is unplugged.

What stops a drawer seating properly:

  • Crumbs and hardened grease in the runners. The usual culprit. Pull the drawer right out and clean the channel it slides into, not just the basket.
  • The basket is not clicked into the drawer. On two-piece designs the inner basket must latch into the outer drawer before the assembly is the right length to reach the switch.
  • Overfilling. Food standing proud of the basket fouls the top of the cavity and holds the drawer a few millimetres short.
  • A warped or swollen drawer on an older machine.

Push the drawer in firmly and listen. Most models give an audible click as the switch closes, and the display wakes. If it wakes when you press harder, that is your answer.

Some displays spell it out. The Instant Vortex Dual 8L manual (UK/EU edition) says the panel shows OPEN when the basket is not fully inserted, and OFF to confirm the basket is locked into place.

It is plugged into an extension lead or a shared socket

Air fryers draw a lot of current — commonly 1,400 to 1,800 watts, comparable to a kettle. That matters more than people expect.

Many extension leads and multi-way adaptors are not rated for a sustained load like that. The result is either a lead that trips or overheats, or enough voltage drop that the appliance behaves erratically. Sharing a socket with a kettle, toaster or microwave can also trip the circuit as soon as both draw at once. If that is the actual symptom, there is a separate guide to an air fryer that keeps tripping the breaker.

Plug the air fryer directly into a wall socket, on its own, and try again. This is a safety point as much as a troubleshooting one: a warm or discoloured extension lead under this kind of load should be taken out of service rather than reused.

The plug fuse or the breaker

If the wall socket is dead, test it with something small like a phone charger. In the UK and other countries using fused plugs, the fuse in the plug itself can fail while everything else looks fine. At the consumer unit, a tripped breaker points at the circuit rather than the appliance — and if it trips again the moment the air fryer is switched on, stop and get it looked at rather than resetting repeatedly.

The fan runs but there is no heat

The temperature was never actually set

Worth ruling out first because it costs nothing. A good number of models will run the fan on the timer alone and only heat once a temperature is also selected and the start button pressed. On digital models a temperature shown on the display is not always a temperature that has been confirmed. Set both, press start, and check whether a heating indicator appears.

The thermal cut-out has tripped

This is the second big one, and it is the machine protecting itself rather than failing.

Air fryers have a thermal cut-out that kills the element if the internal temperature runs away. The usual reason is restricted airflow, and the usual reason for that is where the machine is standing. Most manufacturers specify meaningful clearance behind and above the unit — often around five inches — because the exhaust comes out of the back. Pushed against a wall, under a cabinet, or in a corner, the hot exhaust is drawn straight back in and the temperature climbs until the cut-out opens.

Unplug it, move it into open space, and leave it for half an hour or more. Many cut-outs reset once cool. If it heats normally afterwards and you have moved it somewhere with clearance, that was the whole problem. If it trips repeatedly, stop using it.

The heating element has failed

Less common than the causes above, but it does happen, and on a basket model you can usually see it without tools.

Unplug the machine, let it cool, remove the drawer and look up into the cavity. The element is the coiled metal loop above the basket. You are looking for an obvious break in the coil, a section that is blistered or discoloured very differently from the rest, or heavy carbonised residue baked onto it. A visibly broken coil is a failed element.

The thermostat or control board

If the drawer switch is fine, the machine has cooled properly, the temperature is set, and the element looks intact, the remaining candidates are the thermostat and the control electronics. Neither is a home repair on a sealed appliance, and this is the point at which the decision becomes repair or replace rather than troubleshoot.

What an error code on the display means

A code on the display is the machine telling you which fault it has detected, but not every brand uses the same set of codes. E3 is overheat protection in the COSORI and Chefman manuals below, E4 (wrong voltage) appears only in the COSORI manuals, and the Instant manual lists just E1 and E2. Check the manual for your own model before acting on a code.

Maker and manual Code What the manual says it means What the manual says to do
COSORI Lite LI211 and Pro LE L501 (US manuals) E1 Open circuit in the temperature monitor Contact Customer Support
COSORI Lite LI211 and Pro LE L501 (US manuals) E2 Short circuit in the temperature monitor Contact Customer Support
COSORI Lite LI211 and Pro LE L501 (US manuals) E3 Overheat protection has activated Turn off, unplug and let it cool completely; contact Customer Support if E3 is still showing
COSORI Lite LI211 and Pro LE L501 (US manuals) E4 Plugged into a 220–240V outlet Unplug; use only a 120V, 60Hz outlet
Chefman TurboFry Touch RJ38-4T E3 Shut off by overheat protection Let it cool fully and it will operate normally
Chefman TurboFry Touch RJ38-4T E1 or E2 A malfunction that can’t be fixed Contact Chefman Customer Support
Instant Vortex Dual 8L (UK/EU manual) E1 Open circuit Contact Customer Care
Instant Vortex Dual 8L (UK/EU manual) E2 Temperature sensor short circuit Contact Customer Care

An E3 is the thermal cut-out described above, reported on the display, so the same fix applies: unplug it, give it clearance and let it cool. For E1 and E2, all four manuals in the table send you to customer support rather than offering a home fix.

If it heats, but not enough

Worth separating, because it is a genuinely different fault and the fixes do not overlap.

A machine that reaches temperature slowly, or never seems to get properly hot, is usually suffering from restricted airflow or a dirty element rather than an electrical fault. Carbonised grease baked onto the element insulates it and cuts the heat reaching the food, which is also the mechanism behind an air fryer that smokes. Clean the element with the machine unplugged and cold, and clear the vents front and back.

If the machine genuinely is hot and the food still is not right, the problem is the food rather than the appliance — that is covered separately in why air fryer food comes out soggy or pale.

Repair or replace?

Be realistic about the arithmetic before ordering parts.

  • Check the warranty first. Heating element and thermostat failures inside the warranty period are normally covered, and it costs one email to ask.
  • Out of warranty, the economics are usually bad. An element or thermostat plus a repair callout frequently approaches or exceeds the price of a new mid-range air fryer, and sealed budget units are often not designed to be opened at all.
  • Do not attempt an element replacement on a mains appliance unless you are competent to work on one. The saving does not justify the risk.

If you are replacing it, the practical lesson from this fault is to buy something with clearance in mind and enough capacity that you are not overfilling the drawer — overfilling is what jams drawers and restricts airflow in the first place. The air fryer guide covers sizes and build, the family-size models matter if overfilling is a habit, and the budget picks are worth reading with the repairability point above in mind.

The order worth working through

  1. Nothing at all? Push the drawer firmly home and listen for the click.
  2. Still nothing? Clean the drawer runners, then plug directly into a wall socket rather than an extension lead.
  3. Fan runs, no heat? Confirm a temperature is actually set and start has been pressed.
  4. Still no heat? Unplug, move it away from the wall, and leave it half an hour for the thermal cut-out to reset.
  5. Still no heat? Unplugged and cold, look at the element for a break or blistering.
  6. Element intact? Thermostat or control board — check the warranty before spending anything.

How This Guide Was Put Together

Plainly: this is a research-based guide, not a hands-on test. I have not dismantled air fryers to compare failure modes, and nothing here is a report from my own kitchen.

What it rests on: manufacturer manuals and support documentation, which are consistent on the drawer safety switch, on rear and top clearance requirements, and on thermal protection resetting after cooling; the electrical characteristics of the appliance class, where a 1,400 to 1,800 watt sustained load explains the extension lead and shared circuit problems; and the pattern of what owners report, in which an unseated drawer and a tripped thermal cut-out account for the large majority of machines that look dead.

The error codes and the OPEN/OFF basket messages come from the COSORI Lite LI211 and Pro LE L501 manuals, the Chefman TurboFry Touch RJ38-4T manual and the Instant Vortex Dual 8L UK/EU manual, each for those models only.

Also not established: a clearance figure that applies to every machine. Manufacturers differ, and the roughly five inches quoted above is a common recommendation rather than a universal specification. Check the manual for your model.

Frequently Asked Questions

Why is my air fryer not heating up?

If nothing happens at all, the drawer is probably not fully closed — a safety switch cuts all power unless it is pushed completely home, and crumbs in the runners are usually what stops it. If the fan runs but there is no heat, either no temperature was actually set, or the thermal cut-out has tripped because the machine is standing too close to a wall.

My air fryer turns on but does not get hot. What does that mean?

The fan and the element are on separate circuits, so the machine can run while the heating circuit is dead. Check that a temperature has been selected and confirmed, then unplug the unit, move it into open space and leave it half an hour in case the thermal cut-out has tripped. If it still will not heat, inspect the element for a visible break.

How do I reset an air fryer?

There is rarely a reset button. What works is unplugging it at the wall and leaving it for at least thirty minutes, which allows the thermal cut-out to cool and reset. Move it away from the wall while it cools, since restricted exhaust is usually what tripped it.

Can I use an air fryer with an extension lead?

Best avoided. Air fryers commonly draw 1,400 to 1,800 watts, and many extension leads and multi-way adaptors are not rated for that sustained load. The result can be tripping, voltage drop or an overheating lead. Plug it directly into a wall socket, and retire any lead that has become warm or discoloured under this load.

How do I know if the heating element has failed?

With the machine unplugged and cold, take the drawer out and look up into the cavity at the coiled element above the basket. A clear break in the coil, or a section blistered and discoloured very differently from the rest, indicates a failed element. Heavy baked-on residue is worth cleaning off first, since that alone reduces heat reaching the food.

Is it worth repairing an air fryer that will not heat?

Inside the warranty period, yes — element and thermostat failures are normally covered. Outside it, parts plus labour often approach the price of a new mid-range machine, and budget units are frequently sealed and not designed to be opened. Do not attempt an element replacement on a mains appliance unless you are competent to do so.

Why does my air fryer keep cutting out mid-cook?

That is the thermal cut-out doing its job, and it almost always means restricted airflow. The exhaust comes out of the back, so a machine pushed against a wall or tucked under a cabinet recirculates its own hot air until it overheats. Give it clear space behind and above, and check the vents are not blocked with grease. The COSORI and Chefman manuals call an E3 code overheat protection: let it cool fully.

What does E1 or E2 mean on an air fryer?

The COSORI LI211 and L501 manuals give E1 as an open circuit and E2 as a short circuit in the temperature monitor. Instant’s Vortex Dual 8L manual gives the same two faults. Chefman’s TurboFry Touch manual calls either one a malfunction that can’t be fixed. Each says contact support.

More air fryer troubleshooting

If it heats but the food is disappointing, see why air fryer food comes out soggy or pale. If it smokes, there is a guide to why an air fryer smokes, and if the basket surface is deteriorating, one on a basket coating that flakes.
Filed Under: Helpful Kitchen Tips

Coffee Grinder Not Grinding Properly? Three Different Faults

Last Updated October 28, 2026

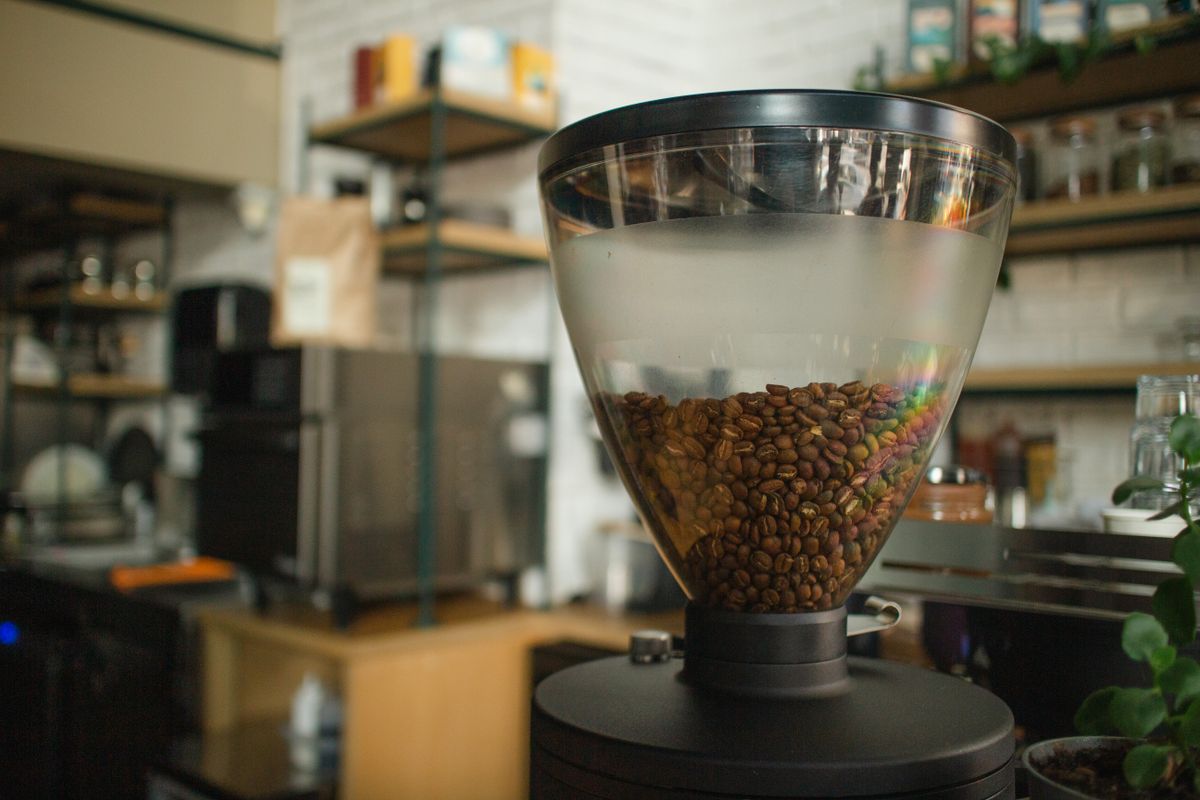
Burr coffee grinder with roasted beans sitting in the conical hopper above the throat

“Not grinding properly” covers three unrelated faults, and they have almost nothing in common. Before changing settings or ordering parts, work out which one you are looking at — it takes one grind to find out.

Which of the three is it?

Run the grinder with beans in it and watch what happens.

The motor runs but little or nothing comes out. You can hear it working, and the output is a dribble of grounds or none at all. This is a feeding or blockage problem. It is the most common of the three and usually the easiest to fix.

Grounds come out, but they are wrong. Uneven, too coarse however you set it, full of dust and boulders together, or simply not what the same setting used to give you. This is about the burrs, the adjustment, or the type of grinder you own.

The motor does not run at all. Nothing happens, or it hums without turning. This is usually a safety interlock rather than a dead machine, and it is worth checking before assuming the worst.

Motor runs, nothing comes out

The beans are bridging in the hopper

This is the single most common cause, and from the outside it looks exactly like a broken grinder: full hopper, running motor, no coffee.

Beans form an arch over the throat of the hopper and hold each other up, so nothing drops into the burrs. Oily dark roasts do it far more than lighter ones, because the surface oil makes the beans stick to one another and to the hopper walls. A nearly empty hopper does it too, since there is less weight pressing down.

To confirm it: stop the grinder and give the hopper a firm tap on the side, or stir the beans with a wooden spoon handle. If coffee immediately starts coming through, that was your fault — there is nothing else wrong with the machine.

Longer term: keep the hopper reasonably full, avoid very oily beans if your grinder is prone to it, and wipe the inside of the hopper occasionally with a dry cloth, because oil residue on the walls makes bridging worse over time.

The chute is packed with old grounds

Every grinder retains some ground coffee inside the exit chute. Over weeks that retained coffee absorbs moisture from the air, and the oil in it goes tacky. Eventually it packs into a plug that new grounds cannot push past. You get a trickle rather than a dose, and often a burst of stale grounds when it finally clears.

Unplug the machine, take off the hopper, and work through the chute with a stiff brush — a dedicated grinder brush, a clean paintbrush, or a toothbrush. A chopstick or the handle of a wooden spoon shifts a solid plug. Do not use anything metal that could reach the burrs.

Something is jammed in the burrs

Coffee occasionally arrives with a small stone or a piece of packaging in it, and it will stop a grinder dead or make it grind unevenly with a horrible noise. If the machine sounds different — grating, rattling, straining — unplug it, remove the hopper and the upper burr, and look.

This is also the moment to stop using the grinder rather than persist. Running a motor against a jam is how a working grinder becomes a broken one.

It grinds, but the grounds are wrong

First: is it actually a blade grinder?

Worth ruling out before anything else, because it is not a fault at all.

A blade grinder has a spinning blade like a small propeller and chops beans by hitting them. It does not have an adjustable grind size — you control it only by how long you run it. It cannot produce a consistent, uniform grind, and it can never produce a proper espresso grind. Some particles are dust and some are still chunks, no matter how long you run it.

If your grinder chops rather than mills, and you are trying to get an even grind for espresso or pour over, the machine is doing everything it is capable of. That is a hardware limit, and the espresso grinder guide covers what a burr grinder actually changes and at what price.

The burrs were not reseated properly after cleaning

If the problem appeared right after you cleaned the grinder, this is almost certainly it, and it catches a lot of people.

Upper burrs on most home grinders locate on tabs or lugs and then twist to lock. It is entirely possible to seat one almost correctly — it sits down, the hopper goes back on, and everything looks fine, but the burr gap is now wrong or uneven. The result is a grind that is far too coarse, or wildly inconsistent, at a setting that used to be right.

Take the burr back out and reseat it deliberately, checking it sits flat and turns to its stop. On many grinders you also need the hopper fitted and locked before the adjustment collar engages at all.

The grind adjustment is not doing what you think

Stepped grinders only change setting while the burrs are turning on some models — adjusting a stationary grinder does nothing, or forces the mechanism. Stepless collars can drift as the machine vibrates. And if the grinder has been apart, the numbers on the dial no longer correspond to what they did before, because the reference point moved.

Rather than chasing the numbers, reset from scratch: with no beans in the burrs, close the adjustment until the burrs just touch and the machine chirps, then back off gradually and re-dial from there.

The burrs are coated in stale oil

Coffee oil builds up on the burr faces and in the grooves between the teeth. A coated burr cuts less cleanly, producing more fines and a duller, muddier grind. It is gradual, so people adapt to it without noticing and then conclude the grinder is worn out.

Use grinder cleaning tablets and follow with a run of the beans you actually use, to clear the tablet residue. Do not use rice. It is widely recommended and several manufacturers explicitly warn against it — rice is much harder than coffee and can damage burrs or strain the motor. And never wash burrs in water: steel burrs rust, and a rusted burr is finished.

The full cleaning routine, with what each maker says, is in how to clean a coffee grinder.

Are the burrs actually worn out?

This is the question people jump to first and it is usually the wrong one, so it is deliberately last.

Burrs are consumables and they do wear. But a home grinder making a few coffees a day passes very little coffee through in a year compared with a cafe machine running kilos a day, and most domestic grinders are cleaned out and sold on long before their burrs are genuinely finished. When someone says their grinder “stopped grinding properly”, stale oil, a bad reseat or bridging beans are far more likely explanations.

The signs that point to real wear, rather than one of the above:

  • You have had to move steadily finer over months to get the same result — the gap needed to produce a given particle size grows as the cutting edges round off.
  • More dust and more boulders at the same time. Worn burrs stop cutting cleanly and start crushing, which widens the spread of particle sizes at every setting.
  • It takes noticeably longer to grind the same dose than it used to.
  • The problem survives a proper clean and a careful reseat. That is the test that separates wear from the far more common causes.

You can also look: remove the upper burr and inspect the cutting edges against a bright light. Sharp burrs have crisp edges and defined corners on the teeth. Worn ones look rounded and polished, and may be visibly shiny where they should be matt.

If the burrs are genuinely worn, replacement burrs are available for most mid-range and better grinders and are usually far cheaper than a new machine. On inexpensive grinders the parts either do not exist or cost more than the grinder did, which is one of the practical differences between price tiers — the espresso grinder guide notes which machines are built to be maintained.

The motor does not run at all

Check these in order before concluding anything is broken.

  1. The hopper is not locked into position. Most grinders have a safety interlock that will not let the motor start unless the hopper is fitted and twisted fully to its stop. A hopper that is on but not locked is the most common cause of a completely dead grinder.
  2. The lid or grounds bin is not seated. Some models interlock on those too.
  3. It has overheated and cut out. Grinders have thermal protection that stops the motor after prolonged use or a jam, and it resets only once the motor has cooled. Give it thirty minutes and try again before doing anything else.
  4. It is jammed. A motor that hums but does not turn is being physically blocked. Unplug it and clear the burrs.
  5. Then the boring possibilities: the socket, the plug fuse, and the cable.

The order worth working through

  1. Motor runs, nothing out? Tap the hopper. If coffee flows, it was bridging.
  2. Still nothing? Unplug and brush out the chute.
  3. Grounds wrong? Did it start right after cleaning? Reseat the burrs properly.
  4. Still wrong? Run cleaning tablets, then re-dial the grind from the point where the burrs just touch.
  5. Still wrong after a clean and a careful reseat? Now consider worn burrs, and inspect the edges.
  6. Motor dead? Lock the hopper down, then let it cool for half an hour.

How This Guide Was Put Together

Plainly: this is a research-based guide, not a hands-on test. I have not stripped down a set of grinders to compare burr wear, and nothing here is a report from my own kitchen.

What it rests on: the mechanics of burr grinding, which explain why a coated or rounded burr widens particle distribution rather than simply grinding coarser, and why a blade grinder cannot produce a uniform grind at all; manufacturer instructions for hopper interlocks, thermal cutouts, burr removal and cleaning, including the warnings against rice as a cleaning medium; and the pattern of what owners report, where bridging, retained grounds and a mis-seated burr after cleaning dominate the reported causes by a wide margin.

Also not established: a figure in kilograms for how long burrs last. Published numbers vary enormously between sources and burr materials, they are drawn largely from commercial use, and applying a cafe figure to a domestic grinder would be misleading. The wear signs above are described qualitatively for that reason.

Frequently Asked Questions

Why is my coffee grinder not grinding?

If the motor runs but nothing comes out, the beans are almost certainly bridging over the hopper throat, or the exit chute is packed with old grounds. Tap the side of the hopper: if coffee starts flowing immediately, that was the whole problem. If the motor does not run at all, check the hopper is twisted fully into its locked position, because most grinders will not start otherwise.

How do I know if my coffee grinder burrs are worn out?

The reliable test is whether the problem survives a proper clean and a careful reseat of the burrs. Genuine wear shows as needing a steadily finer setting over months for the same result, more dust and more large pieces at the same time, and longer grinding for the same dose. Removing the upper burr and looking at the teeth under bright light also helps: sharp burrs have crisp edges, worn ones look rounded and polished.

Why is my grinder producing an uneven grind?

If it started right after cleaning, the upper burr is probably not seated correctly, which changes the burr gap without looking wrong. Otherwise it is usually oil build-up on the burr faces, which stops them cutting cleanly. If you have a blade grinder rather than a burr grinder, an uneven grind is not a fault at all — chopping cannot produce uniform particles.

Can I use rice to clean a coffee grinder?

Better not to. It is a widely repeated tip and several manufacturers specifically warn against it, because rice is considerably harder than coffee and can damage burrs or overload the motor. Use purpose-made grinder cleaning tablets instead, and never wash burrs in water, since steel burrs rust. The full cleaning routine, with what each maker says, is in how to clean a coffee grinder.

Why did my grinder stop working after I cleaned it?

Two likely reasons. Either the upper burr has not gone back on correctly, which gives a very coarse or inconsistent grind, or the hopper is not locked fully into place, which leaves the safety interlock open so the motor will not start. Both are quick to correct.

My grinder hums but does not turn. What is wrong?

Something is physically blocking the burrs, or the motor has thermally cut out. Unplug it, remove the hopper and upper burr, and check for a stone or a jammed bean fragment. If it is clear, let the machine cool for half an hour before trying again. Do not keep running it against a jam.

Is it worth replacing the burrs or should I buy a new grinder?

Replacement burrs are available for most mid-range and better grinders and usually cost far less than a new machine, so they are worth fitting. On cheap grinders the parts often do not exist, or cost more than the grinder is worth, which effectively makes those machines disposable.

More espresso troubleshooting

If the shot is the problem rather than the grind, see what to check when an espresso machine is not building pressure, or the guide to a steam wand that will not froth milk.

Filed Under: Helpful Kitchen Tips

Warped Pan Not Sitting Flat? Whether It Matters Depends on Your Hob

Last Updated October 20, 2026

Frying pan resting on a black glass induction cooktop, where a flat base matters most

A pan that rocks, spins or lets oil run to one side has warped. Most advice jumps straight to whether you can hammer it flat. The more useful question comes first, and the answer depends entirely on what you cook on.

Does it actually matter? That depends on your hob

The same warp is a non-event on one cooker and a real problem on another, which is why people get such contradictory advice.

Gas: it matters least. A flame wraps around the base and heats it whether or not the pan is perfectly flat. A pan that rocks is annoying to stir in, and oil will pool on one side, but the heating itself is largely unaffected. A mild warp on a gas hob is something you can live with more or less indefinitely.

Electric radiant and ceramic or glass tops: it matters most. These heat by direct contact. Where the base lifts away from the surface, there is an air gap, and air is an excellent insulator.

The result is slow heating, obvious hot and cold zones, and often a pan that spins when you stir. This is the setup where a warped pan genuinely stops working.

Induction: it matters, differently. Induction couples a magnetic field into the base, and that coupling weakens as the base lifts away. A moderately warped pan heats less efficiently and unevenly, and a badly warped one may buzz, rattle or fail to be detected at all. A domed base also lets the pan rotate on a smooth glass surface.

So before deciding what to do about it, decide whether it is actually costing you anything.

Which way has it gone?

Two different shapes get called warping, and they behave differently.

Convex, or domed. The centre of the base bulges downward. The pan rocks or spins on a flat surface, and oil runs away from the middle towards the rim. This is the more common form on thin pans.

Concave, or dished. The centre is pulled upward, so the pan sits flat on its rim but the middle does not touch. Oil pools in a ring rather than spreading, and on a glass top the middle heats poorly. This is more common on disc-base pans where the bonded disc has moved relative to the body.

How to check: put the pan on a genuinely flat surface such as a worktop or a glass chopping board and press one edge, then the opposite one. Rocking means convex. If it sits still, lay a ruler or any straight edge across the inside of the base and look for daylight under the middle — that is concave. A teaspoon of oil and a level surface tells you the same thing faster: watch which way it runs.

Can it be flattened again?

Usually not, and this is where most of the advice on the subject is more optimistic than it should be.

Warping is not the pan being bent out of position. It is plastic deformation: the metal was heated unevenly, one region expanded more than the region around it, and the stress exceeded the point at which the metal could spring back. The base is now a slightly different shape than it was made. Reversing that means deforming it again, in exactly the right places, by exactly the right amount.

Non-stick and coated pans: no

Do not attempt it. Any force sufficient to move the metal will craze, crack or delaminate the coating, and you will convert a slightly annoying pan into one that sheds its surface. That failure is covered in the guide to coatings that flake off, and it is not worth causing deliberately.

Thin stainless and clad pans: almost certainly not

The popular method — upside down on a hard surface, a block of wood over the bulge, a few taps with a mallet — occasionally works on a genuinely thick base. On thin or multi-ply construction it usually moves the problem rather than removing it, creating a new high spot next to the old one, and it can separate a bonded disc from the pan body. Clad pans in particular are layers of different metals joined under heat and pressure; hammering them is not a repair operation.

Cast iron and thick carbon steel: sometimes, carefully

Thick single-metal pans are the realistic candidates, because there is enough material to move without buckling and no coating or bonded layer to ruin. Even then it wants a proper flat anvil surface, a dead-blow or rubber mallet, work from the outside of the bulge inward, and frequent checking with a straight edge. Cast iron is brittle and can crack rather than bend, which ends the pan immediately.

The honest summary: if the pan is cheap, replace it. If it is expensive, it probably has a warranty worth using before anyone reaches for a mallet.

What about the warranty?

Worth checking first, and more often successful than people expect. Several cookware manufacturers treat warping within the warranty period as a manufacturing defect rather than misuse, particularly on pans sold as suitable for induction or flat tops. It is one email, and it costs nothing to ask.

Why it happened

Thermal shock, which is nearly always the cause

Taking a hot pan off the heat and running it under a cold tap, or setting it on a wet surface, or adding cold liquid to a very hot empty pan. The surface in contact with the cold contracts fast while the rest of the metal is still expanded, and the stress between them does the damage in a fraction of a second.

This single habit accounts for most warped pans. Let a pan cool before it meets water, and soak it afterwards if something is stuck.

Preheating empty, especially on high

An empty pan has nothing to absorb the heat, so the base races upward in temperature while the sides lag. Food or liquid in the pan buffers this. Thin pans are much more vulnerable, and non-stick should never be preheated empty at high heat for the separate reason that the coating degrades.

A burner much smaller than the pan

A small gas ring or a small radiant element under a large pan creates a hot disc in the middle and a comparatively cool rim. That difference is exactly the condition that warps a base, and it is a slow, cumulative version of thermal shock. Match pan size to burner size where you can — the gas stove cookware guide covers why burner-to-base matching matters more than most people assume.

The pan was thin to begin with

Warping resistance comes almost entirely from base thickness and construction. A thin single-ply pan will warp eventually under normal use; a thick disc base or fully clad base distributes heat well enough that the stress never concentrates. This is the one factor you buy rather than manage.

Choosing one that will not do it again

If you are replacing the pan, the specification that matters is not the brand or the coating — it is the base.

  • Thickness first. A heavy base resists warping and heats evenly. Pick the pan up: weight in the base is the single best proxy available in a shop.
  • Fully clad or a thick bonded disc, rather than a thin sheet with a disc spot-welded on. Delamination of a cheap disc shows up as the concave form described above.
  • Flatness matters more on flat tops. If you cook on glass, ceramic or induction, this is the specification to prioritise, because it is the setup where a warp actually costs you performance. The frying pan guide for electric and flat top stoves is built around exactly that requirement, and the cookware set guide notes base construction across full sets.
  • Cast iron does not warp in normal use because it is thick, though it can crack under genuine thermal shock. If flatness on a glass top is the priority, it is worth considering — see the cast iron skillet picks.

The order worth working through

  1. Work out whether it matters. Gas: mostly cosmetic. Glass, ceramic or induction: it is costing you real performance.
  2. Check which way it has gone — rock it, or lay a straight edge across the base.
  3. Check the warranty before doing anything else.
  4. Coated pan? Do not attempt to flatten it. Replace it.
  5. Thick cast iron or carbon steel? Flattening is possible but risky, and cast iron can crack.
  6. Whatever happens next: stop putting hot pans under cold water. That is what did it.

How This Guide Was Put Together

Plainly: this is a research-based guide, not a hands-on test. I have not warped pans deliberately to compare outcomes, and nothing here is a report from my own kitchen.

What it rests on: the mechanics of thermal expansion and plastic deformation, which explain both why sudden cooling warps a base and why the deformation is not simply reversible; the difference in how gas, radiant and induction hobs deliver heat, which is why the same warp has such different consequences on different cookers; and manufacturer care instructions, which are consistent in warning against cold water on hot pans and against preheating empty.

Also not established: a base thickness in millimetres above which warping stops being a risk. Manufacturers rarely publish base thickness, the figure interacts with construction and hob type, and any number would be invented.

Frequently Asked Questions

Why does my pan not sit flat?

The base has warped, almost always from thermal shock — a hot pan meeting cold water, or being preheated empty, or a burner much smaller than the base. The metal expanded unevenly and deformed past the point where it could spring back, so the base is now a slightly different shape than when it was made.

Is it safe to use a warped pan?

Yes, provided the pan is otherwise sound and the coating, if it has one, is intact. Warping is a performance and stability problem rather than a safety one. The genuine risk is a pan that rocks badly enough to tip on a hob, which is a reason to stop using it for anything heavy or liquid.

How do I make a warped pan flat again?

In most cases you cannot. Coated pans should never be hammered, because the force required will wreck the coating. Thin or clad pans usually end up worse, with a new high spot beside the old one.

Thick cast iron or carbon steel can sometimes be worked flat on a hard surface with a rubber mallet, but cast iron can crack instead of bending. Check the warranty first.

Does a warped pan matter on a gas hob?

Much less than on other cookers. A flame heats the base whether or not it is perfectly flat, so the main annoyances are oil running to one side and the pan rocking while you stir. On glass, ceramic or induction, where heat depends on contact or magnetic coupling, the same warp causes slow and uneven heating.

Why does my pan spin on an induction hob?

The base is domed, so it touches the glass at one point in the middle and pivots on it. Beyond being irritating, it means the base is not sitting flush, which reduces how efficiently the hob couples into the pan and can cause buzzing or a failure to detect the pan at all.

What causes a pan to warp in the first place?

Rapid, uneven temperature change. Running a hot pan under a cold tap is the most common cause by a wide margin. Preheating an empty pan on high, and using a burner much smaller than the pan base, do the same thing more gradually. Thin bases warp far more readily than thick ones.

Do expensive pans warp?

Less often, but not never. Resistance comes from base thickness and construction rather than price as such, so a heavy fully clad pan resists warping while a thin one from the same brand may not. No pan is immune to a hot base meeting cold water.

More cookware guides

For other marks and damage on bare steel, see white spots on a stainless steel pan. If the pan is coated and food has started sticking, there is a guide to a non-stick pan that will not release food.

Baking sheets warp for similar reasons; my best non-toxic baking sheets guide covers what makers and owners say about warping on half sheet pans.

Filed Under: Helpful Kitchen Tips

White Spots on a Stainless Steel Pan? One Test Tells You

Last Updated October 28, 2026

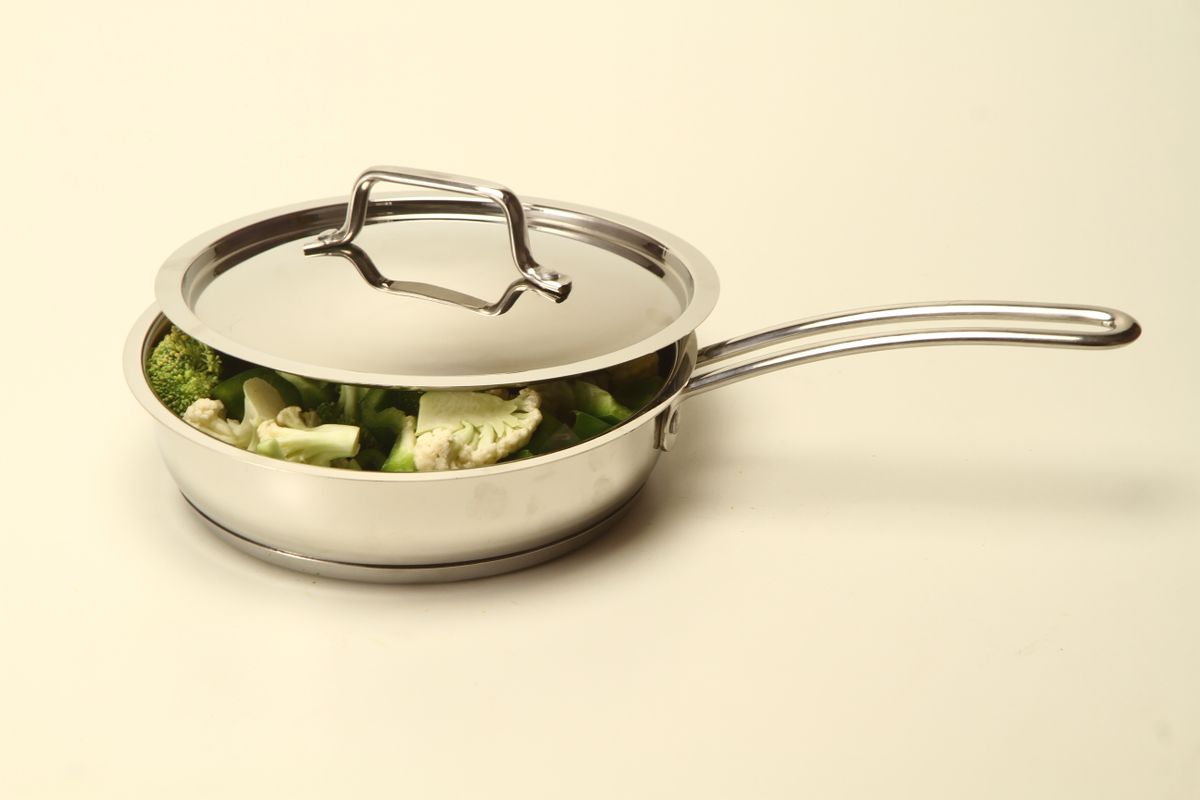
Bare stainless steel pan with a lid and vegetables, showing the bright uncoated cooking surface

Almost every answer to this says the same thing: they are calcium deposits, simmer some vinegar, done. That is right about half the time. The other half is not a deposit at all — it is damage to the metal, it does not come off, and it is caused by a habit worth breaking.

The test that tells you which you have

Put enough white vinegar in the pan to cover the spots, warm it gently for a few minutes, then wash and dry.

The spots are gone. They were mineral deposits. Entirely cosmetic, and the pan is fine.

The spots are still there. Now run a fingernail over one. If you can feel it — a very slight roughness, or a catch, where the surrounding steel is smooth — that is pitting. It is metal loss, it is permanent, and no cleaning product will bring it back.

Those two results have almost nothing in common except their colour, which is why the standard advice frustrates so many people.

If they wipe off: mineral deposits

Hard water carries dissolved calcium and magnesium. When water evaporates or boils away, the minerals do not go with it — they are left behind on the metal as chalky white spots or a cloudy film. This is the same substance as the limescale in a kettle.

Boiling water in the pan is the usual culprit, especially boiling it dry or nearly dry, and it shows up worst in hard water areas. Boiling dry also risks warping the base out of true, which is a more expensive problem than a white mark. It is not a sign of a cheap pan or of anything you did wrong.

Removing it

  1. Cover the affected area with white vinegar, or a one-to-one mix of vinegar and water.
  2. Warm it gently — not a rolling boil — for five to ten minutes. The acid dissolves the carbonate.
  3. Tip it out, wash with hot soapy water, rinse and dry immediately.

For a stubborn film, a paste of bicarbonate of soda and water rubbed with a soft cloth after the vinegar step will finish it. The same vinegar treatment clears water spots on stainless cutlery, which Flatware Finesse covers in its guide to cleaning silverware. Bar Keepers Friend, which is oxalic acid based, also works well on stainless and is worth having — but keep it away from coated pans, where abrasive cleansers cause the damage described in the guide to a non-stick pan that has started sticking.

Preventing it

Dry the pan rather than leaving it to drip. Do not let water boil away to nothing. In a very hard water area, filtered water for boiling makes a visible difference.

If they do not wipe off: pitting

This is the part the standard answer misses, and it has a specific and avoidable cause.

What is actually happening

Stainless steel does not resist corrosion because it is inert. It resists corrosion because chromium in the alloy reacts with oxygen to form an ultra-thin, invisible, self-repairing oxide layer over the surface. That passive layer is the whole reason stainless is stainless.

Chloride ions attack that layer. Where the layer is breached and cannot immediately re-form, corrosion eats into the steel at that one point — a pit. Pits are small, often shallow, and appear as dull white or grey specks that will not polish out, because there is less metal there than there used to be.

The cause: when you add the salt

Salt is sodium chloride, and the way most people salt a pan of water is close to the worst case.

Add salt to cold or still-heating water and it sinks. Undissolved grains sit on the base of the pan in direct contact with the steel, and in that tiny area the chloride concentration is enormously higher than in the water above. It sits there, undisturbed, while the pan heats. That is precisely the condition that breaks down the passive layer.

The fix costs nothing: bring the water to a boil first, then add the salt, then stir. In moving, already-boiling water the salt dissolves in seconds and never rests on the metal. This is why cookware manufacturers put it in their care instructions, and it is the single most useful thing on this page.

Other chloride sources worth knowing about

  • Leaving salty or acidic food standing in the pan. Tomato sauce, brine, stock, anything with soy sauce — decant it rather than storing it in the pan overnight.
  • Bleach and any chlorine-based cleaner. These are chloride sources by definition and should never be used on stainless cookware. This includes soaking in water with a splash of bleach to freshen it.
  • Dishwasher detergent left sitting on a damp pan at the end of a cycle, particularly on the base.

Can it be fixed?

Not really, and it is worth being clear rather than hopeful about it. The pits are missing metal. Polishing removes surrounding material to bring the surface level with the bottom of the pits, which on cookware means removing a meaningful amount of steel for a cosmetic gain.

It is very rarely more than cosmetic. Pitting does not make a pan unsafe or unusable, and a lightly pitted pan cooks exactly as it did before. It may stick slightly more in the affected spots, and if the pitting is severe and widespread the pan is nearing the end of a long life rather than suddenly ruined.

The other marks people call spots

Several different things get described as spots or stains, and they have different causes and different fixes.

Rainbow or oil-slick colours

Blue, purple, gold and green iridescence, usually appearing after the pan has been heated empty or run hot. This is heat tint: the passive oxide layer has thickened slightly, and the colours are an optical effect of light interfering within that film rather than anything deposited on it.

It is completely harmless and does not affect cooking. Vinegar or Bar Keepers Friend removes it if it bothers you. It tends to return, because the cause is simply using the pan hot.

A cloudy, chalky white film across the whole base

Usually starch, from boiling pasta, rice or potatoes, sometimes combined with mineral deposits. Vinegar handles the mineral part; a soak in hot soapy water and a nylon scourer handles the starch.

If the whole interior looks uniformly dull and slightly frosted rather than spotted, and it has been through a dishwasher many times, that is detergent etching. It is a very fine surface roughening and cannot be reversed, though it is purely cosmetic.

Blue or grey hazing

Overheating, usually from preheating empty for too long. Cosmetic, and the same acid cleaners lift most of it.

Brown or golden-brown patches that feel slightly sticky

Not a stain but polymerised oil — cooking oil that has cross-linked into a hard varnish on the surface. On stainless this is harmless and comes off with a hot soak and Bar Keepers Friend. On coated cookware the same substance is the cause of a non-stick pan that will not release food, and on cast iron the very same reaction is what you are deliberately creating when you season a pan. Same chemistry, three completely different verdicts depending on the metal. The makers’ own steps for the hot soak on stainless, and where they disagree on scrubbers and timing, are in how to clean a burnt stainless steel pan.

Does a better pan resist this?

Partly, and it is worth knowing which parts money actually buys.

It does not make the pan immune to pitting. Every stainless steel used in cookware depends on the same chromium oxide layer, and chloride attacks all of them. An expensive pan salted in cold water will pit just as a cheap one does. The habit matters more than the price.

The alloy grade does shift the odds. Most cookware is 304, usually marked 18/10 or 18/8. Some higher-end and commercial pieces use 316, which contains molybdenum and is meaningfully more resistant to chloride pitting — it is the grade specified for marine and food-processing equipment for exactly that reason. It is not common in domestic cookware, and it is not worth hunting down solely to avoid salt marks.

Construction changes how often you boil it dry. A thin, single-ply pan with a hot spot over the burner runs dry in one place long before the rest, which is where mineral deposits concentrate and where overheating hazing starts. A thick disc base or fully clad construction heats evenly and forgives inattention. That is a genuine, everyday difference rather than a marketing point — the cookware set guide and the frying pan picks both note base construction, and the gas stove guide covers it for burners that concentrate heat in a ring.

So: buy for even heating and buy for the size you need, and salt the water after it boils. The second one is free and prevents more damage than the first.

The order worth working through

  1. Warm some vinegar in the pan for a few minutes, then wash and dry.
  2. Gone? Mineral deposits. Harmless. Dry the pan properly and stop boiling it dry.
  3. Still there, and you can feel them? Pitting. Permanent, cosmetic, and caused by chloride.
  4. Change one habit: salt the water after it boils, not before, and stir it in.
  5. Rainbow colours instead of white? Heat tint. Harmless, and vinegar removes it.
  6. Never use bleach or any chlorine cleaner on stainless, and do not store salty or acidic food in the pan.

How This Guide Was Put Together

Plainly: this is a research-based guide, not a hands-on test. I have not deliberately pitted a set of pans to compare outcomes, and nothing here is a report from my own kitchen.

What it rests on: the metallurgy of stainless steel, which is well established and not in dispute — corrosion resistance comes from a self-repairing chromium oxide layer, and chloride ions are the classic agent that breaks it down locally to produce pitting; the care instructions published by stainless cookware manufacturers, which is where the add-salt-after-boiling guidance comes from and why they bother to print it; and the chemistry of carbonate scale, which is why an acid dissolves mineral deposits and does nothing at all for pits.

What I could not establish: how often the permanent case occurs relative to the cosmetic one. Wirecutter’s guide to cleaning stainless steel pans does not mention pitting, corrosion or salt at all — the permanent case is not covered there.

What I could not establish: a water-hardness threshold above which deposits become likely. It varies with local supply and with how the pan is used, and any number would be invented.

Frequently Asked Questions

What are the white dots on my stainless steel pan?

Either mineral deposits left by hard water, or pits corroded into the metal by chloride. Warm some white vinegar in the pan for a few minutes: deposits dissolve and disappear, pits do not. If the spots remain and you can feel a slight roughness with a fingernail, they are pits.

How do I get white spots out of a stainless steel pan?

If they are mineral deposits, cover them with white vinegar, warm gently for five to ten minutes, then wash and dry immediately. A bicarbonate of soda paste or Bar Keepers Friend finishes off anything stubborn. If they are pits, they cannot be removed, because the metal is missing rather than covered.

Why does my stainless steel pan have white spots after boiling water?

Hard water. Calcium and magnesium stay behind on the metal when the water evaporates, exactly as limescale builds up in a kettle. It is worse if the pan is boiled dry or left to air dry. It is cosmetic and vinegar removes it.

Does salt damage stainless steel pans?

Salt added to water that is not yet boiling can. Undissolved grains sink and sit against the base, where the local chloride concentration attacks the pan’s protective oxide layer and etches small permanent pits. Bring the water to a boil first, then add salt and stir, and it dissolves before it can settle.

Is a pitted pan safe to use?

Yes. Pitting is a cosmetic and structural surface issue rather than a safety one, and a lightly pitted pan cooks the same as it always did. Food may stick slightly more in the pitted areas. Only very severe, widespread pitting is a reason to replace a pan.

What are the rainbow colours on my stainless pan?

Heat tint — a slightly thickened oxide layer producing an optical interference effect, usually after the pan has been run hot or heated empty. It is harmless, does not affect cooking, and comes off with vinegar or Bar Keepers Friend, though it will come back with use.

Can I use bleach to clean a stainless steel pan?

No. Bleach is chlorine based, and chloride is the specific thing that breaks down the protective layer on stainless steel and causes pitting. Soaking a pan in dilute bleach to freshen it is a reliable way to damage it permanently.

More cookware guides

For which utensils are safe on this material, see using metal utensils on stainless steel. If it is a coated pan rather than bare stainless, there is a separate guide to a non-stick pan that has started sticking.

Filed Under: Helpful Kitchen Tips

Knife Still Dull After Sharpening? It Is the Burr

Last Updated October 19, 2026

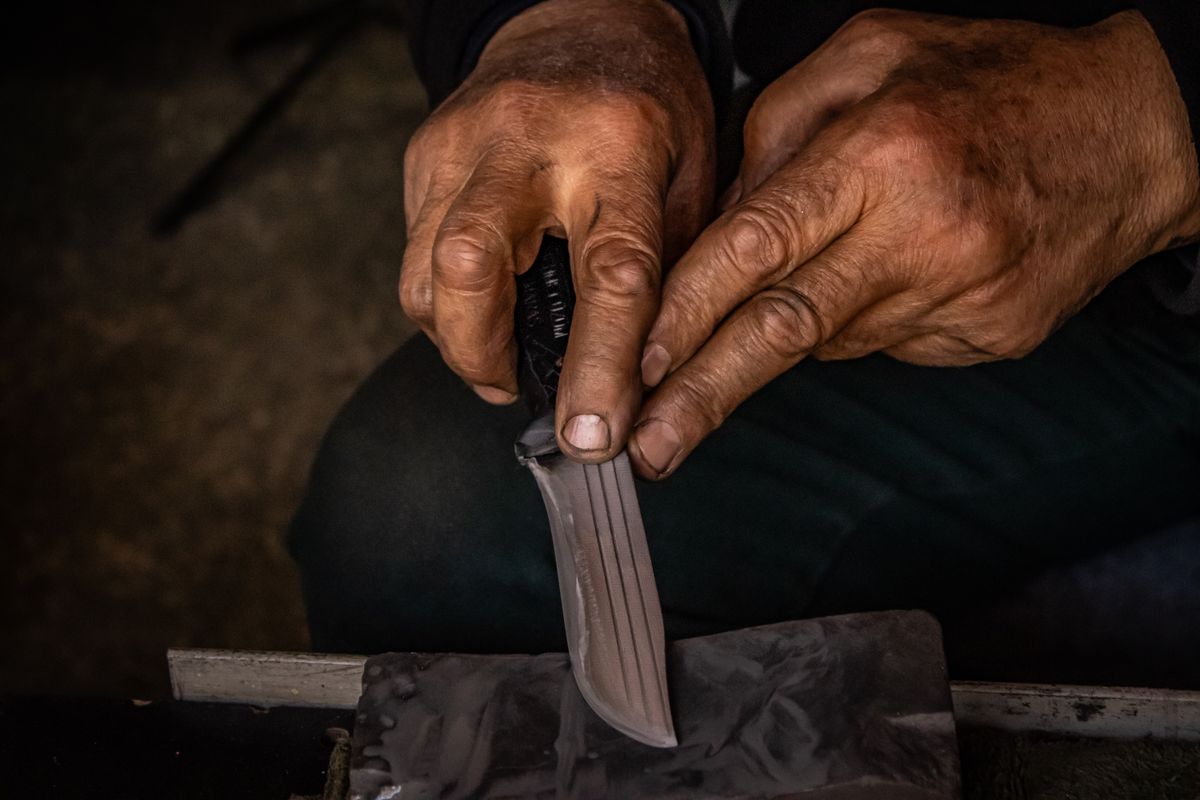
Close-up of hands drawing a knife blade across a sharpening stone

Spending twenty minutes on a stone and ending up with a knife that still will not cut a tomato is one of the most common experiences in home knife sharpening. It is almost never a lack of effort, and it is usually one of two specific things.

Which one is it: never sharp, or sharp for one cut?

Answer this before changing anything, because the two failures have opposite fixes.

It never felt sharp, not even straight off the stone. You finished, tested it, and it was much as it started. This means the edge was never actually reached — you were grinding metal, but not the metal that does the cutting.

It felt genuinely sharp, then went dull almost immediately. It caught on your thumbnail, maybe sliced paper once, and after a few cuts it was blunt again. This is the opposite problem: you did reach the edge, and then left something on it that fell off.

Both come down to one thing that most sharpening advice mentions in passing and never explains properly.

The burr is the whole game

A knife edge is two bevels meeting at a line. That line — the apex — is what cuts. It is a few microns across, far too small to see.

When you grind one side of the blade, you remove metal until you reach the apex. At that moment the metal has nowhere left to go, so it folds over to the far side as a tiny, ragged lip of steel. That lip is the burr, sometimes called a wire edge.

The burr is not a defect. It is the only reliable proof that you have actually reached the apex along the whole length of the blade. Sharpening is essentially: raise a burr on one side, raise it back the other way, then remove it cleanly.

Miss either half of that and you get exactly the two failures above.

Failure one: you never raised a burr

If the knife never felt sharp, this is almost certainly what happened. You ground away at the bevel, possibly for a long time, but never quite reached the apex — so the actual cutting edge is the same rounded, dull edge you started with, now sitting on a beautifully polished bevel.

How to check for a burr

Do not run a finger along the edge. Move your fingertip off the edge, perpendicular to it, from the spine towards the cutting edge and past it. A burr feels like a faint catch or roughness as your finger leaves the blade — on the side opposite the one you have been grinding.

Check along the entire length: heel, middle and tip. A burr near the middle but not at the tip means the tip is still dull, and it will feel dull, because you test on the part that never got sharpened.

Why it usually happens

  • The angle is too high, or inconsistent. Lifting the spine mid-stroke rounds the apex instead of forming it. Consistency matters more than the exact number.
  • The stone is too fine for the job. A very dull knife on a 3000-grit stone will take hours. Fine stones refine an edge; they do not create one. Start coarse — around 400 to 1000 grit — until a burr forms along the full length, and only then move up.
  • Not enough passes, spread too evenly. People alternate sides every few strokes from the start. Work one side until the burr appears along the whole edge, then do the other. Alternating early means neither side ever gets there.

The procedure itself, in order, is covered in the guide to sharpening a chef’s knife on a whetstone. This page is about why the procedure did not work.

Failure two: you raised a burr and left it on

This is the more frustrating one, because the knife genuinely is sharp when you finish testing it — and then it is not.

A burr is a thin flag of steel hanging off the apex. It catches on a thumbnail and will slice paper, which is why it passes your test. But it is barely attached. The first time it meets a carrot or a chopping board it folds over or tears away, and what is left behind is a torn, uneven edge that is often worse than before you started.

The tell is unmistakable: sharp for one or two cuts, then noticeably dull. If that is your pattern, you are not failing to sharpen. You are failing to finish.

Removing the burr properly

  1. Alternate sides with progressively lighter strokes. On your finishing stone, do five passes each side, then three, then one, using barely any downward pressure — the weight of the blade is close to enough. Each alternation flips the burr back and weakens it at the root.
  2. Strop it. Draw the blade spine-first (edge trailing, away from the direction of travel) across leather, denim, cardboard, or the back of an old belt, ten or so passes a side. This aligns and removes what is left without cutting a new edge.
  3. Check. Repeat the perpendicular fingertip test. It should now feel clean and crisp with no catch on either side.

What not to do: scrape the burr off against a hard edge, or drag the knife through a chopping board. That tears it away and takes part of the apex with it, which is how people end up worse off than when they started.

You may also be testing it wrong

Two tests mislead people constantly.

Running a thumb along the edge tells you a burr is present, not that the knife is sharp. A properly finished edge with the burr removed can feel less grabby than a burred one. If your knife felt sharper before you stropped it, that is the burr talking.

The paper test, done badly. Hold a sheet of printer paper by one corner and slice down through it at a slight angle. A sharp knife bites immediately and cuts cleanly without tearing.

Sawing at it, or holding the paper too loosely, will fail a genuinely sharp knife. Try the tip, middle and heel separately — that is how you find the section you missed.

If it is not the burr

You are using a pull-through sharpener

The little V-shaped devices with carbide inserts are very common and produce this exact complaint. They do not grind an edge so much as scrape metal off it, leaving a coarse, torn apex that feels sharp briefly and then crumbles. They also remove a great deal of steel for the result they give.

They are not useless for a cheap knife you want serviceable in ten seconds. But if you are sharpening a knife you care about and it will not hold an edge, the tool is a likely suspect — the knife sharpener guide covers what the different types actually do to an edge, and my ChefsChoice 15XV review looks at one electric model.

The edge is damaged, not dull

A chip, or a section rolled over from hitting bone or a plate, will not respond to normal sharpening because you are trying to refine an edge that is not there. Hold the blade edge-up under a light and look straight down at it: a sharp edge reflects nothing, while a dull or damaged one shows a bright line or glinting spots where the apex has flattened. Damage needs coarse work to grind past it before anything else will help.

The steel is softer than you think

Softer stainless takes an edge easily and loses it quickly. That is a property of the knife, not a mistake you made. If a knife sharpens up nicely and dulls within a week of normal use, it may simply be doing what it is capable of — the chef’s knife guide covers which steels hold an edge and what that costs.

Why a knife will not hold an edge

A knife that sharpens up beautifully and is blunt again in a week is a different complaint from one that never got sharp, and it has its own causes. Start by working out how the edge is actually failing, because the three ways look similar and need different responses.

Rolled, worn or chipped?

Hold the blade edge-up under a bright light and look straight down along it, slowly, from heel to tip. A truly sharp edge is invisible — there is no flat surface to catch the light.

  • Rolled. The apex is still there but has bent over to one side, so it catches the light as a fine bright line that may wander from side to side. This is by far the most common, it happens within days of normal use, and it is not really dulling at all — the steel has moved rather than gone. A honing steel straightens it in seconds.
  • Worn. The apex has been abraded away and the bright line is even and consistent along its length. This is genuine dulling and needs sharpening, not honing.
  • Chipped. Small bright specks or nicks at intervals rather than a continuous line, and often a visibly ragged feel when you draw a fingertip perpendicularly across the edge. Chips need coarse work to grind past them, because sharpening around a chip just produces a sharp edge with a gap in it. There is a separate guide to judging and fixing a chipped edge.

Getting this right changes what you should do next more than anything else on this page.

Honing is not sharpening, and it is what most people are missing

The single biggest reason a knife seems not to hold an edge is that it is never honed between sharpenings.

A honing steel removes essentially no metal. It pushes a rolled apex back into alignment. Because rolling is what happens to an edge in ordinary use, a few passes before cooking keeps a knife performing for far longer between actual sharpenings — and a knife that is never honed will feel like it lost its edge in a fortnight, even though the steel is mostly still there.

Sharpening, by contrast, removes metal to create a new apex. It is needed when the edge is genuinely worn or chipped, and for most home cooks that is a few times a year rather than monthly. The procedure is covered in the guide to sharpening a chef’s knife on a whetstone.

The steel, and the trade you cannot avoid

Edge retention is largely a property of the knife rather than something you can technique your way around.

Kitchen steels are usually quoted as a hardness on the Rockwell C scale. German-style knives typically sit around 56 to 58 HRC; Japanese knives commonly run 60 to 62 and sometimes higher. That difference produces a genuine trade-off, not a ranking:

  • Softer steel rolls rather than chips. It loses its edge sooner, but a honing steel brings it straight back, and it tolerates knocks and awkward contact.
  • Harder steel holds a keen edge considerably longer and resists rolling — but it is more brittle, so what would have been a harmless roll on a softer knife becomes a chip, and it responds less well to a honing steel.

So a soft knife that dulls quickly is not faulty; it is doing what that steel does. If genuine edge retention matters to you, that is a purchase decision rather than a maintenance one, and the chef’s knife guide covers which steels hold an edge and what you give up in exchange.

The edge angle

Angle matters as much as hardness and is easier to get wrong.

German knives are traditionally ground at roughly 20 degrees per side, Japanese ones closer to 15 or less. A thinner edge cuts better and feels sharper, but there is less steel behind the apex supporting it, so it deforms and chips more readily.

The practical trap: sharpening a softer German knife to a Japanese angle because it feels sharper afterwards. It will feel superb for two days and then roll, because that steel cannot support that geometry. Match the angle to the knife rather than to the result you want.

The board is doing more damage than anything else

Glass, granite, marble and ceramic boards destroy edges — the steel loses that contest every single time, and one meal prepared on glass can undo a full sharpening.

Wood and soft plastic are the only sensible surfaces. This one factor outweighs most of the others combined, and it is worth checking before blaming the knife. The cutting board guide covers which materials are kind to an edge and why end-grain behaves differently from edge-grain.

The rest of the everyday damage

  • The dishwasher. Knives knock against other items, and the heat and harsh detergent are bad for both edge and handle. Wash by hand and dry immediately.
  • Storage. Loose in a drawer, blades bang against everything metal. A block, magnetic strip or edge guard prevents damage no amount of sharpening prevents.
  • Scraping food off the board with the edge. Turn the knife over and use the spine. Dragging the cutting edge sideways rolls it immediately.
  • Bones, frozen food and hard squash. Lateral force and hard contact are what turn rolls into chips, particularly on harder steel.

What is actually realistic

A well-treated kitchen knife honed before use should go months between sharpenings, not weeks. If you are sharpening monthly and using a wooden board, the likely explanations are that honing is missing from the routine, or that the edge angle is finer than the steel supports. If you are sharpening weekly, check the board first — that is almost always the answer.

The order worth working through

  1. Ask which failure you have. Never sharp, or sharp for one cut?
  2. Never sharp: go back to a coarse stone and work one side until you can feel a burr along the whole edge, tip included.
  3. Sharp then instantly dull: you left the burr on. Alternate progressively lighter strokes, then strop.
  4. Test properly: slice paper at the tip, middle and heel separately rather than running a thumb along the edge.
  5. Still failing: check for chips or a rolled section under a light, and consider whether a pull-through sharpener is the cause.
  6. Sharpens fine but dulls in days: that is the board, the dishwasher or the storage, not the sharpening.

How This Guide Was Put Together

Plainly: this is a research-based guide, not a hands-on test. I have not sharpened a set of knives to compare stones or techniques, and nothing here is a report from my own kitchen.

What it rests on: the mechanics of an abraded edge, which are well documented and not in dispute — a burr forms when abrasion reaches the apex, which is why its presence is the standard check that sharpening has actually worked, and why a burr left in place fails immediately under load; the published guidance of sharpening specialists and stone manufacturers, which agree closely on burr formation, grit progression and deburring; and the pattern of what people report, where an unraised burr and an unremoved burr between them account for the overwhelming majority of cases.

Also not established: specific grit numbers and stroke counts that would suit every knife. These depend on the steel, the hardness and how dull the blade is, and any single set of numbers would be wrong for many readers. The ranges above are directional.

Frequently Asked Questions

Why will my knife not hold an edge?

Usually because it is never honed. Ordinary use rolls the apex over rather than wearing it away, and a honing steel straightens that in seconds — a knife that is only ever sharpened will feel blunt within a fortnight even though the steel is still there. The other common causes are a glass or stone chopping board, which destroys an edge faster than anything else, and an edge angle finer than the steel can support.

Does a harder steel hold an edge better?

Yes, and that is not automatically better. Harder steels around 60 to 62 HRC keep a keen edge much longer than softer German steels at 56 to 58, but they are more brittle: what would be a harmless roll on a softer knife becomes a chip, and honing helps less. Softer steel dulls sooner but comes straight back with a few passes on a steel. It is a trade rather than a ranking.

Why is my knife still dull after sharpening?

Nearly always one of two things. Either you never raised a burr, meaning you never actually reached the cutting edge and only polished the bevel behind it; or you raised a burr and left it on, in which case the knife feels sharp but the thin lip of steel folds over within a cut or two. Which one you have is told by whether it felt sharp at all when you finished.

What is a burr on a knife?

A thin lip of steel that folds over to the opposite side when grinding reaches the apex. It is not a defect — it is the proof that you have sharpened all the way to the edge. The job is then to remove it cleanly, because if it stays on it will tear away during use and leave a ragged edge.

How do I know if I have raised a burr?

Move a fingertip off the edge perpendicular to it, from spine to edge and past it, on the side opposite the one you have been grinding. A burr feels like a faint catch. Check at the heel, middle and tip — a burr along only part of the blade means the rest is still dull.

How do I remove a burr?

Alternate sides with progressively lighter strokes on your finishing stone — five each side, then three, then one, with almost no pressure — then strop the blade edge-trailing on leather, denim or cardboard for about ten passes a side. Do not scrape it off against something hard, which tears part of the apex away with it.

Why does my knife feel sharp but not cut?

That is the signature of a burr still in place. The lip of steel catches on a thumbnail and will even slice paper, so it passes the usual tests, but it collapses on the first real cut. A correctly finished edge can feel less grabby than a burred one, which misleads people into stopping too early.

Do pull-through sharpeners ruin knives?

They do not ruin a knife, but they scrape a coarse, torn edge rather than grinding a clean one, and they remove a lot of steel for the result. That edge feels sharp briefly and then crumbles, which produces this exact complaint. For a knife you care about, a stone or a guided system is a better tool.

How often should I sharpen a kitchen knife?

Far less often than people expect, if honing is used in between. A honing steel straightens an edge that has rolled and takes seconds; actual sharpening removes metal and is needed only when the apex has genuinely worn away. For most home cooks that is a few times a year, and much less often if the knife stays off glass boards and out of the dishwasher.

More knife guides

For the sharpening procedure itself, see how to sharpen a chef’s knife with a whetstone. For choosing a sharpening tool, there is the knife sharpener guide, and for the knives themselves the chef’s knife guide.

Filed Under: Helpful Kitchen Tips

  • « Go to Previous Page
  • Page 1
  • Interim pages omitted …
  • Page 16
  • Page 17
  • Page 18
  • Page 19
  • Page 20
  • Interim pages omitted …
  • Page 27
  • Go to Next Page »

Recent Articles

  • Coffee Grinder Static: Why It Happens and How to Fix It
  • How to Descale an Electric Kettle
  • Saucepan vs Saucier: Which Pan Do You Need?
  • Espresso Shot Troubleshooting: Fast, Slow, Sour or Bitter
  • How to Clean a Coffee Grinder: What Makers Say

Search


HOME          Contact          Affiliate Disclosure          Terms of Service          Privacy Policy


kitchenwarecompare.com is a participant in the Amazon Services LLC Associates Program, an affiliate advertising program designed to provide a means for sites to earn advertising fees by advertising and linking to Amazon.com, Endless.com, MYHABIT.com, SmallParts.com, or AmazonWireless.com. Amazon, the Amazon logo, AmazonSupply, and the AmazonSupply logo are trademarks of Amazon.com, Inc. or its affiliates. As an Amazon Associate I earn from qualifying purchases.


Copyright © 2026 kitchenwarecompare.com, ALL RIGHTS RESERVED.