• Skip to primary navigation
  • Skip to main content
  • Skip to primary sidebar

Kitchenware Compare

  • Home
  • Product Reviews
    • Air Fryers
    • Coffee
    • Cookware
    • Flat Top Grills
    • Meat Thermometers
    • Food Processors
    • Knives
    • Pizza Ovens
    • Toaster Ovens
    • Juicers
  • Food Blog
  • Helpful Kitchen Tips
  • Data Studies
  • About
  • How I Review
  • Contact
You are here: Home / Archives for Product Reviews

Victoria 12-Inch Cast Iron Skillet Review: The Lodge Alternative

Last Updated July 27, 2026

Victoria 12-Inch Cast Iron Skillet

This post contains affiliate links. If you buy through my links, I may earn a commission at no extra cost to you. Read the full disclosure.

The Victoria 12-Inch is the “Best Alternative to Lodge” pick in my cast iron skillet buying guide, priced within a few dollars of Lodge’s flagship pan but built by a different 87-year-old family foundry with a genuinely different handle design. This review covers what actually changes when you pick Victoria over the more famous name, and whether it’s worth the switch.

Quick Verdict

Product Best For Price Rating Buy
Victoria 12-Inch Cast Iron Skillet A lighter, longer-handled Lodge alternative $32.99 4.7★ (8,688) Check Price

Score: 7.9/10 — a genuinely different pan from Lodge, not just a rebadge: lighter, longer handle, smoother factory finish. The trade-off is quality control that owner reviews describe as less consistent than Lodge’s.

Specifications

Spec Detail
Diameter 12 inches
Capacity 120 oz
Max temperature 500┬░F
Material Pre-seasoned cast iron, kosher-certified non-GMO flaxseed oil seasoning
Handle Long curved handle plus helper handle, drip-free spouts on both sides
Compatible surfaces Gas, electric, smooth-surface induction, oven, campfire, grill (not dishwasher safe)
Warranty Limited lifetime warranty
Price $32.99

Who It’s For

  • Anyone who wants a Lodge-equivalent pan but slightly lighter — owner reviews consistently describe it as roughly a pound lighter than a same-size Lodge
  • Cooks who prefer a longer handle with more leverage over Lodge’s shorter, straighter one
  • Anyone who wants a smoother out-of-box factory finish without paying Stargazer-level prices
  • Buyers who like supporting an independent family foundry (Medell├¡n, Colombia, since 1939) over the larger Lodge brand

Who Should Look Elsewhere

  • Anyone who wants the single most consistent quality control in this price range — Lodge’s manufacturing scale gives it an edge here; Victoria owner reviews report occasional units with uneven seasoning or spot rust that require a slower warranty process to resolve
  • Cooks who dislike a longer handle — some owners specifically find it gets in the way in a smaller kitchen compared to Lodge’s shorter design
  • Anyone who wants the smoothest possible surface without any break-in — for that, see my Stargazer 10.5-Inch review instead, at a real price premium

Performance

Weight and Handling

The recurring theme across verified owner reviews is that this pan runs lighter than a comparable Lodge — most describe a difference of roughly a pound, with several owners specifically citing that as their reason for choosing Victoria. Combined with the longer curved handle and a genuinely useful helper handle on the opposite side, it’s a pan several long-time cast iron owners describe as easier to maneuver one-handed than Lodge’s shorter-handled design, particularly for anyone with wrist or grip concerns.

Seasoning and Non-Stick Behavior

Victoria seasons with kosher-certified, non-GMO flaxseed oil rather than Lodge’s vegetable oil, and multiple verified owners report a smoother factory texture than current Lodge pans — described as closer to “220-grit sandpaper” than Lodge’s rougher as-cast finish. Several owners report cooking eggs and scallops successfully straight out of the box with minimal sticking, though the general cast iron rule still applies: a few rounds of home seasoning meaningfully improves results over the factory finish alone.

Heat Retention and Everyday Cooking

As bare cast iron, heat retention performs the same as any solid pan in this weight class — searing, braising, and oven finishing all work as expected. One structural detail worth knowing: several owners with glass-top stoves note the pan’s underside has no raised heat ring, so it sits flat against a glass cooktop edge-to-edge, which several describe as producing more even heating on that surface type specifically.

Design and Build

The defining design choice is the handle: longer, more curved, and angled up and away from the pan compared to Lodge’s shorter, straighter handle — a genuine ergonomic difference, not a cosmetic one. The dual drip-free pour spouts on either side of the pan are a small but real convenience Lodge’s single-spout design doesn’t match. Victoria has cast iron cookware in the same Medell├¡n, Colombia factory since 1939, and the brand backs the pan with a limited lifetime warranty against manufacturing defects.

Cleaning and Maintenance

Standard bare cast iron care applies: hand-wash with hot water (a stiff brush or chain-mail scrubber for stuck-on food), dry immediately over heat, wipe on a thin layer of oil, and never let it soak. Owner reviews mention that light surface rust, if it appears, responds well to a citric acid or lemon juice soak followed by re-oiling and a bake — the same recovery process used across every cast iron pan on this site. My cast iron cleaning guide covers the full process in more depth.

Value

At $32.99, this sits within a few dollars of Lodge’s 12-inch flagship, so the decision comes down to the handle and weight difference rather than price. The honest caveat, drawn directly from owner reviews rather than glossed over: quality control is described as less consistent than Lodge’s — a meaningful minority of reviews mention units arriving with uneven seasoning patches or light surface rust, and getting a warranty replacement has been described as a slower process (one reviewer documented roughly three weeks start to finish) than the near-universal consistency Lodge’s larger manufacturing scale delivers.

Durability

Bare cast iron doesn’t wear out from normal use, and that holds regardless of brand — the material itself is the cooking surface, with no coating to degrade. Victoria’s limited lifetime warranty covers manufacturing defects, and owner reports of successful (if sometimes slow) warranty resolutions suggest the company does stand behind genuinely defective units. Barring dropped-and-cracked damage or long-term rust neglect, this pan should last for decades with basic care, the same as any quality cast iron skillet.

Alternatives to Consider

If consistent quality control matters more than shaving a pound off the weight, my Lodge 12-Inch review covers the more established alternative at a similar price. For the smoothest possible surface with no factory-finish compromise, my Stargazer 10.5-Inch review covers a genuinely premium option at a real price jump. For the lowest-cost entry into 12-inch cast iron, my Utopia Kitchen 12-Inch review covers the budget end. And if a smaller pan fits better, my Lodge 8-Inch review covers the single-portion size class.

Verdict

The Victoria 12-Inch earns its “Best Alternative to Lodge” spot honestly: it’s genuinely lighter, has a longer and arguably more comfortable handle, and ships with a smoother factory finish, all at a price within a few dollars of Lodge itself. The trade-off owner reviews are consistent about is quality control — a meaningful share of buyers report units that needed a warranty exchange, something Lodge’s reviews mention far less often. If that trade-off is acceptable for the weight and handle improvement, this is a legitimately good pan; if consistency matters most, Lodge remains the safer default.

How This Review Was Put Together

Plainly: this is research-based, not a hands-on test. I have not owned or used this, and nothing here should be read as a report from my own kitchen.

What it rests on: the published specification – casting weight and diameter, the factory seasoning and what oil Victoria uses, the surface finish as cast, and handle geometry; plus the pattern across verified-purchase reviews, which for Victoria concentrates on the smoother-than-Lodge surface and on the longer handle being divisive.

What I could not establish: how the seasoning develops over years, which is the point of buying cast iron and unfolds over a timescale no test covers.

Frequently Asked Questions

Is the Victoria 12-inch actually lighter than a Lodge 12-inch?
Multiple verified owner reviews report a difference of roughly a pound, with Victoria being the lighter of the two. Cast iron castings do vary piece to piece, so treat this as a consistent pattern rather than an exact guaranteed figure.

Does the Victoria skillet come pre-seasoned?
Yes, with kosher-certified, non-GMO flaxseed oil. Several owners report successfully cooking eggs straight out of the box, though additional home seasoning rounds still improve results, as with any cast iron pan.

Is Victoria’s quality control worse than Lodge’s?
Owner reviews suggest yes, modestly — a meaningful minority mention units arriving with uneven seasoning or light surface rust that required a warranty exchange, a complaint that shows up less frequently in Lodge’s much larger review base. Most owners report no issues at all, but it’s a real pattern worth knowing about.

Can I use this on a glass-top or induction stove?
Yes to both. Several owners with glass-top ranges specifically note the pan’s flat underside (no raised heat ring) sits evenly against the glass, and cast iron works directly on induction since it’s magnetic.

How does the handle compare to Lodge’s?
Victoria’s handle is longer and more upswept, giving more leverage and keeping your hand further from the heat — some owners prefer this, while others with smaller kitchens find the extra length gets in the way more than Lodge’s shorter, straighter handle.

Filed Under: Product Reviews

Stargazer 10.5-Inch Cast Iron Skillet Review: Worth the Splurge?

Last Updated July 27, 2026

Stargazer 10.5-Inch Cast Iron Skillet

This post contains affiliate links. If you buy through my links, I may earn a commission at no extra cost to you. Read the full disclosure.

The Stargazer 10.5-Inch is the “Best Smooth Surface / Splurge” pick in my cast iron skillet buying guide, and at $155 it costs more than five Lodge pans — the entire question is whether a machined-smooth surface is worth that gap. This review covers what that machining actually buys you, and who should spend the extra money.

Quick Verdict

Product Best For Price Rating Buy
Stargazer 10.5-Inch Cast Iron Skillet Smooth-surface premium pan $155.00 4.5★ (495) Check Price

Score: 8.1/10 — genuinely different from a Lodge in a way that matters (smooth surface, lighter feel, shorter break-in), at a price that only makes sense if that difference matters to how someone actually cooks.

Specifications

Spec Detail
Cooking surface 8.1 inches (19.4″ total length, 10.5″ rim diameter)
Weight 5.2 lbs
Capacity 2.3 quarts
Material CNC-machined, hand-finished cast iron, made in Allentown, Pennsylvania
Handle Stay-cool cast iron handle, helper handle on the opposite side
Compatible surfaces Gas, electric, smooth-surface induction, oven (not dishwasher safe)
Warranty Lifetime warranty against manufacturing defects
Price $155.00

Who It’s For

  • Cooks who’ve used a rougher cast iron pan (Lodge, Victoria) and specifically disliked the sticking during the break-in period
  • Anyone who wants cast iron’s heat retention without cast iron’s usual weight — 5.2 lbs is genuinely lighter than most 10-inch-class pans
  • Cooks who plan to keep one pan for decades and would rather pay once for the smoother finish than live with the rougher one
  • Gift buyers looking for a premium, American-made piece that still gets used daily rather than displayed

Who Should Look Elsewhere

  • Anyone who’s happy with a standard cast iron surface once it’s seasoned — the smooth finish mostly shortens the break-in period, it doesn’t add a capability a well-seasoned Lodge lacks long-term
  • Budget-conscious buyers — this costs 5-8x what my Lodge 12-inch or Utopia 12-inch reviews cover, for a difference that owner reviews describe as real but not transformative
  • Anyone who needs a full-size family pan — at 8.1 inches of cooking surface, this is closer to my Lodge 8-Inch review‘s single-portion territory than a 12-inch’s

Performance

Surface and Non-Stick Behavior

This is the entire reason the pan costs what it does. Stargazer CNC-machines the entire interior instead of leaving the rougher “as-cast” texture that Lodge and Victoria ship with, then hand-finishes it further. Themoderntravelers.com tested this exact 10.5-inch pan and used it to bake cornbread as a break-in dish, cooking it with butter alone straight out of the box — confirming real non-stick performance from day one rather than the multi-week break-in a standard cast iron pan needs. A second source (Prudent Reviews) tested Stargazer’s 12-inch model and found the same pattern at that size: noticeably smoother than Lodge, and “almost as slick as a non-stick pan” once a few seasoning layers build up — background evidence the smooth-surface effect holds across the product line, not proof specific to this exact size.

Weight and Handling

At 5.2 lbs, this is meaningfully lighter than a same-size Lodge — a real, verifiable spec difference, not marketing. The stay-cool handle design trades a slightly less comfortable cold grip for a handle you can hold bare well into a cooking session, and the helper handle on the opposite side actually earns its keep at this weight, making one-handed lifts easy even hot off the stove.

Heat Retention and Searing

Cast iron’s heat retention doesn’t change with a smoother surface — this pan holds heat the same way any solid cast iron pan does, which is its real advantage over lighter carbon steel or aluminum options. At 8.1 inches of cooking surface, it’s sized for one to two servings at a time rather than a full family meal, the same practical ceiling as any pan in this size class.

Design and Build

The machining process is the whole story: raw castings go through a CNC pass across the entire interior surface to dial in consistent wall thickness, then get hand-finished to smooth out any remaining casting artifacts before a two-step surface treatment. The flared, drip-free rim is a genuinely practical detail lost on cheaper pans — pouring off excess fat or a pan sauce doesn’t dribble down the side the way it can on a Lodge. Made in Allentown, Pennsylvania, which is part of what the premium buys as much as the surface finish itself.

Cleaning and Maintenance

Same fundamentals as any bare cast iron pan: hand-wash, dry immediately over heat, a thin oil coat before storing, never a dishwasher or an extended soak. The smoother surface does make food residue let go more easily during cleaning, which is a genuine everyday convenience even after the pan is well broken in. My cast iron cleaning guide covers rust recovery and full re-seasoning if either is ever needed.

Value

$155 is real money for a 10.5-inch pan, and the honest case for it rests entirely on how much the smoother surface and lighter weight matter to someone personally. Owner reviews are genuinely split on this point — several describe it as worth every penny for a pan they’ll own for decades; others say a $30 Lodge does the same job once it’s seasoned in. Both are defensible positions. What isn’t in question is the manufacturing: this is a real, small-batch, American-made product, not a markup on an otherwise identical casting.

Durability

Bare cast iron doesn’t wear out from normal use regardless of price tier, and the machining process doesn’t change that — it changes the surface finish, not the material’s fundamental longevity. Stargazer backs the pan with a lifetime warranty against manufacturing defects (not damage from misuse, like any cast iron warranty), and given the brand’s decade-plus track record, there’s no reason to expect this pan to behave any differently than cast iron generally does: it will outlast the kitchen it’s used in with basic care.

Alternatives to Consider

If the smooth surface is the appeal but $155 isn’t, my cast iron skillet buying guide covers the full price range this sits at the top of. For a full-size pan at a fraction of the price with a standard as-cast texture, my Lodge 12-Inch review and Utopia Kitchen 12-Inch review both cover proven, much cheaper options. For the same size class as this pan but a fraction of the price, my Lodge 8-Inch review covers the budget end of single-portion cast iron.

Verdict

The Stargazer 10.5-Inch delivers exactly what it promises: a genuinely smoother, lighter cast iron pan that skips most of the usual break-in frustration, made in the USA with a lifetime warranty behind it. Whether that’s worth five to eight times the price of a Lodge comes down entirely to how much the smooth surface and lighter weight matter personally — it’s not a pan that makes a standard cast iron skillet obsolete, it’s a pan for someone who’s already decided the difference is worth paying for.

How This Review Was Put Together

Plainly: this is research-based, not a hands-on test. I have not owned or used this, and nothing here should be read as a report from my own kitchen.

What it rests on: the published specification – casting weight and diameter, the machined cooking surface, which is the entire premise of the pan and the thing its price rests on, handle geometry and the factory seasoning; plus the pattern across verified-purchase reviews, which for cast iron concentrates on surface finish as delivered and on pre-seasoning flaking in the first few uses.

What I could not establish: how the seasoning develops over years, which is the whole reason to buy cast iron and unfolds on a timescale no test covers.

Frequently Asked Questions

Is the Stargazer skillet worth the price over a Lodge?
Only if the smoother surface and lighter weight matter to you specifically. The cooking results are comparable once both pans are properly seasoned — the Stargazer just gets there faster and stays lighter in hand. A Lodge at a fifth the price does the same job for someone who doesn’t mind the longer break-in.

Does the Stargazer 10.5-inch need seasoning before first use?
It arrives pre-seasoned and ready to cook with, and reviewers report genuine non-stick performance right out of the box on a first dish. A couple of additional home seasoning rounds still improve it further, same as any cast iron pan.

How much smaller is the 10.5-inch than the 12-inch Stargazer?
The cooking surface drops from 9.4 inches to 8.1 inches, capacity from 3.4 quarts to 2.3 quarts, and weight from 6.5 lbs to 5.2 lbs. It’s a genuine step down in capacity, not just a labeling difference.

Can I use this on an induction cooktop?
Yes — cast iron is magnetic and works on induction, gas, or electric without any adapter.

Is the smooth surface actually non-stick, or does it still need oil?
It still needs oil like any cast iron pan — “smooth” describes the machined surface texture, not a coating. The practical benefit is that food releases more easily and the pan reaches good non-stick behavior faster than a rougher-surfaced pan, not that it behaves like Teflon.

Filed Under: Product Reviews

Lodge 8-Inch Cast Iron Skillet Review: Big Pan, Small Size

Last Updated July 26, 2026

Lodge 8-Inch Cast Iron Skillet with a baked breakfast strata

This post contains affiliate links. If you buy through my links, I may earn a commission at no extra cost to you. Read the full disclosure.

The Lodge 8-Inch Cast Iron Skillet is the same pan as Lodge’s 12-inch bestseller, just sized for one person instead of a family — and at $14.39, it’s the cheapest way into cast iron this site has reviewed. It’s the “Best for Small Households” pick in my cast iron skillet buying guide, and this review covers what changes — and what doesn’t — when you go smaller.

Quick Verdict

Product Best For Price Rating Buy
Lodge Cast Iron Skillet, 8-Inch One-person cooking, daily eggs $14.39 4.6★ (131,954) Check Price

Score: 7.6/10 — Genuinely good for what it’s built for (single servings, daily eggs, a permanent spot on the stove), and genuinely bad for what it isn’t (cooking for more than one or two people at once). The rating above is Lodge’s aggregated figure across every size in this product line, not testing specific to the 8-inch — more on that below.

Specifications

Spec Detail
Diameter 8 inches (6-inch usable cooking surface)
Weight 3.2 lbs
Material Pre-seasoned cast iron, vegetable oil seasoning
Handle Cast iron teardrop, no silicone sleeve included
Compatible surfaces Gas, electric, induction, oven, grill, campfire
Warranty Lifetime limited manufacturer’s warranty
Price $14.39

Who It’s For

  • Anyone cooking for one or two people who wants a pan light enough to leave permanently on the stove for daily eggs
  • A second, smaller pan to complement a 12-inch for households that already own one
  • Someone testing whether they’ll actually use cast iron before committing to a full-size pan
  • Camping or small-kitchen cooks who want the smallest genuinely useful cast iron size

Who Should Look Elsewhere

  • Anyone cooking for more than one or two people at a time — the 6-inch usable surface fits one egg or one small portion, not a family meal
  • Cooks who want a smoother out-of-box surface with less initial stickiness (see my 12-inch Lodge review for the same seasoning trade-off at a larger size, or my Stargazer 10.5-Inch review for its machined-smooth alternative)
  • Anyone who wants a lid included — Lodge sells lids separately, and this pan doesn’t come with one

Performance

Heat Distribution

Curatedcook.com ran a toast test on this exact 8-inch pan — bread weighted down and heated for two minutes to map hot and cool spots — and found real heat spots even at this smaller size, consistent with cast iron’s reputation as a mediocre heat conductor regardless of diameter. In practice this matters less on a small pan than a large one: with only 6 inches of usable surface, there’s less room for the heat to vary across, and most single-portion cooking (an egg, a few strips of bacon) sits comfortably within the hottest zone anyway.

Eggs and Daily Cooking

This is the pan’s actual job, and it does it well once past the break-in period. Like every Lodge skillet, the factory seasoning ships with a pebbly texture rather than a smooth finish, and eggs stick more than expected for the first several uses. Owners who stick with it report the surface improving noticeably after a few weeks of regular cooking and oil top-ups — the same pattern documented on the 12-inch version, since it’s the identical seasoning process at a smaller scale.

Searing and High Heat

At 6 inches of usable surface, this isn’t a searing pan for anything beyond a single small steak or a couple of scallops. It gets hot enough and holds heat as well as any Lodge product, but the math is simple: less iron mass than the 12-inch means less total heat storage, so it cools faster when food goes in and needs a slightly longer recovery time between batches if you’re cooking more than one portion.

Design and Build

This is the same casting and finishing process as Lodge’s 12-inch flagship, scaled down — same teardrop handle shape, same vegetable-oil pre-seasoning, same PFAS-free bare iron. At 3.2 lbs it’s noticeably easier to handle one-handed than the 12-inch’s 3.6 kg, which is really the entire point of buying this size: a pan light enough to lift, flip, and put away without a second thought. The handle has no silicone sleeve, so a pot holder or hot handle cover is mandatory once the pan is up to temperature — budget an extra few dollars for one if it doesn’t already own a cast-iron-compatible cover.

Cleaning and Maintenance

Identical to every other bare cast iron pan on this site: hand-wash with warm water (a little dish soap is fine), dry immediately over heat, wipe on a thin coat of oil before storing, and never let it soak in the sink. The smaller surface area means cleaning takes noticeably less time than a 12-inch pan — a genuine, if minor, advantage of buying small. My cast iron cleaning guide covers rust recovery and re-seasoning in more depth if the pan ever needs it.

Value

At $14.39, this is one of the least expensive genuinely-good pieces of cookware on this entire site, and the value case is straightforward: a cast iron pan bought once tends to outlast the kitchen it’s used in, and $14.39 is a low price to pay to find out whether cast iron fits how someone actually cooks. The honest caveat is that the 144,696-rating figure quoted above is Lodge’s aggregated total across every size Amazon groups under this listing family, not testing specific to the 8-inch — a quirk of how Amazon structures size-variant listings, not a claim that this exact size has that many reviews on its own.

Durability

Bare cast iron doesn’t wear out the way nonstick coatings do — there’s no coating to scratch off, and the material itself is the cooking surface. Barring dropped-and-cracked damage (rare, but not impossible with cast iron) or years of neglect leading to rust, this pan should outlast the person who bought it. The lifetime warranty covers manufacturing defects, though the pan’s low price means most owners will never need to use it.

Alternatives to Consider

If a 6-inch cooking surface is genuinely too small, Lodge’s own 10.25-inch size (not covered as a standalone review on this site, but sold under the same product line) splits the difference between this pan and the full 12-inch. For a smoother out-of-box surface at a premium price, the Stargazer 10.5-inch is machined smooth rather than left with Lodge’s rougher as-cast texture — reviewed in my buying guide alongside this pan. Households that need genuine family-size capacity should look at my 12-inch Lodge review or the Utopia Kitchen 12-inch instead.

Verdict

The Lodge 8-Inch is exactly what it claims to be: a smaller, lighter, cheaper version of the same well-proven pan Lodge has sold for decades, sized for one person instead of a family. It’s not the pan to buy if there’s ever a need to cook for more than one or two people at once, and it inherits the same rough factory seasoning and break-in period as every other Lodge skillet. But for its actual job — daily eggs, a single portion, a pan light enough to leave on the stove permanently — it does that job well, at a price that makes it an easy first cast iron purchase.

How This Review Was Put Together

Plainly: this is research-based, not a hands-on test. I have not owned or used this, and nothing here should be read as a report from my own kitchen.

What it rests on: the published specification – casting weight and diameter, the smaller 8-inch format and what it is genuinely useful for, handle geometry and the factory seasoning; plus the pattern across verified-purchase reviews, which for cast iron concentrates on surface finish as delivered and on pre-seasoning flaking in the first few uses.

What I could not establish: how the seasoning develops over years, which is the whole reason to buy cast iron and unfolds on a timescale no test covers.

Frequently Asked Questions

Is the Lodge 8-inch skillet big enough to cook for two people?
Barely, and only for something like two fried eggs side by side. With a 6-inch usable cooking surface, anything beyond a single portion means cooking in batches. For two people regularly, a 10.25-inch pan is a better fit.

Does the 8-inch Lodge come pre-seasoned like the larger sizes?
Yes — same vegetable-oil pre-seasoning process as every Lodge skillet. It ships with the same pebbly, as-cast texture and the same initial stickiness during the first several uses before the seasoning builds up with regular cooking.

Is a smaller cast iron skillet easier to season than a larger one?
The process is identical regardless of size — thin layers of oil, baked on at high heat, repeated a few times. A smaller pan is simply faster to coat and easier to maneuver in and out of the oven during the process.

Can I use the 8-inch Lodge on an induction stove?
Yes — cast iron is magnetic, so it works on induction the same as gas or electric, with no special adapter needed.

Why does this pan share a rating with other Lodge sizes on Amazon?
Amazon groups size variants of the same core product listing together, so the 144,696-rating figure reflects the entire Lodge skillet size family rather than testing specific to the 8-inch alone. It’s a listing quirk, not a claim about this exact size’s individual review count.

Filed Under: Product Reviews

Why Won’t My Pizza Oven Get Hot Enough? Troubleshooting Guide

Last Updated July 26, 2026

Flames and glowing coals inside a wood-fired pizza oven with a pizza cooking on the stone

This article contains affiliate links. If you purchase through them, I may earn a small commission at no extra cost to you. Read the full disclosure.

If a pizza oven won’t get past 500-600°F, something specific is stopping it — it’s essentially never a defective oven. After running the gas, wood, and hybrid ovens in my pizza oven buying guide through more sessions than I can count, the same handful of fixable causes explain nearly every underperforming session: how you’re actually measuring the heat, how long you’re really giving it, the wind, the fuel, and the airflow. Here’s how to work through them in the order that actually finds the problem fastest.

First, Check How You’re Measuring It

Before touching the oven itself, rule out a bad reading. An infrared thermometer is the only reliable way to check stone temperature, but it’s easy to get a misleading number from one: point it at the back of the stone near the flame and you’ll read hotter than the cooking surface actually is; point it too close to the mouth and you’ll read cooler. Aim for the center of the stone, hold it at the distance the thermometer’s manual specifies, and take the reading right before you launch the pizza, not five minutes earlier. If your oven has a built-in dial gauge instead of a laser thermometer, treat it as a rough guide only — these are notoriously optimistic on several popular models.

Give It More Time Than the Box Says

Most ovens quote a 15-20 minute preheat, and that number describes ideal conditions: a warm day, no wind, a bone-dry oven. In practice, especially on a cool day or with an oven that’s been sitting outside, 25-30 minutes is often what it actually takes to get the stone itself fully saturated with heat, not just the air inside the dome. A dome that reads hot fast but has a stone that’s still lagging behind is a common way to get a pizza with a good top and a pale, undercooked bottom. If your first pizza of the session comes out underwhelming, resist the urge to declare the oven broken — give the stone another five to ten minutes and try again.

Block the Wind

Wind is the single most underrated cause of a pizza oven that won’t hold temperature, and it affects every fuel type. A cross-breeze through the mouth of the oven pulls heat out as fast as the burner or fire can replace it, which is especially punishing on ovens without a front door (like the Koda 12 in my buying guide). Even a mild breeze that you wouldn’t notice while standing outside can be enough to stall an oven 100°F or more below its target. Reposition the oven so a wall, fence, or windbreak sits between it and the prevailing wind direction rather than trying to out-fuel the problem.

On Gas Ovens: Check the Supply Before Blaming the Oven

A weak or fluctuating flame on a propane model is almost always upstream of the oven itself. A propane tank below roughly a quarter full can struggle to maintain pressure, especially in cold weather, and will show up as a flame that starts strong and fades. A regulator that’s been sitting disconnected can also stick — disconnect it, wait a few minutes, then reconnect and open the tank valve slowly rather than all at once.

Confirm the hose connection is fully seated and that nothing is kinked, and make sure the burner and its intake vents are free of spider webs or debris, which is a surprisingly common cause of a weak flame on ovens that sat unused over winter. Single-burner ovens like the Koda 12 also run a hotter spot right at the back of the stone, which I cover in more detail in my Koda 12 vs 16 comparison — worth a read if you’re chasing uneven heat rather than an oven that won’t get hot at all.

On Wood or Charcoal Ovens: Manage the Fuel, Not Just the Fire

Wood-fired ovens lose temperature fast at the top end, which is normal physics, not a flaw — but it means fuel management matters more here than on gas. Build a proper base fire before you start cooking rather than a small starter flame, and feed it every 10-15 minutes rather than letting it burn down between additions. Dry, well-seasoned wood burns meaningfully hotter than anything damp, so wood stored outdoors without cover is a common, invisible culprit.

Small splits catch and build heat faster than large logs, and adding one more piece just before your cooking session (rather than mid-session) helps hold temperature through the first few pizzas. This is exactly why a retained-heat design like the Gozney Roccbox holds its temperature more evenly than an open-hearth wood oven — its insulated jacket buys back some of the margin for error that a bare wood fire doesn’t give you.

Keep Doors and Vents in the Right Position

On ovens with a front door and a rear damper or chimney, door and vent position change the draw of air through the fire more than most owners expect. A closed or partially closed front door during preheat concentrates heat and improves airflow past the fire; leaving it open the whole time lets heat escape as fast as it builds. The chimney or rear vent needs to stay open (and its cap removed, if it has a weatherproof cap) so the fire can draw properly — a blocked or capped chimney will visibly choke a wood fire down.

Account for a Cold, Damp, or First-Use Oven

An oven that’s been stored outside through a cold snap, or one that’s simply brand new, has more thermal mass to bring up to temperature than one that was used yesterday and is still slightly warm. Cement and firebrick components in particular hold moisture, and driving that moisture out on a cold oven’s first few sessions takes noticeably longer than a normal preheat. Don’t chase this with more fuel than usual — give it more time instead, and expect the second and third sessions of the day to heat up faster than the first.

When It’s Actually the Oven

If you’ve ruled out measurement, time, wind, fuel, and airflow and a gas oven still won’t produce a strong, consistent flame, or a wood oven won’t hold temperature even with a well-built fire, that’s the point to stop troubleshooting and check the manufacturer’s warranty support — a genuinely faulty regulator, burner, or gasket is uncommon but does happen, and no amount of technique fixes a hardware fault.

Frequently Asked Questions

What temperature should a pizza oven actually reach?
For authentic Neapolitan-style results, 800-950°F at the stone is the target, which cooks a pizza in 60-90 seconds. Ovens that top out at 650-700°F still make good pizza, just with a longer cook time and a different crust character — that’s not necessarily a malfunction, just a lower ceiling for that model.

Why does my oven read hot on the dial but the pizza cooks slowly?
Built-in dial gauges usually measure air temperature inside the dome, not the stone surface the pizza actually sits on. The stone lags behind the air by several minutes, especially early in a preheat cycle. An infrared thermometer aimed at the stone itself is the only way to know the number that actually matters.

Does a full propane tank really make a difference?
Yes. As a propane tank empties, especially below about a quarter full, the liquid propane struggles to vaporize fast enough to maintain pressure, and that effect gets worse in cold weather. A flame that starts strong and gradually weakens over a session is a classic low-tank symptom, not a regulator or burner fault.

How much difference does wind actually make?
More than most owners expect. A breeze light enough to go unnoticed standing next to the oven can pull enough heat out through an open mouth to stall the temperature 100°F or more below target, particularly on ovens without a front door. Repositioning behind a windbreak is usually a bigger fix than adding fuel.

Is it normal for a wood-fired oven to lose heat between pizzas?
Some drop is normal — opening the mouth to launch and check pizzas lets heat escape every time. A well-fed fire recovers within a minute or two between cooks. If temperature keeps dropping and doesn’t recover, that’s a fuel-management issue (add wood sooner and in smaller, more frequent amounts) rather than a sign anything is wrong with the oven.

Should I use more fuel if the oven won’t get hot enough?
Not as a first response. Overloading a cold oven with fuel before it has warmed through often just wastes fuel and creates excess smoke without speeding up the process. Diagnose the actual cause first (measurement, time, wind, airflow) — extra fuel only helps if fuel quantity was genuinely the problem.

Filed Under: Product Reviews

How to Sharpen a Chef’s Knife with a Whetstone: Step-by-Step

Last Updated July 26, 2026

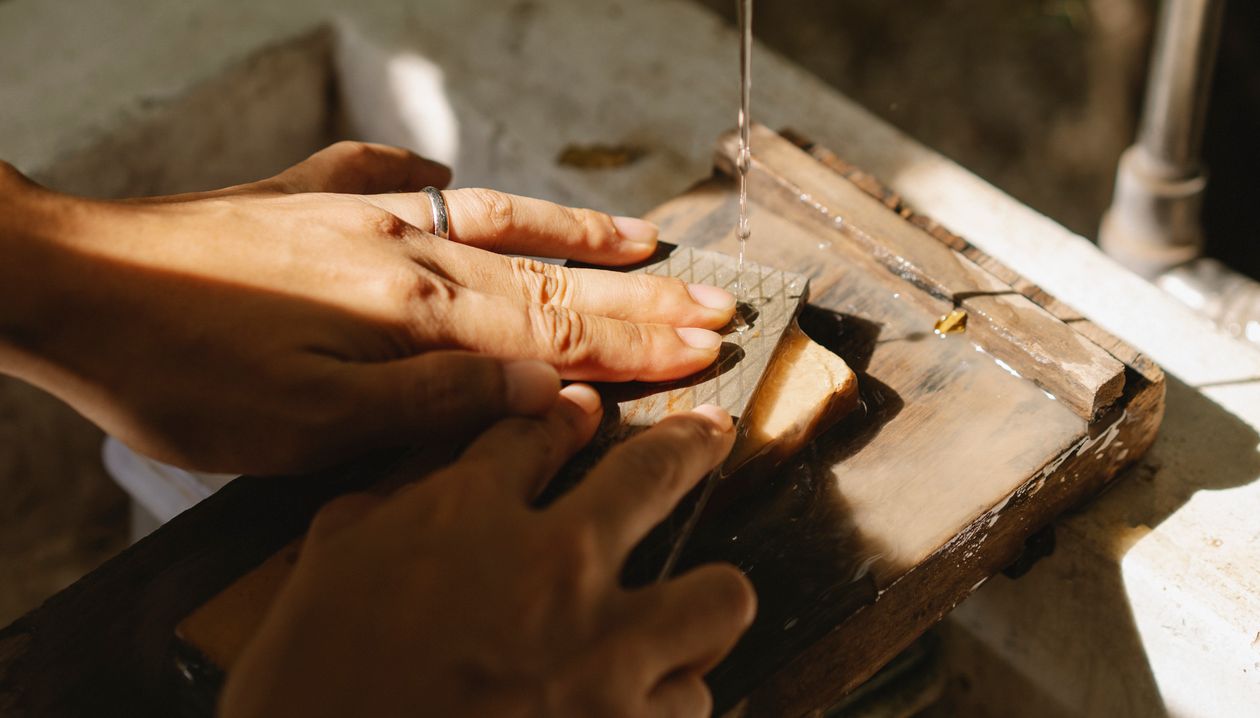
Hands running a knife blade across a wet whetstone

This article contains affiliate links. If you purchase through them, I may earn a small commission at no extra cost to you. Read the full disclosure.

A whetstone gets a knife sharper than almost any other method, and it costs less than most electric sharpeners — but only if you learn the technique properly first. This guide walks through the actual physical process step by step: soaking the stone, holding the angle, working coarse to fine, and knowing when to stop. It’s a genuine skill that takes a few tries to get comfortable with, and I’d rather be upfront about that than pretend it’s effortless.

What You Need

  • A combination whetstone with a coarser side for repair work and a finer side for polishing the edge — one stone with both grits is enough for most home kitchens.
  • A shallow container of water for soaking (skip this step entirely if your stone is a “splash-and-go” type designed to be used dry or lightly misted — check the packaging, since soaking the wrong stone can damage it).
  • A damp towel or a rubber stone holder to stop the stone sliding around on the counter.
  • A knife that’s actually dull enough to need it — if it still slices a tomato skin under its own weight, a honing rod is all you need for now.

Step 1: Soak the Stone

Submerge the stone in water for about 10 to 15 minutes before you start, or until bubbles stop rising from it. This lets the stone’s surface hold enough water to float away the fine metal particles you’ll be grinding off the blade, which is what actually does the polishing work. Skipping this step is one of the most common reasons a whetstone feels like it’s not doing much.

Step 2: Set the Angle

Hold the blade against the stone at roughly 15 degrees for a Japanese-style knife or 20 degrees for a Western-style chef’s knife — the difference comes down to how thin each style grinds its edge. A rough way to find 15 degrees: rest the blade flat on the stone, then lift the spine until there’s about a coin’s width of gap underneath. Keeping that angle consistent matters more than getting the exact number right.

Step 3: Work the Coarse Side First

Starting on the coarser grit, draw the blade across the stone in a sweeping, diagonal motion, moving from the heel of the blade toward the tip as you go, then lift and reset at the starting position for the next pass. Keep the angle steady through the whole stroke rather than letting the blade rock. Do this on one side of the blade until you feel a slight burr — a tiny, rough ridge of displaced metal — running the full length of the edge on the opposite side.

Check for the burr by running a fingertip perpendicular to the edge, never along it, feeling for that rough catch rather than testing sharpness directly. Once the burr runs edge to edge on one side, flip the knife and repeat on the other side until the burr forms there too and the first one mostly disappears. If you finish and the knife is still dull after sharpening, the burr is nearly always the reason — either it never formed, or it never came off.

Step 4: Refine on the Fine Side

Move to the finer grit and repeat the same motion at the same angle, using lighter pressure this time. This step doesn’t remove much metal — it’s polishing the edge the coarse side just created, refining that rough burr into a clean, thin edge. A dozen or so light passes per side is typically enough.

How to Tell When You’re Done

The tomato test is the simplest check: rest the blade’s edge on a tomato’s skin with no downward pressure and let the weight of the knife do the work. A properly sharpened edge slices through the skin cleanly; a dull one dents it first. If you’re still getting dents, go back for a few more light passes on the fine stone rather than pressing harder, since pressure doesn’t fix a poor angle.

Common Mistakes

  • Changing the angle mid-stroke. This is the single biggest reason a whetstone edge comes out uneven — it’s more important to hold one consistent angle than to hit an exact number.
  • Skipping the burr check. Moving to the fine stone before a burr has formed on the coarse side means you’re polishing an edge that was never actually reshaped.
  • Using a bone-dry stone. Water (or oil, for oil stones) carries away metal swarf; working dry just clogs the stone’s surface and slows everything down.
  • Sharpening a knife that only needed honing. A stone removes metal permanently. If a few strokes on a honing rod would have realigned the edge, reach for that first and save the stone for when the knife is genuinely dull.

How Often This Is Actually Needed

For a knife used most days, sharpening with a stone every two to four months is typical, with honing done weekly in between to keep the edge aligned. Honing and sharpening solve different problems — honing straightens an edge that’s bent out of true, while sharpening removes steel to create a new one — so doing one doesn’t replace the other. Cooks who use a knife daily and hone consistently often stretch the gap between stone sharpenings out further than that.

If You’d Rather Not Learn the Technique

A whetstone gives the best edge and the most control, but it’s a genuine skill that takes practice, and not everyone wants to spend a Saturday afternoon learning it. An electric or guided sharpening system removes more metal per use and won’t teach you the underlying skill, but it gets a consistent result with far less practice. My knife sharpener buying guide covers the electric, guided, and pull-through options if that’s the more realistic fit for how you actually cook.

Whichever method you use, the knife itself matters too — a well-made blade holds an edge longer between sharpenings than a cheap one does. My chef’s knife buying guide covers which knives are actually worth sharpening in the first place, and my cutting board guide covers the surfaces that keep an edge sharp longest between sessions — a glass or stone board undoes a good sharpening job faster than almost anything else.

If the Wusthof Classic 8-Inch is the knife you’re maintaining, my full review of the Wusthof Classic 8-Inch covers real edge-retention data on exactly this question.

Frequently Asked Questions

What grit whetstone should I start with?
A combination stone with a coarser side (roughly 1000 grit) and a finer side (roughly 3000-6000 grit) covers most home sharpening needs in a single stone, so there’s no need to buy several separate stones to start.

Do I need to soak every whetstone before use?
Only water stones need soaking. Oil stones use honing oil instead of water, and some modern “splash-and-go” stones only need a light misting. Check what your specific stone is designed for before soaking it, since the wrong prep can damage certain stones.

Why does my knife feel duller right after sharpening?
That’s almost always a leftover burr that hasn’t been fully removed. A few very light finishing passes on the fine stone, or a couple of strokes on a honing rod afterward, usually clears it up.

Can I use the same angle for every knife I own?
Not ideally. Japanese-style knives are typically sharpened closer to 15 degrees per side and Western-style knives closer to 20 degrees, reflecting how thin each style’s edge is ground at the factory. Matching the original angle keeps the edge geometry consistent.

How do I know if my knife needs honing or sharpening?
Try the tomato test first. If the blade dents the skin before cutting through, try a few strokes on a honing rod before reaching for the stone — if honing fixes it, the edge was just bent out of alignment, not actually dull.

Is a whetstone better than an electric sharpener?
A whetstone gives more control over the exact angle and removes less metal per session, which means a knife lasts longer between replacements over its lifetime. An electric sharpener trades some of that precision for consistency and speed, which is a fair trade for a lot of home kitchens.

Filed Under: Product Reviews

  • « Go to Previous Page
  • Page 1
  • Interim pages omitted …
  • Page 18
  • Page 19
  • Page 20
  • Page 21
  • Page 22
  • Interim pages omitted …
  • Page 35
  • Go to Next Page »

Recent Articles

  • Cuisinart DLC-10SYP1 Review: Durable, But a Newer Bowl
  • COSORI Pro Gen 2 Review: Big Basket, Fragile Handle
  • Dash Tasti-Crisp Review: Cheap, but the Coating Wears Fast
  • Chefman TurboFry Touch Review: Cheap, but the Coating Wears
  • Chef’sChoice 15XV Review: Very Sharp, With Scratch Reports

Search


HOME          Contact          Affiliate Disclosure          Terms of Service          Privacy Policy


kitchenwarecompare.com is a participant in the Amazon Services LLC Associates Program, an affiliate advertising program designed to provide a means for sites to earn advertising fees by advertising and linking to Amazon.com, Endless.com, MYHABIT.com, SmallParts.com, or AmazonWireless.com. Amazon, the Amazon logo, AmazonSupply, and the AmazonSupply logo are trademarks of Amazon.com, Inc. or its affiliates. As an Amazon Associate I earn from qualifying purchases.


Copyright © 2026 kitchenwarecompare.com, ALL RIGHTS RESERVED.