• Skip to primary navigation
  • Skip to main content
  • Skip to primary sidebar

Kitchenware Compare

  • Home
  • Product Reviews
    • Air Fryers
    • Coffee
    • Cookware
    • Flat Top Grills
    • Meat Thermometers
    • Food Processors
    • Knives
    • Pizza Ovens
    • Toaster Ovens
    • Juicers
  • Food Blog
  • Helpful Kitchen Tips
  • Data Studies
  • About
  • How I Review
  • Contact
You are here: Home / Archives for Glenn

Best Espresso Grinders for Home Use: 7 Picks

Last Updated November 9, 2026


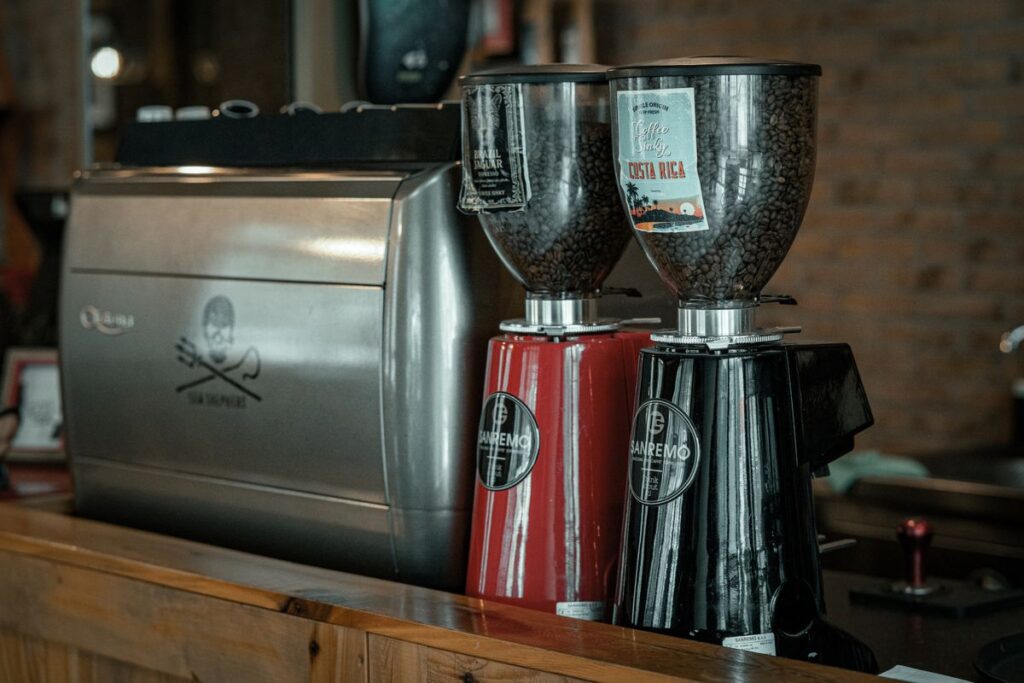
Coffee grinders and an espresso machine on a cafe counter

This post contains affiliate links. If you buy through them, I earn a small commission at no extra cost to you. Full disclosure here.

If you’re making espresso with a blade grinder — or even a basic burr grinder not calibrated for espresso — the grinder is almost certainly the weak link. Uneven particle sizes cause channeling and inconsistent extraction, and none of that is the espresso machine’s fault. Seven grinders are compared below across different price points and burr styles, on the specifications and owner reports that actually separate them for home espresso in 2026. My main pick is the Breville Smart Grinder Pro — 60 settings, a dose timer, and portafilter grinding for around $200.

Quick Comparison

Product Best For Price Rating Buy
OXO Brew Conical Burr Grinder Best Budget Electric ~$110 4.3★ (23,346) Check Price
Breville BCG820BSS Smart Grinder Pro Best Overall (electric) ~$200 4.5★ (6,993) Check Price
Timemore Chestnut C2S Best Budget Manual $75 4.7★ (986) Check Price
Timemore Chestnut C3S Pro Best Manual for Travel $95 4.7★ (1,715) Check Price
Capresso Infinity Plus Best for Multi-Style Brewing (electric) $99 4.4★ (1,685) Check Price
Baratza Encore ESP Best Espresso-First Electric $199.95 4.0★ (1,407) Check Price
Eureka Mignon Specialita Best Step-Up (Stepless) $599 4.2★ (202) Check Price

Why the Grinder Matters More Than People Expect

Espresso is unforgiving. Hot water pushes through a compressed coffee puck at 9 bars of pressure in roughly 25 seconds. If grind consistency is off — even by a small amount — water finds the path of least resistance through the puck (called channeling), and you get uneven extraction: part of the puck over-extracts and turns bitter, part under-extracts and tastes sour. The espresso machine itself isn’t the culprit.

When a shot tastes sour or bitter, the espresso shot troubleshooting guide works through each symptom using the makers’ own charts.

A good espresso grinder needs two things a standard coffee grinder often lacks:

Precise, fine adjustment. Espresso sits at the finest end of the grind range — between powdered sugar and fine table salt. A single step on the adjustment dial can shift your shot time by several seconds. Cheap grinders have wide stepped adjustments with limited positions; proper espresso grinders have many fine steps, or true stepless adjustment.

Burrs, not blades. Blade grinders chop beans randomly, producing a wide range of particle sizes. Burrs slice beans cleanly into consistent particles.

For espresso, burrs are non-negotiable — and the best results come from burrs specifically designed for fine grinding. If you already own a burr grinder and it has stopped performing, start with why a coffee grinder stops grinding properly before replacing it — the cause is usually bridging beans or a mis-seated burr rather than wear.

Manual hand grinders deserve more credit than most people give them. A quality hand grinder with conical steel burrs — like the Timemore models reviewed below — produces grind consistency that rivals electric grinders at twice the price. The obvious trade-off: you grind by hand for 45–60 seconds per shot. For one coffee that’s fine; for a morning round of two or three, it adds up.

The Best Espresso Grinders (2026)

1. OXO Brew Conical Burr Grinder — Best Budget Electric

OXO Brew Conical Burr Grinder in silver stainless steel
Price: ~$110  |  Rating: 4.3★ (23,346 reviews)

The OXO Brew Conical Burr is where most people should start if they’re upgrading from a blade grinder and want to stay near the $100 mark. With more than 23,000 reviews it’s the most-reviewed burr grinder in this price range, and the 4.3-star average reflects broad satisfaction across different coffee setups.

Forty grind settings cover drip, pour-over, and espresso. For espresso, you’ll be working at the fine end of the dial where small step differences have a surprisingly large effect — dialling in takes patience, and the sweet spot sometimes falls between two adjacent settings. The one-touch timer is the standout practical feature: set your grind duration once and it repeats, which helps keep dose weight consistent from shot to shot.

Stainless steel burrs, a removable grounds container, and a hopper that holds enough beans for a week of daily shots. The body is plastic, which is appropriate for the price. The limitation is that the stepped adjustment isn’t as precise as dedicated espresso grinders — but at $109.95, this is a real burr grinder that will meaningfully improve your espresso over any blade alternative.

Best for: first-time burr grinder buyers, budget-conscious home espresso setups

  • ✅ 23,000+ reviews (highly proven)
  • ✅ 40 grind settings, one-touch timer
  • ✅ Stainless steel burrs
  • ❌ Stepped adjustment — imprecise at fine espresso range
  • ❌ Plastic body

Check Price on Amazon

2. Breville BCG820BSS Smart Grinder Pro — Best Overall

Breville Smart Grinder Pro BCG820BSS in brushed stainless steel
Price: ~$200  |  Rating: 4.5★ (6,993 reviews)

The Breville Smart Grinder Pro covers the widest range of brew methods of any electric grinder here. Sixty grind settings, a digital timer display with 0.2-second increment control, and the ability to grind directly into the portafilter — the last of which makes a real difference to your workflow, since you lose fewer grounds in the transfer.

Sixty settings means there’s nearly always a position to land between any two steps as you dial in. The digital timer lets you set your dose by duration and repeat it consistently — important for espresso where a gram or two of dose weight affects extraction. The stainless steel conical burrs perform reliably at fine espresso grind sizes. If you’re using a Breville Bambino Plus or another Breville machine, the portafilter cradle fits 54mm baskets directly, which is a genuine convenience during a morning routine.

At around $200 the Smart Grinder Pro costs the same as the Baratza Encore ESP and about a third of the Eureka Mignon Specialita, and the case for it rests on grind adjustment rather than on price. The caveats: the portafilter cradle doesn’t fit all basket sizes, so verify the fit if you have a non-Breville machine, and the exterior is plastic. Neither affects the core grinding performance.

Best for: home espresso enthusiasts who want precise dosing control, Breville machine owners

  • ✅ 60 grind settings — maximum espresso precision
  • ✅ Digital dose timer (0.2-second increments)
  • ✅ Grinds directly into portafilter
  • ✅ Exceptional current value for the specification
  • ❌ Portafilter cradle fit varies by machine
  • ❌ Plastic exterior

Check Price on Amazon

3. Timemore Chestnut C2S — Best Budget Manual Grinder

Timemore Chestnut C2S manual coffee grinder in black
Price: $75  |  Rating: 4.7★ (986 reviews)

Manual grinders split opinion. If you’ve never used one, grinding by hand for 45 seconds before your morning espresso sounds tedious. In practice, it becomes routine quickly — and the grind quality from a $75 Timemore often matches electric grinders costing twice as much.

The C2S uses Timemore’s S2C conical burr set, designed with espresso in mind. The stainless steel burrs produce notably consistent particle sizes at fine settings. The double bearing positioning system keeps the burr assembly centred during grinding — any wobble in the burr gap creates larger, irregular particles. Eliminate the wobble and you get a more even coffee bed, more predictable extraction, and better shots.

The C2S is simpler than the C3S Pro (no foldable handle, more compact body), which makes it the better choice for home countertop use where travel portability isn’t a priority. If you make one or two espresso shots per day and don’t mind the hand grinding, this is the best precision-to-cost ratio on this list. I have written it up in full: read the Timemore C2S review, which covers the click scale, the top cover Timemore says it fixed, and what owners report after a year.

Best for: home single-shot brewers, anyone who values precision over speed

  • ✅ S2C espresso-optimised burrs
  • ✅ Double bearing positioning for consistency
  • ✅ 4.7★ rating
  • ✅ Silent — no motor noise
  • ❌ Hand grinding (~45 sec per double shot)
  • ❌ Lower throughput than electric models

Check Price on Amazon

4. Timemore Chestnut C3S Pro — Best Manual Grinder for Travel

Timemore Chestnut C3S Pro manual grinder with foldable handle
Price: $95  |  Rating: 4.7★ (1,715 reviews)

The Timemore Chestnut C3S Pro is the C2S’s more capable sibling, and its 4.7-star average on 1,715 reviews is one of the strongest ratings I’ve seen for any grinder at this price. The core improvements: a foldable handle that collapses for packing, a wider grind adjustment range, and better ergonomics during grinding.

For espresso drinkers who travel — anyone who packs a portable coffee setup — this is the obvious choice. It pairs naturally with an AeroPress or a portable espresso maker, and in that combination you have a genuinely capable espresso-style setup that fits in a carry-on. At home, the foldable handle is a mild inconvenience, but the improved adjustment precision over the C2S makes it worth the $20 premium if you’re serious about espresso dialling.

The grind range covers fine espresso through coarser AeroPress grind, so one grinder handles everything if you brew different ways on different days. The S2C burrs produce the same clean, consistent grounds as the C2S. For a hand grinder at $95, the C3S Pro sets a high bar. I have written it up in full: read the Timemore C3S Pro review, which covers the transposed grind chart and what owners report about the top cover.

Best for: travellers, campers, home brewers who want maximum manual grinder quality

  • ✅ Foldable handle — genuinely travel-ready
  • ✅ 4.7★ on 1,715 reviews
  • ✅ Wide grind range (espresso through coarse)
  • ✅ S2C conical burrs
  • ❌ Hand grinding (~45–60 sec per double shot)
  • ❌ Slightly slower grinding rate than the C2S

Check Price on Amazon

5. Capresso Infinity Plus — Best for Multi-Style Brewing
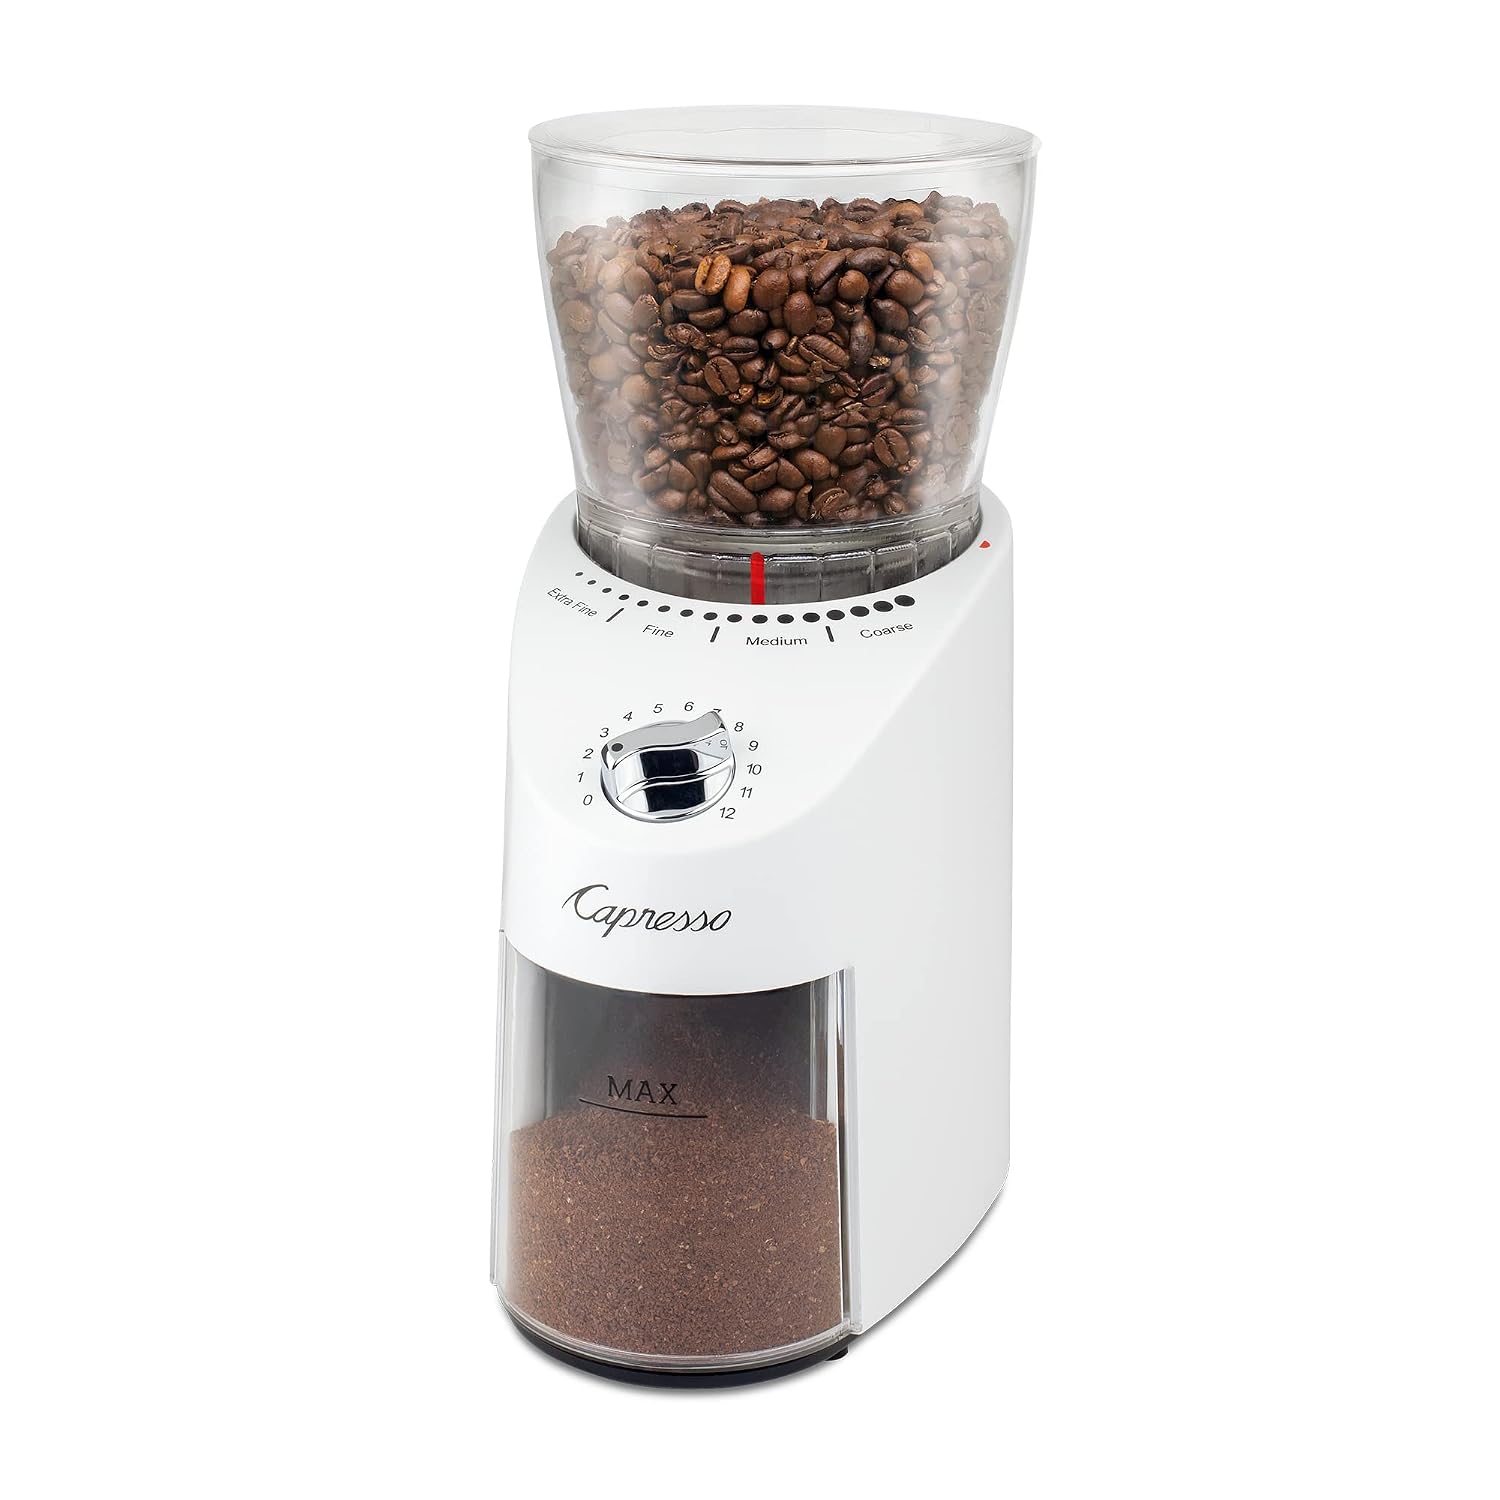
Capresso Infinity Plus burr grinder
Price: $99  |  Rating: 4.4★ (1,685 reviews)

Capresso has been making burr grinders for decades, and the Infinity Plus reflects that experience. Its motor runs at 450 RPM — significantly slower than most electric grinders. Lower speed generates less heat, and potentially better flavour preservation in lighter roasts where volatile aromatics matter most. It does not, on the evidence of owner reviews, mean less mess: static is the single most common complaint about this grinder, including from one household on their third Capresso who call it by far the messiest they have owned.

Sixteen grind settings is fewer than the Breville’s sixty, but they’re well-spaced: dedicated positions for fine espresso, medium drip, coarser pour-over, and French press. The conical burrs produce consistent results across all of them. Amazon lists the housing material as plastic, and two owners who previously had an aluminium-bodied Infinity report the current build as lighter and cheaper. At four pounds it is not a heavy machine.

The Infinity Plus earns its place in households where different people want different brewing methods. One person wants espresso; another wants drip; a third wants French press. For pure espresso enthusiasts who want maximum dialling precision, the Breville’s 60 settings win on flexibility — but for variety across brewing styles, the Capresso is the stronger choice. I have written it up in full: read the Capresso Infinity Plus review, which covers the static reports, the housing change and how the grind collar differs from the timer dial.

Best for: multi-method households, anyone who wants range across brewing styles rather than the finest espresso adjustment

  • ✅ Slow 450 RPM motor — less heat, and quieter than the model it replaced
  • ✅ 16 settings covering espresso through French press
  • ✅ 4.4★ on 1,685 reviews
  • ✅ Large 11 oz hopper and 4 oz grounds container
  • ❌ Fewer settings than Breville (less fine-tuning at espresso range)
  • ❌ Stepped adjustment only
  • ❌ Static is the dominant owner complaint, and the housing is plastic

Check Price on Amazon

6. Baratza Encore ESP — Best Espresso-First Electric Under $200

Baratza Encore ESP coffee grinder in black
Price: $199.95 | Rating: 4.0★ (1,407 reviews)

Baratza sells the Encore ESP as the espresso-capable version of its long-running Encore. The listing describes a dual-range dial: micro-steps numbered 1–20 for fine espresso adjustment and wider macro-steps from 21 to 40 for filter brewing, driven by 40 mm hardened steel conical burrs and a DC motor. Where the Breville spreads 60 settings across everything, the Baratza puts half of its dial into the espresso end.

What it leaves out matters. The listing describes a front pulse button and an on/off switch rather than a timer, so you dose by eye or by scale, not by programmed seconds, and it mentions no portafilter cradle.

Its 4.0 stars from 1,407 ratings is the lowest rating on this list, which is a reason to read the recent critical reviews before buying rather than a verdict. Coffee Bros, a coffee retailer, names it both its beginner pick and its best espresso grinder under $200, and that is a seller’s opinion, not a test. I compare it directly with the Breville in my Smart Grinder Pro review.

Best for: beginners who want an espresso-weighted dial and are happy to dose with a scale

  • ✅ 40 mm steel conical burrs; the dial is split into 20 espresso steps and 20 filter steps
  • ✅ Same $199.95 typical price as the Breville
  • ✅ Quick-release burr for cleaning, per the listing
  • ❌ No timer or programmable dose, only a pulse button and an on/off switch
  • ❌ Stepped adjustment, not stepless
  • ❌ 4.0★, the lowest rating on this list

Check Price on Amazon

7. Eureka Mignon Specialita — Best Step-Up (Stepless Flat Burr)

Eureka Mignon Specialita espresso grinder in matte white
Price: $599 | Rating: 4.2★ (202 reviews)

The Specialita is the one pick here that is not a budget machine. Its listing describes 55 mm hardened steel flat burrs with stepless adjustment, a touchscreen that sets grind time for single, double and continuous modes, a sound-insulated case, and an adjustment made from below the motor mount so the grind setting survives taking the grinder apart. Stepless adjustment means you are not limited to preset positions at the fine end, where espresso is dialled in, which is the limitation I flag on every stepped grinder in this guide.

It costs nearly three times the Breville’s usual price, it is sold on Amazon by Seattle Coffee Gear rather than by Amazon itself, and its 4.2 stars rests on only 202 ratings, so the sample is small. Coffee Bros names it its best flat burr espresso grinder, again a retailer’s ranking rather than a test. Dosing is by time, so it does not weigh the dose either. The black finish was listed as currently unavailable on Amazon US when I last checked in November 2026, so the links here go to the matte white version, at the same price and from the same seller.

Best for: someone who has outgrown a stepped grinder and expects to keep one machine for years

  • ✅ 55 mm flat burrs with stepless adjustment
  • ✅ Sound-insulated case, per the listing
  • ✅ Touchscreen timer with single, double and continuous modes
  • ✅ Grind setting is kept when you take it apart to clean
  • ❌ $599, about three times the Breville’s usual price
  • ❌ Timed, not weighed, dosing
  • ❌ 4.2★ on only 202 ratings, sold by a third-party retailer

Check Price on Amazon

What Is GBW (Grind by Weight) and Why Does It Matter for Espresso?

Grind by weight (GBW) grinders use a built-in scale to stop dosing once a target weight is reached, instead of running for a set time. That weight-based cutoff produces more repeatable doses than timed dosing, since bean density varies and a fixed grinding time doesn’t compensate for it.

None of the seven grinders above dose by weight. The Breville, OXO and Eureka use timed dosing and the Baratza has only a pulse button and an on/off switch, so none of them will adjust for a denser or staler batch of beans the way GBW does. If dose accuracy matters more to you than price, that’s the gap to weigh against the Breville’s other advantages.

What to Look for When Buying an Espresso Grinder

Burr type: conical vs flat

Both conical and flat burrs work well for espresso. Conical burrs (used in six of the seven grinders above; the Eureka is the flat-burr exception) are slower, quieter, and tend to produce a bimodal distribution — a mix of fine and coarser pieces — that some espresso brewers prefer for body and mouthfeel. Flat burrs grind faster and produce more uniform particle sizes. Below about $200, conical is the norm and performs well.

Number of grind settings

More settings means finer adjustment. For espresso this matters: the gap between “perfectly dialled in” and “slightly too fine” is small. Sixty settings (Breville) gives more room to manoeuvre than sixteen (Capresso). Manual grinders with stepless adjustment can often be dialled in more precisely than either, but require more patience to find and return to a consistent position.

Electric vs manual

Electric is faster and more convenient. Manual produces better grind consistency at a given price. If you make one or two shots per day and want the best quality under $100, a hand grinder will outperform an electric in that range. If you prioritise convenience or make multiple rounds, go electric.

Hopper or single-dose

A hopper grinder holds beans for days and is the convenient choice. A single-dose grinder is loaded with just the beans for one shot, which keeps the rest of the bag sealed and makes switching beans painless, at the cost of more fiddling per shot. Every electric grinder here is hopper-fed, and the two Timemore hand grinders are single-dose by nature because you load each dose.

The usual argument for single-dosing is retention, the grounds left in the chute after a shot, which can mix stale grounds into the next dose and matters more the more often you change beans. These makers do not publish retention figures, so it appears in this guide only through owner complaints. Retained grounds are also what a cleaning routine clears out; how often to clean, and how, differs by maker and is compared in how to clean a coffee grinder.

Static adds to retention, because grounds cling to the chute. My guide to coffee grinder static covers what reduces it.

Noise

Hand grinders make the least noise. Among the electric ones the evidence is uneven: the Eureka’s listing advertises a sound-insulated case, the Capresso’s slow motor is described in my review as quieter than the model it replaced, and TechGearLab’s 2019 test scored the Breville 8.0 out of 10 for noise against a 5.6 average, describing a relatively high-pitched but steady sound. I found no noise measurement for the OXO or the Baratza.

Grinding directly into the portafilter

Transferring grounds from a container into the portafilter distributes them unevenly and causes spills. Grinders that can grind directly into the portafilter — the Breville being the main example here — reduce that problem. It’s a small practical benefit that matters more than it sounds during daily use.

Pairing with your espresso machine

The grinder and machine work together, and portafilter size is an important factor for compatibility. Most home machines use one of two basket sizes:

Machine Basket size Notes
Gaggia Classic Pro 58mm Works with stock pressurized or unpressurized baskets; grind consistency matters more once you switch to unpressurized
Breville machines (Bambino Plus and similar) 54mm Portafilter cradle on the Breville Smart Grinder Pro is sized for this range
DeLonghi home machines Commonly 51mm or 54mm, depending on model Check the basket stamped on your portafilter before buying a grinder marketed for direct dosing

A budget espresso machine will still benefit from a proper burr grinder, but there’s a ceiling to what it can extract regardless of grind quality. Move up to a mid-range espresso machine and the grinder becomes more critical, and on a semi-automatic espresso machine, grind precision is the single biggest variable you control.

Of the seven grinders above, the Breville Smart Grinder Pro is the one whose listing confirms portafilter grinding: it ships with two cradles, 50–54 mm and 58 mm, which covers most domestic machines, so check your machine’s basket size against those two. The Eureka is built for espresso but its listing does not say how it holds a portafilter, so check before buying. The OXO, the two Timemore hand grinders, the Capresso and the Baratza all dispense into a container or dosing cup, meaning you transfer grounds into the portafilter by hand rather than grinding straight into it.

To check compatibility before buying:

  • Measure your basket. The size is usually stamped on the rim of the portafilter basket itself; 54mm and 58mm are the two most common home sizes.
  • Check the grinder’s dosing method. A grinder that lists a portafilter cradle or fork will state which basket diameters it fits; anything without that spec should be assumed to require a dosing cup.
  • Match unpressurized baskets to grind consistency. A Gaggia Classic Pro running an unpressurized 58mm basket needs even grounds to avoid channeling, which pushes you toward a grinder with fine, repeatable adjustment rather than wide stepped settings.
  • Plan for a workaround if there’s no direct fit. A dosing cup or funnel closes the gap between grinder and portafilter when the grinder doesn’t cradle your basket size, and it adds a step to the routine rather than blocking the pairing entirely.

Frequently Asked Questions

Do I need a special grinder for espresso?

Not technically — any burr grinder that reaches fine enough settings can work. But espresso-specific grinders have more fine-adjustment positions in the espresso range, which makes dialling in easier. The ideal extraction often falls between two positions on a general-purpose burr grinder with no way to split the difference.

What’s the difference between a burr grinder and a blade grinder for espresso?

Blade grinders chop beans randomly, producing a wide mix of particle sizes that extract unevenly under espresso pressure — fine particles over-extract (bitter) while coarse ones under-extract (sour) simultaneously. Burr grinders slice beans between two rotating surfaces into consistent particles that extract evenly. For espresso, a burr grinder is non-negotiable.

Is a manual hand grinder good enough for espresso?

Yes — often better than comparably-priced electric grinders. Hand grinders like the Timemore C2S and C3S Pro use the same quality burr materials as electric grinders at twice the price. The trade-off is time: 45–60 seconds of hand grinding per shot. For single-cup mornings it’s workable; for multiple shots or a busy household, an electric grinder is more practical.

How fine should I grind for espresso?

Fine enough that a double shot (about 36g of liquid) takes 25–30 seconds to pull, with an 18g dose. If your shot runs in under 20 seconds, grind finer. If it takes longer than 35 seconds, grind coarser. Exact grind size varies by roast level, so dialling in is a continuous process rather than a one-time setting.

How often should I clean my espresso grinder?

Brush out the grounds chute and burr chamber every 1–2 weeks if you grind daily. Give the burrs a proper clean using a cleaning tablet or a brush every month or so. Stale coffee oils build up on the burrs and transfer a rancid taste to fresh grounds — this matters more for espresso because high-pressure extraction concentrates everything, including off-flavours.

Does a more expensive grinder make noticeably better espresso?

Up to a point, yes — and that point is roughly $100–150. Within this range, each price step brings real improvements in burr quality, adjustment precision, and consistency. Beyond $200–300, the improvements are more subtle. For home use with a machine under $500, the Breville at $200 or a Timemore at $75–95 delivers results close to what much more expensive grinders produce.

How These Picks Were Chosen

Plainly: this is a research-based guide, not a hands-on test. I have not run these machines side by side, and nothing here should be read as a report from my own kitchen.

What the picks rest on: burr type and diameter, whether adjustment is stepped or stepless and how fine the steps actually are, motor speed, and how much ground coffee the chamber retains between doses; plus the complaint patterns across verified-purchase reviews, which for grinders concentrate tightly on retention, static clinging, clumping, and whether a setting repeats reliably after you change it and come back. For the Baratza and the Eureka the evidence adds the Amazon listing specifications and a coffee retailer’s published ranking (Coffee Bros), which is a seller’s opinion and is labelled as such.

What I could not establish: grind consistency, which is the whole point of a grinder and the one property that cannot be read off a specification. Measuring it properly needs sieve analysis or particle imaging, and the only independent grind-consistency measurement I found for these seven is TechGearLab’s 2019 sieve test of the Breville, which used a pour-over grind rather than an espresso one. Burr size and type are a reasonable proxy and that is how they are used here, but a proxy is not a measurement.

A grinder that cannot go fine enough is the most common reason a machine stops building pressure at all — if your shots are gushing rather than pouring, start with the guide to what to do when your espresso machine is not building pressure before buying anything.

The Bottom Line

For most home espresso setups, the Breville Smart Grinder Pro is the pick. Sixty settings, a digital dose timer, and the ability to grind directly into the portafilter at around $200 is worth the money if grind precision is the bottleneck in your setup. It pairs particularly well with a semi-automatic espresso machine where grind precision directly controls shot quality.

If you prefer manual grinding — or want the best grind quality under $100 regardless of convenience — the Timemore Chestnut C3S Pro at $95 is the other standout, with its 4.7-star average reflecting genuine satisfaction across a large number of espresso brewers.

The OXO is the sensible starting point if you’re not ready to commit over $60. The Capresso is for households that need one grinder to cover drip and espresso. The Timemore C2S splits the difference if travel portability isn’t a priority. The Baratza Encore ESP is the alternative if you want an espresso-weighted dial at the same typical price, and the Eureka Mignon Specialita is the step-up for anyone who wants stepless adjustment and will pay about $599.

Grinding for pour-over instead of espresso? The other half of that setup is water control — my best gooseneck kettle guide covers flow and temperature, the two variables a grinder can’t fix.

The full Breville Smart Grinder Pro review goes into what its 60 stepped settings actually give you, and why dosing by time rather than weight is the real limitation.

The full OXO Brew Conical Burr review unpacks what the headline 43-settings figure actually is, and where that resolution runs out at the espresso end.
Filed Under: Helpful Kitchen Tips

Best Roasting Pan for Prime Rib: 5 Picks for Perfect Results

Last Updated November 4, 2026

This post contains affiliate links. If you buy through my links, I may earn a commission at no extra cost to you.

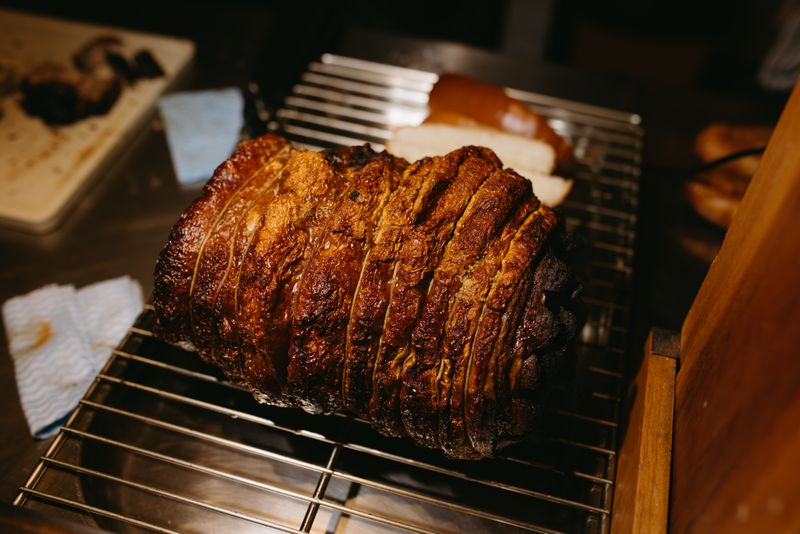
A browned rib roast on a metal roasting rack

Disclosure: As an Amazon Associate I earn from qualifying purchases. This doesn’t affect which products I recommend — I only include items I’d stand behind.

These picks are based on a review of Amazon customer data — ratings, review counts, and verified purchase feedback — alongside technical specifications for prime rib roasting: pan size relative to roast weight, rack inclusion, material heat tolerance, and stovetop compatibility for making pan gravy.

The Circulon Total Bakeware Nonstick Roaster is the best roasting pan for prime rib for most cooks — large enough for a 5-bone roast, includes a proper rack, and is built heavy enough that it won’t warp at prime rib temperatures. Below are five picks that cover every situation from budget to premium, compact to family-feast size.

Best Roasting Pan for Prime Rib 2026: Quick Comparison

Product Best For Price Rating Buy
Circulon Nonstick Roaster Best Overall $69.59 4.7★ (9,113) Check Price
Granite Ware 15″ Covered Oval Roaster Best Oval Shape $27.45 4.5★ (14,050) Check Price
P&P CHEF 16″ V-Rack Best Value $43.99 4.7★ (1,535) Check Price
Cuisinart Multiclad Pro Best Premium $159.95 4.7★ (1,398) Check Price
Cooks Standard Best Compact $84.36 4.8★ (1,135) Check Price

Best Roasting Pan for Prime Rib 2026: Full Reviews

1. Circulon Total Bakeware Nonstick Roaster 17×13″ — Best Overall

Circulon Total Bakeware Nonstick Roaster 17x13 inch

At 17×13 inches, this is the largest nonstick option on the list and one of the few that comfortably fits a full 5-bone prime rib without the roast overhanging the edges. The included flat rack lifts the meat off the pan surface so heat circulates underneath rather than steaming the bottom. With 9,113 reviews at 4.7 stars, it’s the most-reviewed nonstick roaster on Amazon.

The hard-anodized exterior handles oven heat at roasting temperatures (325–350°F) without issue. The Dupont nonstick interior makes cleanup straightforward — drippings release easily after the pan cools. One limitation: nonstick construction means it can’t go on a stovetop burner for deglazing, so you’d transfer drippings to a saucepan to make au jus.

Pros

  • 17×13″ fits a 5-bone roast with room to spare
  • Rack included; hard-anodized construction holds up at roasting temps
  • Easiest cleanup of the five picks; dishwasher safe
  • 9,113 reviews — most proven nonstick roaster option

Cons

  • Not stovetop-safe — can’t deglaze directly for pan gravy
  • Nonstick coating won’t last forever with metal utensils or aggressive scrubbing

Bottom line: The most practical choice for most households — large, includes a rack, cleans easily, and proven at scale. Accept the stovetop limitation and it’s hard to beat.

Check Price on Amazon

2. Granite Ware 15″ Covered Oval Roaster — Best for Prime Rib Shape

Granite Ware covered oval roaster in speckled black enamel with lid

This slot used to go to the IMUSA Cajun cast aluminum oval roaster. Amazon showed that listing as unavailable from 28 October to 4 November 2026, so the oval pick moved to Granite Ware’s 15-inch covered oval roaster, which was in stock on 4 November at $27.45 (sold by Kwik Retail). Its 4.5 stars across 14,050 ratings are shared across the Granite Ware oval roaster sizes on one listing; 8 percent of them are one or two stars.

Prime rib is a naturally elongated, rounded roast, and an oval pan fits that shape with less empty pan around it than a rectangle. Amazon’s listing puts this one at about 15.7 x 12.4 x 6.1 inches with a 10 lb poultry capacity, which covers the 3-bone roast that the FAQ below fits in a 14-inch pan. It is porcelain enamel on steel, which Granite Ware describes as PFOA- and PTFE-free; the maker says the dark surface absorbs oven heat evenly, and the domed lid covers the roast for warming or resting.

It is also the cheapest pan here. The trade-off is construction: enameled steel is a lighter build than tri-ply stainless or heavy-gauge pans, and the listing does not say it is safe on a stovetop burner, so make pan gravy in a separate saucepan.

Pros

  • Oval shape matches prime rib roast proportions, with less empty pan space
  • Lid included for resting and keeping warm
  • The cheapest pick, about $16 under the P&P CHEF
  • Large rating base

Cons

  • No included rack, so the roast sits on the pan base
  • Lighter enameled-steel build, and the listing does not cover stovetop use
  • Too small for a 4- or 5-bone roast; Granite Ware sells larger sizes on the same listing

Bottom line: The cheap way to get an oval, lidded pan for a smaller rib roast. Add a V-rack, and pick one of the rack pans below if you want to deglaze on the stove.

Check Price on Amazon

3. P&P CHEF 16″ V-Rack Roasting Pan — Best Value

P&P CHEF 16 inch V-Rack Roasting Pan with rack

At $43.99 with a V-rack included, this is the most affordable stainless option on the list. The 16-inch length fits a standard 4-bone prime rib without difficulty. Stainless construction means it’s broiler-safe for the final high-heat blast that builds the crust on prime rib — something nonstick pans can’t handle. It also goes on the stovetop for deglazing drippings into au jus.

The trade-off for the price is gauge — the pan is thinner than the premium picks and can flex slightly when loaded with a heavy roast and full drip capacity. It won’t warp at oven temperatures, but it doesn’t have the solidity of the Cuisinart. For occasional prime rib use, the difference is minor.

Pros

  • Best price-to-function ratio on the list — V-rack included under $50
  • Stainless: broiler-safe, stovetop-compatible, no coating to preserve
  • 16″ fits 4-bone prime rib comfortably
  • Dishwasher safe, with no coating to worry about scrubbing off

Cons

  • Thinner gauge than premium options — flexes slightly when fully loaded
  • Handles are lower profile and can be harder to grip with oven mitts

Bottom line: For cooks who make prime rib once or twice a year and don’t need a lifetime pan, this delivers everything that matters at a price that’s hard to argue with.

Check Price on Amazon

4. Cuisinart Multiclad Pro Triple Ply 16″ — Best Premium

Cuisinart Multiclad Pro Triple Ply 16 inch Roasting Pan

Triple-ply construction — stainless exterior, aluminum core, stainless interior — gives this pan the most even heat distribution of the five picks. The aluminum core eliminates the hot spots you can get with single-layer stainless, which matters when you’re collecting drippings at high oven temperatures. Fully stovetop compatible across all hob types including induction, rated to 550°F, and broiler-safe.

The rack is sold separately, which is a notable omission at $159.95. The pan itself is excellent; you’re essentially paying for better metallurgy and the assurance that this pan will last decades. At 16″, it handles 4-bone prime rib well.

Pros

  • Triple-ply construction for the most even heat distribution
  • Stovetop-safe on all hob types including induction
  • 550°F oven rating — handles any prime rib technique
  • Built for decades of use; lifetime warranty

Cons

  • Rack sold separately — unexpected omission at this price
  • Most expensive pick; premium you pay for is longevity and even heat

Bottom line: The right pan if you roast prime rib regularly, want one pan that does everything, and are comfortable buying a rack separately. The metallurgy is genuinely better than the other stainless options.

Check Price on Amazon

5. Cooks Standard Classic 14×12″ V-Rack — Best Compact

Cooks Standard Classic 14x12 inch V-Rack Roasting Pan

At 14×12 inches, this is sized for a 3-bone prime rib (serves 4–6) rather than the larger holiday roasts. It’s the highest-rated pan on this list at 4.8 stars across 1,129 reviews. Stainless construction with riveted handles means it’s stovetop-safe and durable. The V-rack is included and fits the pan proportions correctly — no adapting required.

The 14-inch length is the limiting factor. A 4-bone or larger prime rib won’t fit without overhang, and you lose the benefit of the rack when the roast extends past the pan sides. Know your roast size before buying.

Pros

  • Highest-rated pan on this list — 4.8 stars across 1,129 reviews
  • V-rack included; stainless with riveted handles for durability
  • Stovetop-compatible; right size for a 3-bone roast without wasted space
  • Under $80 with rack — better value than similarly-sized competitors

Cons

  • 14″ only fits a 3-bone prime rib — won’t accommodate larger holiday roasts
  • Smaller drip capacity than 16″+ pans

Bottom line: The best option for a smaller prime rib (3-bone, 4–6 people) where you don’t want to pay for a larger pan that’s mostly empty. The 4.8-star rating reflects genuine buyer satisfaction.

Check Price on Amazon

What to Look for When Buying a Roasting Pan for Prime Rib

Match Pan Length to Your Roast Size

Pan length is the first thing to check. A 3-bone prime rib (serves 4–6) needs at least a 14-inch pan. A 4-bone roast (serves 6–8) needs 16 inches. A 5-bone or larger holiday roast (serves 8–10+) needs 17 inches or more.

A roast that overhangs the pan edges won’t cook evenly — the exposed sections get direct oven heat while the pan-covered sections stay cooler. Measure your typical roast before buying.

Rack vs. Flat Pan

A rack lifts the roast off the pan surface so hot air circulates underneath. For prime rib this matters — sitting in drippings steams the bottom of the roast rather than roasting it, and the fat won’t render as cleanly.

Four of the five picks above include a rack. The Granite Ware oval is the exception, so its roast sits on the pan base unless you add one. If you already own a roasting pan without a rack, a universal V-rack ($15–25) solves the problem without replacing the pan.

Stovetop Compatibility for Pan Gravy

After prime rib comes out of the oven, the drippings left in the pan are the base for au jus or pan gravy. If the pan is stovetop-safe — stainless or cast aluminum — you deglaze directly on the burner.

Nonstick pans can’t go on a stovetop burner (the coating degrades above direct heat), so you’d pour drippings into a separate saucepan first. For most home cooks, this is a minor extra step. For frequent prime rib cooks who value keeping everything in one vessel, stovetop compatibility is worth paying for.

Best Roasting Pan for Prime Rib: FAQ

What size roasting pan do I need for prime rib?
A 3-bone roast (4–6 servings) fits in a 14″ pan. A 4-bone (6–8 servings) needs 16″. A 5-bone or larger holiday roast needs 17″ or more.

The key is that the roast shouldn’t overhang the pan sides — overhanging sections cook unevenly because they’re exposed to direct oven heat without the pan’s buffer underneath.

Do I need a rack in my roasting pan for prime rib?
A rack is recommended. Without one, the bottom of the roast sits in accumulated drippings and steams rather than roasts, which gives you uneven texture.

A rack lifts the roast so heat circulates all the way around. Four of the five picks above include a rack. If your pan doesn’t come with one, a universal V-rack ($15–25) is a worthwhile addition.

Should I cover prime rib while roasting?
No — cook prime rib uncovered. Covering the pan traps steam and softens the crust you’re trying to build.

The exception is resting: after the roast comes out of the oven, tenting loosely with foil for 20–30 minutes (longer for larger roasts) lets the juices redistribute before carving. If your pan has a lid, as the Granite Ware oval roaster does, keep it for warming and resting rather than the cooking phase.

Can I use a nonstick roasting pan for prime rib?
Yes, with one limitation. Nonstick pans can’t go on a stovetop burner for making pan gravy, so you’d transfer drippings to a separate saucepan.

They’re also not suitable for the dry-sear technique some prime rib methods use. If you’re roasting at standard temperatures (325–350°F) and don’t need stovetop deglazing, a nonstick pan like the Circulon works fine and is easier to clean than stainless.

What temperature do I cook prime rib in the oven?
Most methods use 325°F for the main cook, with an optional 450–500°F blast at the start or finish to build a crust. All five pans above are rated for 450°F or higher.

The reverse-sear method — low-and-slow at 225–250°F, then a final 500°F blast — has become popular for more consistent edge-to-edge doneness. Any of these pans handles the temperature range involved.

How do I make pan gravy from prime rib drippings?
After the roast rests, pour the drippings from the roasting pan into a saucepan (or use the pan directly if it’s stovetop-safe). Skim most of the fat.

Add beef stock, deglaze any browned bits, season with salt and pepper, and reduce over medium heat. For a thicker gravy, whisk in a small amount of cornstarch slurry. The fond — the browned bits stuck to the pan — is where most of the flavor comes from, so don’t skip deglazing.

How These Picks Were Chosen

Plainly: this is a research-based guide, not a hands-on test. I have not run these side by side, and nothing here should be read as a report from my own kitchen.

What the picks rest on: gauge and material, whether a rack is included and whether it holds a heavy roast clear of the fat, interior dimensions against both a standard rib roast and a standard oven, and handle design for lifting something heavy in oven gloves; plus the complaint patterns in verified-purchase reviews, which for roasting pans concentrate on warping at high heat and handles too small to grip safely when loaded.

What I could not establish: how each pan behaves at sustained high heat. Warping is the common failure and it depends on gauge, material and how fast the pan is heated. No independent test covers it for these pans, so this guide reasons from construction rather than from measurement.

The Bottom Line

For most households, the Circulon Total Bakeware Nonstick Roaster is the right choice — large, includes a rack, has a nonstick coating that wipes clean without scrubbing, and is proven by 9,113 buyers. If you want stovetop-safe for deglazing pan drippings, the P&P CHEF stainless pan delivers that at under $50. For the serious prime rib cook who wants lifetime quality, the Cuisinart Multiclad Pro is the one to buy.

For vegetables and sheet-pan dinners rather than a large roast, see my best non-toxic baking sheets guide. For more on cookware choices, see the cookware hub for guides to individual pan types, the best cookware for gas stove guide if you’re cooking over an open flame, or the best cookware sets guide for a full kit around your new roasting pan.


Filed Under: Product Reviews

Best Meat Slicers: 5 Home Picks Reviewed

Last Updated November 9, 2026

This post contains affiliate links. If you buy through my links, I may earn a commission at no extra cost to you.

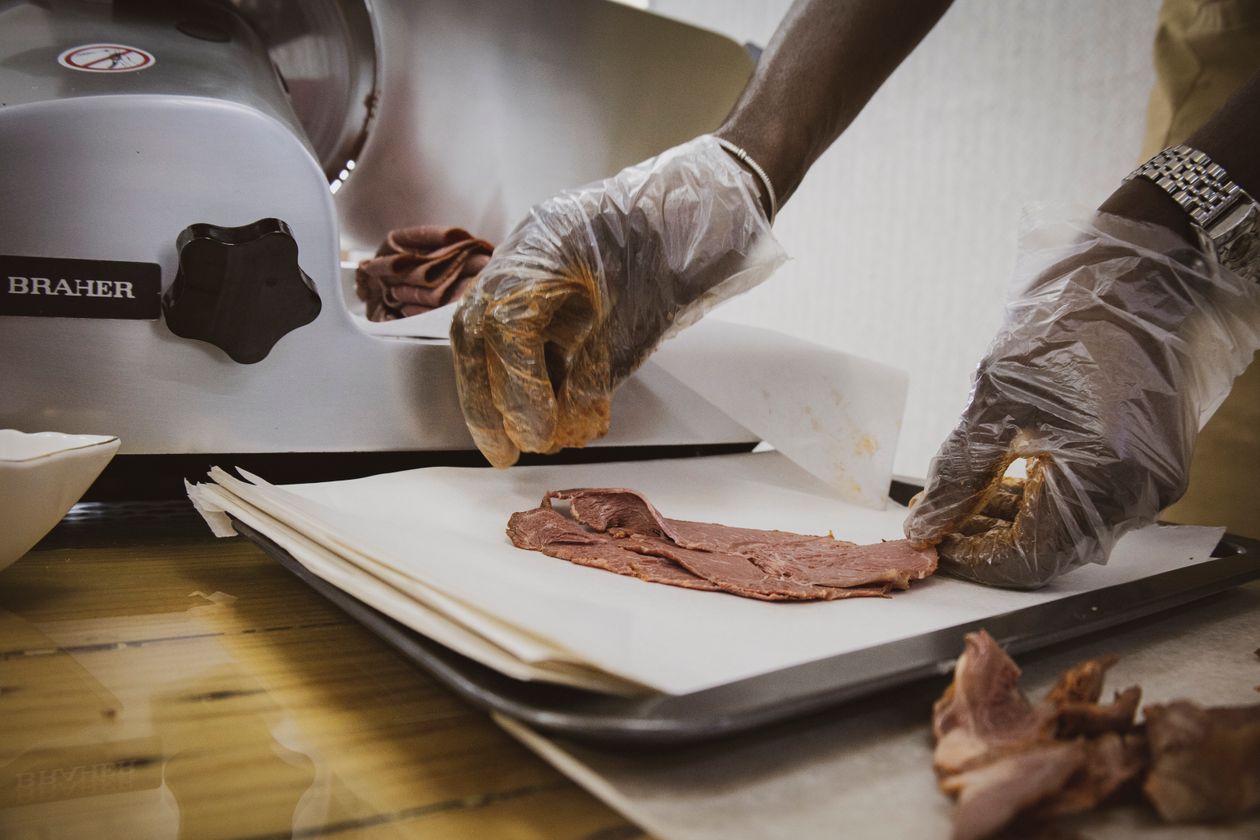
Hands slicing beef on an electric meat slicer

Photo by Tubarones from Pexels

Disclosure: I earn a small commission if you buy through links on this page, at no extra cost to you.

Home meat slicers used to be a professional kitchen item. Now they sit in suburban kitchens next to the stand mixer, used for deli-thin turkey after Thanksgiving, paper-thin prosciutto for charcuterie boards, and uniform cheese slices that a knife will never produce. The market has filled up accordingly — with some genuinely good machines and a lot of cheap hardware that vibrates across the counter and jams on the first pass through roast beef.

The CUSIMAX Electric Deli Meat Slicer is the right starting point for most households: 5,089 reviews at 4.3 stars, a dual-blade setup that handles both smooth and serrated cuts, and an adjustable thickness dial from 1 to 20mm. If you want a trusted consumer appliance brand with simpler operation, the Cuisinart FS-75 has 3,877 reviews at a similar price point. Both are reviewed in full below.

These picks are based on confirmed Amazon product data, verified specifications, and aggregated buyer reviews. All ASINs verified before inclusion.

Best Meat Slicers 2026: Quick Comparison

Product Best For Price Rating Buy
CUSIMAX Dual Blade Best overall (8.7-inch dual blade, 200W) $109.78 4.3★ (5,089) Check Price
Cuisinart FS-75 Best brand name (7.5-inch single blade, 130W) $129.95 4.2★ (3,877) Check Price
Techwood 9″ Blade Best for large cuts (9-inch single blade, 200W) $139.99 4.3★ (1,153) Check Price
Borlebbi Dual Blade Best mid-range (7.5-inch dual blade, 200W) $119.99 4.3★ (4,099) Check Price
FOHERE Dual Blade Best budget (7.5-inch dual blade, 200W) $69.95 4.2★ (657) Check Price

Prices and ratings were read from Amazon.com on 6 October 2026. Only the Cuisinart FS-75 was sold by Amazon.com; the others were sold by their own brand stores or third-party sellers.

Best Meat Slicers 2026: Full Reviews

1. CUSIMAX Electric Deli Meat Slicer — Best Overall

CUSIMAX Electric Deli Meat Slicer with dual 8.7 inch stainless steel blades

4.3/5  ·  5,089 reviews  ·  $109.78  ·  View on Amazon

With over 5,000 reviews, the CUSIMAX is the most validated home meat slicer at this price by a significant margin. It comes with two 8.7-inch blades — one serrated for bread and cured meats, one smooth for cold cuts and cheese — and a thickness adjustment that runs from 1mm to 20mm. That range covers deli-thin turkey slices at the fine end and thick-cut bacon at the other. The food carriage removes for cleaning, which matters a lot with a machine that collects meat debris in every crevice.

4.3 stars across just over 5,000 buyers is a credible validation. Common complaints in the reviews center on the motor running warm during extended sessions — this is a home machine, not a commercial one, and it’s not designed for continuous 20-minute runs. Use it in 5-minute intervals and it handles everything a home kitchen will throw at it. At $109.78 it is the second-cheapest machine here — only the FOHERE undercuts it, while the Borlebbi, Cuisinart FS-75 and Techwood all cost more — and it is the only one at this level that ships both a serrated and a smooth blade.

Pros:

  • 5,089 reviews — most validated home slicer in this category
  • Dual blade (serrated + smooth) handles bread, cured meats, cheese, and deli cuts
  • 1–20mm thickness range covers paper-thin to thick-cut in one machine
  • Removable food carriage makes cleaning significantly easier

Cons:

  • Motor warms after extended use — designed for home sessions, not continuous commercial runs
  • 8.7″ blade limits maximum cut width; won’t handle very large roasts in one pass
  • 4.3 stars is good but not exceptional — some buyers report inconsistent thickness at fine settings

Verdict: The right first choice for most households. More buyer validation than any comparable home slicer, dual-blade setup, and genuine thickness range.

Check Price on Amazon ↗

2. Cuisinart Kitchen Pro Food Slicer FS-75 — Best Brand Name

Cuisinart Kitchen Pro Food Slicer FS-75 in gray with 7.5 inch stainless blade

4.2/5  ·  3,877 reviews  ·  $129.95  ·  View on Amazon

Cuisinart’s FS-75 is the most straightforward slicer on this list. One 7.5-inch stainless blade, a thickness knob that runs from 1/32″ to 1/2″ (roughly 0.8mm to 13mm), a tray that removes for cleaning, and a build quality that reflects Cuisinart’s consumer appliance standards rather than the budget-focused construction you get from lesser-known brands. The motor is 130W rather than 200W, which is the main functional trade-off — it handles standard deli cuts and cheese without issue but can slow on very dense cold cuts or partially frozen meat.

3,877 reviews at 4.2 stars puts it slightly below the CUSIMAX in both validation volume and average rating. The appeal here is the brand: Cuisinart has warranty support, consistent parts availability, and a track record in consumer kitchens. If you’d rather buy from a name you trust than an unknown brand with more reviews, that’s a legitimate preference.

Pros:

  • Cuisinart brand — established warranty, parts, and customer support
  • 3,877 reviews — well-validated with 10+ years of buyer feedback
  • Simple single-blade operation — fewer parts to clean and maintain
  • Compact footprint; easier to store than larger commercial-style slicers

Cons:

  • 130W motor is weaker than 200W alternatives — slows on dense or semi-frozen meat
  • Single blade only — no serrated option included
  • 4.2 stars — lowest rating among the first three picks; more durability complaints in reviews

Verdict: Right for buyers who prioritise brand trust over spec-sheet performance. Slightly weaker motor at the same price as the CUSIMAX, but backed by Cuisinart’s consumer support.

Check Price on Amazon ↗

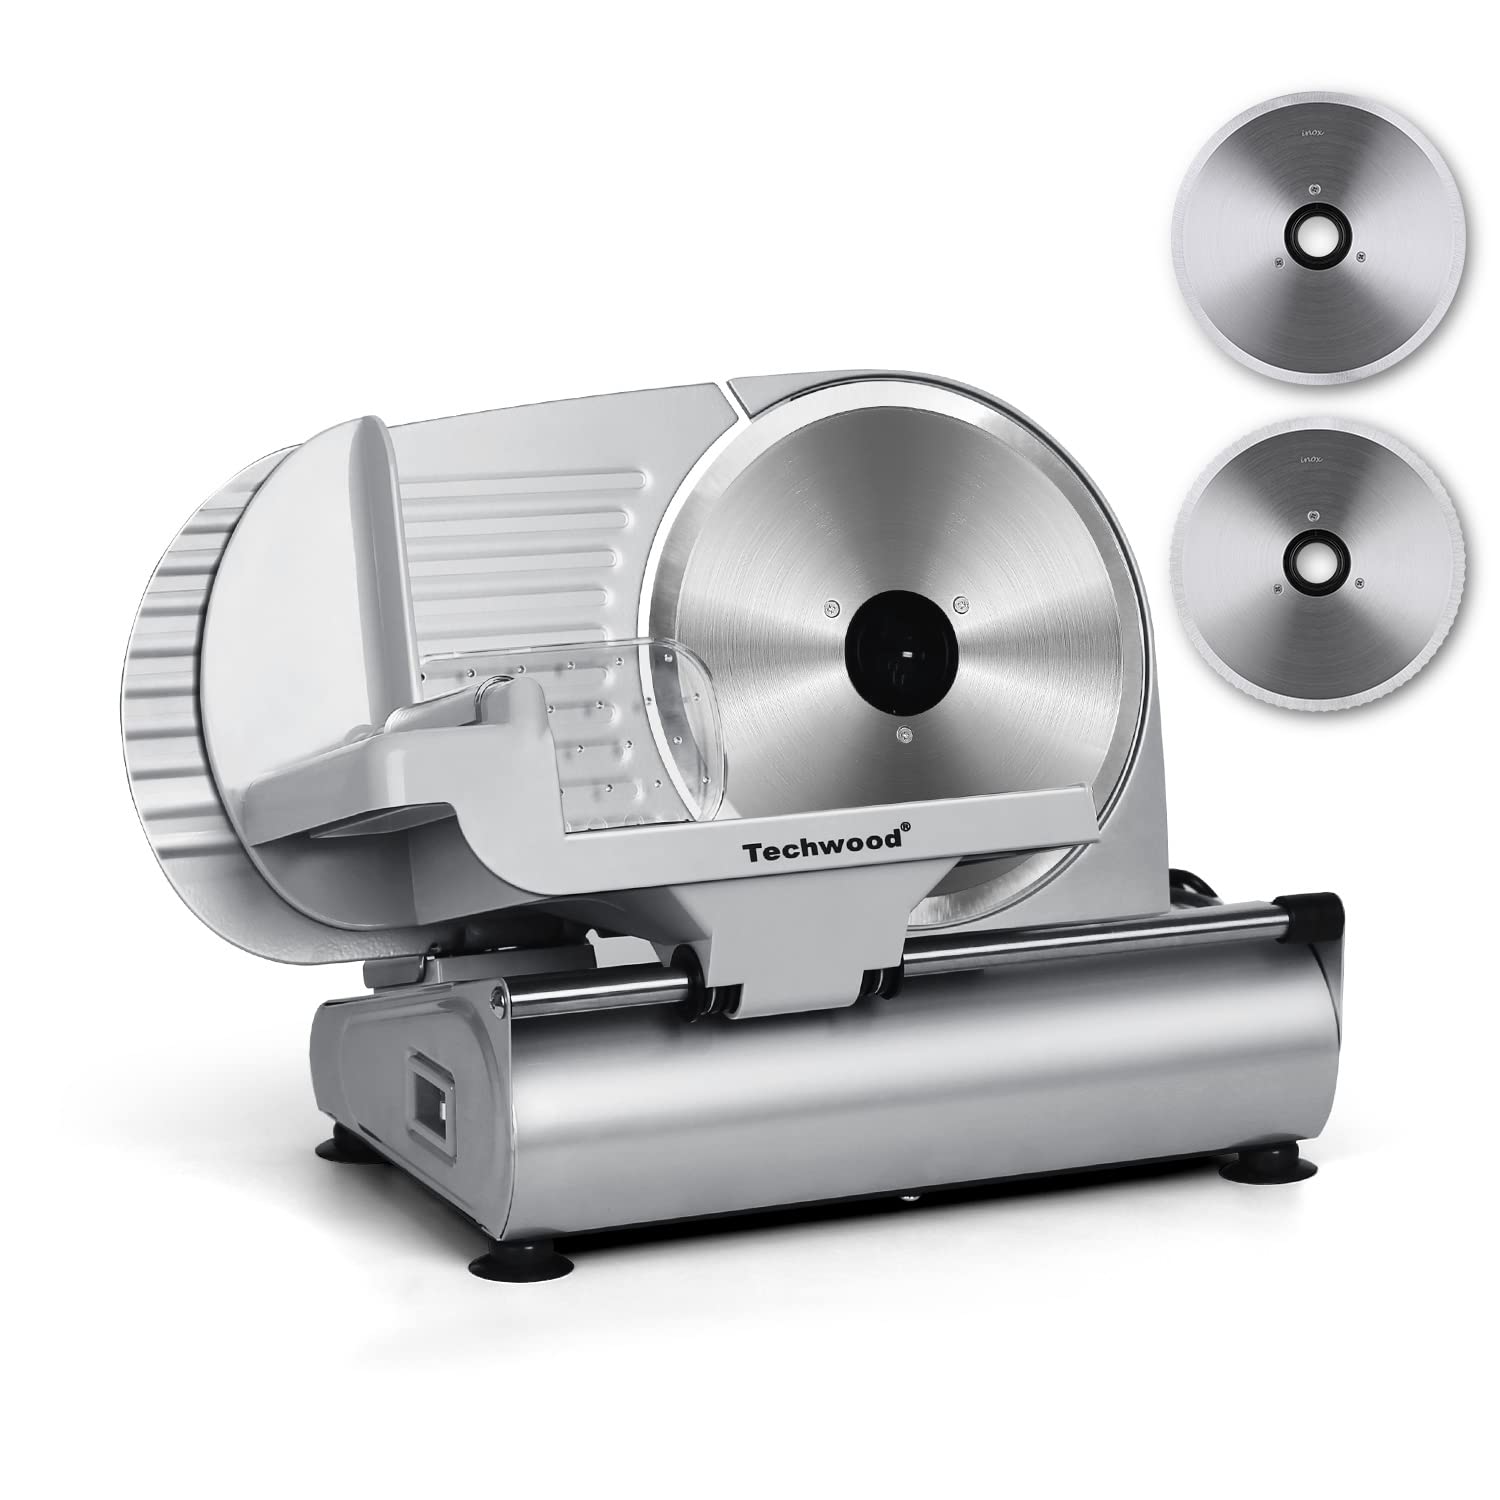
3. Techwood 9-Inch Meat Slicer — Best for Large Cuts

Techwood electric meat slicer with 9 inch stainless steel blade

4.3/5  ·  1,153 reviews  ·  $139.99  ·  View on Amazon

The Techwood has a 9-inch blade — the largest on this list — which matters if you’re slicing large roasts, full turkey breasts, or wide cuts that a 7.5-inch blade has to make multiple passes on. Aluminum housing, a stainless carriage tray and a 200W motor round it out, with non-slip feet to keep it in place during use.

At $139.99 it is now the most expensive machine on this list, about $20 more than the Borlebbi and $10 more than the Cuisinart FS-75. It is still the only way to get a 9-inch blade here, though its 1,153-review sample is the second smallest in this guide, after the FOHERE’s.

Pros:

  • 9″ blade — largest on this list; handles wide roasts and turkey breasts in fewer passes
  • The only 9-inch blade on this list
  • 200W motor, ahead of the Cuisinart FS-75’s weaker motor
  • 4.3 stars across 1,153 reviews

Cons:

  • Ships one blade, where the CUSIMAX and Borlebbi ship two
  • Heaviest machine on this list at 15.42 lb; needs more storage space
  • Smallest review sample of any pick in this guide

Verdict: Best choice if you regularly slice large roasts or want the extra blade width without paying a premium for it. The tradeoff is one blade instead of two, and a smaller track record than its rivals here.

Check Price on Amazon ↗

4. Borlebbi 200W Dual Blade Meat Slicer — Best Mid-Range

Borlebbi 200W electric meat slicer with two removable 7.5 inch stainless steel blades

4.3/5  ·  4,099 reviews  ·  $119.99  ·  View on Amazon

The Borlebbi runs a 200W motor against two removable 7.5″ stainless blades with a 0–15mm thickness dial. That is the same motor rating and the same blade count as the CUSIMAX, on a blade about an inch smaller, though at $119.99 it currently costs about $10 more. It also lists a child lock, non-slip suction feet, and a food pusher that doubles as a blade guard.

Its 4,099 ratings at 4.3 stars make it the second-largest review base in this guide, behind only the CUSIMAX. That matters more than the score itself. A 4.3 drawn from four thousand buyers is a steadier signal than a higher average drawn from a few hundred, and it is the main reason this machine is here rather than one of the thinly-rated alternatives at the same price.

One thing to check before you buy. The listing copy describes the housing as die-cast aluminium, while Amazon’s own specification table for the same product lists the material as ABS plastic and stainless steel. Those cannot both be right. Judge it as a plastic-bodied machine with stainless fittings at 10.7 pounds, and if the metal housing is the reason you were buying it, ask the seller before ordering.

Pros:

  • $119.99 — between the FOHERE and the Cuisinart FS-75 on price
  • 4,099 ratings — second-largest review base in this guide
  • 200W motor with two removable 7.5″ stainless blades
  • Child lock, non-slip feet, and a food pusher that doubles as a blade guard

Cons:

  • The listing contradicts itself on housing material — the specification table says ABS plastic, not the die-cast aluminium claimed in the description
  • Blade types are not specified, so there is no way to tell whether the second blade is serrated
  • 7.5″ blade — joint smallest here, so not the choice for large roasts
  • Hand wash only

Verdict: The middle of the range on price, with the review volume to back it up. At current prices, though, the CUSIMAX costs about $10 less with the same motor rating and blade count on a larger blade, so the Borlebbi makes sense only if its price drops back below the CUSIMAX’s.

Check Price on Amazon ↗

5. FOHERE 200W Dual Blade Meat Slicer — Best Budget

FOHERE 200W Electric Meat Slicer with dual 7.5 inch stainless blades in silver

4.2/5  ·  657 reviews  ·  $69.95  ·  View on Amazon

At $69.95, the FOHERE is the cheapest machine on this list that still includes two blades (serrated and smooth). The 200W motor matches the CUSIMAX on wattage, the 0–15mm thickness range covers standard home use, and the dual-blade design is the same core feature that makes the CUSIMAX appealing — at about $40 less. The trade-off is build quality. The housing is lighter plastic, the blade rotation isn’t as smooth as pricier options, and the 4.2-star rating (the lowest on this list) reflects real buyer dissatisfaction with long-term durability and vibration at full speed.

For occasional use — slicing deli meats a few times a month — the FOHERE does the job. For weekly or heavy use, the build quality will become apparent faster than the CUSIMAX or Techwood. Buy it if budget is the genuine constraint; budget for an upgrade within 2–3 years.

Pros:

  • $69.95 — lowest price on this list for a dual-blade slicer
  • 200W motor — adequate wattage despite low price
  • Dual blades (serrated + smooth) for bread and deli cuts
  • 0–15mm thickness adjustment covers standard home use

Cons:

  • 4.2 stars — lowest rating on this list; durability and vibration complaints in reviews
  • Lighter plastic construction than any other pick here; not built for heavy use
  • 650 reviews — moderate validation compared to CUSIMAX (5,089) or Cuisinart (3,877)

Verdict: Adequate for occasional use at the lowest price on this list. If budget is the constraint, it gets the job done. For regular use, add about $40 and buy the CUSIMAX instead.

Check Price on Amazon ↗

How to Choose a Home Meat Slicer

Blade Size: 7.5″ vs 8.7″ vs 9″

Blade diameter determines the maximum width of cut you can make in a single pass. A 7.5-inch blade (the Cuisinart and FOHERE) handles standard deli cuts and average roasts. An 8.7-inch blade (the CUSIMAX) adds margin for wider cuts.

A 9-inch blade (the Techwood) is the right choice if you regularly slice full turkey breasts or large standing roasts. For sandwich meat and charcuterie, 7.5 inches is sufficient. For whole roasts, go larger.

Above that there is a commercial class again — 10-inch machines built to slice continuously rather than in short bursts, which I cover in my BESWOOD 250 review and my KWS MS-10NT review, or the two compared head to head. For more on cutting-focused cookware, see my cookware hub.

Wattage: Does Motor Power Matter?

For home use, 130W is sufficient for standard deli meats, cooked chicken, and soft cheese. Where motor power becomes relevant is semi-frozen or very dense meat — thick salami, hard sausage, or partially frozen cuts that you’re slicing for portions rather than deli paper.

A 200W motor (CUSIMAX, Borlebbi, FOHERE and Techwood) handles these tasks better than a 130W motor (Cuisinart). At normal home use frequencies, both will perform well. If you process larger volumes, prioritise wattage.

Single Blade vs Dual Blade

A serrated blade cuts bread and cured meats with a sawing action that a smooth blade can’t replicate without tearing. A smooth blade produces clean, precise slices for fresh meats, turkey, and semi-firm cheese. If you want both functions, buy a slicer that includes both blades (CUSIMAX, FOHERE).

The Borlebbi also ships with two blades, though its listing does not say which types or check whether your chosen model offers optional blades sold separately. The Cuisinart FS-75 has aftermarket blade options available. For related equipment guides, see my cookware for gas stoves page.

Frequently Asked Questions

What’s the best home meat slicer for beginners?

The CUSIMAX. It has the most buyer reviews of any home slicer (5,089), a dual-blade setup that handles most home use cases, and a straightforward thickness dial. The main thing to know upfront: don’t run it for more than 5–10 minutes continuously.

Let it rest between sessions. It’s designed for home portions, not continuous commercial use.

Can a home meat slicer cut through bone?

No. Every slicer on this list is designed for boneless meat only. Attempting to slice through bone will damage the blade and potentially the motor. For bone-in cuts (lamb chops, ribs, T-bone), use a band saw or ask your butcher to cut them before purchase.

How thick can a home meat slicer cut?

Most home slicers on this list go up to 15–20mm (roughly 3/4 inch). The CUSIMAX reaches 20mm; the others stop at 15mm. For context: standard deli thin is 1–2mm, sandwich-ready is 3–5mm, and thick-cut bacon territory starts at 6mm and up. These machines cover the full range for practical home use.

How do you clean a meat slicer safely?

Unplug it first, put on cut-resistant gloves, and set the thickness dial to zero before you remove anything. Wash the blade, carriage and tray by hand in hot soapy water — hand wash, not the dishwasher, because the detergent is hard on plated and coated blade edges. Wipe the body with a damp cloth and never submerge it.

Dry everything fully before reassembly, and clean after every session rather than letting residue dry on. My full guide to how to clean a meat slicer covers the part most people skip: the area behind the blade, which you cannot reach without taking the machine apart.

Is a 200W or 130W motor better for home use?

For standard deli cuts and cheese, 130W is sufficient. The difference becomes noticeable with semi-frozen meat or dense cured sausage — a 200W motor powers through these more cleanly. If your primary use is turkey and ham for sandwiches, either works. If you process thicker or denser cuts regularly, prioritise 200W.

Do meat slicers need sharpening?

Yes, eventually. Most home slicers include a built-in sharpener on the housing — a ceramic wheel you run the blade through to restore the edge. How often depends on use frequency.

For typical home use (a few times a month), most buyers report the blade staying sharp for 6–12 months before the built-in sharpener is needed. Some higher-end models, like the Cuisinart FS-75, also support aftermarket blade replacement.

How These Picks Were Chosen

Plainly: this is a research-based guide, not a hands-on test. I have not run these side by side, and nothing here should be read as a report from my own kitchen.

What the picks rest on: blade diameter and whether it is stainless or carbon, motor wattage against the density of what you are actually slicing, the thickness dial range and whether it holds a setting, and how far the machine strips down for cleaning; plus the complaint patterns across verified-purchase reviews, which for slicers concentrate on two things – blades loosening over time, and food residue trapped in seams that do not come apart.

What I could not establish: slice consistency, which is the whole job. Measuring it means slicing the same chilled product at one setting repeatedly and measuring every slice, and no independent test does that for these machines. Blade size and wattage are used here as proxies, and a proxy is not a measurement.

The Bottom Line

For most households, the CUSIMAX is the right first slicer — the most validated machine at this price, dual blades, and a genuine thickness range. If you want a trusted consumer brand, the Cuisinart FS-75 trades some performance for brand support. Slicing large roasts regularly?

Get the Techwood 9-inch. Want the middle of the range? The Borlebbi sits between the two on price and has the second-largest review base here.

Working to a budget? The FOHERE dual-blade gets the job done for occasional use.

Everything on this site about slicers is collected in my meat slicer hub. For more kitchen equipment comparisons, see my cookware hub and my guide to best cookware sets.

Slicing by hand with good knives instead? The board matters more than most people think — my cutting boards for Japanese knives guide explains why hard boards quietly ruin sharp edges.

For powered prep beyond slicing — chopping, shredding, dough — see my food processors and choppers hub.


The full CUSIMAX review covers what the second blade actually buys, why 200W is a duty-cycle number, and how the recent price rise changes the value case.

Filed Under: Product Reviews

Blackstone 28-Inch vs 36-Inch Griddle: Which Size Should You Buy?

Last Updated October 26, 2026

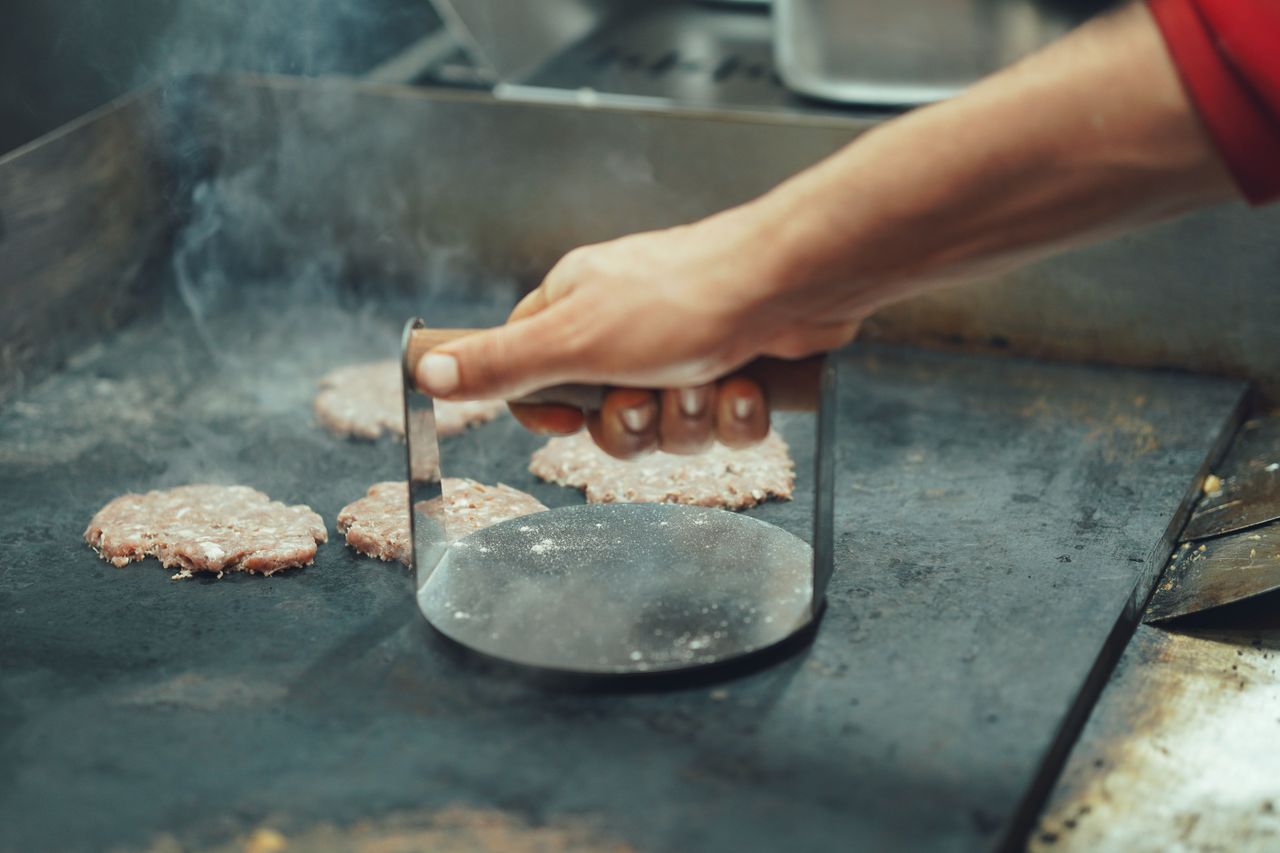
Pressing smash burgers on a hot flat top griddle

The quick answer

For a family of four doing regular outdoor cooking, buy the 28-inch. Owner reports are full of people who bought the 36-inch first and wished they had started smaller. The 36-inch is the right choice if you cook for large groups regularly or want to batch cook seriously — but for everyday family cooking, it’s more work than the extra cooking surface is worth.

I earn a commission if you buy through the Amazon links below, at no extra cost to you.

Blackstone 28-Inch Omnivore Griddle

Blackstone 28″ Omnivore
(2 burners)

Check Price
Blackstone 36-Inch 4-Burner Griddle Cooking Station

Blackstone 36″
(4-burner cooking station)

Check Price

I’m going to tell you something that Blackstone’s marketing won’t: bigger is not always better with flat top griddles. The 36-inch is an excellent piece of equipment, but it’s the right choice for a narrower range of people than most comparison articles would have you believe.

The two sizes get bought for different jobs — weekend breakfasts for a family, weeknight dinners, summer cookouts for twenty people — and owner reports separate fairly cleanly along those lines. What follows is an honest answer rather than a hedge.

Product Best For Price Rating Buy
Blackstone 28″ Omnivore Everyday family cooking $249.99 4.7★ (12,146) Check Price
Blackstone 36″ (4 burners) Large groups & batch cooking $399.00 4.7★ (10,726) Check Price

Prices and ratings checked 21 September 2026. Both links go to Blackstone’s standard Amazon listings (4.7★ with 10,000+ ratings each). In July these were out of stock and this page linked bundled versions instead, a 28″ with a hard cover and a 36″ with a hood; both standard listings are available again.

Feature Blackstone 28-Inch Blackstone 36-Inch
Cooking surface 470 sq inches 720 sq inches
Burners 2 4
BTU output 34,000 total 60,000 total
Weight ~68 lbs ~120 lbs
Dimensions (approx.) 52 x 22 x 36″ 62 x 22 x 36″
Typical price $250 $399
With hood option Yes (some models) Yes (some models)

The cooking surface: what those numbers mean in practice

470 square inches sounds abstract. Here’s what it means: on the 28-inch, you can simultaneously cook a dozen eggs, a pound of bacon, and a stack of pancakes. That’s a full breakfast for four people, all at once.

The 28-inch is a large cooking surface. It just doesn’t feel like it in photos.

720 square inches is the surface area that lets you cook for eight to ten people simultaneously without any batching. It’s the surface that lets you smash a dozen burgers at once, or cook a week’s worth of meal prep in a single session. It’s a lot of griddle.

The case for the 28-inch (which is stronger than you think)

For a family of four, much of a 36-inch surface will sit unused on most cooks, which means heating, holding temperature on and cleaning a surface you only partly use. The 28-inch would do the same job with less fuel, a faster heat-up and less cleanup.

The weight difference is real and it matters more than people anticipate. At 68 lbs, the 28-inch is manageable — one person can move it, store it for winter, take it tailgating. At 120 lbs, the 36-inch is functionally permanent.

Once it’s in your backyard, it stays there. Make sure you want it there before you buy it.

The 28-inch also heats more evenly, because two burners across a 28-inch surface delivers more consistent coverage than four burners across 36 inches where the outer edges can lag slightly.

The case for the 36-inch (and who actually needs it)

The 36-inch is unambiguously better when you’re cooking for a crowd. Six or more people for dinner, a cookout for twenty, meal prep for the week — these are the use cases where the extra surface earns its place.

The four-burner setup gives you meaningful heat zone control. Left side screaming hot for searing, right side medium for keeping things warm, middle for active cooking. This is genuinely useful when you’re managing a complex meal with multiple proteins and vegetables at different stages.

The 28-inch’s two burners create a more limited temperature gradient. Either way, a wireless probe thermometer makes it easier to track multiple proteins across those zones without cutting into anything to check.

If you run a weekend pop-up, cater parties, feed an extended family regularly, or just genuinely love the ritual of a big cook, the 36-inch will make you happy every time you use it. But be honest with yourself about how often that actually describes you.

Cleanup: the thing nobody mentions in comparisons

Cleaning a flat top after cooking takes a few minutes regardless of size. But cleaning 720 square inches versus 470 square inches adds up. Every session on the 36-inch involves scraping, wiping, and re-seasoning a significantly larger area.

Over a summer of regular use, that difference is noticeable. This sounds minor and it is — but if you’re already someone who finds post-cook cleanup tedious, don’t make it 50% bigger.

Buy the 28-Inch if…

  • You cook for two to four people most of the time
  • You want the option to move it or take it with you
  • You want faster heat-up and more even coverage
  • You don’t want to dedicate permanent outdoor space to it
  • You’re buying your first flat top and want to start right

Buy the 36-Inch if…

  • You regularly cook for six or more people
  • You want serious heat zone control with four independent burners
  • You batch cook or meal prep in large quantities
  • You have a dedicated outdoor cooking area and it can live there permanently
  • You run events or cook for extended family gatherings

The verdict

Start with the 28-inch. If you find yourself consistently running out of cooking surface — actually running out, not just theoretically wanting more — then you’ll know exactly why to upgrade. Most people who buy the 36-inch first find they’re using 60% of it most of the time. The 28-inch is an excellent flat top griddle for the way most people actually cook outdoors.

Check 28″ Price on Amazon Check 36″ Price on Amazon

How This Comparison Was Put Together

Plainly: this is a research-based comparison, not a hands-on test. I have not run these two side by side.

What it rests on: the published specification for both – cooking area in square inches, burner count and total BTU, and how BTU per square inch compares between them, which is the number that actually decides whether the extra size costs you heat; plus cart and shelf configuration, and the pattern across verified-purchase reviews, where the recurring themes are rust after seasoning lapses and uneven heat between burner zones.

What I could not establish: heat evenness across either plate, which is the practical difference between the two sizes. Measuring it needs a grid of infrared readings across a fully preheated surface, and no independent test does that for these griddles. Burner layout and BTU per square inch are the indicators used here.

Frequently Asked Questions

Is the Blackstone 28-inch big enough for a family?

Yes. Its 470 square inches of cooking surface handles a dozen burgers or a full pancake breakfast for four at once. Most people who buy the 36-inch report using around 60% of the surface for everyday cooking, which is roughly what the 28-inch gives you.

What is the main difference between the Blackstone 28-inch and 36-inch?

Size and heat output. The 28-inch has 470 square inches of cooking surface with two independently controlled burners producing 34,000 BTU total. The 36-inch has 720 square inches with four burners producing 60,000 BTU. Cooking capability is otherwise identical — the 36-inch just does more at once.

Which Blackstone griddle should I buy first?

Start with the 28-inch unless you regularly cook for large groups or batch cook seriously. It costs less, heats up faster, and has less surface to clean and season. If you consistently run out of cooking surface, that is your signal to upgrade.

Where do the Amazon links go?

Both links go to the standard Blackstone 28-inch and 36-inch listings. In July those were out of stock, so this page linked bundled versions with a hard cover or a hood; both standard listings are available again, so the links now go to them.

Related: See all my flat top grill reviews and guides
Related: Best flat top grill: all options compared


Whichever size you pick, seasoning it correctly matters more for day-to-day performance than the size difference does.

For the full breakdown of the 36″ model specifically, see my Blackstone 36″ review.

Filed Under: Product Reviews

Lodge vs Le Creuset Dutch Oven: Is the Price Difference Worth It?

Last Updated November 7, 2026

The quick answer

The honest answer: Lodge makes a very good Dutch oven for the money, and if budget is the constraint, buy it and cook happily. But if you cook with a Dutch oven three or four times a week and you’re buying once for a decade, the Le Creuset is worth every penny of the price difference. The quality gap is real — the question is whether it matters for how you cook.

I earn a commission if you buy through the Amazon links below, at no extra cost to you.

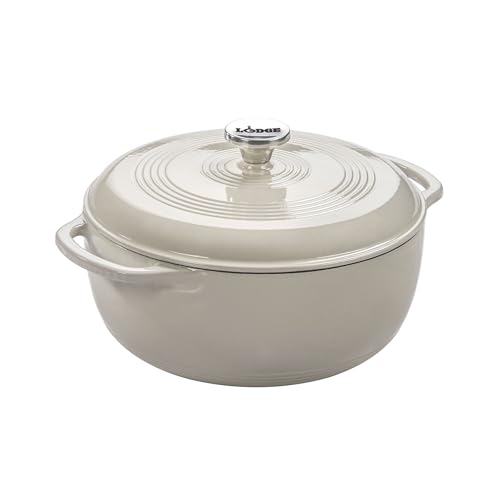
Lodge 6-Quart Enameled Cast Iron Dutch Oven
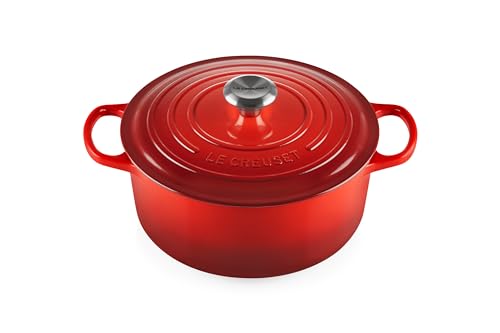
Le Creuset Signature 5.5-Quart Dutch Oven

I want to be straight with you about something before I go any further: I have not cooked with either of these. This comparison is built from published specifications, owner reviews at scale, and the testing other outlets have published. On the evidence, the Le Creuset is the better piece of cookware — better enamel, better lid seal, better heat retention. The question is whether that difference is worth spending about $200 more.

It depends entirely on how you cook. Let me explain what you actually get for the extra money, and then you can decide.

Product Best For Price Rating Buy
Lodge Essential Enamel 6 Qt Best Value $89.90 4.7★ (39,179) Check Price
Le Creuset Signature 5.5 Qt Best Long-Term Buy $299.98 4.7★ (7,884) Check Price
Feature Lodge 6qt Enameled Le Creuset 5.5qt Signature
Capacity 6 quarts 5.5 quarts
Material Enameled cast iron Enameled cast iron
Made in China France
Oven safe to 500°F 500°F
Induction compatible Yes Yes
Warranty Lifetime limited Lifetime limited
Typical price about $90 $279–$465, by colour

What you actually get for the extra money

I know $200 is a lot, and I’m not going to pretend it isn’t. But let me describe the differences as specifically as I can, because ‘it’s just better’ isn’t useful.

Enamel quality

This is where owners report the biggest difference. Chipping is the most repeated complaint in verified-purchase reviews of the Lodge enameled Dutch oven, usually on the rim and the lid edge, where knocks happen. Le Creuset reviews dwell far more on whether the price is justified than on chipping. Neither maker publishes an enamel thickness, so this is a pattern in owner reports, not a measured difference.

How the two enamels hold up over a decade has not been measured by any independent test I could find. The warranty each maker gives (see the table above) is the firmest signal of what it expects from its own enamel, so read the exclusions on both before you pay for either.

Interior cooking surface

The interior of a Le Creuset is lighter in colour (cream/off-white) and smoother than Lodge’s darker interior. The lighter colour is actually functional — you can see browning more clearly, which helps you judge when a fond is developed or when garlic is about to burn. The smoother surface is easier to clean and behaves more predictably with acidic ingredients like tomatoes.

Lid fit and heat retention

A tight lid matters most for long braises and for bread, because the lid holds steam in the pot. Owners of the Le Creuset tend to describe its lid fit as the closer of the two, though no published test has measured the seal on both. No-knead bread bakers know this well — a tight lid seal in the first phase of baking is what creates the steam environment that makes the crust. The Lodge lid is good, not perfect.

Both pots retain heat well once up to temperature, as heavy cast iron does. Neither maker publishes wall thickness, so any claim that one spreads heat more evenly than the other is a guess this page will not make.

Where Lodge is completely fine

For braising — pot roasts, lamb shanks, chicken thighs, short ribs — Lodge performs as well as Le Creuset. Once you’ve got liquid in the pot and the lid is on, the small differences in lid seal and interior surface matter very little. The physics of braising are forgiving. A Lodge turns out genuinely spectacular braises.

For stovetop soups, stews, and anything where the pot is a vehicle rather than the critical tool, Lodge is more than adequate. You’re not leaving quality on the table in these applications.

The bread baking argument

If you bake no-knead or Dutch oven bread, the Le Creuset is meaningfully better. The lid fit matters. The light-coloured interior shows you what’s happening.

If you bake bread weekly, those small differences in lid fit and interior colour are used every week, which is the case for paying more.

The honest long-term calculation

The strongest argument for Le Creuset is cost per use. A $300 pot used three times a week for ten years works out to under $0.20 a use. That is arithmetic, not a promise about how long either pot lasts: chipped enamel can happen to both, and how a pot is heated and cleaned matters as much as the brand.

But that calculation only works if you actually cook with it that often. If you’re buying your first Dutch oven and you’re not sure how much you’ll use it, start with Lodge. If you already love Dutch oven cooking and you’re replacing a pot you’ve worn out, buy Le Creuset and stop thinking about it.

Buy the Lodge if…

  • Budget is a genuine constraint
  • You’re buying your first Dutch oven and want to try the format
  • You cook with it occasionally rather than weekly
  • You use it primarily for braising and soups where the lid seal matters less

Buy the Le Creuset if…

  • You cook with a Dutch oven three or more times a week
  • You bake bread in it regularly
  • You want to buy once and keep it for ten to fifteen years
  • You care about the cooking surface staying pristine

The verdict

Buy Lodge if budget matters or if you’re not yet certain how much you’ll use it. Buy Le Creuset if you already know you love Dutch oven cooking and you want the best version of the thing. Both are good pots. One is significantly better.

Related: See all my cookware reviews and guides
Related: Best cast iron Dutch ovens 2026: full buying guide

How This Comparison Was Put Together

Plainly: this is a research-based comparison, not a hands-on test. I have not run these side by side.

What it rests on: the published specification for both – capacity, weight, enamel type, knob material and its oven-safe limit, and the warranty each carries, which is the clearest signal of what each maker expects of its own enamel; plus the pattern across verified-purchase reviews for each, where the Lodge theme is enamel chipping and the Le Creuset theme is whether the price difference is justified rather than whether the pot works.

What I could not establish: whether Le Creuset’s enamel genuinely outlasts Lodge’s by enough to justify the gap. That needs controlled thermal-shock and impact testing on both, and no independent test covers it. Warranty terms and the balance of owner reporting are what this comparison reasons from, and both are weaker than a measurement.

Frequently Asked Questions

Is Le Creuset worth the extra cost over Lodge?

For daily, long-term use, yes — the smoother enamel, better lid seal, and heat retention are real, measurable differences. For occasional cooking or a first Dutch oven, Lodge delivers most of the same results for a third of the price.

Which is better for bread baking, Lodge or Le Creuset?

Both work well for no-knead bread baking — the enclosed cast iron traps steam either way. Le Creuset’s tighter lid seal holds slightly more moisture, which can help with crust development, but the difference is marginal enough that most bakers won’t notice it.

Do Lodge and Le Creuset Dutch ovens work the same on all stovetops?

Yes — both are compatible with gas, electric, induction, and oven use. Cast iron is magnetic, so induction heating works efficiently on either brand.

Which has better resale value, Lodge or Le Creuset?

Le Creuset holds resale value noticeably better — its enamel finish and brand recognition mean used pieces regularly sell for 40-60% of retail on the secondhand market. Lodge Dutch ovens have minimal resale value, which is consistent with their lower purchase price.

Filed Under: Product Reviews

  • « Go to Previous Page
  • Page 1
  • Interim pages omitted …
  • Page 63
  • Page 64
  • Page 65
  • Page 66
  • Page 67
  • Interim pages omitted …
  • Page 70
  • Go to Next Page »

Recent Articles

  • Burr vs Blade Grinder: Which One Should You Buy?
  • Stainless Steel Pan Sticking? Causes and the Water Test
  • Carbon Steel Pan Rusting: What Makers Say to Do
  • Moka Pot Grind Size: What to Set and How to Dial It In
  • Hard Anodized vs Stainless Steel Cookware: Which to Buy

Search


HOME          Contact          Affiliate Disclosure          Terms of Service          Privacy Policy


kitchenwarecompare.com is a participant in the Amazon Services LLC Associates Program, an affiliate advertising program designed to provide a means for sites to earn advertising fees by advertising and linking to Amazon.com, Endless.com, MYHABIT.com, SmallParts.com, or AmazonWireless.com. Amazon, the Amazon logo, AmazonSupply, and the AmazonSupply logo are trademarks of Amazon.com, Inc. or its affiliates. As an Amazon Associate I earn from qualifying purchases.


Copyright © 2026 kitchenwarecompare.com, ALL RIGHTS RESERVED.