• Skip to primary navigation
  • Skip to main content
  • Skip to primary sidebar

Kitchenware Compare

  • Home
  • Product Reviews
    • Air Fryers
    • Coffee
    • Cookware
    • Flat Top Grills
    • Meat Thermometers
    • Food Processors
    • Knives
    • Pizza Ovens
    • Toaster Ovens
    • Juicers
  • Food Blog
  • Helpful Kitchen Tips
  • Data Studies
  • About
  • How I Review
  • Contact
You are here: Home / Archives for Product Reviews

Best Espresso Grinder 2026: 5 Picks Compared

Last Updated June 30, 2026

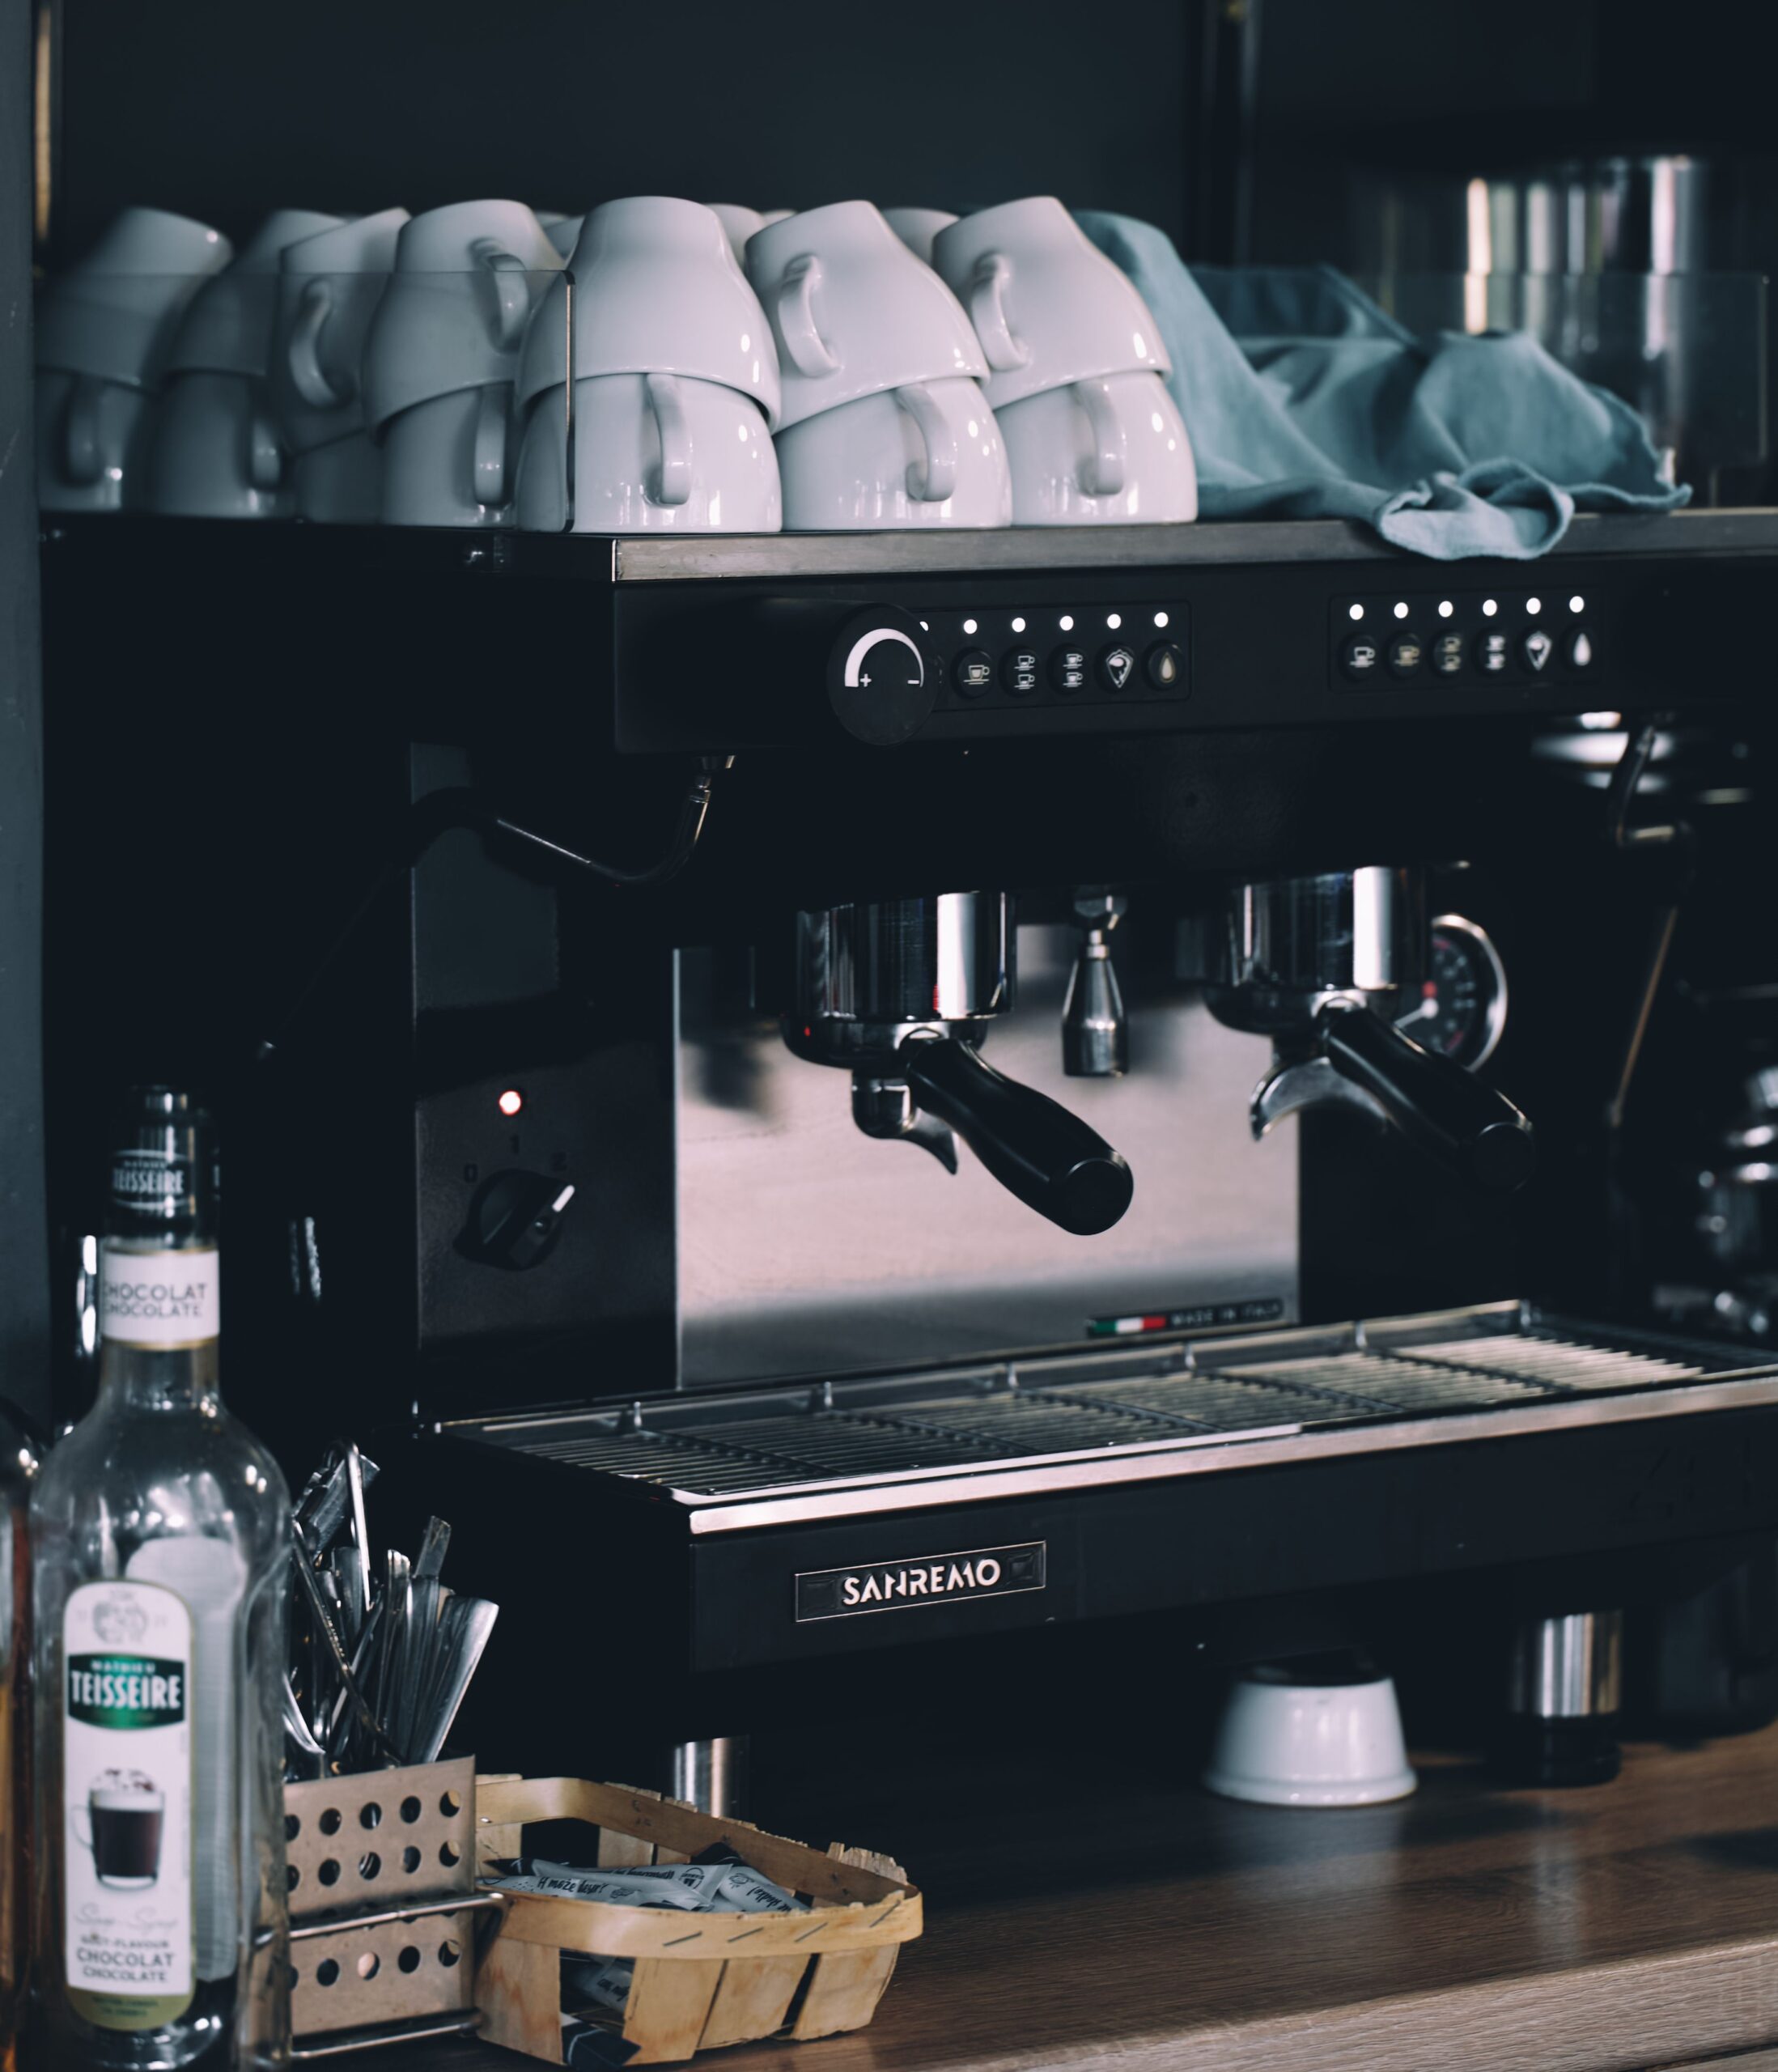
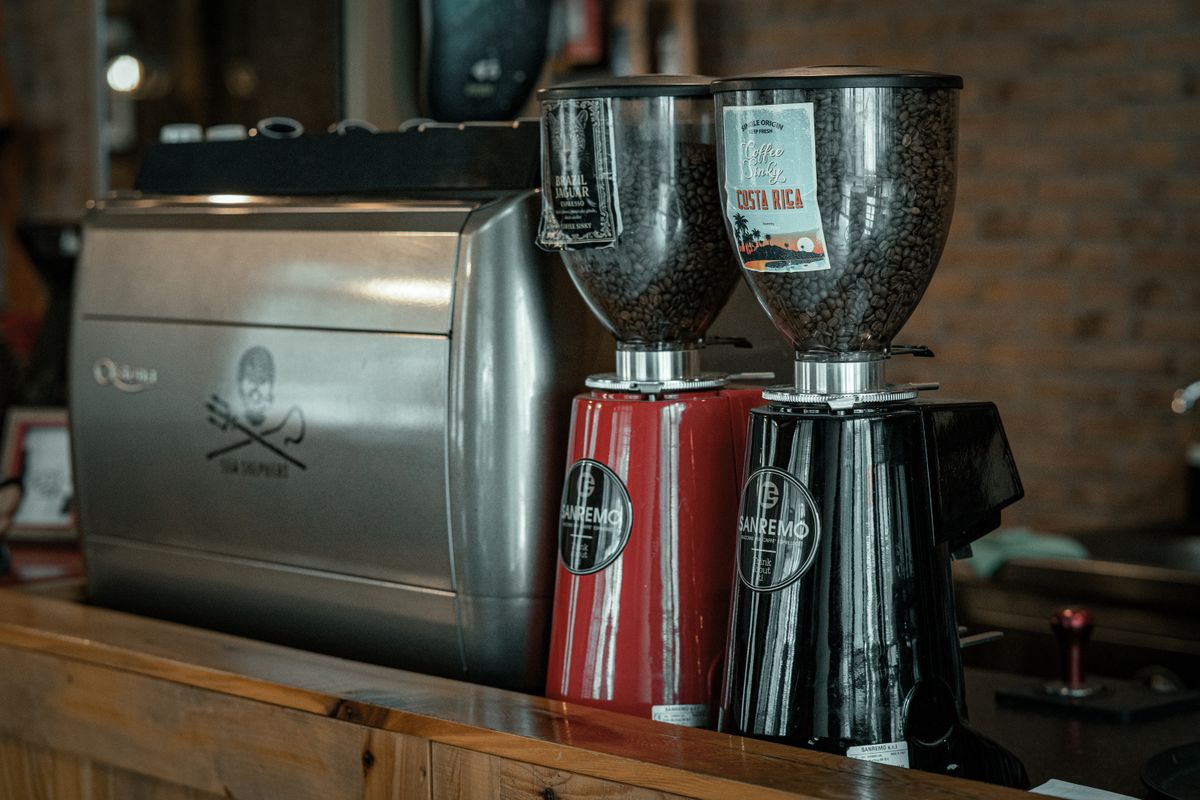
Coffee grinders and an espresso machine on a cafe counter

This post contains affiliate links. If you buy through them, I earn a small commission at no extra cost to you. Full disclosure here.

If you’re making espresso with a blade grinder — or even a basic burr grinder not calibrated for espresso — the grinder is almost certainly the weak link. Uneven particle sizes cause channeling and inconsistent extraction, and none of that is the espresso machine’s fault. Five grinders are compared below across different price points and burr styles, on the specifications and owner reports that actually separate them for home espresso in 2026. My main pick is the Breville Smart Grinder Pro — 60 settings, a dose timer, and portafilter grinding for around $200.

Quick Comparison

Product Best For Price Rating Buy
OXO Brew Conical Burr Grinder Best Budget Electric ~$110 4.3★ (23,346) Check Price
Breville BCG820BSS Smart Grinder Pro Best Overall (electric) ~$200 4.5★ (6,993) Check Price
Timemore Chestnut C2S Best Budget Manual $75 4.7★ (986) Check Price
Timemore Chestnut C3S Pro Best Manual for Travel $95 4.7★ (1,715) Check Price
Capresso Infinity Plus Best for Multi-Style Brewing (electric) $99 4.4★ (1,685) Check Price

Why the Grinder Matters More Than People Expect

Espresso is unforgiving. Hot water pushes through a compressed coffee puck at 9 bars of pressure in roughly 25 seconds. If grind consistency is off — even by a small amount — water finds the path of least resistance through the puck (called channeling), and you get uneven extraction: part of the puck over-extracts and turns bitter, part under-extracts and tastes sour. The espresso machine itself isn’t the culprit.

A good espresso grinder needs two things a standard coffee grinder often lacks:

Precise, fine adjustment. Espresso sits at the finest end of the grind range — between powdered sugar and fine table salt. A single step on the adjustment dial can shift your shot time by several seconds. Cheap grinders have wide stepped adjustments with limited positions; proper espresso grinders have many fine steps, or true stepless adjustment.

Burrs, not blades. Blade grinders chop beans randomly, producing a wide range of particle sizes. Burrs slice beans cleanly into consistent particles.

For espresso, burrs are non-negotiable — and the best results come from burrs specifically designed for fine grinding. If you already own a burr grinder and it has stopped performing, start with why a coffee grinder stops grinding properly before replacing it — the cause is usually bridging beans or a mis-seated burr rather than wear.

Manual hand grinders deserve more credit than most people give them. A quality hand grinder with conical steel burrs — like the Timemore models reviewed below — produces grind consistency that rivals electric grinders at twice the price. The obvious trade-off: you grind by hand for 45–60 seconds per shot. For one coffee that’s fine; for a morning round of two or three, it adds up.

The Best Espresso Grinders (2026)

1. OXO Brew Conical Burr Grinder — Best Budget Electric

OXO Brew Conical Burr Grinder in silver stainless steel

Price: ~$110  |  Rating: 4.3★ (23,346 reviews)

The OXO Brew Conical Burr is where most people should start if they’re upgrading from a blade grinder and want to stay near the $100 mark. With more than 23,000 reviews it’s the most-tested burr grinder in this price range, and the 4.3-star average reflects broad satisfaction across different coffee setups.

Forty grind settings cover drip, pour-over, and espresso. For espresso, you’ll be working at the fine end of the dial where small step differences have a surprisingly large effect — dialling in takes patience, and the sweet spot sometimes falls between two adjacent settings. The one-touch timer is the standout practical feature: set your grind duration once and it repeats, which helps keep dose weight consistent from shot to shot.

Stainless steel burrs, a removable grounds container, and a hopper that holds enough beans for a week of daily shots. The body is plastic, which is appropriate for the price. The limitation is that the stepped adjustment isn’t as precise as dedicated espresso grinders — but at $109.95, this is a real burr grinder that will meaningfully improve your espresso over any blade alternative.

Best for: first-time burr grinder buyers, budget-conscious home espresso setups

  • ✅ 23,000+ reviews (highly proven)
  • ✅ 40 grind settings, one-touch timer
  • ✅ Stainless steel burrs
  • ❌ Stepped adjustment — imprecise at fine espresso range
  • ❌ Plastic body

Check Price on Amazon

2. Breville BCG820BSS Smart Grinder Pro — Best Overall

Breville Smart Grinder Pro BCG820BSS in brushed stainless steel

Price: ~$200  |  Rating: 4.5★ (6,993 reviews)

The Breville Smart Grinder Pro covers the widest range of brew methods of any electric grinder here. Sixty grind settings, a digital timer display with 0.2-second increment control, and the ability to grind directly into the portafilter — the last of which makes a real difference to your workflow, since you lose fewer grounds in the transfer.

Sixty settings means there’s nearly always a position to land between any two steps as you dial in. The digital timer lets you set your dose by duration and repeat it consistently — important for espresso where a gram or two of dose weight affects extraction. The stainless steel conical burrs perform reliably at fine espresso grind sizes. If you’re using a Breville Bambino Plus or another Breville machine, the portafilter cradle fits 54mm baskets directly, which is a genuine convenience during a morning routine.

At around $200 the Smart Grinder Pro is the most expensive pick here, and the case for it rests on grind adjustment rather than on price. The caveats: the portafilter cradle doesn’t fit all basket sizes, so verify the fit if you have a non-Breville machine, and the exterior is plastic. Neither affects the core grinding performance.

Best for: home espresso enthusiasts who want precise dosing control, Breville machine owners

  • ✅ 60 grind settings — maximum espresso precision
  • ✅ Digital dose timer (0.2-second increments)
  • ✅ Grinds directly into portafilter
  • ✅ Exceptional current value for the specification
  • ❌ Portafilter cradle fit varies by machine
  • ❌ Plastic exterior

Check Price on Amazon

3. Timemore Chestnut C2S — Best Budget Manual Grinder

Timemore Chestnut C2S manual coffee grinder in black

Price: $75  |  Rating: 4.7★ (986 reviews)

Manual grinders split opinion. If you’ve never used one, grinding by hand for 45 seconds before your morning espresso sounds tedious. In practice, it becomes routine quickly — and the grind quality from a $75 Timemore often matches electric grinders costing twice as much.

The C2S uses Timemore’s S2C conical burr set, designed with espresso in mind. The stainless steel burrs produce notably consistent particle sizes at fine settings. The double bearing positioning system keeps the burr assembly centred during grinding — any wobble in the burr gap creates larger, irregular particles. Eliminate the wobble and you get a more even coffee bed, more predictable extraction, and better shots.

The C2S is simpler than the C3S Pro (no foldable handle, more compact body), which makes it the better choice for home countertop use where travel portability isn’t a priority. If you make one or two espresso shots per day and don’t mind the hand grinding, this is the best precision-to-cost ratio on this list. I have written it up in full: read the Timemore C2S review, which covers the click scale, the top cover Timemore says it fixed, and what owners report after a year.

Best for: home single-shot brewers, anyone who values precision over speed

  • ✅ S2C espresso-optimised burrs
  • ✅ Double bearing positioning for consistency
  • ✅ 4.7★ rating
  • ✅ Silent — no motor noise
  • ❌ Hand grinding (~45 sec per double shot)
  • ❌ Lower throughput than electric models

Check Price on Amazon

4. Timemore Chestnut C3S Pro — Best Manual Grinder for Travel
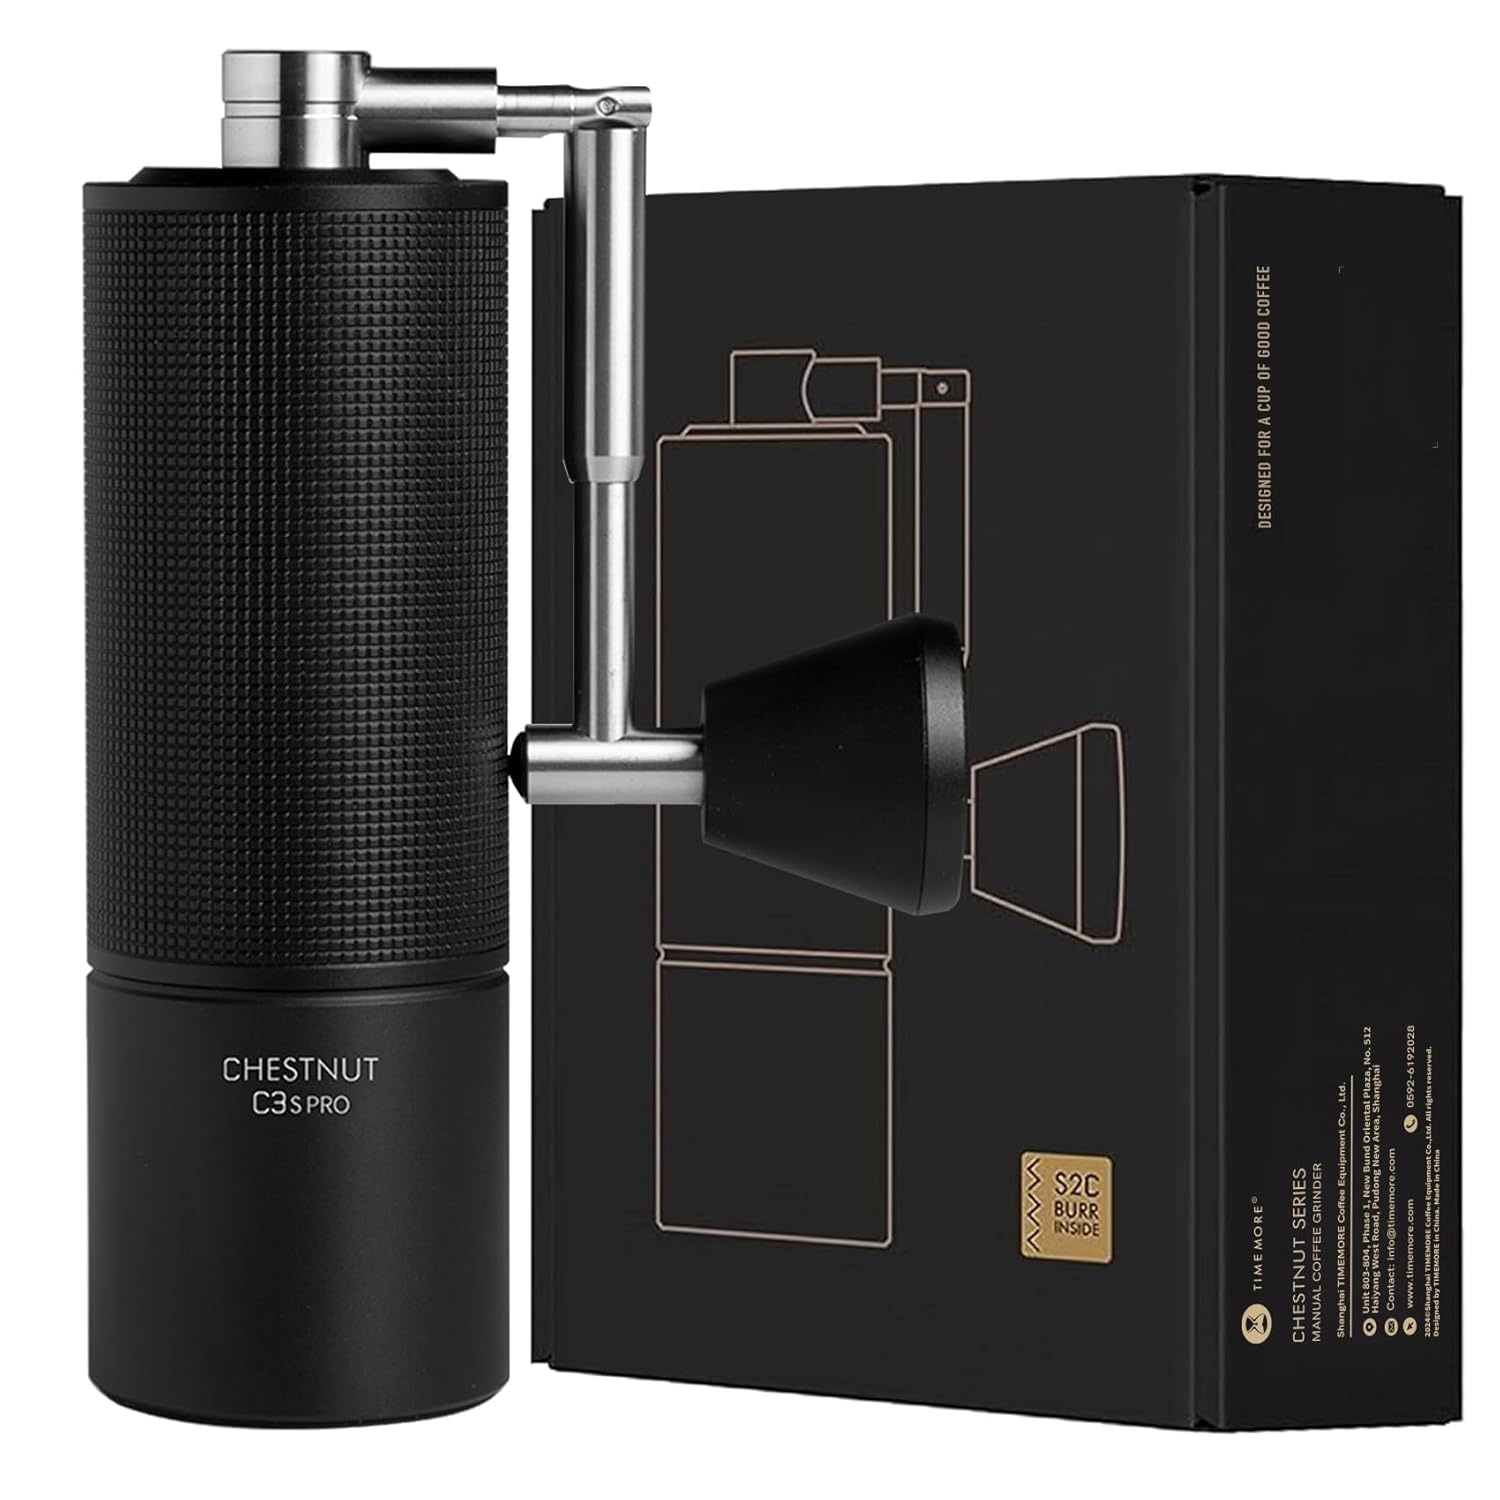
Timemore Chestnut C3S Pro manual grinder with foldable handle

Price: $95  |  Rating: 4.7★ (1,715 reviews)

The Timemore Chestnut C3S Pro is the C2S’s more capable sibling, and its 4.7-star average on 1,715 reviews is one of the strongest ratings I’ve seen for any grinder at this price. The core improvements: a foldable handle that collapses for packing, a wider grind adjustment range, and better ergonomics during grinding.

For espresso drinkers who travel — anyone who packs a portable coffee setup — this is the obvious choice. It pairs naturally with an AeroPress or a portable espresso maker, and in that combination you have a genuinely capable espresso-style setup that fits in a carry-on. At home, the foldable handle is a mild inconvenience, but the improved adjustment precision over the C2S makes it worth the $20 premium if you’re serious about espresso dialling.

The grind range covers fine espresso through coarser AeroPress grind, so one grinder handles everything if you brew different ways on different days. The S2C burrs produce the same clean, consistent grounds as the C2S. For a hand grinder at $95, the C3S Pro sets a high bar. I have written it up in full: read the Timemore C3S Pro review, which covers the transposed grind chart and what owners report about the top cover.

Best for: travellers, campers, home brewers who want maximum manual grinder quality

  • ✅ Foldable handle — genuinely travel-ready
  • ✅ 4.7★ on 1,715 reviews
  • ✅ Wide grind range (espresso through coarse)
  • ✅ S2C conical burrs
  • ❌ Hand grinding (~45–60 sec per double shot)
  • ❌ Slightly slower grinding rate than the C2S

Check Price on Amazon

5. Capresso Infinity Plus — Best for Multi-Style Brewing
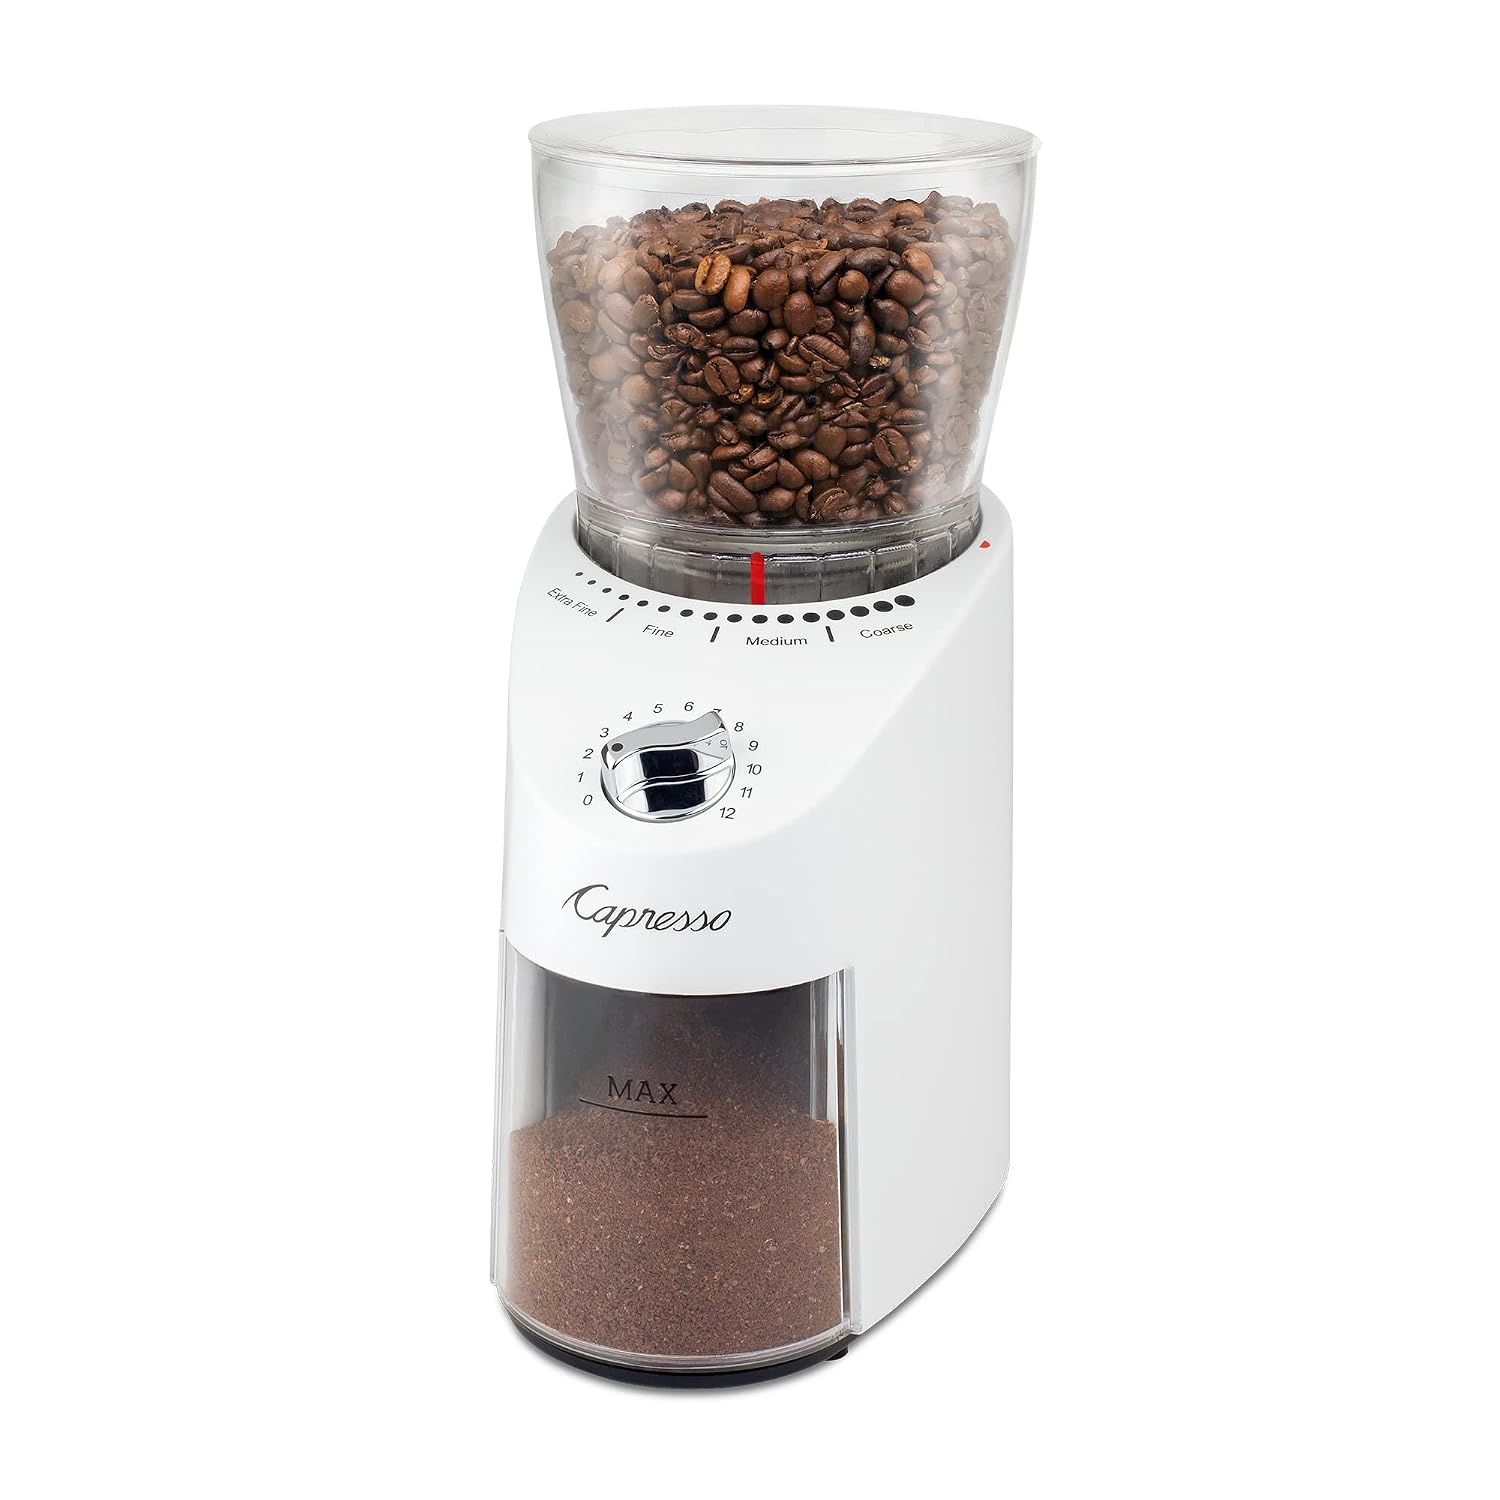
Capresso Infinity Plus conical burr grinder in white

Price: $99  |  Rating: 4.4★ (1,685 reviews)

Capresso has been making burr grinders for decades, and the Infinity Plus reflects that experience. Its motor runs at 450 RPM — significantly slower than most electric grinders. Lower speed generates less heat, and potentially better flavour preservation in lighter roasts where volatile aromatics matter most. It does not, on the evidence of owner reviews, mean less mess: static is the single most common complaint about this grinder, including from one household on their third Capresso who call it by far the messiest they have owned.

Sixteen grind settings is fewer than the Breville’s sixty, but they’re well-spaced: dedicated positions for fine espresso, medium drip, coarser pour-over, and French press. The conical burrs produce consistent results across all of them. Amazon lists the housing material as plastic, and two owners who previously had an aluminium-bodied Infinity report the current build as lighter and cheaper. At four pounds it is not a heavy machine.

The Infinity Plus earns its place in households where different people want different brewing methods. One person wants espresso; another wants drip; a third wants French press. For pure espresso enthusiasts who want maximum dialling precision, the Breville’s 60 settings win on flexibility — but for variety across brewing styles, the Capresso is the stronger choice. I have written it up in full: read the Capresso Infinity Plus review, which covers the static reports, the housing change and how the grind collar differs from the timer dial.

Best for: multi-method households, anyone who wants range across brewing styles rather than the finest espresso adjustment

  • ✅ Slow 450 RPM motor — less heat, and quieter than the model it replaced
  • ✅ 16 settings covering espresso through French press
  • ✅ 4.4★ on 1,685 reviews
  • ✅ Large 11 oz hopper and 4 oz grounds container
  • ❌ Fewer settings than Breville (less fine-tuning at espresso range)
  • ❌ Stepped adjustment only
  • ❌ Static is the dominant owner complaint, and the housing is plastic

Check Price on Amazon

What to Look for When Buying an Espresso Grinder

Burr type: conical vs flat

Both conical and flat burrs work well for espresso. Conical burrs (used in all five grinders above) are slower, quieter, and tend to produce a bimodal distribution — a mix of fine and coarser pieces — that some espresso brewers prefer for body and mouthfeel. Flat burrs grind faster and produce more uniform particle sizes. At this price range, conical is the norm and performs well.

Number of grind settings

More settings means finer adjustment. For espresso this matters: the gap between “perfectly dialled in” and “slightly too fine” is small. Sixty settings (Breville) gives more room to manoeuvre than sixteen (Capresso). Manual grinders with stepless adjustment can often be dialled in more precisely than either, but require more patience to find and return to a consistent position.

Electric vs manual

Electric is faster and more convenient. Manual produces better grind consistency at a given price. If you make one or two shots per day and want the best quality under $100, a hand grinder will outperform an electric in that range. If you prioritise convenience or make multiple rounds, go electric.

Grinding directly into the portafilter

Transferring grounds from a container into the portafilter distributes them unevenly and causes spills. Grinders that can grind directly into the portafilter — the Breville being the main example here — reduce that problem. It’s a small practical benefit that matters more than it sounds during daily use.

Pairing with your espresso machine

The grinder and machine are a system. A budget espresso machine will benefit from a proper burr grinder, but there’s a ceiling to what the machine can extract regardless of grind quality. If you’re running a mid-range espresso machine, the grinder becomes more critical. For a semi-automatic espresso machine, grind precision is the single biggest variable under your control.

Frequently Asked Questions

Do I need a special grinder for espresso?

Not technically — any burr grinder that reaches fine enough settings can work. But espresso-specific grinders have more fine-adjustment positions in the espresso range, which makes dialling in easier. The ideal extraction often falls between two positions on a general-purpose burr grinder with no way to split the difference.

What’s the difference between a burr grinder and a blade grinder for espresso?

Blade grinders chop beans randomly, producing a wide mix of particle sizes that extract unevenly under espresso pressure — fine particles over-extract (bitter) while coarse ones under-extract (sour) simultaneously. Burr grinders slice beans between two rotating surfaces into consistent particles that extract evenly. For espresso, a burr grinder is non-negotiable.

Is a manual hand grinder good enough for espresso?

Yes — often better than comparably-priced electric grinders. Hand grinders like the Timemore C2S and C3S Pro use the same quality burr materials as electric grinders at twice the price. The trade-off is time: 45–60 seconds of hand grinding per shot. For single-cup mornings it’s workable; for multiple shots or a busy household, an electric grinder is more practical.

How fine should I grind for espresso?

Fine enough that a double shot (about 36g of liquid) takes 25–30 seconds to pull, with an 18g dose. If your shot runs in under 20 seconds, grind finer. If it takes longer than 35 seconds, grind coarser. Exact grind size varies by roast level, so dialling in is a continuous process rather than a one-time setting.

How often should I clean my espresso grinder?

Brush out the grounds chute and burr chamber every 1–2 weeks if you grind daily. Give the burrs a proper clean using a cleaning tablet or a brush every month or so. Stale coffee oils build up on the burrs and transfer a rancid taste to fresh grounds — this matters more for espresso because high-pressure extraction concentrates everything, including off-flavours.

Does a more expensive grinder make noticeably better espresso?

Up to a point, yes — and that point is roughly $100–150. Within this range, each price step brings real improvements in burr quality, adjustment precision, and consistency. Beyond $200–300, the improvements are more subtle. For home use with a machine under $500, the Breville at $200 or a Timemore at $75–95 delivers results close to what much more expensive grinders produce.

How These Picks Were Chosen

Plainly: this is a research-based guide, not a hands-on test. I have not run these machines side by side, and nothing here should be read as a report from my own kitchen.

What the picks rest on: burr type and diameter, whether adjustment is stepped or stepless and how fine the steps actually are, motor speed, and how much ground coffee the chamber retains between doses; plus the complaint patterns across verified-purchase reviews, which for grinders concentrate tightly on retention, static clinging, clumping, and whether a setting repeats reliably after you change it and come back.

What I could not establish: grind consistency, which is the whole point of a grinder and the one property that cannot be read off a specification. Measuring it properly needs sieve analysis or particle imaging, and I found no independent test covering these five. Burr size and type are a reasonable proxy and that is how they are used here, but a proxy is not a measurement.

A grinder that cannot go fine enough is the most common reason a machine stops building pressure at all — if your shots are gushing rather than pouring, start with the guide to what to do when your espresso machine is not building pressure before buying anything.

The Bottom Line

For most home espresso setups, the Breville Smart Grinder Pro is the pick. Sixty settings, a digital dose timer, and the ability to grind directly into the portafilter at around $200 is worth the money if grind precision is the bottleneck in your setup. It pairs particularly well with a semi-automatic espresso machine where grind precision directly controls shot quality.

If you prefer manual grinding — or want the best grind quality under $100 regardless of convenience — the Timemore Chestnut C3S Pro at $95 is the other standout, with its 4.7-star average reflecting genuine satisfaction across a large number of espresso brewers.

The OXO is the sensible starting point if you’re not ready to commit over $60. The Capresso is for households that need one grinder to cover drip and espresso. The Timemore C2S splits the difference if travel portability isn’t a priority.

Grinding for pour-over instead of espresso? The other half of that setup is water control — my best gooseneck kettle guide covers flow and temperature, the two variables a grinder can’t fix.

The full Breville Smart Grinder Pro review goes into what its 60 stepped settings actually give you, and why dosing by time rather than weight is the real limitation.

The full OXO Brew Conical Burr review unpacks what the headline 43-settings figure actually is, and where that resolution runs out at the espresso end.
Filed Under: Product Reviews

Best Small Chest Freezer in 2026: 5 Top Picks for Any Space

Last Updated June 30, 2026

Inside view of a neatly organized home chest freezer

Disclosure: As an Amazon Associate I earn from qualifying purchases. This costs you nothing extra and helps keep this site running.

A small chest freezer is one of the most practical appliances you can add to a kitchen, garage, or basement. Chest freezers run more efficiently than upright models, keep food frozen longer during power outages, and cost less to operate year-round. The problem is finding one that actually fits your space and budget without compromising on performance.

I’ve looked at the current Amazon bestsellers in small chest freezers — sized from 2.0 to 5.0 cubic feet — and picked the five worth buying in 2026. Each earned its place based on verified ratings, real review volume, and a clear reason someone would choose it over the others.

Quick Comparison: Best Small Chest Freezers 2026

Freezer Capacity Price Rating Buy
Midea MERC04C4BAWW
Best Overall
3.5 cu‑ft ~$199.99 4.5★ View on Amazon
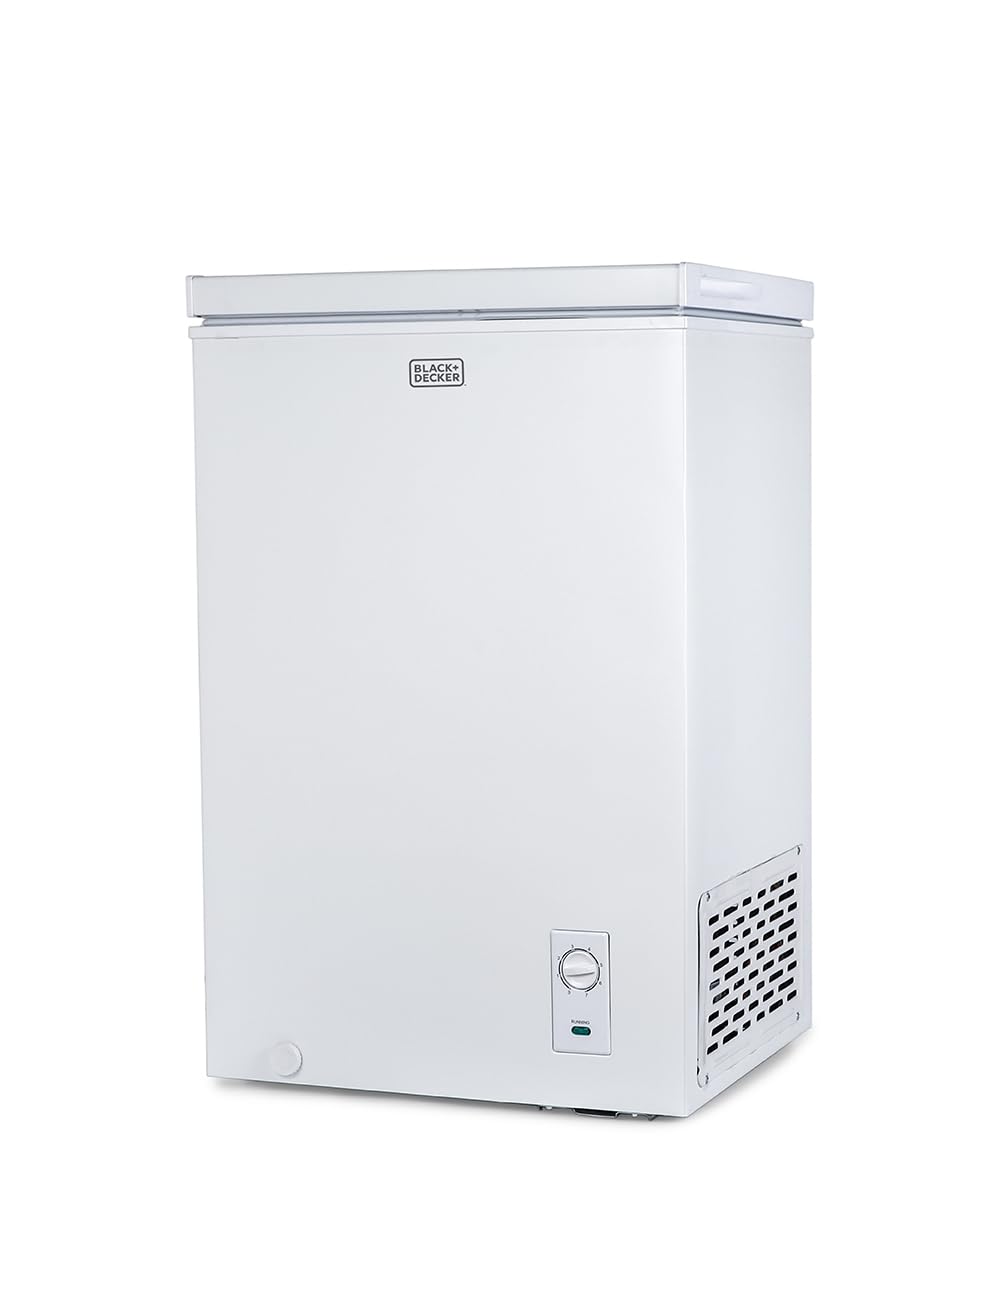
BLACK+DECKER 2.0 Cu Ft
Best Ultra‑Compact
2.0 cu‑ft $192.99 4.5★ View on Amazon
Kismile 3.2 Cu Ft
Best Budget
3.2 cu‑ft ~$199.99 4.5★ View on Amazon
EUHOMY 3.5 Cu Ft (Wheels)
Best Portable
3.5 cu‑ft ~$188.99 4.5★ View on Amazon
Bodacious 5.0 Cu Ft
Best Capacity
5.0 cu‑ft ~$199.99 4.3★ View on Amazon

1. Midea MERC04C4BAWW — Best Overall

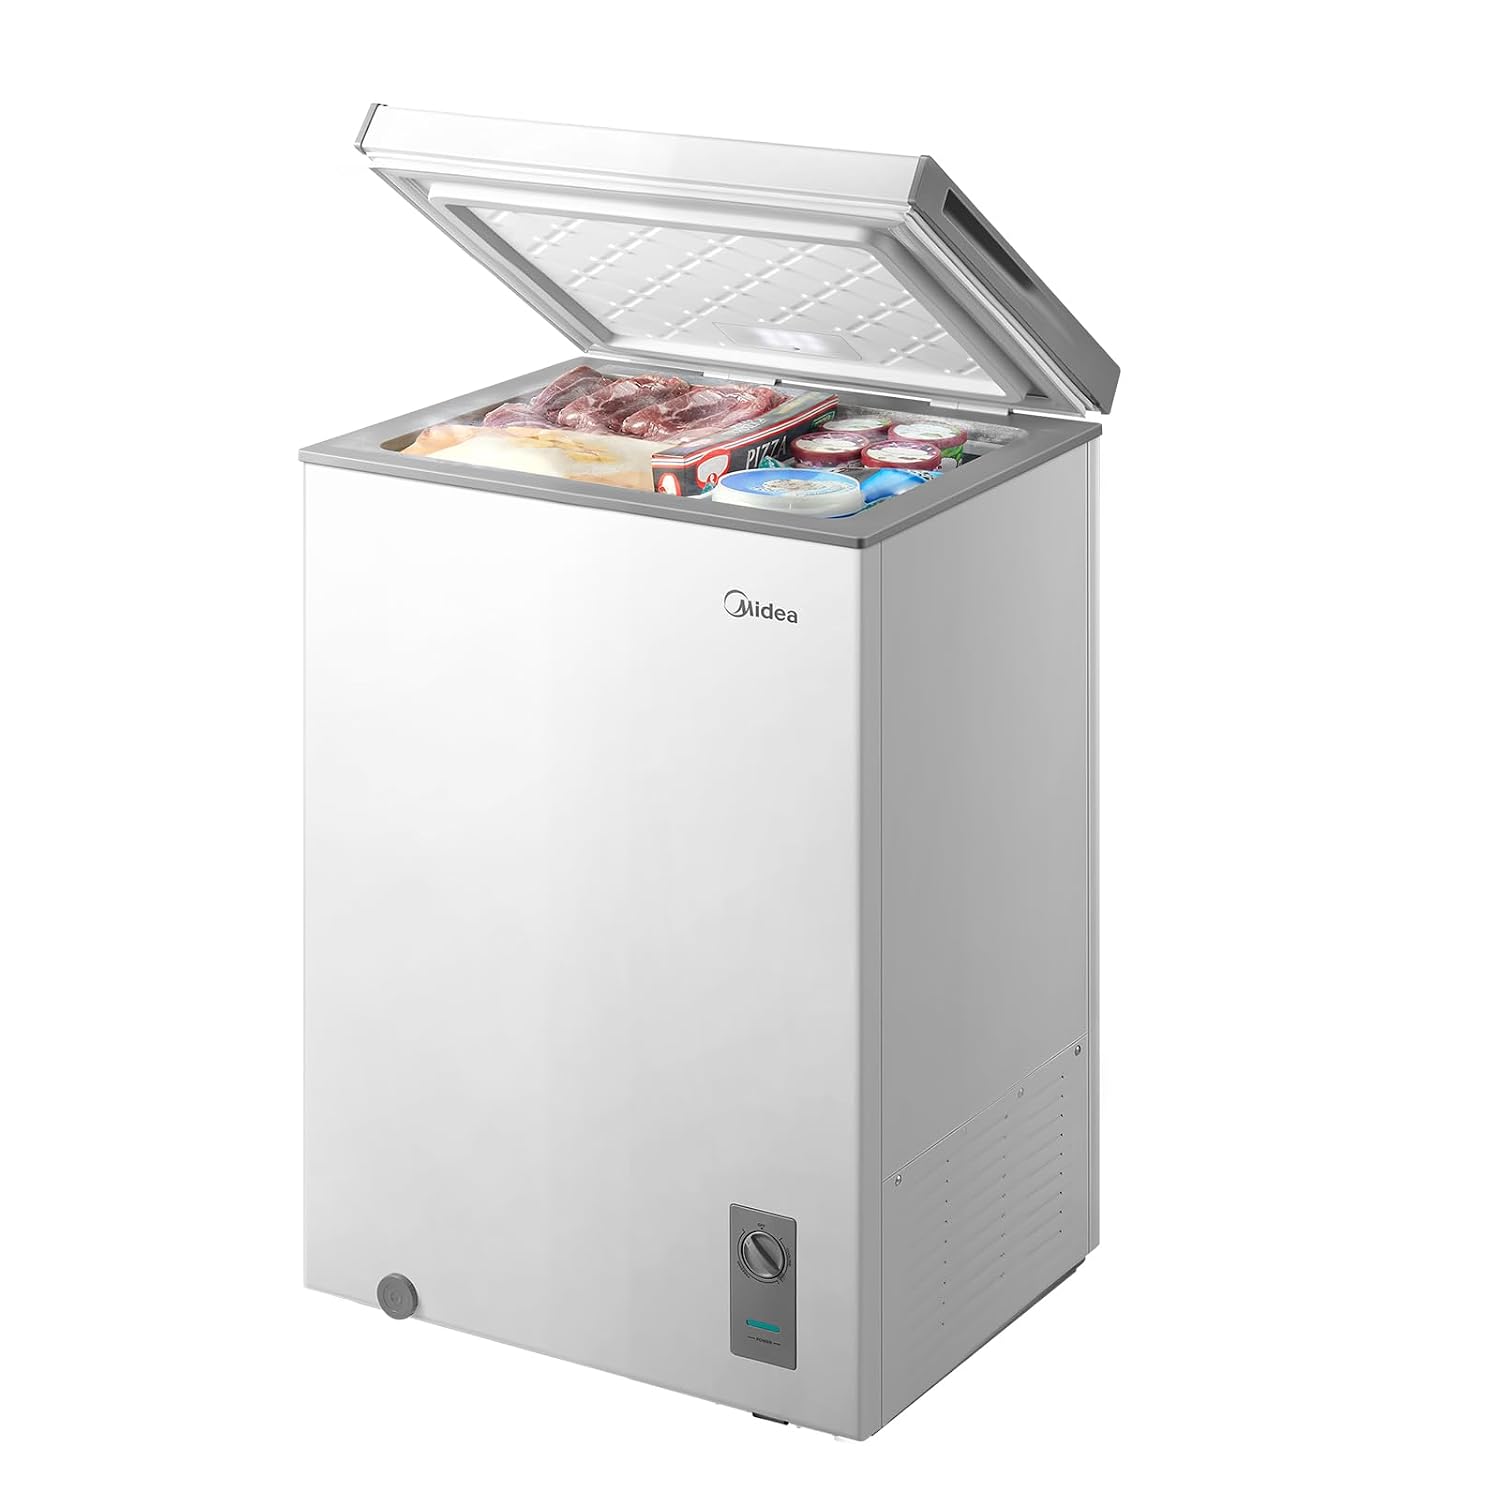
Midea MERC04C4BAWW 3.5 cubic feet convertible chest freezer in white

The Midea MERC04C4BAWW is the most reviewed small chest freezer on Amazon — over 10,000 ratings at 4.5 stars — and earns its top spot for good reason. That review volume means you’re relying on real-world experience from thousands of buyers, not a new listing with inflated early numbers. The 3.5 cubic foot capacity is genuinely useful for 1–3 people: roughly 100 lbs of frozen food, enough for a month of bulk meal prep or a full hunting haul.

What sets the Midea apart is the convertible mode. A front-mount dial switches it between freezer mode (down to 0°F) and refrigerator mode (38°F), so it can double as extra fridge space when you need it. It’s also garage-ready: tested to operate in ambient temperatures from 38°F to 110°F — essential if you plan to put it in an uninsulated space. The 48-hour power outage protection means food stays frozen for two days without electricity, which matters anywhere that gets severe weather.

There’s an interior LED light (more useful than it sounds when digging for something at the bottom), a removable storage basket, and a flat-top design that functions as extra counter or shelf space. If you can only buy one small chest freezer, this is the one.

Pros:

  • 10,000+ ratings at 4.5★ — the most proven pick on this list
  • Convertible freezer/refrigerator mode
  • Garage-ready; operates up to 110°F ambient
  • 48-hour power outage protection
  • Interior LED light + flat top for extra surface

Cons:

  • Only one removable basket
  • White finish only

Check Price on Amazon

2. BLACK+DECKER 2.0 Cu Ft — Best Ultra-Compact

BLACK+DECKER 2.0 cubic feet compact chest freezer in white

If you’re working with a tight footprint — a small apartment, a dorm, or a corner of the garage — the BLACK+DECKER 2.0 cubic foot chest freezer is the most compact option on this list from a brand most people already trust. It holds up to 70 lbs of frozen food: enough for a single person or a couple who wants a backup freezer without sacrificing much floor space.

The design is deliberately simple: mechanical temperature control on the outside (so you don’t have to open the lid to adjust it), a removable storage basket, a manual defrost drain, and a power indicator light. No convertible mode, no wheels, no LED interior — just a solid, compact chest freezer that does exactly what it needs to do. The 4.5-star rating across 454 reviews reflects that reliability.

At $192.99, it’s close in price to the Kismile below but gets you nearly 40% less capacity (2.0 vs. 3.2 cu ft). The trade-off is brand recognition and the smallest available footprint. Worth the premium if space is the constraint.

Pros:

  • Most compact footprint on this list (2.0 cu ft)
  • Trusted BLACK+DECKER brand
  • External mechanical temperature control
  • Removable storage basket + power indicator light

Cons:

  • No wheels, convertible mode, or interior light
  • Smallest capacity — only worth it if space is genuinely tight

Check Price on Amazon

3. Kismile 3.2 Cu Ft — Best Budget Pick

Kismile 3.2 cubic feet chest freezer with two removable baskets

The Kismile 3.2 cubic foot chest freezer stands out because it gives you two removable baskets rather than one — a practical difference when you’re trying to keep meat separate from ice cream. With 2,053 ratings at 4.5 stars, it has the second-largest review base on this list, which gives real confidence in the quality.

The 7-grade temperature control runs from 6.8°F down to -7.6°F — one of the colder operating ranges on a compact chest freezer, useful if you’re storing ice cream or meat that benefits from lower temps. Dimensions are 20.67″ × 17.12″ × 31.89″ — slightly slimmer than most in this size range. A bottom drain port makes defrosting far less of a chore than models without one.

At around $199.99, it’s competitive with the BLACK+DECKER but gives you 60% more capacity and an extra basket. If you want the most value in the $150–$200 range without paying for features you don’t need, the Kismile is the clear choice.

Pros:

  • Two removable baskets for better organization
  • 2,053 reviews at 4.5★ — well-proven
  • 7-grade temperature down to -7.6°F
  • Bottom drain port for easy defrosting
  • Slimmer footprint than most 3 cu ft models

Cons:

  • No convertible mode, wheels, or interior light
  • Black finish only

Check Price on Amazon

4. EUHOMY 3.5 Cu Ft with Wheels — Best for Portability

EUHOMY 3.5 cubic feet chest freezer with built-in bottom wheels

The EUHOMY 3.5 cubic foot chest freezer earns its spot with one feature none of the others have: built-in wheels. For a freezer in a garage, utility room, or anywhere you occasionally need to move it for cleaning or rearranging, this makes a genuine practical difference. Moving a full chest freezer without wheels is an awkward two-person job; wheels let one person slide it out alone.

Beyond the wheels, you also get a drainage port at the bottom for defrosting (no more towels and scooping), a built-in mesh storage basket, and a 7-grade thermostat. At 21.5″ × 18.7″ × 32.7″, it’s a similar footprint to the Midea MERC04C4BAWW. Energy consumption stays below 0.42 kWh per day, which is competitive across the board. At around $188.99, it’s also the most affordable 3.5 cu ft option on this list.

The EUHOMY has fewer reviews (197) than the other picks, making it the least proven option here. But the 4.5-star rating is consistent, and the wheel feature is useful enough to justify its inclusion — especially at the lowest price per cubic foot among the mid-size options.

Pros:

  • Built-in wheels — the only pick on this list with this feature
  • Bottom drainage port for easy defrosting
  • Most affordable 3.5 cu ft option (~$188.99)
  • 7-grade temperature control

Cons:

  • Lowest review count on this list (197)
  • No convertible fridge mode
  • Single mesh basket only

Check Price on Amazon

5. Bodacious 5.0 Cu Ft — Best for Bulk Storage

Bodacious 5 cubic feet ultra-quiet chest freezer compact design

If you want more storage without jumping to a full-size freezer, the Bodacious 5.0 cubic foot chest freezer gives the most capacity while still qualifying as small. It runs at under 40dB — quieter than a normal conversation — which means it won’t be intrusive in a living space, not just a basement or garage. Energy consumption is 0.36 kWh per 24 hours, which is the most efficient on this list for the capacity.

The 5.0 cu ft interior holds enough for a family of four doing monthly bulk shopping, or for hunters and anglers who need to store seasonal harvests. With 922 reviews at 4.3 stars, it’s a credible product — not as battle-tested as the Midea or Kismile, but far from an unknown. At around $199.99 for 5 cubic feet, the value per cubic foot is the best on this list by a significant margin.

Pros:

  • Largest capacity on this list (5.0 cu ft)
  • Ultra-quiet operation (under 40dB)
  • Best value per cubic foot (~$199.99)
  • Lowest energy consumption on this list (0.36 kWh/day)
  • 922 reviews at 4.3★

Cons:

  • 4.3★ is slightly lower than the other picks
  • Bodacious is a newer brand with less history
  • No wheels, no convertible mode

Check Price on Amazon

What to Look for in a Small Chest Freezer

What Size Do You Actually Need?

Rough rule of thumb: one cubic foot holds around 35 lbs of frozen food. A 2.0 cu ft freezer holds about 70 lbs — fine for a single person buying in moderate bulk. A 3.5 cu ft model handles around 120 lbs, which suits a couple or small family.

Five cubic feet gets you close to 175 lbs of storage, which is what you want if you’re doing serious bulk buying or storing seasonal meat. Don’t overestimate your needs: a half-full chest freezer is less efficient than one that’s well-stocked.

Chest Freezer vs. Upright Freezer

Chest freezers are 10–25% more energy-efficient than upright models at the same capacity. The physics are simple: cold air is denser than warm air and sinks to the bottom. When you open a chest freezer lid, almost no cold air escapes. When you open an upright door, a large amount of cold air pours out and warm air rushes in.

Chest freezers also maintain temperature longer in a power outage. The trade-off is access — you have to dig for items at the bottom. For a guide to other kitchen prep tools, see my best food processors roundup.

Garage-Ready vs. Standard Models

Standard chest freezers are typically rated for 60–90°F ambient temperatures. If your garage gets hot in summer or cold in winter, you need a garage-ready model tested for a wider range. The Midea MERC04C4BAWW on this list operates from 38°F to 110°F — essential in an uninsulated garage. Cold garages can also be a problem: most standard freezers stop working properly when ambient temps drop below 35°F, because the compressor doesn’t kick on when it already senses cold air.

Defrosting: Manual vs. Frost-Free

Every freezer on this list is manual defrost — standard for chest freezers at this size and price range. Frost builds up over time and needs to be cleared once or twice a year (more often in humid climates). Models with a bottom drain port — the Kismile and EUHOMY on this list — make the job significantly easier: drain the meltwater directly rather than scooping and mopping. Budget about 30–60 minutes when defrost day comes.

Energy Efficiency

Chest freezers run continuously, so even small differences in consumption add up. Most on this list use 0.36–0.42 kWh per day. At the US average of around 13 cents per kWh, that’s $17–$20 per year to run — not a major cost, but worth noting if you’re adding multiple appliances.

ENERGY STAR-certified models sit at the low end of that range. The Bodacious 5.0 cu ft is the most efficient per cubic foot at 0.36 kWh/day. For other energy-conscious kitchen picks, see my best air fryers guide.

Frequently Asked Questions

What is the smallest practical chest freezer?

The smallest chest freezers hold around 1.1–2.0 cubic feet. The BLACK+DECKER 2.0 cu ft model on this list is at the compact end of what’s genuinely useful for household food storage. Anything smaller becomes awkward for real quantities of frozen food.

Are chest freezers more efficient than upright freezers?

Yes — typically 10–25% more efficient at the same capacity. Cold air is denser than warm air and stays at the bottom of a chest freezer when you open the lid. Upright freezers lose a large amount of cold air every time the front door opens.

Can I put a chest freezer in my garage?

It depends on the model. Standard chest freezers work in moderate temperatures (60–90°F). If your garage gets hotter in summer or colder in winter, you need a garage-ready model like the Midea MERC04C4BAWW, rated for 38–110°F. Cold garages are also a problem: many standard freezers stop cooling when ambient temps drop below 35°F, because the compressor reads the surrounding air as already cold enough.

How long does a chest freezer stay frozen during a power outage?

A full, well-insulated chest freezer stays frozen for 24–48 hours without power. The Midea MERC04C4BAWW is rated for 48 hours. Keep the lid closed — every time you open it, you let warm air in and shorten the window considerably.

Do small chest freezers need to be defrosted?

Yes. All five freezers on this list are manual defrost — standard for this size range. Frost accumulates over time and should be cleared once or twice a year. The Kismile and EUHOMY models have bottom drain ports, which make the process much cleaner. Expect to spend 30–60 minutes and have towels ready.

What is the best small chest freezer for a basement?

The Midea MERC04C4BAWW is the best choice for most basements: the most reviewed, convertible fridge/freezer mode, and 48-hour power protection. If budget is the priority, the Kismile 3.2 cu ft gives solid performance with two baskets at a similar price point.

One thing a chest freezer quietly solves: pint storage for a Ninja CREAMi, whose containers need 24 hours frozen dead level before processing. My CREAMi Deluxe review has the full workflow.

How These Picks Were Chosen

Plainly: this is a research-based guide, not a hands-on test. I have not run these side by side, and nothing here should be read as a report from my own kitchen.

What the picks rest on: usable capacity in cubic feet against external footprint, stated annual energy consumption in kWh, whether the unit is manual-defrost, the temperature range and whether there is a proper thermostat rather than a numbered dial, and drain design; plus the complaint patterns in verified-purchase reviews, which for chest freezers concentrate on lid seals failing, thermostats drifting, and units running warm in an unheated garage.

What I could not establish: real energy use and real temperature stability. The kWh figures quoted here are the manufacturers’ own, measured in conditions they do not publish, and garage or outbuilding placement – which is where most small chest freezers end up – changes both substantially. No independent test covers these models in that setting.

The Verdict

For most people, the Midea MERC04C4BAWW is the right small chest freezer. The review count (10,000+) is unmatched in this category, and the convertible mode plus 48-hour power protection are extras most people will actually use. It’s garage-ready, which eliminates one of the most common failure points with budget models.

If space is the main constraint, the BLACK+DECKER 2.0 cu ft gets the job done in the smallest footprint. For maximum storage per dollar, the Bodacious 5.0 cu ft wins on value. And if you need to move your freezer regularly, the EUHOMY with wheels is the only pick built for that.

For other kitchen appliance guides, see my best blender food processor combos and best air fryers roundups. Tight on counter space too? See my countertop dishwasher guide. A chest freezer also pairs well with a countertop ice maker — bag each batch and you have party ice without store runs.

If the problem is ice rather than frozen food, a chest freezer is the wrong tool — the Silonn countertop ice maker review covers what a dedicated ice machine does instead.

Filed Under: Product Reviews

Best Espresso Machine Under $500 in 2026: 4 Picks Reviewed

Last Updated June 29, 2026

Professional espresso machine with coffee cups on a kitchen counter

Disclosure: This post contains affiliate links. If you buy through them I earn a small commission at no extra cost to you.

The honest truth about espresso machines under $500: the price gap between $150 and $450 is larger than it looks on paper. Budget machines get you into the hobby. The top-of-range picks in this guide get you espresso you are genuinely proud to make.

Top pick: The Breville Bambino Plus (~$500) is the best espresso machine under $500 for most home users. Dual boiler, 3-second heat-up, automatic milk texturing — it removes the hardest parts of home espresso without removing your control over the basics. For those who want full manual control and a machine built to last 15 years, the Gaggia Classic Pro (~$452) is the better long-term investment.

How I selected these: Research-based — Amazon review analysis weighted by verified purchaser patterns, specialist espresso forums (r/espresso, Home-Barista), and documented owner teardowns. Where specific specs appear (heat-up time, portafilter diameter, boiler type), those are manufacturer-confirmed figures cross-checked against community tests.

Comparison: Best Espresso Machines Under $500

Machine Price Pick Best For Buy
Breville Bambino Plus ~$500 Best Overall Fast heat-up, easy milk drinks Check Price
Gaggia Classic Pro ~$452 Best Prosumer Manual control, long-term investment Check Price
De’Longhi Stilosa EC260 ~$150 Best Entry-Level First machine, huge owner base Check Price
Gevi 20-Bar Semi-Auto ~$140 Best Budget Lowest price in this guide Check Price

What the $500 Budget Actually Gets You

Three distinct tiers exist under $500:

Under $150 (Gevi, Stilosa): Functional semi-automatics. You grind, dose, tamp, and pull — the machine provides pressure. Shots are inconsistent until you dial in grind and dose precisely.

Steam wands work but take patience — and if a wand stops frothing milk entirely, that is usually a blocked tip rather than a fault with the machine. These are starting points.

$450–$500 (Bambino Plus, Gaggia Classic Pro): Where serious home espresso begins. Dual boilers or steel boilers, commercial-grade components, and build quality that lasts a decade. The shots are categorically better. The price step from $150 to $450 is steep, but the quality difference is steeper.

1. Breville Bambino Plus BES500 — Best Overall

Breville Bambino Plus BES500 compact espresso machine in stainless steel

The Bambino Plus is a dual-boiler machine at the price of most single-boiler alternatives. One boiler handles brewing, the other handles steam — you can start steaming milk the moment your shot finishes, with no waiting and no temperature-surfing between cycles. The 3-second heat-up from cold is consistently documented in owner reports, not a marketing number.

The 54mm portafilter is the main limitation. The commercial standard is 58mm, and most aftermarket accessories are designed for that size. Breville’s 54mm ecosystem has grown but remains narrower than what is available for 58mm machines.

Pre-infusion (gradual pressure ramp-up at the start of extraction) is built-in and default — it produces more consistent shots than most machines at this price range, even when your grind is not perfectly dialled. Full notes: Breville Bambino Plus review.

Pros:

  • Dual boiler: brew and steam simultaneously, 3-second heat-up from cold
  • Automatic steam wand textures milk to 60°C hands-off — no technique required for flat whites
  • Pre-infusion produces consistent shots even with imperfect grinds
  • Compact at 7.7 inches wide
  • Four filter baskets included (single/double, pressurized/unpressurized)

Cons:

  • 54mm portafilter limits aftermarket upgrade options vs. the 58mm commercial standard
  • Automatic steamer cannot be overridden — experienced users lose manual steam control
  • At ~$500, the highest price in this guide
Check Price on Amazon ↗

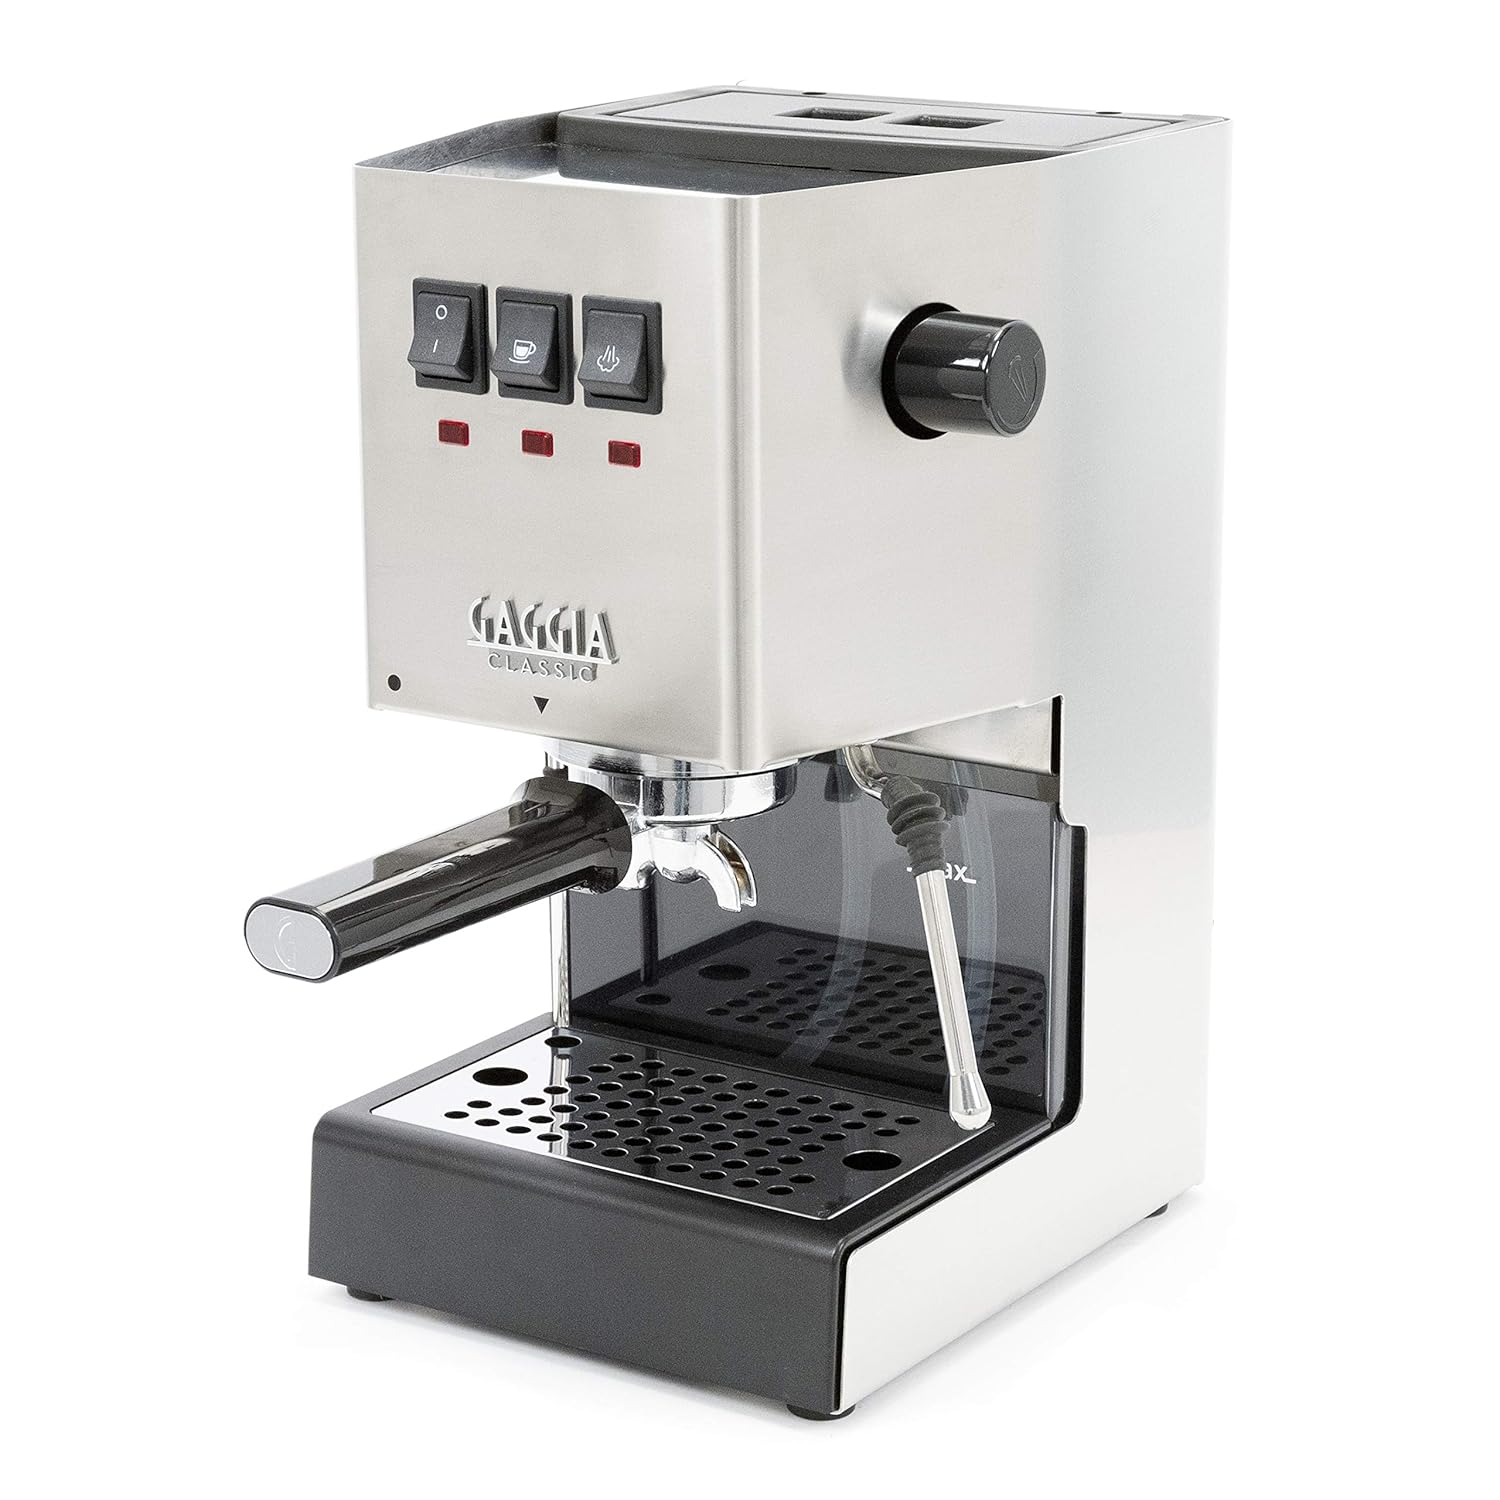
2. Gaggia Classic Pro — Best Prosumer

Gaggia Classic Pro stainless steel semi-automatic espresso machine

The Gaggia Classic Pro uses a 58mm commercial portafilter, a steel boiler, and a 3-way solenoid valve — the same fundamentals as machines costing twice as much. It exposes every flaw in technique.

If your grind is off, you will taste it. If your tamp is uneven, the shot will tell you. That accountability is the machine’s greatest teaching tool.

The steam wand is powerful, fully manual, and demands practice. Learning to texture milk on the Gaggia takes weeks of consistent effort. Once you have it, the microfoam quality is café-grade. A PID temperature controller can be retrofitted for around $100, bringing consistency closer to machines priced at $800+.

Out of the box, with a dialled grind and solid tamp, owners regularly report shots that rival specialty coffee shops. Read my full Gaggia Classic Pro review for a detailed breakdown.

Pros:

  • 58mm commercial portafilter: maximum aftermarket compatibility (baskets, tampers, distribution tools)
  • Steel boiler with thermal stability across consecutive shots
  • 3-way solenoid valve: clean pressure release after each shot, dry puck
  • Retrofit-ready: OPV pressure adjustment, PID mod, precision baskets all supported
  • Built to last 10–15 years with basic maintenance

Cons:

  • High learning curve — inconsistent results for weeks until technique is dialled in
  • Manual steam wand demands real practice to texture milk correctly
  • No PID temperature control included in the base model
Check Price on Amazon ↗

3. De’Longhi Stilosa EC260 — Best Entry-Level

De'Longhi Stilosa EC260 black espresso machine

The Stilosa is the safest first espresso machine under $150. It pulls recognizable espresso, steams milk passably, and has over 13,800 Amazon ratings behind it. For anyone who wants to try home espresso before committing serious money, this is where most people start — and many stay. My De’Longhi Stilosa review covers what those owners report.

The effective pump pressure runs lower than the 15-bar spec suggests, which limits results with specialty-grade single-origin beans that require precise extraction. There is no pre-infusion. Shots from light roasts can taste thin or sour until grind and dose are dialled precisely. For medium roasts and quality pre-ground coffee, the Stilosa is reliably competent, though owners do report parts failures, chiefly the plastic control knob.

Pros:

  • Under $150 — the most accessible price point for a genuine semi-automatic
  • Over 13,800 Amazon ratings
  • Works with ground coffee and ESE pods
  • Simple enough that beginners are not overwhelmed on day one

Cons:

  • Effective pump pressure lower than the 15-bar spec — limits results with specialty beans
  • No pre-infusion: less forgiving on inconsistent grinds than the Bambino Plus
  • Steam wand pressure is limited — steaming larger milk volumes takes time
Check Price on Amazon ↗

4. Gevi 20-Bar Semi-Automatic — Best Budget

Gevi 20-bar semi-automatic espresso machine in stainless steel

At $139.99, the Gevi is a genuine semi-automatic: you grind, dose, tamp, and pull each shot manually. It has a 1-litre water tank, a stainless housing, a pressure gauge and a steam wand with a removable froth nozzle. It holds 4.3 stars across 3,767 Amazon ratings, but only 306 written reviews are for this listing and 30% of those are critical; my Gevi 20-Bar review covers what owners report.

The “20-bar” spec is marketing headroom — commercial espresso targets 9 bars of extraction pressure. What matters here is that the Gevi is a real semi-automatic, not a capsule or pod system.

You control the variables that produce quality espresso. Plastic parts and accessories, including a flimsy tamper, are the trade-off for the price. It pairs well with a Timemore C2 or similar entry-level burr grinder to get the most out of it.

Pros:

  • True semi-automatic at $139.99 — full manual grind, dose, and tamp control
  • Pressure gauge and pre-infusion at the lowest price in this guide
  • Narrow 5.5-inch stainless body
  • Quick heat-up, by owner accounts

Cons:

  • Frequent owner reports of failures within the first year
  • “20-bar” pump spec is inflated — effective extraction pressure similar to 9-bar commercial targets
  • Requires a decent burr grinder: pre-ground bags will not show what this machine can do
Check Price on Amazon ↗

Espresso Machine Buying Guide: What to Know Before You Buy

Boiler vs. Thermoblock

A thermoblock (Gevi) heats water on demand as it passes through a heated element. Fast to heat up, inexpensive to manufacture, and adequate for home use.

A boiler (Bambino Plus, Gaggia Classic Pro) holds a reservoir of water at temperature, which means more stable extraction across multiple consecutive shots. The stability difference is real and observable. If you are buying above $400, you are paying for a boiler — and the results justify it.

Portafilter Size and Long-Term Upgrades

58mm is the commercial industry standard. Nearly every aftermarket precision basket, distribution tool, puck screen, and calibrated tamper is designed for 58mm. The Gaggia Classic Pro is 58mm — any tool you buy for it is universally compatible.

The Bambino Plus uses 54mm, which is functional but limits the aftermarket ecosystem. Budget machines use proprietary sizes with the fewest options. If upgrades matter to you long-term, the Gaggia wins this category outright.

Manual vs. Automatic Steam Wands

The Bambino Plus has an automatic frother that textures milk to a set temperature without technique. You submerge the wand, press a button, walk away. Every other machine in this guide has a manual steam wand that requires positioning, angle, timing, and temperature awareness.

Learning manual steaming takes weeks. Once mastered, it offers full creative control over texture and temperature. Neither is objectively better — the question is whether you want to acquire the skill.

The Grinder Matters as Much as the Machine

The machine accounts for roughly 40% of shot quality. Fresh-ground beans from a burr grinder handle most of the rest. Pre-ground coffee from a bag begins oxidising the moment the bag opens — by the time it reaches the portafilter, the aromatic compounds that define good espresso are already degraded. Budget at least $80–$150 for a grinder alongside any machine in this guide.

Entry-level options worth considering: Baratza Encore, Breville Smart Grinder Pro, or Timemore C2 for manual grinding. If a grinder you already own has started producing an uneven or coarse grind, the cause is usually fixable without buying another one. See my best espresso grinder guide for 2026 picks across every budget.

How This Budget Compares to Under $200

The meaningful quality step in home espresso does not happen at $200 — it happens at $400+. If your budget is under $200, the dedicated best espresso machine under $200 guide covers the options at that tier in detail. For a direct comparison between the budget and premium ends of the category, the Breville Bambino Plus vs De’Longhi Stilosa comparison shows exactly where the price difference shows up in practice.

For the full semi-automatic landscape at any budget, see the best semi-automatic espresso machine guide. All espresso and coffee equipment guides are indexed at the complete coffee guide.

Frequently Asked Questions

Is a $500 espresso machine good enough for daily home use?

Yes. The Breville Bambino Plus and Gaggia Classic Pro both produce cafe-quality espresso and are designed for daily use. With fresh-ground beans and basic maintenance (descaling every 2–3 months), either machine handles years of daily shots reliably.

Do I need a separate grinder with any of these machines?

Yes, ideally. None of the four machines include a grinder. Pre-ground coffee works, but fresh-ground from a burr grinder is noticeably better — the difference at home is larger than most people expect before they try it. An entry-level burr grinder at $80–$150 pairs well with any machine in this guide.

What is the main difference between the Bambino Plus and the Gaggia Classic Pro?

Ease vs. mastery. The Bambino Plus is forgiving and automated — good espresso comes quickly. The Gaggia Classic Pro is demanding and fully manual — good espresso comes after weeks of practice, but the ceiling is higher.

The Bambino Plus has an automatic steam wand; the Gaggia’s is fully manual. Portafilter sizes also differ (54mm vs. 58mm), which affects long-term upgrade options.

Can all four machines make lattes and cappuccinos?

All four have steam wands. The Bambino Plus is easiest for milk drinks (automatic steam).

The Gaggia produces the best microfoam but requires technique. The Stilosa and Gevi can both make lattes but take patience at larger volumes.

How long will an espresso machine under $500 last?

The Gaggia Classic Pro is documented at 10–15 years with basic maintenance. The Bambino Plus typically runs 5–8 years. Budget machines — the Stilosa and Gevi — vary more, and the Gevi’s owner reviews include many failures within the first year.

Is the quality gap between the $150 and $450 machines worth the price difference?

For most people who stay with home espresso, yes. The $400+ machines have proper boilers, better extraction consistency, and commercial-grade components that reward better beans. Budget machines plateau quickly — once technique is solid, you will feel their limits. The $400+ tier is the better long-term value despite the higher upfront cost.

How These Picks Were Chosen

Plainly: this is a research-based guide, not a hands-on test. I have not run these side by side, and nothing here should be read as a report from my own kitchen.

What the picks rest on: whether temperature is actually controlled – a PID or a genuinely stable thermoblock rather than a bimetal thermostat – along with portafilter size, whether the basket supplied is pressurised, pump pressure and whether an OPV is set correctly at the factory, and how serviceable the machine is; plus the complaint patterns across verified-purchase reviews, where the recurring themes in this bracket are temperature drift between shots and steam wands that stall on larger milk volumes.

What I could not establish: brew temperature stability, which is the specification that most distinguishes machines between $200 and $500 and the one nobody publishes honestly. It needs measurement at the group head across consecutive shots. Where a machine is described here as stable, that reflects its boiler design and the weight of owner reporting, not a reading.

Before replacing a machine that has stopped performing, it is worth ruling out the cheap causes: most pressure problems are the coffee or the basket rather than the pump. There is a diagnostic order in the guide to an espresso machine not building pressure.

The Verdict

For most people buying their first serious home espresso machine under $500: the Breville Bambino Plus is the right pick. It removes the steepest parts of the learning curve, produces excellent espresso from day one, and fits on almost any counter. If you want full manual control and are willing to invest practice time, the Gaggia Classic Pro is the more capable machine and the better long-term investment.

At the budget end: the Stilosa is the sensible first machine if you are unsure whether home espresso will stick. The Gevi is the choice when even $150 feels like too much to commit before you have tried pulling shots at home. For more on the full range, the complete coffee guide covers every category.

A machine in this bracket is usually limited by the grinder in front of it rather than by itself — the Breville Smart Grinder Pro review covers the mid-range option most of these setups end up paired with.

Filed Under: Product Reviews

Best Vegetable Chopper 2026: Reviews + Buying Guide

Last Updated June 28, 2026

This post contains affiliate links. If you buy through my links, I may earn a commission at no extra cost to you.

Hands chopping fresh vegetables on a wooden cutting board — best vegetable choppers

Disclosure: As an Amazon Associate I earn from qualifying purchases. This doesn’t affect which products I recommend — I only include items I’d stand behind.

These picks are based on a review of Amazon customer data — ratings, review volume, and verified purchase feedback — alongside practical criteria for vegetable chopping: mechanism type, blade count, container capacity, and how easy each unit is to clean.

The Fullstar All-in-One Vegetable Chopper & Mandoline Slicer is the best vegetable chopper for most kitchens — 127,900 reviews back it up, it handles everything from fine dice to thin slices, and at $35 it leaves little reason to spend more unless you specifically need electric power or a different cut type.

Best Vegetable Chopper 2026: Quick Comparison

Product Pick Price Reviews Buy
Fullstar All-in-One Vegetable Chopper Best Overall $39.99 127,900 ★4.5 Check Price
Mueller Pro-Series 12-Blade Mandoline Slicer Best Multi-Function $39.99 39,800 ★4.5 Check Price
Fullstar Pro Core Vegetable Chopper Best Budget $19.99 39,900 ★4.5 Check Price
Ninja Food Chopper Express Chop Best Electric $48 15,945 ★4.7 Check Price
Vivaant Manual Food Processor Best for Garlic & Herbs $29 5,305 ★4.5 Check Price

Best Vegetable Chopper 2026: Full Reviews

1. Fullstar All-in-One Vegetable Chopper & Mandoline Slicer — Best Overall

Fullstar All-in-One Vegetable Chopper and Mandoline Slicer

With 127,900 verified reviews, this is the most-bought vegetable chopper on Amazon by a significant margin. The push-down mechanism chops onions, peppers, cucumbers, and most firm vegetables in a single press, depositing pieces directly into the included 1.2L container. The mandoline attachments let you switch between dice, slice, julienne, and spiralize without needing separate tools.

The set includes multiple blade inserts and a cleaning brush. Blades are sharp enough that the unit chops cleanly on the first press without the vegetable slipping or compressing instead of cutting — the most common failure mode in cheaper choppers. At $39.99 it’s priced competitively for what you get. The container fills quickly with large batches but empties and rinses in seconds.

Pros

  • 127,900 reviews — the most proven vegetable chopper on the market
  • Mandoline attachments included: dice, slice, julienne, spiralize
  • 1.2L container catches pieces; sharp blades cut cleanly in a single press
  • Compact footprint; stores flat in a drawer

Cons

  • Container fills quickly for large batches — requires emptying mid-prep
  • Multiple blade attachments require storage space and care during handling

Bottom line: The go-to choice if you chop vegetables regularly and want one tool that handles most prep tasks. The review volume eliminates guesswork — at this price, it’s the obvious starting point.

Check Price on Amazon

2. Mueller Pro-Series All-in-One 12-Blade Mandoline Slicer — Best Multi-Function

Mueller Pro-Series 12-Blade Mandoline Slicer and Vegetable Chopper

The Mueller brings 12 blade configurations to the mandoline category — more than most competitors at this price. That covers thick and thin slices, coarse and fine julienne, spiralizing, shredding, and multiple dice sizes. If you prepare a wide variety of vegetables and need more cut variety than a standard 4-6 blade chopper offers, this is the most versatile manual option under $45.

At 39,800 reviews and 4.5 stars, the buyer satisfaction is consistent. The unit is slightly larger than the Fullstar but the expanded blade set is the trade-off. The hand guard is included and grips vegetables properly — an important safety feature that cheaper mandolines often skip or design poorly.

Pros

  • 12 blade configurations — the widest cut variety in this price range
  • 39,800 reviews at 4.5 stars — consistently well-reviewed
  • Hand guard properly designed — reduces cut risk with mandoline blades
  • Catches pieces directly; rinses clean quickly

Cons

  • More blades means more storage logistics than a simpler 4-blade set
  • Larger footprint than the Fullstar options

Bottom line: The right choice if you need more than dice and basic slice — specifically if you want fine julienne, shredding, or multiple thickness levels. The extra blades are worth it for cooks who use mandoline cuts regularly.

Check Price on Amazon

3. Fullstar Pro Core Vegetable Chopper — Best Budget

Fullstar Pro Core Vegetable Chopper with container

At $19.99, the Fullstar Pro Core is the most affordable well-reviewed chopper on this list. It drops the mandoline attachments of the All-in-One and focuses on the core function: push-down chopping with a single blade grid that produces uniform dice. For cooks who primarily need to dice onions, peppers, tomatoes, and cucumbers — and don’t need slicing or julienne — this does exactly what it promises at the lowest price.

39,900 reviews at 4.5 stars puts it on par with the Mueller in review credibility. The container size is smaller than the All-in-One, which suits smaller meal prep quantities well. For larger batch cooking, you’ll be emptying it more frequently.

Pros

  • Best price on the list at $19.99 — strong value for single-function chopping
  • 39,900 reviews at 4.5 stars — well-proven at the budget tier
  • Simple to use and clean — fewer components than multi-blade sets
  • Compact; fits in a kitchen drawer without difficulty

Cons

  • No mandoline or slicing attachments — dice only
  • Smaller container fills quickly for large-batch prep

Bottom line: The right pick if you want the Fullstar build quality without paying for functions you won’t use. If you only need to dice vegetables quickly and cleanly, there’s no reason to spend more.

Check Price on Amazon

4. Ninja Food Chopper Express Chop — Best Electric

Ninja Food Chopper Express Chop 200-Watt 16-ounce

The Ninja Express Chop is the electric option on this list — plug in, press the top to run, and the 200-watt motor handles everything the manual choppers do plus tasks they can’t: pureeing, blending soft ingredients, and grinding nuts. The 16-ounce bowl is compact and the blades retract into the lid for safe storage.

With 15,945 reviews at 4.7 stars, it’s the highest-rated pick on this list by rating. The electric mechanism removes the hand pressure of push-down choppers, which matters if you’re prepping larger volumes or have limited grip strength. It’s louder than manual options and costs more at $48, but the versatility is genuinely different from a mandoline-style chopper.

Pros

  • Highest-rated pick on this list at 4.7 stars across 15,945 reviews
  • Electric: no push pressure required; handles purée and grinding tasks manual choppers can’t
  • Compact 16-oz bowl with a lid that stores the blades safely between uses
  • 200W motor handles harder vegetables (carrots, beets) without effort

Cons

  • Loudest option on the list — not suitable for quiet early-morning prep
  • Requires a power outlet; cord adds a step manual choppers don’t have

Bottom line: The best option if you want electric convenience, handle harder ingredients frequently, or want to use the chopper for tasks beyond basic vegetable prep. The 4.7-star rating reflects genuine buyer satisfaction.

Check Price on Amazon

5. Vivaant Manual Food Processor — Best for Garlic & Herbs

Vivaant Manual Food Processor 5-Cup pull-string chopper

The Vivaant uses a pull-string mechanism rather than a push-down grid: pull the cord to spin the internal blades, releasing to stop. This mechanism produces a finer, more controlled mince than the push-down choppers above — particularly useful for garlic, herbs, onion, and similar ingredients where you want minced rather than diced pieces.

The 5-cup (1.2L) capacity is generous for a pull-string unit. At $29 with 5,305 reviews and 4.5 stars, it sits at a price point that makes sense alongside a mandoline-style chopper (different tasks) rather than instead of one. The pull-string mechanism is quieter than the Ninja and more portable — no electrical requirement.

Pros

  • Pull-string mechanism produces fine mince — better for garlic and herbs than push-down choppers
  • 5-cup capacity; quiet operation; no electrical outlet needed
  • 4.5 stars across 5,305 reviews — consistent buyer satisfaction
  • More portable than electric; compact for travel or small kitchens

Cons

  • Not designed for thick slices or julienne cuts — that’s the push-down and mandoline territory
  • Fewer reviews than the top 3 picks — less established than Fullstar or Mueller

Bottom line: The right secondary tool if you already have a mandoline chopper and want something specifically for mincing garlic, herbs, and onions finely. As a standalone purchase, it pairs naturally with the Fullstar or Mueller picks above.

Check Price on Amazon

What to Look for in a Vegetable Chopper

Manual vs. Electric — Which is Right for You?

Manual choppers (the first three on this list) require hand pressure to operate. They’re quieter, require no power outlet, are generally cheaper, and are faster to deploy and clean for small jobs. Electric choppers (the Ninja) require no hand pressure, handle harder ingredients more consistently, and can purée or blend in addition to chopping.

For most vegetable prep — onions, peppers, cucumbers, tomatoes — a manual push-down chopper is faster and easier. If you regularly prep carrots, beets, or nuts, or want the chopper to double as a mini blender, electric makes more sense.

Blade Count and What You Actually Need

More blades means more cut variety but more storage and washing. A 4-blade set (like the Fullstar Pro Core) handles dice and basic chopping — enough for most daily cooking. A 12-blade set (like the Mueller) adds fine julienne, multiple slice thicknesses, shredding, and spiralizing.

If your cooking involves different vegetable preparations regularly — coleslaw, stir-fry, salads, and soups all at once — the extra blades earn their place. If you primarily dice onions and peppers for weeknight cooking, 4 blades is plenty.

Container Size and Cleanup

Most choppers in this list have 1.2L containers — enough for 2-3 medium onions or 4-5 peppers before you need to empty. For batch cooking (prepping vegetables for a week at once), you’ll be emptying and continuing. Cleanup matters more than it sounds: choppers with tight-fitting lids, smooth interior corners, and dishwasher-safe components are significantly less annoying to own long-term than ones with awkward joins where vegetable pulp accumulates. All five picks above are designed with cleanup in mind — check the specific listings for dishwasher compatibility.

Best Vegetable Chopper: FAQ

What is the difference between a vegetable chopper and a food processor?
A vegetable chopper focuses on a single task: uniform chopping and slicing of firm vegetables, typically through a push-down or mandoline mechanism.

A food processor has a motor, larger bowl, and multiple attachments for chopping, slicing, shredding, and pureeing — it’s more powerful and versatile but bulkier and more expensive. For vegetable prep specifically, a chopper is faster to set up and clean. See the best food processor guide if you need full food processor capability.

How do I clean a vegetable chopper properly?
Rinse the container and blades immediately after use — dried vegetable matter is harder to remove. Most components are top-rack dishwasher safe, but hand-rinsing takes 30 seconds and avoids dulling the blades over time.

The blade insert should never be left soaking — rinse and dry immediately. The included cleaning brush (standard in the Fullstar sets) reaches the blade grid corners that a sponge can’t.

Can a vegetable chopper replace a knife for most cooking tasks?
For uniform dicing and slicing of firm vegetables, yes. A good chopper is faster than a knife for onions, peppers, cucumbers, and similarly-shaped vegetables.

It won’t replace a knife for irregular cuts, breaking down large items (butternut squash, whole cabbage), or delicate tasks like chiffonade. Most cooks use a chopper for daily prep vegetables and a knife for everything else.

Why does my vegetable chopper crush instead of chop cleanly?
Usually one of three causes: blades are dull (common after 6-12 months of heavy use), the vegetable is too soft (tomatoes and mushrooms compress rather than chop cleanly in push-down choppers), or the chopper mechanism is low-quality. Soft vegetables work better sliced with a knife or in a pull-string chopper. If blades are new and still crushing, the chopper mechanism itself may not be creating enough force per square inch — this is where cheaper unbranded choppers struggle.

Are vegetable choppers worth it?
For cooks who regularly prep the same vegetables — onions, peppers, carrots, cucumbers — yes. A good chopper reduces prep time meaningfully and produces more consistent cuts than hand-chopping.

At $20-40 for a well-reviewed unit, the payback is fast if you cook several times a week. For occasional cooking, a decent chef’s knife is probably sufficient.

What vegetables work best in a vegetable chopper?
Firm vegetables with relatively uniform shapes work best: onions, bell peppers, cucumbers, zucchini, carrots, potatoes, and apples. Soft vegetables (ripe tomatoes, mushrooms, avocado) tend to compress instead of chop cleanly in push-down choppers.

Very hard root vegetables (raw beets, turnips) may require more force than manual choppers provide — the Ninja electric handles these better. Leafy greens and herbs work in pull-string choppers like the Vivaant but not push-down grid choppers.

How These Picks Were Chosen

Plainly: this is a research-based guide, not a hands-on test. I have not run these side by side, and nothing here should be read as a report from my own kitchen.

What the picks rest on: blade material and how the cartridges are changed and stored, the force the mechanism actually demands of your hand or arm, container capacity and whether it catches everything, and how many parts have to be washed afterwards; plus the complaint patterns in verified-purchase reviews, which for choppers are dominated by two things – hinges and latches cracking, and blades dulling far sooner than expected.

What I could not establish: how long the blades stay sharp. That is the practical lifespan of a chopper and there is no published test for it. Owner reports are informative about the failure but not about the timeline, because almost nobody records how much they chopped before it went blunt.

The Bottom Line

For most kitchens, the Fullstar All-in-One is the right pick — 127,900 reviews, mandoline attachments included, and a price that makes it an easy decision. If you only need dicing and want to spend less, the Fullstar Pro Core at $19.99 covers the basics. For electric power, the Ninja at $48 is the most-rated option on the list.

If you need more than a chopper — slicing, shredding, blending, and large-batch capacity — see the best food processors guide, the best blender food processor combos for a machine that does both, or the food processors hub for a full overview of what’s available.

Prefer knife work to gadgets? Protect the edge doing it — my guide to cutting boards for Japanese knives covers the surfaces that keep sharp knives sharp.


Filed Under: Product Reviews

Best Frying Pan for Electric Stove 2026: 5 Picks That Work

Last Updated June 28, 2026

Best frying pan for electric stove — chef cooking with nonstick pans on electric stove

This post contains affiliate links. If you buy through my links, I may earn a commission at no extra cost to you.

Disclosure: I may earn a commission if you buy through my links. Full details here. Prices accurate at time of writing.

Electric stoves are less forgiving than gas. The heating elements — whether coil or glass-ceramic — take longer to respond and transfer heat differently depending on how well your pan makes contact with the surface. A warped or rounded base means hot spots, uneven cooking, and wasted energy. The right frying pan fixes all of that.

The pans below are compared across all price points specifically for electric stove use, where a flat base matters more than it does on gas. The five picks below cover every cooking style — nonstick, cast iron, stainless, and budget ceramic — with verified Amazon ratings from thousands of buyers who’ve cooked on the same burners you have.

Quick Comparison: Best Frying Pans for Electric Stoves

Pan Type Price Rating Best For Buy
T-fal Ultimate 12″ Nonstick Hard anodized $54.99 4.7★ Best Overall Check Price
Lodge 12″ Cast Iron Skillet Cast iron $34.90 4.7★ Best Durability Check Price
CAROTE 12″ Granite Nonstick Granite ceramic $32.99 4.6★ Best Budget Check Price
All-Clad D3 12″ Stainless Tri-ply stainless ~$149.95 4.6★ Best Stainless Check Price
T-fal 2-Piece Nonstick Set Hard anodized $69.99 4.7★ Best Set Value Check Price

Best Frying Pans for Electric Stoves: Reviewed

1. T-fal Ultimate Hard Anodized Nonstick 12″ — Best Overall

T-fal Ultimate Hard Anodized Nonstick 12-Inch Frying Pan with Lid for electric stove

Ratings: 4.7★ from 14,177 Amazon reviews  |  Price: $54.99

The T-fal Ultimate tops this list because it solves the biggest problem electric stove owners face: not knowing when the pan is hot enough to start cooking. T-fal’s patented Thermo-Spot indicator sits in the centre of the pan and turns solid red when the surface has reached the right cooking temperature. On an electric stove where preheating is slower and less predictable than gas, that visual cue removes all guesswork.

The hard anodized exterior is twice as hard as stainless steel and resists warping under sustained high heat — a real concern on electric stoves where you can’t turn the burner down instantly. T-fal describes the coating inside as a PFOA-free titanium nonstick.

The included lid is a practical bonus. On electric stoves where you lower the heat and let the pan finish cooking with residual warmth, a lid traps the steam. Oven safe to 400°F and dishwasher safe, though hand-washing extends the nonstick life considerably.

Pros:

  • Thermo-Spot indicator eliminates preheating guesswork on slow electric burners
  • Hard anodized exterior resists warping — critical for flat base contact on electric coils
  • Titanium nonstick coating, PFOA-free per T-fal
  • Lid included — useful for finishing dishes on lower electric heat settings
  • Dishwasher safe; oven safe to 400°F

Cons:

  • 400°F oven limit rules out high-heat broiler finishing
  • Nonstick coating wears with use, and owner reports of its lifespan vary widely
  • Not the right choice for very high-heat searing where stainless or cast iron excels

Verdict: The Thermo-Spot feature alone justifies this over a generic nonstick. On an electric stove, where the burner is slow to respond, knowing when the pan is ready takes out the guesswork.

→ Check Current Price on Amazon

2. Lodge 12″ Seasoned Cast Iron Skillet — Best Durability

Lodge 12-inch Seasoned Cast Iron Skillet for electric stove cooking

Ratings: 4.7★ from 21,218 Amazon reviews  |  Price: $34.90

Cast iron was made for electric stoves in a way it wasn’t quite made for gas. Electric heating elements — whether coil or glass-ceramic — heat slowly and steadily, which is exactly how cast iron wants to be treated.

Bring it up gradually, let it reach temperature, and it stores that heat far better than any other material. Add a cold steak to a properly heated cast iron and it maintains temperature through the shock. Add that same steak to a thin nonstick and the pan temperature drops noticeably.

Lodge’s 12″ skillet comes pre-seasoned with vegetable oil and arrives ready to cook. The seasoning improves with every use — fat polymerises onto the surface and becomes more nonstick over time. After six months of regular use, a well-maintained Lodge will release eggs and fish with minimal oil. It won’t match a PTFE coating in the short term, but it gets close, and there’s nothing to wear out.

The flat machined base makes excellent contact with electric coils and glass-ceramic tops. For glass-ceramic stove owners: don’t slide or drag the pan across the surface — the rough cast iron base can scratch glass cooktops permanently. Lift it instead. The silicone handle holder in the current version is a welcome addition; cast iron handles get very hot on electric burners where you’re leaving the pan on longer.

Pros:

  • 21,000+ Amazon reviews — one of the most proven kitchen pans available
  • Heat retention is exceptional — electric stove’s slow, steady heat suits cast iron perfectly
  • Naturally nonstick surface that improves with use, not degrades
  • Will outlast any nonstick pan by decades if maintained
  • Versatile: stovetop, oven up to 500°F, grill, campfire

Cons:

  • Heavy at roughly 8 lbs — not ideal for quick tasks or wrist issues
  • Slow to reach temperature on electric burners (though stores heat well once there)
  • Can scratch glass-ceramic cooktops if dragged — must be lifted
  • Requires hand-washing and occasional re-seasoning

Verdict: The best long-term investment on this list. If you cook heartier dishes — steaks, cornbread, frittatas — and don’t mind the weight, a Lodge will outperform nonstick pans in both results and longevity. Just lift, don’t slide.

→ Check Current Price on Amazon

3. CAROTE 12″ Granite Nonstick — Best Budget

CAROTE 12 Inch Granite Nonstick Frying Pan with Lid for electric stove

Ratings: 4.6★ from 17,483 Amazon reviews  |  Price: $32.99

CAROTE has become one of the fastest-growing cookware brands on Amazon because the value proposition is hard to argue with. At $32.99 with a lid included, the 12″ granite nonstick removes every reason to stick with a worn-out pan or make do with the wrong size. If you’re setting up a kitchen or replacing something that’s past its prime, this is the safest low-risk purchase on this list.

The granite-style nonstick coating is PFOS and PFOA free. It performs well for eggs, vegetables, and lighter proteins. The die-cast aluminium body distributes heat reasonably evenly on electric stoves, and the extended base design makes good contact with both coil and glass-ceramic elements.

The Bakelite handle stays cool during stovetop cooking and has a hanging hole for storage. No rivets on the interior means the cooking surface is completely smooth — food doesn’t catch on any hardware, and cleanup is a wipe.

The honest limitation is durability compared to premium options. Die-cast aluminium and granite-style coatings don’t have the lifespan of hard anodized pans.

If you cook multiple times daily, expect 1–2 years before the coating loses its release properties. For occasional cooks, it’ll last longer. At this price, replacing it is still cheaper than buying one premium nonstick pan.

Pros:

  • PFOS and PFOA free granite ceramic coating
  • Lid included at under $33 — exceptional value
  • Rivet-free interior makes cleanup easy and prevents food catching
  • Works on electric, gas, ceramic, and induction hobs
  • Bakelite handle stays cool during stovetop cooking

Cons:

  • Die-cast build is less durable than hard anodized premium pans
  • Coating won’t last as long under heavy daily use
  • Not suitable for high heat or metal utensils

Verdict: The smart buy if you’re on a budget or testing whether a new pan will actually change how you cook. Over 17,000 buyers back it up. Avoid metal utensils, keep the heat moderate, and it’ll last longer than expected.

→ Check Current Price on Amazon

4. All-Clad D3 Stainless Steel 12″ — Best Stainless

All-Clad D3 Stainless Steel 12-inch Frying Pan with Lid for electric stove

Ratings: 4.6★ from 8,636 Amazon reviews  |  Price: ~$149.95

If you want the best sear you can achieve on an electric stove, you want the All-Clad D3. The tri-ply construction — stainless, aluminium core, stainless — is bonded through the entire pan including the sides. Heat reaches the edges as evenly as the centre, which matters more on electric stoves where the burner diameter is fixed and doesn’t always match the pan base.

All-Clad’s D3 has been the reference stainless cookware in professional and serious home kitchens for decades, and it’s made in the USA. The 12″ frying pan with lid is one of the most versatile configurations — the lid allows you to braise, steam, and finish dishes that the open pan couldn’t handle. On electric stoves where you often need to trap heat rather than crank it up, the lid transforms this into a genuinely complete cooking pan.

Stainless requires more technique than nonstick. Preheat it on medium heat for 2–3 minutes before adding oil or food. On an electric stove, where heat ramps slowly, skipping this step leads to sticking every time.

Follow it — let a drop of water bead and slide across the surface before adding oil — and the results are excellent. Proper browning, even fond development, and oven finishing up to 600°F.

At ~$149.95, this is the most expensive pick here by a margin. But there’s nothing to wear out, no coating to replace, and no degradation with heat or time.

Pros:

  • Full tri-ply bonded construction ensures even heat across the entire surface and sides
  • Oven safe to 600°F — handles everything from stovetop to broiler
  • Made in USA; built to last a lifetime with no coating to replace
  • Lid included — uncommon for premium stainless pans
  • Flat base for maximum contact on electric coils and glass-ceramic

Cons:

  • Most expensive pick on this list at ~$149.95
  • Requires proper preheating technique — steeper learning curve if new to stainless
  • Shows fingerprints and water spots; needs drying promptly after washing

Verdict: This is the pan to buy if you take cooking seriously and don’t want to think about replacing it. The investment pays off over a few years compared to cycling through nonstick pans. If you’re new to stainless or mainly cook eggs and delicate fish, start with the T-fal instead.

→ Check Current Price on Amazon

5. T-fal Ultimate Hard Anodized 2-Piece Set — Best Set Value

T-fal Ultimate Hard Anodized Nonstick 2-Piece Set 10 and 12 inch frying pans

Ratings: 4.7★ from 33,955 Amazon reviews  |  Price: $69.99

If you’re stocking a kitchen rather than adding a single pan, this 2-piece T-fal set gives you a 10″ and a 12″ hard anodized nonstick pan for less than the price of the All-Clad alone. Both use the same Thermo-Spot preheating indicator and titanium nonstick construction as the single T-fal reviewed above — you’re not trading quality for quantity here.

The 10″ is the pan you’ll reach for more often than you expect: two-egg omelettes, a single chicken breast, reheating leftovers, toasting nuts. The 12″ handles larger meals, pasta sauces, multiple portions. Having both sizes on an electric stove gives you a practical advantage — a 12″ pan on a small coil burner heats unevenly; the 10″ drops right into place on a medium element. You can also check out my omelette pan guide if you specifically want to optimise for eggs.

With 33,955 reviews and a 4.7-star average, this is one of the most-reviewed pieces of cookware on Amazon. That’s not a small sample. The main trade-off versus the single 12″ reviewed above is that this set doesn’t include lids.

Pros:

  • 33,000+ verified Amazon reviews — as proven a pan as you can buy
  • Two sizes for different burner sizes on your electric stove
  • Same Thermo-Spot and titanium nonstick as the single-pan version
  • Excellent value: two quality pans for $69.99
  • Oven safe to 400°F, dishwasher safe

Cons:

  • No lids included with the set
  • If you already own one T-fal nonstick, the 2-pc adds similar rather than complementary capability
  • Nonstick coating degrades over years of heavy use

Verdict: The strongest value pick for anyone equipping a kitchen from scratch or replacing multiple worn-out nonstick pans. The 10″ + 12″ combination is one of the most practical setups you can put together on an electric stove for under $80.

→ Check Current Price on Amazon

What to Look for in a Frying Pan for an Electric Stove

A Flat Base Is Non-Negotiable

On gas stoves, pans with slightly rounded or warped bases still work because flames wrap around the sides. That difference is the whole question when a warped pan no longer sits flat — on glass and induction it costs real performance, on gas it mostly does not.

On electric stoves — coil or glass-ceramic — the heating element only transfers heat where it makes direct contact. A warped or bowed pan creates air gaps, and those air gaps become cold spots. Every pan on this list has a flat, stable base. If you have an existing pan that’s warped from heat, it won’t un-warp; replacing it will immediately improve how your food cooks.

How Different Materials Behave on Electric

All pan materials work on electric stoves, but they behave differently:

  • Nonstick (hard anodized or granite ceramic): Heats up relatively quickly for electric, responds to temperature changes reasonably well. Best for everyday frying, eggs, and fish.
  • Cast iron: Slow to heat, but stores heat better than any other material. Once at temperature on an electric burner, it’s the most stable cooking surface you can use.
  • Stainless steel tri-ply: Good heat distribution when fully bonded. Requires proper preheating technique but delivers the best searing and browning. Nothing to wear out.

For a full breakdown of cookware materials and how they pair with different heat sources, my cookware for gas stove guide covers the material comparison in depth — the same principles apply on electric.

Size and Burner Matching

On gas stoves, a larger burner adjusts flame to reach any pan size. On electric, the heating element has a fixed diameter. Cooking a 12″ pan on a 6″ coil means only the centre gets full heat. Where possible, match pan size to burner size.

A 10″ pan fits most standard electric coils. Most electric ranges have at least one larger burner for 12″ pans. If your kitchen has only small burners, the 10″ T-fal in the 2-piece set becomes your practical workhorse.

Coil vs Glass-Ceramic: Does It Matter?

The main difference is surface sensitivity. Coil electric stoves are durable and scratch-resistant — almost any flat-bottomed pan works fine on them. Glass-ceramic smooth-top stoves are scratch-sensitive: rough pan bases can permanently mark the surface if dragged.

If you have a glass-ceramic top, always lift pans rather than sliding them, and check the base of any new pan for rough edges before use. All pans on this list are suitable for both coil and glass-ceramic when handled correctly.

When to Choose Nonstick vs Stainless for Electric Cooking

For most people cooking on electric stoves, nonstick is the practical daily choice. It’s forgiving of the temperature variations that electric burners produce, requires less oil, and cleans up easily. Stainless is the right pick if you sear proteins regularly, want to develop fond for pan sauces, or want a pan with no expiration date on it.

The two aren’t in competition — a well-equipped electric stove kitchen benefits from having one of each. If you cook on gas as well as electric and want to compare options, see my fry pans for gas stove guide.

How These Picks Were Chosen

Plainly: this is a research-based guide, not a hands-on test. I have not run these side by side, and nothing here should be read as a report from my own kitchen.

What the picks rest on: base flatness and thickness, which matter more on a flat electric or induction element than on any other hob because contact is everything; then material, induction compatibility, handle construction and oven-safe temperature; plus the complaint patterns in verified-purchase reviews, where the electric-specific theme is pans that rock or spin on a smooth top after a few months.

What I could not establish: base flatness tolerance. It is the single most important specification for this use and not one manufacturer publishes it. Gauge and construction are the available proxies. Where a pan is described here as sitting flat, that comes from the consistency of owner reports, not from a straightedge.

Frequently Asked Questions

What makes a frying pan good for an electric stove?

The most important factor is a perfectly flat base. Electric stove elements — coil or glass-ceramic — only transfer heat where the pan makes direct contact with the surface. A flat base maximises that contact area.

Beyond that, look for materials with good heat conductivity (an aluminium core helps even in stainless pans) and enough weight to resist warping at sustained high temperatures. Thin, inexpensive pans are most prone to warping under the steady heat of electric burners.

Will cast iron work on a glass-top electric stove?

Yes, cast iron works on glass-top electric stoves. The concern isn’t heat — it’s scratching. Cast iron has a rough base surface, and dragging it across a glass-ceramic cooktop can scratch it permanently.

Always lift a cast iron pan rather than sliding it across the surface. As long as you do that, cast iron is an excellent match for electric stoves — its flat base and superior heat retention complement the slow, steady heat that electric elements produce.

Can stainless steel pans scratch a glass-top electric stove?

Stainless steel pans with smooth, polished bases are generally safe on glass-ceramic cooktops. The risk comes from rough or sharp base edges, or grit trapped between the pan and the surface.

Check the base of any new stainless pan before using it on a glass top. A smooth, flat stainless base — like the All-Clad D3 reviewed above — poses no scratch risk under normal use. Avoid sliding any pan across a glass cooktop regardless of material.

What size frying pan is best for electric stoves?

A 12″ pan handles the widest range of cooking tasks and fits the large burner on most standard electric ranges. A 10″ pan is better matched to medium burners and is ideal for 1–2 person households or everyday quick cooking. If your large burner is 8″ diameter or smaller (common on older coil stoves), a 10″ pan is the better primary pan. Having both a 10″ and a 12″ — as the T-fal 2-piece set provides — is the most versatile setup for an electric stove kitchen.

Why does food stick to my stainless pan on an electric stove?

Stainless pans stick when they haven’t been properly preheated — and this happens more on electric stoves, which heat slowly, than on gas. The fix: preheat your stainless pan on medium heat for 2–3 minutes before adding oil or food.

Test readiness by flicking a few drops of water into the pan. If the drops form beads and slide across the surface (the Leidenfrost effect), the pan is at the right temperature. Add your oil, let it shimmer, then add food. It will release cleanly once properly seared.

Cooking on a portable burner instead of a full-size stove? The same flat-bottom rules apply — my guide to the best hot plates for boiling water covers which burners pair well with these pans.

Filed Under: Product Reviews

  • « Go to Previous Page
  • Page 1
  • Interim pages omitted …
  • Page 28
  • Page 29
  • Page 30
  • Page 31
  • Page 32
  • Interim pages omitted …
  • Page 35
  • Go to Next Page »

Recent Articles

  • Cuisinart DLC-10SYP1 Review: Durable, But a Newer Bowl
  • COSORI Pro Gen 2 Review: Big Basket, Fragile Handle
  • Dash Tasti-Crisp Review: Cheap, but the Coating Wears Fast
  • Chefman TurboFry Touch Review: Cheap, but the Coating Wears
  • Chef’sChoice 15XV Review: Very Sharp, With Scratch Reports

Search


HOME          Contact          Affiliate Disclosure          Terms of Service          Privacy Policy


kitchenwarecompare.com is a participant in the Amazon Services LLC Associates Program, an affiliate advertising program designed to provide a means for sites to earn advertising fees by advertising and linking to Amazon.com, Endless.com, MYHABIT.com, SmallParts.com, or AmazonWireless.com. Amazon, the Amazon logo, AmazonSupply, and the AmazonSupply logo are trademarks of Amazon.com, Inc. or its affiliates. As an Amazon Associate I earn from qualifying purchases.


Copyright © 2026 kitchenwarecompare.com, ALL RIGHTS RESERVED.