• Skip to primary navigation
  • Skip to main content
  • Skip to primary sidebar

Kitchenware Compare

  • Home
  • Product Reviews
    • Air Fryers
    • Coffee
    • Cookware
    • Flat Top Grills
    • Meat Thermometers
    • Food Processors
    • Knives
    • Pizza Ovens
    • Toaster Ovens
    • Juicers
  • Food Blog
  • Helpful Kitchen Tips
  • Data Studies
  • About
  • How I Review
  • Contact
You are here: Home / Archives for Product Reviews

Best Probe Thermometers 2026: Wired, Wireless and Instant-Read

Last Updated June 26, 2026

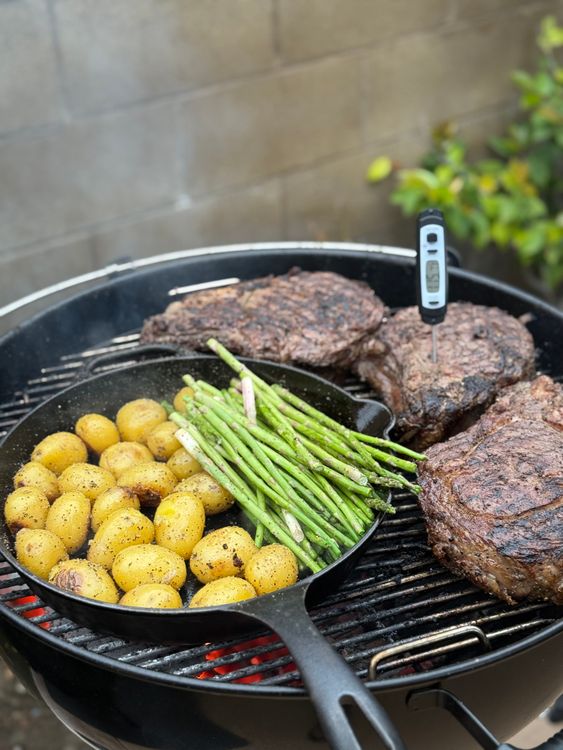
Ribeye steaks on a grill — knowing internal temperature is essential for perfect results

This post contains affiliate links. If you buy through my links, I may earn a commission at no extra cost to you.

“Probe thermometer” covers three distinct types: wired leave-in probes (stay in the meat, tethered to a display), wireless leave-in probes (stay in the meat, transmit to your phone), and instant-read probes (insert briefly for a fast reading, then remove). The right choice depends on how you cook. For most home cooks, one wireless leave-in probe and one instant-read is the complete toolkit.

This guide covers all three types, recommends the best option in each category, and explains what to look for when buying.

Quick Comparison

Model Type Price Best For Buy
TempPro TP16 Wired leave-in $19.99 Oven roasting, budget pick Check Price
MEATER Plus Wireless leave-in $59.98 Truly wireless, guided cooks Check Price
TempPro TempSync Wireless multi-probe $42.98 Monitoring multiple proteins Check Price
Lavatools Javelin PRO Instant-read $43.99 Fast checks, steaks, burgers Check Price

The three types of probe thermometer

Type How it’s used Best for Price range
Wired leave-in Stays in meat, cable to display unit Oven roasting, set-and-forget cooking $20–$50
Wireless leave-in Stays in meat, transmits to phone Grilling, smoking, monitoring at a distance $40–$150
Instant-read Insert briefly, read, remove Steaks, burgers, quick end-of-cook checks $15–$100

Wired leave-in probes

Wired leave-in probes have a probe on a long cable that runs from inside the meat to a display unit outside the oven or grill.

They’re simple, reliable, and cheaper than wireless alternatives. The trade-off: the cable needs to be routed through a gap in the oven door or grill lid, and you need to be within sight of the display to read the temperature.

TempPro TP16 — best wired leave-in probe

TempPro TP16 Digital Probe Meat Thermometer

The TP16 (rebranded from ThermoPro) is the classic wired leave-in probe that millions of home cooks own. Large display, long cable, simple operation.

You set the target temperature, insert the probe, route the cable through the oven door, and the display sounds an alarm when the meat reaches target. No app, no Bluetooth, no complexity. Exactly what you need it to be.

Pros: Very affordable, large backlit LCD, 40-inch braided cable, magnetic back, built-in timer, no app or pairing required
Cons: Cable must be routed through oven door gap; must stay near display to read temperature; single probe only
Current price: $19.99

Check Price on Amazon →

Wireless leave-in probes

Wireless leave-in probes stay in the meat throughout the cook and transmit live temperature readings to your phone via Bluetooth or Wi-Fi. No cable to route through the oven door. You can monitor from anywhere in the house (Bluetooth) or anywhere with phone signal (Wi-Fi). For my full rankings of wireless probes, see the best Bluetooth meat thermometer guide.

MEATER Plus — best wireless probe, no cable

MEATER Plus Wireless Smart Meat Thermometer

The MEATER Plus is the best wireless leave-in probe for most home cooks. It goes entirely inside the meat — no cable at all — and transmits temperature data via Bluetooth to the MEATER app. The app’s guided cook mode calculates estimated finish time and rest time based on live data. 165-foot Bluetooth range covers most kitchens, gardens, and patios.

Pros: Fully cable-free, dual sensor (meat + ambient temp), guided cook mode with rest time estimate, IP67 waterproof, 165-ft range
Cons: Single probe only — can’t monitor two proteins simultaneously; requires phone nearby; more expensive than wired alternatives
Current price: $59.98

Check Price on Amazon →

TempPro TempSync — best multi-probe wireless option

TempPro TempSync 4-Probe Bluetooth Thermometer

The TP25 is the best option for monitoring multiple cooking zones or proteins simultaneously. Four probes connect to a Bluetooth receiver (cables to receiver, not to you), which then transmits to your phone app. 650-foot Bluetooth range is the longest in this price category. Unlike the MEATER, probes are wired to the receiver — it’s “wireless” in the sense that you monitor on your phone from a distance, but the probes themselves have cables.

Pros: Four probes at once, 650-ft Bluetooth range, physical display plus app, 40-hour battery, per-probe high/low alarms
Cons: Probes are cabled to receiver (not truly wireless like MEATER); receiver must stay near the grill; app is functional but not as polished as MEATER
Current price: $49.99

Check Price on Amazon →

Instant-read probes

Instant-read probes are designed for speed — insert the probe into the thickest part of the meat, get a reading in 2–5 seconds, remove the probe. They’re the right tool for steaks, burgers, chicken pieces, fish fillets, and any cook where you want a quick check at the end rather than continuous monitoring. Do not leave an instant-read probe in the meat during cooking — they are not rated for extended oven or grill temperatures.

Lavatools Javelin PRO — best instant-read probe

Lavatools Javelin PRO Classic Instant Read Thermometer

The Javelin PRO reads temperature in 2 seconds — fast enough to check a steak without leaving the grill lid open for long. The auto-rotating display orients itself to be readable at any angle.

NSF certification and IP65 water resistance make it genuinely durable. The magnetic back sticks to your fridge or grill frame. At $43.99 it delivers professional-grade accuracy at a home-cook price.

Pros: 2-second read, auto-rotating backlit display, ±0.9°F accuracy, IP65 water resistant, NSF certified, magnetic back
Cons: Not suitable for leave-in use; no app or Bluetooth; folds shut (small chance of accidental pocket activation)
Current price: $43.99

Check Price on Amazon →

What to look for in a probe thermometer

Accuracy

Consumer probe thermometers typically claim ±1°F or ±0.9°F accuracy. This is sufficient for meat cookery — the difference between 134°F and 135°F is not meaningful in practice. More important is calibration consistency: a thermometer that reads 2°F high consistently is fine (you learn to adjust); one that drifts randomly is not. Verify accuracy with the ice water method (should read 32°F) and boiling water method (should read 212°F at sea level).

Response time

For instant-read probes, response time matters. Under 3 seconds is fast; 5–8 seconds is slow. For leave-in probes, response time is less critical — you’re monitoring over minutes or hours. The Javelin PRO’s 2-second read is genuinely fast enough to check multiple steaks without significantly affecting cooking temperature.

IP (waterproof) rating

IP65 means splash-proof — fine for grill use and rinsing. IP67 means submersible to 1 metre for 30 minutes. For a thermometer you’ll be rinsing under a tap and using near a grill, IP65 is the minimum worth buying. Thermometers with no IP rating will fail eventually from steam and splash exposure.

Bluetooth range (wireless probes)

Advertised range is always measured in open air. Expect roughly 50–60% of the stated range through walls. The TP25’s 650-foot range translates to comfortable monitoring from inside the house with your grill on the patio. The MEATER Plus’s 165-foot range is enough for most home setups but may struggle if you’re multiple walls away from your cooking surface.

Probe count

One probe covers one piece of meat. If you regularly cook for four or more people with multiple proteins — a chicken and a roast simultaneously, or four steaks at different doneness levels — a multi-probe thermometer like the TP25 saves significant hassle.

How These Picks Were Chosen

Plainly: this is a research-based guide, not a hands-on test. I have not run these through a cook, and nothing here should be read as a report from my own kitchen.

What the picks rest on: stated accuracy tolerance, maximum probe temperature, and the practical differences between wired, wireless and instant-read designs; and the complaint patterns in verified-purchase reviews, which separate cleanly by type — wired probes fail at the cable, wireless ones fail at the app, and instant-reads are judged almost entirely on how fast they settle.

What I could not establish: whether these units actually meet their stated accuracy. Every tolerance figure here is the manufacturer’s own claim. I found no independent verification for these specific models, and a thermometer that is confidently wrong is worse than one that is slow — so if accuracy is critical to you, check yours against ice water when it arrives rather than trusting the box.

Frequently Asked Questions

What’s the difference between a leave-in probe and an instant-read thermometer?

A leave-in probe stays in the meat throughout the entire cook and provides continuous temperature monitoring — ideal for roasts, whole chickens, and anything that takes more than 30 minutes. An instant-read thermometer is inserted briefly at the end of the cook for a fast spot-check — it’s not rated for extended use inside an oven or grill. Most serious cooks own one of each.

Can you leave a probe thermometer in the oven?

Only if it’s specifically rated for oven use (all leave-in probes on this list are). Instant-read thermometers are not designed for leave-in use — the electronics cannot handle sustained high temperatures. Check the manual: oven-rated probes specify a maximum cable and probe temperature; instant-reads will say “not for use in oven.”

What internal temperature should chicken reach?

165°F (74°C) at the thickest part of the thigh, away from bone. For whole chickens, check multiple locations — the breast, the thigh, and the area between thigh and body. The thigh typically takes longest. Rest for 5 minutes before carving; temperature will rise slightly during rest.

How accurate are probe thermometers?

The thermometers on this list are accurate to ±1°F or better, which is sufficient for all meat cookery. Verify your thermometer with the ice water method (32°F) and boiling water method (212°F at sea level, adjusting for altitude). If it reads within 2°F of the expected value, it’s calibrated correctly. Most probe thermometers can be recalibrated if they drift.

What’s the best probe thermometer for a smoker?

The TempPro TempSync for monitoring multiple probes across long low-and-slow cooks — brisket, pork shoulder, and ribs simultaneously. The MEATER Plus if you want a single truly wireless probe with no cable running out of your smoker lid. Either pairs well with a dedicated smoker setup. For the full guide to wireless options, see my best Bluetooth meat thermometer roundup.

Do I need a wired or wireless probe thermometer?

Wired if you primarily oven-roast and want simplicity at the lowest price. Wireless if you grill or smoke and want to monitor without standing next to the cooker. The MEATER Plus is the upgrade that most cooks who start with a wired probe eventually make — the cable-free experience is a genuine quality-of-life improvement once you’ve owned one.

The bottom line: A $36 wired probe thermometer (TempPro TP16) and a $37 instant-read (Lavatools Javelin PRO) covers 90% of home cook needs for under $75. The MEATER Plus is the upgrade that makes leave-in monitoring genuinely effortless. The TempPro TempSync is for cooks who regularly run multiple proteins.

Related guides

  • best thermometer for brisket
  • Bluetooth vs Wi-Fi meat thermometers
  • are wireless meat thermometers accurate?
  • Meat Thermometers: Reviews & Buying Guide
  • Best Bluetooth Meat Thermometer 2026
  • How to Calibrate a Meat Thermometer
  • Meat Temperature Guide
  • Best Wireless Meat Thermometers 2026
  • Best BBQ Thermometers 2026
  • Best Meat Thermometer for Smoking 2026
  • MEATER vs ThermoPro: Which Is Better?

Filed Under: Product Reviews

Blackstone 28-Inch vs 36-Inch Griddle: Which Size Should You Buy?

Last Updated June 25, 2026

Pressing smash burgers on a hot flat top griddle

The quick answer

For a family of four doing regular outdoor cooking, buy the 28-inch. Owner reports are full of people who bought the 36-inch first and wished they had started smaller. The 36-inch is the right choice if you cook for large groups regularly or want to batch cook seriously — but for everyday family cooking, it’s more work than the extra cooking surface is worth.

I earn a commission if you buy through the Amazon links below, at no extra cost to you.

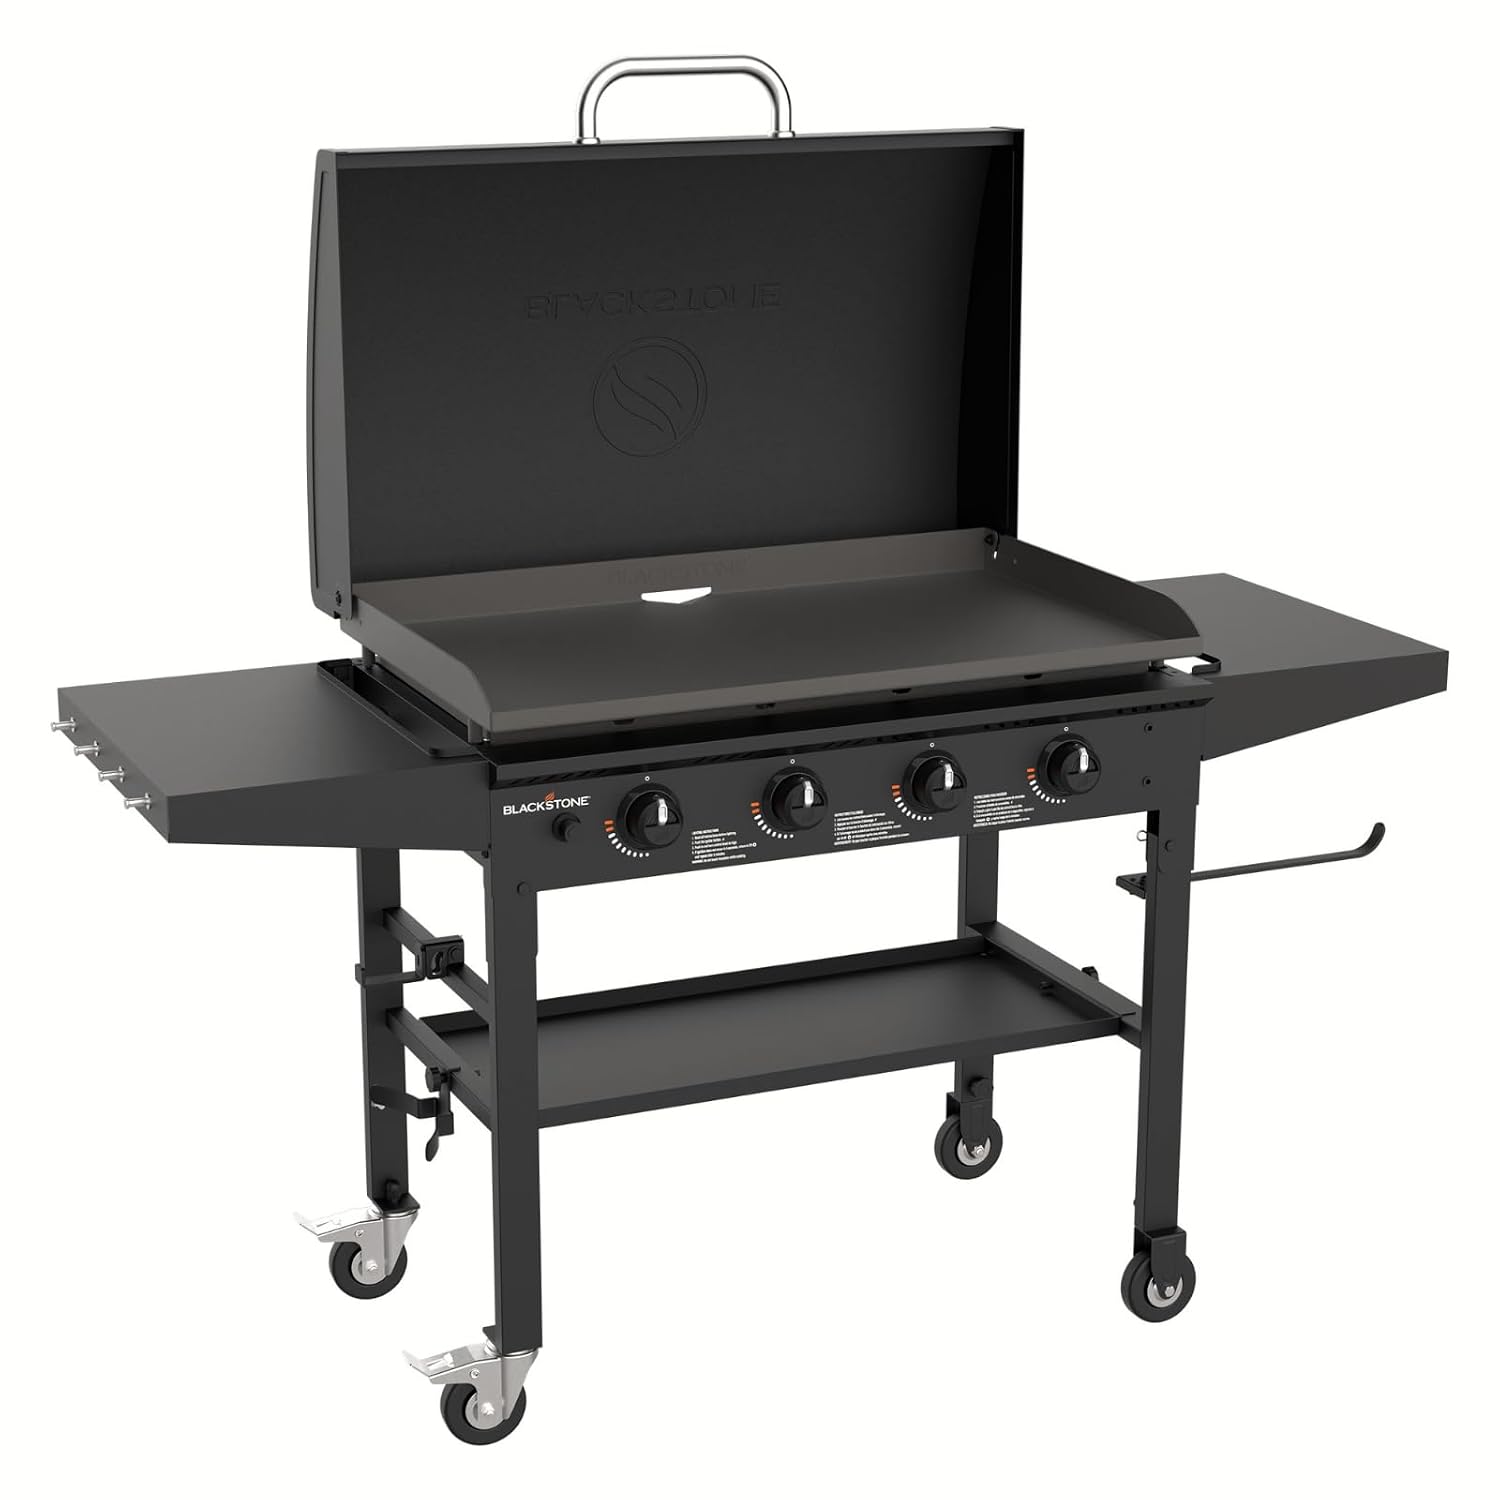
Blackstone 28-Inch Omnivore Griddle with Hard Cover

Blackstone 28″ Omnivore
(hard cover included)

Check Price
Blackstone 36-Inch 4-Burner Griddle with Hood

Blackstone 36″ with Hood
(4-burner cooking station)

Check Price

I’m going to tell you something that Blackstone’s marketing won’t: bigger is not always better with flat top griddles. The 36-inch is an excellent piece of equipment, but it’s the right choice for a narrower range of people than most comparison articles would have you believe.

The two sizes get bought for different jobs — weekend breakfasts for a family, weeknight dinners, summer cookouts for twenty people — and owner reports separate fairly cleanly along those lines. What follows is an honest answer rather than a hedge.

Product Best For Price Rating Buy
Blackstone 28″ Omnivore (hard cover included) Everyday family cooking $312.79* 4.8★ (79) Check Price
Blackstone 36″ with Hood (4 burners) Large groups & batch cooking $527.28* 5.0★ (7) Check Price

*Prices checked 13 July 2026. Blackstone’s standard no-cover 28″ and 36″ listings (4.7★ with 10,000+ ratings each) were out of stock on Amazon when I checked, so these links go to the in-stock configurations — the 28″ with hard cover and the 36″ with hood. The 36″ listing is newer, which is why its rating count is still low.

Feature Blackstone 28-Inch Blackstone 36-Inch
Cooking surface 470 sq inches 720 sq inches
Burners 2 4
BTU output 34,000 total 60,000 total
Weight ~68 lbs ~120 lbs
Dimensions (approx.) 52 x 22 x 36″ 62 x 22 x 36″
Typical price $250–$300 $350–$420
With hood option Yes (some models) Yes (some models)

The cooking surface: what those numbers mean in practice

470 square inches sounds abstract. Here’s what it means: on the 28-inch, you can simultaneously cook a dozen eggs, a pound of bacon, and a stack of pancakes. That’s a full breakfast for four people, all at once. The 28-inch is a large cooking surface. It just doesn’t feel like it in photos.

720 square inches is the surface area that lets you cook for eight to ten people simultaneously without any batching. It’s the surface that lets you smash a dozen burgers at once, or cook a week’s worth of meal prep in a single session. It’s a lot of griddle.

The case for the 28-inch (which is stronger than you think)

Here’s what I’ve noticed cooking on the 36-inch for a family of four: I rarely use more than half of it. Which means I’m heating, maintaining temperature on, and cleaning a cooking surface I’m only partially using. The 28-inch would have done the same job with less fuel, faster heat-up time, and significantly less cleanup.

The weight difference is real and it matters more than people anticipate. At 68 lbs, the 28-inch is manageable — one person can move it, store it for winter, take it tailgating. At 120 lbs, the 36-inch is functionally permanent. Once it’s in your backyard, it stays there. Make sure you want it there before you buy it.

The 28-inch also heats more evenly, because two burners across a 28-inch surface delivers more consistent coverage than four burners across 36 inches where the outer edges can lag slightly.

The case for the 36-inch (and who actually needs it)

The 36-inch is unambiguously better when you’re cooking for a crowd. Six or more people for dinner, a cookout for twenty, meal prep for the week — these are the use cases where the extra surface earns its place.

The four-burner setup gives you meaningful heat zone control. Left side screaming hot for searing, right side medium for keeping things warm, middle for active cooking. This is genuinely useful when you’re managing a complex meal with multiple proteins and vegetables at different stages. The 28-inch’s two burners create a more limited temperature gradient. Either way, a wireless probe thermometer makes it easier to track multiple proteins across those zones without cutting into anything to check.

If you run a weekend pop-up, cater parties, feed an extended family regularly, or just genuinely love the ritual of a big cook, the 36-inch will make you happy every time you use it. But be honest with yourself about how often that actually describes you.

Cleanup: the thing nobody mentions in comparisons

Cleaning a flat top after cooking takes a few minutes regardless of size. But cleaning 720 square inches versus 470 square inches adds up. Every session on the 36-inch involves scraping, wiping, and re-seasoning a significantly larger area. Over a summer of regular use, that difference is noticeable. This sounds minor and it is — but if you’re already someone who finds post-cook cleanup tedious, don’t make it 50% bigger.

Buy the 28-Inch if…

  • You cook for two to four people most of the time
  • You want the option to move it or take it with you
  • You want faster heat-up and more even coverage
  • You don’t want to dedicate permanent outdoor space to it
  • You’re buying your first flat top and want to start right

Buy the 36-Inch if…

  • You regularly cook for six or more people
  • You want serious heat zone control with four independent burners
  • You batch cook or meal prep in large quantities
  • You have a dedicated outdoor cooking area and it can live there permanently
  • You run events or cook for extended family gatherings

The verdict

Start with the 28-inch. If you find yourself consistently running out of cooking surface — actually running out, not just theoretically wanting more — then you’ll know exactly why to upgrade. Most people who buy the 36-inch first find they’re using 60% of it most of the time. The 28-inch is an excellent flat top griddle for the way most people actually cook outdoors.

Check 28″ Price on Amazon Check 36″ Price on Amazon

How This Comparison Was Put Together

Plainly: this is a research-based comparison, not a hands-on test. I have not run these two side by side.

What it rests on: the published specification for both – cooking area in square inches, burner count and total BTU, and how BTU per square inch compares between them, which is the number that actually decides whether the extra size costs you heat; plus cart and shelf configuration, and the pattern across verified-purchase reviews, where the recurring themes are rust after seasoning lapses and uneven heat between burner zones.

What I could not establish: heat evenness across either plate, which is the practical difference between the two sizes. Measuring it needs a grid of infrared readings across a fully preheated surface, and no independent test does that for these griddles. Burner layout and BTU per square inch are the indicators used here.

Frequently Asked Questions

Is the Blackstone 28-inch big enough for a family?

Yes. Its 470 square inches of cooking surface handles a dozen burgers or a full pancake breakfast for four at once. Most people who buy the 36-inch report using around 60% of the surface for everyday cooking, which is roughly what the 28-inch gives you.

What is the main difference between the Blackstone 28-inch and 36-inch?

Size and heat output. The 28-inch has 470 square inches of cooking surface with two independently controlled burners producing 34,000 BTU total. The 36-inch has 720 square inches with four burners producing 60,000 BTU. Cooking capability is otherwise identical — the 36-inch just does more at once.

Which Blackstone griddle should I buy first?

Start with the 28-inch unless you regularly cook for large groups or batch cook seriously. It costs less, heats up faster, and takes noticeably less time to clean and season. If you consistently run out of cooking surface, that is your signal to upgrade.

Why do the Amazon links go to cover and hood bundles?

Blackstone’s standard bare-griddle listings sell out regularly — both were out of stock when I last checked. The linked configurations are the same 28-inch and 36-inch griddles sold with a hard cover or hood included, which is what is actually in stock.

Related: See all my flat top grill reviews and guides
Related: Best flat top grill: all options compared


Whichever size you pick, seasoning it correctly matters more for day-to-day performance than the size difference does.

For the full breakdown of the 36″ model specifically, see my Blackstone 36″ review.

Filed Under: Product Reviews

Lodge vs Le Creuset Dutch Oven: Is the Price Difference Worth It?

Last Updated June 25, 2026

The quick answer

The honest answer: Lodge makes a very good Dutch oven for the money, and if budget is the constraint, buy it and cook happily. But if you cook with a Dutch oven three or four times a week and you’re buying once for a decade, the Le Creuset is worth every penny of the price difference. The quality gap is real — the question is whether it matters for how you cook.

I earn a commission if you buy through the Amazon links below, at no extra cost to you.

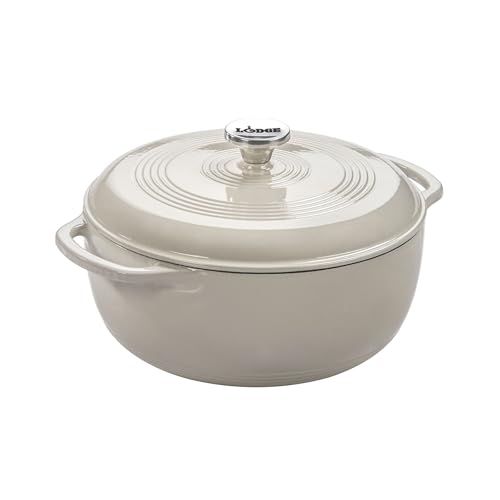
Lodge 6-Quart Enameled Cast Iron Dutch Oven
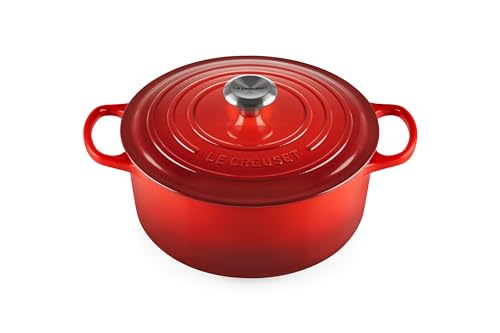
Le Creuset Signature 5.5-Quart Dutch Oven

I want to be straight with you about something before I go any further: I have not cooked with either of these. This comparison is built from published specifications, owner reviews at scale, and the testing other outlets have published. On the evidence, the Le Creuset is the better piece of cookware — better enamel, better lid seal, better heat retention. The question is whether that difference is worth spending $300 more.

It depends entirely on how you cook. Let me explain what you actually get for the extra money, and then you can decide.

Product Best For Price Rating Buy
Lodge Essential Enamel 6 Qt Best Value $89.90 4.7★ (38,979) Check Price
Le Creuset Signature 5.5 Qt Best Long-Term Buy $308.95 4.8★ (7,798) Check Price
Feature Lodge 6qt Enameled Le Creuset 5.5qt Signature
Capacity 6 quarts 5.5 quarts
Material Enameled cast iron Enameled cast iron
Made in China France
Oven safe to 500°F 500°F
Induction compatible Yes Yes
Warranty Lifetime limited Lifetime limited
Typical price $60–$85 $350–$420

What you actually get for the extra money

I know $300 is a lot, and I’m not going to pretend it isn’t. But let me describe the differences as specifically as I can, because ‘it’s just better’ isn’t useful.

Enamel quality

This is where the gap shows most clearly. Le Creuset’s enamel is thicker, smoother, and significantly more resistant to chipping. Lodge’s enamel is good — it’s not bad enamel — but after two or three years of regular use, you’re quite likely to see chips on the rim and on the corners of the lid where impact is most common. This is one of the most consistent complaints about Lodge Dutch ovens in long-term reviews.

Le Creuset’s enamel on a well-maintained pot looks essentially the same after ten years as it did when new. That’s not an accident — it’s the result of a manufacturing process that Lodge’s price point doesn’t allow.

Interior cooking surface

The interior of a Le Creuset is lighter in colour (cream/off-white) and smoother than Lodge’s darker interior. The lighter colour is actually functional — you can see browning more clearly, which helps you judge when a fond is developed or when garlic is about to burn. The smoother surface is easier to clean and behaves more predictably with acidic ingredients like tomatoes.

Lid fit and heat retention

This is the difference I notice most in actual cooking. The Le Creuset lid fits more precisely, which means more steam stays in the pot during long braises and especially when baking bread. No-knead bread bakers know this well — a tight lid seal in the first phase of baking is what creates the steam environment that makes the crust. The Lodge lid is good, not perfect.

Both pots retain heat exceptionally well once up to temperature — that’s just cast iron physics. But Le Creuset’s slightly thicker walls mean marginally more even heat distribution across the base.

Where Lodge is completely fine

For braising — pot roasts, lamb shanks, chicken thighs, short ribs — Lodge performs as well as Le Creuset. Once you’ve got liquid in the pot and the lid is on, the small differences in lid seal and interior surface matter very little. The physics of braising are forgiving. A Lodge turns out genuinely spectacular braises.

For stovetop soups, stews, and anything where the pot is a vehicle rather than the critical tool, Lodge is more than adequate. You’re not leaving quality on the table in these applications.

The bread baking argument

If you bake no-knead or Dutch oven bread, the Le Creuset is meaningfully better. The lid fit matters. The light-coloured interior shows you what’s happening. The oven performance is more consistent. Bread bakers who have upgraded from Lodge to Le Creuset almost universally report noticeably better crusts. If you bake bread weekly, that difference adds up.

The honest long-term calculation

Here’s the argument for Le Creuset that I find most compelling: over ten years of regular use, a Lodge might need replacing (or at minimum, the chipped enamel becomes something you live with rather than enjoy). A Le Creuset bought today will be in excellent condition in fifteen years. The per-use cost of a $380 pot used three times a week for ten years is under $0.25 per use. That’s cheap cookware.

But that calculation only works if you actually cook with it that often. If you’re buying your first Dutch oven and you’re not sure how much you’ll use it, start with Lodge. If you already love Dutch oven cooking and you’re replacing a pot you’ve worn out, buy Le Creuset and stop thinking about it.

Buy the Lodge if…

  • Budget is a genuine constraint
  • You’re buying your first Dutch oven and want to try the format
  • You cook with it occasionally rather than weekly
  • You use it primarily for braising and soups where the lid seal matters less

Buy the Le Creuset if…

  • You cook with a Dutch oven three or more times a week
  • You bake bread in it regularly
  • You want to buy once and keep it for ten to fifteen years
  • You care about the cooking surface staying pristine

The verdict

Buy Lodge if budget matters or if you’re not yet certain how much you’ll use it. Buy Le Creuset if you already know you love Dutch oven cooking and you want the best version of the thing. Both are good pots. One is significantly better.

Related: See all my cookware reviews and guides
Related: Best cast iron Dutch ovens 2026: full buying guide

How This Comparison Was Put Together

Plainly: this is a research-based comparison, not a hands-on test. I have not run these side by side.

What it rests on: the published specification for both – capacity, weight, enamel type, knob material and its oven-safe limit, and the warranty each carries, which is the clearest signal of what each maker expects of its own enamel; plus the pattern across verified-purchase reviews for each, where the Lodge theme is enamel chipping and the Le Creuset theme is whether the price difference is justified rather than whether the pot works.

What I could not establish: whether Le Creuset’s enamel genuinely outlasts Lodge’s by enough to justify the gap. That needs controlled thermal-shock and impact testing on both, and no independent test covers it. Warranty terms and the balance of owner reporting are what this comparison reasons from, and both are weaker than a measurement.

Frequently Asked Questions

Is Le Creuset worth the extra cost over Lodge?

For daily, long-term use, yes — the smoother enamel, better lid seal, and heat retention are real, measurable differences. For occasional cooking or a first Dutch oven, Lodge delivers most of the same results for a third of the price.

Which is better for bread baking, Lodge or Le Creuset?

Both work well for no-knead bread baking — the enclosed cast iron traps steam either way. Le Creuset’s tighter lid seal holds slightly more moisture, which can help with crust development, but the difference is marginal enough that most bakers won’t notice it.

Do Lodge and Le Creuset Dutch ovens work the same on all stovetops?

Yes — both are compatible with gas, electric, induction, and oven use. Cast iron is magnetic, so induction heating works efficiently on either brand.

Which has better resale value, Lodge or Le Creuset?

Le Creuset holds resale value noticeably better — its enamel finish and brand recognition mean used pieces regularly sell for 40-60% of retail on the secondhand market. Lodge Dutch ovens have minimal resale value, which is consistent with their lower purchase price.

Filed Under: Product Reviews

Ninja AF101 vs COSORI Pro II: Which Air Fryer Should You Actually Buy?

Last Updated June 25, 2026

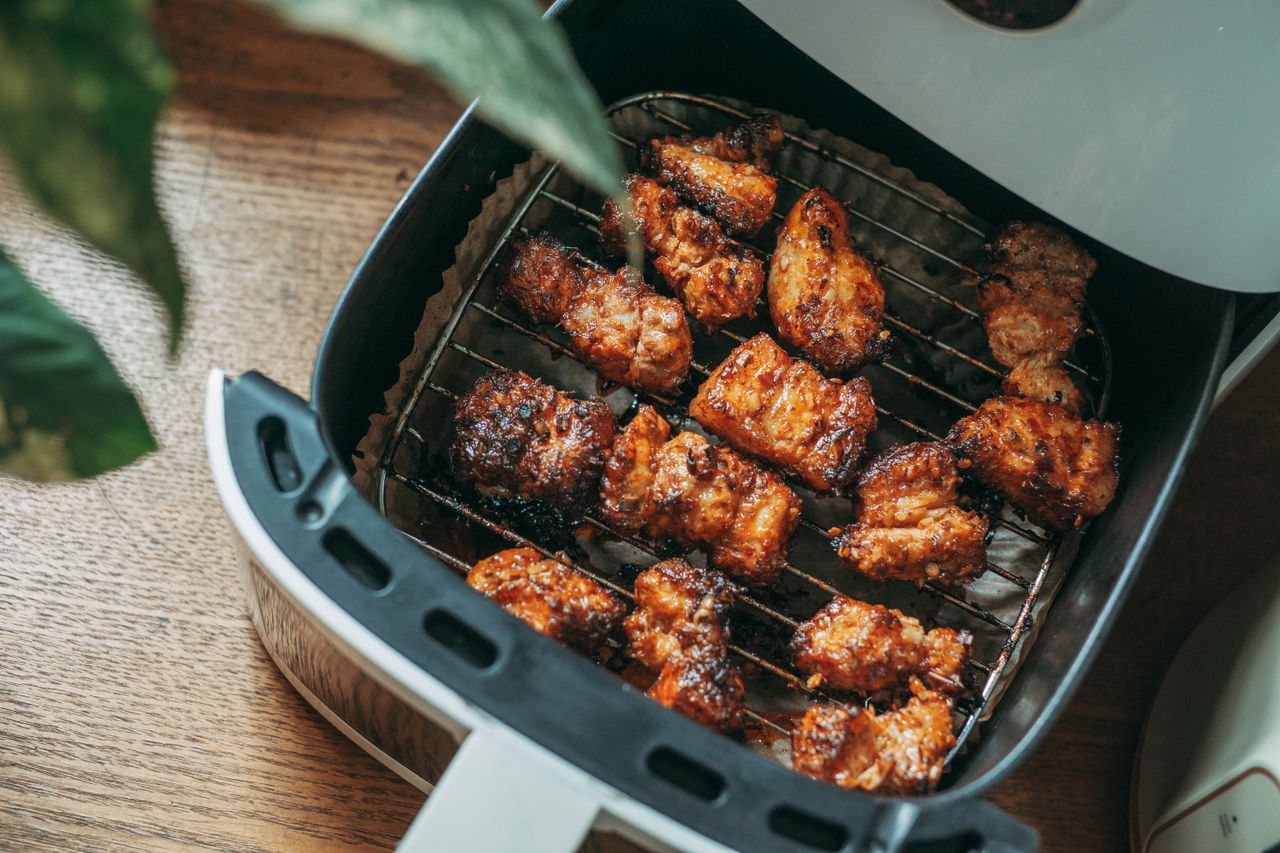
Crispy chicken pieces cooked in an air fryer basket

The quick answer

For most households of one to three people, buy the Ninja AF101. At the same $119.99 price, it takes up less counter space and is easier to clean. If you regularly cook for four or more — or want to fit a whole chicken without engineering a compromise — the COSORI Pro II’s larger basket is the better fit. That’s the whole decision.

I earn a commission if you buy through the Amazon links below, at no extra cost to you.

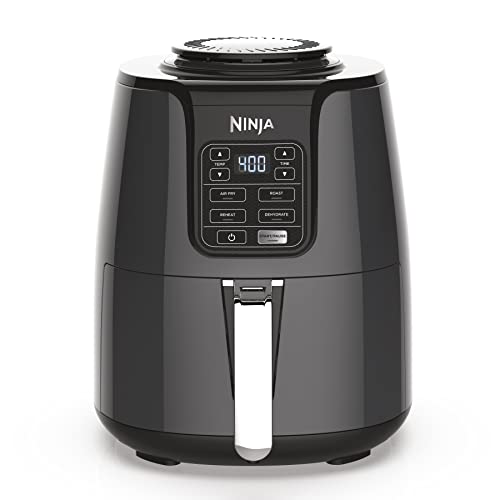
Ninja AF101 4-Quart Air Fryer

Ninja AF101 (4 QT)

Check Price
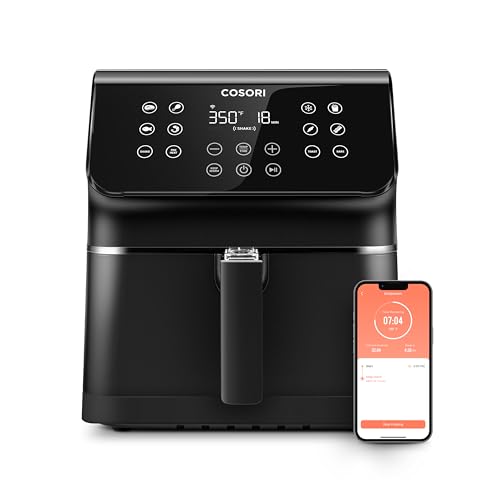
COSORI 6-Quart Air Fryer

COSORI Pro II (5.8 QT)

Check Price

These two have been the default budget air fryer recommendation for years, and the internet makes the comparison much more complicated than it needs to be. Both of these air fryers cook food well. Both are well-built for the price. The question is never which is better — it’s which one fits how you actually cook.

Before I get into the details: don’t buy an air fryer based on the preset buttons. You’ll use them twice and then ignore them for the life of the machine. The thing that actually matters is basket size, and I’ll explain exactly why.

Product Best For Price Rating Buy
Ninja AF101 (4 QT) 1-3 people, compact kitchens $119.99 4.7★ (59,464) Check Price
COSORI Pro II (5.8 QT) Families, batch cooking $119.99 4.6★ (2,393) Check Price

Prices checked 15 September 2026.

Feature Ninja AF101 COSORI Pro II
Capacity 4 quarts 5.8 quarts
Wattage 1,550W 1,700W
Controls Analog dials Digital touchscreen
Presets None 12
Footprint (approx.) 11 x 13.6″ 11.8 x 12.0″
Weight 7.5 lbs 12.3 lbs
Dishwasher safe basket Yes Yes
Typical price $119.99 $119.99

Capacity: the only spec that actually changes your cooking

A 4-quart basket and a 5.8-quart basket sound close on paper. In practice, the difference is significant. In the Ninja AF101, a standard pack of chicken thighs (about four pieces) fits comfortably in a single layer — and a single layer is how you get properly crispy results. Add a fifth piece and you’re starting to overlap, which means steam instead of crispiness.

In the COSORI Pro II, you can fit six chicken thighs flat, or a whole spatchcocked chicken, or a rack of ribs folded to fit. That extra 1.8 quarts isn’t just a number — it’s the difference between cooking dinner in one batch or two.

For one or two people, the Ninja is perfectly sized and you’ll never hit its limits. For a family of four eating together, the COSORI saves you a meaningful amount of time over weeks and months of cooking.

Controls: dials vs digital

People talk about this more than it deserves. The Ninja’s analog temperature and time dials are genuinely easy to use — set temperature, set time, done. The COSORI’s digital touchscreen is clear and responsive, and the 12 presets cover the things people actually air fry: fries, chicken, fish, vegetables, steak.

Here’s my honest take: if you’re the kind of cook who knows what temperature and time they want, you’ll prefer the Ninja’s tactile dials. If you’re newer to air frying or cooking with others who don’t want to think about settings, the COSORI’s presets are genuinely useful. Neither is a disadvantage.

Cooking performance

Both of these machines circulate hot air around food. That’s how air frying works. The Ninja runs at 1,550W; the COSORI at 1,700W. Owner reports describe both cooking evenly when the basket isn’t overcrowded.

Across frozen fries, chicken wings, salmon, roasted vegetables and reheated pizza, owner reports describe the results as indistinguishable.

If someone tells you one of these air fryers produces noticeably crispier food than the other, they’re either imagining it or they had one basket overcrowded. At proper capacity, they cook identically.

Cleaning

Both have dishwasher-safe baskets and inserts. In practice, the Ninja’s basket is slightly simpler — one main basket piece rather than COSORI’s basket-plus-crisper-plate design. The COSORI’s crisper plate does elevate food for better airflow, but it’s one more piece to wash. Neither is a burden, but if you’re cooking for one and already find cleanup tedious, the Ninja is marginally faster.

Build quality and durability

Both feel solid for the price. The Ninja’s plastic housing is slightly thicker; the COSORI has a cleaner, more polished exterior. The durability complaint that recurs in owner reviews of both is basket coating wear, so don’t use metal utensils, and hand-wash occasionally rather than always running the basket through the dishwasher.

Buy the Ninja AF101 if…

  • You cook for one or two people
  • You want a smaller footprint on the counter
  • You prefer tactile dials over touchscreens
  • You want slightly easier cleanup

Buy the COSORI Pro II if…

  • You cook for three or four people regularly
  • You want to cook a whole chicken or larger portions in one batch
  • You appreciate preset programmes
  • You want a bit more headroom for batch cooking

The verdict

The Ninja AF101 is the better choice for most people — not because it outperforms the COSORI, but because it’s correctly sized for most households and doesn’t make you pay for capacity you won’t use. If you know you need the larger basket, the COSORI Pro II is excellent at the same price. Buy either with confidence.

Check Ninja AF101 Price Check COSORI Pro II Price

Want the deeper dive on the AF101 specifically, including what almost 60,000 owners report and whether the newer AF141 is a better buy? See my full Ninja AF101 review.

Considering the COSORI side instead? See my full Cosori Pro II review for what over 2,300 owners report and whether the smart features are worth paying for.

How This Comparison Was Put Together

Plainly: this is a research-based comparison, not a hands-on test. I have not run these side by side.

What it rests on: the published specification for both – basket capacity and usable area, wattage, temperature range, preset count and which parts are dishwasher safe; plus the pattern across verified-purchase reviews for each, where the recurring themes are basket coating wear on both and app dependence on the COSORI side.

What I could not establish: how evenly either cooks a full basket, which is the comparison that would actually separate them. It needs identical food cooked in both and assessed by position, and no independent test covers this pairing.

Frequently Asked Questions

Is the Ninja AF101 big enough for a family?

It’s tight for more than two or three people. The 4-quart basket fits about 2 pounds of fries or a small chicken. If you regularly cook for four or more, the COSORI’s 5.8-quart basket gives you noticeably more room without a second batch.

What is the main difference between the Ninja AF101 and the COSORI Pro II?

Capacity and controls. The Ninja AF101 has a 4-quart basket with dial controls; the COSORI Pro II has a 5.8-quart basket with a digital touchscreen and a few more preset programs. Cooking performance between the two is close — the deciding factor is almost always how much food you need to cook at once.

Which air fryer is easier to clean?

The Ninja is marginally easier — its basket is a single piece, while the COSORI uses a basket-plus-crisper-plate design that adds one more part to wash. Neither is a real burden; both have dishwasher-safe parts.

Should I buy the smaller or larger air fryer?

Buy based on how many people you cook for, not on wanting extra capacity ‘just in case.’ A too-large air fryer takes longer to heat and wastes counter space; a too-small one means cooking in batches. For one to three people, the 4-quart Ninja is usually enough.

Related: See all my air fryer reviews and guides
Related: Best cheap air fryer 2026: full buying guide


Filed Under: Product Reviews

Best Food Processor 2026: Reviews + Buying Guide

Last Updated June 24, 2026

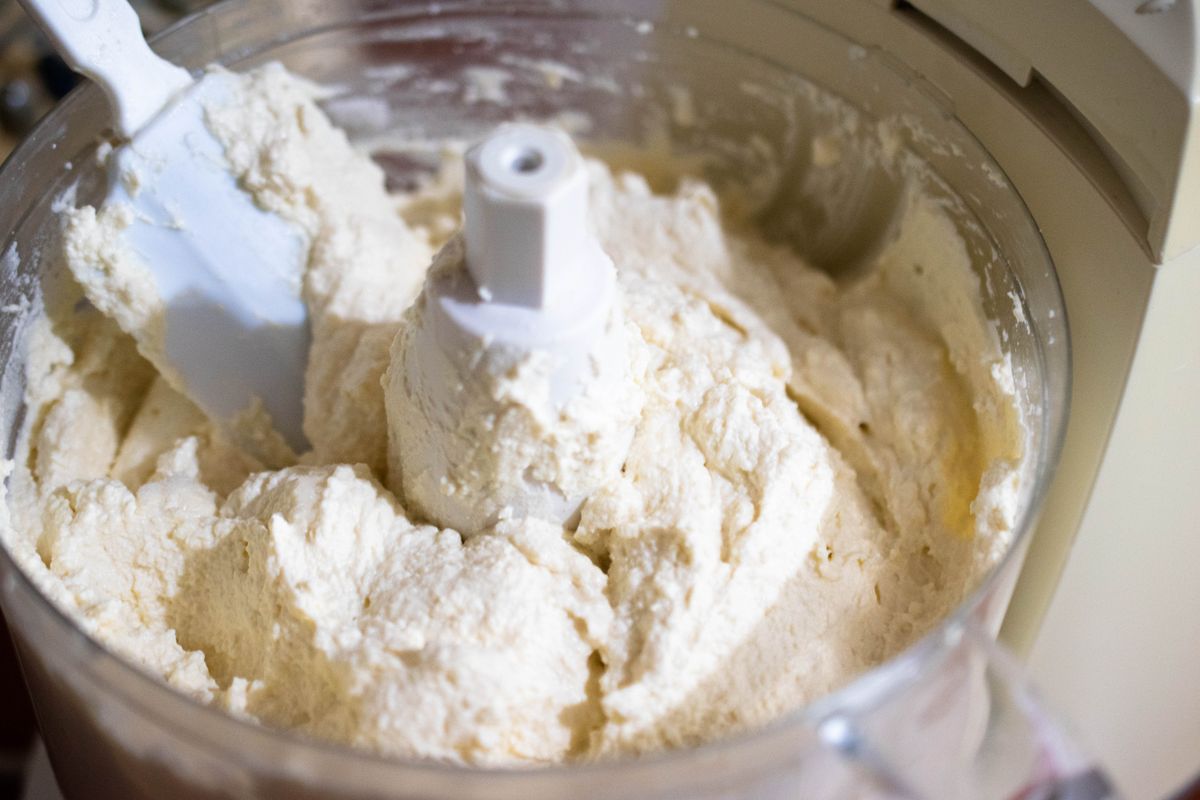
Cheese batter being mixed in a food processor bowl
Photo: Mohammad abasi / Pexels

This article contains affiliate links. If you purchase through them, I may earn a small commission at no extra cost to you. Read the full disclosure.

A good food processor is one of those appliances that makes you wonder how you managed without it. Weekly prep that used to take 40 minutes — chopping, shredding, slicing, blending — drops to 10. (Not sure you even need one over a blender?

My food processor vs. blender guide breaks down which jobs actually need which appliance.) The problem is the market is cluttered with options that look similar on spec sheets but perform very differently in practice.

After working through what’s actually available and worth buying in 2026, here are five picks that cover every budget and use case. The Cuisinart DFP-14BCNY is the clear overall winner — 22,280 reviews at 4.6 stars and a 14-cup capacity that handles serious batch cooking. The Ninja BZ601 ($129.99) is actually the highest-rated option in this guide at 4.7 stars, with a 1000-watt motor that outpunches the more expensive Cuisinart on raw power. And the Hamilton Beach Stack & Snap gives you a 12-cup bowl for $69.99, which is hard to argue with if budget is the priority.

Whichever one you buy, plan on cleaning it properly from day one — my guide to cleaning a food processor covers the two spots (the blade underside and the lid handle) that cause most of the smell and staining complaints in owner reviews.

If yours ever smells like it is burning rather than just needing a clean, my guide to a food processor burning smell covers the common, harmless causes and the rarer ones actually worth worrying about.

Not sure what bowl size you actually need? My food processor sizing guide breaks it down by household size and by what you actually make, since the cup number on the box is not the whole story.

Read the full reviews below, or jump straight to the food processor buying guide if you want to know what to look for first.

Best Food Processors — Quick Comparison

Model Capacity Key Feature Best For Price
Cuisinart DFP-14BCNY 14 cups 720W, 2 discs Best overall Check Price
Ninja BZ601 9 cups 1000W, Auto-IQ Best mid-range Check Price
Hamilton Beach 70725A 12 cups 450W, 2-speed Best budget Check Price
Cuisinart DLC-8SBCYP1 11 cups Dishwasher safe, 3 discs Best for easy cleanup Check Price
BLACK+DECKER 8-Cup 8 cups Easy assembly, compact Best compact Check Price

Reviews

1. Cuisinart DFP-14BCNY 14-Cup Food Processor — Best Overall

Cuisinart DFP-14BCNY 14-cup food processor stainless steel on white background

★ 4.6 | 22,280 reviews | $259.95

The Cuisinart DFP-14BCNY is the benchmark. It’s what professional cooks reach for, what cooking schools stock, and what 22,280 Amazon reviewers have rated at 4.6 stars over many years. That review count is nearly double the Ninja BZ601 — this machine has been tested at scale, and it holds up.

The 14-cup capacity is the main advantage. You can prep a week’s worth of vegetables in one pass, slice enough potatoes for a gratin without refilling, or make a double batch of pastry dough without stopping. The 720-watt motor handles hard root vegetables, frozen fruit, and bread dough without stalling. Included accessories cover the essentials: a stainless steel chopping blade, medium shredding disc, and medium slicing disc handle most tasks without needing add-ons.

The tradeoff is cleanup. The blade is not dishwasher safe and should be hand-washed, and the feed tube assembly has tight corners that trap food. For people who prioritise easy cleanup over maximum capacity, look at the Cuisinart DLC-8SBCYP1 further down — it’s explicitly dishwasher safe and costs nearly the same. For everyone who batch-cooks and doesn’t mind hand-washing a blade, this is the one to get.

Pros
✓ 14-cup capacity for large batches
✓ 720W handles tough ingredients
✓ Slicing and shredding discs included
✓ Extra-large feed tube
✓ 22,280 reviews — proven track record
Cons
✗ Blade not dishwasher safe
✗ Feed tube corners trap food
✗ No mini bowl for small tasks

Check Price on Amazon →

Read my full Cuisinart DFP-14BCNY review for the complete breakdown, including what over 22,000 owners report and a genuine durability issue worth knowing about.

Deciding between these two specifically? See my Cuisinart DFP-14BCNY vs. Ninja BZ601 comparison for a direct breakdown of capacity, price, and reliability.

2. Ninja BZ601 9-Cup Food Processor — Best Mid-Range

Ninja BZ601 9-cup food processor grey with removable bowl and blades

★ 4.7 | 12,399 reviews | $129.99

The Ninja BZ601 is the highest-rated food processor in this guide at 4.7 stars — and $130 cheaper than the Cuisinart. The motor is more powerful (1000 watts vs 720 watts), which means it processes faster and handles tough ingredients with less effort. For the majority of home cooks who don’t regularly fill a 14-cup bowl, this is the smarter buy on performance and price.

The Auto-IQ technology is the standout feature. Four intelligent preset programs — chopping, slicing, shredding, pureeing, and dough — take the guesswork out of timing. You press a button and walk away rather than hovering over the pulse. The stainless steel Ninja blades produce consistent results across fine and coarse textures, and the 9-cup bowl handles most family-sized tasks comfortably.

The limitation is capacity. Nine cups covers most everyday recipes, but if you batch-cook large volumes or regularly double recipes, you’ll hit the limit. The Cuisinart 14-cup makes more sense for high-volume cooking. For everyone else, the BZ601 combination of higher motor power, better rating, and $130 lower price makes it the value pick of this guide.

Pros
✓ Highest-rated pick at 4.7★
✓ 1000W — more powerful than the Cuisinart
✓ Auto-IQ preset programs
✓ $130 cheaper than Best Overall
✓ 12,399 verified reviews
Cons
✗ 9-cup bowl limits batch size
✗ No mini bowl included
✗ Fewer discs than Cuisinart options

Check Price on Amazon →

3. Hamilton Beach Stack & Snap 70725A — Best Budget

Hamilton Beach Stack and Snap 12-cup food processor black stainless steel blades

★ 4.5 | 28,749 reviews | $69.99

The Hamilton Beach Stack & Snap has more reviews than any other food processor in this guide — 28,749 at 4.5 stars. For $69.99, that’s a remarkable track record. The 12-cup bowl is larger than what you get on the Ninja BZ601 at three times the price, and the BPA-free construction with stainless steel blades holds up to daily use.

The name comes from the bowl-lock design: instead of the usual align-and-twist mechanism, the bowl stacks onto the base and the lid locks it in place. It’s simpler to assemble than most food processors — which is why reviewers consistently mention using it regularly rather than leaving it in the cupboard. Two speeds plus pulse handles chopping herbs, pureeing soup, and shredding cheese without complications.

The limits are what you’d expect at this price. The 450-watt motor handles most tasks but can slow down on very hard ingredients like frozen fruit or raw dense vegetables. It does ship with a reversible slicing/shredding disc, though the single-disc design means you can’t have both installed at once.

For mainly chopping, shredding, and pureeing — and for households where budget is the priority — nothing in this guide comes close to this value. Full breakdown in my Hamilton Beach Stack & Snap 70725A review, including independent lab-test results on chopping, slicing, and pureeing.

Pros
✓ $69.99 — lowest price in this guide
✓ 12-cup bowl (largest in budget tier)
✓ 28,749 reviews at 4.5★
✓ Simple stack-and-snap assembly
✓ BPA-free, stainless steel blades
Cons
✗ 450W can slow on hard ingredients
✗ Lid has no rubber gasket, so it can leak if overfilled
✗ Only 2 speeds — no fine control

Check Price on Amazon →

4. Cuisinart Pro Custom 11 DLC-8SBCYP1 — Best for Easy Cleanup

Cuisinart Pro Custom 11 DLC-8SBCYP1 food processor chrome stainless steel on white background

★ 4.5 | 3,402 reviews | $219.95

At $40 less than the Cuisinart DFP-14BCNY, the DLC-8SBCYP1 makes most sense for one specific type of cook: someone who finds cleanup the biggest friction point in using a food processor. The unit is explicitly marketed as dishwasher safe — bowl, lid, and accessories — which the DFP-14BCNY isn’t (its blades require hand-washing). If that single difference changes whether you actually use the machine, it justifies the trade in capacity.

The Pro Custom 11 includes three slicing and shredding discs, one more than the DFP-14BCNY. That extra disc variety gives more options for cut types without buying add-ons separately. The 11-cup capacity is three cups smaller than the top pick but more than sufficient for most households cooking for four or fewer. Build quality is standard Cuisinart — solid motor, tight lid seal, no wobble during operation.

The honest verdict: if cleanup time matters more than capacity, this is the better choice over the DFP-14BCNY at essentially the same price. If you batch-cook large volumes and don’t mind hand-washing a blade, the 14-cup is still the call. Full breakdown in the Cuisinart DLC-8SBCYP1 review, including specific owner-reported pros and cons.

Pros
✓ Fully dishwasher safe
✓ 3 slicing/shredding discs included
✓ Same Cuisinart reliability as Best Overall
✓ 11-cup capacity fits most households
Cons
✗ Same price as the larger DFP-14BCNY
✗ 3 cups smaller capacity
✗ Fewer total reviews

Check Price on Amazon →

5. BLACK+DECKER 3-in-1 8-Cup Food Processor — Best Compact

BLACK+DECKER 8-cup food processor black with touchpad controls on white background

★ 4.5 | 3,841 reviews | $44.99

The BLACK+DECKER 3-in-1 is built around one idea: make it easier to assemble and use than any other food processor at this price. The bowl stacks straight onto the base and the lid locks it — no align-and-twist, no checking which notch lines up. For people who’ve left food processors in the cupboard because of fiddly setup, that matters.

The 8-cup bowl is smaller than the Hamilton Beach budget pick, but the included reversible slice/shred disc adds functionality that the Hamilton Beach lacks at a similar price. If you want to slice vegetables uniformly or shred cheese as well as chop, the BLACK+DECKER delivers that for under $50. Full breakdown in my BLACK+DECKER 8-Cup review, including independent lab-test scores on shredding, slicing, and pureeing. The stainless steel S-blade and touchpad controls (no mechanical knobs) round out a machine that prioritises ease of use at every step.

The 8-cup limit is the main constraint. For single-person prep or smaller kitchens where counter space matters, it’s fine. For batch cooking or households of four or more, move up to the Hamilton Beach 12-cup or step to the Ninja BZ601 for added motor power.

Pros
✓ Easiest assembly in this guide
✓ Reversible slice/shred disc included
✓ Touchpad controls — no mechanical switches
✓ Compact footprint for smaller kitchens
✓ Under $50
Cons
✗ 8-cup bowl limits batch size
✗ 450W struggles on toughest ingredients
✗ Similar price to larger Hamilton Beach

Check Price on Amazon →

Food Processor Buying Guide

Before settling on a model, here are the five things that make a real difference to daily use.

Bowl Capacity

Bowl capacity dictates how much you can process in one pass. For a single person or couple, 7–9 cups covers most tasks. Families of four or more get more use from 11–14 cups. Undersizing is the most common mistake — if you’re splitting batches because the bowl fills up, you’ll use the machine less over time.

Motor Power

Higher wattage means the motor handles tougher ingredients without stalling. Budget machines at 450W manage herbs, onions, and soft vegetables fine. For hard root vegetables, frozen fruit, or bread dough, 600W or more is worth the upgrade. The Ninja BZ601’s 1000-watt motor is the most powerful in this guide and handles everything without hesitation.

Included Blades and Discs

Most food processors include a chopping blade, a shredding disc, and a slicing disc. What varies is the quality and number of those discs. The Cuisinart DLC-8SBCYP1 includes three discs where most competitors include two. If you slice vegetables regularly and care about cut variety, check what’s in the box before buying.

Ease of Use and Cleanup

The best food processor is the one you actually get out of the cupboard. Easy bowl assembly (BLACK+DECKER’s lock-down lid, Hamilton Beach’s stack-and-snap), simple controls, and dishwasher-safe parts all reduce friction. If cleanup is a priority, the Cuisinart DLC-8SBCYP1 is the clear pick — fully dishwasher safe at the same price as the DFP-14BCNY.

Price and Value

The $40–$50 tier (Hamilton Beach, BLACK+DECKER) handles basic chopping and shredding competently. The $130 tier (Ninja BZ601) adds motor power, preset programs, and consistent results. The $200 tier (Cuisinart) adds maximum capacity and professional build quality. There’s a genuine jump at each step, not just marketing.

If you bake gluten-free, a food processor is one half of the equation — for the other half, see my guide to the best gluten-free bread makers, which covers five machines with dedicated GF cycles from $75 to $455.

Frequently Asked Questions

What size food processor do I need?

For one or two people, 7–9 cups covers most tasks. Families of four or more will get more use from 11–14 cups. If you batch-cook or regularly double recipes, choose the largest capacity that fits your counter — running two passes because the bowl filled up defeats the purpose.

Can a food processor replace a blender?

Not entirely. Food processors are better at chopping, slicing, shredding, and mixing dough — tasks where some texture should remain. Blenders are better at completely smooth liquids: smoothies, soups, and sauces. For one machine that does both, see the best blender food processor combos.

What attachments should I look for?

The essentials are a steel chopping blade, a shredding disc, and a slicing disc. Beyond that, a dough blade is useful if you make bread. An adjustable slicing disc (multiple thickness settings) matters if you slice vegetables regularly. Most mid-range and above machines include everything needed for standard prep.

How do I clean a food processor?

The bowl and lid are usually dishwasher safe on the top rack — check your specific model. The chopping blade should always be hand-washed carefully (it’s sharp enough to cut through a cloth). The motor base should be wiped with a damp cloth rather than submerged. The Cuisinart DLC-8SBCYP1 is the pick if you want the full machine to be dishwasher safe.

What is the difference between a food processor and a vegetable chopper?

A vegetable chopper is a smaller, simpler device for quick jobs — dicing onions, mincing garlic, chopping herbs in seconds. Food processors are larger, more powerful, and handle slicing, shredding, kneading dough, and pureeing as well as chopping. For smaller-scale prep, see the best vegetable chopper guide. For larger volumes and more variety of tasks, a full food processor makes more sense.

Can a food processor knead dough?

Yes — most mid-range and above food processors include a dough blade for this purpose. The Cuisinart DFP-14BCNY and Ninja BZ601 both handle bread and pastry dough well. The key is not overfilling the bowl: fill to no more than two-thirds capacity since dough expands during kneading. Budget machines at 450W manage light doughs but can struggle with heavier bread recipes.

How These Picks Were Chosen

Plainly: this is a research-based guide, not a hands-on test. I have not run these side by side, and nothing here should be read as a report from my own kitchen.

What the picks rest on: bowl capacity against what you actually process, since a 14-cup bowl needs a minimum load to engage the blade at all; motor wattage relative to that bowl; which discs and blades are included rather than available separately; feed-tube width; and how many parts must be washed. Plus the complaint patterns across verified-purchase reviews, where the recurring themes are lid interlocks failing and bowls cracking at the collar.

What I could not establish: motor longevity under dough, which is the load that kills food processors and the reason wattage claims exist. No independent test covers these models. Wattage relative to bowl size and the pattern of failure reports are what this guide reasons from.

The Bottom Line

The Cuisinart DFP-14BCNY is the right pick for most home cooks — reliable, high-capacity, and backed by more reviews than any other option in this guide. If $200 is more than you want to spend, the Ninja BZ601 at $129.99 is the value pick: higher rated, more powerful motor, and suited to anyone who doesn’t need 14-cup capacity. And for budget cooking without sacrificing bowl size, the Hamilton Beach Stack & Snap at $69.99 is hard to beat.

For more food processor reviews, see the food processors category. For smaller prep tools, browse the best vegetable choppers. And if you want one machine to replace both appliances, see the best blender food processor combos.

Using the dough blade for bread? A Pullman loaf pan turns that kneaded dough into flat-topped bakery-style sandwich bread — my guide covers the sizes and which pans hold up.

If you want to extract juice rather than chop, a food processor isn’t the right tool — it won’t separate liquid from fiber. See my guide to the best juicers for celery for machines that handle fibrous vegetables efficiently.

If batch-cooking is part of your routine, you need somewhere to store everything you prep. My guide to the best small chest freezers covers compact options from 2.0 to 5.0 cubic feet, including garage-ready and convertible fridge/freezer models.

Already own one and want to get more out of it? See my 10 creative uses for a food processor.

One more maintenance note: a processor that has started crushing instead of chopping usually just has a dull blade, not a dying motor — see my guide on how to sharpen food processor blades before replacing the machine.

Shredding a lot of cheese specifically? See the dedicated shredding-cheese comparison for which disc setup actually performs best.

Filed Under: Product Reviews

  • « Go to Previous Page
  • Page 1
  • Interim pages omitted …
  • Page 30
  • Page 31
  • Page 32
  • Page 33
  • Page 34
  • Page 35
  • Go to Next Page »

Recent Articles

  • Cuisinart DLC-10SYP1 Review: Durable, But a Newer Bowl
  • COSORI Pro Gen 2 Review: Big Basket, Fragile Handle
  • Dash Tasti-Crisp Review: Cheap, but the Coating Wears Fast
  • Chefman TurboFry Touch Review: Cheap, but the Coating Wears
  • Chef’sChoice 15XV Review: Very Sharp, With Scratch Reports

Search


HOME          Contact          Affiliate Disclosure          Terms of Service          Privacy Policy


kitchenwarecompare.com is a participant in the Amazon Services LLC Associates Program, an affiliate advertising program designed to provide a means for sites to earn advertising fees by advertising and linking to Amazon.com, Endless.com, MYHABIT.com, SmallParts.com, or AmazonWireless.com. Amazon, the Amazon logo, AmazonSupply, and the AmazonSupply logo are trademarks of Amazon.com, Inc. or its affiliates. As an Amazon Associate I earn from qualifying purchases.


Copyright © 2026 kitchenwarecompare.com, ALL RIGHTS RESERVED.