• Skip to primary navigation
  • Skip to main content
  • Skip to primary sidebar

Kitchenware Compare

  • Home
  • Product Reviews
    • Air Fryers
    • Coffee
    • Cookware
    • Flat Top Grills
    • Meat Thermometers
    • Food Processors
    • Knives
    • Pizza Ovens
    • Toaster Ovens
    • Juicers
  • Food Blog
  • Helpful Kitchen Tips
  • Data Studies
  • About
  • How I Review
  • Contact
You are here: Home / Archives for Product Reviews

Best Indoor Grill for Korean BBQ: 5 Picks

Last Updated October 8, 2026

Beef, onions and kimchi sizzling on a Korean BBQ tabletop grill

Disclosure: I earn a small commission if you buy through links on this page, at no extra cost to you.

Korean BBQ at home is straightforward in one respect: you need a grill that sits on the table, gets genuinely hot, and doesn’t fill your kitchen with smoke. Finding one that does all three reliably is harder than it looks. Most electric indoor grills either can’t hold high enough heat for thick samgyeopsal, or they claim “smokeless” performance that evaporates the moment you put marinated bulgogi on a hot plate.

Across the five grills compared here, the Ninja Sizzle is the pick for most households — it has a wide nonstick surface, reaches the heat you need, and stays manageable to clean. If you specifically want a grill designed with Korean BBQ in mind, the CUSIMAX 1500W names it in the product description for a reason: the grill plate geometry works well for the tableside cooking style.

These picks are based on product specifications, manufacturer data, and aggregated buyer feedback. Where consistent complaints appear across hundreds of reviews, they are flagged below.

Best Indoor Grills for Korean BBQ 2026: Quick Comparison

Product Best For Price Rating Buy
Ninja Sizzle 14″ Best overall $149.95 4.6★ (3,921) Check Price
CUSIMAX Portable Smokeless Best smoke reduction $99.97 4.4★ (2,389) Check Price
Secura 1800W Largest surface $88.92 4.4★ (1,161) Check Price
Techwood Indoor/Outdoor Indoor and outdoor $89.99 4.1★ (759) Check Price
Hamilton Beach Raclette Groups up to 8 $83.95 4.4★ (1,659) Check Price

Prices and ratings were read from Amazon.com on 6 October 2026. The Ninja Sizzle, Secura and Hamilton Beach offers were sold by Amazon; the CUSIMAX and Techwood offers were from third-party stores.

Full Reviews: Best Indoor Grills for Korean BBQ

1. Ninja Sizzle Indoor Grill & Griddle — Best Overall

Ninja Sizzle 14-inch indoor grill and griddle

4.6/5  ·  Check Price on Amazon

The Ninja Sizzle is a 14-inch electric grill with interchangeable grill and griddle plates and a 500°F ceiling. That temperature is the single most useful number here for Korean BBQ: samgyeopsal wants a surface hot enough to sear thin pork belly in seconds rather than stew it in its own fat, and 500°F is the highest figure of the five grills in this guide.

Ninja rates the plates for four to six people, which suits the Korean BBQ pattern of small batches cooked and eaten continuously rather than one large load. Smoke control is a perforated mesh lid that traps splatter and slows smoke leaving the plate — passive rather than fan-extracted, so heavy marinades will still put smoke into the room. At 4.6 stars across 3,921 ratings it has both the highest rating and the largest review base of anything here.

Pros:

  • 500°F maximum — the hottest surface in this guide, which is what thin-cut pork belly needs
  • Interchangeable grill and griddle plates, both removable and nonstick
  • Highest rated and most reviewed grill here (4.6★, 3,921 ratings)
  • Detachable mesh lid is dishwasher-safe

Cons:

  • The most expensive pick here at $149.95
  • Smoke control is a passive mesh lid, not an extractor fan — marinated galbi will still smoke
  • Square plate rather than the round table format some Korean BBQ setups use

2. CUSIMAX Portable Smokeless Grill — Best for Smoke Reduction

CUSIMAX portable smokeless electric grill for Korean BBQ

4.4/5  ·  Check Price on Amazon

CUSIMAX sells this one explicitly as a Korean BBQ grill, and the hardware backs the label. A removable nonstick plate sits over Double U heating tubes, under a tempered glass lid, and a Turbo Smoke Extractor actively pulls smoke away from the surface rather than relying on a water tray to catch it. Temperature runs from 200°F to 450°F on an LED display.

The extractor is why this is the smoke-reduction pick rather than the overall one. Marinated galbi produces smoke from the sauce as much as the fat, and an active fan deals with that better than a passive lid does. Being able to drop to 200°F between rounds matters too — a plate left roaring while everyone eats is what burns the sugars in a marinade onto the surface. Overheat protection cuts power if the plate runs away.

Pros:

  • Turbo Smoke Extractor is an active fan, not a passive water tray
  • Adjustable 200°F to 450°F on an LED display — useful between rounds
  • Tempered glass lid and removable nonstick plate
  • 2,389 ratings at 4.4★, and $50 less than the Ninja

Cons:

  • 450°F ceiling is 50 degrees below the Ninja’s
  • The extractor fan adds noise the passive grills here do not make
  • Smaller cooking surface than the Secura

3. Secura Smokeless Indoor Grill — Largest Cooking Surface

Secura 1800W smokeless indoor electric grill with reversible plate

4.4/5  ·  Check Price on Amazon

The Secura runs 1800 watts through a reversible nonstick plate measuring 15.5 by 11.5 inches — about 180 square inches, and the largest cooking area of anything in this guide. For Korean BBQ that translates directly into throughput: more strips of pork belly on the surface at once means fewer bottlenecks when five or six people are eating as fast as you can cook.

The plate being reversible is the other reason it earns a place. One side handles the grilling, the other gives you a flat griddle for eggs, garlic, kimchi or the pancake-style sides that usually get cooked separately. At $88.92 it is the second-cheapest grill here, after the Hamilton Beach raclette, which makes the surface area look better still.

Pros:

  • 180 square inches — the largest cooking surface in this guide
  • 1800 watts, the highest power rating here
  • Reversible plate gives both a grill and a flat griddle
  • Second-cheapest pick in the guide at $88.92

Cons:

  • Smallest review base of the three smokeless grills here (1,161 ratings)
  • Bigger footprint on the table and in the cupboard than the CUSIMAX
  • No fan extraction — the smokeless claim rests on plate design, not active removal

4. Techwood Indoor/Outdoor Electric BBQ Grill — Best for Indoor and Outdoor Use

Techwood 1600W Electric BBQ Indoor Outdoor Grill with Removable Stand

4.3/5  ·  Check Price on Amazon

The Techwood runs at 1600W — the highest wattage on this list — and includes a removable stand that lets you use it as either a tabletop grill or a floor-standing unit for outdoor use. The double-layer design keeps the outer surface from getting dangerously hot during use, which matters when a grill is sitting in the middle of a dining table. A drip tray catches fat runoff, which is essential for samgyeopsal where the pork fat renders significantly.

The Techwood is not marketed specifically as a smokeless grill, so manage expectations: it reduces smoke via the drip tray and design, but doesn’t claim the same performance as dedicated smokeless models. For outdoor use or a kitchen with decent ventilation, that’s fine. For a small indoor space, the CUSIMAX or the Ninja Sizzle would serve better. It’s the cheapest entry point on this list at the time of writing.

Pros:

  • 1600W is the highest wattage here — fast heat-up and strong recovery
  • Removable stand gives indoor/outdoor flexibility
  • Double-layer outer surface reduces burn risk at the table
  • Drip tray handles significant fat runoff from pork belly

Cons:

  • Smoke control is limited — not suitable for poorly ventilated indoor spaces
  • Rectangular plate is smaller than it looks in photos

Verdict: The budget pick for outdoor Korean BBQ or a well-ventilated kitchen. Don’t buy it expecting full smokeless performance indoors.

Check Price on Amazon ↗

5. Hamilton Beach Raclette Party Grill — Best for Groups

Hamilton Beach electric raclette party grill with eight warming trays

4.4/5  ·  Check Price on Amazon

This is the odd one out and the most interesting option if you regularly feed a crowd. It is a raclette grill rather than a conventional one: a 200 square inch nonstick dual-texture grill and griddle surface on top, with eight individual heat-resistant warming trays underneath, and Hamilton Beach rates it for up to eight people.

The format maps onto Korean BBQ better than it first appears. The communal top surface does the meat, while the eight trays let everyone warm their own banchan, melt cheese for corn cheese, or keep a portion going at their own pace instead of competing for space on one plate. If your Korean BBQ nights are six or eight people rather than three, this solves the throughput problem differently to simply buying a bigger grill.

Pros:

  • Rated for up to eight people — the largest group capacity here
  • Eight individual warming trays for banchan or per-person portions
  • 200 square inch dual-texture grill and griddle top
  • 1,659 ratings at 4.4★ from an established brand

Cons:

  • A raclette format is not a traditional Korean BBQ grill — the top surface is shallower
  • No smoke extraction of any kind
  • Takes up considerably more table space than a single round grill

What to Look for in an Indoor Korean BBQ Grill

Smokeless Performance: Fan vs. Passive

Smokeless grills reduce smoke through two methods: a water tray that cools fat before it burns, or a motorised fan that actively vents smoke away from the cooking surface. Fan-based systems (the CUSIMAX, with its Turbo Smoke Extractor) perform better with heavily marinated meats, where the sauce itself produces smoke.

Passive systems that rely on lid design and plate geometry (the Ninja Sizzle and the Secura) handle plain or lightly seasoned meat well but will produce some smoke with sticky marinades. For a kitchen with a proper extractor fan above the cooking area, passive systems are adequate and simpler. For a dining table far from any ventilation, a fan-based system is worth the extra complexity.

Surface Size and Shape

Korean BBQ cooking style involves continuous loading — small pieces of meat cooked quickly, eaten immediately, then replaced. This means grill throughput matters more than single-use capacity. A 14-inch grill (the Ninja Sizzle) handles six people comfortably at a typical pace, and the Secura’s 180 square inches more still. A smaller grill works for 2–4 people but creates bottlenecks for larger groups.

Round surfaces mimic the traditional Korean tabletop grill format; rectangular surfaces offer more usable area per centimetre but aren’t the traditional shape. For general use, size matters more than shape. See my guide to the best flat top grills if you’re also considering an outdoor griddle for larger cooking sessions.

Temperature Range and Recovery

Samgyeopsal (thick pork belly slices) needs genuine high heat to render the fat and develop colour without steaming. Look for grills that claim 400°F+ at maximum and back this up with wattage: 1500W and above maintain high temperatures under load better than 1200W models. Temperature recovery after loading cold meat is also important for Korean BBQ — higher-wattage grills bounce back faster. All five grills on this list have adequate temperature ranges; the Techwood’s 1600W gives it the fastest recovery.

Cleanup

Fat renders significantly from samgyeopsal during cooking. A grill without a proper drip collection system will leave burnt fat residue that’s difficult to clean. The Ninja Sizzle’s plates lift out and its mesh lid is dishwasher-safe, which is the easiest cleanup path here.

All five grills on this list have removable cooking surfaces; avoid any indoor grill that doesn’t, as hand-cleaning a fixed surface after pork belly is time-consuming. If you’re using a grill thermometer to monitor cooking temps, the Inkbird IBT-4XS works well with electric tabletop grills.

Frequently Asked Questions

What makes a grill specifically suitable for Korean BBQ?

Three things: it needs to reach high enough heat to sear thin meat cuts quickly, it needs a surface large enough to cook continuously for a group, and ideally it controls smoke well enough to use indoors. The tableside cooking format means the grill has to sit safely at table height without burning anyone nearby. Most electric indoor grills meet these criteria; the differences between models are in how well they perform each function rather than whether they function at all.

Can you use these grills for non-Korean food?

Yes — all five are general-purpose electric grills that happen to work well for Korean BBQ. You can grill chicken, fish, vegetables, or anything else that works on a contact grill. The Hamilton Beach raclette trays also let you cook eggs, melt cheese, or prepare individual side dishes alongside the main grill. The Secura’s large reversible plate works equally well for American-style burgers or steaks.

How do you prevent smoke when grilling Korean BBQ indoors?

Use a smokeless grill with a water tray or fan system. Cook leaner cuts first before moving to fatty pork belly. Turn the heat down slightly when rendering thick fat — lower heat produces less smoke from the fat than high heat.

Open a window and turn on any kitchen extractor fan available. Marinades with high sugar content burn faster and produce more smoke than oil-based marinades — blotting excess marinade before putting meat on the grill helps.

What’s the best meat to cook on an indoor Korean BBQ grill?

Thin-cut beef bulgogi and pork belly (samgyeopsal) are the most common. Thin cuts work best on electric indoor grills because they cook quickly before the grill loses heat from the load. Thick cuts like galbi (short rib) are harder to manage on electric grills — they work better on charcoal or gas where you can manage a real hot zone. Chicken thigh and seafood (squid, shrimp) also work well on all five grills listed here.

How do you clean an indoor Korean BBQ grill after use?

Let the grill cool completely — not just warm, fully cool — before cleaning. Remove the grill plate and wash it with hot soapy water or put it in the dishwasher if it’s dishwasher-safe (the Ninja Sizzle’s mesh lid is).

Empty the drip tray while the fat is still liquid rather than letting it solidify. Wipe the grill body with a damp cloth. Never submerge the electrical unit or power cord in water. The most common cleaning mistake is soaking a grill plate that’s still hot, which warps the nonstick coating over time.

Are these grills safe to use at the dinner table?

Yes, with precautions. Use a heat-resistant mat under the grill and keep the power cord away from where people are sitting. All five grills on this list have handles or external surfaces that stay cool enough to touch during use.

The Techwood’s double-layer outer design specifically reduces surface heat. Keep children’s hands away from the grill surface and the drip tray during cooking. Don’t leave a hot grill unattended.

How These Picks Were Chosen

Plainly: this is a research-based guide, not a hands-on test. I have not run these side by side, and nothing here should be read as a report from my own kitchen.

What the picks rest on: plate material and whether it is genuinely non-stick at searing temperature, how the fat drains away from the heat source, temperature range and whether the control is a dial or fixed settings, and how much of the unit is dishwasher safe; plus the complaint patterns across verified-purchase reviews, which for indoor grills concentrate almost entirely on smoke and on plates losing their coating.

What I could not establish: how smokeless the smokeless ones actually are. Every manufacturer in this category claims smoke reduction and none publishes a method or a figure. Fat-drainage design is the honest proxy, and it is used that way here, but no number on this page comes from a measurement of smoke.

The Bottom Line

For most households, the Ninja Sizzle is the right indoor Korean BBQ grill: the hottest surface of the five at 500°F, interchangeable grill and griddle plates, and the strongest review record here at 4.6 stars across 3,921 ratings. The CUSIMAX is the better pick if you specifically want a grill built around the Korean BBQ cooking format rather than a general indoor grill that works for it, and its Turbo Smoke Extractor is the only active fan in this guide.

If smoke is the primary concern, go with the CUSIMAX and its extractor fan. If you want the most cooking surface for the money, the Secura gives you 180 square inches and 1800 watts for $88.92. The Techwood is the one to pick if you want a grill that also works outdoors. The Hamilton Beach raclette earns its place for households feeding six or eight, where eight individual warming trays solve the throughput problem that a single plate cannot.

For larger outdoor cooking sessions, see my guide to the best flat top grills. For grill temperature monitoring, the Royal Gourmet 4-burner review covers what to expect from higher-output grilling setups.

Indoor grilling makes more smoke than any recirculating hood fully clears — but a good one makes the difference between a haze and a smoke alarm. My best ductless range hood guide covers the options for kitchens without exterior venting.


Filed Under: Product Reviews

Breville Bambino vs De’Longhi Stilosa: Which Budget Espresso Machine Wins?

Last Updated October 30, 2026

Professional espresso machine with white coffee cups

This post contains affiliate links. If you buy through my links, I may earn a commission at no extra cost to you.

The quick answer

The Breville Bambino makes genuinely better espresso and is worth every extra penny if you care about the cup. The De’Longhi Stilosa is the right choice if your budget is firm and you mostly make milk drinks — the steam wand is surprisingly capable. But if espresso quality is the priority, the Bambino wins clearly.

Breville Bambino Espresso Machine
De'Longhi Stilosa EC260BK Espresso Machine

I want to tell you something upfront: this comparison is not as close as the price difference suggests. The Breville Bambino Plus costs about twice as much as the De’Longhi Stilosa, and it shows — in the cup, in the build, and in the daily experience of making coffee. What keeps this comparison interesting is that the Stilosa does some things genuinely well, and for the right person it’s a smart buy.

What separates these two is not the spec sheet but what each is like to live with: how reliably you can hit a decent extraction, how workable the milk texturing is, and whether the machine fights you or works with you.

Feature Breville Bambino De’Longhi Stilosa
Pump pressure 15 bar (9 bar extraction) 15 bar
Boiler type Thermocoil (fast heat) Stainless steel boiler (per De’Longhi)
Heat-up time ~3 seconds ~45 seconds
Steam wand Manual panarello Manual panarello
Milk frothing Good manual control Decent for the price
Portafilter size 54mm 51mm
Dimensions 7.7 x 12.6 x 12.2″ 6.3 x 10.4 x 11.2″
Weight 9.9 lbs 5.3 lbs
Typical price $299.95 $149.95
Where to Buy Check Price Check Price

Espresso quality: where these machines diverge

The Bambino uses a thermocoil heating system and reaches extraction temperature in about three seconds. It also has pre-infusion — a low-pressure pre-soak of the coffee puck before full pressure is applied — which helps extract more evenly and reduces channelling. The result is espresso with genuine crema, balanced sweetness, and real complexity when you use decent beans.

The Stilosa reaches temperature in around 45 seconds and doesn’t have pre-infusion. It can pull a reasonable shot, but it’s less forgiving of grind inconsistency and technique. With good beans and a decent grinder, you’ll get acceptable espresso. With mediocre beans or a blade grinder, you’ll get bitter, flat shots and wonder what you did wrong.

Here’s the honest truth: the Bambino is a forgiving machine. It helps you make good espresso. The Stilosa requires you to bring more to the table.

Steam wand and milk drinks

This is where the comparison gets more balanced. Both machines have a manual steam wand (as opposed to an automatic frothing system), and both can produce good microfoam with practice. The Bambino’s wand has slightly better steam pressure and more nuanced control, but the Stilosa’s wand is better than you’d expect for the price.

If you mostly make lattes and cappuccinos and you’re comfortable frothing milk manually, the Stilosa will serve you reasonably well. This is the use case where its value proposition is strongest.

Build quality and daily use

The Bambino is built like a machine that costs $300. Its housing is stainless steel.

The Stilosa is mostly plastic, and owner reports point to the plastic parts as its weak spot: a broken control knob is a recurring complaint, and one owner is on a third knob in two years. Over years of daily use, it is the more likely of the two to show wear first. My De’Longhi Stilosa review covers the knob and other owner complaints.

Heat-up time: a bigger deal than it sounds

Three seconds vs 45 seconds might not sound significant, but it changes your morning completely. With the Bambino, you press a button and your shot is pulling within seconds. With the Stilosa, you wait.

For a machine on a busy weekday morning, that wait becomes part of your relationship with the machine. Some people stop using their espresso machine because of friction like this.

Buy the Breville Bambino Plus if…

  • Espresso quality matters more than saving $150
  • You want a machine that’s fast to heat up and forgiving to use
  • You plan to use it daily for years
  • You have or plan to buy a decent burr grinder

Buy the De’Longhi Stilosa if…

  • Budget is genuinely constrained at around $130–160
  • You mostly make milk-based drinks (lattes, cappuccinos)
  • You’re new to espresso and want a low-risk entry point
  • You won’t be heartbroken if you upgrade in 18 months

The verdict

Save up for the Bambino if you can — and buy it new rather than second-hand. At $299.95, sold and shipped by Amazon, it is the better espresso machine of the two and the one to get if the budget stretches that far. The three-second heat-up and the automatic milk texturing are what you are paying the extra for, and they are the difference between making espresso and fighting it. The Stilosa is not a bad machine — it’s an honest entry-level option that does what it claims, and at a third of the price it asks a lot less of your budget.

See Breville Bambino Price →
See De’Longhi Stilosa Price →
Related: Best espresso machines under $200: full buying guide
Related: Breville Bambino Plus review
Related: best semi-automatic espresso machines

Related: Gaggia Classic Pro vs De’Longhi Stilosa if you want to see the Stilosa measured against a true commercial-grade machine instead.


How This Comparison Was Put Together

Plainly: this is a research-based comparison, not a hands-on test. I have not run these side by side.

What it rests on: the published specification for both – ThermoJet against a small stainless steel boiler and what that does to warm-up, portafilter size and whether the supplied basket is pressurised, steam wand type (automatic texturing against a manual panarello), and build materials; plus the pattern across verified-purchase reviews for each, where the price gap between them is the thing most reviews are really arguing about.

What I could not establish: shot quality on either. Both are entry-level machines where the grinder and the operator dominate the result. What the comparison can settle is what each gives you to work with, and on that the two are genuinely different products rather than two points on one scale.

Frequently Asked Questions

Which machine makes better espresso — the Bambino Plus or the Stilosa?
The Bambino Plus. Its faster heat-up, better temperature stability, and more forgiving steam wand produce more consistent shots. The Stilosa pulls decent espresso when dialled in, but it requires more attention and is less forgiving of grind inconsistencies.

Is the Bambino Plus worth three times the price of the Stilosa?
Depends what you value. If you make milk drinks daily and want minimal fuss, yes — the Bambino Plus’s speed and auto-steam make a real difference. If you are primarily a black coffee drinker or just getting started with espresso, the Stilosa at around $150 is a sensible place to begin.

Which is better for milk drinks — lattes, flat whites, cappuccinos?
The Bambino Plus by a significant margin. Its auto-steam function heats and textures milk automatically, which makes consistently smooth microfoam accessible even without barista experience. The Stilosa’s manual steam wand requires practice and tends to produce coarser foam.

Can a beginner use the Bambino Plus without barista training?

Yes — it is designed with beginners in mind. The pre-infusion, auto-purge, and auto-steam handle the more technical steps automatically. You still need to dial in your grind, but the machine does more of the work than most entry-level options. The Stilosa has a steeper learning curve.

Filed Under: Product Reviews

Best Juicer for Celery: Cold Press Picks at Every Budget

Last Updated October 25, 2026

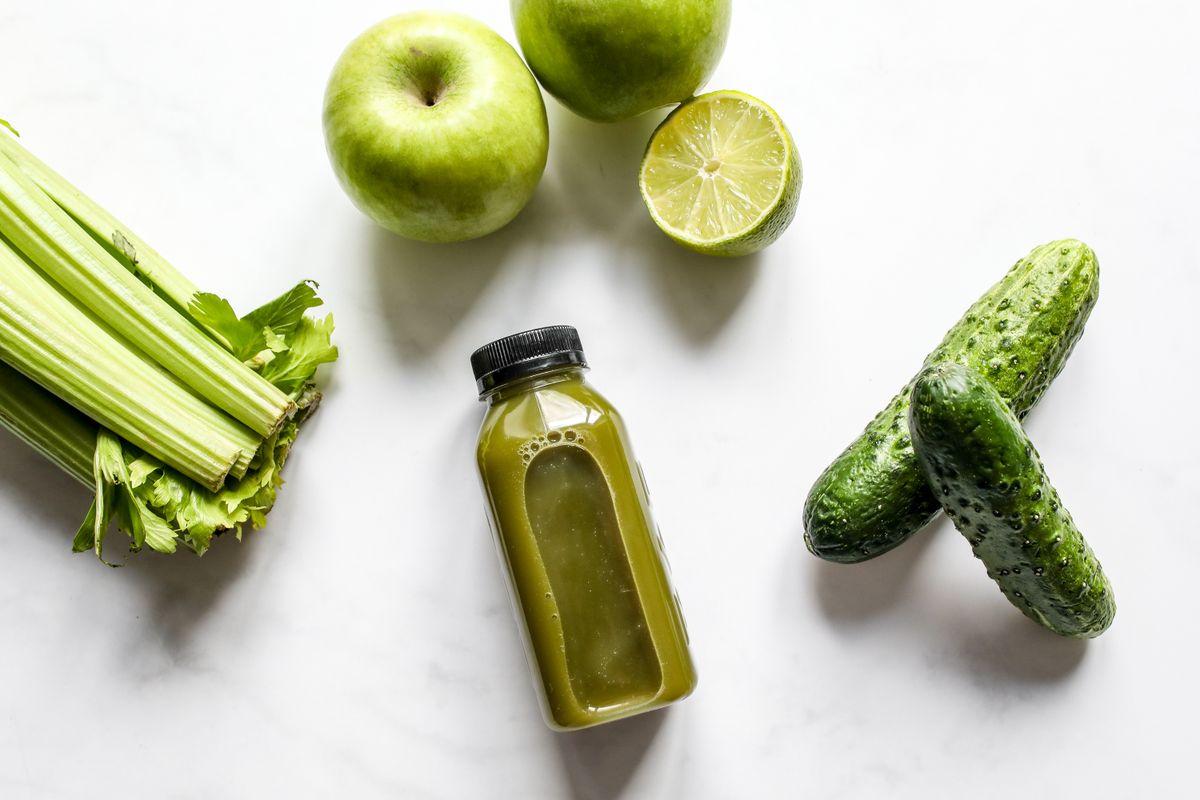
Celery stalks, green apples, lime and cucumbers around a bottle of fresh green celery juice

Disclosure: I earn a commission on qualifying Amazon purchases at no extra cost to you.

Celery is one of the hardest vegetables to juice. Its long parallel fibres wrap around an auger and blind the fine mesh screen in a centrifugal machine, which is why a juicer that handles apples without complaint can still make a mess of a single bunch.

Of the five machines below, the Ninja NeverClog JC151 at $129.99 is the one worth most people’s money: cold press extraction, dishwasher-safe parts, and by far the largest owner review base here. If your ceiling is $60, the Fretta is the cheapest genuine cold press here. If counter space decides it, the vertical Omega is built for that.

I have not run these five machines side by side. How the picks were chosen is set out below.

Quick Comparison: Juicers for Celery in 2026

Product Best For Price Rating Buy
Ninja NeverClog JC151
Cold press · 150W
Overall $129.99 4.4★ (3,762) Check Price
Omega Cold Press All-in-One
Triple-stage · 80 RPM
Yield $199.87 4.4★ (2,835) Check Price
Fretta Cold Press
Wide chute · 3-in-1
Under $60 $59.98 4.5★ (546) Check Price
Omega Vertical
43 RPM · auto-eject
Small counters $330.99 4.3★ (1,953) Check Price
Hamilton Beach Big Mouth
Centrifugal · 800W
Cheapest way in $64.79 4.4★ (41,501) Check Price

Prices, ratings and stock were checked on 15 September 2026 from a New York ZIP code in USD. Amazon pricing moves, sometimes sharply, which is why the date above matters.

1. Ninja NeverClog JC151 — Best Overall

Ninja NeverClog Cold Press Juicer JC151 in charcoal

The JC151 is a slow auger machine built around a specific problem: fibrous produce jamming the works. It runs a 150W high-torque auger, holds 24 oz of juice and 36 oz of pulp, offers two one-touch programs and adjustable pulp control, and the parts that touch produce go in the dishwasher.

Ninja’s anti-clog claim is a marketing claim, and it is worth naming as one. What gives it weight is the size of the sample behind the rating: 3,762 ratings at 4.4 stars is by a wide margin the largest review base of any cold press machine on this page, and the clog complaints that dominate reviews of cheap masticating juicers are not the dominant theme here. That is owner consensus rather than a lab measurement, but it is a lot of owners.

For celery specifically, the dishwasher-safe parts matter more than they sound. Celery juice stains plastic green with daily use, and a machine you dread cleaning is a machine that ends up in a cupboard. If you want the longer write-up, I have a full Ninja NeverClog JC151 review.

Pros: Largest cold press review base here (3,762 at 4.4★), dishwasher-safe parts, adjustable pulp control, compact footprint, two one-touch programs

Cons: Chute is narrow enough that celery needs cutting into 3–4 inch pieces, 150W motor, the “NeverClog” name is Ninja’s claim and not an independent test result

Check Price on Amazon →

2. Omega Cold Press All-in-One — Best If Yield Is the Priority

Omega Cold Press All-in-One juicer with triple-stage auger

This is the horizontal Omega: a 200W motor turning a triple-stage auger at 80 RPM, pressing produce against a screen rather than flinging it at one. The design is the reason it gets recommended for celery — a horizontal auger gives stringy stalks a proper pressing stage, and the pulp comes out drier than a centrifugal machine leaves it.

One thing worth knowing before you buy, because it cost me a while to untangle: this machine appears on Amazon under more than one listing. The variant linked here is $199.87. A second listing for what is by every visible sign the same machine — same title, same rating, same review count — was more than $60 dearer when this guide was last checked. Check both before you commit; that kind of gap on identical hardware is worth ninety seconds of clicking.

It is not dishwasher safe, and it takes up a genuine foot of counter. If you juice one bunch a morning and value the cleanup being over quickly, the Ninja above is the better daily machine.

Pros: Triple-stage horizontal auger, 200W at 80 RPM, doubles as a nut butter and pasta attachment system, long motor warranty, 4.4★ across 2,835 ratings

Cons: Hand-wash only, largest footprint here, sold under multiple listings at meaningfully different prices

Check Price on Amazon →

3. Fretta Cold Press — Best Under $60

Fretta cold press juicer with wide feed chute

At $59.98 this is the cheapest genuine cold press here, and what earns it a place is the 4.2-inch feed chute. Celery goes in with far less pre-cutting than the narrow chutes on most budget augers ask for, which matters when a single juice means a whole bunch. It runs the same low-speed cold press extraction as the machines above it, and doubles as a nut milk and sorbet maker.

The compromises are where you would expect them at this price. The housing is lighter than the Omega or the Ninja, cleanup means patience with the supplied brush, and the review base is 546 — the smallest here by some way, around a seventh of the Ninja’s, and from a brand with no real track record behind it. Buy this if $60 is a hard ceiling and you want cold press extraction rather than a centrifugal machine at the same money.

Pros: Cheapest cold press option here, 4.2-inch wide feed chute, doubles as a nut milk and sorbet maker, 4.5★ rating

Cons: Lighter build, smallest review base of the five, hand-wash only, little brand history to fall back on if it fails

Check Price on Amazon →

4. Omega Vertical — Best for Small Counters

Omega vertical cold press juicer with automatic pulp ejection

The case for this one is footprint. Horizontal masticating juicers occupy a foot of counter even when idle, and a juicer that gets put away is a juicer that stops being used. This Omega stands upright on a base about 7 inches wide and 8.5 to 10 inches deep, depending on whether you take Omega’s product image or its manual, runs at 43 RPM and ejects spent pulp continuously into a separate bin instead of making you stop and empty it. Omega publishes the speed and auger specification directly.

I have to be straight about the price, though. This was $308.99 in June, peaked at $334.99 in August, and was $330.99 on 15 September — still about 7% above where it started, and worth watching before you commit. At $308 it was a defensible premium pick.

At $330.99, with a 4.3 star rating that is the lowest of the five and an All-in-One Omega available at $199.87, its case has narrowed to one thing: buy it if the vertical footprint genuinely solves a problem in your kitchen. If it does not, the money is better spent elsewhere on this page. My Omega VSJ843 review covers the owner reports: 140 of its 492 written reviews are critical, mostly about jams, a hopper that locks on and machines that stop.

Pros: Upright base about 7 inches wide, 43 RPM, automatic pulp ejection, no-drip tap

Cons: $330.99 and volatile, lowest rating of the five at 4.3★, narrow chute that owners say needs celery cut small

Check Price on Amazon →

5. Hamilton Beach Big Mouth — Cheapest Way to Find Out If You’ll Stick With It

Hamilton Beach Big Mouth centrifugal juicer with 3-inch feed chute

This is the one centrifugal machine here, and it is on the page for an honest reason rather than to pad the list to five. A centrifugal juicer is the wrong tool for pure celery juice: the spinning basket catches those parallel fibres, yield per bunch drops, and the machine works harder for less. That is the mechanism, and it does not change because the juicer is well made.

What it is good for is finding out whether daily juicing is actually a habit you will keep before you spend $150 or more on a slow juicer. At $64.79 with 41,501 ratings at 4.4 stars — by an order of magnitude the most-reviewed machine here — it is a low-risk way in.

The 3 inch chute means far less pre-cutting, the 800W motor gets through a bunch in seconds, and the removable parts are dishwasher-safe, though owners are split on how easy the strainer is to clean by hand. It also makes more sense than the cold press options if your juice is celery mixed with apple, carrot and ginger rather than celery alone. My Hamilton Beach Big Mouth review covers what owners report about noise, pulp and durability.

Pros: 41,501 ratings, 800W, 3 inch chute means minimal prep, dishwasher-safe parts

Cons: Genuinely the wrong mechanism for pure celery juice, lower yield per bunch, noticeably louder, and some owners report burning smells or motor failures

Check Price on Amazon →

What the Measured Tests Actually Show

Almost every celery juicer guide, this one included until now, tells you cold press beats centrifugal and leaves it there. There is one genuinely measured comparison worth reading: JuiceNext put 500 g of celery through seven slow juicers and weighed the strained juice from each.

Two findings are worth carrying across. First, the spread between the best and worst slow juicer was real but not dramatic — strained yields landed roughly between 305 ml and 370 ml, so the gap is on the order of 20%, not double. Second, slower does not automatically mean better: the machine that took nearly six minutes on the same 500 g returned a high raw yield that the author puts down to clogging rather than efficiency.

The limitation matters as much as the findings, and it is why this guide exists alongside that one: every machine in that test is a Hurom. It is a careful examination of a single brand’s range, with no budget machine and no centrifugal in it at all. If you arrived at this question without a Hurom already in mind, it answers which Hurom, not which juicer.

You will also see it stated everywhere that cold press extracts 20–30% more juice than centrifugal. I have not found an independent test behind that specific range, so this page will not repeat it as fact. The mechanism is well established and the direction is not in dispute — pressing beats shredding for fibrous stalks — but treat any precise percentage you see attached to it as a rule of thumb someone has repeated, not a figure someone measured. The same caution applies to enzyme-preservation claims, which are made far more confidently than the evidence supports.

What to Look For in a Juicer for Celery

Cold Press vs Centrifugal

Celery’s long parallel fibres are the whole problem. A centrifugal basket spinning at thousands of RPM catches them, which costs you yield and can stall the machine mid-run. A masticating auger turning at 43–80 RPM presses those fibres instead of shredding them. The rule of thumb: the higher the proportion of celery in your juice, the more the mechanism matters.

For pure celery every morning, buy cold press. For a mixed vegetable juice where celery is one of five ingredients, a centrifugal machine is a defensible choice. The full masticating vs centrifugal comparison goes through the trade-offs.

RPM, and How Much It Actually Matters

Lower RPM means less heat and less foam. The cold press machines here run between 43 and 80 RPM; centrifugal juicers operate at 3,000–16,000. That second gap is the one that changes your results. The difference between 43 and 80 RPM is far smaller than the marketing around it suggests, and the JuiceNext numbers above point the same way — the slowest machine in that test was also the worst performer.

Feed Chute Size and Prep Time

Celery stalks run 10–14 inches. Most chutes are 1.5–2 inches across, so you will be cutting stalks into thirds whatever you buy. The prep that helps most: wash the bunch, cut the thick white base off as a single piece since it juices poorly, then cut the stalks into 3–4 inch lengths. It takes about ninety seconds and it makes every machine on this page run more smoothly.

Cleaning, Which Decides Whether You Keep Doing This

Celery juice stains plastic green within weeks of daily use. The Ninja and the Hamilton Beach have dishwasher-safe parts; both Omegas want hand-washing with the supplied brush. Weigh that properly. A $150 machine that stops being used after three weeks because the cleanup is tedious is worse value than a $75 one you actually reach for.

There is a step-by-step guide to cleaning a juicer if you want the detail, and one on why juicers clog if yours already does.

Can a Food Processor or Blender Do This Instead?

Not directly. A food processor chops celery but will not separate juice from fibre. A blender gets closer: blend with a little water and strain through a fine mesh or a nut milk bag.

It works, it takes longer, and it yields less per bunch than a dedicated juicer. Worth trying once with the blender you already own before spending anything.

How These Picks Were Chosen

Plainly: this is a research-based guide, not a hands-on test. I have not run these five juicers side by side, and this page will not imply otherwise.

What that leaves is still worth something, provided it is done carefully. Prices, star ratings, review counts and stock status were read directly from each Amazon listing on 15 September 2026, from a New York ZIP code in USD.

Motor wattage, auger speed and capacity come from manufacturer specifications rather than from other people’s articles. Owner reviews were read for repeated specific complaints rather than for star averages alone. Independent measurement, where any exists, is cited and linked rather than absorbed and restated.

What I could not establish: there is no independent cross-brand test of celery yield that I can find. The best available measurement covers one manufacturer’s range. Anyone claiming a precise yield ranking across brands is either working from a test they have not shown you or repeating a number someone else invented.

Frequently Asked Questions

What type of juicer is best for celery?

A masticating (cold press) juicer. The slow auger presses celery’s parallel fibres rather than shredding them, which means more juice per bunch and far less clogging. Centrifugal machines are fine when celery is one ingredient among several, but for pure celery juice they give lower yield and struggle with the strings.

How much celery do I need for a 16 oz serving?

Roughly one medium bunch, about nine stalks, in a masticating juicer. A centrifugal machine will typically need more for the same glass because it leaves more moisture in the pulp. Treat these as working estimates rather than measurements — yield varies with how fresh the celery is and how finely you prep it.

Do I need to remove celery strings before juicing?

No. A masticating juicer handles the strings without any pre-stripping. Wash the stalks, trim off the thick white base, and cut into 3–4 inch pieces if your chute is narrow. Pulling individual strings out adds time for no benefit.

Can I juice celery with a blender?

Yes, with extra steps. Blend chopped celery with a small amount of water and strain through a fine mesh strainer or nut milk bag. You will get less juice per bunch than a masticating juicer and a slightly cloudier result, but it is a reasonable way to test whether you actually want a juicer.

How do I stop celery from clogging my juicer?

Cut it into 3–4 inch pieces, feed slowly rather than forcing it, and push a piece of apple or cucumber through every few stalks to help clear the chute. If a masticating machine does bind, use the reverse function before taking it apart.

Is cold press really better than centrifugal for celery?

For pure celery juice, yes — pressing extracts more from fibrous stalks than shredding does, and there is no heat from a high-speed basket. What I will not give you is a precise percentage: the 20–30% figure repeated across this topic has no independent test behind it that I can find. The direction is reliable; the exact number is not.

The Bottom Line

For daily celery juice, the Ninja NeverClog JC151 is the one I would point most people to: cold press extraction, dishwasher-safe parts, and the largest body of owner feedback of any comparable machine here. If yield is what you care about and you will hand-wash, the Omega All-in-One at $199.87 is the better machine — just check both of its listings first. And if you are not yet sure daily juicing will stick, the Hamilton Beach Big Mouth at $64.79 answers that question cheaply, with the honest caveat that it is the wrong mechanism for celery on its own.

More Juicer Guides

More from the juicers guides: the main juicer buying guide, the best juicer for greens for kale, spinach and wheatgrass, how long fresh juice actually lasts, and the full juicers section.

Filed Under: Product Reviews

Best Hot Plate for Boiling Water: 5 Picks Compared

Last Updated October 12, 2026

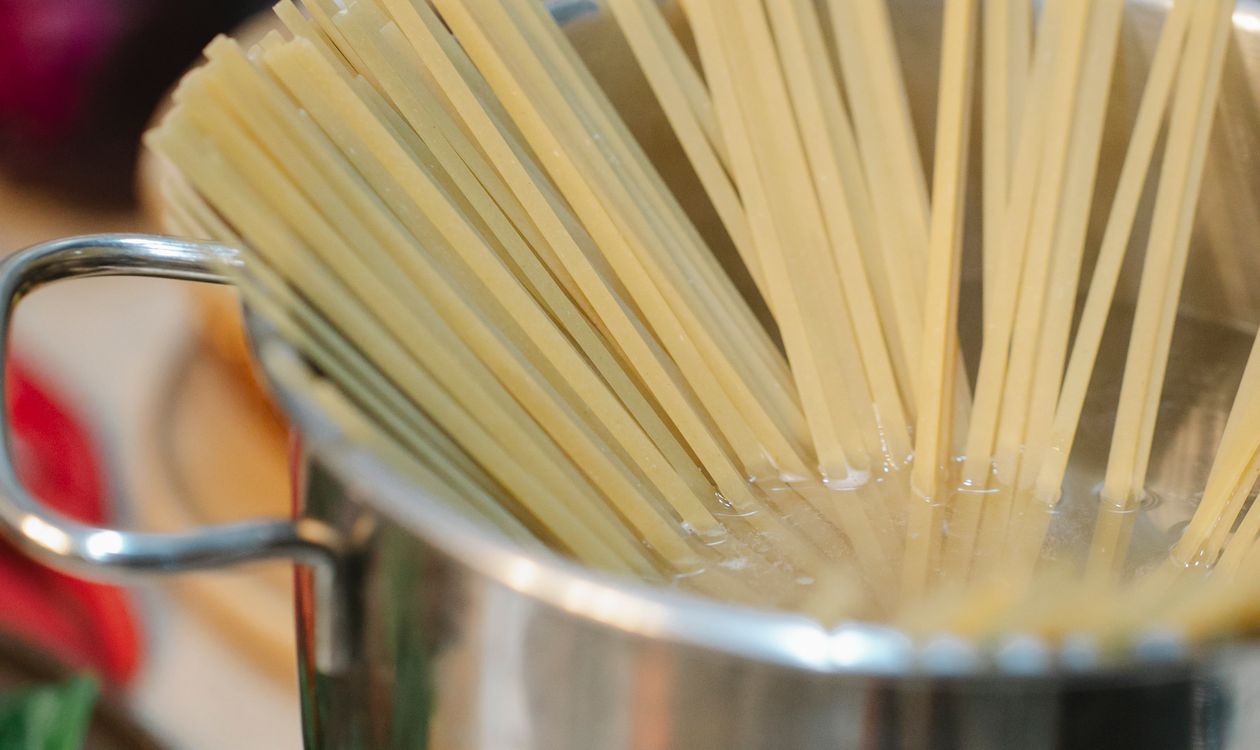
Steam rising from a stainless steel pot of boiling water on a countertop burner

This post contains affiliate links. If you buy through my links, I may earn a commission at no extra cost to you.

A watched pot never boils — but an underpowered hot plate genuinely takes twice as long. Wattage decides almost everything here: an 1800W induction burner brings a quart of water to a rolling boil in around four minutes, while a 1000W coil burner can take three times that once you factor in plate warm-up. My top pick is the Duxtop 8100MC — 1800W of induction heat that boils water faster than most full-size stove burners, for $70.99. Below it are four more picks: a cast iron burner that works with any pot, a $21 budget option, a cheaper induction unit, and a double burner for boiling and simmering at the same time.

Best Hot Plates for Boiling Water — Quick Comparison

Product Best For Price Rating Buy
Duxtop 8100MC 1800W Induction Best Overall $70.99 4.4★ (17,327) Check Price
CUSIMAX 1500W Cast Iron Best for Any Cookware $37.80 4.2★ (6,840) Check Price
Elite Gourmet 1000W Best Budget $20.99 4.4★ (25,114) Check Price
Mueller RapidTherm 1800W Best Budget Induction $54.97 4.2★ (1,595) Check Price
CUKOR Double 1800W Best Two-Burner $49.99 4.3★ (3,125) Check Price

How I Picked

I haven’t strapped thermocouples to twenty hot plates. This guide is built from spec verification, wattage math, and a long read through owner reviews — the five picks here carry over 54,000 Amazon reviews between them. Every product was checked live: current price, rating and availability confirmed on 28 August 2026.

Boil-time estimates come from the physics of wattage and heating technology, cross-checked against what owners actually report. Where induction’s efficiency changes the picture — and it changes it a lot — I say so.

The 5 Best Hot Plates for Boiling Water in 2026

1. Duxtop 8100MC 1800W Induction — Best Overall

Duxtop 8100MC 1800W portable induction cooktop

Induction is the fastest way to boil water short of an electric kettle, and the Duxtop 8100MC is the induction burner everyone else gets compared to. At full power it transfers roughly 85% of its 1800 watts straight into the pot — a quart of water hits a rolling boil in three to four minutes. A cast iron burner at the same wattage wastes a chunk of that heat warming its own plate and the surrounding air.

You get ten power levels from 200W to 1800W, a timer, and auto shut-off when you lift the pot. The glass surface barely warms up outside the pan zone, so there’s no red-hot plate waiting to burn you after cooking. It has held a 4.4-star average across more than 17,000 reviews — remarkable consistency for a product this popular.

Downsides: induction only works with magnetic cookware — stainless steel with a magnetic base or cast iron. Aluminum, glass, and copper pots won’t register at all. The cooling fan is clearly audible at full power. And the pan-detection sensor needs a minimum pan diameter, so very small items like a 1-cup moka pot may not trigger it.

Check Price on Amazon

2. CUSIMAX 1500W Cast Iron — Best for Any Cookware

CUSIMAX 1500W cast iron electric hot plate

If your pots are aluminum, glass, ceramic, or anything else that fails the magnet test, induction is off the table — and this CUSIMAX is the burner to get instead. The solid cast iron plate heats whatever you put on it, no compatibility questions asked. Seven thermostat settings run from a bare simmer to full blast, and the stainless housing sits on non-slip rubber feet.

Downsides: cast iron plates heat slowly. Expect three to five minutes of warm-up before serious heat reaches the water, and eight to ten minutes total to boil a quart. The plate also stays dangerously hot for a long while after you switch it off — there’s a reason induction burners don’t need a “hot surface” warning light. No timer, either. At 4.2 stars across 6,840 reviews, owners rate it slightly below the others here; most complaints are about heating speed, which is a cast iron reality rather than a CUSIMAX defect.

Check Price on Amazon

3. Elite Gourmet 1000W — Best Budget

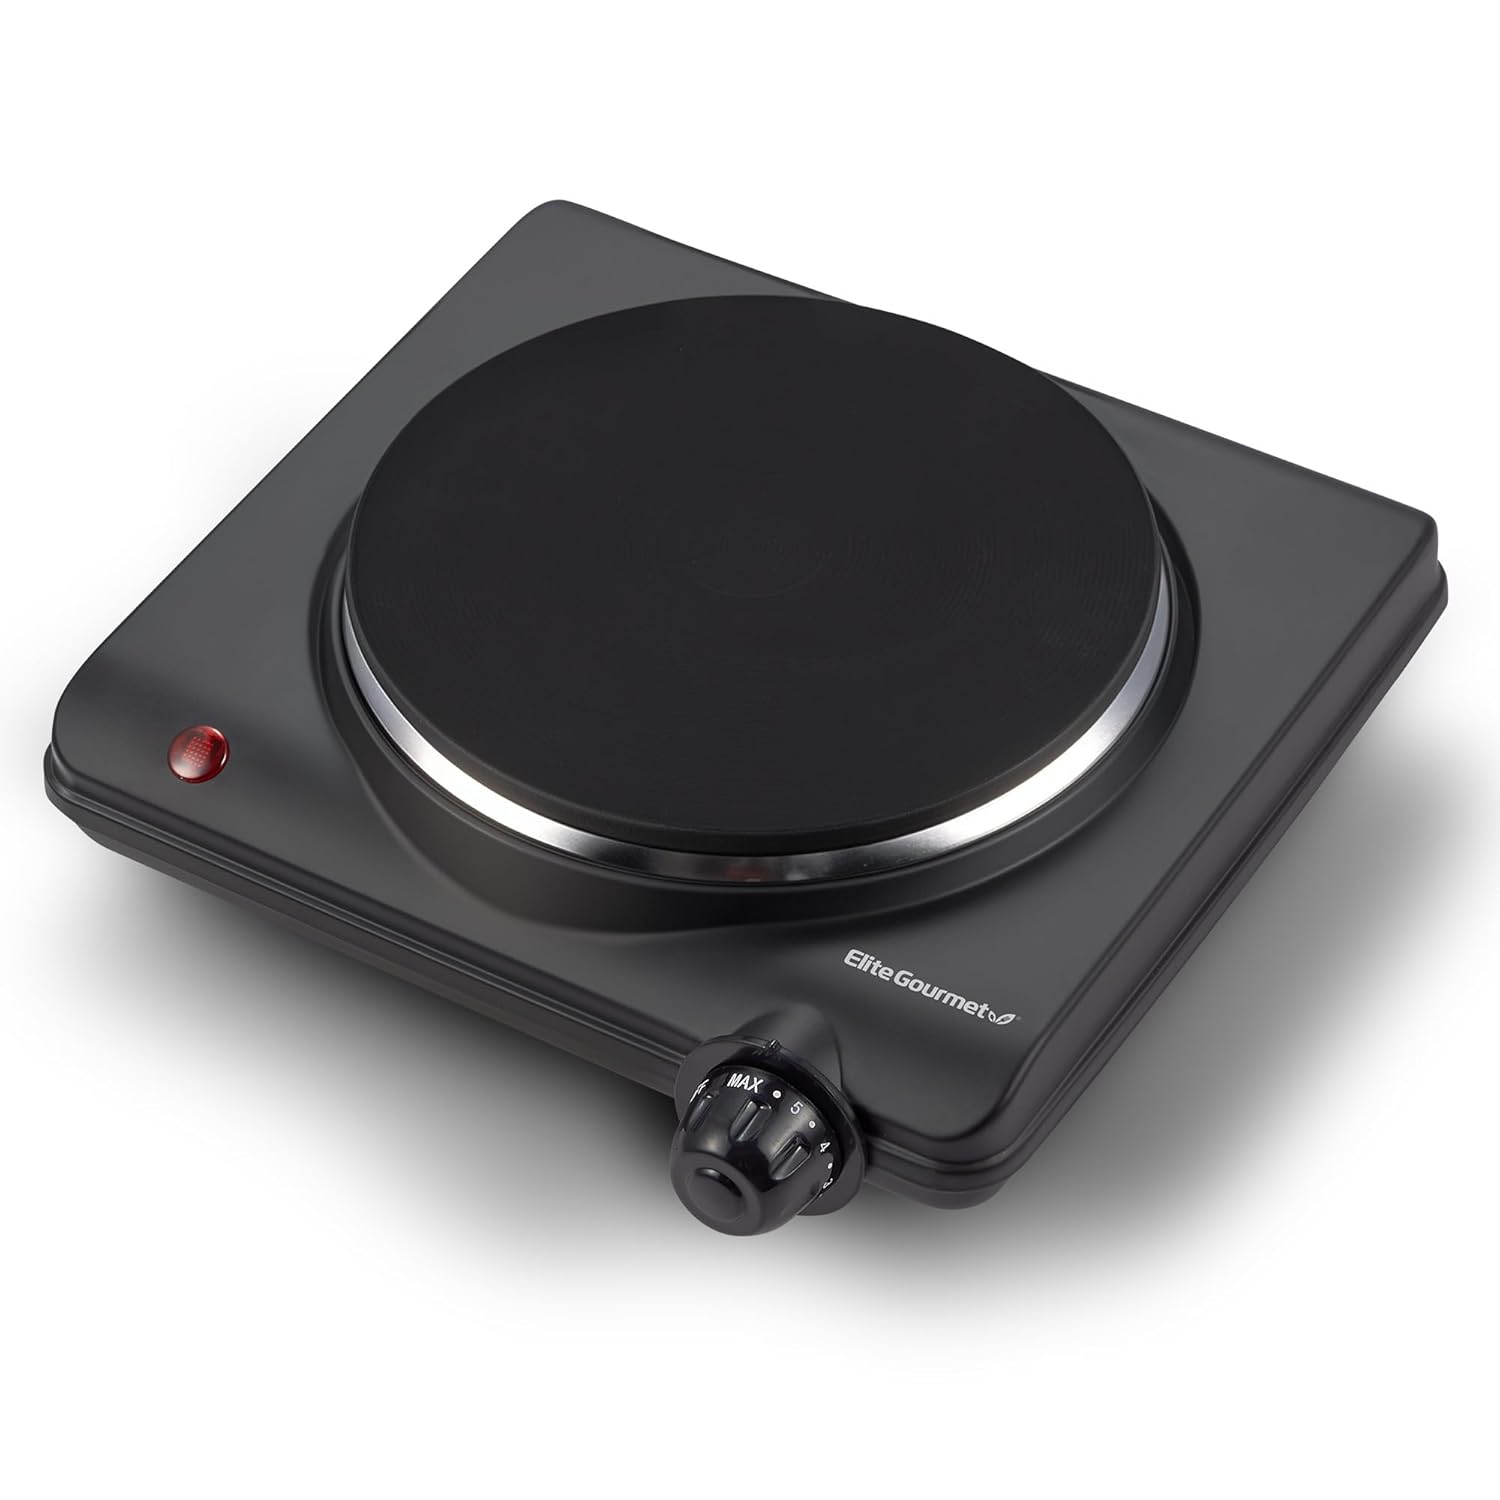
Elite Gourmet 1000W countertop electric hot plate

Twenty-one dollars. That’s the whole pitch, and with over 25,000 reviews at 4.4 stars, it clearly lands. The Elite Gourmet is a compact 1000W cast iron burner with seven heat settings — the default answer for a dorm room, office, RV, or anywhere you occasionally need to heat something and don’t want to spend real money.

Downsides: 1000W is slow for boiling. A quart of water takes twelve minutes or more once the plate warms up — fine for tea and instant noodles, tedious for pasta. The 7.5-inch plate limits you to small and medium pots; a big stockpot will overhang and heat unevenly. And the thermostat cycles power on and off to hold temperature, so keeping a precise simmer takes some knob-fiddling.

Check Price on Amazon

4. Mueller RapidTherm 1800W — Best Budget Induction

Mueller RapidTherm 1800W portable induction cooktop

Same 1800W induction as the Duxtop for about $16 less. The Mueller RapidTherm splits its controls two ways — eight power levels from 200W up to 1800W, or eight temperature settings from 140°F to 460°F — and adds four presets, a four-hour timer, auto shut-off and a child lock. For boiling speed per dollar, it is the cheapest way onto induction in this guide.

Downsides: at 4.2 stars across roughly 1,600 reviews it has both the lowest rating and the smallest review base here, so the evidence behind it is thinner than the Duxtop’s 17,000. Touch controls are fiddly with wet or greasy fingers — knobs are honestly better in a kitchen. Like all induction it needs magnetic cookware: the base takes pans from 4.7 to 10.2 inches, and if a fridge magnet doesn’t stick to your pan, it won’t heat.

Check Price on Amazon

5. CUKOR Double 1800W — Best Two-Burner

CUKOR double cast iron burner 1800W countertop electric stove

Boiling pasta while a sauce simmers next to it needs two burners, and the CUKOR is the rare portable unit that does this well for under $50. Two cast iron plates share 1800W total, with independent temperature dials and a stainless body. Owners rate it 4.3 stars across 3,000+ reviews, and it’s become the standard recommendation for temporary kitchens and renovations.

Downsides: that 1800W is shared — run both plates at once and each heats noticeably slower than a dedicated single burner. The cast iron plates have the same slow warm-up and long cool-down as the CUSIMAX. And the double-wide footprint takes real counter space, which defeats the purpose if portability was the point.

Check Price on Amazon

How to Pick a Hot Plate for Boiling Water

Wattage is the whole game

Heating a quart of tap water to boiling takes a fixed amount of energy — roughly 0.09 kWh. The only variables are how many watts your burner pushes and how much of that actually reaches the water.

At 1800W with induction’s ~85% efficiency, that’s under four minutes. At 1000W through a cast iron plate that first has to heat itself, you’re waiting twelve or more. If boiling speed is why you’re here, don’t buy anything under 1500W.

Induction vs cast iron vs infrared

Induction heats the pot directly through a magnetic field — fastest, coolest surface, and the safest of the three, but it only works with magnetic cookware. Cast iron coil plates heat everything including aluminum and glass, at the cost of slow warm-up and a surface that stays hot long after shutoff. Infrared sits in between and is less common in portable units. If you already own a decent set of stainless cookware, go induction; check my cookware sets guide if you’re starting from zero.

Cookware compatibility

The magnet test settles it: if a fridge magnet sticks firmly to the bottom of your pot, it works on induction. Flat bottoms matter on every hot plate type — a warped or ridged base loses contact with cast iron plates and confuses induction sensors. My frying pans for electric stoves guide covers flat-bottom pans that behave well on portable burners.

Safety features worth having

Auto shut-off when a pot is removed, a hot-surface indicator light, and a child lock are the three that matter. Induction wins by default here — the surface itself barely heats. If you go cast iron, treat the plate like a stove burner: it holds burn-level heat for ten minutes or more after you switch it off.

Frequently Asked Questions

How long does a hot plate take to boil water?

For one quart: around 3–4 minutes on an 1800W induction burner, 8–10 minutes on a 1500W cast iron plate, and 12+ minutes at 1000W. Double those numbers for a half-gallon stockpot.

Are induction hot plates faster than electric coil?

Yes, roughly twice as fast at the same wattage. Induction transfers about 85% of its energy into the pot; a cast iron plate loses a large share heating its own mass and the air around it.

Can I use a moka pot or kettle on an induction hot plate?

Only if it’s magnetic. Most aluminum moka pots won’t work, and small ones may not trigger the pan sensor even if they are steel. A stainless steel moka pot with a magnetic base solves both problems.

Can a hot plate replace a stove?

For boiling, simmering, and one-pan cooking — yes, and plenty of people cook this way through kitchen renovations. The limits are capacity (one or two pots) and recovery speed with big batches.

How much electricity does a hot plate use?

An 1800W burner at full power draws about 1.8 kWh per hour — roughly 28 cents at average US rates. Boiling a single quart costs about two cents. The wattage sounds scary; the actual cost isn’t.

Are hot plates safe to leave unattended?

No — treat them like any stove burner. If you want a margin of safety, pick a model with a timer and auto shut-off like the Duxtop, and avoid leaving cast iron plates energized with nothing on them.

Bottom Line

If your cookware passes the magnet test, buy the Duxtop 8100MC and boil water twice as fast as a coil burner. If it doesn’t, the CUSIMAX 1500W heats any pot made. And if you just need occasional hot water for around $21, the Elite Gourmet has 25,000 reviews saying it’s fine to be patient. For everything else in the kitchen, my cookware guides cover pans, pots, and sets in the same no-nonsense format.

How These Picks Were Chosen

Plainly: this is a research-based guide, not a hands-on test. I have not run these side by side, and nothing here should be read as a report from my own kitchen.

What the picks rest on: wattage, element type – coil, solid or induction, which changes both speed and what cookware works – plate diameter against a normal saucepan base, whether the control is a numbered dial or a genuine thermostat, and stability on a worktop; plus the complaint patterns across verified-purchase reviews, which for hot plates concentrate on elements failing early and controls that run far hotter or cooler than the number suggests.

What I could not establish: actual time to boil, which is the entire point of this category. It needs a fixed volume of water at a fixed starting temperature timed on each unit, and no independent test does that for these models. Wattage and element type are used here as indicators, and wattage alone is a poor predictor across different element types.

You Might Also Like

  • Best fry pans for gas stoves
  • Best omelette pan
  • Best small chest freezer for dorms and small kitchens


Filed Under: Product Reviews

Best Gluten-Free Bread Maker: 5 Picks Reviewed

Last Updated October 26, 2026

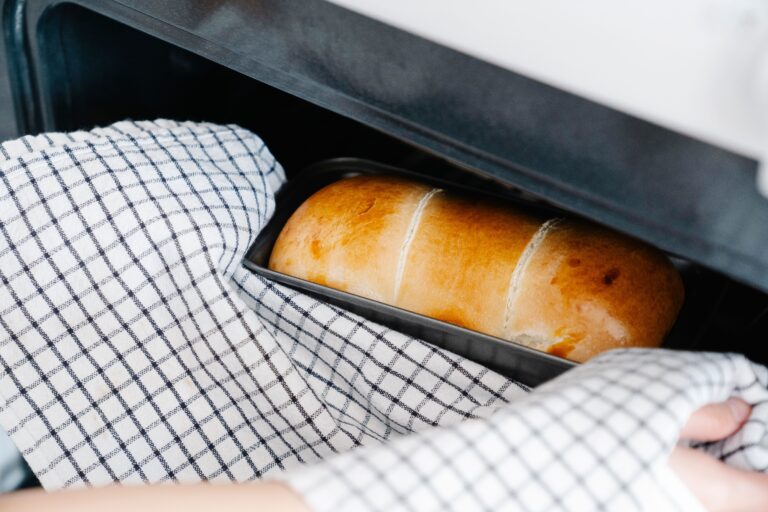
Freshly baked homemade bread loaf being removed from a pan

Disclosure: As an Amazon Associate I earn from qualifying purchases. This costs you nothing extra.

Gluten-free dough is a batter, not a dough: one rise instead of two, and no gluten to trap air. A machine with a genuine gluten-free cycle runs a longer knead and a slower rise; a standard cycle gives you a dense, gummy brick.

The best bread maker for gluten-free baking is the Zojirushi BB-PDC20BA Virtuoso Plus: dual heating elements in base and lid, and a dedicated gluten-free programme among its 15 presets. If $454 is out of range, the Cuisinart CBK-110NAS at $136 is the most-reviewed bread machine on Amazon and handles GF reliably.

Five machines are compared below on how their gluten-free programmes handle rice and almond flour blends, and what owners report about crumb and pan durability.

A stand mixer handles these batters better if you would rather use a conventional oven.

Quick Comparison: Best Gluten-Free Bread Makers 2026

Product Best For Price Rating Buy
Zojirushi BB-PDC20BA Best Overall $454.00 4.6★ (4,939) Check Price
Zojirushi BB-SSC10WZ Best Compact $429.95 4.5★ (537) Check Price
Cuisinart CBK-110NAS Best Mid-Range $136.14 4.4★ (17,153) Check Price
Hamilton Beach Bread Maker Best Entry-Level $109.95 4.4★ (1,373) Check Price
Elite Gourmet EBM8103SS Best Budget $74.99 4.4★ (328) Check Price

1. Zojirushi BB-PDC20BA — Best Overall

Zojirushi BB-PDC20BA Home Bakery Virtuoso Plus breadmaker

Rating: 4.6★ (4,939 reviews) | Price: ~$454.00

The BB-PDC20BA is the right machine if gluten-free bread is a daily part of your household. Its dual heaters — one below the pan, one in the lid — produce even heat across the entire loaf. Most machines only heat from below, which is why gluten-free loaves often sink in the middle or have raw patches near the top. That doesn’t happen here.

The dedicated GF cycle runs a single extended knead followed by a slow rise — the correct approach for rice flour and tapioca blends. Standard cycles push GF doughs too fast and produce a compressed, wet interior. The Virtuoso Plus solves this consistently.

The square pan produces tall loaves that slice cleanly, and the 15-setting menu covers whole wheat, multigrain, jam, cake, and sourdough in addition to standard white and GF programs.

Pros:

  • Dual heating elements — no sunken tops or uneven crumb near the top of the loaf
  • Dedicated GF cycle with correct timing for rice flour doughs
  • Square pan produces tall, even slices that hold together
  • 15-setting menu handles most baking projects beyond everyday bread
  • Delay timer works on the GF cycle

What to know:

  • $454 is significant — best value if you bake GF bread 3+ times per week
  • Lid heater adds height — check clearance under cabinets before buying
  • Kneading paddle leaves a larger base hole than most competitors

Check Price on Amazon

2. Zojirushi BB-SSC10WZ — Best Compact

Zojirushi BB-SSC10WZ Home Bakery Maestro breadmaker

Rating: 4.5★ (537 reviews) | Price: ~$429.95

The BB-SSC10WZ (Maestro) is Zojirushi’s compact option — same engineering as the Virtuoso Plus, scaled to a 1 lb horizontal loaf. For a 1-2 person household, this is often the smarter choice: smaller batches mean less waste, and horizontal loaves slice to standard sandwich dimensions without trimming.

The GF cycle is correctly programmed with the same single-knead, slow-rise approach as the larger model. The $24 savings over the Virtuoso Plus reflects the smaller capacity, not any reduction in quality or heating performance.

Pros:

  • Compact footprint — fits smaller kitchens and counter setups
  • 1 lb horizontal loaves fit standard bread bags and toasters
  • Same Zojirushi dual heating as the flagship model

What to know:

  • 1 lb capacity only — not suitable for families or frequent large-batch baking
  • 537 reviews vs 4,939 for the BB-PDC20BA — less community data available
  • At $430, the $24 saving over the larger model is small

Check Price on Amazon

3. Cuisinart CBK-110NAS — Best Mid-Range

Cuisinart CBK-110NAS stainless steel bread maker

Rating: 4.4★ (17,153 reviews) | Price: ~$136.14

The most reviewed bread machine on Amazon — 17,153 ratings at 4.4 stars — and it earns the position. At $136, the Cuisinart CBK-110NAS sits between budget machines that struggle with GF doughs and Zojirushi models that cost three times as much.

Twelve pre-programmed settings include gluten-free, three loaf sizes (1 lb, 1.5 lb, 2 lb), three crust colors, a viewing window, and a 13-hour delay timer that works on the GF cycle. The stainless exterior is durable, and the removable non-stick pan cleans easily. Bread pans follow the same care rules as the rest of your bakeware and baking tools.

For standard rice flour blends and commercial GF mixes, the results are consistently good. The single bottom heating element — no lid heater — means very wet GF doughs can occasionally develop an uneven top, but this rarely matters with the recipes most home bakers use.

Pros:

  • 17,153 reviews – the most-reviewed bread machine on this list by a wide margin
  • Three loaf sizes give real flexibility for different baking quantities
  • Viewing window — check dough without opening the lid mid-cycle
  • Delay timer works with the GF cycle
  • Stainless exterior more durable than plastic-shelled budget machines

What to know:

  • Single bottom heating element only — no lid heater
  • Paddle indentation in the loaf base is more pronounced than the Zojirushi
  • Control buttons feel softer than premium models

Check Price on Amazon

4. Hamilton Beach Bread Maker — Best Entry-Level

Hamilton Beach automatic bread maker with gluten-free setting

Rating: 4.4★ (1,373 reviews) | Price: ~$109.95

The Hamilton Beach at $110 makes GF bread baking genuinely accessible. It has an explicit gluten-free cycle, 12 total programs, a PFAS-free non-stick pan, and a 2 lb capacity. For someone starting out with home GF baking, this covers what you need without a steep price or learning curve.

The instructions are clear about ingredient order — liquids first — which matters more with GF doughs than with wheat. The PFAS-free coating is a genuine upgrade over older machines using earlier non-stick formulations.

At $110, you’re not getting Zojirushi build quality or the Cuisinart’s versatility, but you’re getting a machine that handles gluten-free cycles correctly and reliably.

Pros:

  • Dedicated GF cycle — not a workaround with a basic setting
  • PFAS-free non-stick pan — a genuine safety improvement over older coatings
  • 12 programs cover the basics without menu overload
  • Compact, with a removable pan and paddle for cleaning
  • Handles Bob’s Red Mill and King Arthur GF blends reliably

What to know:

  • No viewing window — can’t check the dough without opening the lid
  • Fewer settings than the Cuisinart at a similar price point
  • 1,373 reviews — less testing data than mid-range options

Check Price on Amazon

5. Elite Gourmet EBM8103SS — Best Budget

Elite Gourmet EBM8103SS programmable stainless steel bread maker

Rating: 4.4★ (328 reviews) | Price: ~$74.99

At $75, the Elite Gourmet EBM8103SS is the lowest-risk entry point for home GF baking. Nineteen menu settings including gluten-free, stainless steel housing, three loaf sizes, and a 4.4-star rating — though from only 328 buyers, a much thinner evidence base than the rest of this list.

The GF cycle timing is appropriate for standard rice flour blends. Crust can be slightly thicker than mid-range machines, and very wet doughs may need a quick manual stir at the start of kneading. Neither is unusual at this price point and neither affects the final loaf significantly.

If you’re not sure whether regular GF baking is something you’ll stick with, the Elite Gourmet lets you find out before committing to a $400+ machine.

Pros:

  • 19 settings — more than the Hamilton Beach and Cuisinart
  • Stainless exterior at $75 — most budget machines use plastic
  • Three loaf sizes and three crust colors
  • Lowest price on this list — $35 under the Hamilton Beach

What to know:

  • Single bottom heater — crust can run thicker than mid-range machines
  • Very wet GF doughs may need a manual assist during the initial knead

Check Price on Amazon

What to Look for in a Gluten-Free Bread Maker

A Dedicated Gluten-Free Cycle

This is the most important feature. Gluten-free doughs use rice flour, tapioca starch, and xanthan gum — ingredients that need a single extended knead and a slow rise, not the multi-knead cycles designed for wheat. A bread machine without a dedicated GF cycle will produce dense, gummy bread consistently. Every machine on this list has the right programming built in.

Heating Element Position

Budget machines heat from below only. Zojirushi machines heat from below and from an element in the lid. For GF baking, lid heat prevents sunken tops and uneven crumb near the top of the loaf — a common failure point with rice flour doughs in single-element machines.

For everyday sandwich bread with a commercial GF mix, a single bottom element produces acceptable results. For more consistent results across different GF flour types, look for dual heating.

Pan Shape and Loaf Size

Most machines use a vertical pan and produce a tall loaf. The Zojirushi BB-SSC10WZ uses a horizontal pan and produces a smaller, wider loaf that slices to standard sandwich dimensions without trimming. Neither is better — it depends on your household. A good food processor is worth having alongside your bread maker if you’re grinding almond flour or mixing custom GF flour blends in bulk.

Non-Stick Coating Durability

Gluten-free doughs are stickier than wheat doughs. A worn non-stick pan tears loaves on removal. The Zojirushi and Cuisinart pans hold up well with regular use.

The Elite Gourmet pan typically needs replacing after 12-18 months of heavy baking. For the Hamilton Beach: the PFAS-free coating is a genuine upgrade, but inspect it regularly and replace the pan at the first signs of flaking.

Delay Timer Compatibility with the GF Cycle

Some machines don’t allow the delay timer on the GF cycle, citing concerns about doughs containing eggs or dairy sitting at room temperature. The Zojirushi BB-PDC20BA and Cuisinart CBK-110NAS both support the delay timer on the GF cycle. Check the manual before buying if overnight setup is something you want.

Frequently Asked Questions

Can you bake gluten-free bread in any bread machine?

Technically yes, but without a dedicated GF cycle the results are usually poor. Standard cycles are timed for wheat dough — the rise is too fast and the knead pattern wrong for rice flour. Any machine with a purpose-built gluten-free program will produce significantly better results.

Does gluten-free bread rise properly in a bread machine?

Yes, but only once. GF doughs don’t punch down and rise again like wheat — they rise once and go straight into baking. Most dedicated GF cycles account for this with a longer, single rise. Don’t open the lid during the rise phase; a temperature drop can collapse GF dough that wheat dough would recover from.

What flour blend works best in a bread machine?

Commercial 1-to-1 GF blends like Bob’s Red Mill and King Arthur Measure for Measure work best because they already include xanthan gum. Pure rice flour without xanthan gum produces crumbly results — add 1 tsp per cup if using it. Almond flour-based doughs are denser and work better in machines with stronger motors like the Zojirushi.

Is the Zojirushi BB-PDC20BA worth $454 for gluten-free baking?

If you bake GF bread 3+ times per week, yes. The Zojirushi has dual heaters where the budget machines have one, which is the main design reason to pay more, and the 15-setting menu covers everything from standard GF sandwich bread to whole wheat and sourdough. For weekly bakers, the Cuisinart at $136 delivers 90% of the result at 30% of the price.

Can bread machines make gluten-free pizza dough?

Yes — use the dough-only cycle, which stops before baking. GF pizza dough is wetter than wheat dough, so expect a different texture before shaping. The Zojirushi and Cuisinart handle it reliably. Budget machines manage standard GF pizza dough fine but can struggle with stiff doughs containing heavy additions like seeds.

How do I clean the bread pan after a gluten-free loaf?

Let the pan cool completely first — GF bread is stickier when warm. Soak in warm soapy water for 10-15 minutes, then use a soft sponge. Never put the pan in the dishwasher; it degrades the non-stick coating. Remove the kneading paddle separately — it often gets baked into the base of the loaf and needs to be twisted free carefully before washing.

How These Picks Were Chosen

Plainly: this is a research-based guide, not a hands-on test. I have not run these machines side by side, and nothing here should be read as a report from my own kitchen.

What the picks rest on: whether there is a genuine dedicated gluten-free cycle rather than a relabelled basic one, the length and rest structure of that cycle, paddle and pan design, capacity, and crust control; plus the complaint patterns across verified-purchase reviews, which for gluten-free baking concentrate on dense or gummy crumb, uneven bake, and the paddle embedding itself in the finished loaf.

What I could not establish: how good the bread actually is. Gluten-free crumb depends far more on the flour blend and the recipe than on the machine, so comparing loaves across these five without controlling the blend would be measuring the flour. No independent test that controls for it appears to exist. What can be said is which machines give you a real GF cycle to work with.

The Bottom Line

For regular GF bakers, the Zojirushi BB-PDC20BA is the right machine — dual heating, 15 settings, and consistently even loaves. The Cuisinart CBK-110NAS at $136 is the pick for most households: 17,153 reviews, three loaf sizes, and reliable GF performance without the premium price. The Elite Gourmet EBM8103SS at $75 is a genuine starter machine, not a toy — good enough to decide whether home GF baking is worth a long-term investment.

For a small household, the Zojirushi BB-SSC10WZ delivers flagship quality in a compact format. The Hamilton Beach at $110 covers the essentials correctly if you want something straightforward without extra menus.

For other kitchen appliance reviews, see my guides to the best food processors, best blender food processor combos, and best air fryers — all useful tools for a fully equipped gluten-free kitchen.

For gluten-free sandwich bread specifically, the pan matters as much as the machine: a lidded Pullman loaf pan gives structurally weak GF doughs a square shape they can’t hold on their own.

More baking guides are collected on the baking equipment hub.


Filed Under: Product Reviews

  • « Go to Previous Page
  • Page 1
  • Interim pages omitted …
  • Page 32
  • Page 33
  • Page 34
  • Page 35
  • Page 36
  • Interim pages omitted …
  • Page 41
  • Go to Next Page »

Recent Articles

  • Coffee Grinder Static: Why It Happens and How to Fix It
  • How to Descale an Electric Kettle
  • Saucepan vs Saucier: Which Pan Do You Need?
  • Espresso Shot Troubleshooting: Fast, Slow, Sour or Bitter
  • How to Clean a Coffee Grinder: What Makers Say

Search


HOME          Contact          Affiliate Disclosure          Terms of Service          Privacy Policy


kitchenwarecompare.com is a participant in the Amazon Services LLC Associates Program, an affiliate advertising program designed to provide a means for sites to earn advertising fees by advertising and linking to Amazon.com, Endless.com, MYHABIT.com, SmallParts.com, or AmazonWireless.com. Amazon, the Amazon logo, AmazonSupply, and the AmazonSupply logo are trademarks of Amazon.com, Inc. or its affiliates. As an Amazon Associate I earn from qualifying purchases.


Copyright © 2026 kitchenwarecompare.com, ALL RIGHTS RESERVED.