• Skip to primary navigation
  • Skip to main content
  • Skip to primary sidebar

Kitchenware Compare

  • Home
  • Product Reviews
    • Air Fryers
    • Coffee
    • Cookware
    • Flat Top Grills
    • Meat Thermometers
    • Food Processors
    • Knives
    • Pizza Ovens
    • Toaster Ovens
    • Juicers
  • Food Blog
  • Helpful Kitchen Tips
  • Data Studies
  • About
  • How I Review
  • Contact
You are here: Home / Archives for Helpful Kitchen Tips

Tips For Maintaining Bakeware And Baking Tools

Last Updated August 30, 2023

Maintaining bakeware and baking tools is essential for ensuring delicious and evenly cooked treats. From cookie sheets to cake pans and measuring cups, these kitchen essentials require a little TLC to keep them in top shape. In this article, I will share some useful tips to help you maintain your bakeware and baking tools, so you can continue creating mouthwatering masterpieces for years to come.

Baking Equipment 1024x683

Cleaning Bakeware

Cleaning bakeware right means taking proper care of your cooking tools. One of the first steps in maintaining your bakeware is to wash it immediately after use. Leaving leftover food particles on your bakeware can lead to stubborn stains and make it more difficult to clean later on. By tackling the cleaning process as soon as you’re done using your bakeware, you’ll save yourself time and effort in the long run.

When choosing a cleaner for your bakeware, it’s best to opt for non-abrasive options. Abrasive cleaners can scratch the surfaces of your bakeware and damage its non-stick coatings. Look for gentle dish soap or specialized bakeware cleaners that are designed to remove grease and grime without causing any harm.

Although soaking bakeware may seem like an easy way to loosen stubborn food residues, it’s best to avoid this practice. Soaking can cause damage to certain types of bakeware, such as those made from cast iron or stoneware. Instead, try using a gentle scrub brush or sponge to remove stuck-on food residues.

For particularly stubborn stains or burnt-on food, a mixture of baking soda and vinegar can work wonders. Create a paste using equal parts of baking soda and white vinegar, then apply it to the affected areas. Let it sit for a few minutes before scrubbing gently with a non-abrasive sponge. Rinse thoroughly and dry your bakeware before putting it away.

Storing Bakeware

Proper storage of your bakeware is essential for keeping it in good condition and saving space in your kitchen. Start by organizing your bakeware in a dedicated cabinet or drawer to keep it easily accessible. This way, you won’t have to dig through other kitchen items when you’re ready to use your baking tools.

To further maximize your storage space and keep your bakeware neat and organized, consider using dividers or racks. These handy tools help separate your bakeware and prevent them from getting scratched or damaged. You can find dividers or racks specifically designed for bakeware in kitchen supply stores or online.

Stacking your bakeware properly is another great storage tip. If you have limited cabinet space, stacking allows you to make the most of it. However, make sure to stack your bakeware carefully to avoid any scratches or dents. For added protection, place a layer of silicone or parchment paper between each piece of bakeware.

For smaller bakeware items like muffin tins or cookie cutters, hanging hooks can be a great storage solution. Install hooks on the inside of a cabinet door or on a wall, and hang your smaller bakeware items. This not only keeps things organized but also saves valuable cabinet or drawer space for other kitchen essentials.

Maintaining Non-Stick Coatings

Non-stick bakeware is a kitchen staple for many bakers, and keep the non-stick coatings in good condition to ensure optimum performance. When using non-stick bakeware, it’s best to use silicone or wooden utensils to avoid scratching the surface. Metal utensils can cause damage to the non-stick coating, which may lead to food sticking and uneven baking.

Avoid using metal scrubbers or abrasive cleaning tools when cleaning non-stick bakeware. These can scratch and damage the non-stick coating, reducing its effectiveness. Instead, opt for gentle cleaning methods like using a soft sponge or cloth to remove any residues.

To maintain the non-stick properties of your bakeware, it’s a good idea to re-season the non-stick pans occasionally. This involves applying a thin layer of cooking oil to the surface of the bakeware and heating it in the oven for a short period. Re-seasoning helps to keep the non-stick coating in good condition and prevents food from sticking.

For storage, keep non-stick bakeware separate from other types of bakeware. Stacking non-stick pans together can lead to scratches and damage to the non-stick coating. Store them in a dedicated space or use protective layers like silicone mats or parchment paper to prevent any accidents.

If you notice that your non-stick bakeware is worn out or the coating is peeling, it’s time to replace them. Continuing to use damaged non-stick bakeware can pose health risks and negatively affect the quality of your baked goods. Invest in new non-stick pans to ensure the best results in your baking endeavors.

Preventing Rust

Rust is a major concern for bakeware maintenance, especially if it’s made of metal. To prevent rust from forming on your bakeware, take a few preventive measures.

After washing your bakeware, make sure to thoroughly dry it before storing. Any moisture left on the surface can lead to rust formation over time. Take extra care to dry hard-to-reach areas, such as the corners and edges of baking pans.

To further protect your bakeware from moisture, consider applying a light coat of oil before storing. This creates a barrier between the metal surface and the air, preventing rust from developing. Use a neutral oil like vegetable or canola oil and apply a thin layer to the entire surface of the bakeware.

Choosing a dry storage environment for your bakeware is crucial in preventing rust. Moisture in the air can contribute to rust formation, so store your bakeware in a dry cupboard or pantry. Avoid storing it in areas where there is high humidity, such as near the sink or the dishwasher.

If you’re concerned about rust, consider investing in rust-resistant bakeware. There are many options available, including stainless steel, aluminum, or even silicone-coated bakeware. These materials are less prone to rust and can provide long-lasting durability for your baking needs.

Regularly inspect your bakeware for any signs of rust. If you notice any rust spots starting to form, address them immediately. Use a gentle scrub brush or sponge to remove the rust, then dry and oil the affected area. Taking prompt action can prevent further rust development and extend the lifespan of your bakeware.

Caring for Glass Bakeware

Glass bakeware is beloved for its even heat distribution and its ability to showcase your baked goodies. To ensure that your glass bakeware lasts for a long time, handle and care for it properly.

One of the key points to keep in mind is to avoid extreme temperature changes. Glass can shatter when exposed to sudden changes in temperature, so handle it with care. When taking it out of the oven, place it on a heat-resistant surface and allow it to cool gradually.

Avoid placing hot glass bakeware on cold surfaces, such as a granite countertop or metal cooling rack. The rapid change in temperature can cause the glass to crack or shatter. Instead, place a trivet or a folded kitchen towel on the countertop and rest your hot bakeware on it.

To protect your hands from the heat, always use oven mitts or potholders when handling hot glass bakeware. The glass can retain heat for an extended period, so it’s better to be safe than sorry. Invest in good quality oven mitts or potholders that provide sufficient insulation and grip.

Another crucial point is to avoid sudden impacts or dropping your glass bakeware. Glass can be fragile and is prone to cracking or breaking if mishandled. Be gentle when placing or removing your glass bakeware from the oven or any other surfaces to avoid accidents.

For cleaning glass bakeware, hand washing is the preferred method. Avoid using abrasive scrubbers or harsh chemicals that can scratch or damage the glass surface. Instead, use warm, soapy water and a soft sponge or cloth to clean the bakeware. Rinse thoroughly and dry it before putting it away.

Maintaining Baking Tools

Just like your bakeware, your baking tools also require regular maintenance to ensure they stay in good shape. Here are some tips for keeping your baking tools clean and functioning optimally:

Wash your baking tools immediately after each use. This prevents food residues from hardening and becoming more difficult to remove later on. Use hot water and soap to clean greasy tools thoroughly. Pay attention to hard-to-reach areas, such as the crevices of spatulas or the spaces between the tines of a whisk.

Delicate baking tools, such as pastry brushes or piping tips, should be hand-washed. These tools can be easily damaged in a dishwasher or by rough handling. Use a gentle dish soap and warm water to clean them, then let them air dry on a clean towel.

If you have baking tools with baked-on batter or stubborn residues, soaking can help to loosen them. Fill a sink or a basin with warm water and add a small amount of dish soap. Let your baking tools soak for a while, then use a gentle scrubbing brush or sponge to remove the residues. Rinse thoroughly and dry them completely before putting them away.

Regularly inspect your baking tools for any signs of wear or damage. Handles that are loose or cracked, rust spots or bent wires in whisks are indications that it’s time to replace them. Using worn-out or damaged baking tools can affect the quality of your baked goods and pose safety risks.

Investing in well-made baking tools is worth considering. They tend to be more durable and can withstand heavy use. Look for tools made from stainless steel or heat-resistant silicone, as they are less likely to warp or break under high temperatures.

Sharpening and Honing Knives

Properly sharpened and honed knives are essential for efficient and safe baking. Dull knives not only make the cutting process more difficult but can also lead to accidents. Here are some tips for maintaining sharp knives:

Regularly sharpen your knives with a whetstone or sharpening rod. A sharp knife not only makes cutting and slicing easier but also ensures precision in your baking. Follow the manufacturer’s instructions for sharpening your specific type of knife. If you’re unsure, there are professional sharpening services available that can provide expert assistance.

Hone your knives before and after each use. Honing realigns the microscopic edge of the blade, ensuring it remains sharp. Use a honing rod or steel to run the blade along at a consistent angle. This quick and simple step helps to maintain the sharpness of your knives.

Proper storage of your knives is crucial in preventing them from dulling. Avoid tossing your knives in a drawer with other utensils, as this can cause the blades to rub against other objects and become dull. Invest in a knife block or a magnetic strip to keep your knives safely stored and protected.

Avoid cutting on hard surfaces like glass or marble, as this can quickly dull your knives. Instead, opt for cutting boards made of wood or plastic. These materials are softer and gentler on the knife’s blade, helping to maintain its sharpness for longer.

If you’re unsure about your sharpening skills or prefer a professional touch, consider taking your knives to a professional knife sharpening service. These services have the expertise and specialized tools to ensure your knives are sharpened to perfection.

Cleaning Silicone Baking Mats

Silicone baking mats have gained popularity among bakers for their non-stick properties and easy cleanup. To keep your silicone baking mats in top condition, follow these cleaning tips:

After using a silicone baking mat, remove any excess food or grease. Use a spatula or scraper to gently scrape off any residue. Unlike traditional baking pans, silicone mats are flexible and wipe clean fast.

Wash your silicone baking mats with warm, soapy water. Use a soft sponge or cloth to scrub away any remaining residue. This method is effective in removing most stains and residues from the surface of the mats. Rinse thoroughly to remove any soap residue.

For stubborn stains or residues that won’t come off with regular washing, create a paste using baking soda and water. Apply the paste to the stained areas and let it sit for a few minutes. Then, gently scrub the area with a soft sponge or cloth. This natural and non-abrasive method can help remove tough stains without damaging the silicone material.

Avoid using abrasive cleaning tools like steel wool or harsh chemicals on your silicone baking mats. These can scratch and damage the silicone surface, reducing its non-stick properties. Stick to gentle cleaning methods to ensure the longevity of your silicone mats.

Once cleaned, you can allow your silicone baking mats to air dry or pat them dry with a clean cloth. Make sure they are completely dry before storing them to prevent the growth of mold or mildew.

Maintaining Wooden Baking Tools

Wooden baking tools, such as rolling pins or cutting boards, require special care to keep them in good condition. Follow these tips to maintain your wooden baking tools:

Hand wash your wooden baking tools with mild soap and warm water. Avoid soaking them for extended periods, as this can cause warping or splintering. Instead, immediately wash and dry your wooden tools after each use.

To keep your wooden baking tools in top shape, keep them well-oiled. Apply a food-safe oil, such as mineral oil or beeswax, to the surface of the tools. This helps to moisturize the wood and prevent it from drying out or cracking. Apply the oil evenly and allow it to soak into the wood for a few hours before wiping off any excess.

Avoid subjecting your wooden baking tools to high heat or prolonged exposure to water. Extreme temperature changes can cause the wood to warp or split, while excessive moisture can lead to mold or mildew growth. Store your wooden tools in a dry and cool environment to maintain their quality.

Over time, wooden baking tools may show signs of wear or become rough. To revive them, sand the surface lightly with fine-grit sandpaper. This helps to smooth out any imperfections and refresh the appearance of the wood. After sanding, apply a fresh coat of oil to protect the wood and restore its luster.

Disposing of Damaged Bakeware and Tools

When your bakeware or baking tools have reached the end of their lifespan, dispose of them properly. Here are some suggestions on how to handle damaged or unusable items:

Check if your bakeware is recyclable before throwing it away. Certain types of metal or aluminum pans can be recycled; check with your local recycling facility for specific guidelines. Recycling not only helps to reduce waste but also benefits the environment by conserving resources.

Consider repurposing damaged bakeware for non-food-related uses. For example, old baking sheets can be transformed into craft organizers or magnetic display boards. Get creative and find ways to give your bakeware a new life outside of the kitchen.

When disposing of bakeware or baking tools made of non-recyclable materials, such as certain types of plastic or silicone, follow the appropriate waste management practices in your area. Check with your local waste management facility or refer to their guidelines to ensure proper disposal.

Metal baking tools, such as whisks or cookie cutters, can usually be recycled. Check with your local recycling facility to confirm. By recycling metal baking tools, you contribute to reducing the demand for raw materials and energy needed for production.

Consider donating usable bakeware and baking tools to local charities or organizations. There may be people or community groups in need of these items who would greatly appreciate your donation. Make sure to thoroughly clean the items before donating them.

Conclusion

By following these tips for maintaining bakeware and baking tools, you can extend their lifespan and ensure optimal performance in your baking adventures. Whether it’s cleaning and storing properly or disposing of them responsibly, taking care of your bakeware and baking tools is essential for a successful and enjoyable baking experience. Happy baking!

If you need some tips on what sort of baking tools you need, be sure to check out The Ultimate List of Kitchen Essentials For a New Home.

Filed Under: Helpful Kitchen Tips Tagged With: Bakeware, Baking Tools, Maintenance

What Does Elderberry Taste Like

Last Updated August 29, 2023

You find yourself intrigued by the mysterious and intriguing flavor of elderberry. Curiosity piques your senses as you wonder, what exactly does elderberry taste like? In your quest to explore and unravel the taste profile of this fascinating fruit, you begin to delve into its unique characteristics.

Elderberry, with its deep purple hues and enticing aroma, offers a flavor that is both complex and captivating. As you take your first bite, you are met with a burst of rich sweetness that dances upon your taste buds. The initial impression is reminiscent of blackberries and blueberries, but with a distinct tangy twist. This delightful combination of sweet and tart creates a balance that is truly exquisite. The flavor lingers on your palate, revealing subtle notes of floral undertones and a hint of earthiness. With each mouthful, you can’t help but be enchanted by the layers of complexity that elderberry brings to your culinary journey.

As you continue to explore the flavor of elderberry, you discover its versatility and ability to elevate a variety of dishes. From jams and pies to cocktails and sauces, elderberry adds a touch of elegance and intrigue to any creation. Its unique taste profile makes it a favorite among chefs and food enthusiasts alike, as it seamlessly weaves together sweet, tangy, and floral notes in perfect harmony. With every taste, you find yourself drawn deeper into the enchanting world of elderberry, eager to uncover more of its extraordinary flavor and endless possibilities.

So, next time you come across the alluring elderberry, don’t hesitate to embark on your own flavor exploration. Let your taste buds guide you on a journey of discovery as you savor the intricate and delightful taste that elderberry has to offer.

Exploring the Flavor of Elderberry

Elderberry 1024x683

Introduction to Elderberry Flavor

When it comes to exploring the world of flavors, few fruits can compare to the unique and enchanting taste of elderberry. Whether you are a culinary enthusiast or simply curious about expanding your palate, delving into the realm of elderberry flavor is a journey worth embarking on. With its exceptional blend of sweet and tangy notes, earthy undertones, and delightful floral aromas, elderberry offers a sensory experience that captivates and delights.

Sweet and Tangy Notes

The flavor profile of elderberry is characterized by a marvelous combination of sweetness and tanginess. When you take a bite of ripe elderberries, your taste buds are greeted by a burst of natural sweetness. The sweet notes are akin to a decadent blend of blackberries and cranberries, leaving a pleasant and lingering sensation on your tongue. However, unlike the overpowering sweetness of some fruits, elderberries also possess a subtle tanginess that adds a refreshing and slightly tart twist to their flavor. This delicate balance between sweet and tangy makes elderberries a truly captivating fruit to savor.

Earthy Undertones

Beyond its sweet and tangy qualities, elderberry boasts intriguing earthy undertones that add depth and complexity to its overall flavor. As you indulge in elderberries, you may notice subtle hints of earthiness that evoke the essence of the natural world. These earthy undertones bring a grounding and organic quality to the fruit, creating a well-rounded flavor profile that is both comforting and intriguing.

Floral Aromas

One of the most captivating aspects of elderberry flavor is its enchanting floral aroma. When the berries are crushed or cooked, they release a fragrance reminiscent of delicate flowers in full bloom. This floral bouquet enhances the sensory experience of consuming elderberries, delighting the senses and adding a touch of elegance to the overall flavor. The floral aromas of elderberry give the fruit a distinct personality and make it a versatile ingredient in various culinary creations.

Understanding the Taste Profile of Elderberry

To truly appreciate the flavor of elderberry, it is essential to understand its taste profile and how it compares to other berries. While elderberries share some similarities with their berry counterparts, they also possess unique flavor characteristics that set them apart from the rest.

Similarities to Other Berries

In taste, elderberries resemble certain other berries. They share the juiciness and deep berry flavour of blackberries. Additionally, elderberries exhibit a hint of tartness like that found in cranberries, further adding to their multifaceted taste. These shared characteristics make elderberries a delightful addition to any recipe that calls for the natural sweetness and tang of berries.

Unique Flavor Characteristics

Beyond their similarities to other berries, elderberries possess unique flavor characteristics that make them truly special. Their distinctive taste experience can be attributed to their tartness and acidity, bitterness and astringency, as well as their richness and depth.

Tartness and Acidity

Elderberries boast a pleasant tartness and a subtle acidity that elevate their flavor profile. This tartness provides a contrasting note to the natural sweetness, enhancing the complexity of the fruit’s taste. The acidity adds a lively and invigorating aspect to the overall flavor, making elderberries an excellent choice for creating vibrant and balanced culinary delights.

Bitterness and Astringency

In addition to their tartness and acidity, elderberries possess a subtle bitterness and astringency that contribute to their intriguing taste profile. These elements lend a touch of sophistication and depth to the fruit’s flavor, ensuring that each bite or sip of elderberry-infused creations carries a sense of complexity and nuance.

Richness and Depth

What truly sets elderberries apart is their exceptional richness and depth of flavor. The interplay of sweet, tangy, earthy, and floral notes creates a multidimensional tasting experience that is both satisfying and captivating. Elderberries have the ability to elevate the flavor profile of any dish or beverage, adding a luxurious and indulgent element to culinary creations.

Culinary Uses of Elderberry Flavor

With its delightful taste profile, elderberry opens the doors to a world of culinary possibilities. Its versatility allows it to be incorporated into a wide range of beverages, desserts, baked goods, and even savory dishes, adding a touch of elegance and complexity.

Beverages

Elderberry can be harnessed to create delectable and refreshing beverages that cater to diverse tastes and preferences. From soothing winter remedies to indulgent summer cocktails, the possibilities are endless.

Elderberry Syrup and Cordials

One popular use of elderberry flavor is in the creation of syrup and cordials. Elderberry syrup, with its rich, slightly sweet taste, can be added to a variety of beverages, from hot teas to sparkling water, to create a soothing and invigorating drink. Cordials, on the other hand, combine the fruity sweetness of elderberries with carefully chosen herbs and spices, resulting in a vibrant and versatile drink mixer.

Elderberry Wine and Cocktails

Elderberry’s unique flavor profile makes it an excellent choice for crafting exceptional wines and cocktails. Elderberry wine is known for its deep, rich color and complex taste. Its robust flavor, tinged with the distinctive characteristics of elderberries, makes it a favorite among wine enthusiasts. Furthermore, elderberry cocktails allow mixologists to explore the interplay of flavors by combining the fruit’s sweetness with various spirits and mixers, resulting in exquisite and memorable concoctions.

Desserts and Baked Goods

Elderberries lend themselves beautifully to the realm of desserts and baked goods, imparting their unique flavor and captivating aroma to these sweet creations.

Elderberry Pie and Tarts

Elderberry pie and tarts offer a delightful way to showcase the distinctive taste of elderberries. The sweet and tangy notes of the berries harmonize with the buttery crust, creating a dessert that is as visually appealing as it is delicious. Elderberry pie and tarts carry the flavors of the season and capturing the essence of nature’s bounty.

Elderberry Jam and Jelly

The natural sweetness and tanginess of elderberries make them an ideal choice for crafting flavorful jams and jellies. By combining the fruit with ingredients such as sugar, lemon juice, and pectin, a delectable spread can be created that elevates breakfast or afternoon tea to new heights. Elderberry jam and jelly make for a delightful addition to toast, scones, and other baked treats.

Savory Dishes

While elderberries are often associated with sweet creations, their unique flavor can also enhance savory dishes by adding depth and complexity.

Elderberry Sauces and Marinades

Elderberry sauces and marinades are a delightful way to introduce the fruit’s flavor into savory dishes. The rich and slightly tart characteristics of elderberries can complement and balance the flavors of meat and poultry, elevating each bite to a new level of enjoyment. Whether used as a glaze, a base for sauces, or as a marinade ingredient, elderberries add a touch of elegance and sophistication to your culinary repertoire.

Elderberry-infused Meats and Poultry

Infusing meats and poultry with the flavor of elderberries adds a fruity, slightly tart depth that’s worth trying at least once. By incorporating elderberry-based marinades or glazes, dishes like roasted pork, grilled chicken, or pan-seared duck can be transformed into culinary masterpieces. The combination of the rich, fruity flavor of elderberries with the savory notes of the protein creates a harmonious union that tantalizes the taste buds and leaves a lasting impression.

In conclusion, the flavor of elderberry is a captivating journey that combines sweet and tangy notes with earthy undertones and enchanting floral aromas. Understanding the taste profile of elderberry, its unique characteristics, and its versatile culinary applications allows me to fully appreciate this remarkable fruit. By venturing into the realm of elderberry flavor, I open myself to a world of creative possibilities and exquisite taste experiences that are sure to leave an indelible mark on my palates. So, whether you’re savoring elderberry-infused desserts, indulging in a glass of elderberry wine, or adding its distinctive flavor to savory dishes, let the remarkable taste of elderberry enrich your culinary adventures.

If you enjoyed learning about elderberry, check out my guides to crawfish, okra, and quinoa.a>

Filed Under: Helpful Kitchen Tips Tagged With: elderberry, exploration, Flavor

The Ultimate Guide to Cleaning a Fan-Assisted Oven

Last Updated July 26, 2023

Clean fan-assisted oven interior with the racks removed

A fan-assisted oven has two things a conventional oven does not: a fan behind the back panel, and a ventilation path that pulls grease-laden air past it. Most oven-cleaning advice ignores both. That is why an oven can look spotless inside and still smell the moment it heats up.

This guide works through the job in order: interior, door glass and seals, fan housing and ducts, control panel, exterior. You will need a non-abrasive cleaner, a microfiber cloth, and an old toothbrush. Every step assumes the oven is off, cool, and unplugged.

Understanding Fan-Assisted Ovens

What is a fan-assisted oven?

A fan-assisted oven, also known as a convection oven, is a type of oven that circulates hot air evenly throughout its interior. Unlike traditional ovens, which only use radiant heat from the top and bottom heating elements, a fan-assisted oven uses a fan to distribute the heat more efficiently. This results in faster cooking times and more even browning of food.

Benefits of using a fan-assisted oven

There are several benefits to using a fan-assisted oven:

  1. Faster cooking: The circulating hot air in a fan-assisted oven speeds up the cooking process, reducing overall cooking times by up to 25%. This is especially useful for busy individuals and families who want to prepare meals quickly.
  2. Even heat distribution: The fan in a fan-assisted oven ensures that the heat is evenly distributed throughout the oven. This means that there are no hot spots or cold spots, resulting in uniform cooking and consistent results.
  3. Reduced energy consumption: Because fan-assisted ovens cook food more quickly, they require less time to heat up. This can lead to energy savings and lower electricity bills in the long run.
  4. Handles more cooking tasks: Fan-assisted ovens work well for baking, roasting, and grilling. The even heat distribution and faster cooking times make them a solid fit for a wide range of recipes.

How does a fan-assisted oven work?

A fan-assisted oven works by using a fan to circulate hot air inside the oven cavity. When you turn on the oven, the heating elements, located at the top and bottom of the oven, heat up. The fan then blows the hot air around the oven, ensuring that the heat reaches all areas of the oven.

This circulating hot air creates a convection effect, where the hot air rises and the cooler air sinks. As a result, the food is cooked more evenly and at a faster rate. The fan-assisted oven also helps to remove moisture from the oven, which can result in crispier and browner food.

Fan-assisted ovens typically come with a fan setting and a conventional setting. The fan setting is ideal for most cooking tasks, while the conventional setting is better suited for traditional baking and roasting methods. It’s recommended to follow the manufacturer’s instructions for optimal results.

Preparing for Cleaning

Gathering the necessary supplies

Before you start cleaning your oven, gather all the necessary supplies first. Here’s a list of items you will need:

  • Oven cleaner or a homemade cleaning solution (such as a mixture of baking soda and water)
  • Warm water
  • Dish soap
  • Sponge or soft cloth
  • Oven gloves or heat-resistant gloves
  • Scrub brush or toothbrush
  • Microfiber cloth
  • Vinegar (optional for dealing with stubborn stains)
  • Safety goggles (optional for added eye protection)

Having these supplies ready will ensure a smooth and effective cleaning process.

Safety precautions to take

Cleaning an oven can be a messy and potentially hazardous task, so take some safety precautions before you begin. Here are a few safety tips to keep in mind:

  1. Wear protective gloves: Oven cleaner can be harsh on the skin, so be sure to wear gloves to protect your hands from irritation or chemical burns.
  2. Protect your eyes: While cleaning the oven, there may be splatters or fumes that could irritate your eyes. Consider wearing safety goggles as an extra precaution.
  3. Ventilate the area: Open windows or use a fan to ensure good ventilation while cleaning. This will help to dissipate any fumes or odors that may be released during the cleaning process.
  4. Turn off and cool the oven: Before you begin cleaning, make sure the oven is turned off and has had time to cool down. Cleaning a hot oven can be dangerous and may cause burns.

By taking these safety precautions, you can ensure a safe and hassle-free cleaning experience.

Disconnecting and cooling the oven

Before you start cleaning the fan-assisted oven, disconnect it from the power source and allow it to cool down. This will prevent any accidents or injuries from occurring. Here’s how to do it:

  1. Turn off the oven: Make sure the oven is turned off before you proceed with any cleaning. This will prevent any accidental burns or electrical shocks.
  2. Unplug the oven or turn off the circuit breaker: To ensure your safety, unplug the oven from the power source. If you’re unable to do so, switch off the circuit breaker that supplies electricity to the oven.
  3. Allow the oven to cool down: Give the oven ample time to cool down before you start cleaning. This will prevent any burns or injuries from touching hot surfaces.

By following these steps, you can ensure that the oven is safe to clean and that you can start the cleaning process without any complications.


Cleaning the InteriorOven rack being scrubbed in hot soapy water

Removing oven racks and trays

To clean the interior of your oven effectively, start by removing the oven racks and trays. This will make it easier to access and clean the oven surfaces. Here’s how to do it:

  1. Take out the oven racks: Open the oven door and gently pull out the oven racks. Place them in a sink or bathtub filled with warm, soapy water.
  2. Soak the racks: Let the oven racks soak in the warm, soapy water for at least 30 minutes to loosen any burnt-on debris or grease.
  3. Clean the racks: After soaking, use a sponge or scrub brush to scrub away any remaining dirt or grime on the oven racks. Rinse them thoroughly with clean water and set them aside to dry.
  4. Clean the oven tray: Remove the oven tray and place it in the sink or bathtub. Depending on the type of oven tray you have, you may need to scrub it with a scrub brush or use a non-abrasive sponge to remove any stubborn stains. Rinse it thoroughly and set it aside to dry.

By removing the oven racks and trays, you can clean them more thoroughly and ensure that your oven is free from any dirt or residue.

Applying an appropriate cleaning solution

Once you have removed the oven racks and trays, it’s time to apply a suitable cleaning solution to the interior surfaces of your oven. There are several options available, including store-bought oven cleaners or homemade cleaning solutions. Here are a few options to choose from:

  • Store-bought oven cleaner: There are many oven cleaning products available on the market. Follow the instructions on the product label to ensure safe and effective use. Please note that some oven cleaners are caustic and may require protective gloves and eye protection.
  • Homemade cleaning solution: If you prefer a more natural cleaning approach, you can make a homemade cleaning solution using baking soda and water. Mix a paste using equal parts baking soda and water, and apply it to the interior surfaces of the oven.

Regardless of the cleaning solution you choose, make sure to apply it to the interior surfaces of the oven, including the sides, back, and bottom, avoiding the heating elements and fans.

Scrubbing the interior surfaces

Once you have applied the cleaning solution to the interior surfaces of your oven, it’s time to start scrubbing. Use a sponge or soft cloth to scrub away any dirt, grease, or residue. Pay close attention to any areas with stubborn stains or burnt-on grease.

For tough stains or baked-on residues, you may need to use a scrub brush or toothbrush for extra scrubbing power. Gently scrub in a circular motion until the stains are removed. If you’re using a store-bought oven cleaner, follow the manufacturer’s instructions for the recommended scrubbing technique.

Take care not to scrub too hard or use abrasive materials that could damage the oven surfaces. Remember to clean the vents and fans as well, being careful not to push any dirt or debris further into the ventilation system.

Dealing with stubborn stains

If you encounter stubborn stains or burnt-on grease that are difficult to remove with a regular cleaning solution, you may need to use vinegar to tackle the problem. Here’s how:

  1. Apply vinegar: Dip a sponge or cloth in vinegar and apply it directly to the stubborn stains or burnt-on grease. Let it sit for a few minutes to loosen the residue.
  2. Scrub the stains: After allowing the vinegar to sit, gently scrub the stains or residue with a sponge or scrub brush. The acidity of the vinegar will help break down the stubborn stains or grease.
  3. Rinse with water: Once the stains are removed, rinse the interior surfaces of the oven thoroughly with clean water to remove any vinegar residue.

By using vinegar, you can effectively remove stubborn stains or burnt-on grease from your oven and restore it to its original condition.

Cleaning the Door and Glass

Removing and cleaning oven door

To ensure a thorough cleaning of your oven, remove and clean the oven door. Over time, the door can accumulate grease and food residue, which can affect the efficiency and appearance of your oven. Here’s how to remove and clean the oven door:

  1. Open the oven door: Fully open the oven door. Look for any locking mechanism or latches that may be keeping the door in place.
  2. Remove the door: Depending on the make and model of your oven, there may be specific instructions on how to remove the oven door. Most oven doors can be lifted off their hinges. Carefully lift and remove the door from the oven.
  3. Clean the door: Place the oven door on a flat surface covered with a towel or soft cloth to prevent scratching. Use a sponge or soft cloth to clean the door thoroughly, paying special attention to any greasy areas or stains. You can use warm soapy water or a mild cleaning solution for this task.
  4. Rinse and dry the door: After cleaning, rinse the door with clean water to remove any soap or cleaning solution residue. Dry it thoroughly with a microfiber cloth before reattaching it to the oven.

Cleaning the glass and door seals

The glass on the oven door and the door seals can also accumulate dirt and grease over time, affecting the appearance and efficiency of your oven. Here’s how to clean them:

  1. Clean the glass: To clean the glass on the oven door, dampen a sponge or cloth with warm soapy water or a mild cleaning solution. Gently scrub the glass, paying close attention to any stains or greasy areas. Rinse with clean water and dry with a microfiber cloth.
  2. Clean the door seals: The door seals are located around the edges of the oven door and help to keep the heat inside the oven. They can become dirty and greasy over time. Use a sponge or cloth dampened with warm soapy water to clean the door seals. Gently wipe away any dirt or grease. Rinse with clean water and dry with a microfiber cloth.

By cleaning the oven door, glass, and door seals, you can ensure that your oven looks clean and functions efficiently.


Cleaning the Fan and Ventilation SystemRear fan cover removed to expose the oven fan blades

Removing the fan cover

To maintain the performance of your oven, clean the fan and ventilation system regularly. Here’s how to remove the fan cover for cleaning:

  1. Disconnect the power: Before you start cleaning the fan and ventilation system, make sure the oven is disconnected from the power source to prevent any accidents.
  2. Locate the fan cover: The fan cover is usually located at the back of the oven, behind the back panel. You may need to use a screwdriver to remove the screws securing the back panel in place.
  3. Remove the fan cover: Once you have removed the back panel, you should be able to see the fan cover. Depending on the make and model of your oven, the fan cover may be secured with screws or clips. Carefully remove these, taking note of their position for easy reassembly.

Cleaning the fan blades

Once the fan cover is removed, you can access the fan blades for cleaning. Here’s how to clean the fan blades:

  1. Gently remove any visible dirt or debris from the fan blades using a soft brush or cloth.
  2. Use a damp cloth or sponge to wipe the blades, removing any grease or residue that may have accumulated. Be careful not to bend or damage the fan blades.
  3. If the fan blades are particularly dirty or greasy, you can use a mild cleaning solution to help break down the grime. Mix warm water and dish soap and dip a cloth or sponge into the solution. Wipe the blades thoroughly, ensuring all grease and dirt are removed. Rinse with clean water and dry with a microfiber cloth.

By regularly cleaning the fan blades, you can prevent the buildup of grease and dirt that can affect the performance of your oven.

Clearing the ventilation ducts

Along with cleaning the fan blades, it’s essential to clear any debris or blockages from the ventilation ducts to maintain proper airflow. Here’s how to clear the ventilation ducts:

  1. Use a vacuum cleaner or a brush attachment to remove any loose debris from the ventilation ducts. Pay attention to both the intake and exhaust vents.
  2. After removing loose debris, use a flexible brush or a long, thin cleaning tool to reach deeper into the ventilation ducts. Gently brush away any additional dirt or dust that may have accumulated.
  3. Once you have finished brushing, use a vacuum cleaner or brush attachment to remove any dislodged debris from the ventilation ducts.

By clearing the ventilation ducts, you can ensure that your oven has proper airflow and operates efficiently.

Cleaning the Control Panel and Knobs

Disconnecting power

Before you start cleaning the control panel and knobs of your oven, disconnect the power first to prevent any accidents. Here’s how to do it:

  1. Make sure the oven is turned off and has had a chance to cool down.
  2. Locate the power supply switch or unplug the oven from the power source.

By following these steps, you can ensure your safety while cleaning the control panel and knobs of your oven.

Cleaning the control panel

The control panel of your oven can accumulate dirt, grease, and fingerprints, affecting its appearance and functionality. Here’s how to clean the control panel effectively:

  1. Dampen a soft cloth or sponge with warm water and a small amount of dish soap.
  2. Gently wipe the control panel, paying attention to any stubborn stains or grease spots.
  3. If necessary, use a toothbrush or cotton swab to clean hard-to-reach areas, such as around the buttons or knobs.
  4. Rinse the cloth or sponge with clean water and wipe away any soap residue from the control panel.

By cleaning the control panel regularly, you can maintain the appearance and functionality of your oven.

Cleaning and disinfecting the knobs

The knobs on your oven can become dirty and greasy over time, affecting their ease of use and appearance. Here’s how to clean and disinfect the knobs:

  1. Remove the knobs from the oven by gently pulling them away from the control panel. This can usually be done by applying even pressure and pulling away from the oven.
  2. Soak the knobs in warm, soapy water to loosen any grease or dirt. Leave them to soak for a few minutes.
  3. Use a sponge or soft cloth to clean the knobs, paying close attention to any stubborn stains or grease spots. Rinse the knobs with clean water to remove any soap residue.
  4. Disinfect the knobs by wiping them with a cloth soaked in a mild disinfectant solution, such as a mixture of water and vinegar. This will help eliminate any bacteria or germs that may be present.
  5. Rinse the knobs with clean water and dry them thoroughly before reattaching them to the oven.

By regularly cleaning and disinfecting the knobs, you can ensure their smooth operation and prevent the accumulation of dirt and grease.

Cleaning Exterior Surfaces

Choosing the right cleaning solution

Cleaning the exterior surfaces of your oven is just as important as cleaning the interior. The exterior surfaces can accumulate dirt, grease, and fingerprints, affecting the appearance of your oven. Here’s how to choose the right cleaning solution:

  1. Consider the material: The cleaning solution you choose will depend on the material of your oven’s exterior surfaces. If the exterior is stainless steel, you can use a stainless steel cleaner or a mild soapy water solution. If the exterior is made of enamel or another non-stainless steel material, a mild soapy water solution will suffice.
  2. Read the manufacturer’s instructions: Before using any cleaning solution, always refer to the manufacturer’s instructions. They may have specific recommendations for cleaning their particular oven model.

By choosing the right cleaning solution, you can effectively clean the exterior surfaces of your oven without causing any damage.

Wiping down the exterior

Once you have chosen the appropriate cleaning solution, it’s time to wipe down the exterior surfaces of your oven. Here’s how to do it:

  1. Dampen a soft cloth or sponge with the cleaning solution.
  2. Gently wipe the exterior surfaces of the oven, paying attention to any stains, grease spots, or fingerprints.
  3. If necessary, use a toothbrush or cotton swab to clean any hard-to-reach areas or crevices.
  4. Rinse the cloth or sponge with clean water and wipe away any residue from the exterior surfaces.

By regularly wiping down the exterior surfaces of your oven, you can keep it looking clean and polished.

Polishing stainless steel surfaces

If your oven has stainless steel surfaces, polish them to maintain their shine and prevent smudges and fingerprints. Here’s how to polish stainless steel surfaces:

  1. Apply a few drops of stainless steel cleaner or a small amount of olive oil to a soft cloth.
  2. Gently rub the cloth on the stainless steel surfaces, following the grain of the steel.
  3. Continue to polish until the stainless steel surfaces are shiny and free from smudges.
  4. Use a clean microfiber cloth to buff the stainless steel surfaces, giving them a final shine.

By polishing stainless steel surfaces, you can enhance the appearance of your oven and keep it looking brand new.

Reassembling and Testing

Reassembling oven racks and trays

After you have cleaned the interior and exterior of your oven, it’s time to reassemble the oven racks and trays. Here’s how to do it:

  1. Make sure the oven racks and trays are completely dry.
  2. Position the oven racks back into their original slots, ensuring they are level and secure.
  3. Place the oven trays back into their designated positions, making sure they fit properly.

By reassembling the oven racks and trays, you can ensure that your oven is ready for use.

Testing the oven’s functionality

Before you start cooking in your oven again, test its functionality. Here’s how to do it:

  1. Reconnect the oven to the power source.
  2. Turn on the oven and set it to a low temperature.
  3. Allow the oven to heat up and check that the heat is evenly distributed throughout the oven cavity.
  4. Check that all the buttons and knobs are working properly.

By testing the functionality of your oven, you can ensure that it is in proper working order and ready for your next cooking adventure.

Using the Self-Cleaning Cycle (and What It Will Not Do)

Not every fan oven has one. Look for a “Self Clean” or “Pyrolytic” setting on the control panel, or check the model number against the manual. If neither mentions it, the cycle is not available to you and the manual method above is the job.

Where it does exist, the cycle locks the door and heats the cavity far beyond cooking temperature, reducing baked-on spills to a fine ash you sweep out with a damp cloth once everything has cooled. On the floor, walls and roof of the cavity it works well.

What the cycle does not reach

This is the part worth understanding before relying on it. The cycle burns residue off the inside of the cavity. It does not touch the fan housing behind the back panel, the ventilation ducts, the door seal, or the outer pane of the door glass.

Grease drawn past the fan is still sitting there afterwards, which is why an oven can come out of a self-clean cycle looking spotless and still smell the next time it heats up. The fan and ventilation work covered earlier is not made redundant by the cycle. It is precisely the part the cycle cannot do.

Before you start the cycle

  1. Take the racks out. Whirlpool’s guidance for its ranges and wall ovens is to remove the oven racks, broiler pan, grid, cookware and bakeware before starting.
  2. Ventilate properly. Open a window and run the extractor, because the cycle produces heat, odour and some smoke.
  3. Move pet birds out of the house, not just out of the kitchen. Whirlpool warns that the health of some birds is extremely sensitive to the fumes and that exposure can kill them.
  4. Allow for the run plus the cool-down. The door stays locked until the cavity has dropped to a safe temperature, and that cool-down period is counted inside the cycle time.
  5. Do not run it over chemical cleaner. If you have already applied an oven cleaner, rinse it out completely first.

Wipe the ash out with a damp cloth once the door unlocks. Some discolouring, a loss of gloss, fine hairline crazing in the enamel, or the odd popping sound during the cycle are all normal on porcelain-on-steel and do not mean anything is broken.

When to Stop and Call Someone

Most of this job is wiping and rinsing. A few parts of it are not, and it is worth knowing in advance where the line sits.

  1. The fan cover is riveted or spot-welded rather than screwed. Some models were never designed to be opened at home. If there are no visible screws, stop. Levering the panel bends it, and it rarely seats flat again.
  2. The fan does not spin freely, or it grinds or squeals after reassembly. That points at the bearing or the motor, and no amount of cleaning fixes either.
  3. There is brittle, scorched or damaged wiring behind the back panel. Close it up and get an engineer out.
  4. The oven trips the breaker after cleaning. Usually moisture has reached the element or a connection. Leave it switched off to dry out fully; if it still trips after that, it is a fault rather than damp.
  5. The door glass is chipped or cracked. Toughened glass fails suddenly rather than gradually, so a cracked inner pane wants replacing, not cleaning around.
  6. It is a built-in oven, still under warranty, and the back panel needs to come off. Check the terms first. With some manufacturers, removing internal panels yourself ends the cover.

None of these is common. All of them cost less to hand over than to get wrong.

Maintenance Tips

Regular cleaning schedule

To keep your oven in optimal condition, establish a regular cleaning schedule. Here are a few tips:

  1. Clean the oven interior, including the oven racks and trays, at least once every three months or whenever a spill occurs.
  2. Wipe down the exterior surfaces of the oven regularly to prevent the buildup of dirt and grease.
  3. Clean the control panel, knobs, and glass regularly to maintain their appearance and functionality.

By incorporating regular cleaning into your routine, you can keep your oven clean and ensure its efficient performance.

Preventing future buildup

To prevent future buildup and the need for frequent deep cleaning, there are a few steps you can take:

  1. Use oven liners or aluminum foil to catch any spills or drips while cooking. This will prevent them from hardening and becoming difficult to clean.
  2. Place a baking sheet on the bottom rack while cooking foods that may cause splatters or drips. This will catch any mess and make cleanup easier.
  3. Avoid overfilling pots or pans with liquids or foods that may bubble over. This will minimize the risk of spills and reduce the need for extensive cleaning.

By taking these preventive measures, you can reduce the frequency of deep cleaning and keep your oven looking and functioning its best.

Oven maintenance dos and don’ts

To ensure the longevity and efficient performance of your oven, here are a few dos and don’ts to keep in mind:

Dos:

  • Do read the manufacturer’s instructions for proper use and cleaning guidelines.
  • Do preheat the oven as recommended for optimal cooking results.
  • Do use oven mitts or heat-resistant gloves when handling hot trays or racks.
  • Do clean spills or splatters as soon as they occur to prevent them from hardening.
  • Do replace oven racks or trays if they become damaged or warped.

Don’ts:

  • Don’t use abrasive cleaning materials or harsh chemicals on the interior or exterior surfaces of your oven, as they can damage the finish.
  • Don’t use sharp objects or abrasive materials to scrape off hardened food or debris from the oven surfaces.
  • Don’t leave spills or food particles in the oven for extended periods, as they can affect the taste and odor of future meals.
  • Don’t overload the oven with heavy or oversized dishes, as this can hinder the circulation of hot air and affect cooking times and results.

By following these dos and don’ts, you can ensure the proper maintenance and performance of your oven for years to come.

Frequently Asked Questions

How often should you clean a fan-assisted oven?

Wipe spills as they happen and clean the interior every three months under normal use. If you roast or bake several times a week, shorten that to every six to eight weeks. The fan housing and ventilation ducts need attention roughly once a year.

Does the self-cleaning cycle clean the fan and vents?

No. The cycle burns residue off the inside of the cavity only. The fan housing, ventilation ducts and door seal sit outside its reach, which is why an oven can finish a self-clean cycle spotless and still smell when it next heats up.

Can you use oven cleaner on the fan blades?

Avoid it. Caustic cleaners can pit the blade finish, and any residue left behind sits directly in the path of the air your food cooks in. Warm water with washing-up liquid on a cloth, plus a soft brush for the blade edges, does the job.

Why does my oven still smell after a thorough clean?

Almost always grease drawn past the fan into the housing or the ducts, where wiping the cavity never reaches it. After cleaning, run the oven empty at a moderate heat with a window open to burn off whatever is left.

Is it safe to take the fan cover off yourself?

On most models yes, provided the oven is unplugged or isolated at the consumer unit first and the cover is held on by visible screws. If the panel is riveted, or the wiring behind it looks damaged, stop and call an engineer.

Conclusion

Regularly cleaning and maintaining your oven is essential for both its appearance and performance. By following this ultimate guide, you can ensure that your oven remains in optimal condition, providing efficient and safe cooking for you and your family. This is the best way to clean a fan-assisted oven

Taking the time to clean the interior, including oven racks and trays, the door, glass, and the ventilation system will not only enhance the efficiency of your oven but also prevent any buildup of dirt, grease, and bacteria.

Remember to follow safety precautions, gather the necessary supplies, and choose the right cleaning solutions for your oven. By incorporating a regular cleaning schedule and implementing preventive measures, you can enjoy efficient and safe cooking while maintaining the longevity of your oven.

I really hope you enjoyed the article. For all your kitchen needs, please check out The Ultimate List of Kitchen Essentials For a New Home

Filed Under: Helpful Kitchen Tips Tagged With: Cleaning, Fan-Assisted, Guide, Oven

10 Creative Uses for a Food Processor

Last Updated July 26, 2023

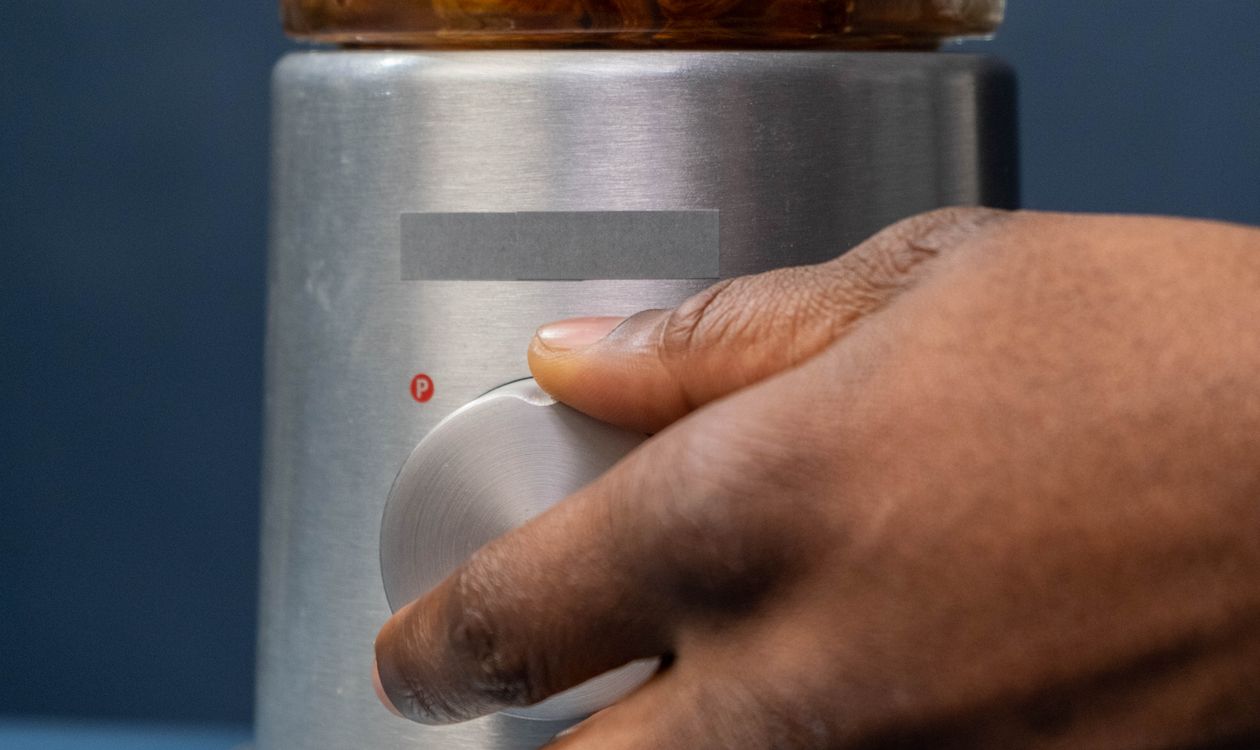
Hand pressing the pulse button on a food processor
Full guide: Best Food Processor 2026
Part of my food processor guide — all reviews, comparisons, and buying advice in one place.

Most people use a food processor for chopping and pureeing and stop there. They will do considerably more than that — here are 10 uses that go past the basics, each one solving a specific prep problem rather than just being a party trick.

I earn a commission if you buy through the Amazon links below, at no extra cost to you.

A food processor handles chopping and slicing faster than almost any other kitchen tool. Say goodbye to endless hours spent with a knife in hand. With just a few pulses, you can have perfectly diced onions, sliced tomatoes, or finely minced herbs. It cuts real prep time, especially for anything that would otherwise mean ten minutes with a knife.

But that’s not all! A food processor can also tackle more complex tasks, like making homemade sauces and dips. Have you ever wanted to whip up your own pesto, hummus, or salsa?

Well, with a food processor, it’s easier than ever. Just toss in the ingredients, give it a whirl, and voila – you’ve got a delicious, homemade dip or sauce to impress your guests.

The possibilities are truly endless with a food processor. From making your own nut butters and grinding spices to creating creamy soups and even kneading dough, this kitchen gadget can do it all. So, if you’re ready to take your culinary skills to new heights and save yourself some precious time and effort in the kitchen, keep reading — this is only scratching the surface of what a food processor can do.

If you need help picking the perfect food processor please check out my in-depth Best Blender Food Processor Combo review.

10 Creative Uses for a Food Processor

Most people associate a food processor with chopping and pureeing. It can do a lot more than that, and the ten uses below cover jobs most owners never try with it.

Food processor bowl with fresh ingredients ready for prep

Making Dough

Bread Dough

One of the most popular uses for a food processor is making bread dough. You can easily combine all the ingredients in the processor and let it knead the dough for you. This saves you time and effort, and ensures that your bread comes out perfectly every time. With your food processor, you can make artisanal breads, bagels, and even homemade pizza crust.

Pizza Dough

Speaking of pizza crust, a food processor can also be used to make the perfect pizza dough. Simply mix together flour, yeast, water, salt, and olive oil in the processor, and let it do the work for you. You can customize your pizza dough by adding herbs or spices to give it a unique flavor.

Pie Crust

If you’re someone who loves to bake pies, you’ll be pleased to know that a food processor can help you create the flakiest pie crust. By pulsing together flour, butter, sugar, and salt in the processor, you can achieve the perfect crumbly texture. This saves you from having to manually cut in the butter, making the process much quicker and easier.

Pureeing and Chopping

Chopping Vegetables

Chopping vegetables can be a tedious and time-consuming task, but with a food processor, it becomes a breeze. Simply toss your vegetables into the processor, and within seconds, they will be finely chopped and ready to use in your recipe. This is especially handy when making dishes like salsa or stir fry, where you need evenly chopped vegetables.

Pureeing Soups

If you enjoy making creamy soups, a food processor can be your best friend. After cooking your vegetables, simply transfer them to the processor and blend until smooth. This creates a creamy texture without the need for added cream or butter. It’s a great way to make healthy, homemade soups that are also delicious.

Making Salsa

Salsa is a popular condiment that can be enjoyed with tortilla chips, tacos, or as a topping for various dishes. Making salsa from scratch is simple with a food processor. Just toss in tomatoes, onions, garlic, cilantro, and any other ingredients you desire, and blend until you reach your desired consistency. You can have fresh, homemade salsa in a matter of minutes.

Shredded cheese and vegetables made with a food processor

Grinding

Spices

Grinding your own spices at home allows you to achieve a fresher and more flavorful result. A food processor comes in handy for this task. Whether you’re grinding whole spices like cumin seeds or making a spice blend, the processor can quickly and efficiently grind them to your desired consistency.

Nuts

Using a food processor to grind nuts is a great way to make your own nut butter or add a crunchy texture to baked goods. Whether you want to make almond butter, cashew butter, or simply finely chop nuts for a recipe, the processor can do it all. Just make sure not to over-process, as it may turn the nuts into a paste.

Coffee Beans

If you’re a coffee lover, you’ll be pleased to know that a food processor can be used to grind your own coffee beans. Simply pulse the beans until they reach your desired grind size. This allows you to have freshly ground coffee every morning, ensuring maximum flavor in every cup.

Making Homemade Nut Butter

Peanut Butter

Store-bought peanut butter often contains added sugars and preservatives. By making your own peanut butter in a food processor, you have full control over the ingredients. Just blend roasted peanuts until they reach a smooth and creamy consistency, and you’ll have delicious homemade peanut butter.

Almond Butter

Almond butter is another popular nut butter that can easily be made using a food processor. Just like with peanut butter, blend roasted almonds until smooth and creamy. You can customize your almond butter by adding a pinch of salt or a drizzle of honey for added flavor.

Cashew Butter

Cashew butter has a creamy and rich flavor that can be enjoyed on toast, in smoothies, or as a dip for fruits and vegetables. With your food processor, you can easily make your own cashew butter by blending roasted cashews until smooth. It’s a great alternative for those with peanut allergies.

Homemade nut butter blended in a food processor

Whipping Cream and Eggs

Whipped Cream

Making whipped cream by hand can be tiring and time-consuming. With a food processor, you can whip cream quickly and effortlessly. Simply add chilled cream and a sweetener of your choice to the processor, and blend until soft peaks form. It’s a great way to add a dollop of creamy goodness to your desserts.

Whipped Egg Whites

When making desserts like mousse or soufflés, whipped egg whites are often required for a light and airy texture. Instead of whisking by hand, a food processor can do the job in half the time. Just add the egg whites to the processor, and let it whip until stiff peaks form. It saves the arm work of whipping egg whites by hand.

Shredding and Grating

Cheese

Grating cheese can be a messy and time-consuming task, but with a food processor, it becomes a breeze. Simply cut your cheese into cubes and pulse in the processor until finely grated. You can now easily sprinkle the grated cheese on your favorite dishes or make a delicious cheesy sauce.

Carrots

Whether you’re making carrot cake or adding shredded carrots to a salad, a food processor can come in handy for shredding. Just peel and chop the carrots into pieces, and pulse in the processor until they reach your desired shred size. It’s a great way to save time and effort in the kitchen.

Potatoes

If you love making homemade hash browns or potato pancakes, a food processor can make the process much easier. By using the grating attachment, you can quickly shred potatoes for your recipe. It saves you from the laborious task of grating potatoes by hand, making breakfast preparation a breeze.

Making Nut Flours

Almond Flour

Almond flour is a popular gluten-free alternative to regular flour. You can easily make your own almond flour at home using a food processor. Just blend blanched almonds until they reach a fine, powdery consistency. It’s a great option for those who follow a gluten-free or low-carb diet.

Coconut Flour

Coconut flour is another gluten-free flour that can be made using a food processor. Simply blend shredded coconut until it turns into a fine powder. It’s a great option for adding a coconut flavor to your baked goods or thickening sauces and gravies.

Making Ice Cream

Basic Vanilla Ice Cream

Did you know that you can make your own ice cream using a food processor? By blending together frozen bananas, milk (or a dairy-free substitute), and vanilla extract, you can create a delicious and healthy alternative to traditional ice cream. It’s a great treat for those looking to indulge in something sweet without the guilt.

Chocolate Ice Cream

For all the chocolate lovers out there, a food processor can help you make the most decadent chocolate ice cream. By adding cocoa powder and sweetener to your basic vanilla ice cream mixture, you can create a rich and velvety chocolatey treat. It’s the perfect dessert for any occasion.

Fruit Sorbet

If you prefer a lighter and fruitier dessert, a food processor can help you make refreshing fruit sorbets. Simply blend together frozen fruits of your choice, a sweetener if desired, and a splash of citrus juice. You will have a fresh sorbet in minutes without an ice cream maker.

Making Smoothies and Milkshakes

Fruit Smoothies

Smoothies are a quick and nutritious way to start your day or enjoy as a snack. A food processor can effortlessly blend together your favorite fruits, yogurt, and a liquid of your choice to create a thick and creamy smoothie. It’s a great way to sneak in those extra servings of fruits and vegetables.

Green Smoothies

If you’re looking to boost your intake of leafy greens, a food processor can help you make a delicious green smoothie. By blending together spinach or kale with fruits, yogurt, and a liquid, you can create a nutrient-packed drink without the grainy texture a blender sometimes leaves behind. It’s a great way to incorporate more greens into your diet.

Chocolate Milkshakes

A food processor can also make indulgent chocolate milkshakes. Simply blend together milk, ice cream, cocoa powder, and a sweetener of your choice until smooth and frothy. It’s a great treat for those special occasions or when you’re craving something sweet.

Conclusion

A food processor earns its counter space through range, not any single feature: dough, spice grinding, nut butter, shredding, and ice cream all run through the same base and blade. If yours has been sitting in a cabinet, these ten uses are a reasonable place to start putting it back into regular rotation. For picking a model or upgrading an old one, see my best food processor picks.

Frequently Asked Questions

Can a food processor replace a stand mixer?

Partially. A food processor handles dough, whipped cream, and egg whites well, but it lacks a stand mixer’s paddle and whisk attachments for tasks like creaming butter and sugar for cakes. For occasional baking, a food processor covers most needs; frequent bakers still benefit from a dedicated stand mixer — see my best stand mixer guide.

Is it safe to grind coffee beans in a food processor?

Yes, though the grind will be less consistent than a dedicated coffee grinder, which matters most for espresso. For drip coffee or French press, a food processor’s pulse function gets close enough for most people.

Why is my food processor struggling to make nut butter?

Nut butter takes longer than most people expect — often 5-10 minutes of processing with scrape-downs in between, as the nuts go through a crumbly stage before releasing their oils. A processor under 500 watts may also just be underpowered for the job.

Can I use a food processor to make ice cream without an ice cream maker?

Yes — frozen fruit blended in a food processor produces a soft-serve consistency in a few minutes, which is the basis for most “nice cream” and quick sorbet recipes. It will not have the same texture as a churned custard-based ice cream, but it is a genuine shortcut for fruit-based desserts.

All ten of these uses assume a sharp S-blade — if your results have turned mushy lately, read how to sharpen food processor blades first.

Filed Under: Helpful Kitchen Tips Tagged With: Creative Uses, Food Processor, Kitchen Appliances

The Best Way To Clean A Toaster Oven

Last Updated March 9, 2023

The best way to clean a toaster oven

This post contains affiliate links. If you buy through my links, I may earn a commission at no extra cost to you. Read the full disclosure.

Toaster ovens handle toast, reheating, and small bakes, but they can be difficult to clean. Discover the best way to keep your toaster oven in tip-top shape with this helpful guide. If you’re shopping for a new one, see my convection toaster oven comparison.

Cleaning the full-size version is a different job — my guide to cleaning a fan-assisted oven covers the fan housing, ventilation and door glass.

For all your kitchen needs please check out my ultimate kitchen utensils list.

What is the best way to clean a toaster oven?

The best way to clean a toaster oven is to start by unplugging it and allowing it to cool completely. Then, use a damp cloth or sponge to wipe down the exterior of the oven and remove any crumbs or food particles.

Next, you can use a soft-bristled brush or a toothbrush to clean the interior of the toaster oven, paying special attention to the crevices and corners. Once you’ve scrubbed the interior, use a damp cloth to wipe away any residue. For tougher stains, you can use a mild, non-abrasive cleaner.

To clean the toaster oven racks, soak them in hot, soapy water for 10-15 minutes. Then, scrub them with a sponge or brush to remove any stuck-on food particles. Finally, rinse them off with warm water and dry them with a clean cloth.

Use a dry cloth to dry the entire toaster oven before plugging it back in and using it again.

How often should you clean your toaster oven?

Toaster ovens should be cleaned thoroughly at least once a month.  Regular maintenance is key to keeping your toaster oven looking and functioning at its best. After each use, use a dry kitchen cloth to wipe away crumbs or other food bits that could clog up its crevices, creating fire hazards.

Cleaning your toaster oven regularly will help keep it functioning properly and reduce the risk of fire. The microwave earns the same habit for different reasons — my guide to cleaning a microwave oven covers lifting baked-on splatter with steam rather than scrubbing.

What is the best cleaning product to use on a toaster oven?

The best cleaning product to use on a toaster oven is an all-purpose cleaner. All-purpose cleaners are specially formulated to be safe for use on most surfaces and can be used to clean the interior and exterior of a toaster oven.

Be sure to read the instructions on the label to ensure that it is safe for use on your particular model. To clean the exterior, spray the cleaner onto a damp cloth and wipe down the outside of the toaster oven. For the interior, spray the cleaner directly onto the surface and wipe away any residue.

The product I would most recommend is Method All-Purpose cleaner. It’s biodegradable, which is an added bonus. However, you could also use a homemade solution, which is equally as effective.

The best homemade cleaning product to use on a toaster oven is a combination of baking soda and vinegar. Start by sprinkling baking soda liberally over the interior of the toaster oven and then spray with a mixture of 1 part white vinegar to 3 parts water.

Let the mixture sit for 5 minutes, then use a damp cloth to wipe away the baking soda and vinegar. This will help remove any grease and grime. For tougher stains, use a paste of baking soda and water and let it sit for 10-15 minutes before wiping clean. To finish, use a dry cloth to buff the surface and make sure all residue is gone.

How do I keep the bottom of my toaster oven clean?

Keeping the bottom of your toaster oven clean is an important part of its maintenance. The best way to do this is by regularly wiping it down with a damp cloth or sponge. If there are any stubborn stains, use a scrub brush and some baking soda and water to remove them.

You should also empty the crumb tray after every use, as this will help prevent the buildup of grease and food particles. Finally, you can use a vacuum cleaner to suck up any loose debris that may have accumulated in the nooks and crannies of the toaster oven.

How do I clean a stained toaster oven tray?

Cleaning a stained toaster oven tray can be a daunting task, but it doesn’t have to be. The best way to clean a toaster oven tray is to use a combination of baking soda and white vinegar. Start by sprinkling baking soda on the tray, then spritz the tray with white vinegar.

Allow the mixture to sit for 15 minutes, then scrub the tray with a sponge or brush. Rinse the tray with warm water and dry it with a towel. If the stains are still present, repeat the process until the stains are gone.

How do I clean the glass on a toaster oven?

Cleaning the glass on a toaster oven is a simple process. First, unplug the toaster oven and let it cool completely. Then, use a damp cloth to remove any crumbs or residue. If there is stubborn dirt or grease, use mild dish soap and warm water to scrub the glass.

Finally, dry the glass with a clean cloth. Be sure not to use any abrasive cleaners or sponges that could scratch the glass. Additionally, make sure to clean the outside of the toaster oven as well. Use a damp cloth to wipe off any dust or dirt.

Once the glass is clean, you can use a dry paper towel to buff away any streaks or smudges. If any burnt-on grease remains, use a razor blade to scrape it away gently.

Once the glass is clean, it’s time to give it a shiny sheen. You can do this with either a spray bottle or by dipping coffee filters into an alcohol mixture to clean the surface.

Finally, plug the toaster oven back in and you’re done! Be sure to clean the glass regularly to keep your toaster oven looking like new.

If you enjoyed this article, please check out How Does A Microwave Toaster Oven Combo Work?


Shopping for a new one instead? My toaster oven buying guide covers what to look for and links to my picks.

Filed Under: Helpful Kitchen Tips

  • « Go to Previous Page
  • Page 1
  • Interim pages omitted …
  • Page 12
  • Page 13
  • Page 14
  • Page 15
  • Page 16
  • Page 17
  • Go to Next Page »

Recent Articles

  • Cuisinart DLC-10SYP1 Review: Durable, But a Newer Bowl
  • COSORI Pro Gen 2 Review: Big Basket, Fragile Handle
  • Dash Tasti-Crisp Review: Cheap, but the Coating Wears Fast
  • Chefman TurboFry Touch Review: Cheap, but the Coating Wears
  • Chef’sChoice 15XV Review: Very Sharp, With Scratch Reports

Search


HOME          Contact          Affiliate Disclosure          Terms of Service          Privacy Policy


kitchenwarecompare.com is a participant in the Amazon Services LLC Associates Program, an affiliate advertising program designed to provide a means for sites to earn advertising fees by advertising and linking to Amazon.com, Endless.com, MYHABIT.com, SmallParts.com, or AmazonWireless.com. Amazon, the Amazon logo, AmazonSupply, and the AmazonSupply logo are trademarks of Amazon.com, Inc. or its affiliates. As an Amazon Associate I earn from qualifying purchases.


Copyright © 2026 kitchenwarecompare.com, ALL RIGHTS RESERVED.