• Skip to primary navigation
  • Skip to main content
  • Skip to primary sidebar

Kitchenware Compare

  • Home
  • Product Reviews
    • Air Fryers
    • Coffee
    • Cookware
    • Flat Top Grills
    • Meat Thermometers
    • Food Processors
    • Knives
    • Pizza Ovens
    • Toaster Ovens
    • Juicers
  • Food Blog
  • Helpful Kitchen Tips
  • Data Studies
  • About
  • How We Review
  • Contact
You are here: Home / Archives for Helpful Kitchen Tips

How to Calibrate a Meat Thermometer (Ice Water Method + More)

Last Updated July 5, 2026

Using a digital probe thermometer while cooking

The quick answer

The ice water method is the standard way to calibrate any meat thermometer: fill a glass with ice, add cold water, stir, and insert the probe. After 30 seconds it should read 32°F (0°C). If it doesn’t, adjust your thermometer’s calibration dial or note the offset. Most quality digital thermometers don’t need manual calibration — they hold accuracy well unless dropped or exposed to extreme heat.

An inaccurate thermometer is worse than no thermometer at all — it gives you false confidence. If your probe says 165°F and your chicken is actually at 155°F, you have a food safety problem. If it says 135°F when the actual temperature is 145°F, you’ll overcook your steak chasing a doneness you’ve already passed.

Here’s how to check your thermometer’s accuracy, how to adjust it if it’s off, and when to replace it entirely.


The ice water method

This is the most reliable calibration check for home use. Ice water holds a stable temperature of exactly 32°F (0°C) at sea level regardless of how much ice or water you add, provided ice is still present. This makes it a perfect reference point.

How to do it:

  1. Fill a tall glass or container completely with ice cubes. Don’t use ice chips — the cubes hold their shape longer.
  2. Add cold tap water until the glass is almost full. The water should reach the top of the ice without overflowing.
  3. Stir the mixture for 15 seconds to equilibrate the temperature.
  4. Insert the probe into the centre of the ice water mixture, making sure the tip is not touching the bottom or sides of the glass. The sensing area must be submerged.
  5. Wait 30 seconds without stirring, then read the temperature.
  6. A correctly calibrated thermometer reads 32°F (0°C). An accuracy of ±1–2°F is acceptable for most thermometers.
At high altitude (above 1,500 feet), the boiling point of water is lower than 212°F, but the freezing point of water does not change with altitude. The ice water method works accurately at any elevation.

The boiling water method

Boiling water provides a second reference point, but altitude affects its usefulness. At sea level, water boils at exactly 212°F (100°C). At 5,000 feet (Denver, Colorado), water boils at approximately 202°F. At 7,000 feet (Santa Fe), it’s around 199°F.

If you live at or near sea level, this method is reliable. If you live at high altitude, look up your local boiling point before using this method, or stick to the ice water test.

How to do it:

  1. Bring a pot of water to a full, rolling boil.
  2. Insert the probe into the boiling water, making sure the tip is submerged but not touching the pot.
  3. Wait 30 seconds and read the temperature.
  4. At sea level, it should read 212°F (100°C). At your local altitude, adjust the expected reading accordingly.

How to adjust a thermometer that’s off

Dial (bimetallic) thermometers

Traditional dial thermometers have a calibration nut under the dial face. When the probe is submerged in ice water and reading an incorrect temperature, use pliers or the calibration wrench that came with the thermometer to rotate the dial until it reads 32°F. This type of thermometer can drift and should be checked regularly.

Digital instant-read thermometers

Most modern digital thermometers either have a calibration button (which resets the reading to 32°F when pressed while in ice water) or they don’t offer field calibration at all. Check your thermometer’s manual. If there is no calibration function and the thermometer is consistently off by more than 2°F, note the offset and adjust mentally — or replace the thermometer.

Wireless/Bluetooth thermometers (MEATER, ThermoPro, etc.)

Wireless probe thermometers like MEATER are factory-calibrated and generally do not offer user calibration. If your MEATER probe is reading noticeably off (more than 2°F in ice water), contact the manufacturer. These probes use silicon nitride ceramic tips and precision sensors; if the calibration has drifted significantly, the probe may need replacement. MEATER’s app does include a probe check feature that can flag sensors that have drifted out of spec. For my tested picks across the MEATER range and competitors, see my best Bluetooth meat thermometer guide.


When to replace instead of calibrate

Some signs indicate a thermometer has failed and should be replaced rather than calibrated:

  • Inconsistent readings: If you get a different number each time you test in the same ice water without moving the probe, the sensor has failed.
  • Off by more than 5°F consistently: A thermometer that far out of spec may have a damaged sensor.
  • Physical damage: A bent probe, cracked housing, or water inside the display indicates the unit is compromised.
  • After a drop: Dropping a thermometer — especially onto a hard surface — can damage the sensor or displace the bimetallic spring in dial thermometers.
  • After extremely high heat exposure: Probe tips damaged by flame or excessive ambient heat (such as placement too close to a grill burner) can produce permanently inaccurate readings.

A good meat thermometer costs between $15 and $100. The cost of a foodborne illness — or a ruined $80 brisket — is significantly higher. Replace a suspect thermometer.


How often should you calibrate?

For instant-read digital thermometers: check calibration every few months, or whenever you suspect an inaccurate reading. These hold calibration well unless dropped or subjected to extreme conditions.

For dial thermometers: check before any important cook. Dial thermometers drift more easily and the calibration nut can shift during transport or handling.

For wireless probe thermometers: check once a season, or if your cooked food consistently seems over- or under-done relative to the probe readings. Test with ice water exactly as described above. See my full meat thermometer buying guide for how this compares across the whole category.

Quick routine: keep a glass, some ice, and water near your prep area. Thirty seconds before you start cooking, dip your probe. If it reads 32°F, cook with confidence.

Related guides

Related: Best Bluetooth Meat Thermometer 2026
Related: Meat Temperature Guide: Safe Temps for Every Protein
Related: Are Wireless Meat Thermometers Accurate?

Frequently Asked Questions

How do I know if my meat thermometer is accurate?
The ice water test is the standard check: fill a glass with ice, add cold water, stir, and insert the probe. After 30 seconds, a correctly calibrated thermometer reads 32F (0C). If it reads within 1-2F of this, the thermometer is accurate enough for cooking. If it’s off by more than 2-3F consistently, it needs calibration or replacement.

Can I calibrate a digital meat thermometer?
It depends on the model. Some digital thermometers have a dedicated calibration button or setting — check your manual. Others, including most wireless Bluetooth thermometers like MEATER, are factory-calibrated and don’t offer field adjustment. If a non-adjustable digital thermometer is consistently off by more than 2F, note the offset and adjust mentally, or replace the unit.

How do I calibrate a dial meat thermometer?
Submerge the dial thermometer probe in ice water for 30 seconds. While still submerged, use pliers or the calibration wrench (usually included) to grip the hex nut beneath the dial face and rotate it until the dial reads 32F. This resets the bimetallic spring to the correct reference point. Verify by removing and reinserting the probe.

Does dropping a thermometer affect its accuracy?
Yes, significantly. Dropping a dial thermometer can displace the bimetallic spring and cause it to read incorrectly. Dropping a digital thermometer can damage the temperature sensor or loosen internal connections. Always check calibration after dropping a thermometer before trusting its readings for cooking.


Filed Under: Helpful Kitchen Tips

Are Wireless Meat Thermometers Accurate? (Honest Answer)

Last Updated July 5, 2026

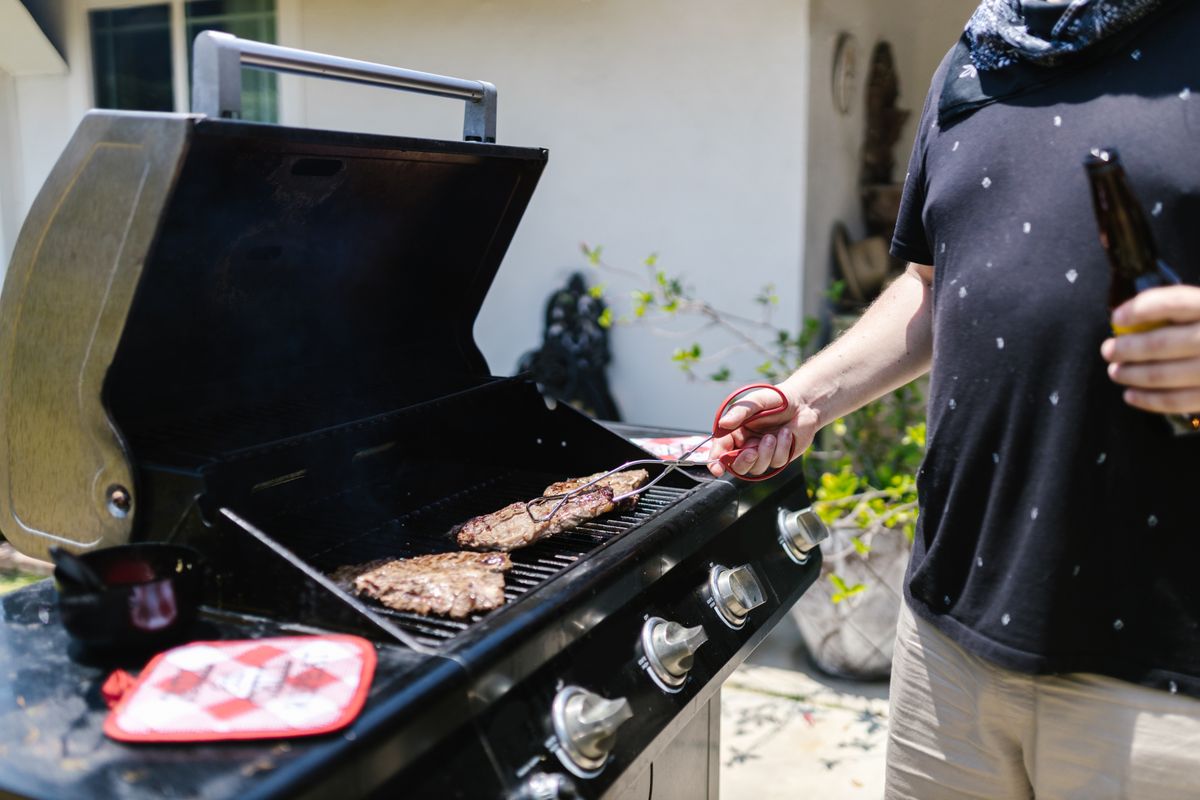
Grilling sausages on an outdoor barbecue

The quick answer

Yes — quality wireless meat thermometers are genuinely accurate, typically within ±1°F (±1°C) under normal conditions. MEATER, ThermoPro, and Inkbird all publish and deliver this level of accuracy. The main variables that affect readings are probe placement, oven calibration (not the thermometer’s fault), and how far the probe tip is from bone or fat. The thermometer itself is rarely the problem.

This is one of the most searched questions about wireless thermometers, and it’s a fair one. You’re trusting a wireless device to tell you whether a piece of meat is safe to eat and cooked to the texture you want. The question of whether to trust it matters.

The short answer is: modern wireless meat thermometers are accurate. The longer answer explains why, what affects that accuracy, and how to get the best readings from any probe thermometer. Every model I reference in this article is tested in depth in my best Bluetooth meat thermometer roundup.


Published accuracy specs from major brands

Brand / Model Published Accuracy Sensor Type Probe Material
MEATER Plus ±1°C (±1.8°F) Dual-sensor ceramic Silicon nitride
MEATER Pro Duo ±1°C (±1.8°F) Dual-sensor ceramic Silicon nitride
TempPro TempSync ±1°C (±1.8°F) NTC thermistor Stainless steel
ThermoPro TP20 ±1°C (±1.8°F) NTC thermistor Stainless steel
Inkbird IBT-4XS ±1°C (±1.8°F) NTC thermistor Stainless steel
Weber iGrill 3 ±1.5°C (±2.7°F) NTC thermistor Stainless steel

All of these are well within the margin needed for practical cooking accuracy. Chicken at 165°F is not meaningfully different from chicken at 163°F or 167°F in terms of either safety or eating quality. The ±1°F specification is more than precise enough.

For comparison: the USDA’s recommended safe temperature guidelines assume a thermometer accuracy of ±2°F. Modern wireless thermometers from reputable brands beat this specification.

What actually affects accuracy in practice

Probe placement

This is the biggest variable — not the thermometer itself. The internal temperature of a thick piece of meat varies by as much as 20–30°F between the centre and the edge. Insert the probe into the thickest part, avoiding bone, fat pockets, and the cooking surface. A correctly placed probe from a mediocre thermometer will give a better reading than a poorly placed probe from a premium one.

Bone proximity

Bone conducts heat at a different rate than muscle. A probe tip resting against or near bone will read higher than the surrounding muscle temperature. Always keep the probe tip at least half an inch from any bone.

Fat pockets

Intramuscular fat melts at lower temperatures than muscle proteins cook. A probe in a fat pocket reads the fat temperature, not the muscle. In marbled cuts (brisket, ribeye), take multiple readings at different insertion points.

Ambient temperature measurement (for wireless probes with dual sensors)

Probes like MEATER measure both internal meat temperature and ambient oven/grill temperature simultaneously. The ambient sensor is exposed to direct flame and radiant heat, which can affect its accuracy if the probe is placed too close to a burner or hot spot. The internal sensor (at the probe tip, inside the meat) is insulated from this and remains accurate throughout.

Probe condition

A damaged probe tip — bent, corroded, or exposed to extreme direct flame — can read inaccurately. Check your probe before each use. Stainless steel probes (ThermoPro, Inkbird, Weber) are highly durable. Ceramic-tipped probes (MEATER) are hard and heat-resistant but can crack if dropped on a hard surface.


Independent test results

Third-party testing of major wireless thermometers consistently confirms manufacturer accuracy specs. MEATER probes tested in controlled ice water and boiling water conditions have performed within ±1°C. ThermoPro and Inkbird units tested the same way have also come within their published specs in the majority of units reviewed.

Where wireless thermometers do occasionally fall short is in Bluetooth range rather than temperature accuracy. A probe that’s dropped its connection and is showing a cached (stale) temperature reading isn’t inaccurate — it’s not reading. This is a connectivity issue, not a sensor issue, and modern thermometers have significantly improved in this area.

The practical conclusion from real-world testing: if your wireless thermometer tells you your chicken is at 165°F, it is very likely at 165°F ±2°F. That is accurate enough for safe, consistent cooking.


When a wireless thermometer might give a misleading reading

Carry-over cooking during rest: The probe reading continues to rise after the meat comes off the heat. This is real physics, not inaccuracy — the meat is genuinely getting hotter. Pull your meat before your target temperature.

Stall (in smoking): During the barbecue stall, the internal temperature can plateau for hours and even temporarily drop slightly as evaporative cooling counters heat gain. The thermometer is accurately measuring what’s happening.

Reading before equilibration: Insert the probe and wait 5–10 seconds before reading. Instant-read thermometers reach their displayed temperature quickly, but probe thermometers that have been cold can take a few seconds to equilibrate to the surrounding meat temperature.

Cheap or damaged units: Budget thermometers with no published accuracy spec and no brand reputation behind them are where inconsistency is genuinely found. Buying from a reputable brand with a stated accuracy specification is the most reliable way to ensure accuracy. See my full meat thermometer buying guide for how this compares across the whole category.


Related guides

Related: Best Bluetooth Meat Thermometer 2026
Related: Meat Temperature Guide: Safe Temps for Every Protein
Related: How to Calibrate a Meat Thermometer
Related: Bluetooth vs Wi-Fi Meat Thermometers

Frequently Asked Questions

Are wireless meat thermometers as accurate as wired ones?
Yes. The accuracy of a meat thermometer depends on its sensor quality and calibration, not whether it transmits wirelessly. Premium wireless thermometers (MEATER, ThermoPro) achieve +/-1C accuracy — the same specification as the best wired probes. The wireless transmission carries the temperature data; it does not affect how the temperature is measured.

How accurate is the MEATER thermometer?
MEATER publishes a +/-1C (+/-1.8F) accuracy spec for all its probes. Independent tests confirm this. The dual-sensor design measures both internal meat temperature and ambient cooking temperature simultaneously, and both sensors perform within this specification under normal cooking conditions.

Can I trust a meat thermometer for food safety decisions?
Yes, if it’s from a reputable brand with a published accuracy spec. USDA temperature guidelines assume a thermometer accuracy of +/-2F. Quality wireless thermometers from brands like MEATER, ThermoPro, and Inkbird all achieve +/-1F or better, making them reliable tools for food safety decisions.

Why is my wireless thermometer giving different readings than I expect?
The most common causes are probe placement (measuring too close to bone or fat), reading before the probe has equilibrated (wait 5-10 seconds after insertion), or carry-over cooking (temperature continues rising after leaving the heat). The thermometer itself is rarely the cause of unexpected readings in quality units.


Filed Under: Helpful Kitchen Tips

Bluetooth vs Wi-Fi Meat Thermometers: Which Should You Buy?

Last Updated July 5, 2026

Meat skewers grilling over an open flame

The quick answer

For most home cooks, Bluetooth is enough. A 100–165 foot range covers the average backyard and kitchen. Choose Wi-Fi if your grill is far from your house, you do overnight low-and-slow cooks, or you want to monitor from anywhere. The practical difference is range and whether you need to stay near a window.

Wi-Fi thermometers cost more and require your home network. Bluetooth thermometers are simpler and cheaper, but tether you to within a certain range. The right answer depends entirely on how you cook and where you cook it.


Side-by-side comparison

Feature Bluetooth Wi-Fi
Typical range 30–165 ft (10–50m) Unlimited (anywhere with phone signal)
Setup complexity Simple — pair to phone Requires home Wi-Fi network setup
Price premium Baseline Typically $50–100 more
Works outside home? No (out of range) Yes — monitor from anywhere
Network dependency None Requires active Wi-Fi and power
App quality Generally good Generally good
Battery life Similar Slightly shorter (Wi-Fi draws more power)
Best for Backyard grilling, kitchen oven Large property, overnight smokes, travel monitoring

When Bluetooth range is enough

Bluetooth meat thermometers typically reach 30 to 165 feet depending on the model and conditions. Walls, floors, and obstacles reduce range. The MEATER Plus advertises 165 feet; in real-world indoor/outdoor conditions with walls in between, 50–80 feet is more realistic.

For most cooks, Bluetooth is completely adequate:

  • Grilling on a patio or deck while inside the house — typically 20-40 feet, easily within Bluetooth range
  • Oven roasting — you’re in the same house as the oven; there’s no range problem
  • BBQ in a standard-sized backyard — 50-80 feet covers most situations
  • Camping or tailgate — you’re already near the grill

The MEATER Plus ($79.95) is the best Bluetooth-only option for most people. Its 165-foot range, dual-sensor probe, and guided cook app cover the vast majority of home cooking scenarios without the complexity or cost of Wi-Fi. For a full head-to-head test of the top five Bluetooth models, see my best Bluetooth meat thermometer guide.


When Wi-Fi is worth the upgrade

Wi-Fi thermometers (like the MEATER Pro Duo) use your home network as a bridge to send temperature data to the cloud. You can then check your meat temperature from anywhere with a phone signal — across town, at the grocery store, at a neighbour’s house.

Wi-Fi becomes genuinely valuable in these situations:

  • Large properties: If your smoker or grill is more than 100 feet from where you’ll be inside, or separated by multiple walls, Bluetooth may drop. Wi-Fi eliminates range as a concern entirely.
  • Overnight low-and-slow cooks: Brisket takes 12–18 hours. You don’t want to sleep near a window to maintain Bluetooth range. Wi-Fi means you can monitor from the bedroom or check on your phone when you wake up at 3am.
  • Long smokes that run while you’re out: Leave a brisket smoking and run errands. Wi-Fi thermometers can send push notifications and let you monitor from your car or a shop.
  • Peace of mind for critical cooks: If you’re cooking for a large group and can’t afford a mistake, the ability to monitor from anywhere adds confidence.

The MEATER Pro Duo ($179.95) is the leading Wi-Fi-capable wireless probe thermometer. It adds 1,600-foot Wi-Fi range and two probes to the MEATER feature set. ThermoWorks also makes Wi-Fi-enabled probes at the higher end of the price range.


The hybrid approach: Bluetooth with Wi-Fi extender

Some thermometer systems (notably the MEATER Block) include a dedicated Wi-Fi hub that bridges Bluetooth to Wi-Fi without requiring each probe to connect to Wi-Fi directly. You place the Block hub near the grill; the probes connect to it via Bluetooth, and the Block relays data to your phone via Wi-Fi. This gives you Wi-Fi-equivalent range using Bluetooth probes.

This is a good option if you want to expand a Bluetooth setup without replacing your probes. However, it requires the hub to be powered (plugged in) and within Bluetooth range of the probes.


What about cellular thermometers?

A small number of thermometers use cellular connectivity (like a GPS tracker) rather than requiring your home Wi-Fi. These work anywhere with a cellular signal and don’t need your Wi-Fi at all. They typically require a monthly subscription and are aimed at commercial or professional use. For home cooking, they’re not necessary and are priced accordingly.


My recommendation

Buy Bluetooth if: you grill in a standard backyard, cook indoors, or do short-to-medium length cooks where you’re near the cooking setup. The MEATER Plus is the benchmark.

Buy Wi-Fi if: you do overnight low-and-slow smoking, have a large property, or want the ability to genuinely step away and monitor remotely. The MEATER Pro Duo is the right choice here.

Don’t pay for Wi-Fi range you won’t use. But if overnight smokes are part of how you cook, Wi-Fi will change your relationship with them. See my full meat thermometer buying guide for how this compares across the whole category.


Related guides

Related: Best Bluetooth Meat Thermometer 2026
Related: MEATER Plus vs MEATER Pro Duo
Related: Are Wireless Meat Thermometers Accurate?
Related: Meat Temperature Guide

Frequently Asked Questions

What is the range of a Bluetooth meat thermometer?
Most Bluetooth meat thermometers have a stated range of 30-165 feet (10-50 metres). Real-world range is typically lower than the stated maximum due to walls, floors, and interference. The MEATER Plus advertises 165 feet; in practice, 50-100 feet is more realistic through typical home walls. For most backyards and indoor oven cooks, this is more than sufficient.

Do Wi-Fi meat thermometers work without Wi-Fi?
No. Wi-Fi thermometers require an active Wi-Fi connection to relay data beyond Bluetooth range. Without Wi-Fi, they revert to Bluetooth-only mode and work within normal Bluetooth range. If your home Wi-Fi goes down during a cook, the thermometer will still monitor locally via Bluetooth, but remote monitoring will stop.

Is MEATER Bluetooth or Wi-Fi?
The MEATER Plus is Bluetooth only, with a 165-foot range. The MEATER Pro Duo adds Wi-Fi connectivity via its charging dock, giving it a range of up to 1,600 feet (approximately unlimited for home use). The older MEATER Block also adds Wi-Fi bridging to standard MEATER probes.

Can I use a Bluetooth meat thermometer in my kitchen oven?
Yes. Kitchen oven use is one of the best applications for Bluetooth thermometers — you’re typically in the same room or nearby, well within Bluetooth range, and the wireless connection removes the need for a trailing wire through the oven door seal. All major wireless probe thermometers (MEATER, ThermoPro, Inkbird) are designed for oven use as well as outdoor grilling.


Filed Under: Helpful Kitchen Tips

Are Expensive Kitchen Appliances Worth It? We Analyzed 602 Products

Last Updated July 3, 2026

High-end built-in kitchen appliances in a luxury white kitchen

Short answer: no. We collected prices, star ratings, and review counts for 602 kitchen products across five categories — representing over 2.6 million owner ratings — and found that price has zero, or slightly negative, correlation with owner satisfaction in every single category. The most expensive espresso machines rate worse than the cheapest ones.

This article contains no affiliate links. It’s a data study — cite it, argue with it, or use it to win a kitchen-budget debate. Journalists and bloggers: the data and methodology below are free to reference with a link.

Key Findings

  • Across 602 products and 2,627,171 owner ratings, the correlation between price and star rating ranged from −0.15 to +0.015 — statistically, price tells you almost nothing about how happy you’ll be
  • Espresso machines show the strongest negative relationship: the priciest 20% (averaging $1,022) rate 4.09 stars; the cheapest 20% (averaging $70) rate 4.29
  • Air fryers: the cheapest fifth outrates the priciest fifth by 0.20 stars (4.55 vs 4.35)
  • Non-stick pans: $23 pans and $128 pans are statistically identical (4.42 vs 4.41)
  • The only premium sweet spot in the study: food processors between $100–200, which rate 4.71 — the highest of any price bucket in any category

The Numbers

Category Products Ratings represented Price ↔ rating correlation Cheapest 20% Priciest 20%
Espresso machines 158 512,289 −0.150 $70 avg → 4.29★ $1,022 avg → 4.09★
Air fryers 47 678,311 −0.135 $62 avg → 4.55★ $253 avg → 4.35★
Non-stick pans 179 702,631 −0.029 $23 avg → 4.42★ $128 avg → 4.41★
Electric kettles 171 513,314 −0.029 $21 avg → 4.37★ $108 avg → 4.38★
Food processors 47 220,626 +0.015 $35 avg → 4.55★ $622 avg → 4.48★

Correlation is Pearson’s r between buy-box price and average star rating. A value near 0 means no relationship; −1 would mean more expensive always rates worse. Data collected 3–4 July 2026.

Methodology

We collected the title, current buy-box price, average star rating, and review count for every organic (non-sponsored) product on the first four Amazon US search result pages for five category queries: “air fryer,” “non stick frying pan,” “espresso machine,” “electric kettle,” and “food processor.” We excluded sponsored placements, renewed and refurbished items, and accessories. Listings were de-duplicated, leaving 602 products. For each category we computed the Pearson correlation between price and star rating, average ratings by price bucket, and a comparison of the cheapest and priciest quintiles.

Full aggregate data is available in the tables in this article. If you want the underlying dataset for your own analysis, contact us via the contact page.

Category Detail: Where the Money Goes to Die

Espresso machines — the strongest case against spending

The priciest quintile in our espresso sample averaged $1,022 — machines with PID controllers, dual boilers, and Italian nameplates — and rates 4.09 stars. The cheapest quintile averaged $70 and rates 4.29. Some of that gap is expectation: nobody writes a furious review of a $70 machine for being a $70 machine, but a $1,400 machine that needs a warranty claim earns a one-star essay. Which is exactly the point — satisfaction is what ratings measure, and money demonstrably does not buy it here. It’s also consistent with what we found hand-reviewing machines for our best espresso machines under $200 guide: the sub-$200 bracket produces real espresso and very few regrets.

Air fryers — the budget quintile wins outright

The cheapest 20% of air fryers (averaging $62) outrate the priciest 20% (averaging $253) by a fifth of a star — 4.55 to 4.35. Air fryers are a mature, commoditized technology: a heating element, a fan, and a basket. Past $100, you’re paying for capacity, screens, and app connectivity, and the ratings say those features generate complaints as often as delight. Our air fryer guide has leaned budget-first for exactly this reason.

Non-stick pans and kettles — perfect flatlines

Both categories return correlations of −0.029 — as close to zero as real-world data gets. A $23 pan and a $128 pan make their owners equally happy (4.42 vs 4.41); a $21 kettle and a $108 kettle are statistically identical (4.37 vs 4.38). The materials science in a budget non-stick pan and a premium one is closer than the price tags suggest, and every coating dies eventually regardless of what you paid — something we cover in depth in the best non-stick pan guide. With kettles, water boils at 212°F for everyone; past that, you’re buying temperature presets and design (which our gooseneck kettle guide argues are worth it for pour-over — but the ratings say they don’t buy general satisfaction).

Food processors — the one real sweet spot

The only positive signal in the study: food processors between $100 and $200 rate 4.71 — the highest bucket anywhere in our data. This is the price band of full-size, direct-drive machines from established brands, above the flimsy entry tier but below the commercial-priced flagships that invite expectation-driven disappointment. If the study endorses spending more anywhere, it’s here — and it matches what hands-on testing found in our food processor guide.

Why Doesn’t Price Buy Satisfaction?

Three forces, all pulling the same direction. Expectations scale with price: a $40 gadget gets graded on a curve; a $400 one gets graded like a luxury purchase, and any flaw reads as betrayal. Kitchen tech is mature: heating elements, fans, motors, and non-stick coatings are solved problems — the marginal dollar buys styling and features, not function. Complexity fails: the expensive tier carries screens, apps, sensors, and pumps that create failure modes a $60 appliance physically cannot have. None of this means premium gear is bad — it means the premium buys things (durability, service, aesthetics, precision) that a star rating mostly doesn’t capture, and buyers should know that’s the trade they’re making.

What This Means When You’re Buying

Read the rating count, not the price tag. A $60 product with 40,000 reviews at 4.6 stars is one of the most thoroughly validated purchases you can make anywhere. Spend up only when a specific capability demands it — capacity, temperature control, repairability, a commercial-size portafilter — and know which capability you’re paying for. And treat 4.0–4.2-star premium products with real suspicion: at that price, the rating has already survived the expectations discount.

Limitations (Read Before Citing)

Star ratings measure satisfaction relative to expectations, not laboratory quality — a premium product can be objectively better and still rate lower. Our sample comes from Amazon’s organic search results, which favor established best-sellers, so poorly-rated products of every price are under-represented. Prices are point-in-time buy-box prices from early July 2026. And correlation, as ever, is not causation: expensive machines don’t cause dissatisfaction — they attract expectations they can’t always meet.

Frequently Asked Questions

Are expensive kitchen appliances better quality?

Sometimes — in materials, durability, and service. But across 602 products, owners of expensive appliances are not measurably happier, and in espresso machines and air fryers they’re measurably less happy.

What’s the best price range for kitchen appliances?

Our data points to the crowded middle: $50–100 for air fryers, under $100 for kettles and pans, $100–200 for food processors (the study’s single best bucket at 4.71 stars), and under $200 for a first espresso machine.

Why do cheap products have such high ratings?

Partly value-for-money grading, partly survivorship: the cheap products that reach Amazon’s first pages are the ones that already beat their price class. The junk exists — it just doesn’t rank.

How was this study conducted?

We collected price, star rating, and review count for 602 organic (non-sponsored) Amazon US listings across five categories in July 2026, then computed price-rating correlations and quintile comparisons. Full methodology is above.

Can I cite this study?

Yes — cite freely with a link to this page. For the underlying dataset, reach out via our contact page.

Filed Under: Helpful Kitchen Tips

Ductless Range Hoods: Complete Guide to Benefits, Installation & Noise Control

Last Updated October 13, 2023

A range hood capturing steam rising from a pot on the stove

If you’re upgrading your kitchen ventilation, you’ve probably come across two options: ducted and ductless range hoods. This guide covers everything you need to know — from choosing between the two to installing your ductless hood, keeping noise levels low, and getting the most from your ventilation system. I installed a ductless hood in my own kitchen a few years back and went through the same duct-vs-ductless decision, so this covers what actually matters, not just spec sheets.

I earn a commission if you buy through the Amazon links below, at no extra cost to you.

If you already know you want a ductless hood and just need product picks, see my tested ductless range hood recommendations.

Ducted vs. Ductless Range Hoods: Key Differences

Ducted range hoods pull air through a duct in the wall or ceiling and vent it outside. They offer superior performance and are the gold standard for serious cooks.

Ductless range hoods draw air through a charcoal (activated carbon) filter that traps grease and odours, then recirculate the cleaned air back into the kitchen. No ductwork required.

Pros of Ductless Range Hoods

  • No ductwork needed — ideal for flats, rented kitchens, or any space where running ducts isn’t practical
  • Flexible placement — can be mounted almost anywhere without structural modifications
  • Lower installation cost — no contractor needed for duct work
  • Works in any building type — including high-rise apartments and older homes where duct installation isn’t possible

Cons of Ductless Range Hoods

  • Less effective at removing moisture — steam and humidity stay in the kitchen
  • Ongoing filter cost — charcoal filters need replacing every 3–6 months
  • Not ideal for very high-heat cooking — wok or commercial-burner cooking works better with ducted extraction

Benefits of Ductless Range Hood Ventilation

Removes Cooking Odours Effectively

Modern activated carbon filters are highly effective at trapping cooking smells. Fish, garlic, spices — the charcoal filter captures them before the air returns to your kitchen. High-heat cooking like searing on cast iron produces the most smoke of any home cooking method, so it’s exactly the scenario where a good hood earns its keep. Many units use multi-layer filters combining a grease mesh and a charcoal filter for maximum odour removal.

Reduces Airborne Grease

The mesh grease filter catches fat particles before they coat your cabinets, walls, and ceiling. This means less cleaning and longer-lasting kitchen surfaces — gas stoves in particular throw off more airborne grease than electric or induction, so ventilation matters more if that’s what you’re cooking on.

Easy Retrofit Installation

Because ductless hoods only need a power outlet — no external duct — they can be added to virtually any kitchen without construction work. Most installations take under two hours.

Multiple Speed Settings

Most ductless range hoods offer 3–4 fan speed settings. Use low speeds for gentle simmering and high speeds when frying or grilling to pull smoke away quickly.

How to Install a Ductless Range Hood

What You’ll Need

  • Electric drill and drill bits
  • Spirit level
  • Screwdrivers (flathead and Phillips)
  • Wall anchors (usually included with the hood)

Step 1: Choose Your Location

Position the hood 65–75 cm (26–30 inches) above an electric hob, or 75–90 cm (30–36 inches) above a gas hob. Centre over your cooking surface and mark the position lightly with a pencil.

Step 2: Find the Studs

Use a stud finder to locate studs or joists behind the wall. Attaching the bracket to a stud provides a much more secure fit than wall anchors alone.

Step 3: Attach the Mounting Bracket

Hold the mounting template against the wall and mark the drill holes. Drill pilot holes, insert wall anchors, and secure the bracket with the provided screws. Use a spirit level to ensure the bracket is perfectly horizontal.

Step 4: Connect the Wiring

Most domestic ductless range hoods plug into a standard 13A socket. If your hood is hardwired, you’ll need a qualified electrician. Switch off the circuit at the consumer unit before any wiring work.

Step 5: Install the Filters

Slide the grease mesh filter(s) into their slots — they usually click into place. Insert the activated charcoal filter behind the mesh filter.

Step 6: Hang, Secure, and Test

Lift the hood onto the mounting bracket and secure with the provided screws. Switch on at the lowest speed and check all controls work. Run through each fan speed to confirm everything functions correctly.

How to Reduce Noise Levels of Your Ductless Range Hood

Use the Lowest Effective Fan Speed

The most effective noise reduction is using the lowest fan speed that does the job. For gentle frying and simmering, speed 1 or 2 is usually sufficient and considerably quieter than maximum speed.

Keep Filters Clean

Clogged grease filters force the fan motor to work harder and run louder. Wash the metal mesh grease filter every 4–6 weeks in hot soapy water or the dishwasher. A clean filter lets air pass through more freely, reducing load on the motor and cutting noise.

Replace Charcoal Filters on Schedule

Saturated charcoal filters also restrict airflow. Replace them every 3–6 months, or sooner if you cook frequently with strong-smelling foods.

Check for Loose Screws and Panels

Vibration from the fan motor can gradually loosen screws in the casing and mounting bracket. Every six months, check all visible screws and tighten any that have worked loose.

Ensure Secure Wall Mounting

A poorly mounted hood will vibrate against the wall. If your hood is mounted on drywall anchors rather than directly into studs, consider adding an anti-vibration rubber pad between the bracket and the wall surface.

Maintenance Schedule

  • Weekly: Wipe the exterior with a damp cloth
  • Monthly: Wash the grease mesh filter in hot soapy water or the dishwasher
  • Every 3–6 months: Replace the activated charcoal filter
  • Every 6 months: Check and tighten all mounting screws

Cooking frequency changes that 3–6 month filter estimate more than people expect — see my full breakdown on how often to replace a charcoal filter for the real range and the signs it’s overdue.

What to Look for When Buying a Ductless Range Hood

CFM Rating: What It Means and What You Actually Need

CFM (cubic feet per minute) measures how much air the fan moves. Most residential hoods range from 200 CFM to 1,200 CFM. For a ductless hood, the figure matters less than for a ducted model — because you’re not actually venting air out of the house, you’re recirculating and filtering it. That said, higher CFM still means faster smoke and steam capture, and better coverage for high-heat cooking.

A general rule for ductless hoods: aim for at least 100 CFM per 10,000 BTU of hob output, or roughly 300–400 CFM for a standard four-burner gas range. For induction or electric hobs, which produce less ambient heat, 200–300 CFM is usually sufficient.

Size: Match the Hood to the Hob

A range hood should be at least as wide as the hob beneath it, ideally 3–6 inches (7–15 cm) wider on each side. A 60 cm (24-inch) hob needs a minimum 60 cm hood; a 90 cm (36-inch) range needs a 90 cm hood. Under-cabinet models often come in standard widths (60, 76, and 90 cm) that correspond to common hob sizes.

Mounting Height

Install the hood between 65–75 cm (26–30 inches) above the hob surface for gas hobs, and 60–70 cm (24–28 inches) for electric or induction. Too high and the hood captures less smoke; too low and it can be a safety hazard for tall pots. Check the manufacturer’s specifications — most give a recommended range.

Filter Type and Replacement Schedule

Ductless hoods use two types of filters:

  • Grease filter (aluminium mesh or baffle): Catches cooking grease before it reaches the charcoal filter. Clean monthly in the dishwasher or with hot soapy water. Most are dishwasher-safe.
  • Charcoal/carbon filter: Removes odours and smoke particles. Not washable — must be replaced every 3–6 months depending on how frequently you cook. Budget for replacement filters when buying the hood; some brands use proprietary sizes that are expensive to replace.

Noise Levels

Ductless hoods are typically louder than equivalent ducted models at the same CFM because the fan must work harder against the filter resistance. Look for noise ratings measured in sones or decibels. Under 4 sones (roughly 56 dB) at mid-speed is a reasonable target for everyday use. Island and wall-mounted models with larger fan housings tend to be quieter than compact under-cabinet units at equivalent airflow.

Frequently Asked Questions

Do ductless range hoods work as well as ducted ones?

For most home cooks, a good ductless hood is more than adequate. Ducted hoods are superior for removing moisture and are better for very high-heat cooking. But for standard gas or electric hobs, a quality ductless hood will keep your kitchen fresh and grease-free.

How often do I need to replace the charcoal filter?

Every 3–6 months for average use. If you cook daily or use a lot of strongly-scented ingredients, replace closer to the 3-month mark. Most hoods have an indicator light to remind you.

Can I install a ductless range hood myself?

Yes — most ductless hoods are designed for DIY installation and come with all necessary fixings. The job typically takes 1–2 hours. If the hood is hardwired rather than plug-in, have a qualified electrician do the electrical connection.

How loud is a ductless range hood?

Typical noise levels range from 45 dB on low speed to 65 dB on high speed. Look for hoods rated under 60 dB at maximum speed if noise is a concern.

Can I convert a ductless hood to ducted?

It depends on the model. Some range hoods are sold as “convertible” — they come configured for ductless use but can be switched to ducted installation by removing the charcoal filters and connecting the exhaust port to a duct. Others are ductless-only. Check the product specifications before buying if you think you might ever want to switch.

What’s the best placement for a ductless range hood in a kitchen without a ceiling exhaust point?

Under-cabinet ductless hoods are the most common choice for kitchens without exhaust points, as they mount directly beneath the wall cabinet above the hob. If there’s no cabinet, a wall-mounted chimney-style hood provides a permanent installation with a clean visual. Island hoods require ceiling mounting and are generally overkill for ductless applications — the longer ductwork run creates more resistance and reduces effectiveness.

Filed Under: Helpful Kitchen Tips Tagged With: ducted, Ductless range hood, pros and cons

  • « Go to Previous Page
  • Page 1
  • Page 2
  • Page 3
  • Page 4
  • Page 5
  • Interim pages omitted …
  • Page 10
  • Go to Next Page »

Recent Articles

  • Nama J2 Review: You Are Paying for Time, Not More Juice
  • Omega Cold Press Juicer Review: Great for Greens, Confusing to Buy
  • Breville JE98XL Review: Fast on Fruit, Hopeless on Greens
  • Ninja NeverClog JC151 Review: Great at Greens, Weak at Carrots
  • Masticating vs Centrifugal Juicer: Which Should You Buy?

Search


HOME          Contact          Affiliate Disclosure          Terms of Service          Privacy Policy


kitchenwarecompare.com is a participant in the Amazon Services LLC Associates Program, an affiliate advertising program designed to provide a means for sites to earn advertising fees by advertising and linking to Amazon.com, Endless.com, MYHABIT.com, SmallParts.com, or AmazonWireless.com. Amazon, the Amazon logo, AmazonSupply, and the AmazonSupply logo are trademarks of Amazon.com, Inc. or its affiliates. As an Amazon Associate we earn from qualifying purchases.


Copyright © 2026 kitchenwarecompare.com, ALL RIGHTS RESERVED.