• Skip to primary navigation
  • Skip to main content
  • Skip to primary sidebar

Kitchenware Compare

  • Home
  • Product Reviews
    • Air Fryers
    • Coffee
    • Cookware
    • Flat Top Grills
    • Meat Thermometers
    • Food Processors
    • Knives
    • Pizza Ovens
    • Toaster Ovens
    • Juicers
  • Food Blog
  • Helpful Kitchen Tips
  • Data Studies
  • About
  • How I Review
  • Contact
You are here: Home / Archives for Helpful Kitchen Tips

Food Processor Not Turning On? It Is the Interlock

Last Updated August 25, 2026

Top-down view into a food processor bowl showing the central drive spindle and the locking lugs on the rim

A food processor that does nothing at all is usually not broken. It is a machine that refuses to run unless several parts are locked in exactly the right position, and it gives you no clue which one is wrong — it just sits there.

Before anything else: unplug it before touching the blade. Everything below is either an external check or one made with the machine unplugged.

Three different failures, and they need different things

Put the bowl and lid on, plug it in, and press on.

Nothing at all — no sound, no light. The motor gets no power. This is nearly always the safety interlock, not a fault, and it is the most common of the three by a wide margin.

It hums or buzzes but the blade does not turn. The motor has power and is trying. Something mechanical is stopping it, or the drive is no longer connected to the blade.

It ran, then stopped, and now will not restart. The motor cut out on its own. That is thermal protection, and it usually resets itself.

Nothing happens at all

Food processors have more interlocks than almost any other kitchen appliance, because the blade is exposed the moment the lid comes off. Most machines will not start unless all of the following are true at once.

The bowl is not locked to the base

The bowl drops onto the motor housing and twists to lock. Sitting it on and not turning it is the single most common mistake, and on many designs the bowl will feel stable while still being a few degrees short of locked.

Look for the alignment marks — an arrow, a dot or a padlock symbol moulded into both the bowl and the base. They must line up. Twist until it stops, not until it feels seated.

The lid is not fully rotated

Same idea, one level up. The lid locks to the bowl and usually drives a tab down into a slot in the base, which is what actually closes the switch.

The tell is whether the lid rotates smoothly to its stop. If it fouls or feels springy before it gets there, something below it is misaligned — usually the bowl, occasionally a blade sitting proud.

The pusher or feed tube is not in place

This one catches people constantly, because it looks optional. On a great many models the small pusher must be inserted into the feed tube for the machine to run at all. Some designs use the large pusher as part of the interlock and will not start with it removed, which is deliberate — it stops anyone reaching into a running blade.

The blade or disc is not seated on the shaft

A blade that has not dropped fully onto the drive shaft sits a few millimetres high, which stops the lid closing properly, which leaves the interlock open. Push it down and rotate gently until it drops.

The interlock tab is broken

If everything above looks right and the machine still does nothing, inspect the plastic tab on the lid or bowl that engages the switch. These snap, and a snapped one is invisible unless you look for it — the parts still fit together and still feel locked.

A cracked bowl in that area does the same thing, which is covered in the guide to a food processor bowl that has cracked. Replacement bowls and lids are sold as spare parts for most mid-range and better machines.

Never bypass an interlock. There are videos showing how to defeat them with tape or a screwdriver. The interlock is the only thing standing between your hand and a blade that spins at speed, and it exists because people have been injured. If the tab is broken, replace the part.

And the boring possibilities

Test the socket with something small. Food processors draw a lot of current on start-up, so a marginal extension lead can also stop one starting — plug it directly into the wall.

It hums but the blade does not turn

The motor has power, so the interlocks are satisfied. Stop straight away: leaving a stalled motor powered is how a working machine becomes a dead one.

Something is jamming the blade

Unplug, take the bowl off and turn the blade by hand. If it will not move freely, food has wedged between the blade and the bowl wall, or a piece of something hard has got in. Frozen or very hard items are the usual cause.

The drive coupling has stripped

This is the failure that separates food processors from most other appliances, and it is worth knowing about because it is commonly mistaken for a dead motor.

Between the motor and the blade there is a plastic coupling — sometimes on the motor shaft, sometimes moulded into the bottom of the bowl or the blade itself. It is deliberately the weakest part of the drive, so that it fails before the motor does when the machine is overloaded. When its splines round off, the motor spins freely and the blade does not move at all.

How to tell: with the machine unplugged, look at the drive shaft on the base and the matching socket on the blade or bowl. Rounded, shiny or visibly worn splines mean the coupling has gone. It is a cheap part on machines that sell spares, and replacing it is far more sensible than replacing the machine.

What causes it: processing frozen food, dough that is too stiff, or overfilling. That is also the failure mode behind a food processor that smells like burning, which is worth reading if you have noticed a smell as well.

It ran, then stopped, and will not restart

Thermal cut-out. Food processor motors are protected against overheating, and the protection trips after sustained heavy work — stiff dough, a large batch of nut butter, or a long run without a break.

Unplug the machine and leave it for thirty minutes to an hour. Most cut-outs reset once cool, and the machine behaves normally afterwards. A few models have a reset button on the base, which the manual will identify.

If it trips repeatedly on ordinary work, the machine is undersized for what you are asking of it rather than faulty. Dough is the usual culprit — many processors are simply not built for it, and the guide to choosing a food processor covers which models have the motor for heavy jobs.

If it will not come apart, or the lid will not lock

Two related complaints worth covering, because they are what stop people getting to the checks above.

The lid will not rotate to its locked position. Something underneath is proud. Take everything out and rebuild in order — bowl onto base and twist to the marks, blade down onto the shaft until it drops, then the lid. Do not force the lid; the tabs it turns against are the interlock, and forcing them is how they break.

The bowl will not release. Usually suction or wedged food rather than a broken catch. Run a thin spatula around the inside edge to break the seal, and twist the bowl evenly rather than levering on the handle.

Repair or replace?

  • Warranty first. Motor and switch failures inside the warranty period are normally covered, and it costs an email to ask.
  • Couplings, bowls and lids are cheap on machines that sell spares. A coupling in particular is a genuinely economical repair.
  • Switch and motor faults usually are not. Once the interlock switch itself or the motor has failed on an out-of-warranty machine, the repair cost approaches the price of a replacement.
  • Parts availability is the real dividing line between price tiers. Cheaper machines often have no spares at all, which makes a broken tab terminal.

The order worth working through

  1. Nothing at all? Twist the bowl to its marks, rotate the lid to its stop, and put the pusher in.
  2. Still nothing? Strip it and rebuild in order, checking the blade drops fully onto the shaft.
  3. Still nothing? Inspect the interlock tab for a crack, and test the socket.
  4. Humming? Unplug immediately. Turn the blade by hand, then check the drive coupling splines for wear.
  5. Stopped mid-job? Unplug and leave it half an hour for the thermal cut-out to reset.
  6. Never defeat an interlock to get it running.

How This Guide Was Put Together

Plainly: this is a research-based guide, not a hands-on test. I have not dismantled food processors to compare failure modes, and nothing here is a report from my own kitchen.

What it rests on: manufacturer support documentation, which is consistent across brands that improper assembly is the leading cause and that the interlock will not close unless bowl, lid and pusher are all correctly positioned; the mechanical design of the drive coupling as a deliberate sacrificial part, which is why it strips before the motor burns out; and the pattern of what owners report, in which an unlocked bowl and an unseated blade account for most machines that appear dead.

What I could not establish: how commonly the drive coupling fails relative to the interlock. Manufacturers do not publish failure data, and owner reports do not reliably distinguish a stripped coupling from a dead motor.

Frequently Asked Questions

Why is my food processor not turning on?

Almost always the safety interlock rather than a fault. The bowl must be twisted to lock on the base, the lid rotated fully to its stop, and on many models the pusher must be in the feed tube. All three have to be right at once, and the machine gives no indication which one is wrong. Check the alignment marks moulded into the bowl and base.

What to do if your food processor will not turn on?

Strip it completely and rebuild in order: bowl onto the base and twist to the marks, blade pressed down until it drops onto the drive shaft, lid rotated to its stop, then the pusher. If it still does nothing, inspect the plastic interlock tab on the lid or bowl for a crack, then test the wall socket.

My food processor hums but the blade does not spin. What is wrong?

Unplug it immediately, because running a stalled motor damages it. Either something is jamming the blade, or the plastic drive coupling between the motor and the blade has stripped. The coupling is designed to fail before the motor does, so this is a cheap repair on machines that sell spare parts.

How do I reset a food processor?

Most have no reset button. If the machine stopped mid-job and will not restart, the thermal cut-out has tripped after heavy work such as stiff dough. Unplug it and leave it thirty minutes to an hour to cool, and it will usually run again. A few models do have a reset button on the base.

Can I bypass the safety interlock on a food processor?

No, and it is worth being blunt about it. The interlock is the only thing preventing the blade from spinning with the lid off, and it exists because people have been injured. If a tab is broken, replace the lid or bowl — both are sold as spare parts for most machines.

Why does my food processor stop working with dough?

Stiff dough is the heaviest load most home processors ever see. It trips the thermal cut-out, and repeatedly it is what strips drive couplings. If it happens on ordinary batches, the machine is undersized for the job rather than faulty.

Is it worth repairing a food processor that will not turn on?

If the fault is a broken tab, a cracked bowl or a stripped coupling, yes — those parts are inexpensive where spares are sold. If the interlock switch or the motor has failed out of warranty, the repair usually costs close to a replacement. Parts availability is the practical dividing line between cheap machines and better ones.

More food processor guides

If the machine runs but smells wrong, see a food processor that smells like burning. For a cracked bowl there is a guide to why food processor bowls crack, and for blades that have gone dull, sharpening food processor blades.
Filed Under: Helpful Kitchen Tips

Juicer Not Working After Cleaning? It Is the Safety Lock

Last Updated August 25, 2026

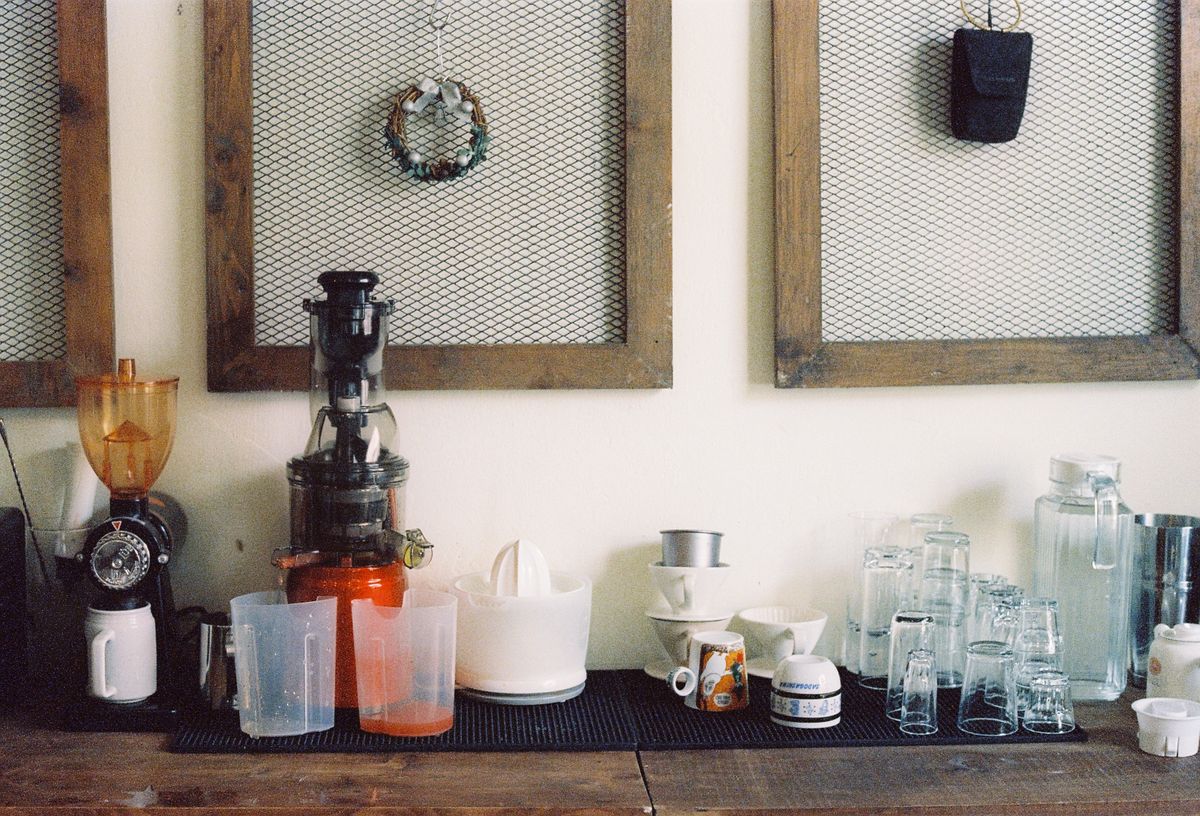
Vertical masticating juicer assembled on a counter beside jugs and glasses

A juicer that worked perfectly before you washed it and refuses to start afterwards has almost certainly not broken. The rest of the juicer guides are collected on the juicers hub. Cleaning does not damage juicers. What it does is take them apart, and a juicer that is reassembled a few millimetres out will not run at all — by design.

The safety lock is doing this, not a fault

Every mains juicer has a safety interlock. It exists because the machine contains a fast-spinning cutting disc or a powerful auger, and it must be impossible to run with the lid off. The interlock only closes when the parts are assembled and locked in exactly the intended position.

That is why the failure looks so alarming. There is no partial behaviour, no warning noise, no weak running. The motor simply does nothing, exactly as though it were unplugged — and it does that whether the assembly is wrong by a centimetre or by a millimetre.

The lid is the tell. On almost every design, if the lid or locking arm will not rotate smoothly into its fully locked position, something underneath is not seated. The lid is the last thing to go on, so it is the first thing to reveal a mistake made earlier in the stack.

Do not force it. Forcing a locking arm against a misaligned bowl is how people crack the tabs that the interlock depends on, which turns a two-minute fix into a replacement part.

Work back through the stack

Take it apart completely and rebuild it in order, checking each stage. On most machines the sequence runs bowl, then screen or filter basket, then auger or cutting disc, then lid, then locking arm.

1. The bowl is not seated on the base

The juicing bowl usually drops onto the motor base and twists a few degrees to locate. If it is sitting on the base rather than locked into it, everything above it will be a fraction too high and the lid will never lock. Look for the alignment marks — most machines have a dot, arrow or padlock symbol on the bowl that must line up with one on the base.

2. The screen or filter basket is not fully home

On a masticating juicer the screen sits inside the bowl and often has a notch that must engage a matching lug. On a centrifugal machine the filter basket must click down onto the drive coupling — if it is merely resting in place it will sit proud, and it will also spin freely by hand rather than driving the coupling.

A screen that has been scrubbed and is still slightly damp can also stick part-way down and feel seated when it is not. Push it home firmly and check it does not lift.

3. The auger is not pushed fully down

This is the most common single mistake on masticating machines. The auger has to drop right into the drive shaft and engage the splines at the bottom. It frequently goes down most of the way and stops, held up by the screen or simply not lined up with the shaft.

Press it down and rotate it gently at the same time until you feel it drop the last few millimetres. There is usually an audible or felt seating. If the auger stands proud by even a small amount, the lid cannot close and the interlock stays open.

4. Parts went back in the wrong order, or from the wrong machine

Worth checking if you own more than one appliance, or if parts were washed together. Screens and augers from different models can look nearly identical and will physically sit in the wrong machine without locking. The same applies to a screen fitted upside down — many are asymmetric and only lock one way up.

5. The pulp container or juice jug is part of the interlock

On some models it is. If the machine still will not start with everything else correct, put every removable part back in its running position, including the pulp bin, and try again.

If it starts but something else is wrong

It runs but leaks from underneath

Almost always the rubber seal. Most juicing bowls have a removable silicone seal or bung in the base, and it is the part most often left out after a wash or refitted the wrong way round. A missing seal produces juice running out under the bowl within seconds; an inverted one leaks more slowly.

Take the bowl off, find the seal, and check it is seated in its groove all the way round with the flat face in the direction the manual shows. The juicer cleaning guide covers where the seal lives on the common designs, since it is the part nearly everyone misses.

It starts and immediately stalls or hums

The auger or disc is fouling something it should clear. Usually the screen is very slightly out of position, so the two are touching. Strip it, rebuild it carefully, and try again with nothing in the chute.

If it hums without turning at all, stop. Repeatedly powering a stalled motor is how you burn one out.

It ran, then stopped, and now will not restart

That is the motor’s thermal cut-out rather than the interlock, and it is usually the aftermath of a jam. Unplug the machine and leave it thirty minutes to an hour. Most reset themselves once cool. If it happens repeatedly, the cause is what is jamming it — covered in the guide to a juicer that clogs or stops making much juice.

If the machine will not come apart at all

The opposite problem, and common enough to be worth covering: the juicer has locked and now the lid or bowl will not release.

This is nearly always pressure and dried pulp rather than a broken catch. Pulp compacted between the screen and the bowl dries into a solid ring that grips both parts, and on masticating machines the auger can wind itself tight against the screen.

  • Run the machine in reverse if it has that function, in short bursts. This relieves the pressure that is holding everything together and is what the function is for.
  • Stand the assembly in warm water for fifteen minutes to soften the dried pulp, then try again. Not hot water, which can distort plastic parts.
  • Twist evenly, not sharply. Grip the bowl rather than the lid, so you are not levering on the locking tabs.

Prevention is simply rinsing the parts straight after juicing rather than letting pulp dry in place, which is the same habit that keeps the screen clear.

Some designs are far easier to put back together

If this has happened more than once, it is worth knowing that the difficulty varies enormously between machines — and that reassembly complexity is a genuine buying criterion almost nobody weighs before purchase.

  • Part count is the honest measure. A juicer with five components to wash and stack has five chances to be a millimetre out. Some vertical masticating machines have seven or eight. Count the parts in the manual before buying, not the features on the box.
  • Clear alignment marks make the difference. Better machines mould arrows, dots or padlock symbols into every mating part, so correct assembly is visible rather than something you learn by feel. Cheaper ones often have none, and you are left guessing which way a screen goes in.
  • Horizontal masticating juicers are generally simpler to reassemble than vertical ones, because the parts stack along an axis you can see rather than dropping blind into a bowl.
  • Centrifugal machines have fewer parts but a filter basket that must click positively onto the drive coupling — a single point of failure rather than several, which some people find easier and some find harder to judge.

None of this shows up in a specification list, which is why it is worth reading owner reports for mentions of fiddly assembly before buying. The juicer buying guide and the guide to juicers for greens both note part counts and cleaning effort, and the masticating versus centrifugal comparison covers how the two mechanisms differ in what has to come apart.

The order worth working through

  1. Try to lock the lid. If it will not rotate fully, the problem is below it — do not force it.
  2. Strip it completely and rebuild in order: bowl, screen, auger or disc, lid, locking arm.
  3. Check the bowl is twisted onto the base and the alignment marks line up.
  4. Press the auger down while rotating gently until it drops onto the drive splines.
  5. Refit every removable part, including the pulp container, since some models interlock on it.
  6. Leaking rather than dead? The silicone seal in the base of the bowl is missing or inverted.

How This Guide Was Put Together

Plainly: this is a research-based guide, not a hands-on test. I have not stripped down a range of juicers to compare assemblies, and nothing here is a report from my own kitchen.

What it rests on: the safety interlock design common to mains juicers, which is a legal and practical requirement on an appliance with an exposed cutting element and which explains why the failure is total rather than partial; manufacturer assembly instructions, which are consistent across brands on alignment marks, assembly order and seating the auger onto the drive shaft; and the pattern of what owners report, in which an unseated auger and a bowl not twisted onto the base account for the large majority of machines that stop working immediately after a clean.

Also not established: assembly details that hold for every machine. Designs differ enough between masticating and centrifugal types, and between brands, that the sequence above is the common pattern rather than a universal specification. Your manual is the authority for your model.

Frequently Asked Questions

Why is my juicer not working after cleaning?

A part is not seated, so the safety interlock has not closed and the motor gets no power at all. The usual culprits are an auger that has not dropped fully onto the drive shaft, or a bowl that is resting on the base rather than twisted into it. Strip the machine and rebuild it in order, checking the alignment marks, and never force the locking arm.

Why will my juicer not turn on at all?

On a juicer, no response whatsoever usually means the interlock rather than an electrical fault, because the switch cuts power completely until everything is locked in position. Check that the lid rotates fully to its locked position. If it does not, something below it is out of place. On some models the pulp container also has to be fitted.

How do I know if the auger is seated properly?

Press it down while rotating it gently. It should drop the last few millimetres onto the drive splines, often with a felt or audible seating, and then sit flush rather than standing proud. If the auger is high by even a small amount, the lid will not lock and the machine will not start.

My juicer leaks from the bottom after cleaning. What did I miss?

The silicone seal or bung in the base of the juicing bowl. It is removable for cleaning and it is the part most commonly left out or refitted the wrong way round. A missing seal leaks within seconds of starting; an inverted one leaks more slowly.

My juicer is stuck and will not come apart. What now?

Dried pulp compacted between the screen and bowl is usually holding it. Run the reverse function in short bursts if the machine has one, or stand the assembly in warm water for fifteen minutes to soften the pulp. Twist the bowl evenly rather than levering on the lid, which risks breaking the locking tabs.

My juicer hums but does not turn. Is it broken?

Probably not, but stop immediately. A hum without rotation means the motor is being blocked, usually by a screen sitting slightly out of position and touching the auger. Unplug it, strip it, rebuild it carefully and try again empty. Repeatedly powering a stalled motor is how it gets damaged.

Can washing a juicer damage it?

Washing the removable parts will not. What causes problems is water reaching the motor base, which should only ever be wiped rather than rinsed, and putting parts back while still wet, which makes them stick part-way and feel seated when they are not. Dry everything before reassembly.

More juicer guides

For the routine itself, see the guide to cleaning a juicer. If the machine runs but the yield has dropped, there is a separate guide to a juicer that clogs or stops making much juice, and if you are choosing a machine, the juicer buying guide notes which designs are simplest to reassemble.

Filed Under: Helpful Kitchen Tips

Air Fryer Not Heating Up? Start With the Drawer

Last Updated August 24, 2026

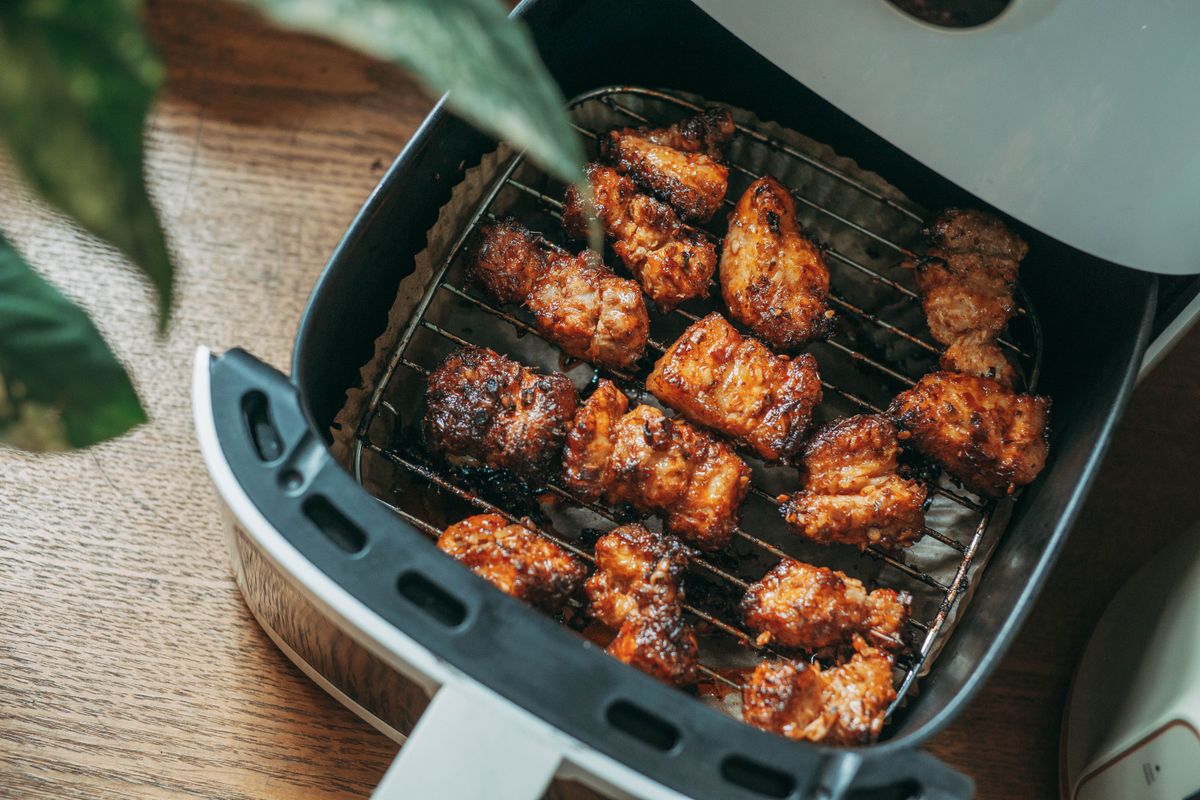
Air fryer with the drawer pulled out, showing the basket and the cavity above it

An air fryer that will not heat is usually not broken. The two most common causes are a drawer that is not quite closed and a safety cut-out that has done exactly what it was designed to do — and both look identical to a dead machine from the outside.

A safety note first: this is a mains appliance drawing over a kilowatt. Every check below is external, or made with the machine unplugged. Do not open the casing unless you are competent with mains equipment, and never defeat a safety switch.

Which of the three is it?

Put the drawer in, set it going, and watch.

Nothing happens at all. No lights, no fan, no noise. The machine appears dead. This is almost always power or the drawer safety switch rather than a fault.

The fan runs but the food stays cold. Lights come on, you can hear it working, and after ten minutes nothing has changed. This is the heating circuit — a tripped cut-out, an element, or a control setting that was never made.

It heats, but nowhere near enough. The machine works and the food cooks, just slowly and pale. That is a different problem from this page and is covered in the guide to food that comes out soggy or pale.

Nothing happens at all

The drawer is not fully closed

Start here, because it is the most common cause by a wide margin and it is free to check.

Essentially every basket-style air fryer has a safety switch that cuts all power to the element and fan unless the drawer is pushed fully home. It is what stops the machine running while open. A drawer that is almost closed leaves the switch open, and the machine behaves exactly as though it is unplugged.

What stops a drawer seating properly:

  • Crumbs and hardened grease in the runners. The usual culprit. Pull the drawer right out and clean the channel it slides into, not just the basket.
  • The basket is not clicked into the drawer. On two-piece designs the inner basket must latch into the outer drawer before the assembly is the right length to reach the switch.
  • Overfilling. Food standing proud of the basket fouls the top of the cavity and holds the drawer a few millimetres short.
  • A warped or swollen drawer on an older machine.

Push the drawer in firmly and listen. Most models give an audible click as the switch closes, and the display wakes. If it wakes when you press harder, that is your answer.

It is plugged into an extension lead or a shared socket

Air fryers draw a lot of current — commonly 1,400 to 1,800 watts, comparable to a kettle. That matters more than people expect.

Many extension leads and multi-way adaptors are not rated for a sustained load like that. The result is either a lead that trips or overheats, or enough voltage drop that the appliance behaves erratically. Sharing a socket with a kettle, toaster or microwave can also trip the circuit as soon as both draw at once. If that is the actual symptom, there is a separate guide to an air fryer that keeps tripping the breaker.

Plug the air fryer directly into a wall socket, on its own, and try again. This is a safety point as much as a troubleshooting one: a warm or discoloured extension lead under this kind of load should be taken out of service rather than reused.

The plug fuse or the breaker

If the wall socket is dead, test it with something small like a phone charger. In the UK and other countries using fused plugs, the fuse in the plug itself can fail while everything else looks fine. At the consumer unit, a tripped breaker points at the circuit rather than the appliance — and if it trips again the moment the air fryer is switched on, stop and get it looked at rather than resetting repeatedly.

The fan runs but there is no heat

The temperature was never actually set

Worth ruling out first because it costs nothing. A good number of models will run the fan on the timer alone and only heat once a temperature is also selected and the start button pressed. On digital models a temperature shown on the display is not always a temperature that has been confirmed. Set both, press start, and check whether a heating indicator appears.

The thermal cut-out has tripped

This is the second big one, and it is the machine protecting itself rather than failing.

Air fryers have a thermal cut-out that kills the element if the internal temperature runs away. The usual reason is restricted airflow, and the usual reason for that is where the machine is standing. Most manufacturers specify meaningful clearance behind and above the unit — often around five inches — because the exhaust comes out of the back. Pushed against a wall, under a cabinet, or in a corner, the hot exhaust is drawn straight back in and the temperature climbs until the cut-out opens.

Unplug it, move it into open space, and leave it for half an hour or more. Many cut-outs reset once cool. If it heats normally afterwards and you have moved it somewhere with clearance, that was the whole problem. If it trips repeatedly, stop using it.

The heating element has failed

Less common than the causes above, but it does happen, and on a basket model you can usually see it without tools.

Unplug the machine, let it cool, remove the drawer and look up into the cavity. The element is the coiled metal loop above the basket. You are looking for an obvious break in the coil, a section that is blistered or discoloured very differently from the rest, or heavy carbonised residue baked onto it. A visibly broken coil is a failed element.

The thermostat or control board

If the drawer switch is fine, the machine has cooled properly, the temperature is set, and the element looks intact, the remaining candidates are the thermostat and the control electronics. Neither is a home repair on a sealed appliance, and this is the point at which the decision becomes repair or replace rather than troubleshoot.

If it heats, but not enough

Worth separating, because it is a genuinely different fault and the fixes do not overlap.

A machine that reaches temperature slowly, or never seems to get properly hot, is usually suffering from restricted airflow or a dirty element rather than an electrical fault. Carbonised grease baked onto the element insulates it and cuts the heat reaching the food, which is also the mechanism behind an air fryer that smokes. Clean the element with the machine unplugged and cold, and clear the vents front and back.

If the machine genuinely is hot and the food still is not right, the problem is the food rather than the appliance — that is covered separately in why air fryer food comes out soggy or pale.

Repair or replace?

Be realistic about the arithmetic before ordering parts.

  • Check the warranty first. Heating element and thermostat failures inside the warranty period are normally covered, and it costs one email to ask.
  • Out of warranty, the economics are usually bad. An element or thermostat plus a repair callout frequently approaches or exceeds the price of a new mid-range air fryer, and sealed budget units are often not designed to be opened at all.
  • Do not attempt an element replacement on a mains appliance unless you are competent to work on one. The saving does not justify the risk.

If you are replacing it, the practical lesson from this fault is to buy something with clearance in mind and enough capacity that you are not overfilling the drawer — overfilling is what jams drawers and restricts airflow in the first place. The air fryer guide covers sizes and build, the family-size models matter if overfilling is a habit, and the budget picks are worth reading with the repairability point above in mind.

The order worth working through

  1. Nothing at all? Push the drawer firmly home and listen for the click.
  2. Still nothing? Clean the drawer runners, then plug directly into a wall socket rather than an extension lead.
  3. Fan runs, no heat? Confirm a temperature is actually set and start has been pressed.
  4. Still no heat? Unplug, move it away from the wall, and leave it half an hour for the thermal cut-out to reset.
  5. Still no heat? Unplugged and cold, look at the element for a break or blistering.
  6. Element intact? Thermostat or control board — check the warranty before spending anything.

How This Guide Was Put Together

Plainly: this is a research-based guide, not a hands-on test. I have not dismantled air fryers to compare failure modes, and nothing here is a report from my own kitchen.

What it rests on: manufacturer manuals and support documentation, which are consistent on the drawer safety switch, on rear and top clearance requirements, and on thermal protection resetting after cooling; the electrical characteristics of the appliance class, where a 1,400 to 1,800 watt sustained load explains the extension lead and shared circuit problems; and the pattern of what owners report, in which an unseated drawer and a tripped thermal cut-out account for the large majority of machines that look dead.

Also not established: a clearance figure that applies to every machine. Manufacturers differ, and the roughly five inches quoted above is a common recommendation rather than a universal specification. Check the manual for your model.

Frequently Asked Questions

Why is my air fryer not heating up?

If nothing happens at all, the drawer is probably not fully closed — a safety switch cuts all power unless it is pushed completely home, and crumbs in the runners are usually what stops it. If the fan runs but there is no heat, either no temperature was actually set, or the thermal cut-out has tripped because the machine is standing too close to a wall.

My air fryer turns on but does not get hot. What does that mean?

The fan and the element are on separate circuits, so the machine can run while the heating circuit is dead. Check that a temperature has been selected and confirmed, then unplug the unit, move it into open space and leave it half an hour in case the thermal cut-out has tripped. If it still will not heat, inspect the element for a visible break.

How do I reset an air fryer?

There is rarely a reset button. What works is unplugging it at the wall and leaving it for at least thirty minutes, which allows the thermal cut-out to cool and reset. Move it away from the wall while it cools, since restricted exhaust is usually what tripped it.

Can I use an air fryer with an extension lead?

Best avoided. Air fryers commonly draw 1,400 to 1,800 watts, and many extension leads and multi-way adaptors are not rated for that sustained load. The result can be tripping, voltage drop or an overheating lead. Plug it directly into a wall socket, and retire any lead that has become warm or discoloured under this load.

How do I know if the heating element has failed?

With the machine unplugged and cold, take the drawer out and look up into the cavity at the coiled element above the basket. A clear break in the coil, or a section blistered and discoloured very differently from the rest, indicates a failed element. Heavy baked-on residue is worth cleaning off first, since that alone reduces heat reaching the food.

Is it worth repairing an air fryer that will not heat?

Inside the warranty period, yes — element and thermostat failures are normally covered. Outside it, parts plus labour often approach the price of a new mid-range machine, and budget units are frequently sealed and not designed to be opened. Do not attempt an element replacement on a mains appliance unless you are competent to do so.

Why does my air fryer keep cutting out mid-cook?

That is the thermal cut-out doing its job, and it almost always means restricted airflow. The exhaust comes out of the back, so a machine pushed against a wall or tucked under a cabinet recirculates its own hot air until it overheats. Give it clear space behind and above, and check the vents are not blocked with grease.

More air fryer troubleshooting

If it heats but the food is disappointing, see why air fryer food comes out soggy or pale. If it smokes, there is a guide to why an air fryer smokes, and if the basket surface is deteriorating, one on a basket coating that flakes.

Filed Under: Helpful Kitchen Tips

Coffee Grinder Not Grinding Properly? Three Different Faults

Last Updated August 24, 2026

Burr coffee grinder with roasted beans sitting in the conical hopper above the throat

“Not grinding properly” covers three unrelated faults, and they have almost nothing in common. Before changing settings or ordering parts, work out which one you are looking at — it takes one grind to find out.

Which of the three is it?

Run the grinder with beans in it and watch what happens.

The motor runs but little or nothing comes out. You can hear it working, and the output is a dribble of grounds or none at all. This is a feeding or blockage problem. It is the most common of the three and usually the easiest to fix.

Grounds come out, but they are wrong. Uneven, too coarse however you set it, full of dust and boulders together, or simply not what the same setting used to give you. This is about the burrs, the adjustment, or the type of grinder you own.

The motor does not run at all. Nothing happens, or it hums without turning. This is usually a safety interlock rather than a dead machine, and it is worth checking before assuming the worst.

Motor runs, nothing comes out

The beans are bridging in the hopper

This is the single most common cause, and from the outside it looks exactly like a broken grinder: full hopper, running motor, no coffee.

Beans form an arch over the throat of the hopper and hold each other up, so nothing drops into the burrs. Oily dark roasts do it far more than lighter ones, because the surface oil makes the beans stick to one another and to the hopper walls. A nearly empty hopper does it too, since there is less weight pressing down.

To confirm it: stop the grinder and give the hopper a firm tap on the side, or stir the beans with a wooden spoon handle. If coffee immediately starts coming through, that was your fault — there is nothing else wrong with the machine.

Longer term: keep the hopper reasonably full, avoid very oily beans if your grinder is prone to it, and wipe the inside of the hopper occasionally with a dry cloth, because oil residue on the walls makes bridging worse over time.

The chute is packed with old grounds

Every grinder retains some ground coffee inside the exit chute. Over weeks that retained coffee absorbs moisture from the air, and the oil in it goes tacky. Eventually it packs into a plug that new grounds cannot push past. You get a trickle rather than a dose, and often a burst of stale grounds when it finally clears.

Unplug the machine, take off the hopper, and work through the chute with a stiff brush — a dedicated grinder brush, a clean paintbrush, or a toothbrush. A chopstick or the handle of a wooden spoon shifts a solid plug. Do not use anything metal that could reach the burrs.

Something is jammed in the burrs

Coffee occasionally arrives with a small stone or a piece of packaging in it, and it will stop a grinder dead or make it grind unevenly with a horrible noise. If the machine sounds different — grating, rattling, straining — unplug it, remove the hopper and the upper burr, and look.

This is also the moment to stop using the grinder rather than persist. Running a motor against a jam is how a working grinder becomes a broken one.

It grinds, but the grounds are wrong

First: is it actually a blade grinder?

Worth ruling out before anything else, because it is not a fault at all.

A blade grinder has a spinning blade like a small propeller and chops beans by hitting them. It does not have an adjustable grind size — you control it only by how long you run it. It cannot produce a consistent, uniform grind, and it can never produce a proper espresso grind. Some particles are dust and some are still chunks, no matter how long you run it.

If your grinder chops rather than mills, and you are trying to get an even grind for espresso or pour over, the machine is doing everything it is capable of. That is a hardware limit, and the espresso grinder guide covers what a burr grinder actually changes and at what price.

The burrs were not reseated properly after cleaning

If the problem appeared right after you cleaned the grinder, this is almost certainly it, and it catches a lot of people.

Upper burrs on most home grinders locate on tabs or lugs and then twist to lock. It is entirely possible to seat one almost correctly — it sits down, the hopper goes back on, and everything looks fine, but the burr gap is now wrong or uneven. The result is a grind that is far too coarse, or wildly inconsistent, at a setting that used to be right.

Take the burr back out and reseat it deliberately, checking it sits flat and turns to its stop. On many grinders you also need the hopper fitted and locked before the adjustment collar engages at all.

The grind adjustment is not doing what you think

Stepped grinders only change setting while the burrs are turning on some models — adjusting a stationary grinder does nothing, or forces the mechanism. Stepless collars can drift as the machine vibrates. And if the grinder has been apart, the numbers on the dial no longer correspond to what they did before, because the reference point moved.

Rather than chasing the numbers, reset from scratch: with no beans in the burrs, close the adjustment until the burrs just touch and the machine chirps, then back off gradually and re-dial from there.

The burrs are coated in stale oil

Coffee oil builds up on the burr faces and in the grooves between the teeth. A coated burr cuts less cleanly, producing more fines and a duller, muddier grind. It is gradual, so people adapt to it without noticing and then conclude the grinder is worn out.

Use grinder cleaning tablets and follow with a run of the beans you actually use, to clear the tablet residue. Do not use rice. It is widely recommended and several manufacturers explicitly warn against it — rice is much harder than coffee and can damage burrs or strain the motor. And never wash burrs in water: steel burrs rust, and a rusted burr is finished.

Are the burrs actually worn out?

This is the question people jump to first and it is usually the wrong one, so it is deliberately last.

Burrs are consumables and they do wear. But a home grinder making a few coffees a day passes very little coffee through in a year compared with a cafe machine running kilos a day, and most domestic grinders are cleaned out and sold on long before their burrs are genuinely finished. When someone says their grinder “stopped grinding properly”, stale oil, a bad reseat or bridging beans are far more likely explanations.

The signs that point to real wear, rather than one of the above:

  • You have had to move steadily finer over months to get the same result — the gap needed to produce a given particle size grows as the cutting edges round off.
  • More dust and more boulders at the same time. Worn burrs stop cutting cleanly and start crushing, which widens the spread of particle sizes at every setting.
  • It takes noticeably longer to grind the same dose than it used to.
  • The problem survives a proper clean and a careful reseat. That is the test that separates wear from the far more common causes.

You can also look: remove the upper burr and inspect the cutting edges against a bright light. Sharp burrs have crisp edges and defined corners on the teeth. Worn ones look rounded and polished, and may be visibly shiny where they should be matt.

If the burrs are genuinely worn, replacement burrs are available for most mid-range and better grinders and are usually far cheaper than a new machine. On inexpensive grinders the parts either do not exist or cost more than the grinder did, which is one of the practical differences between price tiers — the espresso grinder guide notes which machines are built to be maintained.

The motor does not run at all

Check these in order before concluding anything is broken.

  1. The hopper is not locked into position. Most grinders have a safety interlock that will not let the motor start unless the hopper is fitted and twisted fully to its stop. A hopper that is on but not locked is the most common cause of a completely dead grinder.
  2. The lid or grounds bin is not seated. Some models interlock on those too.
  3. It has overheated and cut out. Grinders have thermal protection that stops the motor after prolonged use or a jam, and it resets only once the motor has cooled. Give it thirty minutes and try again before doing anything else.
  4. It is jammed. A motor that hums but does not turn is being physically blocked. Unplug it and clear the burrs.
  5. Then the boring possibilities: the socket, the plug fuse, and the cable.

The order worth working through

  1. Motor runs, nothing out? Tap the hopper. If coffee flows, it was bridging.
  2. Still nothing? Unplug and brush out the chute.
  3. Grounds wrong? Did it start right after cleaning? Reseat the burrs properly.
  4. Still wrong? Run cleaning tablets, then re-dial the grind from the point where the burrs just touch.
  5. Still wrong after a clean and a careful reseat? Now consider worn burrs, and inspect the edges.
  6. Motor dead? Lock the hopper down, then let it cool for half an hour.

How This Guide Was Put Together

Plainly: this is a research-based guide, not a hands-on test. I have not stripped down a set of grinders to compare burr wear, and nothing here is a report from my own kitchen.

What it rests on: the mechanics of burr grinding, which explain why a coated or rounded burr widens particle distribution rather than simply grinding coarser, and why a blade grinder cannot produce a uniform grind at all; manufacturer instructions for hopper interlocks, thermal cutouts, burr removal and cleaning, including the warnings against rice as a cleaning medium; and the pattern of what owners report, where bridging, retained grounds and a mis-seated burr after cleaning dominate the reported causes by a wide margin.

Also not established: a figure in kilograms for how long burrs last. Published numbers vary enormously between sources and burr materials, they are drawn largely from commercial use, and applying a cafe figure to a domestic grinder would be misleading. The wear signs above are described qualitatively for that reason.

Frequently Asked Questions

Why is my coffee grinder not grinding?

If the motor runs but nothing comes out, the beans are almost certainly bridging over the hopper throat, or the exit chute is packed with old grounds. Tap the side of the hopper: if coffee starts flowing immediately, that was the whole problem. If the motor does not run at all, check the hopper is twisted fully into its locked position, because most grinders will not start otherwise.

How do I know if my coffee grinder burrs are worn out?

The reliable test is whether the problem survives a proper clean and a careful reseat of the burrs. Genuine wear shows as needing a steadily finer setting over months for the same result, more dust and more large pieces at the same time, and longer grinding for the same dose. Removing the upper burr and looking at the teeth under bright light also helps: sharp burrs have crisp edges, worn ones look rounded and polished.

Why is my grinder producing an uneven grind?

If it started right after cleaning, the upper burr is probably not seated correctly, which changes the burr gap without looking wrong. Otherwise it is usually oil build-up on the burr faces, which stops them cutting cleanly. If you have a blade grinder rather than a burr grinder, an uneven grind is not a fault at all — chopping cannot produce uniform particles.

Can I use rice to clean a coffee grinder?

Better not to. It is a widely repeated tip and several manufacturers specifically warn against it, because rice is considerably harder than coffee and can damage burrs or overload the motor. Use purpose-made grinder cleaning tablets instead, and never wash burrs in water, since steel burrs rust.

Why did my grinder stop working after I cleaned it?

Two likely reasons. Either the upper burr has not gone back on correctly, which gives a very coarse or inconsistent grind, or the hopper is not locked fully into place, which leaves the safety interlock open so the motor will not start. Both are quick to correct.

My grinder hums but does not turn. What is wrong?

Something is physically blocking the burrs, or the motor has thermally cut out. Unplug it, remove the hopper and upper burr, and check for a stone or a jammed bean fragment. If it is clear, let the machine cool for half an hour before trying again. Do not keep running it against a jam.

Is it worth replacing the burrs or should I buy a new grinder?

Replacement burrs are available for most mid-range and better grinders and usually cost far less than a new machine, so they are worth fitting. On cheap grinders the parts often do not exist, or cost more than the grinder is worth, which effectively makes those machines disposable.

More espresso troubleshooting

If the shot is the problem rather than the grind, see what to check when an espresso machine is not building pressure, or the guide to a steam wand that will not froth milk.

Filed Under: Helpful Kitchen Tips

Warped Pan Not Sitting Flat? Whether It Matters Depends on Your Hob

Last Updated August 24, 2026

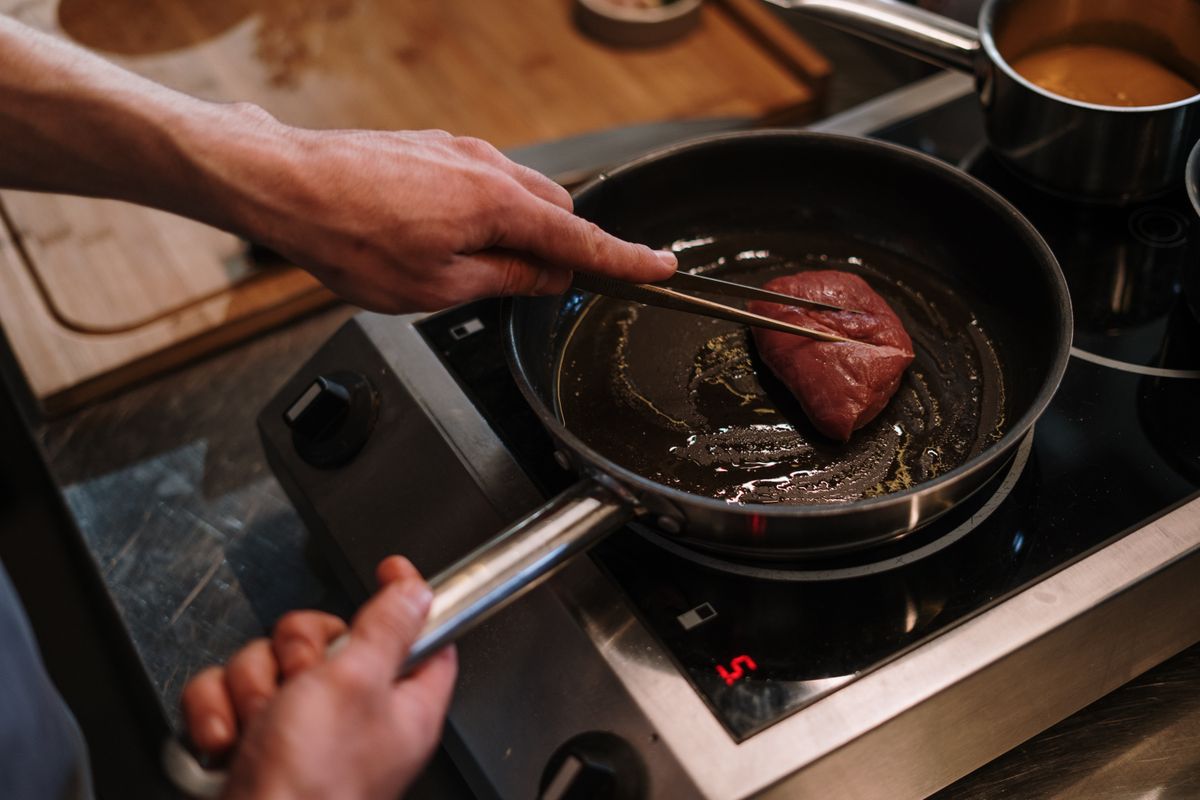
Frying pan resting on a black glass induction cooktop, where a flat base matters most

A pan that rocks, spins or lets oil run to one side has warped. Most advice jumps straight to whether you can hammer it flat. The more useful question comes first, and the answer depends entirely on what you cook on.

Does it actually matter? That depends on your hob

The same warp is a non-event on one cooker and a real problem on another, which is why people get such contradictory advice.

Gas: it matters least. A flame wraps around the base and heats it whether or not the pan is perfectly flat. A pan that rocks is annoying to stir in, and oil will pool on one side, but the heating itself is largely unaffected. A mild warp on a gas hob is something you can live with more or less indefinitely.

Electric radiant and ceramic or glass tops: it matters most. These heat by direct contact. Where the base lifts away from the surface, there is an air gap, and air is an excellent insulator.

The result is slow heating, obvious hot and cold zones, and often a pan that spins when you stir. This is the setup where a warped pan genuinely stops working.

Induction: it matters, differently. Induction couples a magnetic field into the base, and that coupling weakens as the base lifts away. A moderately warped pan heats less efficiently and unevenly, and a badly warped one may buzz, rattle or fail to be detected at all. A domed base also lets the pan rotate on a smooth glass surface.

So before deciding what to do about it, decide whether it is actually costing you anything.

Which way has it gone?

Two different shapes get called warping, and they behave differently.

Convex, or domed. The centre of the base bulges downward. The pan rocks or spins on a flat surface, and oil runs away from the middle towards the rim. This is the more common form on thin pans.

Concave, or dished. The centre is pulled upward, so the pan sits flat on its rim but the middle does not touch. Oil pools in a ring rather than spreading, and on a glass top the middle heats poorly. This is more common on disc-base pans where the bonded disc has moved relative to the body.

How to check: put the pan on a genuinely flat surface such as a worktop or a glass chopping board and press one edge, then the opposite one. Rocking means convex. If it sits still, lay a ruler or any straight edge across the inside of the base and look for daylight under the middle — that is concave. A teaspoon of oil and a level surface tells you the same thing faster: watch which way it runs.

Can it be flattened again?

Usually not, and this is where most of the advice on the subject is more optimistic than it should be.

Warping is not the pan being bent out of position. It is plastic deformation: the metal was heated unevenly, one region expanded more than the region around it, and the stress exceeded the point at which the metal could spring back. The base is now a slightly different shape than it was made. Reversing that means deforming it again, in exactly the right places, by exactly the right amount.

Non-stick and coated pans: no

Do not attempt it. Any force sufficient to move the metal will craze, crack or delaminate the coating, and you will convert a slightly annoying pan into one that sheds its surface. That failure is covered in the guide to coatings that flake off, and it is not worth causing deliberately.

Thin stainless and clad pans: almost certainly not

The popular method — upside down on a hard surface, a block of wood over the bulge, a few taps with a mallet — occasionally works on a genuinely thick base. On thin or multi-ply construction it usually moves the problem rather than removing it, creating a new high spot next to the old one, and it can separate a bonded disc from the pan body. Clad pans in particular are layers of different metals joined under heat and pressure; hammering them is not a repair operation.

Cast iron and thick carbon steel: sometimes, carefully

Thick single-metal pans are the realistic candidates, because there is enough material to move without buckling and no coating or bonded layer to ruin. Even then it wants a proper flat anvil surface, a dead-blow or rubber mallet, work from the outside of the bulge inward, and frequent checking with a straight edge. Cast iron is brittle and can crack rather than bend, which ends the pan immediately.

The honest summary: if the pan is cheap, replace it. If it is expensive, it probably has a warranty worth using before anyone reaches for a mallet.

What about the warranty?

Worth checking first, and more often successful than people expect. Several cookware manufacturers treat warping within the warranty period as a manufacturing defect rather than misuse, particularly on pans sold as suitable for induction or flat tops. It is one email, and it costs nothing to ask.

Why it happened

Thermal shock, which is nearly always the cause

Taking a hot pan off the heat and running it under a cold tap, or setting it on a wet surface, or adding cold liquid to a very hot empty pan. The surface in contact with the cold contracts fast while the rest of the metal is still expanded, and the stress between them does the damage in a fraction of a second.

This single habit accounts for most warped pans. Let a pan cool before it meets water, and soak it afterwards if something is stuck.

Preheating empty, especially on high

An empty pan has nothing to absorb the heat, so the base races upward in temperature while the sides lag. Food or liquid in the pan buffers this. Thin pans are much more vulnerable, and non-stick should never be preheated empty at high heat for the separate reason that the coating degrades.

A burner much smaller than the pan

A small gas ring or a small radiant element under a large pan creates a hot disc in the middle and a comparatively cool rim. That difference is exactly the condition that warps a base, and it is a slow, cumulative version of thermal shock. Match pan size to burner size where you can — the gas stove cookware guide covers why burner-to-base matching matters more than most people assume.

The pan was thin to begin with

Warping resistance comes almost entirely from base thickness and construction. A thin single-ply pan will warp eventually under normal use; a thick disc base or fully clad base distributes heat well enough that the stress never concentrates. This is the one factor you buy rather than manage.

Choosing one that will not do it again

If you are replacing the pan, the specification that matters is not the brand or the coating — it is the base.

  • Thickness first. A heavy base resists warping and heats evenly. Pick the pan up: weight in the base is the single best proxy available in a shop.
  • Fully clad or a thick bonded disc, rather than a thin sheet with a disc spot-welded on. Delamination of a cheap disc shows up as the concave form described above.
  • Flatness matters more on flat tops. If you cook on glass, ceramic or induction, this is the specification to prioritise, because it is the setup where a warp actually costs you performance. The frying pan guide for electric and flat top stoves is built around exactly that requirement, and the cookware set guide notes base construction across full sets.
  • Cast iron does not warp in normal use because it is thick, though it can crack under genuine thermal shock. If flatness on a glass top is the priority, it is worth considering — see the cast iron skillet picks.

The order worth working through

  1. Work out whether it matters. Gas: mostly cosmetic. Glass, ceramic or induction: it is costing you real performance.
  2. Check which way it has gone — rock it, or lay a straight edge across the base.
  3. Check the warranty before doing anything else.
  4. Coated pan? Do not attempt to flatten it. Replace it.
  5. Thick cast iron or carbon steel? Flattening is possible but risky, and cast iron can crack.
  6. Whatever happens next: stop putting hot pans under cold water. That is what did it.

How This Guide Was Put Together

Plainly: this is a research-based guide, not a hands-on test. I have not warped pans deliberately to compare outcomes, and nothing here is a report from my own kitchen.

What it rests on: the mechanics of thermal expansion and plastic deformation, which explain both why sudden cooling warps a base and why the deformation is not simply reversible; the difference in how gas, radiant and induction hobs deliver heat, which is why the same warp has such different consequences on different cookers; and manufacturer care instructions, which are consistent in warning against cold water on hot pans and against preheating empty.

Also not established: a base thickness in millimetres above which warping stops being a risk. Manufacturers rarely publish base thickness, the figure interacts with construction and hob type, and any number would be invented.

Frequently Asked Questions

Why does my pan not sit flat?

The base has warped, almost always from thermal shock — a hot pan meeting cold water, or being preheated empty, or a burner much smaller than the base. The metal expanded unevenly and deformed past the point where it could spring back, so the base is now a slightly different shape than when it was made.

Is it safe to use a warped pan?

Yes, provided the pan is otherwise sound and the coating, if it has one, is intact. Warping is a performance and stability problem rather than a safety one. The genuine risk is a pan that rocks badly enough to tip on a hob, which is a reason to stop using it for anything heavy or liquid.

How do I make a warped pan flat again?

In most cases you cannot. Coated pans should never be hammered, because the force required will wreck the coating. Thin or clad pans usually end up worse, with a new high spot beside the old one.

Thick cast iron or carbon steel can sometimes be worked flat on a hard surface with a rubber mallet, but cast iron can crack instead of bending. Check the warranty first.

Does a warped pan matter on a gas hob?

Much less than on other cookers. A flame heats the base whether or not it is perfectly flat, so the main annoyances are oil running to one side and the pan rocking while you stir. On glass, ceramic or induction, where heat depends on contact or magnetic coupling, the same warp causes slow and uneven heating.

Why does my pan spin on an induction hob?

The base is domed, so it touches the glass at one point in the middle and pivots on it. Beyond being irritating, it means the base is not sitting flush, which reduces how efficiently the hob couples into the pan and can cause buzzing or a failure to detect the pan at all.

What causes a pan to warp in the first place?

Rapid, uneven temperature change. Running a hot pan under a cold tap is the most common cause by a wide margin. Preheating an empty pan on high, and using a burner much smaller than the pan base, do the same thing more gradually. Thin bases warp far more readily than thick ones.

Do expensive pans warp?

Less often, but not never. Resistance comes from base thickness and construction rather than price as such, so a heavy fully clad pan resists warping while a thin one from the same brand may not. No pan is immune to a hot base meeting cold water.

More cookware guides

For other marks and damage on bare steel, see white spots on a stainless steel pan. If the pan is coated and food has started sticking, there is a guide to a non-stick pan that will not release food.

Filed Under: Helpful Kitchen Tips

  • « Go to Previous Page
  • Page 1
  • Page 2
  • Page 3
  • Page 4
  • Page 5
  • Page 6
  • Interim pages omitted …
  • Page 17
  • Go to Next Page »

Recent Articles

  • Egg Cooker vs Boiling, Instant Pot and Air Fryer: Which Peels Easiest?
  • Cuisinart DLC-10SYP1 Review: Durable, But a Newer Bowl
  • COSORI Pro Gen 2 Review: Big Basket, Fragile Handle
  • Dash Tasti-Crisp Review: Cheap, but the Coating Wears Fast
  • Chefman TurboFry Touch Review: Cheap, but the Coating Wears

Search


HOME          Contact          Affiliate Disclosure          Terms of Service          Privacy Policy


kitchenwarecompare.com is a participant in the Amazon Services LLC Associates Program, an affiliate advertising program designed to provide a means for sites to earn advertising fees by advertising and linking to Amazon.com, Endless.com, MYHABIT.com, SmallParts.com, or AmazonWireless.com. Amazon, the Amazon logo, AmazonSupply, and the AmazonSupply logo are trademarks of Amazon.com, Inc. or its affiliates. As an Amazon Associate I earn from qualifying purchases.


Copyright © 2026 kitchenwarecompare.com, ALL RIGHTS RESERVED.