• Skip to primary navigation
  • Skip to main content
  • Skip to primary sidebar

Kitchenware Compare

  • Home
  • Product Reviews
    • Air Fryers
    • Coffee
    • Cookware
    • Flat Top Grills
    • Meat Thermometers
    • Food Processors
    • Knives
    • Pizza Ovens
    • Toaster Ovens
    • Juicers
  • Food Blog
  • Helpful Kitchen Tips
  • Data Studies
  • About
  • How I Review
  • Contact
You are here: Home / Archives for Product Reviews

Air Fryer vs Deep Fryer: Which Should You Buy?

Last Updated October 8, 2026

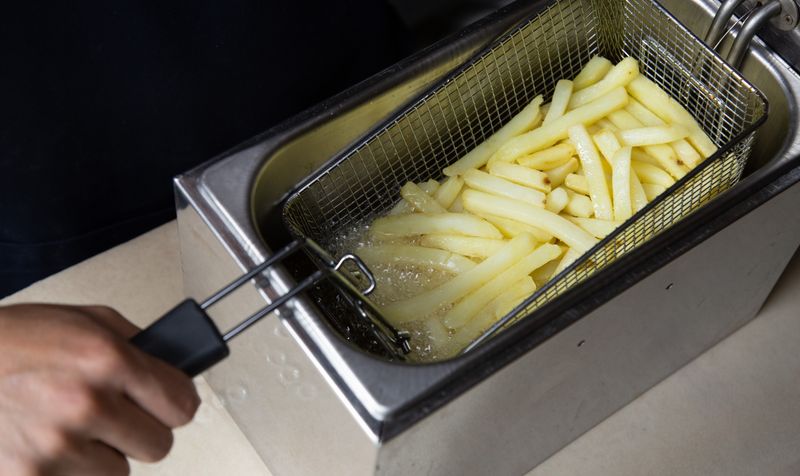
Basket of french fries being lowered into a deep fryer of bubbling oil

This post contains affiliate links. If you buy through my links, I may earn a commission at no extra cost to you.

Short answer: the air fryer, for most kitchens. It gets you 85% of the crisp with a tablespoon of oil instead of four quarts, no disposal problem, and a machine that also roasts, reheats, and bakes.

The deep fryer keeps exactly one crown — anything in wet batter. Beer-battered fish, tempura, and proper corn dogs physically cannot happen in an air fryer, and if those are your kitchen’s love language, no air fryer replaces the real thing. Here’s the honest breakdown.

Air Fryer vs Deep Fryer — Head to Head

Factor Air Fryer Deep Fryer Winner
Oil per session 0–1 tablespoon 3–4 quarts Air fryer
Fat in the finished food Up to ~75% less Oil is the point Air fryer
Wet batter (fish, tempura) Drips off — can’t do it Its whole reason to exist Deep fryer
Fries & frozen foods Excellent, slightly drier The gold standard Deep fryer, narrowly
Cook time (batch of fries) 15–20 min, no preheat ritual 5–8 min + 10–15 min oil heat-up Roughly even
Cleanup Basket in the dishwasher Cooling, straining, storing or dumping quarts of oil Air fryer
Running cost Electricity only Oil is a subscription ($8–15 per fill) Air fryer
Versatility Roasts, bakes, reheats, dehydrates Fries. That’s it. Air fryer
Safety Enclosed element, auto shut-off Gallons of 350°F oil on the counter Air fryer

The Actual Difference (It’s Physics, Not Marketing)

A deep fryer immerses food in oil at 325–375°F. Oil transfers heat brutally fast and from every direction at once, which is why crusts set in seconds and batter puffs instead of sliding off. An air fryer is a small, violent convection oven: a fan slams hot air across the surface, dehydrating and browning the outside. With a light oil coating, that gets remarkably close to fried texture on solid foods — wings, fries, vegetables, breaded (not battered) items.

The gap shows in two places. Wet batter needs the instant set that only oil immersion provides — in an air fryer it drips through the basket before it cooks. And moisture-rich crispness — the glassy shell on a proper french fry — comes from oil penetrating the surface, which hot air alone can’t replicate. Close, honestly close.

Not identical.

Health: The Math Nobody Argues With

Deep-fried foods absorb oil as they cook — that’s flavor, and it’s also roughly 10–15 extra grams of fat per serving of fries. Air-fried versions of the same foods carry up to about 75% less fat, because a tablespoon of oil spread over a pound of food is all there is to absorb.

Both methods produce acrylamide in starchy foods at high heat, so “air-fried” doesn’t mean “health food” — it means fried-adjacent with a fraction of the fat. My are air fryers healthy? guide covers the full picture without the marketing gloss.

Cost: Purchase Price Lies, Oil Doesn’t

Decent machines in both categories start around $50–70, so the sticker is a wash. The divergence is everything after: a deep fryer drinks 3–4 quarts of oil per fill, and even with careful straining and reuse, frequent fryers buy oil like a subscription — $8–15 a fill, several fills a month if you’re serious.

Then there’s disposal, which your drain pipes will not forgive you for skipping. An air fryer’s running cost is a few cents of electricity. Over a year of weekly use, the air fryer is cheaper by the price of a second air fryer.

Cleanup: The Category Killer

This is what actually retires deep fryers to garage shelves.

After deep frying, you wait an hour for the oil to cool, strain it through cheesecloth if you’re keeping it, find a sealed container, wipe an oil-misted counter, and hand-wash a greasy tank. After air frying, the basket goes in the dishwasher. Owner reviews across both categories tell the same story: deep fryers get used weekly for a month, then monthly, then never.

Air fryers stay on the counter.

Which One Should You Buy?

Buy an air fryer if: you want weeknight fries, wings, and crispy reheats with no oil logistics; counter space is limited and one machine should do many jobs; or the fat math matters to anyone in the house. Start with my best air fryers guide — and if you’re feeding four or more, size matters more than features: see the best air fryer for a family of 4.

Buy a deep fryer if: battered fish, tempura, donuts, or wings with that specific glassy crunch are regulars in your kitchen, and you’ll genuinely deal with the oil ritual. It does its one thing better than anything else made.

The honest third option: most households that “need both” actually need an air fryer plus a heavy pot and a thermometer for the four times a year batter calls. And if you want one machine covering the most ground, a pressure cooker air fryer combo stretches the versatility argument even further. What fits in an air fryer might surprise you — my what can you cook in an air fryer guide runs the full list.

Food by Food: Which Method Wins What

Food Air Fryer Deep Fryer Verdict
French fries Excellent; interior runs slightly drier The benchmark — glassy shell, creamy center Deep fryer by a nose; air fryer wins on effort
Chicken wings Skin crisps while fat renders out — arguably better Great, but greasier Air fryer — the owner-consensus favorite
Breaded tenders & schnitzel Excellent with a spray of oil Excellent Tie — air fryer on cleanup
Battered fish & chips Physically impossible — batter drips off Perfect Deep fryer, no contest
Frozen snacks (nuggets, rolls, fries) Modern packaging literally prints air fryer times Works, but overkill Air fryer
Vegetables (brussels, cauliflower) Caramelized edges, superb Oil-logged unless battered Air fryer
Doughnuts Baked-adjacent imitation The real thing — fried is the definition Deep fryer

The pattern is consistent: solid and breaded foods air-fry beautifully; anything battered or defined by oil immersion doesn’t. Wings are the surprise — rendering fat out of the skin while it crisps is something oil immersion can’t do, which is why wing devotees increasingly side with the air fryer. And if you want both worlds in one appliance, an air fryer pressure cooker combo pairs a real air fryer with a real pressure cooker.

The Energy Math (It’s Not What You’d Guess)

Electricity is nearly a wash. A 1,700-watt air fryer cycling through a 20-minute session draws roughly 0.4 kWh — about 7 cents at average US rates. A 1,800-watt deep fryer heating four quarts of oil and holding temperature lands around 0.5–0.6 kWh — 9 or 10 cents. Nobody’s utility bill will notice either.

The real cost difference is the oil itself: $8–15 per fill, and even stretched across several strained-and-reused sessions, that’s $1–3 every time the deep fryer runs, against effectively zero for the air fryer. (Both, incidentally, embarrass a 3,000-watt full-size oven for small batches.) One safety note for oil reusers: each heating cycle lowers the oil’s smoke point, and oil that smokes at frying temperature or smells off is done — no straining rescues it.

Frequently Asked Questions

Does an air fryer taste as good as a deep fryer?

For fries, wings, and breaded foods: 85–90% as good, and most households stop noticing within a month. For battered foods there’s no contest — the deep fryer wins outright because batter needs oil immersion to set.

Is an air fryer really healthier than deep frying?

Yes, on fat: the same foods carry up to ~75% less of it. It’s not a free pass — starchy foods still form acrylamide at high heat either way — but per serving, the difference is real and large.

Can you deep fry in an air fryer?

No. Never pour oil into an air fryer’s drawer — it’s a fire hazard and it won’t create immersion frying anyway. A tablespoon tossed over the food is the correct maximum.

What can a deep fryer do that an air fryer can’t?

Wet batters (fish and chips, tempura, corn dogs), true doughnuts, and the glassy all-over crust of oil-immersed fries. If none of those are staples for you, you don’t need one.

Do restaurants use air fryers?

No — commercial kitchens deep fry for speed and texture at volume. Which is exactly why restaurant fries taste the way they do, and why home air-fried versions are the everyday compromise.

Bottom Line

The air fryer wins on oil, cost, cleanup, safety, and everything-else-it-does; the deep fryer wins on batter and the last 15% of texture. For most kitchens that’s an easy call — and the whole air fryer lineup, from compact to family-size, lives in my air fryers hub. Comparing the air fryer against an oven with a fan instead? See air fryer vs convection oven.

Filed Under: Product Reviews Tagged With: Air Fryers, Comparison, Deep Fryers

Best Flat Top Grill: 5 Picks Compared

Last Updated October 8, 2026

Chef cooking fried eggs on an outdoor flat top griddle

This post contains affiliate links. If you buy through my links, I may earn a commission at no extra cost to you.

Let’s be honest about this category up front: Blackstone owns it. Three of my five picks wear the same badge, because after checking every serious flat top on Amazon, that’s what the market looks like — nobody else combines the steel, the burner power, and six-figure review counts. The real question isn’t which brand; it’s which size. I break that decision down head-to-head in my Blackstone 28 vs 36 comparison.

The Blackstone 36″ 4-Burner Station is the pick for families and entertainers: 60,000 BTUs across four independent zones, 4.7 stars from 10,000+ owners, $399.00. Cooking for fewer people? The 28″ version is the sweet spot, and there’s a $128 tabletop for tailgates. One combo unit and one compact two-burner round out the field.

Best Flat Top Grills — Quick Comparison

Product Best For Price Rating Buy
Blackstone 36″ 4-Burner Station Best Overall $399.00 4.7★ (10,726) Check Price
Blackstone 28″ Omnivore Best for Most Backyards $249.99 4.7★ (12,146) Check Price
Royal Gourmet GD401C Combo Best Grill + Griddle Combo $259.99 4.4★ (1,439) Check Price
Blackstone 22″ Tabletop Best Compact Two-Burner $178.99 4.7★ (6,805) Check Price
Blackstone 17″ Tabletop Best Portable $128.12 4.7★ (1,412) Check Price

How I Picked

Every pick was verified live on Amazon today (4 July 2026) — real US prices, current ratings, confirmed in stock.

That check mattered more than usual here: two products from the previous version of this guide had quietly died (Camp Chef’s flat top left Amazon entirely; a Blackstone listing got merged into a broken variant page). Selection weighed cooking surface per dollar, burner zones, steel gauge, grease management, and what 26,000+ combined owner reviews say after seasons of use.

Research-based and spec-verified, with the honest caveat that I haven’t lined up five griddles in a parking lot.

The 5 Best Flat Top Grills in 2026

1. Blackstone 36″ 4-Burner Station — Best Overall

Blackstone 36 inch 4-burner flat top griddle cooking station

The 36″ Blackstone is the reason this category exists on Amazon at all: 756 square inches of cold-rolled steel over four independently controlled burners pushing 60,000 BTUs. That’s pancakes for a crowd on one zone, bacon on another, and a hot sear zone on the third — the wide-open cooking style that made flat tops a backyard movement. Ten thousand reviews at 4.7 stars is the kind of consensus almost nothing at $400 achieves.

Downsides: it’s a commitment — around 120 pounds assembled, and it lives outside under a cover, not in a garage corner. The steel needs seasoning like cast iron, and skipping that care shows up as rust complaints in reviews. And the base model has no hood; windy-day cooking takes planning.

Check Price on Amazon

Read my full Blackstone 36″ review for the complete breakdown, including what over 10,000 owners report and a genuine grease-drain design flaw worth knowing about.

2. Blackstone 28″ Omnivore — Best for Most Backyards

Blackstone 28 inch Omnivore flat top griddle

The highest-reviewed griddle in this guide (12,146 and counting) is not the big one. The 28″ hits the balance most households actually need: two burner zones, enough surface for a family smash-burger night, a rear grease system that’s genuinely tidier than the front-drain designs, and a $149 saving over its big brother. If you’re not regularly feeding eight people, this is the smarter buy.

Downsides: two zones means less temperature separation than the 36″ — you’ll juggle when a meal needs three heats. The Original trim skips side shelves, so plan a prep table. Same seasoning duty as every bare-steel griddle.

Check Price on Amazon

3. Royal Gourmet GD401C — Best Grill + Griddle Combo

Royal Gourmet GD401C 4-burner grill and griddle combo with cover

Can’t choose between grill grates and a griddle plate? The GD401C splits its 48,000 BTU, four-burner surface between both, and throws in a fitted cover — an accessory Blackstone charges extra for. For households that want burgers seared over open flame AND a breakfast griddle in one footprint, it’s the value play at $260.

Downsides: the split surface means neither half is huge — big batches involve rotation. The steel runs thinner than Blackstone’s, which shows in heat retention when you load it with cold food. And its 4.4-star average, while solid, sits visibly below the Blackstone 4.7s; assembly complaints drive most of the difference.

Check Price on Amazon

4. Blackstone 22″ Tabletop Griddle — Best Compact Two-Burner

Blackstone 22 inch tabletop griddle with two burners

The 22″ tabletop is the apartment-balcony and small-patio answer: two independently controlled burner zones and 24,000 BTU across 361 square inches, in a footprint that lifts onto a table and stores in a cupboard. Blackstone quotes 14 burgers or 60 hot dogs at once, which is more than the size suggests, and the two zones mean you can hold one side low for onions while searing on the other.

Downsides: it is rolled steel like every other Blackstone here, so it needs the same seasoning and oiling routine — there is no coated shortcut in this line-up any more. It has no cart, no wheels and no side shelves, so you need a sturdy table to put it on, and the lid is sold separately.

Check Price on Amazon

5. Blackstone 17″ Tabletop — Best Portable

Blackstone 17 inch Omnivore tabletop griddle

Same cold-rolled steel, same 4.7-star owner satisfaction, scaled to a $128 unit you can carry one-handed to a tailgate, campsite, or picnic table. For couples, campers, and anyone testing whether griddle life is for them before committing to a cart-size unit, this is the entry point.

Downsides: single burner zone — one temperature at a time. It needs a table or stand; there are no legs. And 267 square inches feeds two to three people comfortably, not a party.

Check Price on Amazon

Flat Top Grill Buying Guide

Griddle vs grill: know which cooking you want

A flat top can’t do open-flame char or grate marks — it does smash burgers with full crust contact, breakfast spreads, fried rice, fajitas, and anything that would fall through grates. If weeknight variety beats steakhouse marks for your household, the flat top wins; if you want both, that’s the Royal Gourmet combo’s whole argument. For the full side-by-side, see my griddle vs grill comparison. For indoor tabletop grilling — Korean BBQ style — see my indoor KBBQ grill guide.

Size by the people you actually feed

The honest sizing rule: 17″ for 2–3 people, 28″ for a family of four with room to spare, 36″ only if you host regularly. Oversizing wastes propane heating steel you never cook on, and the 36″ unit’s 120-pound reality deserves respect before checkout. Most flat top grills run on propane by default; if you have a fixed outdoor kitchen and grill often, my propane vs natural gas comparison covers whether a gas line is worth installing.

Steel care is the ownership cost

Bare-steel griddles season like cast iron: thin oil layers baked into a black, slick patina. Ten minutes after each cook keeps them perfect; neglect earns rust. If that ritual sounds like a chore rather than a pleasure, this is the wrong category for you — every griddle here is bare rolled steel. Surface temperature discipline matters too — a good BBQ thermometer takes the guesswork out of zones, and my meat temperature guide covers doneness once the sear is on.

Wind, covers, and living outside

Flat tops live outdoors, and open burners hate wind — position matters, and a fitted cover is non-negotiable for the bare-steel models (rust never sleeps). Already seeing orange spots on yours? My guide to griddle rust covers how to tell surface rust from normal heat discoloration and fix it. My guide to cleaning a flat top grill covers the routine that actually prevents rust and grease buildup from happening in the first place.

If food is sticking despite good seasoning, my guide to griddle sticking walks through the three separate causes and how to tell them apart. Budget $30–50 for a cover if your pick doesn’t include one; the Royal Gourmet’s bundled cover is a genuine line-item saving. For monitoring long cooks from indoors, a Bluetooth meat thermometer earns its keep.

Griddles run on the same propane hardware as a gas grill, so the same ignition faults apply — and if the burners click without catching, the cause is usually the regulator rather than the igniter, which is covered in a grill igniter clicking but not lighting.

Frequently Asked Questions

Is a flat top grill better than a regular grill?

Different, not better. Flat tops win on versatility (breakfast to stir-fry), even heat, and beginner-friendliness; grills win on char, smoke flavor, and fat drainage. Households that cook outdoors weekly increasingly keep both — or split the difference with a combo.

Why does everyone buy Blackstone?

Thicker cold-rolled steel than most rivals at each price, a parts and accessories ecosystem, and review counts in the tens of thousands that de-risk the purchase. Three of my five picks are Blackstones because that dominance is earned, not sponsored.

Do flat top grills rust?

Bare steel rusts if neglected — it’s the #1 owner complaint across every brand. Season after each cook, cover it, and rust never starts. There is no coated option left in this line-up to opt out of the problem.

What size flat top grill do I need?

17″ for two to three people, 28″ for a typical family, 36″ for regular entertaining. When in doubt, size down — a crowded 28″ cooks better than a half-cold 36″.

Can you cook on a flat top in winter?

Yes — propane burners don’t care, though cold steel takes longer to preheat and wind chill widens temperature swings. A windbreak and a surface thermometer keep winter smash burgers realistic.

What should I cook first on a new flat top?

After the initial seasoning (several thin oil coats, smoked off one at a time): bacon. The rendered fat deepens the seasoning, and the low stakes let you learn the hot spots before anything expensive hits the steel.

Bottom Line

Feed a crowd: the 36″ Blackstone. Feed a family: the 28″ — the best griddle-per-dollar in the category. Test the waters: the 17″ tabletop.

Want flame and flat top in one: Royal Gourmet’s combo. All my outdoor cooking coverage lives at the flat top grills hub.

How These Picks Were Chosen

Plainly: this is a research-based guide, not a hands-on test. I have not run these side by side, and nothing here should be read as a report from my own kitchen.

What the picks rest on: cooking area in usable square inches, burner count and total BTU set against that area, griddle plate thickness and material, and how grease is collected and emptied; plus the complaint patterns across verified-purchase reviews, which for flat tops concentrate on rust after seasoning failures, uneven heat between burner zones, and grease trays that overflow or leak.

What I could not establish: heat evenness across the plate, which is what separates a good flat top from a frustrating one. Measuring it needs an infrared thermometer and a grid of readings across a fully preheated surface, and no independent test does that for these models. Plate thickness and burner layout are used as indicators instead.

You Might Also Like

  • Best meat thermometer for smoking
  • Best fry pans for gas stoves — the indoor rainy-day backup

Just bought one? See how to season a Blackstone griddle before your first cook — it changes how well food releases from day one.

Filed Under: Product Reviews

Gaggia Classic Pro vs Breville Bambino Plus: Which to Buy?

Last Updated October 29, 2026

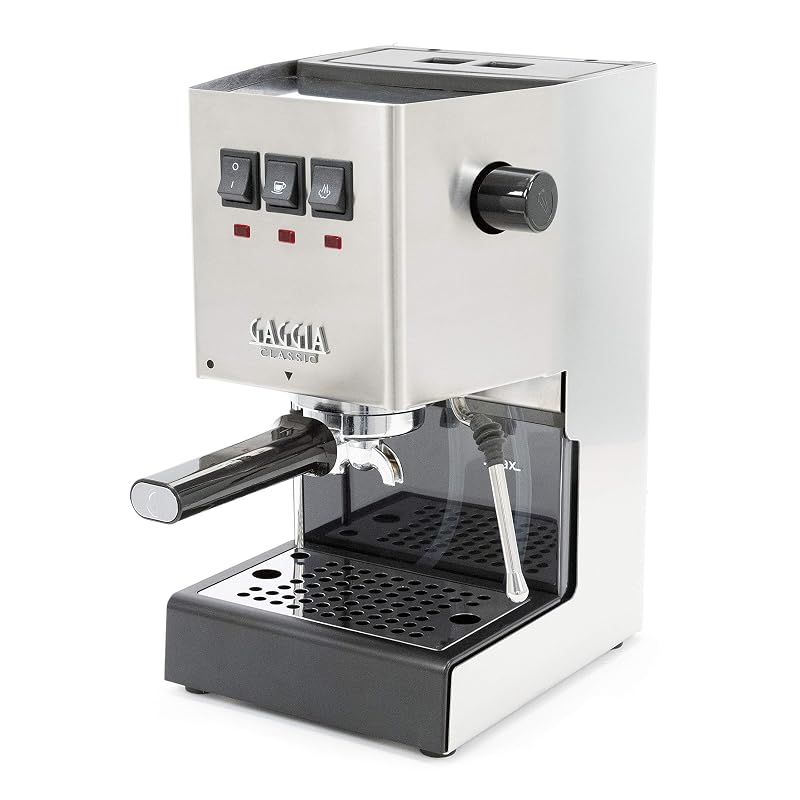
Stainless steel espresso machine on a modern kitchen counter

This post contains affiliate links. If you buy through my links, I may earn a commission at no extra cost to you.

Quick verdict:

  • Gaggia Classic Pro wins for: hobbyists who want commercial-size equipment they can learn on, mod, and repair for a decade
  • Breville Bambino Plus wins for: anyone who wants a proper latte five minutes after waking up, with zero learning curve on milk
  • My pick for most people: the Bambino Plus — automatic milk steaming and a 3-second heat-up remove the two biggest reasons people stop using their espresso machine

These are the two machines everyone lands on when they decide to make real espresso at home without spending four figures. The Gaggia Classic Pro ($450.83) is a 30-year-old Italian design built like a tank around a commercial 58mm portafilter. The Breville Bambino Plus ($499.95) is modern engineering aimed at the opposite problem: making the process fast and foolproof.

Everything below draws on my full hands-on reviews of both machines, not spec sheets alone: specs, shot quality, steam, cleaning, long-term ownership, and exactly who should buy which.

Gaggia Classic Pro vs Bambino Plus — Specs Side by Side

Spec Gaggia Classic Pro Breville Bambino Plus
Price $450.83 $499.95
Rating 4.4★ (3,151) 4.1★ (2,795)
Portafilter 58mm commercial 54mm
Heat-up time ~5 min to fully warm ~3 seconds (ThermoJet)
Milk steaming Manual commercial-style wand Automatic (temp + texture sensors) or manual
Temperature control Thermostat (PID moddable) Digital PID built in
Housing Steel, made in Italy Stainless-wrapped, plastic internals
Water tank 2.1 L 1.9 L
User-repairable Yes — full parts availability No — sealed unit
Buy Check Price Check Price

Gaggia Classic Evo Pro espresso machine in brushed stainless steel Breville Bambino Plus BES500 espresso machine

Shot Quality

With good beans, a capable grinder, and a practiced hand, the Gaggia pulls the better shot — its 58mm commercial basket spreads the puck thinner, which is more forgiving of distribution errors and produces the syrupy, textured shots hobbyists chase. The Evo Pro update fixed the old machine’s biggest flaw by setting the overpressure valve to 9 bar from the factory.

The Bambino Plus counters with consistency. Its built-in PID holds brew temperature tighter than the Gaggia’s basic thermostat, and low-pressure pre-infusion smooths over minor prep mistakes. Shot one on the Bambino tastes very close to shot fifty; on the Gaggia, shot one is usually a lesson. Ceiling: Gaggia.

Floor: Bambino. Both need a real grinder either way — see my best espresso grinder guide.

Temperature Stability

Stock versus stock, the Bambino wins this one outright. The ThermoJet heater plus digital PID lands within a couple of degrees of target every time, with no warm-up ritual.

The Gaggia’s aluminum boiler cycles around a thermostat, so experienced owners “temperature surf” — flushing water and timing the shot off the heating light. It works, but it’s a technique you have to learn, and it’s the single most common reason new Gaggia owners get sour shots in week one. A PID mod (~$100 in parts) closes the gap completely — but that’s a soldering-iron weekend, not a checkbox.

Steam Wand Performance

This is the fork in the road. The Gaggia’s commercial-style wand produces genuinely better microfoam once you’ve learned it — full manual control over stretch and texture, enough power to paint latte art foam. Budget two weeks of mediocre cappuccinos while you learn.

The Bambino Plus steams milk for you: sensors track temperature and texture, you pick one of three foam levels, and it purges the wand automatically afterward. The result is 90% as good as skilled manual foam with 0% of the practice. If your household drinks lattes daily and nobody wants a hobby, this feature alone decides the comparison. My milk frothing guide covers the manual technique if you want to learn it anyway.

Design and Usability

The Bambino Plus is the machine you can actually live with in a small kitchen: 7.7 inches wide, about 11 pounds, ready in three seconds, with one-touch buttons. The Gaggia is 16 pounds of Italian steel that needs five minutes of warm-up to pull its best shot (the ready light lies — the group head needs the time even when the boiler doesn’t).

Neither has a screen, and neither needs one. The Gaggia’s rocker switches feel like a 1990s machine because it is one, mechanically speaking — which is either charming or dated depending on why you’re buying it.

Cleaning and Maintenance

Day to day they’re similar: knock the puck, rinse the basket, wipe the wand.

The Bambino’s auto-purge keeps its steam wand cleaner with no thought. Long term, the machines diverge completely. The Gaggia is fully user-serviceable — descale it yourself, replace gaskets in ten minutes, and every part down to the boiler is available; forty-year-old Classics are still running on their original frames.

The Bambino is a sealed unit: when something fails out of warranty, the usual outcome is replacement, not repair. Descaling matters on both — my descaling guide covers the schedule.

Value for Money

Prices are close — $450.83 versus $499.95 on 29 October 2026 — which makes this comparison unusually clean: you’re not paying a premium for either philosophy, you’re just choosing one. The Gaggia’s money goes into metal, the 58mm group, and repairability.

The Bambino’s goes into the ThermoJet heater, PID, and the milk automation. Nobody is overpaying here; the only mistake is buying the one designed for somebody else. Both sit in the sweet spot of my best espresso machines under $500 guide.

Who Should Buy Each

Buy the Gaggia Classic Pro if:

  • You enjoy the process — dialing in, tweaking, learning the wand — as much as the coffee
  • You want equipment that accepts standard 58mm commercial baskets, bottomless portafilters, and a PID mod down the road
  • You expect to still be using (and repairing) the same machine in ten years
  • Straight espresso is your drink, so milk automation buys you nothing

Buy the Breville Bambino Plus if:

  • Milk drinks are the household default and you want café-quality foam on day one
  • Your mornings can’t absorb a five-minute warm-up — three seconds changes daily behavior
  • Counter space is tight and 16 pounds of steel is a liability, not a feature
  • You want the machine to be an appliance, not a hobby

Check Gaggia Price on Amazon  Check Bambino Price on Amazon

Long-Term Ownership

Ten years out, the Gaggia is the safer bet — not because Breville builds junk, but because the Gaggia is designed to be opened and the Bambino isn’t.

Gaggia parts supply spans decades of near-identical machines; gaskets, thermostats, even boilers are cheap and documented. The Bambino carries a 2-year warranty (versus Gaggia’s 1) and its owners’ 4.1-star average partly reflects units that failed young — but when a 7-year-old Bambino dies, it’s done. Factor that in if total cost of ownership drives your decision.

Verdict

For most people, the Breville Bambino Plus is the right machine. The 3-second heat-up and automatic milk steaming remove the two friction points that turn espresso machines into countertop ornaments, and its PID makes it more consistent shot-to-shot than a stock Gaggia. It’s the machine you’ll still be using — not just owning — in a year.

The Gaggia Classic Pro is the better machine for the person who wants to get better at espresso. Higher shot ceiling, commercial tooling, a legendary mod scene, and repairability the Bambino can’t touch. If that paragraph made you nod, ignore the “most people” verdict — you’re not most people.

Full deep-dives: my Gaggia Classic Pro review and Breville Bambino Plus review. Comparing more machines? Start with the best semi-automatic espresso machines or browse all my coffee equipment guides.

How This Comparison Was Put Together

Plainly: this is a research-based comparison, not a hands-on test. I have not run these side by side.

What it rests on: the published specification for both – boiler versus ThermoJet heating and what each means for warm-up and recovery, portafilter size (58mm commercial against 54mm), whether the supplied basket is pressurised, steam wand design and automatic versus manual milk texturing, and how serviceable each machine is; plus the pattern across verified-purchase reviews for each.

What I could not establish: shot quality on either, which at this price is decided more by the grinder and the operator than by the machine.

What this comparison can do is set out what each hardware choice lets you control and what it takes out of your hands – which is the real difference between these two.

Frequently Asked Questions

Is the Gaggia Classic Pro worth it over the Bambino Plus?

Only if you want espresso as a hobby. The Gaggia has a higher shot ceiling and lasts decades with basic maintenance, but the Bambino makes better coffee than a Gaggia in unpracticed hands — and prices are nearly identical.

Which makes better espresso?

A dialed-in Gaggia beats a dialed-in Bambino on shot texture thanks to the 58mm commercial basket. A stock Bambino beats a stock Gaggia on consistency thanks to its built-in PID. The grinder you pair with either matters more than this difference.

Which is better for lattes and cappuccinos?

The Bambino Plus, decisively, unless you’re willing to practice. Its automatic steam wand produces reliable microfoam from the first cup; the Gaggia’s manual wand produces better foam only after a couple of weeks of learning.

Do I need a separate grinder for these machines?

Yes, for both. Neither has a built-in grinder, and pre-ground coffee wastes what you’re paying for. Budget $100–300 for a proper burr grinder.

Which machine lasts longer?

The Gaggia, by design. It’s fully user-serviceable with decades of parts availability; the Bambino is a sealed unit that’s typically replaced rather than repaired when it fails out of warranty.

Filed Under: Product Reviews

5 Best Nonstick Cookware Sets: Reviewed and Ranked

Last Updated October 8, 2026

Disclosure: This post contains affiliate links. If you buy through them, I earn a small commission at no extra cost to you. Full disclosure here.

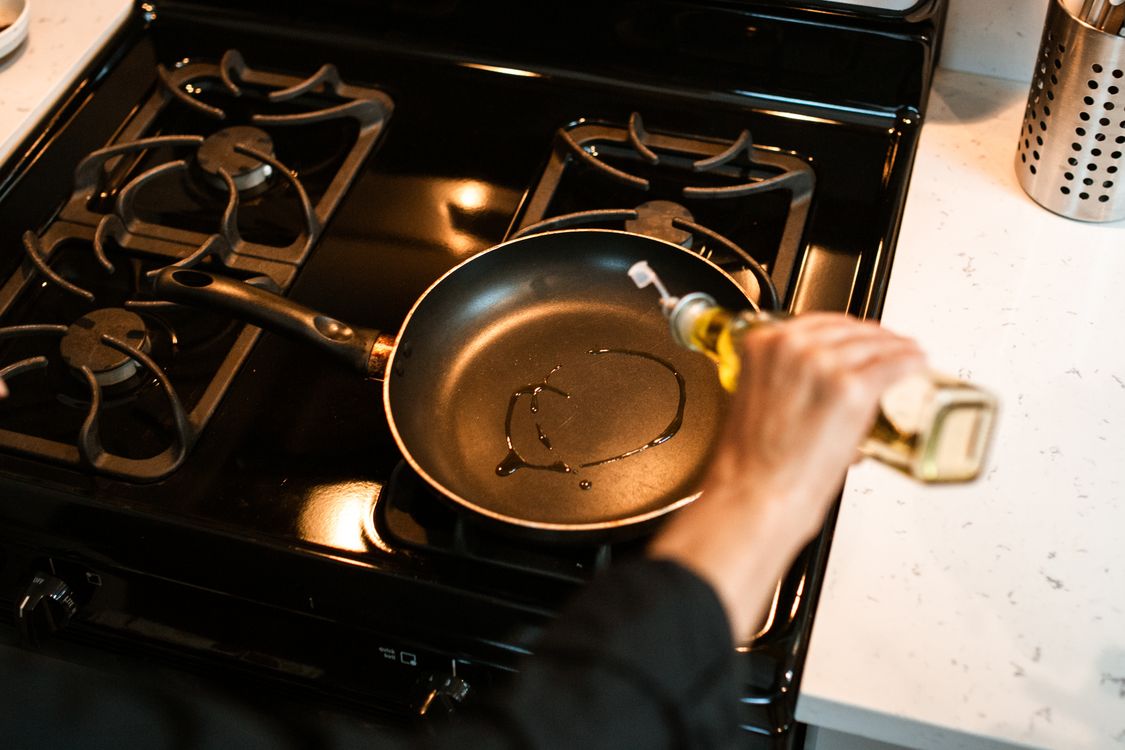
Pouring oil into a nonstick frying pan on a stovetop

The right nonstick cookware set handles 90% of what you cook — from eggs and pancakes to weeknight stir-fries and pasta sauces. After researching the most-reviewed sets available, my top pick is the T-Fal Signature 12-Piece Set ($109.99). It has over 18,000 customer reviews, a Thermo-Spot indicator that tells you when the pan is ready, and enough pieces to cover most cooking tasks.

The right choice depends on your priorities — material, durability and heat conductivity pull in different directions. The Amazon Basics 15-Piece gives you more pieces for less money. The GreenPan Lima uses a ceramic coating free of PTFE and PFAS. For high-heat cooking or a set you want to last a decade, hard-anodized aluminum is worth the extra spend.

Here’s how all five compare.

Best Nonstick Cookware Sets at a Glance

Product Best For Price Rating Buy
T-Fal Signature 12pc Best Overall $109.99 4.7★ (18,422) Check Price
Amazon Basics 15pc Best Budget $62.99 4.6★ (25,990) Check Price
GreenPan Lima 12pc Best Ceramic $149.99 4.4★ (1,614) Check Price
T-fal Ultimate Hard Anodized 12pc Best Hard Anodized $159.99 4.7★ (8,678) Check Price
Calphalon 10pc Hard-Anodized Best Premium $324.54 4.6★ (7,151) Check Price

What Makes a Good Nonstick Cookware Set

Not all nonstick sets are equal. Before diving into specific products, a few things that actually separate a set that lasts three years from one that lasts ten.

Coating thickness. Single-layer PTFE (common on budget sets) starts showing wear after 1-2 years of regular use. Two-layer coatings — like the Calphalon — last meaningfully longer. Ceramic coatings (GreenPan Lima) are more durable at high heat but require a small amount of oil to match PTFE’s food release.

Body material. Standard aluminum heats quickly but dents and warps under thermal stress. Hard-anodized aluminum has the same thermal properties but a harder exterior — it resists scratching, corrosion, and warping. None of the sets here use stainless steel, which is where you’d step up for induction compatibility and genuine long-term durability. See my guide to the most durable cookware materials for the full breakdown.

Induction. All five sets here use aluminum bodies — none of them work on induction cooktops. If you have induction, see my guide to induction-compatible cookware instead.

1. T-Fal Signature 12-Piece Nonstick Set — Best Overall

T-Fal Signature 12-Piece Nonstick Cookware Set in black

Best for: First-time buyers and everyday cooks who want a reliable, well-reviewed set without overthinking the purchase.

The T-Fal Signature’s most useful feature is the Thermo-Spot heat indicator — a circle on the base that turns solid red when the pan has reached the right cooking temperature. It removes one of the most common cooking mistakes: adding food to a pan that hasn’t properly preheated. When the Thermo-Spot goes solid, the pan is ready. It’s a small detail that actually affects results.

The 12-piece set covers most household needs: two fry pans (8″ and 10″), saucepans with lids, a sauté pan with lid, a Dutch oven with lid, and a griddle. The PTFE coating releases food cleanly at low to medium heat — eggs, pancakes, and fish do particularly well. Oven safe to 350°F, dishwasher safe, and built around a straightforward premise: do the basics reliably for several years.

With 18,348 reviews at 4.7 stars, it’s one of the most validated cookware sets available. Common complaints in reviews centre on expected PTFE limitations: the coating eventually wears (typically after 3-5 years of regular use) and very high heat shortens its life. Both are true of all standard PTFE nonstick — not defects specific to this set.

Key Specs

  • Pieces: 12 (8″ and 10″ fry pans, 1.5qt and 2qt saucepans with lids, 3qt sauté pan with lid, 5qt Dutch oven with lid, griddle)
  • Coating: PTFE nonstick
  • Body: Aluminum
  • Oven safe: To 350°F
  • Induction: No
  • Dishwasher safe: Yes

Pros

  • Thermo-Spot indicator removes preheating guesswork
  • 18,000+ reviews offer reliable long-term performance data
  • Comprehensive set — fry pans, saucepans, sauté pan, Dutch oven, griddle
  • Dishwasher safe for easy cleanup

Cons

  • Not induction compatible
  • 350°F ceiling — hard-anodized sets handle higher temperatures
  • PTFE coating won’t last as long as hard-anodized or ceramic alternatives

Check Price on Amazon

2. Amazon Basics 15-Piece Nonstick Set — Best Budget

Amazon Basics 15-Piece Nonstick Cookware Set in black

Best for: Budget buyers, first apartments, second homes, or anyone who wants the most pieces at the lowest price.

The Amazon Basics set does one thing very well: quantity at a low price. For $62.99, you get 10 cooking pieces — two fry pans, four covered saucepan/casserole pans — plus a complete 5-piece utensil set (pasta server, soup ladle, slotted turner, serving spoon, slotted serving spoon). That’s everything a new kitchen needs, in a single box.

The build quality matches the price. The nonstick coating is effective when new, but reviews consistently note wear beginning around the 18-24 month mark with regular daily cooking. For occasional use or a secondary kitchen, that’s acceptable. For a busy household using the pans twice a day, you’d want to step up to the T-Fal Signature at minimum.

With 25,940 reviews at 4.6 stars, it’s the most reviewed set in this lineup. The high review count and consistent 4+ rating suggest most buyers are getting what they expected at this price point.

Key Specs

  • Pieces: 15 (8″ and 10″ fry pans; 1.5qt, 2qt, 3qt, 5qt pans with lids; plus 5-piece utensil set)
  • Coating: PTFE nonstick
  • Body: Aluminum with spiral base
  • Oven safe: To 350°F (lids to 250°F)
  • Induction: No
  • Dishwasher safe: Yes

Pros

  • Best price-per-piece of any set reviewed here
  • 25,940 reviews — the most validated set in this lineup
  • Includes full utensil set (most sets don’t)
  • Even heat distribution on gas and electric

Cons

  • Coating starts wearing noticeably at 18-24 months with regular daily use
  • Not induction compatible
  • Lids only oven-safe to 250°F — meaningfully lower than the pans themselves
  • Handles can warm up during longer cooking sessions

Check Price on Amazon

3. GreenPan Lima 12-Piece Ceramic Nonstick Set — Best Ceramic

GreenPan Lima 12-Piece Hard Anodized Ceramic Nonstick Cookware Set in gray

Best for: Buyers who want to avoid PTFE, PFAS, lead, and cadmium, and are willing to use a small amount of oil to get comparable food release.

GreenPan’s Thermolon coating is sand-based rather than PTFE. The practical difference: it won’t release toxic fumes if accidentally overheated, and it contains no PFAS, PFOA, lead, or cadmium. For households with babies, young children, or anyone who’s read about the health concerns around traditional nonstick coatings, that’s a meaningful distinction. My guide to cast iron vs ceramic cookware covers the health comparison in detail.

The hard anodized body is more robust than the aluminum used in the T-Fal and Amazon Basics sets — it resists scratching, corrosion, and warping. The 600°F oven-safe rating for the pan body (lids rated to 425°F) is the highest in this lineup, making it the best option if you regularly start things on the stovetop and finish under a broiler.

The trade-off is food release. Ceramic coatings don’t match PTFE for pure slickness — you’ll want a little oil or butter, especially for eggs or fish. Ceramic is also more sensitive to thermal shock: don’t plunge a hot pan into cold water, and avoid sudden temperature swings. The 4.4★ rating from 1,609 reviews reflects this — it’s a well-made set, but users moving from PTFE notice the difference in daily use.

Key Specs

  • Pieces: 12 (8″ and 10″ fry pans, 1.5qt and 2.5qt saucepans with lids, 3qt sauté pan with lid, 5qt stockpot with lid)
  • Coating: Thermolon ceramic nonstick (PFAS-free, PFOA-free, lead-free, cadmium-free)
  • Body: Hard anodized aluminum
  • Oven safe: To 600°F (body), 425°F (lids)
  • Induction: No
  • Dishwasher safe: Yes (hand wash recommended to extend coating life)

Pros

  • Free of PFAS, PFOA, lead, and cadmium — won’t off-gas even if overheated
  • 600°F oven-safe body — highest in this lineup
  • Hard anodized body is more durable than standard aluminum
  • Riveted stainless steel handle is secure and built to last

Cons

  • Requires more oil/butter than PTFE — food release isn’t as effortless
  • Sensitive to thermal shock: avoid rapid temperature changes
  • Not induction compatible
  • Lowest review count of the five sets here

Check Price on Amazon

4. T-fal Ultimate Hard Anodized 12-Piece Set — Best Hard Anodized

T-fal Ultimate Hard Anodized Nonstick 12-Piece Cookware Set in black

Best for: Buyers who want the durability of hard anodized construction with the convenience of nonstick release, at a mid-range price.

Hard anodized aluminum starts as standard aluminum but goes through an electrochemical process that makes the exterior significantly harder — roughly twice the hardness of stainless steel. The result is a pan that’s more resistant to scratching, denting, and corrosion, and one that distributes heat more evenly across the cooking surface without developing hot spots over time.

The T-fal Ultimate layers a PTFE nonstick surface on top of this hard-anodized body, combining durability with easy food release. The oven and broiler-safe rating reaches 400°F for the pan (lids to 350°F) — a step up from the 350°F ceiling on the standard T-Fal Signature. The thicker construction also holds heat better: when cold food hits the pan, it recovers temperature faster than thinner aluminum sets. If you’re cooking on gas, see my best cookware for gas stoves guide for how materials perform across different burner types.

At $159.99, this costs $50 more than the T-Fal Signature. That’s a modest premium for a product built to last meaningfully longer under regular cooking conditions. If the standard Signature is a 3-5 year set, the hard-anodized version is realistically a 6-10 year set with proper care.

Key Specs

  • Pieces: 12 (8″ and 10″ skillets, saucepans, sauté pan, Dutch oven — all with lids)
  • Coating: PTFE nonstick on hard anodized body
  • Body: Hard anodized aluminum
  • Oven safe: To 400°F (lids to 350°F)
  • Induction: No
  • Dishwasher safe: Yes

Pros

  • Hard anodized body is significantly more durable than standard aluminum
  • Oven and broiler safe to 400°F — more cooking flexibility than entry-level sets
  • 8,677 reviews confirm reliable long-term performance
  • PTFE layer delivers effortless food release without sacrificing durability

Cons

  • Not induction compatible
  • About $50 more than the T-Fal Signature for a similar piece count
  • Hard anodized exterior can discolour over time in a dishwasher at high heat

Check Price on Amazon

5. Calphalon 10-Piece Hard-Anodized Nonstick Set — Best Premium

Calphalon 10-Piece Hard-Anodized Nonstick Cookware Set in black

Best for: Buyers who want a well-built, professional-feeling set and aren’t interested in replacing it in five years.

Calphalon has been building hard-anodized cookware since the 1960s. The 10-piece set doesn’t have gimmick features — no heat indicators, no detachable handles — just solid construction with a 2-layer PTFE nonstick interior. The difference between one and two layers of coating is durability: more coating means more material to wear through before the base is exposed, which meaningfully extends the pan’s useful life under regular cooking conditions.

The 6-quart stockpot stands out. Most 10-piece sets top out at 3-4 quarts; the 6-quart handles pasta for 4-5 people, proper stock-making, or batch cooking. The long silicone handles stay cool consistently during cooking — something that sounds minor until you’ve burned your hand on a short handle that conducted more heat than expected. Oven safe to 450°F, which pushes past what either T-Fal set offers.

At $324.54, this is the most expensive set reviewed here. The extra cost over the T-fal Ultimate Hard Anodized buys the 2-layer coating, the 6-quart stockpot, and Calphalon’s long manufacturing history. Worth it for a daily-use kitchen where the cookware gets serious, consistent use. Not necessary if you’re cooking twice a week.

Key Specs

  • Pieces: 10 (8″ and 10″ fry pans, 1qt and 2qt saucepans with lids, 3qt sauté pan with lid, 6qt stockpot with lid)
  • Coating: 2-layer PTFE nonstick
  • Body: Hard anodized aluminum
  • Oven safe: To 450°F
  • Induction: No
  • Dishwasher safe: Yes

Pros

  • 2-layer nonstick coating is more durable than single-layer alternatives
  • 6-quart stockpot is the largest capacity in any set reviewed here
  • Long silicone handles stay cool reliably during cooking
  • 450°F oven-safe rating — highest among the hard-anodized sets here

Cons

  • Most expensive set here — $165 more than the T-fal Ultimate for two fewer pieces
  • 10 pieces is the smallest set in this lineup
  • Not induction compatible
  • No griddle included, unlike either T-Fal set

Check Price on Amazon

How to Choose a Nonstick Cookware Set

PTFE vs Ceramic: Which Coating Is Right for You

PTFE (the generic term for Teflon) has dominated nonstick coatings for decades.

At normal cooking temperatures — under 500°F — it’s considered safe. It excels at food release; nothing sticks when the coating is in good condition. The concerns around PTFE relate to manufacturing: PFAS chemicals used in the process have environmental and health implications, and older formulations contained PFOA (now banned). Modern PTFE cookware is PFOA-free, but broader PFAS concerns remain for some buyers.

Ceramic coatings (like GreenPan’s Thermolon) avoid both PTFE and PFAS entirely. They’re sand-derived, won’t off-gas at any cooking temperature, and are genuinely free of synthetic PFAS chemistry. The practical downsides: they don’t release food quite as effortlessly as PTFE, and they’re more sensitive to abrasion and thermal shock. If eliminating PFAS is a priority, ceramic is the only option in this price range.

If you want the best food release with the fewest complications, PTFE remains the practical choice for most cooks.

How Many Pieces Do You Actually Need

For a household of 1-2, you can manage with a 10″ fry pan, a 2-quart saucepan with lid, and a 5-6 quart stockpot. That’s three pieces. The rest of what comes in a 12-15 piece set is convenience and coverage for edge cases.

For families of 3+, a 12-piece set makes more sense. You want multiple pans running simultaneously, and larger skillets and stockpots become genuinely useful. The Amazon Basics 15-piece is the obvious choice if you want maximum coverage at minimum cost. The T-Fal Signature 12-piece hits a good middle ground: enough variety without excess.

Oven-Safe Ratings: What They Actually Mean

The oven-safe temperature is the maximum a pan can handle without the coating degrading. 350°F covers most everyday cooking: braising, finishing dishes, warming through. 400°F handles more — you can roast at that temperature without issue. 450°F (Calphalon) and 600°F (GreenPan Lima) open the door to high-temperature roasting and broiling that lower-rated sets can’t safely handle.

Worth checking the lid rating separately — it’s almost always lower than the pan rating.

Induction Compatibility

All five sets reviewed here use aluminum bodies, which are not induction compatible. Induction cooktops require ferromagnetic material at the base to generate heat — iron or certain stainless steels.

Bare steel surfaces do show their history, and it is worth knowing which marks matter: white spots on stainless are either harmless deposits or permanent pitting. If you have induction, none of these sets will work.

See my guide to induction-compatible cookware for alternatives. On gas or electric, all five work normally.

Hard Anodized vs Standard Aluminum

Standard aluminum (T-Fal Signature, Amazon Basics) is lightweight, heats quickly, and keeps costs down.

Its weakness is durability: it dents more easily, and the surface can corrode over time. Hard anodized aluminum has the same thermal properties but a dramatically harder exterior. It resists scratches, doesn’t corrode, and handles thermal stress better — and the nonstick coating applied on top lasts longer because the base it adheres to is more stable.

If you cook daily and want the set to last 8-10 years, hard anodized is worth the premium.

Frequently Asked Questions

How long does a nonstick cookware set last?

With daily use, a standard PTFE nonstick set (T-Fal Signature, Amazon Basics) will show meaningful coating wear after 2-4 years.

Hard anodized sets (T-fal Ultimate, Calphalon) extend this to 5-10 years with proper care. Ceramic nonstick can outlast PTFE but is more sensitive to abrasion and thermal shock — lifespan depends heavily on how carefully you use it.

Can I put nonstick pans in the dishwasher?

All five sets reviewed here are marked dishwasher safe. In practice, dishwashers shorten nonstick coating life — the combination of harsh detergent and high heat degrades the coating faster than hand washing. For full lifespan out of the set, hand wash and dry immediately.

For everyday convenience, dishwashing is fine if you expect to replace the set in 2-3 years rather than 5+.

Is PTFE (Teflon) nonstick safe to use?

At cooking temperatures under 500°F, yes. PTFE only starts breaking down above 500°F, which requires leaving an empty pan on high heat for several minutes.

Normal cooking doesn’t come close. Modern PTFE cookware is also PFOA-free, which addressed the main manufacturing-related health concern. If you remain concerned, GreenPan Lima uses a ceramic coating with no PTFE or PFAS.

What’s the difference between hard anodized and regular aluminum?

Both are aluminum, but hard anodized has been through an electrochemical process that converts the surface into aluminium oxide — roughly twice as hard as stainless steel. In practice: a harder, more scratch-resistant exterior that resists corrosion and handles thermal stress better.

The cooking properties (heat distribution, weight) are similar to standard aluminum. The trade-off is price: hard anodized costs significantly more than standard aluminum at the same piece count.

Do I need to season a nonstick pan?

No. Neither PTFE nor ceramic nonstick pans require seasoning in the way cast iron does.

Most manufacturers recommend washing a new pan with warm soapy water, drying it, then rubbing a thin layer of cooking oil onto the surface before first use. After that, it’s ready immediately. No curing, no build-up — just rinse, oil, and cook.

Can nonstick pans go on a gas stove?

Yes.

All five sets reviewed here work on gas, electric, and glass-ceramic cooktops. None are compatible with induction. On gas, match pan size to burner size — an open flame that extends up the sides of a pan can damage the exterior coating over time and heat handles faster than intended.

How These Picks Were Chosen

Plainly: this is a research-based guide, not a hands-on test. I have not run these side by side, and nothing here should be read as a report from my own kitchen.

What the picks rest on: construction – fully clad through the walls versus a disc bonded to the base, which decides whether the sides heat at all – along with the pieces actually included rather than the headline count, since lids and shared items inflate it; induction compatibility, oven-safe temperature, and handle attachment; plus the complaint patterns across verified-purchase reviews, where the recurring themes are rivets loosening and nonstick pieces in a set outlasting nothing.

What I could not establish: how evenly each set heats, which is the practical case for clad construction.

It needs thermal imaging or a flour test across a preheated pan and no independent test covers these sets. Construction type is used as the indicator throughout, and it is a good one, but it is not a measurement.

The Bottom Line

For most kitchens, the T-Fal Signature 12-Piece is the right starting point. It’s well-reviewed, covers real-world cooking needs, and the Thermo-Spot indicator is a genuinely useful daily feature at a price that doesn’t require overthinking. If budget is the priority, the Amazon Basics 15-Piece gives you more pieces for less — just understand the coating will start wearing sooner.

For a set you want to keep for a decade, the T-fal Ultimate Hard Anodized or Calphalon hard-anodized sets are worth the investment. The GreenPan Lima is the only option here that eliminates PTFE and PFAS entirely — important if that matters to your household. If you’re also comparing individual skillets or looking at sets for a specific cooktop, my nonstick copper cookware guide and best cookware for gas stoves are worth reading alongside this one. If holiday roasts are part of your cooking rotation, the best roasting pan for prime rib guide covers the dedicated pans built for the job.

Related: Best Non-Stick Pan 2026: 5 Picks That Actually Last

I’ve also individually reviewed several budget nonstick sets that come up often in searches: Gotham Steel Hammered 10-Piece, CAROTE 14-Piece, and NutriChef 18-Piece. None of them unseat my top picks above, but if you’ve already got one on your radar, my reviews cover what to expect.

Not sure if ceramic or traditional nonstick is right for you? See my direct Ceramic vs Nonstick Cookware comparison, using the GreenPan Lima and T-fal Ultimate Hard Anodized sets above.

One less thing to worry about with any of these: all of them handle metal utensils without damage — see whether metal utensils are safe on stainless steel for why.

Filed Under: Product Reviews

Best Roasting Pan for Prime Rib: 5 Picks for Perfect Results

Last Updated October 28, 2026

This post contains affiliate links. If you buy through my links, I may earn a commission at no extra cost to you.

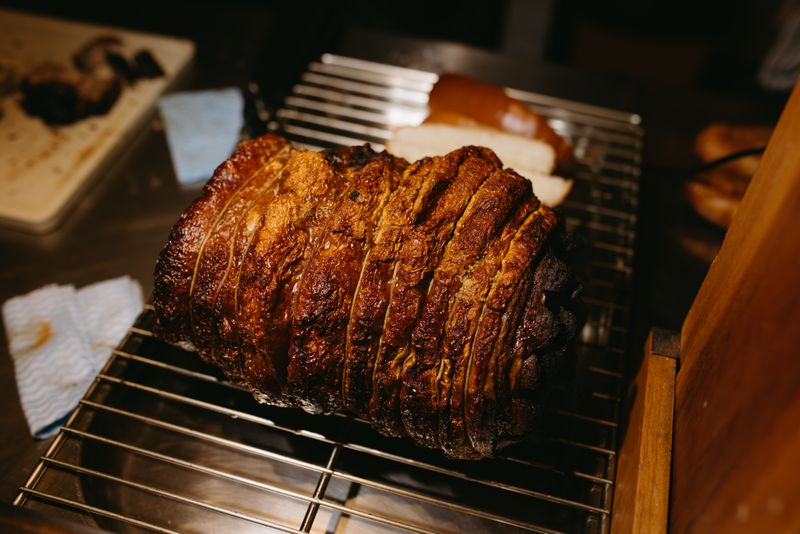
A browned rib roast on a metal roasting rack

Disclosure: As an Amazon Associate I earn from qualifying purchases. This doesn’t affect which products I recommend — I only include items I’d stand behind.

These picks are based on a review of Amazon customer data — ratings, review counts, and verified purchase feedback — alongside technical specifications for prime rib roasting: pan size relative to roast weight, rack inclusion, material heat tolerance, and stovetop compatibility for making pan gravy.

The Circulon Total Bakeware Nonstick Roaster is the best roasting pan for prime rib for most cooks — large enough for a 5-bone roast, includes a proper rack, and is built heavy enough that it won’t warp at prime rib temperatures. Below are five picks that cover every situation from budget to premium, compact to family-feast size.

Best Roasting Pan for Prime Rib 2026: Quick Comparison

Product Best For Price Rating Buy
Circulon Nonstick Roaster Best Overall $69.59 4.7★ (9,113) Check Price
IMUSA Oval Roaster Best Oval Shape $103.13 4.7★ (3,590) Check Price
P&P CHEF 16″ V-Rack Best Value $43.99 4.7★ (1,535) Check Price
Cuisinart Multiclad Pro Best Premium $159.95 4.7★ (1,398) Check Price
Cooks Standard Best Compact $84.36 4.8★ (1,135) Check Price

Best Roasting Pan for Prime Rib 2026: Full Reviews

1. Circulon Total Bakeware Nonstick Roaster 17×13″ — Best Overall

Circulon Total Bakeware Nonstick Roaster 17x13 inch

At 17×13 inches, this is the largest nonstick option on the list and one of the few that comfortably fits a full 5-bone prime rib without the roast overhanging the edges. The included flat rack lifts the meat off the pan surface so heat circulates underneath rather than steaming the bottom. With 9,113 reviews at 4.7 stars, it’s the most-reviewed nonstick roaster on Amazon.

The hard-anodized exterior handles oven heat at roasting temperatures (325–350°F) without issue. The Dupont nonstick interior makes cleanup straightforward — drippings release easily after the pan cools. One limitation: nonstick construction means it can’t go on a stovetop burner for deglazing, so you’d transfer drippings to a saucepan to make au jus.

Pros

  • 17×13″ fits a 5-bone roast with room to spare
  • Rack included; hard-anodized construction holds up at roasting temps
  • Easiest cleanup of the five picks; dishwasher safe
  • 9,113 reviews — most proven nonstick roaster option

Cons

  • Not stovetop-safe — can’t deglaze directly for pan gravy
  • Nonstick coating won’t last forever with metal utensils or aggressive scrubbing

Bottom line: The most practical choice for most households — large, includes a rack, cleans easily, and proven at scale. Accept the stovetop limitation and it’s hard to beat.

Check Price on Amazon

2. IMUSA Cajun Cast Aluminum Oval Roaster — Best for Prime Rib Shape

Availability, 28 October 2026: Amazon.com showed this listing as currently unavailable, so I could not confirm that a new unit can be bought. Check the listing before relying on this pick.

IMUSA Cajun Cast Aluminum Oval Roaster

Prime rib is a naturally elongated, rounded roast — an oval pan fits that shape better than a rectangular one. The IMUSA oval roaster is cast aluminum, which distributes heat more evenly than stamped steel and holds temperature steadier during the long low-and-slow roast phase. It’s stovetop-safe, so you can deglaze drippings directly in the pan after roasting.

The lid traps steam during any resting or warming phase, which matters if dinner timing isn’t perfectly coordinated. At $103.13, it costs more than the other nonstick and value options but less than the premium stainless pick.

Pros

  • Oval shape matches prime rib roast proportions — less empty pan space
  • Cast aluminum heats evenly with no hot spots
  • Stovetop compatible for direct deglazing and pan sauce
  • Lid included for resting and keeping warm

Cons

  • More expensive than rectangular nonstick options
  • No included rack — roast sits on the pan base

Bottom line: The right call if you cook prime rib regularly and want a pan that matches the roast shape, with stovetop capability for the drippings. The missing rack is the main drawback.

Check Price on Amazon

3. P&P CHEF 16″ V-Rack Roasting Pan — Best Value

P&P CHEF 16 inch V-Rack Roasting Pan with rack

At $43.99 with a V-rack included, this is the most affordable stainless option on the list. The 16-inch length fits a standard 4-bone prime rib without difficulty. Stainless construction means it’s broiler-safe for the final high-heat blast that builds the crust on prime rib — something nonstick pans can’t handle. It also goes on the stovetop for deglazing drippings into au jus.

The trade-off for the price is gauge — the pan is thinner than the premium picks and can flex slightly when loaded with a heavy roast and full drip capacity. It won’t warp at oven temperatures, but it doesn’t have the solidity of the Cuisinart. For occasional prime rib use, the difference is minor.

Pros

  • Best price-to-function ratio on the list — V-rack included under $50
  • Stainless: broiler-safe, stovetop-compatible, no coating to preserve
  • 16″ fits 4-bone prime rib comfortably
  • Dishwasher safe, with no coating to worry about scrubbing off

Cons

  • Thinner gauge than premium options — flexes slightly when fully loaded
  • Handles are lower profile and can be harder to grip with oven mitts

Bottom line: For cooks who make prime rib once or twice a year and don’t need a lifetime pan, this delivers everything that matters at a price that’s hard to argue with.

Check Price on Amazon

4. Cuisinart Multiclad Pro Triple Ply 16″ — Best Premium

Cuisinart Multiclad Pro Triple Ply 16 inch Roasting Pan

Triple-ply construction — stainless exterior, aluminum core, stainless interior — gives this pan the most even heat distribution of the five picks. The aluminum core eliminates the hot spots you can get with single-layer stainless, which matters when you’re collecting drippings at high oven temperatures. Fully stovetop compatible across all hob types including induction, rated to 550°F, and broiler-safe.

The rack is sold separately, which is a notable omission at $159.95. The pan itself is excellent; you’re essentially paying for better metallurgy and the assurance that this pan will last decades. At 16″, it handles 4-bone prime rib well.

Pros

  • Triple-ply construction for the most even heat distribution
  • Stovetop-safe on all hob types including induction
  • 550°F oven rating — handles any prime rib technique
  • Built for decades of use; lifetime warranty

Cons

  • Rack sold separately — unexpected omission at this price
  • Most expensive pick; premium you pay for is longevity and even heat

Bottom line: The right pan if you roast prime rib regularly, want one pan that does everything, and are comfortable buying a rack separately. The metallurgy is genuinely better than the other stainless options.

Check Price on Amazon

5. Cooks Standard Classic 14×12″ V-Rack — Best Compact

Cooks Standard Classic 14x12 inch V-Rack Roasting Pan

At 14×12 inches, this is sized for a 3-bone prime rib (serves 4–6) rather than the larger holiday roasts. It’s the highest-rated pan on this list at 4.8 stars across 1,129 reviews. Stainless construction with riveted handles means it’s stovetop-safe and durable. The V-rack is included and fits the pan proportions correctly — no adapting required.

The 14-inch length is the limiting factor. A 4-bone or larger prime rib won’t fit without overhang, and you lose the benefit of the rack when the roast extends past the pan sides. Know your roast size before buying.

Pros

  • Highest-rated pan on this list — 4.8 stars across 1,129 reviews
  • V-rack included; stainless with riveted handles for durability
  • Stovetop-compatible; right size for a 3-bone roast without wasted space
  • Under $80 with rack — better value than similarly-sized competitors

Cons

  • 14″ only fits a 3-bone prime rib — won’t accommodate larger holiday roasts
  • Smaller drip capacity than 16″+ pans

Bottom line: The best option for a smaller prime rib (3-bone, 4–6 people) where you don’t want to pay for a larger pan that’s mostly empty. The 4.8-star rating reflects genuine buyer satisfaction.

Check Price on Amazon

What to Look for When Buying a Roasting Pan for Prime Rib

Match Pan Length to Your Roast Size

Pan length is the first thing to check. A 3-bone prime rib (serves 4–6) needs at least a 14-inch pan. A 4-bone roast (serves 6–8) needs 16 inches. A 5-bone or larger holiday roast (serves 8–10+) needs 17 inches or more.

A roast that overhangs the pan edges won’t cook evenly — the exposed sections get direct oven heat while the pan-covered sections stay cooler. Measure your typical roast before buying.

Rack vs. Flat Pan

A rack lifts the roast off the pan surface so hot air circulates underneath. For prime rib this matters — sitting in drippings steams the bottom of the roast rather than roasting it, and the fat won’t render as cleanly.

Four of the five picks above include a rack. The IMUSA oval is the exception; its oval shape reduces base contact naturally. If you already own a roasting pan without a rack, a universal V-rack ($15–25) solves the problem without replacing the pan.

Stovetop Compatibility for Pan Gravy

After prime rib comes out of the oven, the drippings left in the pan are the base for au jus or pan gravy. If the pan is stovetop-safe — stainless or cast aluminum — you deglaze directly on the burner.

Nonstick pans can’t go on a stovetop burner (the coating degrades above direct heat), so you’d pour drippings into a separate saucepan first. For most home cooks, this is a minor extra step. For frequent prime rib cooks who value keeping everything in one vessel, stovetop compatibility is worth paying for.

Best Roasting Pan for Prime Rib: FAQ

What size roasting pan do I need for prime rib?
A 3-bone roast (4–6 servings) fits in a 14″ pan. A 4-bone (6–8 servings) needs 16″. A 5-bone or larger holiday roast needs 17″ or more.

The key is that the roast shouldn’t overhang the pan sides — overhanging sections cook unevenly because they’re exposed to direct oven heat without the pan’s buffer underneath.

Do I need a rack in my roasting pan for prime rib?
A rack is recommended. Without one, the bottom of the roast sits in accumulated drippings and steams rather than roasts, which gives you uneven texture.

A rack lifts the roast so heat circulates all the way around. Four of the five picks above include a rack. If your pan doesn’t come with one, a universal V-rack ($15–25) is a worthwhile addition.

Should I cover prime rib while roasting?
No — cook prime rib uncovered. Covering the pan traps steam and softens the crust you’re trying to build.

The exception is resting: after the roast comes out of the oven, tenting loosely with foil for 20–30 minutes (longer for larger roasts) lets the juices redistribute before carving. The IMUSA oval roaster’s lid is designed for this resting phase, not the cooking phase.

Can I use a nonstick roasting pan for prime rib?
Yes, with one limitation. Nonstick pans can’t go on a stovetop burner for making pan gravy, so you’d transfer drippings to a separate saucepan.

They’re also not suitable for the dry-sear technique some prime rib methods use. If you’re roasting at standard temperatures (325–350°F) and don’t need stovetop deglazing, a nonstick pan like the Circulon works fine and is easier to clean than stainless.

What temperature do I cook prime rib in the oven?
Most methods use 325°F for the main cook, with an optional 450–500°F blast at the start or finish to build a crust. All five pans above are rated for 450°F or higher.

The reverse-sear method — low-and-slow at 225–250°F, then a final 500°F blast — has become popular for more consistent edge-to-edge doneness. Any of these pans handles the temperature range involved.

How do I make pan gravy from prime rib drippings?
After the roast rests, pour the drippings from the roasting pan into a saucepan (or use the pan directly if it’s stovetop-safe). Skim most of the fat.

Add beef stock, deglaze any browned bits, season with salt and pepper, and reduce over medium heat. For a thicker gravy, whisk in a small amount of cornstarch slurry. The fond — the browned bits stuck to the pan — is where most of the flavor comes from, so don’t skip deglazing.

How These Picks Were Chosen

Plainly: this is a research-based guide, not a hands-on test. I have not run these side by side, and nothing here should be read as a report from my own kitchen.

What the picks rest on: gauge and material, whether a rack is included and whether it holds a heavy roast clear of the fat, interior dimensions against both a standard rib roast and a standard oven, and handle design for lifting something heavy in oven gloves; plus the complaint patterns in verified-purchase reviews, which for roasting pans concentrate on warping at high heat and handles too small to grip safely when loaded.

What I could not establish: how each pan behaves at sustained high heat. Warping is the common failure and it depends on gauge, material and how fast the pan is heated. No independent test covers it for these pans, so this guide reasons from construction rather than from measurement.

The Bottom Line

For most households, the Circulon Total Bakeware Nonstick Roaster is the right choice — large, includes a rack, has a nonstick coating that wipes clean without scrubbing, and is proven by 9,113 buyers. If you want stovetop-safe for deglazing pan drippings, the P&P CHEF stainless pan delivers that at under $50. For the serious prime rib cook who wants lifetime quality, the Cuisinart Multiclad Pro is the one to buy.

For vegetables and sheet-pan dinners rather than a large roast, see my best non-toxic baking sheets guide. For more on cookware choices, see the cookware hub for guides to individual pan types, the best cookware for gas stove guide if you’re cooking over an open flame, or the best cookware sets guide for a full kit around your new roasting pan.


Filed Under: Product Reviews

  • « Go to Previous Page
  • Page 1
  • Interim pages omitted …
  • Page 37
  • Page 38
  • Page 39
  • Page 40
  • Page 41
  • Go to Next Page »

Recent Articles

  • Coffee Grinder Static: Why It Happens and How to Fix It
  • How to Descale an Electric Kettle
  • Saucepan vs Saucier: Which Pan Do You Need?
  • Espresso Shot Troubleshooting: Fast, Slow, Sour or Bitter
  • How to Clean a Coffee Grinder: What Makers Say

Search


HOME          Contact          Affiliate Disclosure          Terms of Service          Privacy Policy


kitchenwarecompare.com is a participant in the Amazon Services LLC Associates Program, an affiliate advertising program designed to provide a means for sites to earn advertising fees by advertising and linking to Amazon.com, Endless.com, MYHABIT.com, SmallParts.com, or AmazonWireless.com. Amazon, the Amazon logo, AmazonSupply, and the AmazonSupply logo are trademarks of Amazon.com, Inc. or its affiliates. As an Amazon Associate I earn from qualifying purchases.


Copyright © 2026 kitchenwarecompare.com, ALL RIGHTS RESERVED.