• Skip to primary navigation
  • Skip to main content
  • Skip to primary sidebar

Kitchenware Compare

  • Home
  • Product Reviews
    • Air Fryers
    • Coffee
    • Cookware
    • Flat Top Grills
    • Meat Thermometers
    • Food Processors
    • Knives
    • Pizza Ovens
    • Toaster Ovens
    • Juicers
  • Food Blog
  • Helpful Kitchen Tips
  • Data Studies
  • About
  • How I Review
  • Contact
You are here: Home / Archives for Glenn

Can You Microwave Cardboard Safely?

Last Updated September 5, 2026

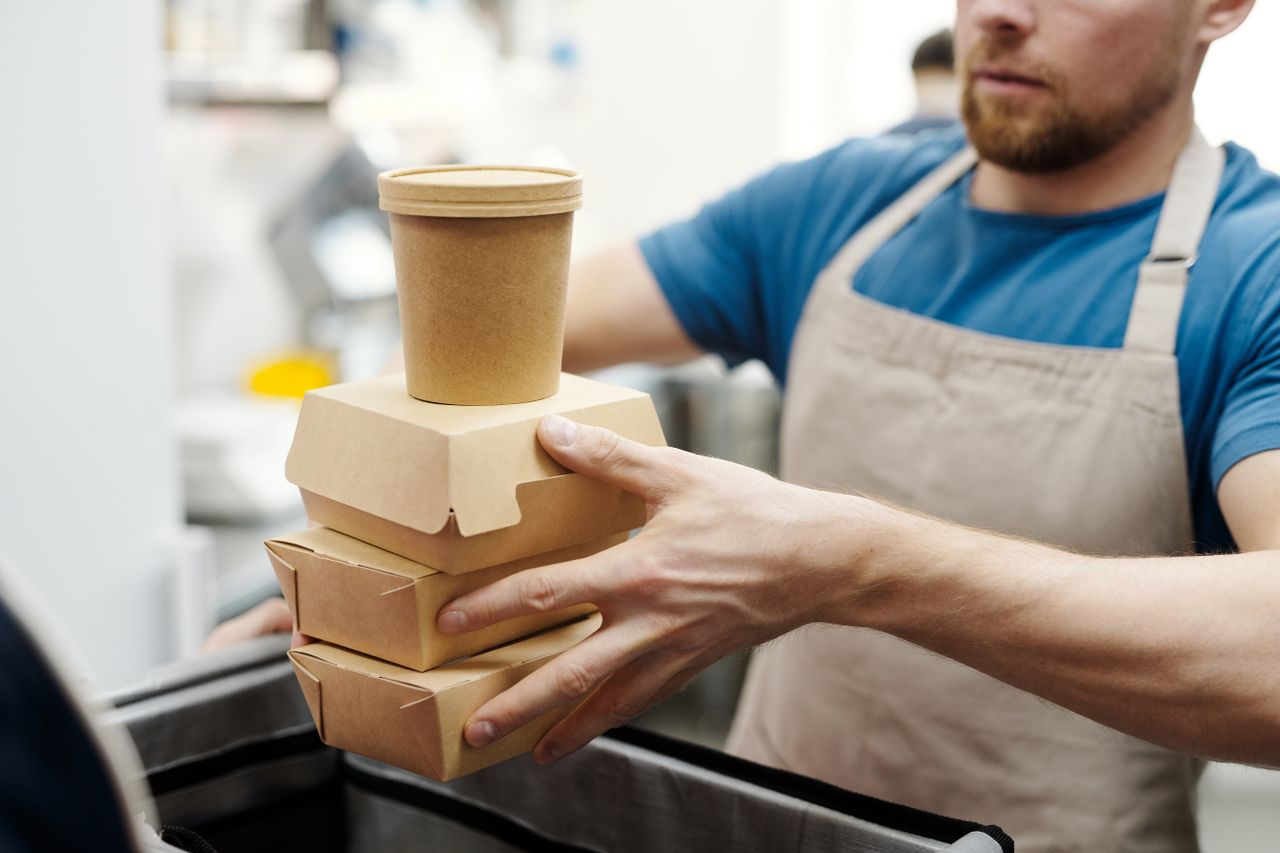
A stack of kraft cardboard takeaway containers and a paperboard soup cup held in a kitchen

Plain, uncoated cardboard will usually survive a short spell in a microwave without catching fire. That is not the useful answer, because almost nothing you would actually want to reheat comes in plain, uncoated cardboard. The trouble comes from what has been added to the board — coatings, glue, ink, and metal you cannot see — and from what happens when board goes into a microwave with nothing to absorb the energy.

The short answer

Only microwave cardboard that is labelled for microwave use. If it is not labelled, take the food out and put it in glass or ceramic. The three things that make a cardboard container genuinely unsafe are metal (staples, wire handles, foil lining), grease-resistant coatings, and running it dry, which is what scorches board and warps the plastic lining inside it.

What the USDA actually allows in a microwave

The USDA’s Food Safety and Inspection Service publishes a list of what is and is not safe to put in a microwave oven. It is worth reading closely, because it is more specific than most advice on this subject and it does not quite say what people assume it says.

FSIS says safe to use FSIS says not safe to use
Any utensil labelled for microwave use Brown paper bags and newspapers
Heatproof glass and glass-ceramic Chinese takeaway containers with metal handles
Most paper plates, towels, napkins and bags — white and unprinted for preference Foam-insulated cups, bowls, plates and trays
Wax paper, parchment paper, heavy plastic wrap (vented, not touching food) Cold-storage tubs — margarine, yoghurt, cottage cheese
Heat-susceptor packaging (popcorn bags, crisping sleeves) Metal pans, metal twist ties, china with metallic trim
Oven cooking bags Anything that has warped or melted during heating

Notice what is missing. FSIS clears “most paper plates, towels, napkins and bags” and it explicitly rules out brown paper bags, but it never names paperboard cartons, pizza boxes or coated soup cups in either column. There is no federal ruling that a takeaway box is fine, and anyone telling you there is has filled in a gap that the source leaves open. What FSIS does give you is a rule that covers the gap: use what is labelled for microwave use, and stop if the container warps or melts.

What actually goes wrong when you microwave cardboard

Metal you cannot see

Staples in the seam of a takeaway box, the wire handle on a carton, and the foil lining inside some drinks cups and ready-meal sleeves all behave the same way: microwaves cannot pass through metal, so the energy concentrates at edges and points. FSIS calls the resulting sparks arcing, and notes that prolonged arcing can damage the oven as well as the container. Caught immediately, it usually does not. The fix is to turn the oven off the moment you see a spark rather than waiting to see whether it settles.

Grease-resistant coatings

Board that has to hold hot, oily food gets treated so the grease does not soak through. For years that treatment often meant PFAS. The FDA is unusually direct about this: of the four categories of PFAS it had authorised for food contact, it found that only paper and paperboard agents would result in dietary exposure that may result in a potential safety concern. The reason is specific — grease-proofing agents are applied at low temperatures, which are not hot enough to drive off the smaller, migratable molecules, so those can detach and move into food.

This has changed recently, and in your favour. The FDA announced in February 2024 that grease-proofing substances containing PFAS were no longer being sold into the United States market for food-contact use, and in January 2025 it determined that the 35 related authorisations were no longer effective. Packaging bought new today should not carry them. A box that has been sitting in a cupboard since 2022 is a different matter, and heat is exactly the condition that encourages migration.

Glue, ink and recycled fibre

FSIS’s preference for “white, unprinted materials” is not fussiness. Printed board carries inks and adhesives that were formulated to survive storage and handling, not to be heated in contact with hot food. Recycled board adds a second unknown, because the fibre came from somewhere and nobody is certifying what was in it.

Neither is a dramatic hazard. Both are reasons to prefer a plain plate you know the composition of.

Running it dry

A microwave heats water, fat and sugar. Cardboard contains very little of any of them, so an empty or nearly empty box does not warm up gently — it sits there while the energy that would have gone into food concentrates in small dry spots in the board. That is how scorching starts, and it is why the same box that is unremarkable under a full container of soup for ninety seconds can smoke when reheated near-empty for four minutes. It is also why FSIS puts anything that has warped or melted during heating on the not-safe list: that container has already told you it was not built for this.

How long is too long? The figure repeated across most advice on this subject — sixty to ninety seconds, checking every thirty — has no authoritative source behind it, and FSIS publishes no time limit at all.

Time is not really the variable; the ratio of food to board is. A full container of wet food holds the board near the boiling point of water for as long as there is water in it, while a near-empty one has nothing holding it there. If you are counting seconds to decide whether a container is safe, the container has already answered the question.

The packaging people ask about most
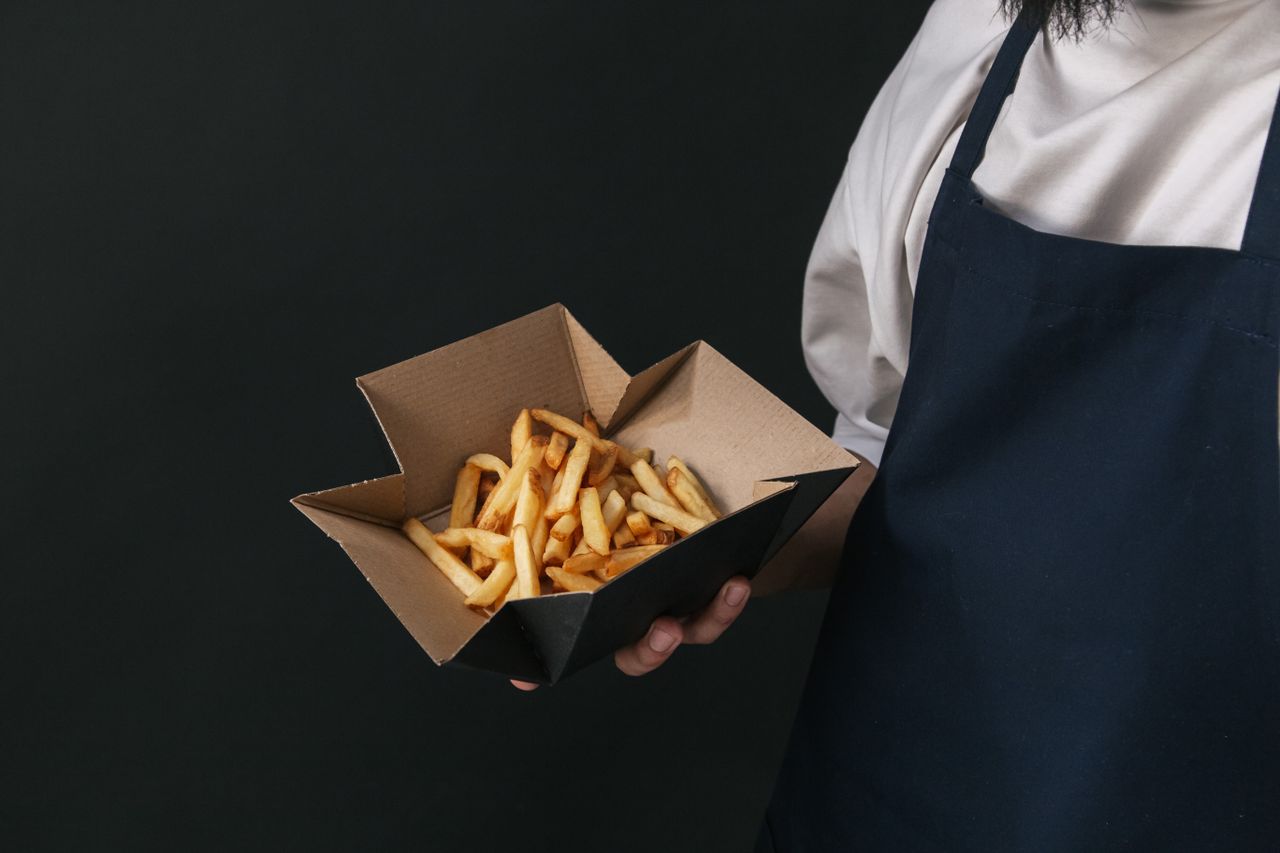
An open cardboard food carton holding french fries, held by a person in an apron

Pizza boxes

No. A pizza box is corrugated board, frequently made from recycled fibre, printed on the outside and soaked with grease on the inside — four of the reasons above in one object. It is also far larger than the food, so most of what you are heating is dry board. Lift the slices out onto a plate, or reheat them properly: a hot, dry skillet gives a crisp base in about three minutes, which a microwave cannot do at all.

Coated cardboard cups and bowls

This is the most common version of the question, and the board is not the issue — the lining is. Soup cups, noodle pots and salad bowls are paperboard with a thin polymer film bonded to the inside, and that film is what holds the liquid.

Some are designed to be heated and say so on the base. Many are designed only to hold hot food that was already hot, which is a different specification. If there is no microwave symbol, treat it as a cold-storage container, which is the category FSIS specifically warns against heating.

Takeaway cartons with wire handles

FSIS names these directly, and they are on the not-safe list. Removing the handle deals with the arcing, but leaves you with a coated, printed, folded carton of unknown specification — so you have solved the spectacular problem and kept the quiet one. Tip the food out.

Popcorn bags and crisping sleeves

These are the exception, and it is worth knowing why. Heat-susceptor packaging has a metallised film laminated into the board that is designed to absorb microwave energy and turn it into surface heat, which is how popcorn pops and how a pie sleeve browns pastry.

FSIS lists it as safe to use. That clearance applies to the packaging used as the manufacturer intended, once. It is not permission to reuse the sleeve for something else.

How to test a container that is not labelled

FSIS publishes a test for exactly this situation, and it takes a minute.

Put one cup of tap water in a glass measuring jug. Place the jug in the microwave alongside the container you want to test, not touching it. Run the oven on high for one minute. If the container is warm or hot at the end, it contains metal in the material or the glaze and should not be used — a microwave-safe item stays cool because the water absorbs the energy, not the container.

The test catches metal. It does not tell you anything about coatings or adhesives, so a cool result is a reason to proceed carefully rather than a clean bill of health.

Common mistakes

The mistake underneath most of the others is treating “it is only two minutes” as a safety argument. Time is the variable that matters most here, because scorching and warping are cumulative and the box gives no warning until it does.

Assuming that compostable or plant-based packaging is microwave-safe is the next most common. Those words describe how the container is disposed of, not what it does at 100 °C. PLA-lined board in particular softens at a lower temperature than the polymer films it replaced.

Closing the lid is a smaller error with a predictable result: steam has nowhere to go, the lining softens against the food, and the box deforms. And reusing a takeaway container repeatedly for reheating compounds every risk on this page, since each cycle degrades the lining a little further. If you want to keep the box, keep it for cold storage.

What to do instead

Decanting takes ten seconds and removes the entire question. Heatproof glass and glass-ceramic are both on the FSIS safe list, and anything sold as microwave-safe will say so on the base.

For food that was crisp when it arrived, a microwave is the wrong tool regardless of the container, because it drives moisture into the surface you want dry. A toaster oven handles reheated pizza, fries and pastry far better; this comparison of convection toaster ovens covers the models worth considering. A skillet does the same job on the hob — the cast iron skillet guide is the place to start if you do not already have a pan that holds heat well. If you are weighing up a combination appliance, how a microwave toaster oven combo works explains what the two functions do and do not share.

One more thing worth doing: if a container has scorched or a lining has melted, clean the cavity before the next use, since residue heats unevenly and smells. This guide to cleaning a microwave oven covers the method. The same “is this metal?” caution applies in other appliances too — whether you can put aluminium foil in an air fryer is the same question with a different answer.

How This Guide Was Put Together

This is a research article, not a test report. The safe and unsafe container lists, the arcing explanation and the one-minute water test all come from the USDA Food Safety and Inspection Service’s guidance on cooking with microwave ovens. The account of grease-proofing chemistry and its withdrawal from the United States market comes from the FDA’s page on authorised uses of PFAS in food-contact applications, including the February 2024 announcement and the January 2025 Federal Register determination. Nothing here was measured in a kitchen.

Three things could not be established, and it is worth being straight about them. FSIS does not name paperboard cartons, pizza boxes or coated bowls in either column of its list, so the guidance above applies its general rules rather than reporting a ruling on takeaway packaging. No authoritative body publishes a safe duration for heating cardboard, which is why the widely repeated sixty-to-ninety-second figure has no citation attached to it anywhere it appears. And the polymer used to line any given container is not determinable from the container itself, since PLA and polyethylene look identical on a bowl and behave differently under heat.

Frequently asked questions

Can you microwave a pizza box?

No. Pizza boxes are corrugated, usually printed, often recycled, and much larger than the food inside, so most of what heats is dry board. Move the slices to a plate. A skillet or toaster oven will also give you a crisp base, which a microwave cannot.

Are coated cardboard bowls microwave-safe?

Only if the base says so. The paperboard is not the problem — the polymer lining is, and linings differ. A bowl designed to hold hot food is not automatically designed to be heated in a microwave, and FSIS warns specifically against heating cold-storage containers.

Can you microwave a cereal box?

No, and there is rarely a reason to. Cereal cartons are printed paperboard with glued seams, sometimes with a foil-lined liner bag inside, and they contain almost no moisture. That combination scorches quickly and can arc if the liner is metallised.

What happens if you microwave cardboard for too long?

The board dries further, hot spots form where there is nothing to absorb the energy, and it begins to scorch and smoke before it will visibly flame. Any lining softens or melts first. FSIS treats a container that has warped or melted as no longer safe to heat food in.

Is a takeaway carton with a wire handle safe to microwave?

No. FSIS lists takeaway containers with metal handles as not safe, because metal concentrates microwave energy and causes arcing. Removing the handle stops the sparks but leaves a coated, printed carton of unknown specification, so it is still better to tip the food out.

Cardboard is not the villain here — unlabelled packaging is. If the container tells you it is microwave-safe, believe it; if it says nothing, spend ten seconds moving the food to a plate.

Filed Under: Helpful Kitchen Tips Tagged With: cardboard, microwave, safety

How to Clean a Microwave Oven

Last Updated September 5, 2026

A gloved hand wiping the interior wall of an open microwave with a cloth

Steam does the work. Boil a bowl of water with baking soda or lemon juice in it, leave the door shut while it cools, then wipe. The softening is what removes baked-on splatter — scrubbing is what damages the interior, and the cavity is painted or coated, not bare metal.

The short answer

USDA FSIS gives specific quantities: 6 tablespoons of baking soda OR half a cup of lemon juice in one cup of water, microwaved until it boils. The step most guides leave out is what happens next — leave the mixture inside with the door closed until it cools. That is the part that does the loosening. Then wipe with a soft cloth.

The method that actually works

Put the mixture in a microwave-safe glass measure — not a plastic tub, and not a sealed container. Microwave it until it boils.

Then stop and leave it alone. FSIS is explicit that the mixture should stay in the oven, door closed, until it cools. Opening the door straight away lets the steam out, which is the only thing actually working on the residue. Give it ten minutes and the splatter wipes off without pressure.

Wipe with a soft cloth or a clean paper towel. For anything still stuck, FSIS names baking soda, mild soap or dishwashing liquid — applied to the cloth, not sprayed into the cavity.

Two notes on the water itself. Vinegar is the version most guides teach, and it does work, but it is not what the federal guidance specifies and it leaves its own smell. Baking soda or lemon juice do the same job and deodorise at the same time.

Why boiling water in a microwave needs a little care

This is the part almost no cleaning guide mentions, and it is worth knowing before you boil a bowl of water on purpose.

Water heated in a microwave can become superheated — hotter than its normal boiling point without actually boiling. FSIS describes it as occurring most often in a very clean vessel, often one straight out of the dishwasher, or when heating room-temperature water. Liquids heat with internal hot spots, so a temperature above 212 °F can build an inch or two below the surface while the top looks calm.

The risk is that the liquid then boils over violently when something disturbs it — adding a spoonful of anything, or in rare cases just moving the cup. It is uncommon, but the precautions cost nothing:

  • Use a vessel with sloping walls, such as a glass measuring jug, rather than a straight-sided mug.
  • Leave a microwavable spoon in the vessel while it heats.
  • Stir occasionally rather than heating undisturbed.

All three give the liquid somewhere to start boiling normally instead of accumulating heat past the point where it should have.

What not to use

FSIS is direct about this: no steel wool, no scouring pads, no abrasive cleaners, and no oven cleaners. The interior of a microwave is a painted or coated cavity, and every one of those strips the coating. Once it is scratched through to the metal underneath, the damage is permanent and the exposed metal can arc.

Oven cleaner deserves its own mention because the packaging invites the mistake. It is formulated for the enamel inside a conventional oven and it is far too aggressive for a microwave cavity. If you clean both appliances on the same afternoon, keep the products separate — the fan-assisted oven guide covers what belongs in the other one.

FSIS also suggests checking the manufacturer’s manual first, and notes that some makers recommend unplugging the oven before cleaning it to reduce the risk of shock. That is worth doing if you are going to be wiping near the control panel.

The parts most guides skip

The cavity is the easy bit. Four other things collect grease and almost never get touched.

The turntable ring

The plate usually gets washed; the roller ring underneath it usually does not. It collects a film of grease that makes the plate drag and squeak. It comes out and goes in the sink with the plate.

The door seal and hinge edge

Splatter dries in the lip around the door where it is hard to see. Wipe along the seal with a damp cloth rather than digging at it — the seal is part of what keeps microwave energy inside the cavity, so it should not be scraped or pulled at.

The vents

Over-the-range models pull cooking air through a grease filter underneath, and countertop models have vents on the back or side. The filter is a real maintenance item on the first kind. Metal mesh filters go in the dishwasher or a hot degreasing soak.

The charcoal filter, on recirculating models

If a microwave vents back into the room rather than outside, it has a charcoal filter that cannot be washed — charcoal works by adsorption and once it is saturated it is finished. It is a replacement part, typically every six to twelve months depending on how much you fry. This is the item people are usually missing when a microwave still smells after a thorough clean. The same logic applies to charcoal filters in a range hood, and recirculating hoods work the same way — the ductless range hood guide explains which models use them.

Getting rid of smells

A lingering smell after cleaning usually means one of three things, and they need different fixes.

Residue you have not found yet is the most common — check the ceiling of the cavity, which is the surface nobody looks at, and the underside of the turntable. A lemon-juice steam is the direct treatment: the acid and the steam work on the residue and the citrus covers what is left.

A saturated charcoal filter is the second, and no amount of cleaning the cavity will fix it.

Burnt-on residue is the third. If something has actually scorched, the smell can persist through several cleans and a bowl of water left in overnight with the door closed will pull a surprising amount of it out.

How often

FSIS frames it as maintenance rather than a schedule: remove spatters and spills as they occur, so residue does not dry on. That is the honest answer — a thirty-second wipe after a spill removes the need for the steam treatment entirely.

Failing that, a steam-and-wipe once a week keeps an averagely-used microwave from ever needing anything harder. If you routinely reheat uncovered, make it more often; covering the food is the single change that reduces the work most.

Common mistakes

Opening the door as soon as the timer stops is the big one. The steam is the active ingredient and letting it out immediately means you are back to scrubbing.

Spraying cleaner directly into the cavity is the second. It runs into the vents and behind the panel where it cannot be wiped out. Put the product on the cloth instead.

Using an abrasive pad on a stubborn spot is the third, and it is the one that does permanent damage. If the residue is not moving, repeat the steam rather than increasing the pressure. If the coating is already scratched through to bare metal the appliance is past cleaning, and a convection toaster oven covers most of the same jobs better if you are replacing rather than repairing.

The fourth is cleaning the cavity and stopping there when the smell was never coming from the cavity. Check the filter before repeating the clean.

How This Guide Was Put Together

The method, the quantities, the list of what not to use and the superheating precautions all come from the USDA Food Safety and Inspection Service’s guidance on cooking with microwave ovens, which covers cleaning and the hazards directly. Nothing here was measured in a kitchen.

Two things could not be established. FSIS gives no interval for how often a microwave should be cleaned, only the principle of removing spills as they happen, so the weekly figure above is a practical convention rather than a sourced recommendation. And charcoal filter life varies by manufacturer and by how much frying a household does; the six-to-twelve-month range is what manufacturers typically state, not a tested figure.

Frequently asked questions

What is the best thing to clean a microwave with?

Steam from water with baking soda or lemon juice in it, then a soft cloth. USDA FSIS specifies 6 tablespoons of baking soda or half a cup of lemon juice per cup of water, and says to use baking soda, mild soap or dishwashing liquid on heavier soil.

Can you use vinegar to clean a microwave?

Yes, and it works, though it is not the formulation the federal guidance gives and it leaves its own smell behind. Baking soda or lemon juice loosen residue just as effectively and deodorise while they do it.

Why does my microwave still smell after cleaning it?

Usually because the smell was never in the cavity. Recirculating models have a charcoal filter that cannot be washed and needs replacing every six to twelve months. Failing that, check the cavity ceiling and under the turntable for residue you have missed.

Is it safe to boil water in a microwave to clean it?

Yes, with one precaution. Water can superheat past boiling point without visibly boiling, then erupt when disturbed. Use a sloping-sided glass jug, leave a microwavable spoon in it, and stir occasionally rather than heating it undisturbed.

Can you use oven cleaner in a microwave?

No. FSIS lists oven cleaners alongside steel wool, scouring pads and abrasive cleaners as things not to use. The cavity is a painted or coated surface and those products strip it, and exposed bare metal inside a microwave can arc.

Steam, wait, wipe. If it is not coming off, the answer is more steam rather than more pressure — and most of the mess is avoidable by covering food, which also settles the separate question of whether the packaging can go in at all.

Filed Under: Helpful Kitchen Tips Tagged With: Cleaning, Guide, Microwave Oven

How Are Chef’s Knives Measured?

Last Updated September 5, 2026

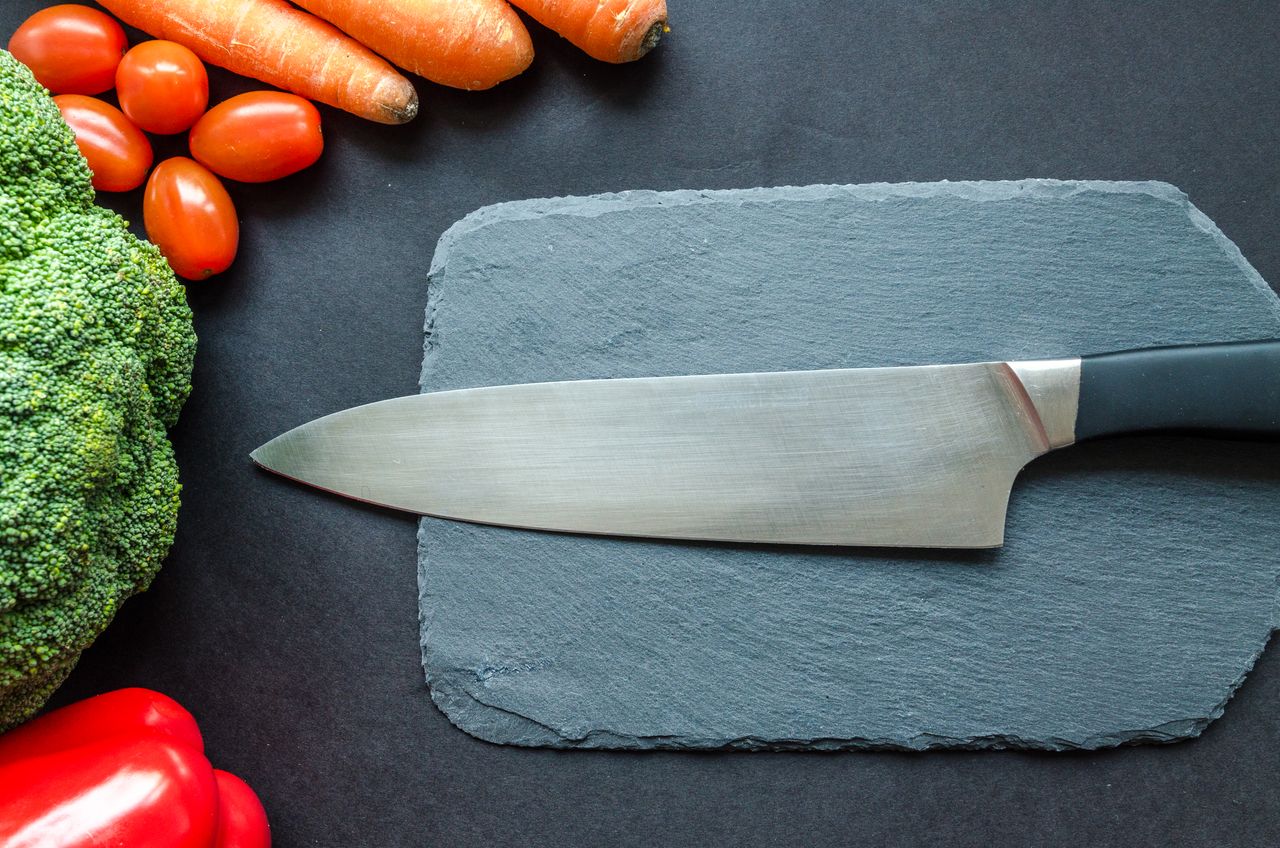
A chef's knife laid flat on a slate board with the whole blade visible from tip to heel

A chef’s knife is measured along the blade only: from the tip to the heel, where the cutting edge stops and the handle begins. The handle is never counted. Neither is the bolster, the thick collar of steel between blade and handle on many Western knives — it is not cutting edge, so it does not go into the number.

The short answer

Tip to heel, in a straight line, blade only. The catch is that the number on the box is a category label rather than a measurement. Two knives both sold as “8-inch” can differ by nearly half an inch, because most makers design in round metric sizes and then round again for the American label.

Where the measurement starts and where it stops

The tip is easy. The heel is the end people get wrong: it is the rear corner of the cutting edge, the point where the sharpened edge meets the bolster or the handle. It is not the back of the handle, and it is not the front of the bolster.

The measurement is taken in a straight line, not traced along the curve of the edge. A chef’s knife has a curved belly for rocking, so following the curve with a tape measure gives a longer figure than the one on the box. Lay the knife flat and measure the straight distance.

One consequence is worth knowing before you buy. Two knives with the same blade length can give you very different amounts of usable edge, because a knife with a full bolster that runs down to the edge sacrifices the last portion of the heel to steel you cannot sharpen. That is a real difference in what the knife can do, and it is invisible in the size on the label.

Why an 8-inch knife is rarely exactly eight inches

Manufacturers publish their own blade lengths, and they do not agree with each other. Three knives that are all sold as 8-inch chef’s knives:

Knife Sold as Blade length Where that figure comes from
Wüsthof Classic 8 inch 20 cm / 7.87 in Wüsthof lists the product as “Classic Chef’s Knife 20 cm | 8 inch”
Victorinox Fibrox Pro 8 inch 20 cm / 7.87 in Part number 5.2063.20 — the suffix is the blade length in centimetres
Misen Chef’s Knife 8 inch 21 cm / 8.26 in Misen’s own specification page

That is a spread of nearly four tenths of an inch between knives with identical labels. Nobody is being dishonest. The German makers design in round metric sizes — 16, 20, 23, 26 cm — and 20 cm converts to 7.87 inches, which gets marketed as 8. Misen designed to a round 210 mm instead, which converts to 8.26 and also gets marketed as 8.

The practical upshot: if the exact length matters to you, read the millimetre or centimetre figure in the specifications rather than the inch figure on the front of the box. The metric number is almost always the one the knife was actually built to.

Reading the length straight off a Victorinox part number

Victorinox encodes it, which makes their catalogue unusually easy to decode. The last group of digits in the part number is the blade length in centimetres: 5.2063.20 is a 20 cm blade sold as 8 inch, and 5.2003.15 is a 15 cm blade sold as 6 inch. If a listing gives you a Victorinox part number but a vague size, the number settles it.

How to measure a knife you already own

It takes a ruler and about fifteen seconds.

Lay the knife flat on a board with the edge facing you. Put the ruler alongside the blade, not on top of it, so the curve does not lift it away from the steel. Line the zero mark up with the very tip.

Read off the figure at the heel — the rear corner of the sharpened edge, where it meets the bolster or handle. Record it in millimetres if you can. Kitchen knife sizes cluster tightly, and millimetres separate a 200 mm blade from a 210 mm one where inches round both to eight.

Millimetres, centimetres or inches

Which unit you meet depends on where the knife was designed. Japanese makers work in millimetres and the common chef’s knife sizes are 180, 210 and 240 mm. German and Swiss makers work in centimetres, usually 16, 20 and 23. American listings convert whichever of those the maker used into inches, and round.

The anchors worth remembering: 180 mm is about 7 inches, 200 mm is just under 8, 210 mm is about 8.3, and 240 mm is about 9.5. A Japanese gyuto sold as an 8-inch knife is usually a 210 mm blade, which is genuinely longer than a European 20 cm blade wearing the same label.

Blade height is a separate measurement

Blade height — the distance from the edge up to the spine at the tallest point, near the heel — is measured separately and is not implied by the length. Misen publishes 49 mm for its chef’s knife; most Western chef’s knives sit somewhere between 45 and 55 mm.

It matters more than people expect. Height is what gives you knuckle clearance over the board, and it is what lets you scoop chopped food off the board on the flat of the blade. A long but shallow knife will rap your knuckles on the board in a way a shorter, taller one will not, which is why blade height is worth checking if you have found an 8-inch knife uncomfortable and assumed the length was the problem.

What size to actually buy

Two things decide this, and your own height is not one of them: what you cut most, and how big your board is.

An 8-inch blade is the default for a reason — long enough to get through a cabbage or a chicken, short enough to stay controllable for everyday chopping. A 6-inch is worth considering if your board is small, if your hands are small, or if most of your prep is herbs and shallots rather than squash. A 10-inch earns its place when you are cutting large produce or working in volume, and it needs a board with the room to swing it.

The constraint people miss is the board. A blade wants a board longer than it is, and an 8-inch knife on a small board leaves you no room to work; the cutting board guide covers sizing. For the knives themselves, the chef’s knife guide compares the options at each size, and length is not what separates a good knife from a bad one — edge retention and how the knife feels in a pinch grip matter far more. A dull 8-inch knife is worse than a sharp 6-inch, which is what the knife sharpener guide is for.

Common mistakes

Measuring the whole knife is the usual one. Overall length includes the handle and runs three to five inches longer than the blade, so a knife measured that way looks like a size it is not. Misen’s 8-inch model, for instance, is 13.5 inches overall against an 8.26-inch blade.

Tracing the curve is the second. Following the belly of the blade with a flexible tape adds length that no manufacturer counts.

Assuming two 8-inch knives are interchangeable is the third, and the table above is the reason. If you are replacing a knife you liked, match the metric figure rather than the inch label.

The last is confusing height with length — a knife described as “taller” is talking about the distance from edge to spine, not about how much cutting edge you get.

How This Guide Was Put Together

The blade lengths above come from the manufacturers’ own published figures: Wüsthof’s product listing for the Classic 20 cm chef’s knife, Misen’s specification panel, and Victorinox’s own part numbering. Nothing here was measured in a kitchen.

Two things could not be established. There is no industry standard that requires blade length to be measured from any particular point, so “tip to heel” is the near-universal convention rather than a rule anyone enforces — which is part of why published figures vary. And no maker publishes a manufacturing tolerance for blade length, so how closely an individual knife matches its stated figure is not something that can be checked against a specification.

Frequently asked questions

Is a chef’s knife measured with the handle included?

No. Only the blade is measured, from the tip back to the heel where the cutting edge ends. Including the handle gives overall length, which runs three to five inches longer and is not what the size on the box refers to.

Where exactly is the heel of a chef’s knife?

The heel is the rear corner of the sharpened edge, where it meets the bolster or the handle. It is the widest part of the blade and the end of the usable cutting edge, which is why the measurement stops there rather than at the handle.

Why is my 8-inch knife not exactly 8 inches?

Because the inch figure is a rounded label. Most European makers build to 20 cm, which is 7.87 inches, and market it as 8. Others build to 210 mm, which is 8.26 inches, and also market it as 8. Read the metric figure instead.

What is the mm measurement on a chef’s knife?

It is the blade length in millimetres, and it is the figure the knife was designed to. Common sizes are 180, 200, 210 and 240 mm. Japanese makers label in millimetres as standard; European makers usually give centimetres.

Does blade height affect what size knife I need?

Yes, independently of length. Height is the edge-to-spine distance, typically 45 to 55 mm, and it sets your knuckle clearance over the board. If an 8-inch knife felt awkward, a taller blade of the same length may fix it.

Measured properly, the number is simple: tip to heel, blade only, in a straight line. It is the label on the box that is approximate.

Filed Under: Helpful Kitchen Tips

How to Clean a Meat Slicer (Safely, and the Part Everyone Skips)

Last Updated September 3, 2026

Gloved hands slicing beef on an electric deli meat slicer

Photo by TUBARONES PHOTOGRAPHY from Pexels

The short version. Unplug it, put on cut-resistant gloves, set the thickness dial to zero, and take the machine apart. Wash the removable parts in hot soapy water, clean the blade from the centre outwards, sanitise every food-contact surface, dry everything completely, and oil the slide rod before reassembly.

The part people skip is the disassembly, and it is the part that matters. Wiping the outside of a slicer is not cleaning it.

Why this is worth doing properly

A slicer is the most hazardous thing in a home kitchen to clean badly, for two separate reasons. One is obvious: it has a 10-inch blade that stays sharp while you handle the parts around it. The other is not obvious at all.

Slicers have seams, and cooked meat residue sits in them. The Centers for Disease Control and Prevention describes deli slicers as an important source of Listeria monocytogenes cross-contamination, and notes that Listeria causes the third highest number of foodborne illness deaths in the United States. Listeria is unusual among foodborne organisms in that it grows at refrigerator temperatures, so a machine that is put away damp and dirty does not simply stay as dirty as it was.

That CDC study is worth knowing about for a second reason. Looking at retail delis — businesses that are inspected and have written procedures — it found that around half were not cleaning their slicers often enough: 49.5% of managers and 54.2% of workers reported cleaning less frequently than every four hours. If half of professional kitchens get this wrong, a home kitchen with no procedure at all is not starting from a strong position.

How often

The FDA Food Code requires food-contact surfaces, slicers included, to be cleaned and sanitised at least every four hours when in constant use — and it requires the machine to be disassembled before cleaning and sanitising. That is the commercial standard, and if you are slicing for a business it is the one you are held to.

For a home kitchen the practical rule is simpler:

  • Full strip-down and sanitise after every session. Not every four hours — every time, because a home slicer is put away rather than kept running.
  • Between raw and ready-to-eat foods, always. Slicing raw meat and then cheese without cleaning in between is the single worst thing you can do with the machine.
  • Between different products in the same session, at minimum wipe the blade and carriage down.

The reason the four-hour figure exists is bacterial growth on a warm, damp, food-covered surface. A machine that sits out for an afternoon between uses is in exactly that condition.

Before you touch it

  • Unplug it. Not switched off — unplugged. Every slicer covered on this site has an on/off switch you can knock.
  • Put on cut-resistant gloves. This is the advice that comes up again and again from people who own these machines, usually phrased as a lesson learned. One owner on a smoking forum described not wearing them the first time he cleaned his and wearing them every time since. The blade is exposed during disassembly and it does not get less sharp because the machine is off.
  • Set the thickness dial to zero. This retracts the gauge plate so it covers the blade edge as much as the design allows, and it is the standard first move before any strip-down.
  • Clear the sink and the counter first. You want somewhere to put a wet 10-inch blade the moment it comes off, not to be looking for one while holding it.

What you need

  • Cut-resistant gloves
  • Hot water and dish soap
  • A food-safe sanitiser, or a dilute bleach solution made up per its own label
  • A cleaning brush — most slicers ship with one
  • Clean cloths or paper towel for drying
  • Food-grade machine oil for the slide rod

Both of the commercial machines covered on this site supply part of that kit. The BESWOOD250 ships with a cleaning brush and a bottle of food-grade machine oil, which tells you what the manufacturer expects the routine to be. The KWS MS-10NT ships with a spare whetstone and a spare drive belt.

Step by step

1. Remove the food carriage and tray

On most machines the carriage lifts off once it is at the end of its travel, and the product tray comes away with it or separately. These are the parts that hold raw product, so they are the priority. A machine whose carriage does not come off is a machine you cannot properly clean, which is one of the things worth checking before buying one.

2. Remove the blade

Blade removal varies by machine, so follow your manual rather than a generic instruction. Some models need a blade removal tool, which is why one is included with certain slicers and sold separately for others.

Handle the blade by the centre hub, never the rim. Carry it flat, put it straight into the sink or onto a clear surface, and do not leave it standing in a bowl of soapy water where you or somebody else will reach in blind.

3. Clean behind the blade

This is the step that separates cleaning from wiping. The blade plate, the ring guard assembly and the recess behind the blade collect a film of fat and protein that never sees a cloth if you only clean what you can see.

Use the brush and hot soapy water, working into the recess and around the mounting. This area is where the seams the CDC is concerned about actually are, and it is the part of the machine that inspectors look at in a commercial kitchen.

4. Wash the removable parts

Hot water, dish soap, and the brush for anything with a corner in it. Wash the carriage, tray, food pusher, blade guard and any slide-rod extension.

Hand wash only. Both the BESWOOD250 and the KWS MS-10NT specify hand washing, and this is not the manufacturer being cautious for the sake of it. Dishwasher detergent is harsh on aluminium and on plated blade edges, and the plating is what stops a high-carbon steel blade underneath from corroding.

Never submerge the machine itself. Removable parts go in the sink; the body does not. There is a motor, a transformer and switchgear inside a slicer housing, and water that gets into them is not a cleaning problem but an electrical one. Wash the body with a damp cloth, not under a tap.

Keep steel wool away from all of it. It scratches aluminium, it strips coatings and plating from blades, and the fibres it sheds are the last thing you want near a food-contact surface.

5. Clean the blade

Wash the blade from the centre outwards, with the cloth or brush moving away from the edge rather than along it. Do both faces. Never run a cloth along the cutting edge, and never use an abrasive pad or scouring powder on a coated or plated blade — you can take the coating off, and the coating is doing a job.

If your machine has a Teflon-coated blade, as the KWS does, you will find noticeably less residue to remove. That is what the coating is for, and it is the reason it is recommended for cheese.

6. Sanitise

Washing removes the soil; sanitising deals with what is left. Apply a food-safe sanitiser to every food-contact surface — blade, carriage, tray, pusher and the blade plate — and leave it for the contact time its label specifies. That contact time is not optional; a sanitiser wiped straight off has not sanitised anything.

If you use a dilute bleach solution, rinse and dry thoroughly afterwards. Chlorine and bare aluminium are a poor combination over time, and a lot of slicer bodies are cast aluminium.

7. Dry completely

Dry every part before it goes back on. Water left on a blade hub or in a seam is how corrosion starts, and it is also how a machine that was clean on Sunday is not clean on Wednesday.

8. Oil the slide rod, then reassemble

The rod the carriage travels along wants a little food-grade machine oil so the stroke stays smooth. Use the oil supplied with the machine or a food-grade equivalent — not cooking oil, which goes sticky and then rancid, and not a general-purpose lubricant, which does not belong near food.

Reassemble in reverse, make sure the blade is seated and its fastening is properly tight, and refit the guards. Then plug it in and run it briefly before you put food anywhere near it.

The bits people miss

  • Behind the blade. Covered above, and it is the single most commonly skipped area.
  • The ring guard and its fixings. Small parts with edges that trap residue.
  • The sharpening stones. They collect metal dust and fat. Brush them; do not soak the assembly.
  • The underside of the carriage. Product juices run down and collect where the carriage meets the rod.
  • The feet and the counter beneath. Whatever ran off the machine is under it.

Dried-on residue, and other problems

If the machine was put away without cleaning and the residue has hardened, do not attack it with a blade or an abrasive. Lay a hot, wet cloth over the area for ten minutes to soften it, then use the brush. Repeat rather than escalate.

Rust spots on the blade tell you something about the blade material. A 304 stainless blade should not rust in normal use; if it has, it has probably been left wet repeatedly. A high-carbon steel blade with chromium plating relies on that plating, and rust suggests the plating has been damaged — usually by an abrasive pad or a dishwasher. Neither is fixable by cleaning harder.

A blade that will not come clean at the rim is often a dull blade rather than a dirty one, because a dull edge tears product and pushes it into the gap rather than cutting through it. Both machines covered here have on-board sharpening stones for exactly this.

When it is not a cleaning problem

Cleaning fixes hygiene. It does not fix mechanical faults, and a few things people try to clean away are telling you something else:

  • Blade wobble or play. Stop using it. A loose blade is the most dangerous fault a slicer can have, and blades loosening over time is one of the two recurring complaints across slicer reviews — the other being trapped residue. Check the fastening first; if it is tight and the wobble remains, the machine needs a part rather than a wipe.
  • New noise, grinding or rumbling. Usually bearings, sometimes a belt. On a machine with published spare parts this is a repair; on one without, it is often the end.
  • Slices that vary in thickness within one pass. That is the gauge plate or the carriage, not dirt.
  • Any exposed wiring or a switch that has got wet inside. Unplug it and stop.

Whether those are fixable is largely a question of who made the machine. That is one of the practical differences in my BESWOOD vs KWS comparison: one publishes around twenty priced spare parts including a motor and a bearing set, and the other lists a blade.

How this guide was researched

Plainly: this is a research-based guide, not a firsthand account, and nothing in it is written as one.

What it rests on: the FDA Food Code requirement for cleaning frequency and for disassembly before cleaning; the CDC’s study of slicer cleaning practice in retail delis, for the frequency data and the Listeria context; the published care instructions and supplied accessories for the machines covered on this site, read from their manufacturers and listings; and owner discussion for the practical safety advice, which is where the recommendation to wear cut-resistant gloves comes from.

What I could not establish: how long a full strip-down actually takes in practice. The CDC study does not report it and no source gives a defensible figure, so this guide does not offer one. Anyone who tells you a commercial slicer strips, washes, sanitises, dries and reassembles in five minutes is guessing.

Frequently Asked Questions

How often should a meat slicer be cleaned?

In a commercial kitchen the FDA Food Code requires cleaning and sanitising at least every four hours in constant use, with the machine disassembled first. At home, do a full strip-down after every session, and always between raw meat and anything ready to eat.

Can you put meat slicer parts in the dishwasher?

Generally no. Both commercial machines covered on this site specify hand washing, because dishwasher detergent is harsh on aluminium bodies and on plated or coated blades. Damaging the plating on a high-carbon blade removes the thing that stops it corroding.

How do you clean a meat slicer safely?

Unplug it, wear cut-resistant gloves, set the thickness dial to zero, and clear a space to put the blade before you remove it. Handle the blade by its centre hub rather than the rim, and never leave it submerged in soapy water where someone could reach in without seeing it.

What is the part of a meat slicer people forget to clean?

The area behind the blade — the blade plate, the ring guard and the recess around the mounting. It is not visible without removing the blade, which is why the FDA Food Code requires disassembly rather than wiping, and it is where residue actually accumulates.

Do you need to sanitise a meat slicer or is washing enough?

Both, in that order. Washing removes the visible soil and sanitising deals with what remains, and the sanitiser needs the contact time printed on its label rather than being wiped straight off. Deli slicers are a recognised route for Listeria cross-contamination, which is why the second step exists.

What oil should you use on a meat slicer?

Food-grade machine oil, on the slide rod the carriage travels along. Some slicers supply a bottle with the machine. Do not substitute cooking oil, which turns sticky and then rancid, and do not use a general-purpose penetrating lubricant anywhere near food surfaces.

The bottom line

The whole job comes down to one habit: take it apart. Every genuine risk a slicer carries — the residue in the seams, the film behind the blade, the corrosion under a wet hub — lives in a place you cannot reach with the machine assembled, which is precisely why the commercial standard requires disassembly rather than wiping.

Do that after every session, with gloves on and the machine unplugged, and a slicer stays safe and stays sharp for years. If you are still choosing one, how far it comes apart is worth weighing as heavily as its motor: my meat slicer buying guide covers the home-priced machines, and the KWS MS-10NT and BESWOOD250 reviews cover the two commercial ones in detail.

Worth checking before you buy: not every slicer strips down the same way. The Cuisinart FS-75 removes its blade, food guide and carriage but is hand wash only, while the FOHERE’s removable parts are dishwasher safe.

Filed Under: Helpful Kitchen Tips

BESWOOD 250 vs KWS MS-10NT: Which 10-Inch Slicer?

Last Updated September 2, 2026

Some links here go to Amazon. If you buy through one, I earn a commission at no extra cost to you.

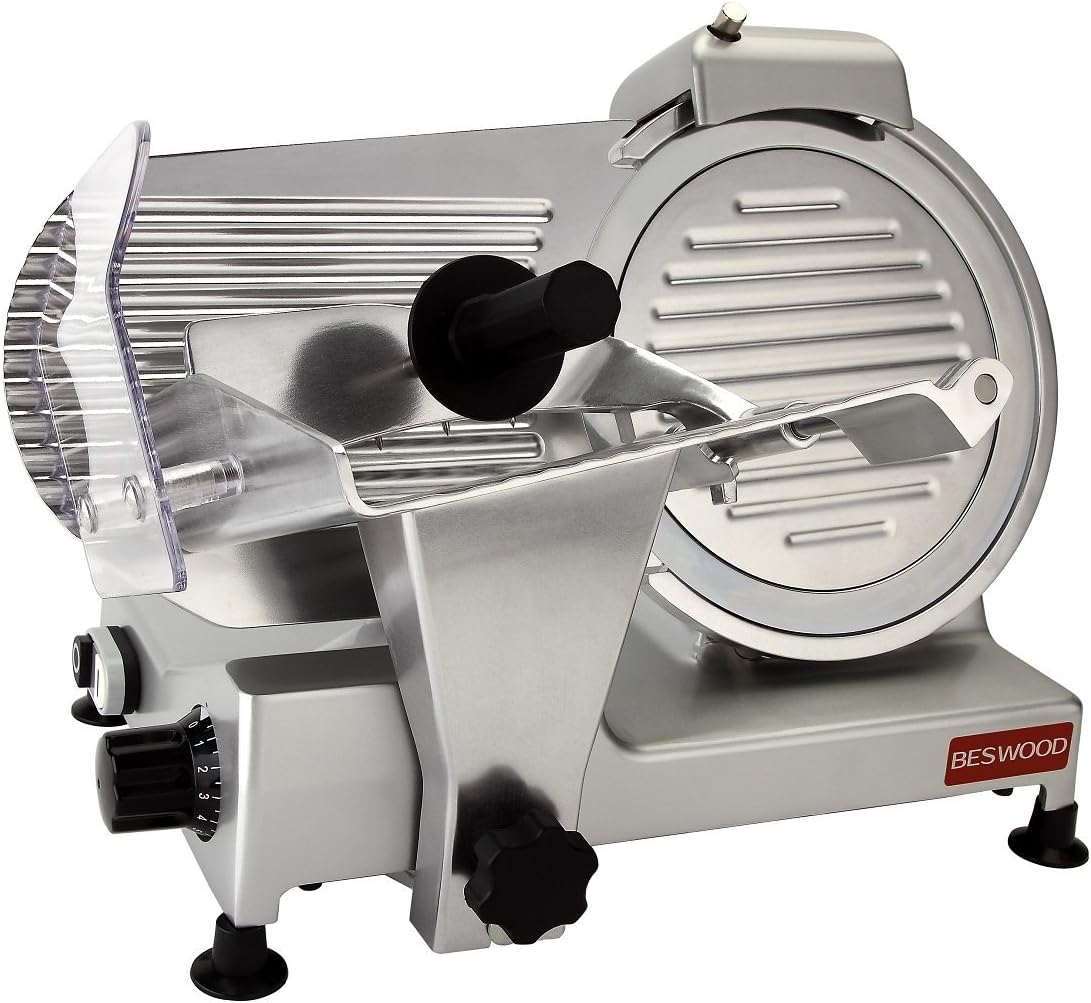
BESWOOD250 10-inch electric meat slicer with chromium-plated steel blade

BESWOOD250 — $358.00

KWS MS-10NT 10-inch electric meat slicer with Teflon-coated stainless blade

KWS MS-10NT — $394.00

Which one do I buy? Buy the KWS MS-10NT if the machine has to satisfy a health inspector, or if you intend to still be using it in ten years. It is the only one of the two with unambiguous NSF certification and a published, priced spare-parts list that includes a $159.99 replacement motor.

Buy the BESWOOD250 for everything else. It is $36 cheaper, better rated across a review base nearly twice the size, sells roughly twice as fast, and has the better-finished body. For a home kitchen that is the safer purchase.

Prices and stock verified 2 September 2026. BESWOOD250 $358.00, in stock, 4.6 out of 5 from 3,368 ratings. KWS MS-10NT $394.00, in stock, 4.5 out of 5 from 1,959 ratings. Both are sold on Amazon by the manufacturer rather than a reseller, and both cost exactly the same buying direct from the maker, so there is no saving either way.

The difference is $36

That is the whole financial question, and it is small enough that specification arguments matter more than price. These are not machines from different tiers. They are two 10-inch, metal-bodied, belt-driven slicers with on-board sharpening stones, aimed at the same buyer, separated by about ten percent.

So the useful comparison is not “which is better value.” It is which of two genuine differences you actually need: certification, or validation.

Head to head

  BESWOOD250 KWS MS-10NT
Price $358.00 $394.00
Rating 4.6★ (3,368) 4.5★ (1,959)
Motor 240W / 1⁄3 HP 320W / 0.4 HP
Blade speed 282 rpm 525 rpm
Blade 10″ high-carbon, chromium plated 10″ 304 stainless, Teflon coated
Slice thickness 1–12 mm 0–10 mm
Certification ETL. NSF inconsistent on its own site ETL, NSF and FDA, stated throughout
Spare parts Blade only, $120.00, was out of stock ~20 parts priced, motor $159.99
Weight 33 lb 36 lb
Footprint 20″ × 17″ × 14.75″ 20.5″ × 18.5″ × 15.5″
In the box Cleaning brush, machine oil Spare whetstone, spare drive belt
Warranty 12 months 1 year factory limited

The certification claim to be careful about

If you research this comparison elsewhere you will find the BESWOOD described as ETL and NSF certified. That claim needs checking, because it is not what the BESWOOD’s own materials consistently say.

The Amazon listing for the BESWOOD250 states one certification: ETL listed and certified. On BESWOOD’s own website, a line of marketing copy lists the approvals as ETL and NSF, while the specification block further down the same page gives ETL, GS, CE and ROHS — with no NSF among them. Those cannot both be right.

The KWS has no such ambiguity. NSF and ETL appear in the Amazon listing title, in a dedicated bullet naming Intertek as the certifying body, and on the manufacturer’s product page, which also claims FDA approval.

What this means in practice. For a home kitchen it changes nothing: ETL is the electrical safety mark that matters for plugging a machine in, and both have it. For a business that gets inspected, NSF is often a requirement, and the difference between “stated everywhere” and “stated in one place and contradicted in another” is the difference between a machine you can rely on and a phone call you have to make. If you need NSF on paper, that alone settles this comparison.

Repairability: the argument that gets ignored

Both machines have on-board sharpening stones, so neither has the disposable-blade problem that ends most cheap slicers. Beyond the blade, though, they are not comparable at all.

KWS publishes a public, priced parts catalogue for the MS-10 series — around twenty items. BESWOOD lists one part, a blade at $120.00, and it was showing as sold out when I checked on the same day.

KWS MS-10 part Price
Teflon blade $204.99
Product tray assembly $199.99
320W motor $159.99
Support arm $59.99
Relay $38.00
Power cord $32.99
Sharpening stone set $29.99
Bearing set $28.49

A machine with a published motor price can outlive its motor. That is a different ownership proposition from one where a failed component means the machine is finished, and it is why the KWS earns its $36 for anyone thinking in decades rather than seasons.

The honest counterweight: the KWS blade costs $204.99 against the BESWOOD’s $120.00, so the part you are most likely to replace is $85 dearer. If you expect to wear out blades rather than motors, that runs the other way.

Motor and blade speed

The KWS has a third more motor, 320W against 240W, and turns its blade at a stated 525 rpm against 282. Nearly double the blade speed is a striking difference on paper.

It is worth resisting the obvious conclusion. Faster is not automatically better on a slicer: a slower blade backed by enough torque can give cleaner results on soft product, and blade speed is not the specification that separates a good slicer from a bad one. What matters is whether the machine holds its speed under load, and both of these do, which is most of what the extra money over a $110 home slicer buys in either case.

Where the KWS motor genuinely helps is sustained running and dense product — long sessions, semi-frozen meat, hard cheese. If your slicing is measured in hours rather than minutes, it is the stronger machine.

Thickness: they are good at opposite ends

This is the most practical difference between them and it is easy to miss, because the two ranges look similar until you notice which end each one covers.

  • BESWOOD250: 1–12 mm. Reaches thicker cuts — a half-inch steak cut is within range.
  • KWS MS-10NT: 0–10 mm. Starts at zero, which is the end that matters for prosciutto, bresaola and anything meant to be translucent.

Most people buying a 10-inch slicer care more about the thin end than the thick one, which is a quiet point for the KWS. If you are portioning roasts rather than making charcuterie, it runs the other way.

One caution: the KWS Amazon listing states a range of “0 to 14 mm depending on models.” That is generic copy written for the whole KWS range. The manufacturer’s page for this specific model gives 0 to 0.4 inches, about 0 to 10 mm. Plan around 10.

What the ratings say about each

Both machines are well rated, and the distributions are more informative than the averages. Read on the listings on 2 September 2026:

Rating BESWOOD250 KWS MS-10NT
5 star 83% 76%
4 star 10% 13%
3 star 2% 5%
2 star 1% 2%
1 star 4% 4%

The one-star rate is identical. What differs is the middle: the KWS collects more three- and four-star reviews, so its negative feedback is graduated where the BESWOOD’s is closer to all-or-nothing.

The recurring KWS complaint across the sources that discuss it is fit and finish rather than function — rough castings, machining marks, labels attached with gaps. That is a real difference and it favours the BESWOOD if you care how the machine looks and feels.

The market agrees, for what that is worth. The BESWOOD sits at an Amazon sales rank around 20,300 against the KWS at roughly 42,900, and its listing shows 500+ bought in the past month. Sales rank is a demand signal, not a quality one, but a review base of 3,368 resolves a machine’s real-world behaviour better than 1,959 does.

What each one costs over ten years

The $36 gap is the number everyone compares. It is also the least important one, because on machines built to run for a decade the purchase price is not the whole cost. Using each maker’s own published parts pricing, here is what the two look like over a long life.

  BESWOOD250 KWS MS-10NT
Machine $358.00 $394.00
One replacement blade $120.00 $204.99
Machine + one blade $478.00 $598.99
If the motor dies No part listed — replace the machine $159.99
Motor failure, total $836.00 (buy a second machine) $758.98

The arithmetic flips depending on what fails first. If you wear out blades, the BESWOOD is cheaper to keep running by $85 a blade. If anything else fails, the BESWOOD has no listed part and the realistic answer is a new machine, at which point the KWS is the cheaper machine to have owned.

This is a projection from list prices, not a prediction. Neither machine is likely to need a motor in a home kitchen, and BESWOOD may sell parts on request that they do not publish. But the published position is the only one a buyer can actually check, and on the published position the KWS is the machine with a floor under it.

Frozen and semi-frozen meat

Both listings advertise frozen slicing, and the KWS puts it in the product title. Neither will cut meat frozen solid, and attempting it is how slicer blades get chipped on any machine at any price.

What both do well is semi-frozen — meat firmed in the freezer for 30 to 45 minutes so the fibres stiffen, which is the standard technique for getting clean thin slices from raw meat. This is the one everyday task where the KWS’s extra motor is doing something you can feel, because dense chilled product is exactly the load that makes a weaker slicer slow down.

If semi-frozen slicing is the reason you are buying — portioning bulk meat, making jerky, cutting your own hotpot slices — that is a real argument for the KWS beyond the certification question.

Cleaning

Neither is difficult to take apart, and both come apart far enough to clean properly, which is the hygiene point that matters on a slicer. The KWS has a removable product tray and carriage; the BESWOOD ships with a cleaning brush and food-grade oil for the slide rod.

The practical advice from owners applies to both, and it is worth repeating: wear cut-proof gloves when you strip either machine down. The full routine for either machine is in my guide to how to clean a meat slicer. The parts come off easily; what takes the time is handling them safely next to a very sharp 10-inch blade.

The KWS Teflon coating is a small genuine advantage here, since less residue clings to the blade in the first place. That is also why it is the better pick if you slice a lot of cheese.

What else each maker sells

Neither machine exists alone, and in one case the alternatives change the decision.

BESWOOD sells the same 10-inch machine in a red finish at the same $358.00, with a removable serving plate the standard model does not include — a free accessory, though on 219 ratings rather than 3,368. Its own site also sells the Classic Line in 9-inch and 10-inch with 9-inch preselected, so it is possible to order a smaller machine than you intended.

KWS sells a ladder: the MS-10NT at $394.00 is the cheapest 10-inch it makes, with the MS-10ES at $419.00, the MS-10ET at $449.00, the MS-10DS at $502.00, and a 12-inch range from $639.00 to $1,299.00 at 60 to 84 pounds. If you were considering a KWS at all, the MS-10NT is the value entry point rather than a compromise.

Choose the BESWOOD250 if

  • You are buying for a home kitchen, where ETL is the certification that matters.
  • You want the better-validated machine — higher rating, nearly twice the reviews, roughly twice the sales rate.
  • Fit and finish matter to you.
  • You cut thick more often than paper-thin.
  • You want to save $36 without giving up anything you will notice.

Choose the KWS MS-10NT if

  • You need NSF certification stated without ambiguity.
  • You are thinking in decades and want a machine whose motor, bearings, relay and tray you can buy.
  • You slice for hours rather than minutes, or work with dense and semi-frozen product.
  • You slice a lot of cheese, where the Teflon coating earns its place.
  • You want the thin end of the thickness range more than the thick end.

Or buy neither

Both of these are commercial machines, and most people asking this question do not need one. The Best Overall pick in my meat slicer buying guide is the CUSIMAX at $109.78, and below roughly two pounds of slicing a session it will not be the limiting factor in your kitchen.

The honest test is whether your current slicer fails on capability or on volume. If you have never owned one, it is volume you cannot yet judge, and $250 is a lot to spend on a guess.

How this comparison was researched

Plainly: I have not run either machine. This is a research-based comparison, not a firsthand account, and nothing in it is written as one.

What it rests on: each manufacturer’s own published specification for the exact model, read from their sites rather than taken from a listing; live Amazon price, stock, seller and rating data pulled on 2 September 2026; the published spare-parts pricing from KWS and BESWOOD; the rating distributions as shown; and owner discussion for the cleaning and finish observations. The certification discrepancy was found by reading BESWOOD’s marketing copy and specification block against each other on the same page.

What I could not establish: slice consistency under sustained load, and the low-noise claims both makers make, which nobody measures. Motor rating, blade speed and mass stand in for the first, and a proxy is not a measurement. Full detail on each machine is in my BESWOOD 250 review and my KWS MS-10NT review.

Frequently Asked Questions

Is the BESWOOD or the KWS better?

For a home kitchen the BESWOOD250 is the safer buy: $36 cheaper, rated 4.6 against 4.5, and across nearly twice as many reviews. The KWS MS-10NT is the better choice in two specific cases — when NSF certification is required, and when you want a machine you can rebuild from published parts.

Is the BESWOOD250 NSF certified?

Its own materials do not agree. The Amazon listing states ETL only, and while one marketing line on BESWOOD’s site claims ETL and NSF, the specification block on the same page lists ETL, GS, CE and ROHS with no NSF. Confirm directly with BESWOOD before relying on it. The KWS states NSF unambiguously.

Which slicer has the more powerful motor?

The KWS, at 320W and 0.4 HP against the BESWOOD’s 240W and 1/3 HP, and it turns its blade at 525 rpm against 282. The extra power matters for long sessions and dense or semi-frozen product rather than for ordinary deli slicing, where both are comfortable.

Which one slices thinner?

The KWS, whose range starts at 0 mm against the BESWOOD’s 1 mm. The BESWOOD reaches thicker, to 12 mm against the KWS’s 10 mm. Note that the KWS Amazon listing quotes “0 to 14 mm depending on models,” which is generic range copy rather than this model’s figure.

Can you get spare parts for either?

For the KWS, yes and extensively — around twenty priced parts including a $159.99 motor, a $28.49 bearing set and a $29.99 stone set. BESWOOD lists a single part, a blade at $120.00, which was showing as sold out when checked on 2 September 2026.

Are they worth it over a $110 home slicer?

Only for volume or longevity. Below roughly two pounds of slicing per session a $110 machine will not be your limiting factor, and the extra $250 buys headroom you never reach. Both of these earn their money when a cheaper slicer would be overheating or losing its thickness setting.

The bottom line

These two machines are closer than the $36 between them suggests, and both are good. The decision is not really about price at all.

If a health inspector will look at it, or you want to still be running it in 2036, buy the KWS MS-10NT — unambiguous NSF, and a parts list that means a dead motor is a $159.99 problem rather than a new machine. Otherwise buy the BESWOOD250, which is cheaper, better finished, and validated by nearly twice as many buyers.

BESWOOD250 Price ↗KWS MS-10NT Price ↗

Everything else on slicers is in my meat slicer hub. If neither is right, the home-priced picks cover the $66 to $153 range, and my food processors hub covers the chopping and shredding side of prep.

Prices, ratings and stock verified 2 September 2026. Both Amazon and manufacturer pricing move; check the current figures before buying.

Filed Under: Product Reviews

  • « Go to Previous Page
  • Page 1
  • Interim pages omitted …
  • Page 9
  • Page 10
  • Page 11
  • Page 12
  • Page 13
  • Interim pages omitted …
  • Page 53
  • Go to Next Page »

Recent Articles

  • Bosch Universal Plus Stand Mixer Review: Built for Bread Bakers
  • Hamilton Beach 63326 Stand Mixer Review: Real Value, Real Limits
  • Ninja Foodi XL Pro Review (DT201): Biggest Capacity, Lowest Price
  • Cuisinart SM-50 Stand Mixer Review: Solid Value, Real Trade-Offs
  • Breville Smart Oven Pro Review (BOV845BSS): Fast, Even, One Real Flaw

Search


HOME          Contact          Affiliate Disclosure          Terms of Service          Privacy Policy


kitchenwarecompare.com is a participant in the Amazon Services LLC Associates Program, an affiliate advertising program designed to provide a means for sites to earn advertising fees by advertising and linking to Amazon.com, Endless.com, MYHABIT.com, SmallParts.com, or AmazonWireless.com. Amazon, the Amazon logo, AmazonSupply, and the AmazonSupply logo are trademarks of Amazon.com, Inc. or its affiliates. As an Amazon Associate I earn from qualifying purchases.


Copyright © 2026 kitchenwarecompare.com, ALL RIGHTS RESERVED.