• Skip to primary navigation
  • Skip to main content
  • Skip to primary sidebar

Kitchenware Compare

  • Home
  • Product Reviews
    • Air Fryers
    • Coffee
    • Cookware
    • Flat Top Grills
    • Meat Thermometers
    • Food Processors
    • Knives
    • Pizza Ovens
    • Toaster Ovens
    • Juicers
  • Food Blog
  • Helpful Kitchen Tips
  • Data Studies
  • About
  • How I Review
  • Contact
You are here: Home / Archives for Glenn

Cast Iron Seasoning Flaking Off? It Is Too Many Layers

Last Updated September 1, 2026

Cast iron skillet on a grill rack with oyster mushrooms cooking in oil, showing the seasoned black surface

Black flecks coming off a cast iron pan look like the pan is disintegrating. It is not. Flaking is a specific failure with a specific cause, and the cause is close to the opposite of what most advice assumes: it is a sign of too much seasoning, not too little. Adding more seasoning in the oven, which is the usual reflex, is the one response that reliably makes it worse.

First, the question everyone actually has: is it safe?

The flakes are polymerised cooking oil and iron. Nothing else. Seasoning is not a coating applied at a factory in the sense people imagine — it is fat that has been heated past the point where it stops being a liquid and cross-links into a hard film bonded to the metal. Lodge describes the change plainly: oils heated in cast iron at a high enough temperature turn from a wet liquid into a hardened surface that is molecularly bonded to the iron.

So a black flake in the pan is cooked oil. Swallowing some is not a health problem. It is unpleasant in the food and it means the pan needs attention, but it is not the situation people are usually picturing when they see black bits appear.

That picture comes from a different problem entirely. When a synthetic non-stick surface degrades, what is coming off is a manufactured polymer coating, and the questions about what to do next are genuinely different — that case is covered separately in the guide to a basket coating that is flaking. Cast iron has no such layer to lose. Conflating the two is the single most common reason people throw out a pan that needed twenty minutes of work.

What flaking actually is

Seasoning builds in layers. Each one has to bond to the iron beneath it, and bonding takes heat and time. Flaking is what happens when layers accumulate faster than they bond — the outer material sits on the surface rather than gripping it, and eventually it lets go, taking a black sheet with it.

Two manufacturers describe it in almost identical terms, which is worth noting because they are competitors with no reason to agree. Lodge attributes flaking to layers of seasoning that have not fully bonded to the metal. Field Company’s care documentation puts the mechanism more directly still, describing flaking as what occurs when thick layers build up without the time and use needed to bond properly to the iron.

Read that twice, because it inverts the usual advice. A flaking pan is not under-seasoned. It is carrying more seasoning than it has managed to attach.

The three ways it starts

Oven-seasoning repeatedly, which is the big one

The standard internet remedy for any cast iron complaint is another oven seasoning cycle. Do that often enough and the layers stack up faster than cooking can bond them. Field Company is explicit that seasoning a pan in the oven too often produces a brittle layer that adheres poorly and is more prone to flaking, and recommends oven seasoning only for rehabilitating a pan that has been stripped bare or has rusted. The rest of the time, seasoning is meant to build through cooking, which lays down thin, uneven, interlocking layers that hold far better than a uniform coat baked on in one go.

This is the part most guides get backwards. Oven seasoning is a repair procedure, not a maintenance routine.

Seasoning applied over rust or residue

Oil cannot bond to iron it never touches. Season over a rust film, burnt-on debris or a greasy residue and the new layer bonds to the contamination instead, which is itself attached to nothing much. It looks fine coming out of the oven and starts shedding weeks later. Any re-seasoning has to start from clean, dry, bare metal in the affected area.

A layer that never fully hardened

Oil applied too thickly cannot polymerise all the way through. The part against the iron may harden while the surface above it stays soft, leaving something that is tacky rather than hard, and which later comes away. That failure has its own tell — a sticky finish rather than a flaking one — and if the pan is tacky rather than shedding, the fix is different and is covered in cast iron that is sticky after seasoning.

What about flaxseed oil?

Flaxseed oil developed a following because it polymerises hard and fast, and it is frequently blamed for flaking months later. The owner reports are numerous and consistent. What does not exist, as far as any published source shows, is a controlled comparison against other oils under the same conditions — so the honest position is that the pattern is real enough to mention and not established enough to state as fact. Anyone who has had a flaxseed-seasoned pan shed on them has reason to use something else; that is a different claim from flaxseed being the cause.

How to fix it

The fix depends on how much is coming off, and the two cases need different amounts of work.

If it is patchy and light

Loose flakes with sound seasoning underneath do not need stripping. Lodge’s guidance for this case is to scrub the pan with a nylon brush or coarse salt, rinse it, dry it by hand, and rub it with oil — then keep cooking, which usually resolves it. Chain mail works well for the same job: it takes off loose material while leaving well-bonded seasoning alone.

The goal is to remove everything that is not properly attached. Whatever survives a firm scrub was bonded, and that is the surface to build on.

If it is coming off in sheets

Large sheets mean the bond has failed over a wide area, and patching around it leaves the same problem underneath. Take the pan back to bare metal: scrub hard, use coarse salt as an abrasive, and accept that the pan will look grey and raw when finished. That is the correct state to season from.

Then rebuild deliberately — a very thin layer of a high smoke point oil, wiped on and then wiped back off until the pan looks almost dry, heated past the oil’s smoke point, and repeated only a small number of times. The thinness matters more than the number of coats. A layer thin enough to look like nothing is a layer that will bond.

After that, cook in it. The durable finish comes from use, not from the oven.

What not to do

Do not add oven seasoning cycles to a flaking pan without stripping first. That is adding layers to a surface that has already demonstrated it cannot hold them.

Do not leave the pan wet or air-dry it, at any stage. Water on bare iron produces rust in minutes, and rust under a fresh layer of seasoning guarantees the next round of flaking.

Do not assume the pan is finished. Cast iron is a solid piece of metal with a surface treatment on it; the treatment can be removed and reapplied indefinitely. Pans in this state are routinely brought back.

How to stop it coming back

Cook in the pan regularly, ideally with some fat, and let that build the seasoning. Reserve oven seasoning for genuine rehabilitation — a stripped pan or one that has rusted — rather than as routine upkeep.

When seasoning is applied, apply less than seems sensible and wipe the surface back until it looks dry. Dry the pan by hand every time, on the hob if that is easier. And re-season only the bare patches rather than recoating the whole pan each time something looks uneven.

The general care routine, including the parts specific to enamel and to Dutch ovens, is in the cast iron skillet guide and the guide to cleaning a cast iron Dutch oven.

When the pan genuinely is beyond saving

Flaking is not one of these, but a few things are. A crack through the iron, however fine, means the pan is done — it will propagate under heat. A base that has warped enough to rock on a flat hob will never sit properly again, and on an induction or glass hob that is a real problem rather than a cosmetic one. Pitting deep enough to feel as texture through a rebuilt seasoning layer will keep breaking the surface film.

Short of those, a pan that is shedding seasoning is a pan that needs an afternoon, not a replacement. If it does turn out to be cracked or badly warped, the cast iron skillet picks cover what is worth buying.

How This Guide Was Put Together

Plainly: this is a research-based guide, not a hands-on test. No pan was deliberately over-seasoned and stripped to see what happened, and nothing here is a report from my own kitchen.

What it rests on: the published care documentation from two cast iron manufacturers who describe the flaking mechanism independently and in near-identical terms — Lodge on seasoning layers that have not fully bonded to the metal, and Field Company on thick layers building faster than they can bond, along with their guidance that oven seasoning belongs to rehabilitation rather than routine care. It also rests on the chemistry the two accounts share, which is that seasoning is polymerised fat bonded to iron rather than an applied coating.

Also not established: whether flaxseed oil is genuinely more prone to flaking than other oils. The owner reports are numerous and consistent, but no controlled comparison under matched conditions appears to have been published, so this guide declines to rule on it.

Frequently Asked Questions

Is it safe to eat cast iron seasoning flakes?

Yes. Seasoning is cooking oil that has been polymerised onto iron, so a flake is cooked fat and a trace of iron. It is unpleasant in food and it means the pan needs attention, but it is not the same as a synthetic non-stick coating degrading, and it does not carry the same questions.

Why is my cast iron seasoning flaking off?

Because layers of seasoning built up faster than they bonded to the iron. That usually means repeated oven seasoning, seasoning applied over rust or residue, or oil applied too thickly to harden all the way through. Flaking indicates too much seasoning rather than too little.

Do I need to strip my cast iron back to bare metal?

Only if it is coming off in sheets. Patchy, light flaking with sound seasoning beneath it just needs a firm scrub with a nylon brush, coarse salt or chain mail to take off whatever is loose, then oil and continued cooking.

Will seasoning it again in the oven fix the flaking?

Not on its own, and it commonly makes it worse. Adding layers to a surface that has already failed to hold them repeats the cause. Strip the affected area first, then rebuild with layers thin enough that the pan looks almost dry before heating.

Is cast iron flaking the same as a non-stick pan losing its coating?

No. Cast iron has no applied coating to lose; the surface is polymerised fat that can be removed and rebuilt indefinitely. A synthetic non-stick surface cannot be rebuilt at home, which is why a degrading coating is treated differently.

Can I keep cooking while the pan is flaking?

Once the loose material is scrubbed off, yes, and cooking is how the surface rebuilds. What is worth avoiding in the meantime is anything acidic, such as tomatoes or wine, which will strip a weakened surface faster than it can recover.

Filed Under: Helpful Kitchen Tips

How to Fix a Chipped Knife Edge (and When Not To)

Last Updated August 31, 2026

Chef’s knife lying on a light wooden board next to fresh herbs

A chipped knife is not a sharpening problem, and treating it like one is why people spend an hour on a stone and end up with a blade that is sharp everywhere except the one place that matters. A chip is missing steel — nothing puts it back. The only repair is lowering the rest of the edge until it meets the bottom of the chip, and how much blade that costs depends mainly on how deep the chip is and what the knife is made of.

First, measure the chip — do not judge it by eye

Chips look worse than they are under kitchen lighting, and a highly reflective blade exaggerates them. Two checks give a usable answer.

The light test. Hold the edge under a bright light with the blade pointing up at you, and look straight down at the cutting edge.

A properly sharp edge is invisible — it has no flat surface to catch light. A chip shows as a bright dot or a line of brightness. The width of that bright patch tells you the length of the damage along the edge.

The fingernail test. Draw a fingernail gently along the edge, moving across it rather than down it. A hairline chip barely catches. Anything that stops your nail or feels like a notch is a real chip with depth to it.

Depth is the number that governs the repair, and it is the harder one to see. A useful proxy: if you can see the chip clearly at arm’s length, it is deep enough to need a coarse stone rather than an ordinary sharpening session.

What repair actually means, geometrically

This is the part most guides skip, and it explains everything else.

Picture the edge in profile. A chip is a bite taken out of it. To remove that bite you have to grind the surrounding edge down until you reach the deepest point of the chip.

A chip half a millimetre deep means removing half a millimetre of blade height. That steel is gone permanently.

You have two ways to do it, and they trade off against each other:

  • Blend locally. Grind mostly around the chip and feather the transition outwards. Faster and removes less total steel, but it leaves a shallow dip — a slight recurve — in the edge profile. On a chip near the middle of the blade this is usually invisible in use.
  • Take the whole edge down. Grind the entire length to the new depth. Keeps the profile perfectly straight, but costs far more steel and far more time.

For a single small chip, blending is almost always the right call. Full-length reprofiling is for a blade with several chips, or one deep enough that a local blend would leave an obvious scallop.

The three sizes, and what each one needs

Hairline: barely catches a fingernail

This is not really a chip. It is edge damage of the kind that ordinary sharpening removes as a matter of course. Sharpen normally — the whetstone method covers the technique — and it will vanish during the coarse stage. No special treatment needed.

Visible, but shallower than about a millimetre

This is the standard home repair, and it is entirely doable. It needs a genuinely coarse stone, in the region of 200 to 400 grit. A 1000-grit stone, which is what most people own as their “coarse” side, will get there eventually but will take an unreasonable amount of time, because it is designed to refine an edge rather than remove metal.

Work the chipped section at your normal sharpening angle, checking the light test regularly, until the bright patch closes up. Then blend outwards along the edge in both directions so there is no step, and take the whole edge through your usual progression to finish. Expect this in tens of minutes of active grinding, not minutes — removing metal is slow, and rushing it means heat and a wandering angle.

One thing to be deliberate about: the repair is finished only when the edge is fully re-formed, which means raising and removing a burr as normal. A chip that is ground out but never brought back to a true apex will feel dull. That failure mode is covered in more depth in the guide to a knife that is still dull after sharpening.

Deeper than a millimetre, or at the tip or heel

This is a reprofiling job rather than a sharpening one. It is still possible by hand, but it is slow enough that most people are better served by a repair service — many knife retailers and sharpening shops will regrind a damaged edge for a modest fee, and it is often cheaper than the stones you would buy to do it yourself once.

If you do it yourself, the risk to manage is heat. Aggressive grinding on a powered wheel can take the edge hot enough to affect the temper, which softens the steel permanently and leaves a knife that will not hold an edge afterwards. Hand stones do not have this problem.

Hard steel chips differently — and that changes the repair

Steel hardness is measured on the Rockwell C scale, and it involves a genuine trade-off. Harder steel holds an edge longer, but it is more brittle. As Knife Steel Nerds, written by a metallurgist, puts it: “Toughness is a measure of how much resistance a steel has to fracturing” — and in a knife, that fracturing shows up as chipped edges.

The knives covered on this site span a meaningful range of that scale:

  • The Victorinox Fibrox Pro sits around 55–56 HRC with a 20-degree edge per side — soft and obtuse, which is precisely why it tends to roll rather than chip.
  • The Wusthof Classic is tempered to 58 HRC and ground to 14 degrees per side.
  • The Global G-2 runs 56–58 HRC at 15 degrees per side.

Two practical consequences follow. First, a harder, thinner edge chips where a softer, thicker one would simply deform — the review of the Mac MTH-80 notes exactly this, that its very thin edge is more prone to chipping on bones or frozen food than a thicker German edge. Second, harder steel is slower to grind, so the same size chip takes longer to remove from a hard Japanese blade than from a soft European one.

There is also a temptation worth resisting on a hard, thin knife: opening the edge angle to make it more chip-resistant. It works, but it turns a precision knife into a blunter instrument, and it is a large amount of grinding to reverse. If a knife keeps chipping at its factory angle, the usual problem is what it is being used on, not the angle.

A broken tip is a different repair

A snapped tip is not an edge chip and is not fixed the same way. Restoring a point means grinding the spine side down to meet the edge, re-forming the curve, so the blade gets shorter and the profile changes shape. It is more forgiving than it sounds, because the last centimetre of a chef’s knife does comparatively little work, but it is a shaping job that wants a coarse stone and a clear idea of the profile you are aiming at before you start.

Is a chip covered by the warranty?

Almost certainly not, and it is worth understanding why rather than being surprised by it.

Manufacturer warranties in this category cover manufacturing faults, not damage from use. WÜSTHOF states plainly that its knives carry a limited lifetime warranty against manufacturer defects. Zwilling’s warranty terms are more explicit about the exclusions, stating that it does not cover defects resulting from “normal wear and tear, misuse, abuse, alteration, negligence, or use of the product other than its intended purpose.”

A chip from hitting a bone is use damage, and falls outside that. The exception is a chip that appears during obviously normal cutting on a soft board within days of purchase, which may point to a heat-treatment fault — that is a defect, and worth raising with the retailer.

Why it chipped, and how to stop it happening again

Chips have a small number of common causes, and they are mostly about what the edge meets rather than the knife itself.

Hard contact. Bones, frozen food, fruit stones, and the shell of a squash are the usual culprits. A chef’s knife is not a cleaver; the twisting force used to get through a bone is what fractures the edge.

The wrong board. Glass, granite, marble and ceramic boards are harder than knife steel and will damage an edge quickly. Wood and soft plastic are the only sensible surfaces.

Lateral force. Using the blade to scrape chopped food off the board sideways puts force across the edge, which is the direction it is weakest in. Turn the knife over and use the spine.

Storage and the dishwasher. Loose in a drawer, blades knock against other steel. A dishwasher combines that with heat and harsh detergent. A block, magnetic strip or edge guard prevents a category of damage that has nothing to do with cutting.

When it is not worth repairing

Some situations do not justify the effort. A knife with multiple deep chips along the edge needs so much steel removed that the blade height changes noticeably and the balance goes with it. A knife that chips repeatedly on a wooden board at its factory angle has a steel or heat-treatment problem that grinding will not cure. And on an inexpensive stamped knife, the cost of a coarse stone or a professional regrind can approach the cost of replacing it — the chef’s knife guide covers what is worth buying, and the knife sharpener guide covers the equipment side if the plan is to maintain what you have.

The order worth working through

  1. Run the light test to find the chip and see how far along the edge it runs.
  2. Use a fingernail across the edge to judge whether it has real depth.
  3. Hairline damage: sharpen normally, it will go.
  4. Under a millimetre: coarse stone, grind the chip out, blend outwards, finish through your normal progression.
  5. Deeper, or at the tip: consider a professional regrind rather than buying coarse stones for one job.
  6. Then fix the cause — the board, the bones, or the storage — or it will happen again.

How This Guide Was Put Together

Plainly: this is a research-based guide, not a workshop report. I have not chipped a set of knives and repaired them on a bench to time the process, and nothing here is presented as a measurement taken in my own kitchen.

What it rests on: the published hardness and edge-angle specifications of the knives already covered on this site, which is where the HRC figures and per-side angles come from; the metallurgical explanation of why hard steel fractures rather than deforms, from Knife Steel Nerds, which is written by a metallurgist; and the published warranty terms of WÜSTHOF and Zwilling for the coverage question.

Deliberately not claimed: a time in minutes for removing a chip of a given depth. That varies with the steel’s hardness, the grit and quality of the stone, and how much pressure the person is applying, and any single figure would be invented. The honest statement is that it is a job measured in tens of minutes of grinding, not a quick pass on a stone.

More knife troubleshooting

If the edge is intact but will not get sharp, the cause is usually the burr — see why a knife is still dull after sharpening. For the sharpening technique itself, there is a step-by-step guide to sharpening a chef’s knife with a whetstone.

Frequently Asked Questions

Can a chipped knife be fixed at home?

Usually yes. A chip shallower than about a millimetre comes out on a coarse stone of roughly 200 to 400 grit, followed by blending and a normal sharpening progression. Deeper damage, or a broken tip, is slow enough by hand that a professional regrind is often the better value.

How deep a chip is too deep to fix?

There is no hard limit, only a cost in steel and time. Removing a chip means lowering the whole edge to the bottom of it, so a deep chip permanently reduces blade height. Several deep chips along one edge is the point at which the blade changes shape enough to affect balance, and replacement becomes the sensible option.

Will repairing a chip make the knife smaller?

Slightly, and permanently. The blade loses height equal to the depth of the chip in the repaired section. Blending the repair locally rather than grinding the full length keeps that loss to a minimum, at the cost of a very shallow dip in the edge profile that is rarely noticeable in use.

Why do my Japanese knives chip more than my German ones?

Harder steel resists wear but fractures more readily, and Japanese knives are typically both harder and ground to a more acute angle. A Victorinox at roughly 55 to 56 HRC with a 20-degree edge tends to roll under stress, while a harder blade at a thinner angle chips instead. The same task damages them in different ways.

Is a chipped knife safe to use?

A small chip is not dangerous, but it cuts poorly and drags at that point on the blade, which encourages more force and more slipping. A chip at the tip is worth addressing sooner, since the tip does fine work where a snag matters most.

Does a chipped knife count as a warranty defect?

Generally not. Manufacturer warranties in this category cover faults in materials and workmanship, and explicitly exclude misuse and normal wear. A chip from a bone, a frozen item or a hard board is use damage. A chip appearing during ordinary cutting on a wooden board very early in a knife’s life is different, and worth raising with the retailer.

Filed Under: Helpful Kitchen Tips

Air Fryer Keeps Tripping the Breaker? How to Fix It

Last Updated August 31, 2026

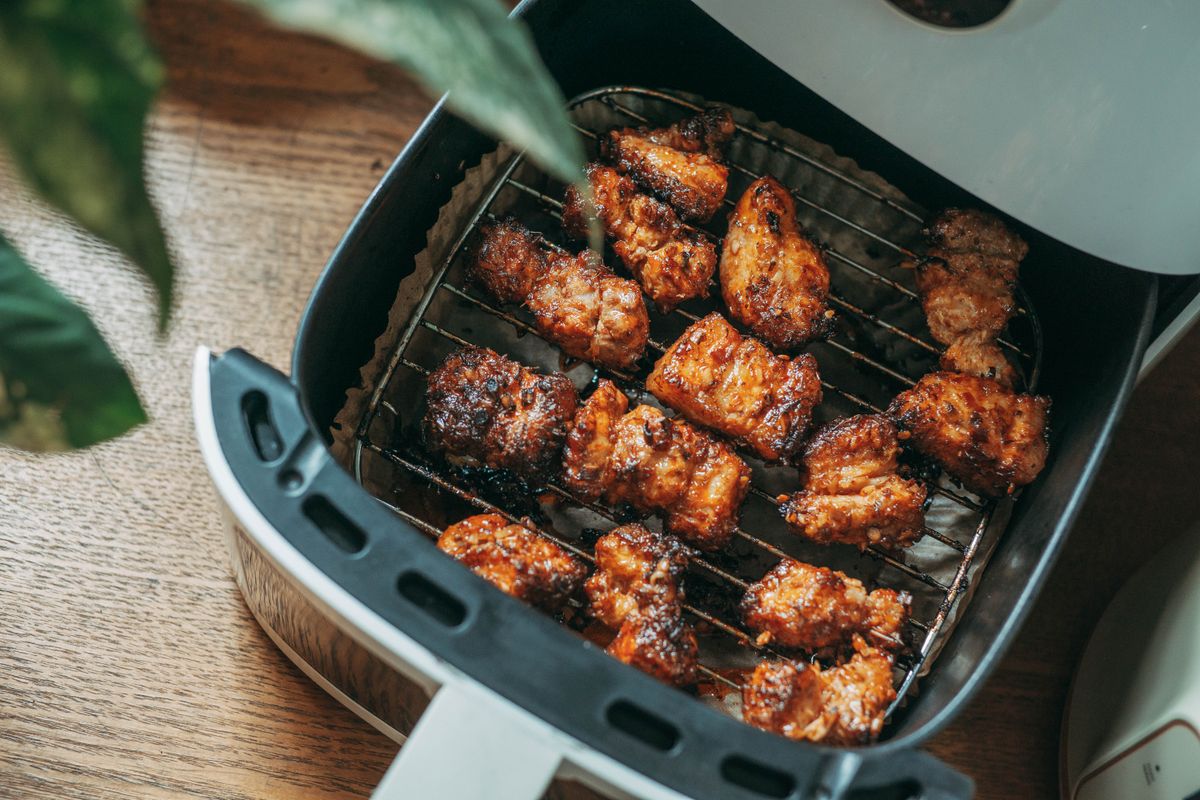
Air fryer basket pulled out with cooked chicken pieces inside, on a kitchen worktop

An air fryer that trips the electrics is telling you one of two completely different things, and the timing separates them. A trip that happens minutes into cooking is an overload — the circuit is carrying more than it is rated for.

A trip the instant the air fryer is switched on, or one that happens when the machine is damp, is a fault in the appliance. The first is usually solvable by moving the plug. The second means stop using it.

First: which device actually tripped?

Go and look at the panel before doing anything else, because the answer changes the diagnosis entirely.

A standard circuit breaker protects the wiring from carrying too much current. It trips on overload, and it usually takes time — the element runs, the current stays high, and after several minutes the breaker gives up. In a UK or Irish consumer unit this is the MCB for the kitchen ring.

A GFCI or RCD is doing a different job. The Electrical Safety Foundation International describes a ground fault circuit interrupter as “a device designed to protect people from electrical shock and electrocution”, which “constantly monitors electricity flowing in” a circuit. It trips when current is escaping somewhere it should not — through moisture, or through damaged insulation. In an American kitchen, countertop receptacles are GFCI-protected, and ESFI advises plugging countertop appliances into them.

So: breaker equals too much load. GFCI or RCD equals leakage. They are not interchangeable, and treating a leakage trip as an overload is how a genuinely faulty machine stays in service.

The arithmetic, which is closer to the limit than most people expect

An air fryer is a heating appliance, and heating appliances draw far more than the small motors most kitchen gadgets contain. Divide the wattage by the supply voltage to get the current.

On a 120 volt supply, the models covered on this site work out roughly like this:

  • A 1,550 W compact model draws about 12.9 amps.
  • A 1,750 W model draws about 14.6 amps.
  • An 1,800 W model draws about 15 amps.
  • A 2,650 W dual-zone model draws about 22 amps.

A standard American kitchen small-appliance circuit is 15 or 20 amps. An 1,800 watt air fryer therefore asks for essentially the entire rated capacity of a 15 amp circuit on its own, before the kettle, the microwave or the toaster is plugged in anywhere else on the same run. And because breakers are sized so that a sustained load should sit below the full rating rather than at it, a machine drawing 15 amps on a 15 amp circuit is not operating with any margin at all — which is exactly why the trip tends to arrive part-way through a cook rather than immediately.

The dual-zone figure is the one worth pausing on. At around 22 amps, a large two-basket model exceeds what a 20 amp circuit is intended to carry continuously. That is not a defect. It is a machine that needs a circuit of its own.

On a 230 volt supply the current is roughly half for the same wattage, which is why this problem is much less common in the UK and Ireland — there the more likely symptom is the fuse in the plug failing, or an RCD tripping on leakage.

If it trips several minutes into cooking

This is the overload pattern, and it is the good outcome, because nothing is broken.

Work out what else is on the circuit

Kitchen circuits usually feed more sockets than people assume, and often reach beyond the kitchen. Switch the air fryer on alone, with the kettle, microwave and toaster unplugged, and see whether it completes a full cook. If it does, the air fryer is not the problem — the total load was.

ESFI lists the warning signs of an overloaded electrical system as “frequent tripping of circuit breakers or blowing of fuses”, along with lights dimming when other devices switch on, buzzing from switches or outlets, and discoloured outlets. If any of the others are present alongside the tripping, the wiring deserves attention rather than a workaround.

Move it to a different circuit, not just a different socket

Two sockets on the same wall are frequently on the same circuit, so moving the plug a metre sideways changes nothing. A socket in another room, ideally on another part of the house, is a real test. If the air fryer runs happily there, the diagnosis is settled.

Take the extension lead out of the equation

What a suitable outdoor lead actually has to be — jacket rating, earth, gauge and length — is covered in the best extension cord for an electric smoker, which applies to any heating appliance rather than only to smokers.

Light-duty extension leads and travel adapters are not built for a sustained 15 amp draw, and a coiled lead makes it worse by trapping heat. Plug a heating appliance straight into a wall socket. If the trip only happens on the extension, the lead was the fault and it should be retired rather than reused elsewhere.

If it trips instantly, or only when damp

An immediate trip on switch-on, or a trip that appears after the air fryer has been washed or has sat somewhere humid, points at current leaking to earth rather than at too much load. Water inside the base, a cracked heating element, or damaged insulation on the cord will all do it.

This is where the guidance stops being about convenience. ESFI is direct about an appliance that shows electrical symptoms: turn the power to it off at the circuit breaker, and do not touch it until it has been checked by a licensed, qualified electrician. An air fryer that trips a GFCI or RCD repeatedly is not a machine to keep resetting and trying again.

If the unit is out of warranty and the trip is instant and repeatable, replacement is usually the sensible answer rather than repair — the air fryer buying guide covers what is worth buying, and the cheap air fryer picks cover the budget end if this was an inexpensive unit to begin with.

What usually goes wrong

The most common mistake is treating a repeat trip as a nuisance to be reset around. A breaker doing its job is not a faulty breaker, and resetting it repeatedly while the same load is applied is the one response that carries actual risk.

The second is the extension lead, usually introduced because the air fryer ended up somewhere without a convenient socket. The third is assuming a bigger air fryer is simply a bigger version of the small one: a dual-zone model can draw close to double a compact one, and it is genuinely a different electrical proposition.

One more worth naming, because it produces a confusing intermittent fault: a socket that is itself worn or loose gives a poor contact, which heats up under a heavy load and can trip protective devices unpredictably. If one socket trips and others do not, and that socket is warm or discoloured, the socket is the suspect rather than the air fryer.

When to stop and get help

Some symptoms are not troubleshooting problems. Stop using the machine, and get an electrician, if the trip is instant every time on more than one circuit, if there is any burning smell or scorching around the plug or socket, if the plug or cord is hot to the touch, or if anyone has felt a shock or tingle from the appliance. Those are not overload symptoms.

The order worth working through

  1. Check which device tripped — breaker, or GFCI/RCD.
  2. Note the timing: instant, or several minutes in.
  3. Run the air fryer alone, with other kitchen appliances unplugged.
  4. Remove any extension lead and plug directly into a wall socket.
  5. Try a socket on a different circuit, not just a different socket.
  6. If it still trips instantly, stop, and have it looked at.

How This Guide Was Put Together

Plainly: this is a research-based guide, not a hands-on test. I have not put a set of air fryers on a meter to measure inrush current, and nothing here is a report from my own kitchen.

What it rests on: the published wattages of the air fryers covered on this site, and the arithmetic that follows from them at 120 and 230 volts; the guidance published by the Electrical Safety Foundation International on ground fault protection, overloaded circuits and when an appliance should be taken out of service; and the pattern of what owners report, where shared circuits and extension leads dominate the overload cases and moisture dominates the leakage cases.

Also not established: how much current these machines draw at the moment of switch-on, as opposed to while running. Inrush is what actually trips some breakers, it varies by model and by the type of breaker fitted, and no manufacturer in this category publishes the figure. Any number here would be invented, so none is given.

More air fryer troubleshooting

If the machine runs but will not get hot, see what to check when an air fryer is not heating up. If there is smoke rather than a trip, there is a separate guide to an air fryer that smokes.

Frequently Asked Questions

Why does my air fryer trip the breaker but the microwave does not?

Air fryers run a heating element at full power for the whole cook, while a microwave cycles on and off. Sustained current is what heats wiring and trips breakers, so a lower-rated appliance running continuously can trip a circuit that a higher-rated intermittent one does not.

Can I run an air fryer on an extension lead?

It is best not to. Light-duty leads are not rated for a sustained draw of this size, and coiling one traps heat. Plug a heating appliance directly into a wall socket. If tripping only happens on the extension, the lead is the fault.

Does an air fryer need its own circuit?

A compact model usually does not. A large dual-zone model can draw around 22 amps at 120 volts, which is more than a 20 amp circuit is meant to carry continuously, so those are worth giving a dedicated circuit.

Is it dangerous if the breaker keeps tripping?

The breaker itself is protecting you and doing its job. The risk comes from repeatedly resetting it while the same load is applied. Repeated tripping, especially with dimming lights, buzzing outlets or a burning smell, means the wiring should be checked.

Why does it only trip when the air fryer is wet?

That is leakage rather than overload, and it is a GFCI or RCD tripping rather than a breaker. Moisture inside the base or a damaged element lets current escape to earth. Stop using it and have it checked.

My air fryer trips the breaker in one socket but not another. What does that mean?

Usually the two sockets are on different circuits and one is more heavily loaded. It can also mean the socket itself is worn and making poor contact, which heats up under load. A warm or discoloured socket points at the socket, not the appliance.

Filed Under: Helpful Kitchen Tips

Wireless Meat Thermometer Not Connecting? How to Fix It

Last Updated August 31, 2026

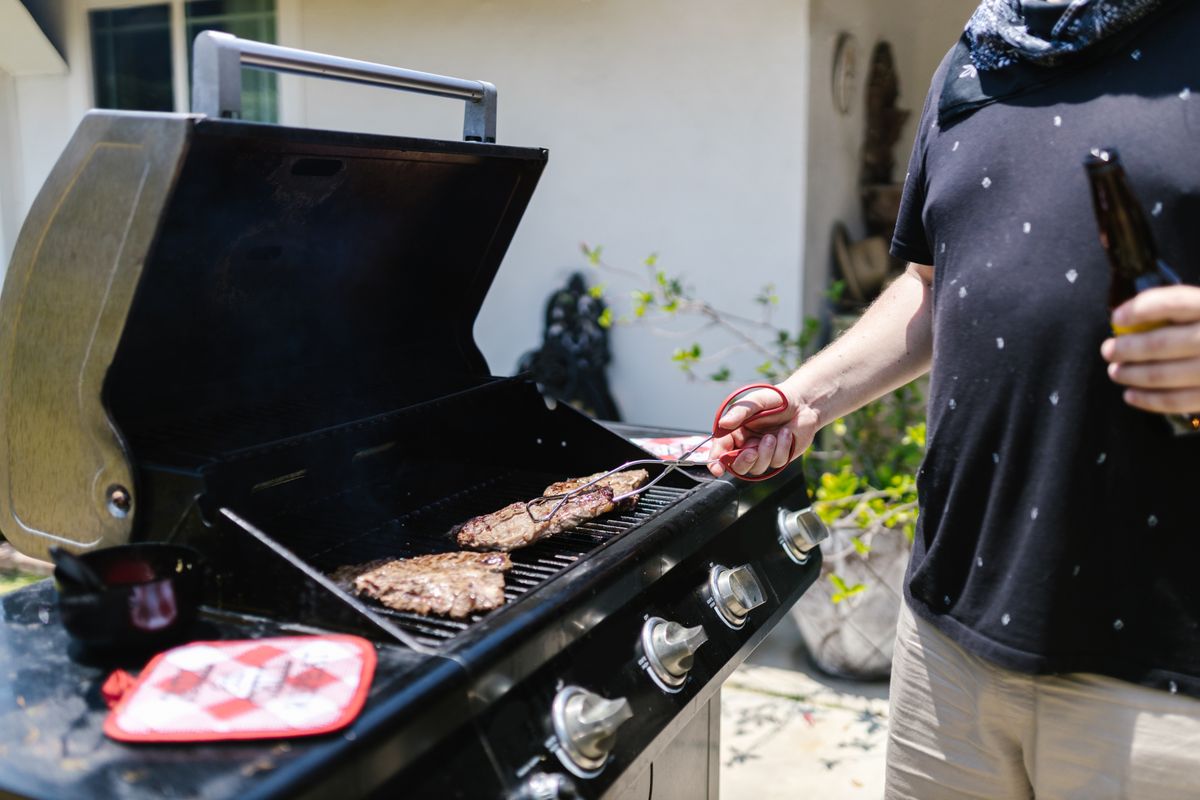
Gas barbecue with the lid open and steaks on the grate, the setting where a wireless thermometer link usually drops

A wireless meat thermometer that will not connect is nearly always one of three things, and they need completely different fixes: the probe is still paired to another device, the phone is blocking the Bluetooth scan, or the signal is being absorbed before it reaches you. Work through them in that order — the first two take under a minute and account for most failures.

First, work out which radio you actually have

Three quite different designs are sold under the word “wireless”, and the thing that breaks is different in each. Check which one is on the counter before troubleshooting anything.

Probe-only. The probe is the transmitter. There is no box and no cable — the metal spike itself holds the battery and the radio, and it charges in a separate block. MEATER-style thermometers work this way.

The quoted range is measured from the probe to the phone, or from the charging block acting as a repeater.

Probe plus transmitter. One or more wired probes plug into a small display box, and the box talks to the phone over Bluetooth. The Inkbird IBT-4XS and the ThermoPro TP25 are built like this. Here the probe cable is a separate failure point from the radio, which matters: a dead reading on one channel is a cable or probe fault, not a connection fault.

Wi-Fi or bridge models. A base station joins the home network and relays readings, so the phone does not need to be in Bluetooth range at all. When these fail it is usually the router relationship rather than the thermometer. If the difference between the two systems is what you are actually trying to resolve, the comparison of Bluetooth and Wi-Fi meat thermometers covers which one suits which kind of cooking.

The checks that take a minute

It is still connected to something else

This is the single most common cause and the least obvious, because nothing on the thermometer indicates it. A Bluetooth device holds one active connection at a time. If the thermometer is still paired to a tablet on the kitchen counter, a partner’s phone, or the phone it was set up on last summer, a second phone will see it and fail to connect — often with no error message beyond a spinner that never resolves.

Turn Bluetooth off on every other device in the house, or walk the thermometer out of range of them, then try again. If that fixes it, the long-term answer is to decide which device owns the thermometer and forget it on the others.

Bluetooth is on, but the app is not allowed to scan

An app cannot connect to a device it is not permitted to look for, and on Android the permission that blocks this is not the one most people expect. Google’s Bluetooth permissions documentation states that for apps targeting Android 11 or lower, location access “is necessary because, on Android 11 and lower, a Bluetooth scan could potentially be used to gather information about the location of the user”.

In practice that means an older thermometer app will refuse to find the probe when Location is switched off, even though nothing about the task involves GPS. Newer apps built against Android 12 or higher can declare that they never use Bluetooth for location and skip the requirement, which is why the same advice works on one phone and appears to be nonsense on another. If the app has not been updated in a while, turn Location on, grant the Bluetooth permission when prompted, and try the scan again.

On iPhone the equivalent is simpler: Settings, then the app, then check Bluetooth is enabled for it specifically.

The battery is low enough to stop transmitting but not to look flat

Radio transmission is the most power-hungry thing these devices do. A probe with just enough charge to light its display or show a status LED may not have enough to hold a link, so the symptom is a device that looks alive and behaves as though it is broken. On probe-only models this is especially easy to miss, because the probe gives almost no feedback.

Charge it fully before concluding anything else is wrong. On transmitter models, check that the transmitter itself has charge or fresh batteries — charging the probes and forgetting the box is a common and frustrating mistake.

It connects, then drops out mid-cook

A link that establishes and then fails is a different problem from one that never forms. This is almost always physics rather than a fault.

2.4 GHz does not travel well through meat, water or metal

Bluetooth runs in the 2.4 GHz band — 2400 to 2483.5 MHz, according to the Bluetooth SIG, which notes that the choice of radio spectrum is a trade-off, with lower frequencies travelling further and higher ones carrying more data.

The practical consequence for cooking is awkward: a large wet roast sitting between the probe and the phone is an effective absorber, and a closed metal lid is close to a shielded box. A probe-only thermometer buried in a brisket, inside a kettle grill with the lid down, is being asked to transmit through the two materials that block it best. Signal that was solid at the start of a cook can degrade as the joint is turned or the lid closed.

The quoted range is line-of-sight, and nothing else

Rated figures are measured in open air with nothing in between. The numbers on the box vary enormously — the Inkbird IBT-4XS is rated at 150 feet, the TempPro TempSync at 650 — but every one of them assumes a clear path. Through a wall, an oven door, or a closed grill, the usable distance is a fraction of the claim.

If the readings hold while standing next to the grill and fail from the sofa, the thermometer is working exactly as designed and the range is simply not enough for the layout. That is a buying problem rather than a fault, and it is the main thing worth paying for: the guide to wireless meat thermometers sets out which models hold a link at distance and which do not.

The transmitter is standing on metal

A transmitter box placed on a grill shelf, a metal worktop or against an appliance will perform far worse than the same box moved two feet onto a wooden surface. Metal both blocks and reflects at this frequency. Moving the base station is the cheapest fix available and it is frequently the whole answer.

Re-pairing properly

Half-finished pairings cause persistent, hard-to-diagnose failures. If the checks above have not resolved it, clear the pairing completely rather than trying to connect again on top of it.

  1. In the phone’s Bluetooth settings, find the thermometer and choose Forget This Device — not just disconnect.
  2. Force-close the thermometer app.
  3. Power the thermometer down fully. On probe-only models, seat the probe in its charger for a few seconds.
  4. Turn the phone’s Bluetooth off, wait ten seconds, turn it back on.
  5. Open the app first, then power the thermometer on, and pair from inside the app rather than from the phone’s Bluetooth menu.

That last step matters more than it sounds. Several of these thermometers are designed to be paired through the app, and pairing them at operating-system level instead produces a device that appears connected in Bluetooth settings while the app still cannot see it.

What usually goes wrong

The recurring mistakes are rarely technical. Charging the probes but not the transmitter accounts for a good share of apparently dead units. Standing the base station on the grill itself is another, and it is often introduced by the magnetic back that many transmitters have, which invites exactly the wrong placement. Assuming a rated range applies through a closed lid leads people to return working thermometers.

Two further traps are worth naming. Firmware updates for these devices are delivered through the phone app and are easy to postpone indefinitely; a stalled update can leave an app and a device on incompatible versions, and the symptom is a connection that fails for no visible reason. And a probe run past its rated temperature — pushed into a searing zone, or left in during a high-heat clean cycle — can be damaged permanently even though it still charges and still pairs, which reads as a connection problem but is not one.

When it is broken rather than disconnected

A few signs point to hardware rather than a link. A probe that reads wildly wrong while connected has a damaged sensor, not a radio problem. A single dead channel on a multi-probe transmitter, with the others fine, is a cable or probe fault. A probe that will not take charge at all, after trying a different cable and a different power source, has usually reached the end of its life.

These are consumable items in a way that is not always made obvious at purchase. Probes wear, cables fail at the strain point, and cheap units fail sooner. If replacement is the conclusion, the Bluetooth meat thermometer picks cover what holds up.

The order worth working through

  1. Disconnect every other device that has ever been paired to it.
  2. Check Bluetooth permission for the app, and Location on older Android builds.
  3. Charge the transmitter as well as the probes.
  4. Move the base station off metal.
  5. Forget the device and re-pair from inside the app.
  6. Test the range in open air before blaming the thermometer.

How This Guide Was Put Together

Plainly: this is a research-based guide, not a hands-on test. I have not bench-tested a set of thermometers for connection stability, and nothing here is a report from my own kitchen.

What it rests on: the published behaviour of Bluetooth itself, including the 2.4 GHz band figures from the Bluetooth SIG and the Android permission requirements documented by Google, both of which explain symptoms that are otherwise reported as folklore; the rated ranges published for the models covered on this site; and the pattern of what owners report across product listings and support threads, where stale pairings, permissions and base-station placement dominate the causes by a wide margin.

Also not established: a reliable figure for real-world range as a percentage of the rated figure. It depends on the meat, the cooker, the building and the phone, the published numbers are all line-of-sight, and no source found offers a controlled measurement across models. Any single percentage here would be invented, so none is given.

More thermometer troubleshooting

If the reading rather than the connection is the problem, see how to calibrate a meat thermometer, or the assessment of how accurate wireless meat thermometers really are.

Frequently Asked Questions

Why will my wireless meat thermometer not connect to my phone?

Most often it is still actively paired to another device, because Bluetooth holds one connection at a time. Failing that, the app has not been granted permission to scan, or the probe has too little charge to transmit even though it powers on.

Does Location have to be switched on for a meat thermometer app?

On Android apps targeting version 11 or lower, yes. Google documents that location access is required because a Bluetooth scan could be used to infer the user’s position. Apps updated for Android 12 or higher can declare they never use Bluetooth for location and skip it.

Why does my thermometer disconnect when I close the grill lid?

A closed metal lid behaves like a shielded box at 2.4 GHz, and wet meat absorbs the same frequency. A probe inside a large joint inside a closed grill is transmitting through both. Moving the phone closer usually restores it.

Can two phones use the same meat thermometer at once?

Not on Bluetooth models, which support a single active connection. Wi-Fi and bridge models can serve more than one device because readings go through the network rather than a direct link.

Is the range on the box realistic?

Only in open air with nothing in the way. Rated figures such as 150 or 650 feet are line-of-sight measurements. Through a wall, an oven door or a closed grill the usable distance is much shorter, and that is normal rather than a fault.

How do I know if the probe is broken rather than disconnected?

If it connects but reads obviously wrong, the sensor is damaged. If one channel of a multi-probe unit is dead while the others work, it is that cable or probe. If it will not charge on a second cable and power source, it has failed.

Filed Under: Helpful Kitchen Tips

Best Bluetooth Meat Thermometer

Last Updated August 30, 2026

This post contains affiliate links. If you buy through my links, I may earn a commission at no extra cost to you.

Best Bluetooth Meat Thermometer 2026 — buying guide and reviews

Disclosure: I earn a small commission if you buy through links on this page, at no extra cost to you.

The Best Bluetooth Meat Thermometers in 2026

Leave-in Bluetooth meat thermometers solve a specific problem: you insert a probe into your meat, connect your phone, set a target temperature, and then go and do something else. The thermometer alerts you when you’re close and when you’re done. No more cutting into meat to check, no more hovering over the grill, no more overcooked chicken because you got distracted.

Of the five models tested, the MEATER Plus is the best starting point for most people — genuinely wireless, excellent app, and consistently accurate. If you want four probes for under $50, the Inkbird IBT-4XS is the obvious value pick.

The market has matured significantly. You can now get a solid four-probe setup for under $50 (Inkbird IBT-4XS) or a completely wireless dual-probe unit with an exceptional app (MEATER Plus, Typhur Sync Gold). Across five of the most popular models, here’s what the specifications and the pattern of owner reports actually single out.

Quick Comparison

Product Best For Price Rating Buy
MEATER Plus Best Overall (1 probe, 165 ft) $79.99 4.3★ (48,512) Check Price
Inkbird IBT-4XS Alternative Pick (4 probes, 150 ft) $49.99 4.4★ (10,855) Check Price
TempPro TempSync Best Multi-Probe (4 probes, 650 ft) $52.99 4.5★ (10,330) Check Price
Typhur Sync Gold Best Premium (2 probes, long range) $152.99 4.5★ (552) Check Price
Weber iGrill 3 Best for Weber Grill Owners (4 probes, Bluetooth) $109.99 4.5★ (5,550) Check Price

MEATER Plus — Best Overall

MEATER Plus wireless meat thermometer

I was skeptical about fully wireless probes at first. How is a small stick supposed to hold a Bluetooth signal through a closed smoker lid? Owner reports at scale answer that: the skepticism is hard to sustain. The probe goes into the meat.

That’s it. No cable dangling near the burners, no transmitter box balanced on the grill shelf, nothing. Your phone shows the temperature in real time from up to 165 feet away.

The app is what really separates the MEATER from cheaper alternatives. Select your protein and target doneness, and it walks you through the cook — including a live estimated finish time that’s accurate enough to actually plan a meal around. The dual sensor reads both internal meat temperature and ambient cook temperature from a single probe, so you’re monitoring your grill’s running temp at the same time without a second thermometer clipped to the grate.

Battery life is roughly 24 hours per charge. The slim bamboo case charges the probe and doubles as a Bluetooth repeater — keep it near the grill and you’ll stay connected reliably well beyond the stated 165 feet. Setup takes about three minutes.

The limitation is one probe per thermometer, meaning one cut at a time. For most home cooks that’s perfectly sufficient. If you’re regularly juggling a brisket and three racks of ribs simultaneously, look at the TempPro TempSync or step up to the Typhur Sync Gold. But for straightforward single-cut cooking, nothing beats the MEATER Plus for ease of use.

Pros

  • Completely cable-free — the cleanest setup of any thermometer compared here
  • Dual sensor reads meat temp and ambient grill temp simultaneously
  • Guided cook app with live finish time estimates — genuinely useful
  • Bamboo case acts as Bluetooth repeater to extend range
  • Setup under 3 minutes, pairs first time every time

Cons

  • One probe only — one cut at a time
  • Requires app account creation before first use

Bottom line: The best single-probe Bluetooth thermometer on the market. If you’re buying your first wireless thermometer and cook one cut at a time, start here.

Current price: $79.99

See Today’s Price on Amazon →

Want more detail? Read my full MEATER Plus review covering accuracy tests, long-term durability, and how it holds up after two years of regular use.


Inkbird IBT-4XS — Alternative Pick

Inkbird IBT-4XS bluetooth meat thermometer

The Inkbird IBT-4XS is what you buy when the MEATER price is hard to justify for something you might use a few times a season — and then you end up using it every weekend because four probes for under $50 changes how you cook. Monitoring a pork shoulder, two racks of ribs, and the grill ambient temperature simultaneously on one screen is the kind of thing that used to cost three times this much.

The app does what it needs to: shows all four probe temperatures, lets you set high and low alerts per probe, and keeps a basic temperature history. It’s not pretty and there’s no guided cook mode, but if you already know you want chicken to hit 165°F and pork to reach 203°F for pulled, you don’t need hand-holding. You need a reliable readout, and the Inkbird gives you that.

Range is 150 feet — fine for a typical backyard patio, a bit tight if you want to disappear into the house during a three-hour smoke and forget about it. The probes are corded with 47-inch braided cables, which means something hanging out of your grill. Not a functional problem, just less tidy than MEATER. USB rechargeable, charges in around two hours.

At this price, the Inkbird IBT-4XS is hard to argue against. Start here if you’re new to Bluetooth thermometers and don’t want to commit $100+ until you know how much you’ll actually use one. Most people find they use it constantly.

Pros

  • Four probes for under $50 — the best value in the category
  • All four temps visible on one app screen simultaneously
  • USB rechargeable — no disposable batteries
  • Accurate to ±1.8°F, consistent with models costing three times more
  • Works with iOS and Android

Cons

  • 150-foot range — shorter than the TempPro TempSync
  • No guided cook mode
  • Corded probes (cables hang out of grill)

Bottom line: Four probes for under $50. If you cook for a group and want to monitor multiple cuts without spending a lot, the Inkbird IBT-4XS is the obvious starting point.

Current price: $49.99

See Today’s Price on Amazon →

Read more: Inkbird IBT-4XS full review — including side-by-side accuracy tests and a full app walkthrough.


TempPro TempSync — Best Multi-Probe

TempPro TempSync bluetooth meat thermometer

Naming note: this listing now shows on Amazon as the TempPro TempSync PRO TP25. It is the same product — earlier listings showed ThermoPro as the manufacturer with TP25 as the model number — the brand name on the box has simply changed. It is referred to as the TempPro TempSync throughout this guide.

The spec that makes the TempPro TempSync worth attention is 650 feet of Bluetooth range. Most Bluetooth thermometers drop signal the moment you’re two rooms inside your house. The TempSync stays connected from the other side of a large garden, through walls, across multiple floors. For long overnight cooks — a brisket running 14 hours, a pork shoulder going low and slow all day — that range means you can actually get on with things instead of hovering near the grill.

Four probes, USB rechargeable, 90 hours of battery life. At $52.99 it costs $3 more than the Inkbird IBT-4XS but adds 500 feet of extra range and a noticeably more polished app. It also undercuts the Weber iGrill 3 by $57 while matching it on probe count and beating it on range. For anyone doing serious BBQ, it’s the most sensible value proposition in the lineup.

The app shows all four probes simultaneously with individual alert thresholds per probe. Temperature history is recorded for the full cook, which is useful for reviewing and improving your process. TempPro’s software is mature — they’ve been in the thermometer market long enough that the app is stable and well-maintained, not a buggy afterthought.

What’s missing: guided cook mode (you set your own target temps) and wireless probes — cables come with the unit. For experienced BBQ cooks, neither of those is a meaningful limitation. For beginners who want more guidance, the MEATER Plus is the more forgiving starting point.

Pros

  • 650-foot Bluetooth range — the best of any model compared here, by far
  • Four probes for $52.99 — $57 less than the Weber iGrill 3
  • 90-hour battery life on a single USB charge
  • Mature, stable app with per-probe alerts and cook history
  • Accurate to ±1.8°F

Cons

  • No guided cook mode — you need to know your target temps
  • Corded probes
  • App less visually polished than MEATER

Bottom line: The best choice for serious BBQ cooks who monitor multiple cuts over long distances. That 650-foot range is genuinely in a different league.

Current price: $52.99

See Today’s Price on Amazon →

Typhur Sync Gold — Best Premium

Typhur Sync Gold wireless meat thermometer

$152.99. That’s the number to sit with before reading anything else about the Typhur Sync Gold. If the price makes sense to you — because you regularly cook multiple large proteins, you do long weekend smokes, you take this seriously — then it absolutely delivers. If it doesn’t, the MEATER Plus at $79.99 does the job for single cuts at roughly half the price.

Two completely wireless probes, six sensors each, 1000°F heat resistance. That heat resistance figure matters more than it sounds. Standard probe tips start degrading above 700°F — over high-heat charcoal or live fire, you’ll eventually see accuracy drift on cheaper probes. The Typhur Sync Gold handles those temperatures without issue, which means it’ll outlast standard probes if you cook hot.

The six sensors per probe (three internal, three ambient) give the MEATER app significantly more data to work with. Stall detection during long brisket cooks is noticeably better than on cheaper thermometers — the estimated finish time updates intelligently as the stall extends rather than just counting down optimistically. Running two independent guided cook modes simultaneously works seamlessly: one probe tracking a brisket to 203°F, the other watching a chicken to 165°F, each with its own alerts and countdown.

One more thing: if you’re deciding between the Sync Gold and the original MEATER Plus, I’ve done a detailed MEATER Plus vs Typhur Sync Gold comparison that covers every difference. The short version — if you cook two proteins simultaneously at least once a month, the Sync Gold earns its price. If you don’t, the Plus is the smarter buy.

Pros

  • Two fully wireless probes — no cables anywhere
  • 1000°F heat resistance for charcoal and live-fire cooking
  • Six sensors per probe for stall detection and accurate time estimates
  • Two simultaneous guided cook modes in the MEATER app
  • Best build quality of any thermometer in this roundup

Cons

  • Expensive — $152.99 is a significant outlay
  • Only two probes; TempPro TempSync offers four for $53
  • Overkill if you cook one protein at a time

Bottom line: The best wireless thermometer for cooks who regularly handle two large cuts simultaneously. The 1000°F heat resistance and stall detection justify the price for serious BBQ. Everyone else should look at the MEATER Plus.

Current price: $152.99

See Today’s Price on Amazon →

Weber iGrill 3 — Best for Weber Grill Owners

Weber iGrill 3 bluetooth meat thermometer

If you own a Weber Spirit, Genesis, or Summit grill, the iGrill 3 does something no other thermometer on this list can: it clips directly onto the side table via a Weber-specific bracket and looks like it was built for the grill, because it was. That native integration is either completely irrelevant to you — in which case, buy the TempPro TempSync for $57 less — or it’s exactly what you’re after.

Four-probe capacity covers a full grill. The Weber iGrill app handles temperature monitoring clearly, with doneness presets and per-probe alerts. The same app reports the propane level from the LP tank scale sensor supplied in the box, which nothing else on this list offers. The 250-hour battery life on AA batteries means you essentially never think about it between sessions — no charging, no checking, just replace the batteries a couple of times a year.

The honest assessment: in pure thermometer terms, the TempPro TempSync at $52.99 matches the iGrill 3 on probe count, beats it on Bluetooth range, and costs $57 less. The iGrill 3’s value is entirely about Weber ecosystem fit. The mounting system, the Weber app integration, the feeling that your setup is intentional rather than cobbled together — if those things matter to you, the premium makes sense.

At $109.99 it’s not cheap for what it does. But Weber owners tend to be Weber owners for life, and the iGrill 3 is the right thermometer for that grill.

Pros

  • Designed specifically for Weber grills with native bracket mount
  • 250-hour battery life — forget about it between seasons
  • Four-probe capacity
  • Integrates with Weber connected grills for combined monitoring
  • 4.5 stars across thousands of verified reviews

Cons

  • Expensive compared to TempPro TempSync for equivalent probe count
  • Much less useful without a compatible Weber grill
  • AA batteries rather than USB rechargeable

Bottom line: If you have a Weber grill and want a thermometer that feels factory-fitted, the iGrill 3 is exactly that. For everyone else, the TempPro TempSync delivers similar specs at $57 less.

Current price: $109.99

See Today’s Price on Amazon →

What to Look For

Wired vs Wireless Probes

Most Bluetooth thermometers use corded probes — a metal tip connected by a braided heat-resistant cable to a transmitter outside the grill. MEATER’s probes are fully wireless, with no cable at all. Wireless is tidier and removes any risk of cables near flames, but costs more per probe. Corded designs are just as accurate and significantly more affordable — the Inkbird and TempPro in this list both use corded probes to excellent effect.

How Many Probes Do You Actually Need?

Honestly, most home cooks do one thing at a time: a roast chicken, a steak, a pork shoulder. One probe handles all of that. You only need multiple probes if you’re regularly cooking two or more large proteins simultaneously, or if you want to use one probe for meat temperature and another for grill ambient temperature separately. If you’re not sure, start with one probe — you can always upgrade.

Bluetooth Range

This is where cheap thermometers cut corners. A 30-foot range means you’re essentially tethered to the grill — fine for a quick steak, useless for a six-hour rib session where you want to watch TV inside. Anything above 150 feet is workable for a typical backyard.

The TempPro TempSync’s 650 feet is genuinely impressive and changes what’s practically possible. Metal smoker bodies reduce effective range, so build in some headroom.

App Quality

You’ll interact with the app far more than the hardware, so don’t underestimate it. MEATER’s app is the clear leader — guided cook modes with live finish time estimates that actually work. TempPro and Inkbird apps are reliable and functional but won’t hold your hand.

Weber’s app works best within the Weber ecosystem. For beginners, app quality matters more than any hardware spec.

Battery Life

USB rechargeable beats disposable batteries for regular use. MEATER charges via its bamboo case. The TempPro TempSync gives 90 hours from a single USB charge.

The Weber iGrill 3 runs on three AA batteries and lasts a stated 250 hours, so you’re not replacing them often. For overnight or multi-day cooks, battery capacity matters — the Inkbird’s shorter battery life is worth checking before a long session.


How These Picks Were Chosen

Plainly: this is a research-based guide, not a hands-on test. I have not run these through a cook, and nothing here should be read as a report from my own kitchen.

What the picks rest on: probe temperature ceilings, stated accuracy tolerances, probe counts and battery specifications from each manufacturer; and a read through verified-purchase reviews for the complaints that repeat rather than the star average — for this category that means pairing failures, connection drops at distance, and probes that stop reading after a few months.

What I could not establish: app quality is half of what you are buying here, and it is the half that changes without warning. A one-star review about a broken app may describe a version that no longer ships, and a good app can regress in an update. Nothing on this page can tell you how these apps behave today — check recent reviews specifically, not the overall rating.

Frequently Asked Questions

What is the difference between Bluetooth and Wi-Fi meat thermometers?

Bluetooth thermometers connect directly to your phone within range — typically 30 to 650 feet. Wi-Fi thermometers connect to your home network, so you can check temperatures from anywhere with internet, including away from home. Wi-Fi models cost more and need router setup.

For backyard cooking where you stay within range, Bluetooth is better value. If you travel and want to monitor a slow cooker remotely, Wi-Fi is worth the premium.

How accurate are Bluetooth meat thermometers?

Accurate enough. Most quality models are rated to ±1.8°F, which is more than sufficient for cooking. The MEATER Plus is rated to ±0.5°C (about ±0.9°F). In practice, the bigger source of error is probe placement rather than thermometer accuracy — always insert into the thickest part of the meat, well away from bone or fat pockets.

Can I leave the probe in the meat the whole time it cooks?

Yes — that’s the whole point. Leave-in thermometers are designed to stay in the meat throughout the cook. All five models in this list handle sustained high temperatures well within cooking ranges.

Just don’t put probes in a dishwasher, submerge the transmitter unit in water, or use a standard probe in a 1000°F pizza oven. The Typhur Sync Gold’s 1000°F rating is there specifically for extreme heat situations.

What is the best Bluetooth thermometer for a beginner?

The MEATER Plus, without hesitation. The guided cook app removes all the guesswork — you pick the protein and doneness, it tells you exactly what to do and when you’re done. The wireless design also means no cable to route under a grill lid, which is one less thing to get wrong on your first few cooks. Once you’re comfortable, you can explore manual temperature targets and customise from there.

Do Bluetooth thermometers work in a smoker?

Yes, all of them do. The thing to watch is range — metal smoker bodies are particularly good at blocking Bluetooth signals. The TempPro TempSync’s 650-foot headroom helps significantly.

With MEATER, position the bamboo case (the Bluetooth repeater) close to the smoker rather than across the garden. All five models handle the temperature ranges and extended cook times that smoking requires.

How do I clean the probes?

Wipe with a damp cloth immediately after use, while the probe is still warm. Never submerge the probe body or put it in a dishwasher. The tip can be sanitised with a small amount of isopropyl alcohol on a cloth.

For corded models, be careful not to get water into the junction where probe meets cable — that’s the most common failure point on cheap thermometers. Dry thoroughly before storing.

Are these thermometers accurate enough for food safety?

Yes. The USDA target temps — 165°F for poultry, 145°F for whole muscle beef and pork with a 3-minute rest, 160°F for ground meat — are well within the measurement range of all five models here. At ±1.8°F accuracy, you have more than enough precision for safe cooking. Use common sense: check in the thickest part of the meat, not near bone, and don’t rely on a single reading if something seems off.


Related Reading

Looking for more detail on a specific model? I cover several of these thermometers in dedicated long-form reviews:

  • MEATER Plus Wireless Meat Thermometer Review — deep dive on accuracy, app, and long-term durability after two years
  • Original MEATER Review — how the entry-level model compares to the Plus
  • Inkbird IBT-4XS Review — full breakdown of the alternative four-probe thermometer
  • MEATER Plus vs Typhur Sync Gold — detailed head-to-head if you’re deciding between the two MEATER models
  • Guide to Buying Outdoor Cooking Equipment — where thermometers fit in a full BBQ setup
  • Meat Thermometers: Reviews & Buying Guide
  • Best Sous Vide Precision Cookers — set-and-hold temperature instead of monitoring it

My Verdict

For most home cooks, the MEATER Plus is the one to buy. The cable-free design, outstanding app, and genuine ease of use make it the right answer for anyone cooking one cut at a time — which is most people, most of the time. If budget is the main constraint, the Inkbird IBT-4XS gives you four probes for under $50, which is remarkable value.

Serious multi-cut BBQ sessions are best served by the TempPro TempSync, whose 650-foot range is in a different league from everything else at this price. Weber grill owners will find the iGrill 3‘s native integration worth the premium, and dedicated BBQ enthusiasts who want the ultimate wireless setup should look at the Typhur Sync Gold.


Filed Under: Product Reviews

  • « Go to Previous Page
  • Page 1
  • Interim pages omitted …
  • Page 12
  • Page 13
  • Page 14
  • Page 15
  • Page 16
  • Interim pages omitted …
  • Page 53
  • Go to Next Page »

Recent Articles

  • Bosch Universal Plus Stand Mixer Review: Built for Bread Bakers
  • Hamilton Beach 63326 Stand Mixer Review: Real Value, Real Limits
  • Ninja Foodi XL Pro Review (DT201): Biggest Capacity, Lowest Price
  • Cuisinart SM-50 Stand Mixer Review: Solid Value, Real Trade-Offs
  • Breville Smart Oven Pro Review (BOV845BSS): Fast, Even, One Real Flaw

Search


HOME          Contact          Affiliate Disclosure          Terms of Service          Privacy Policy


kitchenwarecompare.com is a participant in the Amazon Services LLC Associates Program, an affiliate advertising program designed to provide a means for sites to earn advertising fees by advertising and linking to Amazon.com, Endless.com, MYHABIT.com, SmallParts.com, or AmazonWireless.com. Amazon, the Amazon logo, AmazonSupply, and the AmazonSupply logo are trademarks of Amazon.com, Inc. or its affiliates. As an Amazon Associate I earn from qualifying purchases.


Copyright © 2026 kitchenwarecompare.com, ALL RIGHTS RESERVED.